Can You Take Wooden Items Into Australia?
Australia is renowned for its strict biosecurity regulations aimed at keeping pests and diseases from entering the country and harming its precious natural environments and agricultural sector. For tourists and travelers, these important quarantine laws can pose challenges when trying to bring beloved wooden items along on trips – whether antique walking sticks, handmade musical instruments, or simple utensils.
This comprehensive guide covers all aspects of importing wood products into Australia. We’ll examine prohibited items, preparation steps for permitted goods, what to expect during inspection, options for storing non-approved items for pickup later, biosecurity obligations for exporting wood from Australia, and even cultural considerations around wood handicrafts. By understanding quarantine guidelines, you can navigate your travels with any necessary wood belongings while also helping preserve the country’s ecosystems.

Types of Wooden Items Banned from Import
Australia’s timber quarantine regulations establish clear categories of high-risk wood materials prohibited from entering the country except in rare circumstances with extensive processing. Before packing any wood products in your luggage, review the following banned items:
Unfinished Wood Materials
This encompasses raw wood materials like lumber, logs, planks, bark, mulch, shavings, and industrial wood shavings. Raw wood poses a major contamination risk.
Wood Packing and Pallet Materials
Including wood crating, pallets, boxes, reels, dunnage, packing blocks, skids, and other wood packing supports. Some exemptions exist for treated ISPM-certified packing from approved locations.
Certain Wooden Handicrafts and Decorative Items
Specific products banned include painted masks, spears, arrows, walking sticks, straw goods, rattan and bamboo articles. Exceptions can apply if thoroughly treated and declared.
Wood Furniture and Household Items
Furniture, kitchenware, utensils, etc. made partially or wholly of wood materials often prohibited. Requires extensive cleaning and official certification.
Firewood and Related Products
Transporting firewood, kindling, or similar wood materials, whether as goods themselves or packaging/dunnage, is completely banned.
Contaminated or Pest-Invested Wood Products
Any wood showing signs of live/dead pests, insects, fungi, eggs, soil, bird droppings or organisms. Also bans decorative finishes using animal or insect parts.
Review Australia’s Timber Import Regulations thoroughly before packing wood products. When in doubt, declare items for inspection rather than risk automatic seizure. Fines and penalties apply to non-declared prohibited goods.
Permitted Wooden Items with Proper Preparation
Certain wood items are approved for importation, provided they undergo treatment and declaration procedures demonstrating minimal biosecurity risk. You can bring:
Carvings, Statues and Wood Art
Carved figural statues, masks, painted wood artwork, and decorative boxes/objects are permitted if made from properly dried, treated timber and free of pests. An invoice showing clean treatment may be required.
Musical Instruments
Guitars, violins, clarinets and other instruments can enter if all wood components are thoroughly cleaned and certified pest-free. Avoid instruments incorporating animal materials like ivory.
Furniture and Woodenware
Tables, chairs, kitchen utensils, bowls, and other decorative housewares require documented fumigation, cleaning, and restricted timber use. Must meet lowest biosecurity risk standards.
Approved Wood Packing Materials
Clean lumber, pallets and dunnage materials certified with ISPM markings prove they’ve undergone required heat or fumigation treatments. Lower risk than uncertified woods.
Walking Sticks and Canes
Can be imported after inspection to confirm either a total absence of pests or successful treatment if any infestation detected. Bamboo and rattan often problematic.
The key for these items is meticulous preparation ensuring wood is sterile, dried, and certified free of organisms. Never attempt to sneak untreated or contaminated wood past quarantine.
Recommended Treatment and Preparation Steps
To maximize chances permitted wood products pass inspection, implement the following treatments and preparations:
Careful Visual Inspection
Closely examine all wood surfaces and crevices for any sign of living/dead insects, larvae, fungi, rot, soil, eggs, tunnels or bird droppings. Also check for hidden hollow spaces.
Thorough Cleaning
Wash and scrub all wood surfaces with soapy water and dry completely. Repeat as needed to remove any traces of debris, pests or organisms. Bleaching can also sanitize.
Apply Registered Insecticides
Coat or spray approved insecticides containing bifenthrin, permethrin or other registered agents. Ensure full coverage and let dry completely. Include treatment certificates.
Use of Lumber Preservatives
Seal porous woods with varnishes, polyurethane or oils that contain fungicides or pest resistance and make woods unsuitable environments.
Attach Compliance Stamps and Labels
Fixed compliance labels and stamps prove timber has undergone proper commercial drying and treatment processes to standards.
Include Official Documentation
Provide invoices listing contents, treatment info, pest-free certificates, compliance declarations, and ISPM certifications to customs and quarantine officers.
Following all these preparation best practices demonstrates attention to biosecurity, lowering your risk of wood seizure or delays.
What to Expect During Airport Arrival and Quarantine Inspection
All wood products and organics undergo stringent inspection upon arrival at Australian international airports and seaports. Here’s what to expect:
Declaration of All Wooden Items
Submit completed BICON declaration forms to quarantine officers providing descriptions, values and treatment details for every wood item in your luggage. Omitting materials leads to problems.
X-Ray and Density Meter Screening
Luggage will undergo x-ray or dense wavelength scanning looking for undeclared or unauthorized wood materials. Anomalies require search.
Detector Dog Inspections
Dogs trained to sniff out food, wood, and organic matter patrol the baggage areas. A dog showing interest in your luggage flags it for inspection.
Physical Examination
Quarantine officers closely examine wood products by sight, tapping for hollow spots, using magnifying glasses, and extracting samples. Unpacking of items may be required.
Swabs and Laboratory Testing
Swab tests and on-site labs analyze drill samples for presence of foreign pests, fungi or disease organisms. Suspicious areas warrant further scrutiny.
Treatment or Seizure
Wood found contaminated may be fumigated, cleaned, or surrendered. Heavily invested materials get immediately seized and destroyed to control spread.
Cooperate fully with all inspection processes. Delays are common but this protects Australia’s ecosystems. Report anything missed on your declaration forms.
Storing Prohibited Wood Items in Australia for Return Transport
If certain wood belongings in your luggage don’t clear quarantine standards, they may be confiscated and destroyed on the spot. However, you can request prohibited items be held in secure storage near the airport for retrieval when departing Australia later. Here’s how:
Honestly Declare Banned Materials Upfront
If you have prohibited woods like untreated lumber, uncertified pallets or risky carvings, admit this immediately rather than risk undeclared seizure at the airport.
Complete Appropriate Seizure Paperwork
Fill out Australian Border Force forms to identify stored items, pay required storage fees, provide local contact details and outline the seizure terms.
Give Plenty of Notice Before Pickup
Notify quarantine authorities several days in advance that you’ll be collecting stored materials so transportation to the airport can be arranged in time for your departure.
Inspect Retrieved Items Prior to Re-Packing
Carefully inspect any wood products returned after storage for damage, tampering or signs of further pest contamination before packing them to exit Australia.
Arrive Early When Collecting Items
Leave ample time when picking up stored wood belongings before flights to account for transportation delays. Missing luggage could get stuck in quarantine indefinitely.
Properly coordinating temporary seizure storage and item pickup helps ensure prohibited belongings can be kept intact for the trip home. But work within the system.
Exporting Wood Products From Australia
Wooden items legally imported into Australia that clear quarantine may also undergo monitored export in passenger baggage to other international destinations. Here’s how to do so properly:
Know Import Laws of Destination Country
Research if your next destination restricts or bans import of wood handicrafts, instruments, packing materials or furniture. Bring supporting export documents.
Complete Export Declarations
Fill out required forms declaring all wood items leaving Australia, providing descriptions, values and references to entry inspection certificates. Keep copies.
Request Export Inspection and Certification
Australia can endorse exit of already approved wood through added inspection and cleanliness certification to facilitate entry elsewhere. Fees may apply.
Follow Airline Guidelines For Transporting Wood
If transporting large wood objects like instruments in their own cases, follow airline size and weight limits. Extra luggage fees may be imposed.
Cooperate Fully with Border Exits
Answer exit border agent questions honestly, present any requested documents related to the wood, and fully comply with scanning or examinations of items.
Satisfying Australian export processes demonstrates your commitment to global biosecurity. This speeds the process when entering your next destination country.
Cultural Considerations for Wood Products
If you’ll be acquiring traditional wood handicrafts or instruments while visiting Australia, be sensitive that customs issues can hamper the economic livelihood of Aboriginal and Islander artisans who rely on export income. Some tips:
- Research permitted items in advance so artisans aren’t commissioned to carve prohibited goods.
- If items require treatment, build extra time and costs into the transaction.
- Get proper shipping paperwork from sellers for presenting to customs.
- Pay any gratuities traditionally associated with commissioned handicraft works.
- When possible, ask locals to teach you their wood preparation methods.
- If items are seized, provide compensation to artisans for confiscated works.
- Spread awareness of biosecurity requirements handicapping indigenous artisans.
Culturally-significant wood items deserve special care and consideration around complex quarantine laws. Keep artisans’ best interests in mind.
Summary of Key Advice
- Research prohibited wood categories thoroughly and avoid packing banned products. Declare or discard restricted items before departing.
- Prepare permitted wood objects using all required treatments – inspection, cleaning, insecticides, preservatives, labeling. Supply documentation.
- Expect possible delays, seizures or mandated treatments after extensive examination at Australian airports and seaports. Cooperate fully.
- Arrange temporary seizures of unapproved items for storage and retrieval later if valuable. Give ample notice for pickup.
- Understand rules for exporting certified wood items out of Australia. Research destination country import laws.
- Be thoughtful about how biosecurity regulations impact indigenous creators of wood handicrafts and instruments.
With proper preparation and understanding of quarantine policies, you can successfully visit Australia with needed wood belongings without accidental infractions or sacrificing treasured items. Follow protocols to protect Australia’s environmental treasures.
Frequently Asked Questions on Transporting Wood into Australia
Can I hand-carry wood carvings in my bag instead of checking them in luggage?
No, all wood items must undergo x-ray screening and quarantine inspection so must be checked in as luggage. Do not attempt bypassing security with hand-carried items or they will be seized.
What should I do if wood items are damaged during mandatory treatments?
You can file damage claims and potentially seek compensation if poor handling during cleaning, fumigation or other required treatments damages wood belongings. Save photographs documenting the original condition of items.
Can walking sticks be decorated with animal materials like horn or leather?
Decorative elements made from animal materials introduce additional biosecurity risks and restrictions. Simple, unfinished wooden canes have the highest chance of easy entry. Avoid composites.
Are there exceptions for small amounts of wood shavings or mulch getting in my luggage?
No, even tiny traces of prohibited raw wood materials could present a biohazard. Carefully inspect and clean all luggage, bags, shoes, etc to ensure you do not accidentally transport illegal wood bits or fibers.
Can valuable antiques containing wood components like furniture be shipped instead?
Antique wood furniture can indeed be shipped to Australia through special catchment importers familiar with entry procedures for rare collectibles. This requires extensive documentation and inspections.
What measures prevent wood pallets from transferring pests between destinations?
ISPM regulations require pine lumber fumigation and debarking before pallet construction. Then pallets undergo heat treatment during manufacturing as well to sterilize. Multiple safeguards.
Why are walking sticks and canes classified higher risk for bringing pests?
Sticks tend to have bark intact making detection of organisms harder. Cane materials like bamboo easily harbor insects internally. They may require drilling, swabbing, and treatment to gain Australia entry approval.
Does Australia restrict transport of wood perfume containers like jewlery boxes?
Small decorative wood boxes are permitted if made from compliant timber and containing no pests. However, avoid boxes incorporating seeds, straw, shellac or animal materials which face greater scrutiny.
Can I take a didgeridoo instrument as a souvenir from my Australia trip?
Authentic didgeridoos crafted by Aboriginal artisans make excellent keepsakes. Ensure yours is made from termite-resistant hardwoods like eucalyptus and has received internal cleaning and pest treatments before traveling with it.
What are the consequences if I fail to declare prohibited wood materials and get caught?
Bringing in banned wood without declaring it risks on-the-spot destruction of items plus civil penalties up to $420,000 AUD depending on the severity, quantity, and type of concealment. Declare or discard prohibitives.


 $12.89
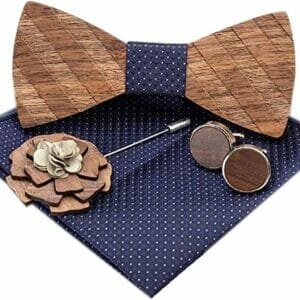 $16.99
 $8.99
$8.99 $11.99
 $13.99
 $16.99
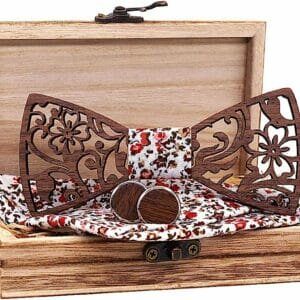 $13.99
 $29.75
 $14.89
 $13.89
 $18.88
 $18.88
 $15.99
")
 Image Credit: homequestionsanswered
 Image Credit: woodrated
 Image Credit: woodfinishingadvice
 Image Credit: elitehardwares
 Image Credit: garagesee


")

 Image Credit: thespruce
 Image Credit: familyhandyman
 Image Credit: bobvila
 Image Credit: artisanwoodfloorsllc
 Image Credit: gizmoplans

")


")