Blog

Blog

What's the Best Wood for a Homemade Desk Desktop and Why?

Are you thinking about building a homemade desk? One of the most important decisions you’ll have to make is what type of wood to use for the desktop. With so many options available, it can be overwhelming to choose the best one for your needs. In this article, we’ll explore the different types of wood commonly used for desktops and discuss the pros and cons of each.

When it comes to selecting the best type of wood for a desktop, there are several factors to consider. You’ll want a wood that is sturdy, durable, and can withstand daily wear and tear. It should also be aesthetically pleasing and complement the overall design of your desk. Additionally, you’ll want to consider the cost and availability of the wood. By taking these factors into account, you can make an informed decision about which type of wood is right for your project. So, let’s dive in and explore your options!

Understanding Different Types of Wood

understanding-different-types-of-wood

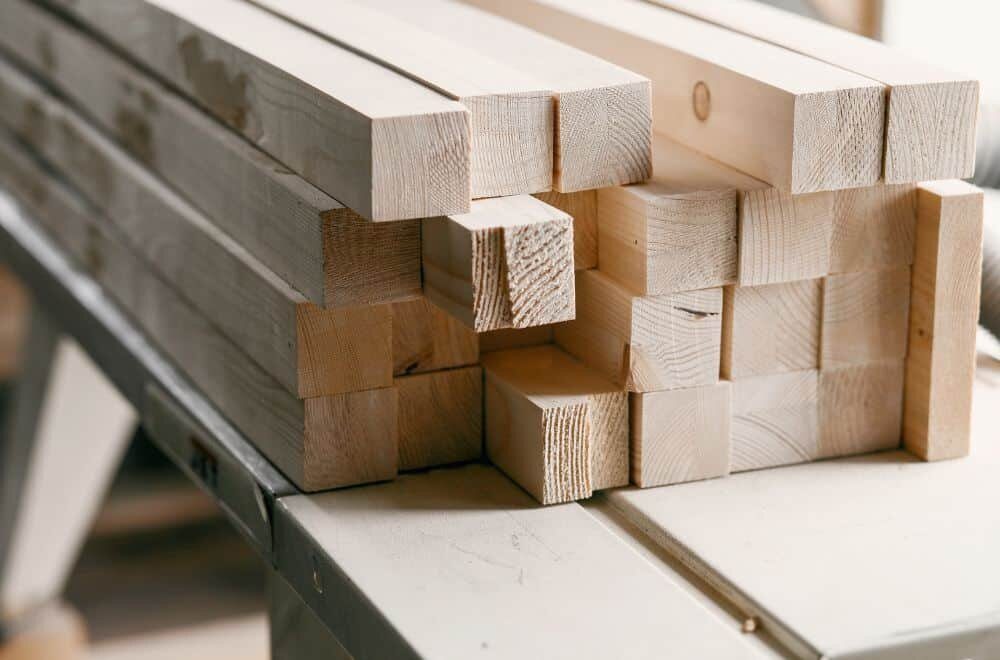
When it comes to choosing the best type of wood for your homemade desk, it’s important to understand the different options available to you. Here are the three main categories of wood to consider:

Hardwoods

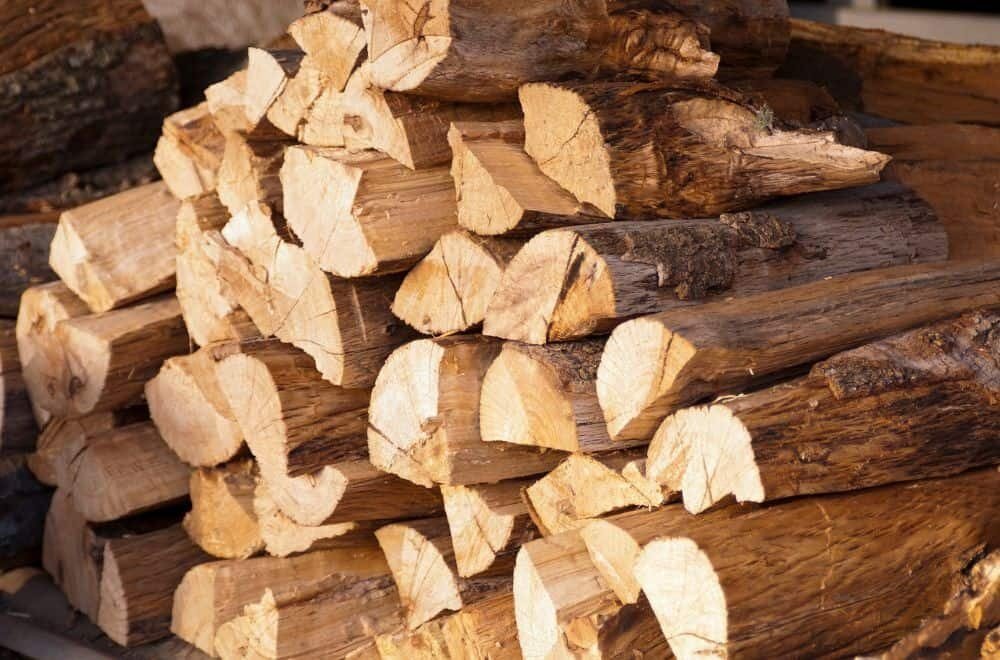
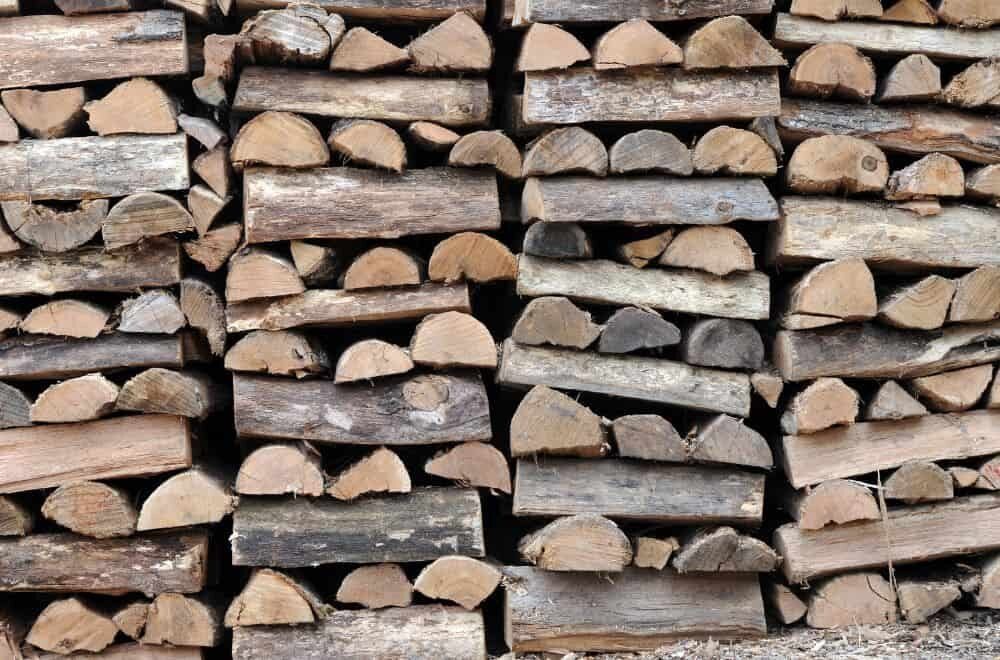
Hardwoods come from deciduous trees, which means they lose their leaves annually. They are generally more durable and dense than softwoods, making them an excellent choice for a desktop. Some popular hardwood options for a desk include:

  • Oak: A classic choice that is strong and durable, with a distinctive grain pattern.
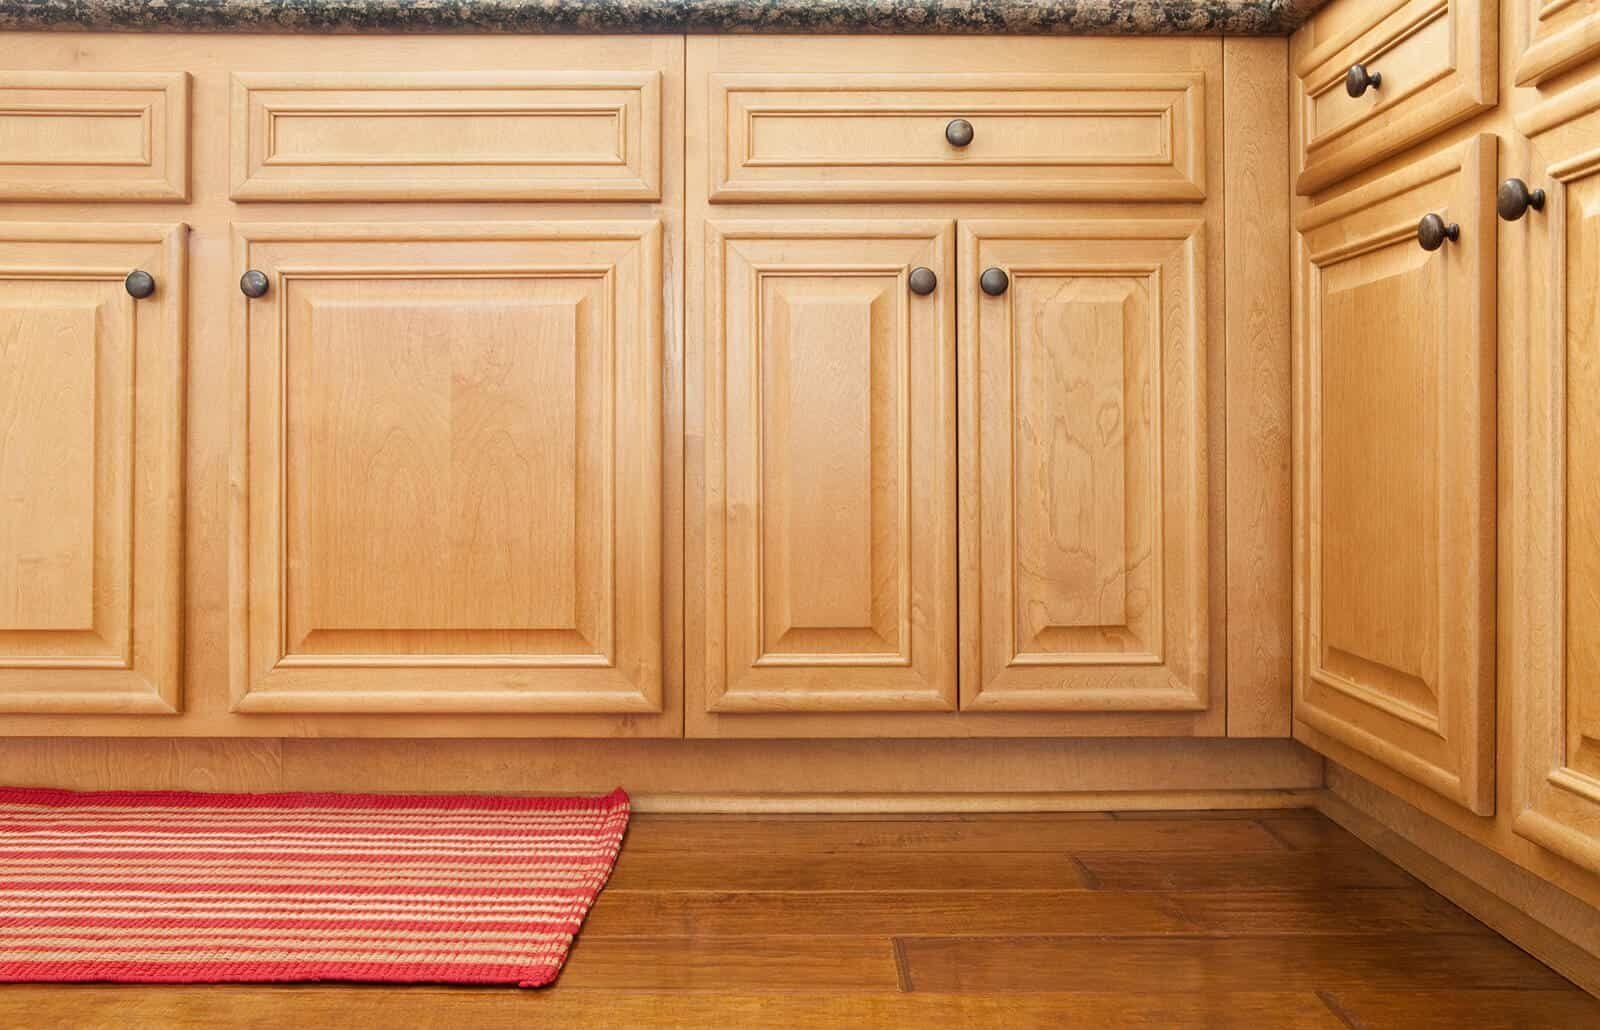
  • Maple: Known for its light color and smooth grain, maple is a popular choice for modern desks.
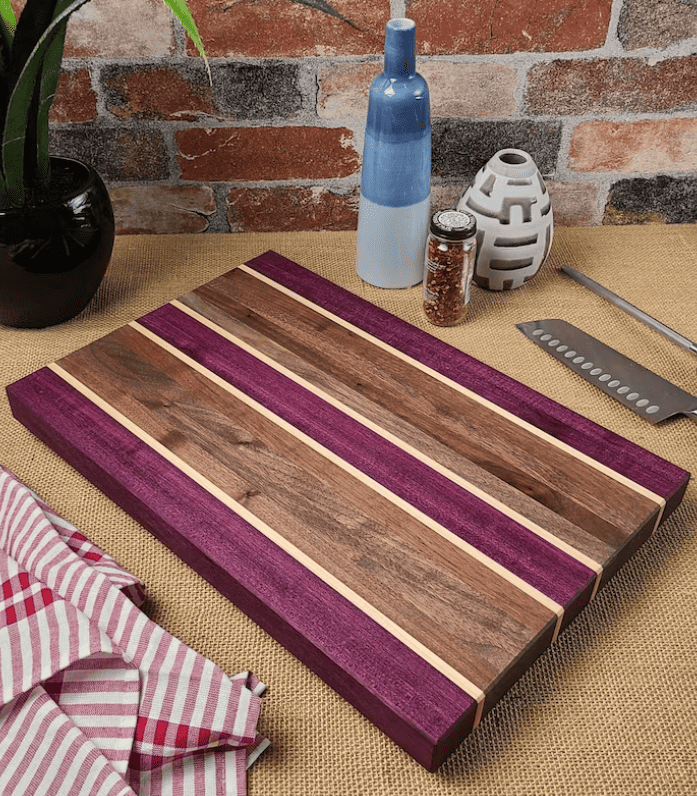
  • Walnut: A beautiful dark wood with a rich, warm tone that makes for an elegant desk.
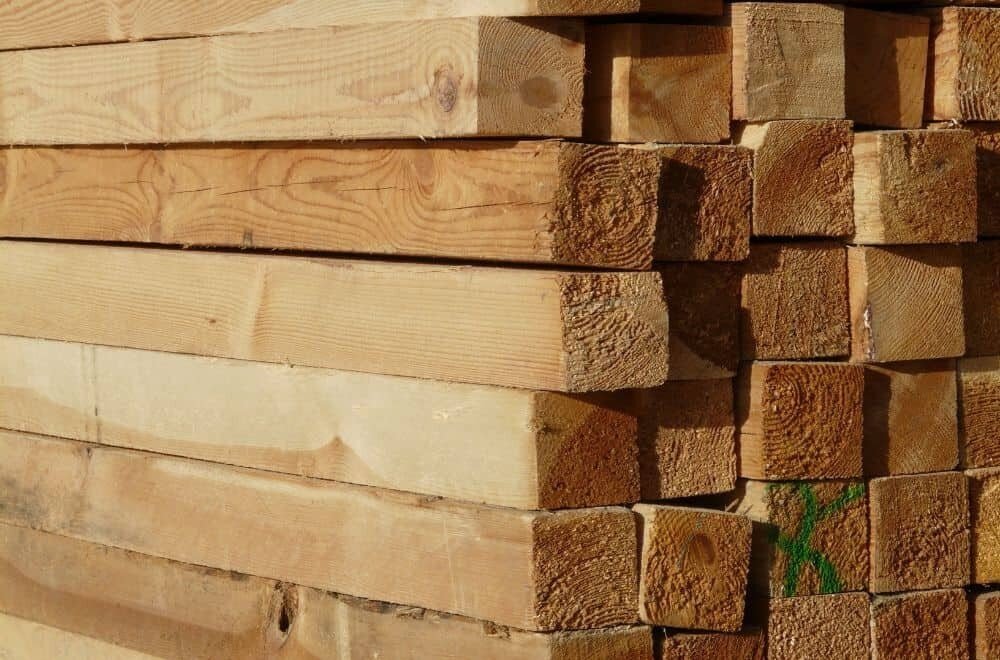
Softwoods

Softwoods come from evergreen trees, which means they keep their leaves year-round. They are generally less dense and less expensive than hardwoods, but can still make a great choice for a desktop. Some popular softwood options for a desk include:

  • Pine: A light-colored wood with a straight grain that is easy to work with.
  • Cedar: A softwood with a distinctive scent that repels insects, making it a good choice for outdoor desks.
  • Spruce: A light-colored wood with a fine grain that is strong and lightweight.
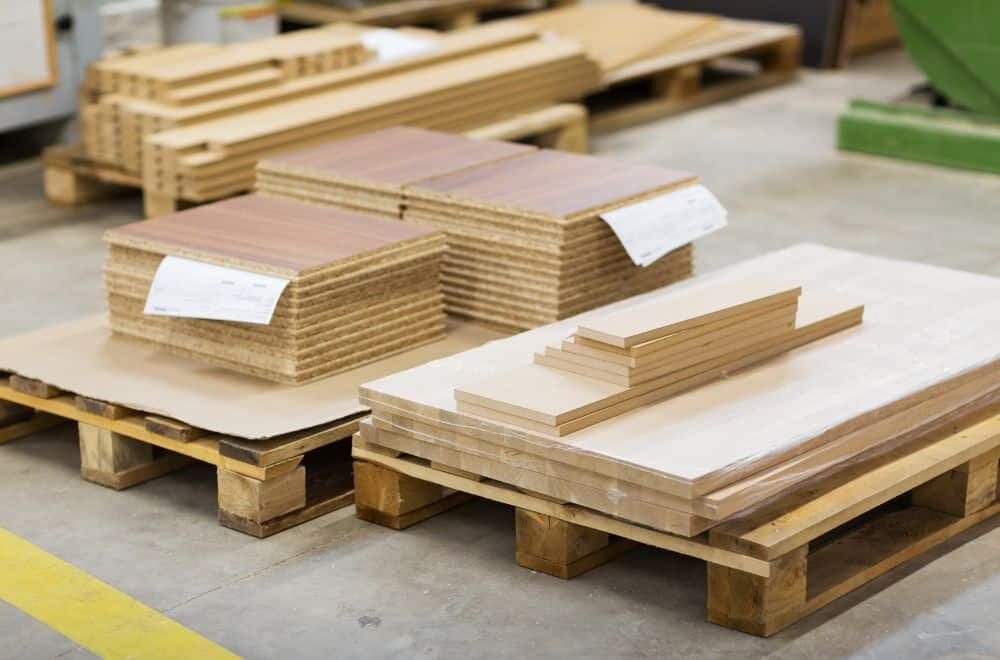
Engineered Woods

Engineered woods are made from a combination of wood fibers and adhesives, and are designed to be stronger and more durable than solid wood. They can be a good choice for a desktop if you want something that is resistant to warping and cracking. Some popular engineered wood options for a desk include:

  • Plywood: Made from thin layers of wood that are glued together, plywood is strong and stable.
  • MDF: Short for medium-density fiberboard, MDF is made from wood fibers and resin, and is known for its smooth surface and uniform density.
  • Particleboard: Made from wood chips and resin, particleboard is a cost-effective option that is less durable than other engineered woods.

By understanding the different types of wood available, you can make an informed decision about which one is right for your homemade desk. Consider factors such as durability, aesthetics, and cost when making your choice.

Key Factors to Consider

key-factors-to-consider

When it comes to choosing the best type of wood for a desktop on a homemade desk, there are several factors that you should consider. Here are the key factors to keep in mind:

Durability

One of the most important factors to consider when choosing the best type of wood for a desktop is durability. You want a wood that can withstand the wear and tear of daily use without showing signs of damage. Some of the most durable woods for desktops include oak, maple, and birch plywood. These woods are strong, sturdy, and can last for years with proper maintenance.

Aesthetic Appeal

Another important factor to consider when choosing the best type of wood for a desktop is aesthetic appeal. You want a wood that looks good and complements the overall design of your homemade desk. Some woods, like maple and oak, have attractive grain patterns that can add visual interest to your desktop. Other woods, like birch plywood, have a more uniform appearance that can create a clean, modern look.

Cost

Cost is also an important factor to consider when choosing the best type of wood for a desktop. Some woods, like oak and maple, can be more expensive than others. If you’re on a tight budget, you may want to consider using a less expensive wood, like birch plywood. However, keep in mind that cheaper woods may not be as durable or aesthetically pleasing as more expensive options.

In summary, when choosing the best type of wood for a desktop on a homemade desk, you should consider factors like durability, aesthetic appeal, and cost. By keeping these factors in mind, you can choose a wood that not only looks good but also stands up to daily use.

Top Wood Choices for Desktops

top-wood-choices-for-desktops

When it comes to building a homemade desk, choosing the right type of wood for your desktop is crucial. The type of wood you choose can affect the durability, appearance, and overall quality of your desk. Here are some of the top wood choices for desktops:

Oak

Oak is one of the most popular choices for desktops, and for good reason. It is a hardwood that is known for its strength and durability. Oak desks can last for several decades, making them a great investment. Oak also has a beautiful grain pattern that can add character to your desk.

Maple

Maple is another great choice for desktops. It is a hardwood that is known for its light color and smooth texture. Maple is also a very hard and durable wood, making it a great choice for a desk that will see a lot of use.

Walnut

Walnut is a beautiful hardwood that is known for its rich, dark color. It has a straight grain pattern that can add a touch of elegance to your desk. Walnut is also a very durable wood, making it a great choice for a desk that will see a lot of use.

Plywood

If you are on a budget, plywood can be a great choice for your desktop. Plywood is made from thin layers of wood that are glued together, making it strong and durable. It is also very affordable and easy to work with. Plywood can be stained or painted to match your decor, making it a versatile choice for a homemade desk.

In conclusion, choosing the right type of wood for your desktop is an important decision when building a homemade desk. Oak, maple, walnut, and plywood are all great choices depending on your budget and desired aesthetic. Consider the durability, appearance, and cost of each type of wood before making your final decision.

Benefits of Each Wood Type

benefits-of-each-wood-type

Benefits of Oak

Oak is a popular choice for desktops because of its durability and strength. It is a hardwood that is resistant to wear and tear, making it ideal for a desk that will be used frequently. Oak has a distinctive grain pattern that gives it a unique look, and it is available in a range of colors from light to dark.

Other benefits of oak include:

  • Resistant to moisture and humidity
  • Easy to work with
  • Long-lasting and durable
  • Can be stained or painted to match your desired aesthetic

Benefits of Maple

Maple is a light-colored hardwood that is affordable and easy to work with. It is a popular choice for desks because of its smooth surface and durability. Maple has a subtle grain pattern that makes it a versatile option for any style of desk.

Other benefits of maple include:

  • Resistant to scratches and dents
  • Lightweight and easy to move
  • Available in a range of finishes
  • Affordable compared to other hardwoods

Benefits of Walnut

Walnut is a high-end hardwood that is known for its rich, dark color and beautiful grain pattern. It is a popular choice for desks because of its durability and resistance to wear and tear. Walnut has a smooth surface that is easy to work with, and it is available in a range of finishes.

Other benefits of walnut include:

  • Resistant to moisture and humidity
  • Long-lasting and durable
  • Can be stained or oiled to enhance its natural beauty
  • Adds warmth and elegance to any room

Benefits of Plywood

Plywood is a composite wood material made from thin layers of wood veneer glued together. It is a popular choice for desktops because of its affordability and versatility. Plywood comes in a range of thicknesses and can be easily cut and shaped to fit any desk design.

Other benefits of plywood include:

  • Lightweight and easy to move
  • Available in a range of finishes
  • Affordable compared to solid wood options
  • Resistant to warping and cracking

Overall, the best type of wood for your desktop will depend on your budget, style preferences, and intended use. Consider the benefits of each wood type before making your final decision.

Potential Drawbacks

potential-drawbacks-1

When it comes to choosing the best type of wood for a desktop on a homemade desk, there are several factors to consider. While each type of wood has its own unique advantages, there are also some potential drawbacks to keep in mind.

Drawbacks of Oak

Although oak is a popular choice for a desktop due to its strength and durability, it does have some potential drawbacks. One of the main issues with oak is that it can be quite heavy, which may make it difficult to move around or adjust the desk height. Additionally, oak can be more expensive than some other types of wood, which may not fit within everyone’s budget.

Drawbacks of Maple

Maple is another popular choice for a desktop due to its light color and smooth, even grain. However, there are some potential drawbacks to consider. For one, maple can be quite soft, which may make it more prone to scratches and dents. Additionally, maple can be more difficult to stain than other types of wood, which may limit your options for customization.

Drawbacks of Walnut

While walnut is known for its rich, dark color and beautiful grain patterns, it also has some potential drawbacks. For one, walnut can be quite expensive compared to other types of wood, which may not be feasible for everyone’s budget. Additionally, walnut can be quite heavy, which may make it difficult to move around or adjust the desk height.

Drawbacks of Plywood

Plywood is a popular choice for a desktop due to its affordability and ease of use. However, there are some potential drawbacks to consider. For one, plywood may not be as durable as solid wood options, which may result in a shorter lifespan for your desk. Additionally, plywood may not have the same level of aesthetic appeal as other types of wood, which may not be ideal for those looking for a more visually appealing desk.

Frequently Asked Questions

What are some common types of wood used for desktops on homemade desks?

There are several types of wood that are commonly used for desktops on homemade desks. Some of the most popular ones include oak, maple, cherry, elm, cedar, and rosewood. Each of these woods has its own unique characteristics, such as color, grain pattern, and durability.

What are the advantages of using oak wood for a desk top?

Oak wood is one of the most popular choices for a desk top because of its strength and durability. It can withstand heavy use and can last for several decades with proper maintenance. Oak also has a beautiful grain pattern that can add character to your desk.

What is the difference between using maple wood and oak wood for a desk top?

While both maple and oak wood are great choices for a desk top, there are some differences between the two. Maple wood is lighter in color and has a more consistent grain pattern, while oak wood has a more pronounced grain pattern and is darker in color. Oak wood is also generally more durable than maple wood.

How thick should the wood be for a sturdy and durable desktop on a homemade desk?

The thickness of the wood for a desktop on a homemade desk depends on several factors, such as the size of the desk and the weight it will need to support. Generally, a thickness of at least 1 inch is recommended for a sturdy and durable desktop.

Are there any alternative materials that can be used for a desktop on a homemade desk?

Yes, there are several alternative materials that can be used for a desktop on a homemade desk. Some of these include plywood, MDF, MDO, and particleboard. While these materials may not be as durable as hardwood, they can still provide a sturdy and functional desktop at a lower cost.

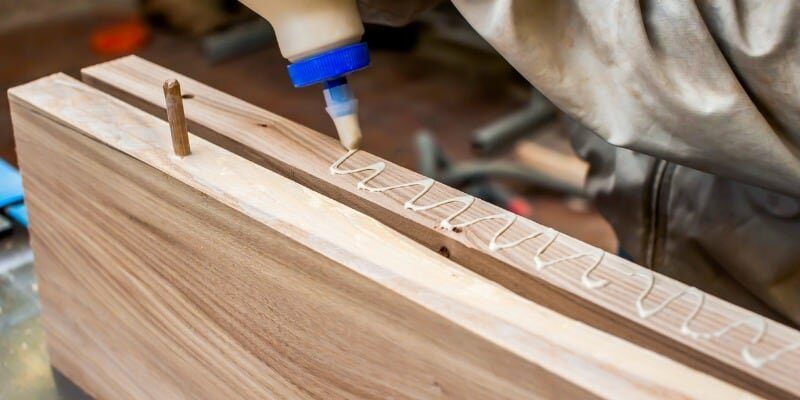
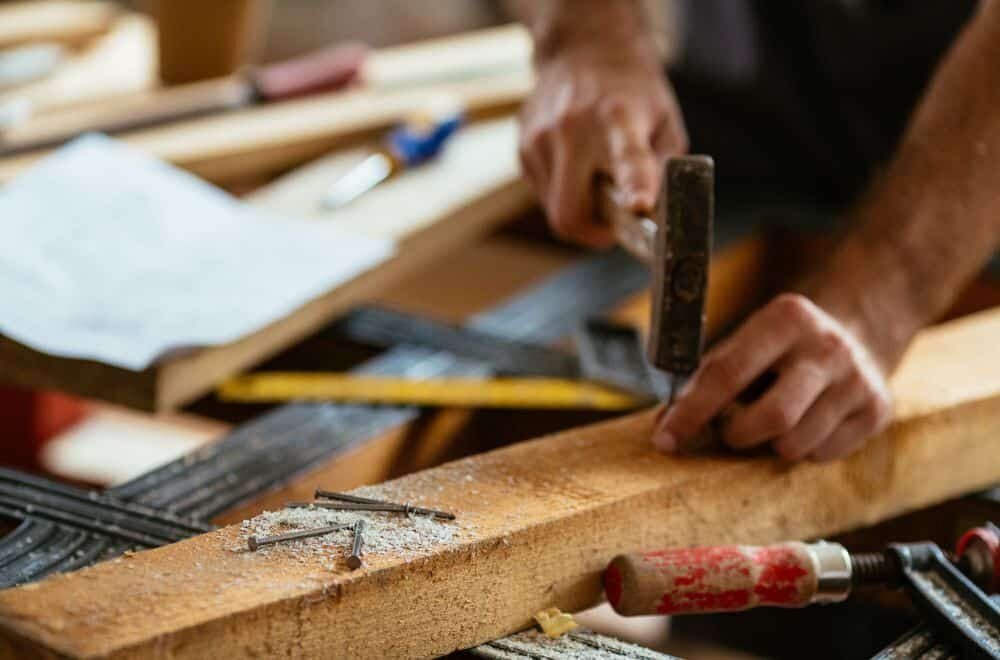
What are some tips for building a DIY hardwood desk with a high-quality desktop?

When building a DIY hardwood desk with a high-quality desktop, it is important to choose the right type of wood for your needs and budget. You should also make sure to properly prepare and finish the wood to ensure its durability and longevity. Additionally, using high-quality hardware and taking your time during the construction process can help ensure a successful outcome.

Blog

What is the Best Adhesive for Wood to Metal?

Are you looking for the best adhesive to attach wood to metal? Whether you’re working on a DIY project or a professional construction job, choosing the right adhesive is essential to ensure a strong and long-lasting bond. But with so many options available, it can be challenging to determine which one is the best fit for your project.

When it comes to attaching wood to metal, there are several factors to consider. The type of wood and metal, the size and weight of the objects, and the environment in which they will be used can all impact the effectiveness of the adhesive. In this article, we’ll explore some of the most popular adhesives for wood to metal bonding and provide tips to help you make the best choice for your project.

Understanding Wood and Metal Surfaces

When it comes to bonding wood and metal, it’s important to understand the characteristics of each material. Wood is a porous material that can absorb moisture, while metal is a non-porous material that can be slippery. This means that not all adhesives are suitable for bonding wood to metal.

To ensure a strong and lasting bond, it’s important to prepare the surfaces properly before applying any adhesive. Here are some tips to help you prepare wood and metal surfaces for bonding:

Preparing Wood Surfaces

  • Sand the wood surface to remove any rough spots or splinters that could prevent a strong bond.
  • Clean the surface with a damp cloth to remove any dust or debris.
  • Apply a wood conditioner to the surface to help the wood absorb the adhesive evenly.

Preparing Metal Surfaces

  • Clean the metal surface with a degreaser to remove any oils or dirt that could prevent a strong bond.
  • Sand the metal surface to create a rough texture that will help the adhesive grip the surface.
  • Apply a primer to the metal surface to help the adhesive adhere to the metal.

By preparing the surfaces properly, you can ensure a strong and lasting bond between wood and metal. In the next section, we’ll discuss some of the best adhesives for bonding wood to metal.

Types of Adhesives for Wood to Metal

When it comes to bonding wood to metal, there are several types of adhesives to choose from. Each type has its own unique properties and advantages. Here are some of the most common types of adhesives for wood to metal:

Epoxy

Epoxy is a two-part adhesive that consists of a resin and a hardener. When mixed together, they create a strong, durable bond that can withstand a lot of stress and strain. Epoxy is a good choice for bonding wood to metal because it can fill gaps and create a strong, permanent bond. There are different types of epoxy available, including steel-reinforced epoxy, which is specifically designed for bonding metal.

Polyurethane

Polyurethane adhesive is a one-part adhesive that cures when exposed to moisture. It creates a strong, flexible bond that can withstand changes in temperature and humidity. Polyurethane adhesive is a good choice for bonding wood to metal because it can fill gaps and create a strong, permanent bond. It is also waterproof and can be used for outdoor applications.

Cyanoacrylate

Cyanoacrylate, also known as super glue, is a fast-drying adhesive that creates a strong, permanent bond. It is a good choice for bonding wood to metal because it can be used on a variety of surfaces and can fill gaps. However, it is not as strong as epoxy or polyurethane adhesive and should not be used for heavy-duty applications.

Acrylic

Acrylic adhesive is a two-part adhesive that consists of a resin and a hardener. When mixed together, they create a strong, durable bond that can withstand a lot of stress and strain. Acrylic adhesive is a good choice for bonding wood to metal because it can fill gaps and create a strong, permanent bond. It is also waterproof and can be used for outdoor applications.

When choosing an adhesive for bonding wood to metal, consider the strength of the bond required, the conditions the bond will be exposed to, and the surfaces being bonded. With the right adhesive, you can create a strong, permanent bond between wood and metal.

Epoxy Resins

When it comes to bonding metal to wood, epoxy resins are a popular choice. They offer a strong, durable bond and are resistant to impact, shock, vibration, and temperature extremes. Epoxy resins come in two types: two-part and one-part.

Two-Part Epoxy

Two-part epoxy resins consist of a resin and a hardener that are mixed together before application. They offer a strong bond and are ideal for high-stress applications. Here are some popular two-part epoxy resins for bonding metal to wood:

Product Features
Gorilla 2-Part Epoxy Sets in 5 minutes, water-resistant, dries clear
J-B Weld 8265S Sets in 4-6 hours, can be sanded or painted over, withstands temperatures up to 300°F
Loctite Epoxy Weld Sets in 5 minutes, water-resistant, can be drilled, sanded, or painted over

One-Part Epoxy

One-part epoxy resins are pre-mixed and ready to use. They offer a strong bond and are easy to use, making them ideal for DIY projects. Here are some popular one-part epoxy resins for bonding metal to wood:

Product Features
Loctite Epoxy Instant Mix Sets in 5 minutes, water-resistant, dries clear
Devcon Epoxy Sets in 30 minutes, can be sanded or painted over, withstands temperatures up to 250°F
PC Products PC-7 Sets in 60 minutes, can be drilled, sanded, or painted over, withstands temperatures up to 200°F

Overall, epoxy resins are a great choice for bonding metal to wood. Just be sure to follow the manufacturer’s instructions carefully and choose the right type of epoxy resin for your project.

Polyurethane Adhesives

Polyurethane adhesives are a type of synthetic plastic resin made from polymers. They are known for their excellent bonding strength and versatility, making them a great choice for bonding wood to metal.

One of the advantages of polyurethane adhesives is that they can be used on a variety of substrates, including wood, metal, glass, concrete, and more. They are also waterproof, making them ideal for outdoor applications.

When using polyurethane adhesives, it is important to note that they can expand as they cure. This means that they can fill gaps and create a strong bond even on uneven surfaces. However, it is important to apply the adhesive carefully to avoid excess expansion, which can cause the adhesive to push out of the joint.

Another important consideration when using polyurethane adhesives is the curing time. While some polyurethane adhesives can cure in as little as 30 minutes, others may take several hours or even days to fully cure. It is important to follow the manufacturer’s instructions carefully to ensure that the adhesive is fully cured before putting any stress on the bond.

Overall, polyurethane adhesives are a great choice for bonding wood to metal due to their excellent bonding strength, versatility, and waterproof properties. However, it is important to use them carefully and follow the manufacturer’s instructions to ensure a strong and long-lasting bond.

Cyanoacrylate Adhesives

Cyanoacrylate adhesives, also known as super glues, are fast-bonding and high-strength adhesives that are engineered to bond almost any material, including wood and metal. These adhesives are valued for their resistance to temperature and moisture, making them ideal for a variety of applications.

When using cyanoacrylate adhesives for wood to metal bonding, it is important to note that they work best on perfectly mated parts. This means that the parts being bonded must be clean and free of any dirt, oil, or debris. If the surfaces are not clean, the bond may not be as strong as desired.

It is also important to note that cyanoacrylate adhesives may not bond well to certain surfaces, such as porous surfaces like wood. In these cases, it may be necessary to use products containing accelerators to ensure a strong bond.

Overall, cyanoacrylate adhesives can be a good choice for bonding wood to metal, but it is important to follow proper preparation and application techniques to ensure a strong and lasting bond.

Silicone-Based Adhesives

Silicon-based adhesives are a popular choice for bonding wood to metal due to their waterproofing capabilities and flexibility. They are also resistant to high temperatures and UV light, making them ideal for outdoor applications.

One of the advantages of silicone-based adhesives is their ability to bond to nonporous and smooth surfaces like plastic or metal. They also offer a strong and durable bond that can withstand vibrations and shocks.

When using silicone-based adhesives for wood to metal bonding, it is important to select a high-quality product that is specifically designed for this purpose. Look for adhesives that have a long curing time and can withstand extreme temperatures.

Some popular silicone-based adhesives for wood to metal bonding include Loctite Clear Silicone, Gorilla Silicone Sealant, and Permatex Silicone Adhesive. These products offer a strong and reliable bond that can last for years.

Overall, silicone-based adhesives are an excellent choice for bonding wood to metal. They offer a waterproof and flexible bond that can withstand harsh environments and extreme temperatures.

Factors to Consider When Choosing an Adhesive

When selecting an adhesive for wood to metal bonding, there are several factors that you should consider to ensure a strong and durable bond. Here are some key factors to keep in mind:

Bond Strength

The bond strength of an adhesive is crucial for wood to metal bonding. You want an adhesive that can create a strong bond that will hold up over time. Look for adhesives that have high shear and peel strength, as these properties are important for wood to metal bonding.

Durability

Durability is another important factor to consider when choosing an adhesive for wood to metal bonding. You want an adhesive that can withstand the elements and resist degradation over time. Look for adhesives that are resistant to water, heat, and UV light, as these factors can weaken the bond over time.

Temperature Resistance

Temperature resistance is also an important factor to consider when choosing an adhesive for wood to metal bonding. Depending on the application, the bond may be exposed to high or low temperatures, so you want an adhesive that can withstand these conditions without losing its strength. Look for adhesives that have a wide temperature range and can maintain their bond strength even in extreme temperatures.

Ease of Use

Finally, ease of use is an important factor to consider when choosing an adhesive for wood to metal bonding. You want an adhesive that is easy to apply and can be used without special equipment or training. Look for adhesives that have a simple application process and can be applied quickly and easily.

Overall, when choosing an adhesive for wood to metal bonding, you want to look for an adhesive that has high bond strength, durability, temperature resistance, and ease of use. By considering these factors, you can ensure that you choose an adhesive that will create a strong and long-lasting bond between wood and metal.

Safety Precautions When Using Adhesives

safety-precautions-when-using-adhesives

When working with adhesives, it is important to take proper safety precautions to prevent accidents and injuries. Here are some safety tips to keep in mind when using adhesives for wood to metal bonding:

Read the Label and Safety Data Sheet

Before using any adhesive, it is important to read the label and safety data sheet (SDS) carefully. The label will provide information about the adhesive’s specific hazards, such as flammability or toxicity. The SDS will provide more detailed information about the adhesive’s composition, handling, storage, and disposal.

Wear Protective Gear

When using adhesives, it is important to wear appropriate personal protective equipment (PPE) to protect yourself from exposure to hazardous chemicals and materials. This may include gloves, safety glasses or goggles, and a respirator.

Work in a Well-Ventilated Area

Many adhesives contain volatile organic compounds (VOCs) that can be harmful if inhaled. To prevent exposure to these chemicals, it is important to work in a well-ventilated area. Open windows and doors, or use a fan or ventilation system to circulate fresh air.

Store Adhesives Safely

When not in use, adhesives should be stored in a cool, dry, and well-ventilated area. Keep them away from sources of heat, sparks, or flames, as many adhesives are flammable. Store adhesives in their original containers, and label them clearly to prevent confusion.

Clean Up Spills and Dispose of Adhesives Properly

If you spill adhesive, clean it up immediately using a solvent recommended by the manufacturer. Do not use water, as many adhesives are water-resistant and will not dissolve. Dispose of adhesives and solvents according to local regulations and guidelines.

By following these safety precautions, you can minimize the risk of accidents and injuries when using adhesives for wood to metal bonding.

Application Process of Adhesives

When it comes to bonding wood to metal, selecting the right adhesive is only half the battle. Applying the adhesive properly is equally important. Here’s a step-by-step guide to help you get the best results possible.

Surface Preparation

The first step in any adhesive application is surface preparation. This is especially important when bonding wood to metal. Any dirt, oil, or other contaminants on the metal surface will weaken the bond. Follow these steps to ensure a clean surface:

  • Clean the metal surface with a degreaser or rubbing alcohol.
  • Sand the metal surface to roughen it up and provide better adhesion.
  • Wipe the surface with a clean, dry cloth to remove any dust or debris.

Applying the Adhesive

Once the surface is clean and dry, it’s time to apply the adhesive. Follow the manufacturer’s instructions carefully, as different adhesives have different application methods. Here are some general tips:

  • Apply the adhesive evenly to both surfaces. Use a notched trowel or a brush to spread the adhesive evenly.
  • Apply enough adhesive to achieve a strong bond, but not so much that it oozes out of the joint.
  • Press the wood and metal together firmly, making sure the joint is tight.

Curing Time

After the adhesive is applied and the surfaces are joined, it’s time to let the adhesive cure. The curing time will vary depending on the adhesive you’re using, as well as the temperature and humidity of the environment. Here are some general guidelines:

  • Follow the manufacturer’s recommended curing time.
  • Do not disturb the joint while the adhesive is curing.
  • After the curing time is complete, test the bond to make sure it’s strong.

By following these steps, you’ll be well on your way to a strong, durable bond between wood and metal.

Frequently Asked Questions

What are some recommended adhesives for attaching wood to metal?

When it comes to bonding wood to metal, there are several types of adhesives that can be used. Some of the most recommended options include epoxy, super glue, and construction adhesive. These adhesives are known for their strong bonding properties and ability to create a permanent bond between wood and metal.

What are some common brands of adhesive for wood to metal?

There are many different brands of adhesive that can be used for bonding wood to metal. Some of the most common brands include Loctite, Gorilla, J-B Weld, and Starbond. These brands are known for their high-quality adhesives that are specifically designed for wood to metal bonding.

Can wood glue be used to bond wood to metal?

While wood glue can be used to bond wood to wood, it is not recommended for bonding wood to metal. This is because wood glue is not strong enough to create a permanent bond between the two materials. Instead, it is recommended to use an adhesive that is specifically designed for wood to metal bonding.

What is the difference between epoxy and super glue for wood to metal?

Epoxy and super glue are both commonly used adhesives for wood to metal bonding. However, there are some key differences between the two. Epoxy is a two-part adhesive that requires mixing before use and has a longer curing time. Super glue, on the other hand, is a one-part adhesive that cures quickly. Epoxy is generally considered to be stronger and more durable than super glue.

Are there any special considerations when using adhesive for wood to metal?

When using adhesive for wood to metal bonding, there are some special considerations that should be taken into account. First, it is important to make sure that both surfaces are clean and free of any debris or oils. Additionally, it is recommended to apply the adhesive in a thin, even layer and to clamp the two surfaces together while the adhesive cures.

Which adhesive is best for a permanent bond between wood and metal?

When it comes to creating a permanent bond between wood and metal, epoxy is generally considered to be the best option. This is because epoxy is known for its high strength and durability, and is able to create a strong, permanent bond between the two materials. However, other adhesives such as super glue and construction adhesive can also be effective for wood to metal bonding, depending on the specific application.

Blog

Can You Use Drywall Anchors in Wood? Explained

Are you wondering whether you can use drywall anchors in wood? The short answer is yes, but it’s important to choose login nirwanapoker the right type of anchor for the job. Not all drywall anchors are compatible with wood, as they are designed for use in drywall that lacks wooden studs. Using the wrong type of anchor can result in damage to your wood surface or a failed installation.

When it comes to using drywall anchors in wood, toggle bolts and expanding plugs are two types of anchors that can be used. However, it’s important to choose the right one for your specific application. Additionally, plastic anchors should be avoided as they are likely to break during installation. Keep in mind that the weight of the item you are hanging will also play a role in determining which type of anchor to use.

Understanding Drywall Anchors

understanding-drywall-anchors

When it comes to hanging items on walls, drywall anchors are a popular slot online idn choice. But can you use drywall anchors in wood? The answer is yes, but not all types of drywall anchors are compatible with wood. Here’s what you need to know about drywall anchors.

What are drywall anchors?

Drywall anchors are devices used to secure objects to walls that are made of drywall. They are designed to distribute weight across a larger surface area than a simple screw or nail, which can cause damage to the drywall and fail to hold heavier items.

Types of drywall anchors

There are several types of drywall anchors, including:

  • Plastic expansion anchors
  • Threaded anchors
  • Toggle bolts
  • Winged plastic anchors
  • Self-drilling anchors

Each type of anchor has its own strengths and weaknesses, and some are better suited to wood than others.

Bermain poker online dengan keberuntungan besar! Rasakan suasana seru bermain dengan lawan sesungguhnya, dan raih kemenangan yang menguntungkan. Situs kami menjamin keselamatan dan keamanan bermain, serta pengalaman yang nyaman dan adil melalui akses idn poker apk, dimana pemain dapat dengan mudah menikmati game poker melalui mobile phone. Sera dapatkan juga bonus dan promosi harian yang menarik dan bikin kantongmu makin tebal. Daftar sekarang dan jadilah juara poker terbaik!

Can you use drywall anchors in wood?

Not all drywall anchors are compatible with wood since they’re designed for drywall that lacks wooden studs. However, some types of drywall anchors can be used in wood, including:

  • Threaded anchors
  • Toggle bolts
  • Self-drilling anchors

It’s important to avoid plastic anchors because they’ll likely break when you install them. You also generally shouldn’t use anchors that expand on the other side since wood is solid.

How to use drywall anchors in wood

To use drywall anchors in wood, you’ll need to follow these steps:

  1. Choose the right type of anchor for your project.
  2. Drill a hole in the wood where you want to place the anchor.
  3. Insert the anchor into the hole.
  4. Tighten the screw into the anchor until it’s secure.

Remember to check the weight capacity of the anchor and choose one that’s appropriate for the weight of the item you’re hanging.

By understanding the different types of drywall anchors and their compatibility with wood, you can choose link situs vio88 the right anchor for your project and ensure that your items are securely hung on the wall.

Can You Use Drywall Anchors in Wood?

can-you-use-drywall-anchors-in-wood

Drywall anchors are typically used to hang heavy objects on drywall, but they can also be used in wood. However, not all drywall anchors are compatible with wood. Some anchors are designed specifically for drywall that lacks wooden studs, so they may not work well in wood.

If you plan to use drywall anchors in wood, it’s important to choose the right type of anchor. Toggle bolts and expanding plugs are two types of drywall anchors that can be used in wood. Toggle bolts are a good choice for heavier objects, while expanding plugs are better for lighter objects.

When installing drywall anchors in wood, it’s important to avoid using plastic anchors because they’re more likely to break during installation. You should also avoid using anchors that expand on the other side, as wood is a solid material and won’t compress like drywall.

Before installing drywall anchors in wood, make sure to drill a pilot hole that’s slightly smaller than the diameter of the anchor. This will help the anchor grip the wood more securely and prevent it from slipping or pulling out.

Overall, drywall anchors can be used in wood, but it’s important to choose the right type of anchor and follow proper installation techniques to ensure a secure hold.

Types of Drywall Anchors Suitable for Wood

When it comes to hanging things on wood surfaces, you may wonder if drywall anchors can be used. The answer is yes, but not all types of drywall anchors are suitable for wood. In this section, we will discuss the three types of drywall anchors that are compatible with wood.

Plastic Expansion Anchors

Plastic expansion anchors are not recommended for wood surfaces. They are designed for hollow walls and may not provide adequate support for heavier objects on wood surfaces. Additionally, they may break or crack when installed in wood.

Threaded Anchors

Threaded anchors are suitable for wood surfaces. They are designed to grip the wood and provide a secure hold. These anchors are available in different sizes and can support various weights. It is important to select the appropriate size and weight capacity for your project.

Molly Bolts

Molly bolts are another type of drywall anchor that can be used on wood surfaces. They are designed to expand behind the surface to provide a secure hold. These anchors are available in different sizes and can support various weights. It is important to select the appropriate size and weight capacity for your project.

Overall, when using drywall anchors on wood surfaces, it is important to select the appropriate type of anchor for your project. Threaded anchors and molly bolts are suitable for wood surfaces, while plastic expansion anchors are not recommended. Always follow the manufacturer’s instructions when installing drywall anchors on wood surfaces to ensure a secure hold.

Pros and Cons of Using Drywall Anchors in Wood

pros-and-cons-of-using-drywall-anchors-in-wood

When it comes to hanging items on walls made of wood, using drywall anchors can be a convenient solution. However, there are both advantages and disadvantages to using them. In this section, we will discuss the pros and cons of using drywall anchors in wood.

Advantages

  • Ease of installation: Drywall anchors are easy to install and do not require you to locate studs in the wall, which can be time-consuming. This makes them a convenient option for hanging lightweight items on wood walls.
  • Versatility: Drywall anchors come in various sizes and types, making them versatile and suitable for a wide range of applications. You can choose from plastic sleeve anchors, self-drilling threaded anchors, molly bolts, and toggle bolt anchors, depending on your needs.
  • Affordability: Drywall anchors are relatively inexpensive and widely available at hardware stores, making them a cost-effective option for hanging items on wood walls.

Disadvantages

  • Limited weight capacity: Drywall anchors are designed to hold lightweight items, and their weight capacity is limited. If you need to hang heavy items on a wood wall, drywall anchors may not be suitable, and you may need to locate and use studs instead.
  • Risk of damage: Drywall anchors can damage the wood wall if they are not installed correctly or if they are overloaded. They can also loosen over time, causing the item to fall and potentially causing damage.
  • Compatibility issues: Not all drywall anchors are compatible with wood walls. Plastic anchors, for example, may break when you install them, and anchors that expand on the other side may not be suitable for solid wood walls.

In conclusion, using drywall anchors in wood walls can be a convenient solution for hanging lightweight items. However, it is essential to consider the weight capacity of the anchors, the risk of damage, and compatibility issues before using them.

How to Install Drywall Anchors in Wood

If you need to hang something on a wooden wall, you may wonder if you can use drywall anchors. The answer is yes, but not all drywall anchors are suitable for wood. Here’s how to install drywall anchors in wood properly.

Choosing the Right Anchor

When choosing a drywall anchor for wood, you need to consider the weight of the object you want to hang. Different types of anchors have different weight capacities. Here are some common types of drywall anchors and their weight limits:

  • Plastic expansion anchors: up to 30 pounds
  • Toggle bolts: up to 100 pounds
  • Winged plastic anchors: up to 75 pounds
  • Threaded anchors: up to 75 pounds

Choose an anchor that can support the weight of your object. If you’re not sure, choose an anchor with a higher weight capacity to be safe.

Drilling the Hole

Once you’ve chosen the right anchor, you need to drill a hole in the wood to insert it. Use a drill bit that is slightly smaller than the anchor’s diameter. For example, if your anchor is 1/4 inch in diameter, use a 3/16 inch drill bit.

Mark the spot where you want to insert the anchor with a pencil. Then, drill the hole straight into the wood. Don’t drill too deep or too shallow. The hole should be just deep enough to fit the anchor.

Inserting the Anchor

After drilling the hole, insert the anchor into the wood. Tap it gently with a hammer to make sure it’s flush with the surface. Then, insert the screw into the anchor and tighten it until it’s snug.

If you’re using a toggle bolt or a threaded anchor, you’ll need to follow the manufacturer’s instructions to install it properly. Some anchors require you to insert a bolt or a hook into the anchor before attaching the object.

In conclusion, you can use drywall anchors in wood, but you need to choose the right type of anchor and install it properly. By following these simple steps, you can hang objects securely on your wooden walls without damaging them.

Safety Precautions When Using Drywall Anchors in Wood

safety-precautions-when-using-drywall-anchors-in-wood

When using drywall anchors in wood, it is important to take certain safety precautions to ensure that your installation is secure and safe. Here are some tips to keep in mind:

1. Choose the Right Type of Anchor

When using drywall anchors in wood, it’s important to choose the right type of anchor for the job. There are many different types of anchors available, each designed for a specific weight and application. Make sure you choose an anchor that is rated for the weight of the item you will be hanging.

2. Check the Load Capacity of the Wood

Before installing a drywall anchor in wood, it is important to check the load capacity of the wood. Different types of wood have different load capacities, and exceeding the load capacity can result in damage to the wood, the anchor, and the item you are hanging.

3. Use the Right Tools

When installing drywall anchors in wood, it is important to use the right tools for the job. This includes a drill, drill bit, and screwdriver. Using the wrong tools can result in damage to the anchor, the wood, and the item you are hanging.

4. Use Proper Installation Techniques

When installing drywall anchors in wood, it is important to use proper installation techniques. This includes drilling a pilot hole, inserting the anchor, and tightening the screw. Failure to follow proper installation techniques can result in the anchor pulling out of the wood, causing damage to the wood and the item you are hanging.

5. Avoid Overloading the Anchor

When using drywall anchors in wood, it is important to avoid overloading the anchor. This can cause the anchor to pull out of the wood, resulting in damage to the wood and the item you are hanging. Always follow the weight capacity guidelines for the anchor and the wood.

By following these safety precautions, you can ensure that your drywall anchor installation in wood is secure and safe.

Frequently Asked Questions

What types of anchors are suitable for wood?

Not all types of anchors are suitable for wood. It is recommended to use anchors that are specifically designed for wood, such as threaded anchors, toggle bolts, or expansion anchors. Avoid using plastic anchors, as they may break or fail to hold properly in wood.

Do I need wall anchors for wood?

If you are mounting something heavy or if the wood is thin, it is recommended to use wall anchors to ensure that the item stays securely in place. However, if the wood is thick and sturdy, you may not need to use wall anchors.

What are the best wall anchors for plywood?

Toggle bolts are a great choice for mounting items on plywood. They are easy to install and provide a strong hold. Another option is to use threaded anchors, which can be screwed directly into the plywood.

What types of screw anchors can be used in wood?

Threaded anchors, toggle bolts, and expansion anchors are all suitable for use in wood. It is important to choose the right size and type of anchor based on the weight and size of the item you are mounting.

Can anchor bolts be used in wood?

Anchor bolts are typically used in concrete or masonry, and are not recommended for use in wood. Instead, use threaded anchors, toggle bolts, or expansion anchors designed specifically for wood.

How do I properly install anchors in wood?

To properly install anchors in wood, start by drilling a pilot hole slightly smaller than the anchor. Then, insert the anchor into the hole and tap it in with a hammer. Finally, screw the anchor into the wood until it is flush with the surface. Make sure to choose the right size and type of anchor for the weight and size of the item you are mounting.

Blog

How Many Types of Wood Are in Minecraft? A Comprehensive Guide

Are you looking to expand your knowledge of Minecraft’s vast world? If so, you may be interested in learning about the different types of wood available in the game. Wood is a crucial resource in Minecraft, as it can be used to craft a variety of tools, weapons, and building materials. In this article, we’ll explore how many types of wood are in Minecraft and what makes each one unique.

First, let’s start with the basics. There are three main types of wood in Minecraft: oak, spruce, and birch. Each type of wood has its own distinct appearance, with oak having a light brown color, spruce being a darker shade of brown, and birch featuring a white bark texture. While each type of wood can be used interchangeably in crafting recipes, their unique appearance can add variety to your builds.

However, the world of Minecraft is constantly expanding, and there are now additional types of wood available in the game. For example, jungle wood has a vibrant, reddish-brown color, while acacia wood has a pale yellow hue. Additionally, dark oak wood has a deep, chocolate brown color, and crimson and warped stems were introduced in the Nether update. With so many options to choose from, you can create a wide range of unique and visually appealing structures using different types of wood.

LinkSlot serves as a sports entertainment solution that prioritizes fast access, up-to-date data, and a comfortable user experience. The platform is designed for readers who want to understand opportunities in a practical way without unnecessary distractions. With clean navigation and regular updates, LinkSlot helps visitors find relevant, accurate, and easy-to-understand football betting references, making it easier to follow match developments in a more focused and efficient manner.

Types of Wood in Minecraft

When it comes to the variety of wood in Minecraft, there are eight different types of wood available. Each type of wood has its own unique characteristics that make them useful for different purposes. Here are the eight types of wood available in Minecraft:

Oak Wood

Oak Wood is the most common type of wood in Minecraft. It can be easily obtained by chopping down Oak Trees. Oak Wood can be used to create various items such as planks, doors, and fences. It can also be used as fuel in a furnace.

Spruce Wood

Spruce Wood is a darker type of wood that is obtained by chopping down Spruce Trees. It is commonly used to create buildings and furniture. Spruce Wood can be crafted into planks, doors, and trapdoors. It can also be used as fuel in a furnace.

Birch Wood

Birch Wood is a lighter type of wood that is obtained by chopping down Birch Trees. It is commonly used to create furniture and decorations. Birch Wood can be crafted into planks, doors, and slabs. It can also be used as fuel in a furnace.

Jungle Wood

Jungle Wood is a type of wood that is obtained by chopping down Jungle Trees. It has a unique texture and is commonly used to create buildings and furniture. Jungle Wood can be crafted into planks, doors, and trapdoors. It can also be used as fuel in a furnace.

Acacia Wood

Acacia Wood is a type of wood that is obtained by chopping down Acacia Trees. It has a unique texture and is commonly used to create buildings and furniture. Acacia Wood can be crafted into planks, doors, and slabs. It can also be used as fuel in a furnace.

Dark Oak Wood

Dark Oak Wood is a darker type of wood that is obtained by chopping down Dark Oak Trees. It is commonly used to create buildings and furniture. Dark Oak Wood can be crafted into planks, doors, and trapdoors. It can also be used as fuel in a furnace.

Crimson Wood

Crimson Wood is a type of wood that is obtained by chopping down Crimson Trees in the Nether. It has a unique texture and is commonly used to create buildings and furniture in the Nether. Crimson Wood can be crafted into planks and doors.

Warped Wood

Warped Wood is a type of wood that is obtained by chopping down Warped Trees in the Nether. It has a unique texture and is commonly used to create buildings and furniture in the Nether. Warped Wood can be crafted into planks and doors.

In summary, each type of wood in Minecraft has its own unique characteristics that make them useful for different purposes. Whether you’re building a house, crafting furniture, or just need fuel for your furnace, there is a type of wood that will suit your needs.

The best digital experience is achieved when technology works seamlessly without feeling complicated. LinkSlot designs systems that are intuitive, fast, and user-friendly. With the latest slots today, users stay connected to real-time updates without needing to search repeatedly or worry about access issues. This approach naturally strengthens the relationship between the brand and its users.

Uses of Different Woods

In Minecraft, there are several types of wood that you can use for different purposes. Here are some of the uses of different woods:

Oak Wood

Oak wood is the most common type of wood in Minecraft. You can use oak wood to make planks, which you can then use to make various items such as tools, weapons, and furniture. You can also use oak wood to make sticks, which are essential for crafting many items.

Spruce Wood

Spruce wood is a darker type of wood that you can use to make planks and sticks. You can also use spruce wood to make doors, trapdoors, and ladders. Additionally, spruce wood is used to make the spruce boat, which is a type of boat that can be used to travel across water.

Birch Wood

Birch wood is a light-colored type of wood that you can use to make planks, sticks, doors, and trapdoors. You can also use birch wood to make the birch boat, which is another type of boat that can be used to travel across water.

Jungle Wood

Jungle wood is a type of wood that is found in the jungle biome. You can use jungle wood to make planks, sticks, doors, and trapdoors. Additionally, jungle wood is used to make the jungle boat, which is yet another type of boat that can be used to travel across water.

Acacia Wood

Acacia wood is a type of wood that is found in the savanna biome. You can use acacia wood to make planks, sticks, doors, and trapdoors. Additionally, acacia wood is used to make the acacia boat, which is another type of boat that can be used to travel across water.

Dark Oak Wood

Dark oak wood is a darker type of wood that is found in the roofed forest biome. You can use dark oak wood to make planks, sticks, doors, and trapdoors. Additionally, dark oak wood is used to make the dark oak boat, which is another type of boat that can be used to travel across water.

Each type of wood has its own unique characteristics and uses, so it’s important to know which type of wood to use for each situation.

Playing flexibility expands significantly thanks to slot deposit via pulsa support on LinkSlot. This method allows players from various backgrounds to access games without technical barriers. The deposit system is designed to be stable and easy to use, making it an ideal option for users who want a fast process without compromising data security or account balance.

How to Obtain Different Woods

In Minecraft, obtaining different types of wood is essential for crafting various items and structures. Here are some ways to obtain different woods in the game:

Oak Wood

Oak Wood is the most common type of wood in Minecraft and can be obtained by chopping down Oak Trees found in Forest and Plains biomes. Each log can be crafted into four Oak Planks.

Birch Wood

Birch Wood can be obtained by chopping down Birch Trees found in Forest and Plains biomes. Each log can be crafted into four Birch Planks.

Spruce Wood

Spruce Wood can be obtained by chopping down Spruce Trees found in Taiga and Mega Taiga biomes. Each log can be crafted into four Spruce Planks.

Jungle Wood

Jungle Wood can be obtained by chopping down Jungle Trees found in Jungle biomes. Each log can be crafted into four Jungle Planks.

Acacia Wood

Acacia Wood can be obtained by chopping down Acacia Trees found in Savanna biomes. Each log can be crafted into four Acacia Planks.

Dark Oak Wood

Dark Oak Wood can be obtained by chopping down Dark Oak Trees found in Roofed Forest biomes. Each log can be crafted into four Dark Oak Planks.

Warped and Crimson Wood

Warped and Crimson Wood can be obtained by chopping down Warped and Crimson Trees found in the Nether. Each log can be crafted into four Warped or Crimson Planks respectively.

It is important to note that each type of wood has a unique texture and color, making them ideal for different building styles and designs. With this knowledge, you can now gather the wood you need to create your dream structures in Minecraft.

Crafting with Woods

In Minecraft, wood is a versatile material that can be used for crafting a variety of items and structures. There are six types of wood in the game: oak, spruce, birch, jungle, acacia, and dark oak. Each type of wood has its own unique properties and uses.

Oak Wood

Oak wood is the most common type of wood in Minecraft. It can be obtained by chopping down oak trees with an axe. Oak wood can be used to craft a variety of items, including wooden planks, sticks, and tools. It is also commonly used as a building material for structures.

Spruce Wood

Spruce wood is a darker, more durable wood than oak wood. It can be obtained by chopping down spruce trees with an axe. Spruce wood is commonly used for building structures such as cabins and houses, as well as for crafting items like wooden planks and sticks.

Birch Wood

Birch wood is a light-colored wood that can be obtained by chopping down birch trees with an axe. Birch wood is commonly used for crafting items like wooden planks and sticks. It is also used as a building material for structures like houses and furniture.

Jungle Wood

Jungle wood is a unique type of wood that can be obtained by chopping down jungle trees with an axe. It has a distinct texture and is commonly used for crafting items like wooden planks, sticks, and tools. Jungle wood is also used as a building material for structures like treehouses and bridges.

Acacia Wood

Acacia wood is a reddish-brown wood that can be obtained by chopping down acacia trees with an axe. It is commonly used for crafting items like wooden planks and sticks, as well as for building structures like houses and furniture.

Dark Oak Wood

Dark oak wood is a dark, rich wood that can be obtained by chopping down dark oak trees with an axe. It is commonly used for crafting items like wooden planks and sticks, as well as for building structures like houses and furniture. Dark oak wood is also a popular material for creating decorative items like picture frames and bookshelves.

Overall, each type of wood in Minecraft has its own unique properties and uses. Whether you’re crafting tools, building structures, or creating decorative items, there’s a type of wood that’s perfect for your needs.

Decorative Uses of Woods

In Minecraft, there are 10 types of wood that players can use for various purposes. But beyond their functional uses, these woods can also be used for decorative purposes. Here are some ways you can use the different types of wood to add some flair to your Minecraft builds:

1. Oak Wood

Oak Wood is the most common type of wood in Minecraft. It can be used to create a classic, rustic look for your builds. You can use oak planks to create a wooden floor, or oak logs to create a log cabin-style wall. You can also use oak wood to create furniture, such as chairs, tables, and bookshelves.

2. Spruce Wood

Spruce Wood has a darker color than oak wood, making it a great choice for creating a more dramatic look. You can use spruce planks to create a dark wooden floor, or spruce logs to create a log cabin-style wall with a darker hue. You can also use spruce wood to create furniture, such as beds, chests, and doors.

3. Birch Wood

Birch Wood has a lighter color than oak wood, making it a great choice for creating a brighter, more cheerful look. You can use birch planks to create a light wooden floor, or birch logs to create a wall with a lighter hue. You can also use birch wood to create furniture, such as tables, chairs, and bookshelves.

4. Jungle Wood

Jungle Wood has a unique texture that can add some interest to your builds. You can use jungle planks to create a floor with a unique pattern, or jungle logs to create a wall with a unique texture. You can also use jungle wood to create furniture, such as tables, chairs, and bookshelves.

5. Acacia Wood

Acacia Wood has a reddish-brown color that can add some warmth to your builds. You can use acacia planks to create a floor with a warm hue, or acacia logs to create a wall with a reddish-brown texture. You can also use acacia wood to create furniture, such as tables, chairs, and bookshelves.

6. Dark Oak Wood

Dark Oak Wood has a dark, rich color that can add some elegance to your builds. You can use dark oak planks to create a dark wooden floor with a touch of sophistication, or dark oak logs to create a wall with a dark, rich texture. You can also use dark oak wood to create furniture, such as beds, chests, and doors.

7. Mangrove Wood

Mangrove Wood has a light, creamy color that can add some brightness to your builds. You can use mangrove planks to create a light wooden floor with a touch of elegance, or mangrove logs to create a wall with a light, creamy texture. You can also use mangrove wood to create furniture, such as tables, chairs, and bookshelves.

8. Cherry Wood

Cherry Wood has a reddish-pink color that can add some playfulness to your builds. You can use cherry planks to create a floor with a fun, whimsical hue, or cherry logs to create a wall with a playful, pinkish texture. You can also use cherry wood to create furniture, such as tables, chairs, and bookshelves.

9. Crimson Wood

Crimson Wood has a deep, purplish-red color that can add some drama to your builds. You can use crimson planks to create a floor with a bold, striking hue, or crimson logs to create a wall with a deep, purplish texture. You can also use crimson wood to create furniture, such as beds, chests, and doors.

10. Warped Wood

Warped Wood has a bluish-gray color that can add some coolness to your builds. You can use warped planks to create a floor with a cool, calming hue, or warped logs to create a wall with a bluish-gray texture. You can also use warped wood to create furniture, such as tables, chairs, and bookshelves.

Frequently Asked Questions

What are the different types of wood found in Minecraft?

There are seven different types of wood found in Minecraft: Oak, Dark Oak, Spruce, Birch, Jungle, Acacia, and Crimson. Each type of wood has its own unique properties, such as texture and color.

What are the properties of each type of wood in Minecraft?

Oak wood is the lightest colored wood, while Crimson wood is the darkest. Spruce wood has a darker color than Oak, and Dark Oak has a darker color than Spruce. Birch wood has a light color with small black spots, while Jungle wood has a darker color with a unique texture. Acacia wood has a reddish color, and Crimson wood is a new type of wood introduced in Minecraft with a red color.

Which type of wood is the rarest in Minecraft?

Crimson wood is the rarest type of wood in Minecraft, as it can only be found in the Nether.

Which type of wood is the strongest in Minecraft?

There is no one type of wood that is the strongest in Minecraft. However, some players prefer to use Dark Oak or Acacia wood for their durability and resistance to fire.

What is the new type of wood introduced in Minecraft?

Crimson wood is the new type of wood introduced in Minecraft with the Nether Update. It has a red color and can only be found in the Nether.

What is the red-colored wood found in Minecraft?

The red-colored wood found in Minecraft is Crimson wood. It has a unique texture and can only be found in the Nether.

Blog

Can Pressure Treated Wood Be Used Indoors? A Friendly Guide

Are you wondering if pressure treated wood can be used indoors? It’s a common question among DIY enthusiasts and homeowners alike. The answer is not straightforward as it depends on several factors. Pressure treated wood is a type of lumber that has been treated with chemicals to make it more resistant to rot, insects, and decay. While it’s commonly used for outdoor projects, such as decks and fences, some people also use it indoors.

However, using pressure treated wood indoors can pose some potential risks. The chemicals used to treat the wood can be harmful to your health, especially if they are inhaled or ingested. Additionally, the wood can release volatile organic compounds (VOCs) into the air, which can cause respiratory problems. Despite these risks, some people still choose to use pressure treated wood indoors because of its durability and resistance to moisture.

Understanding Pressure Treated Wood

If you’re considering using pressure treated wood indoors, it’s important to understand what it is and how it differs from other types of wood. Pressure treated wood is a type of lumber that has been treated with chemicals to make it more resistant to rot, decay, and insects. This process involves placing the wood in a vacuum chamber and then forcing chemicals into the wood under high pressure.

The chemicals used in pressure treated wood can vary depending on the manufacturer, but they typically include copper, chromium, and arsenic. These chemicals are toxic, which is why it’s important to handle pressure treated wood with care and take precautions when using it indoors.

One of the main benefits of pressure treated wood is its durability. It can last for many years, even in harsh environments, making it a popular choice for outdoor projects like decks and fences. However, this durability comes at a cost. The chemicals used in pressure treated wood can be harmful to humans and pets, which is why it’s important to take precautions when handling it.

When using pressure treated wood indoors, it’s important to avoid using it in areas where it may come into contact with food, young children, or pets. This includes surfaces like cutting boards and kitchen countertops, as well as areas where pets may chew the wood.

In addition to the potential health risks, pressure treated wood can also be more difficult to work with than other types of wood. It’s harder and denser than untreated wood, which can make it more difficult to cut and shape. It’s also important to note that pressure treated wood may not take paint or stain as well as other types of wood, so you may need to take extra steps to prepare the wood before finishing it.

Overall, pressure treated wood can be used indoors in some instances, but it’s important to take precautions and understand the potential risks. If you’re not comfortable working with pressure treated wood, there are plenty of other types of wood that can be used for indoor projects.

Indoor Uses of Pressure Treated Wood

indoor-uses-of-pressure-treated-wood

Pressure treated wood can be used indoors for various purposes. Here are a few examples of indoor uses of pressure treated wood:

1. Framing and Structural Support

Pressure treated wood is commonly used for framing and structural support in indoor construction projects. It is ideal for use in areas that are prone to moisture, such as basements and bathrooms, as it is resistant to rot and decay.

2. Flooring

Pressure treated wood can also be used as flooring in indoor spaces. It is particularly useful in areas that are exposed to moisture, such as laundry rooms and mudrooms. However, it is important to note that pressure treated wood can be slippery when wet, so it may not be the best choice for high-traffic areas.

3. Shelving and Storage

Pressure treated wood is also a great option for shelving and storage units in indoor spaces. It is strong, durable, and resistant to moisture, making it ideal for use in areas such as garages and basements.

4. Outdoor Furniture

While pressure treated wood is primarily used for outdoor furniture, it can also be used indoors. It is a great option for rustic or farmhouse-style interiors, and can add warmth and character to any space.

It is important to note that pressure treated wood should never be used for projects that come into direct contact with food, young children, or pets. Additionally, it is important to wear gloves and a mask when working with pressure treated wood to avoid exposure to the chemicals used in the treatment process.

Risks of Using Pressure Treated Wood Indoors

While pressure treated wood can be used indoors, there are some risks associated with its use. Here are a few things you should keep in mind if you’re considering using pressure treated wood indoors:

Chemicals in Pressure Treated Wood

Pressure treated wood is treated with chemicals to prevent rot and insect damage. These chemicals can include arsenic, copper, and chromium, which can be harmful if ingested or inhaled. While the risk of exposure to these chemicals is low if the wood is used properly, it’s important to take precautions to minimize the risk of exposure.

Potential for Off-Gassing

Pressure treated wood can also release volatile organic compounds (VOCs) as it ages. These VOCs can be harmful if inhaled in large quantities, and can cause respiratory problems and other health issues. While the risk of off-gassing is low if the wood is properly sealed and maintained, it’s important to be aware of the potential for off-gassing when using pressure treated wood indoors.

Risk of Splinters

Pressure treated wood can be rough and splintery, which can be a hazard if it’s used in areas where people will be walking or sitting. If you’re using pressure treated wood indoors, it’s important to sand it down and smooth out any rough edges to minimize the risk of splinters.

Avoid Using Pressure Treated Wood in Food Contact Areas

One of the biggest risks associated with using pressure treated wood indoors is the potential for the chemicals in the wood to come into contact with food. If you’re using pressure treated wood in an area where food will be prepared or served, it’s important to use a food-safe sealant to prevent the chemicals from leaching into the food.

Overall, while there are risks associated with using pressure treated wood indoors, it can be used safely as long as you take precautions to minimize the risk of exposure to chemicals and off-gassing. If you’re unsure about using pressure treated wood indoors, it’s always best to consult with a professional to ensure that you’re using the wood safely and effectively.

Alternatives to Pressure Treated Wood for Indoor Use

alternatives-to-pressure-treated-wood-for-indoor-use

Pressure-treated wood is a popular choice for outdoor projects because it is resistant to rot and decay. However, when it comes to indoor use, pressure-treated wood may not be the best option. The chemicals used to treat the wood, such as chromated copper arsenate (CCA), can be harmful if ingested or inhaled. If you are looking for alternatives to pressure-treated wood for indoor use, here are some options to consider:

1. Cedar

Cedar is a popular choice for indoor projects because it is naturally resistant to rot and decay. It also has a pleasant scent and is easy to work with. Cedar is more expensive than pressure-treated wood, but it is a good investment if you want a long-lasting, natural option.

2. Redwood

Redwood is another natural option that is resistant to rot and decay. It is also a good choice for indoor projects because it is easy to work with and has a beautiful, natural color. Like cedar, redwood is more expensive than pressure-treated wood, but it is worth the investment if you want a natural, long-lasting option.

3. Composite Wood

Composite wood is a man-made material that is made from a blend of wood fibers and plastic. It is a good option for indoor projects because it is resistant to rot and decay and does not contain any harmful chemicals. Composite wood is also easy to work with and comes in a variety of colors and styles.

4. Bamboo

Bamboo is a fast-growing, renewable resource that is a good option for indoor projects. It is naturally resistant to rot and decay and is very strong and durable. Bamboo is also easy to work with and comes in a variety of colors and styles.

When it comes to indoor projects, there are many alternatives to pressure-treated wood. Cedar, redwood, composite wood, and bamboo are all good options to consider. Each has its own advantages and disadvantages, so it is important to choose the option that best fits your needs and budget.

Safety Measures When Using Pressure Treated Wood Indoors

If you are considering using pressure treated wood indoors, it is important to take proper safety measures to protect yourself and those around you. Pressure treated wood contains chemicals that are designed to withstand water and elements, but can be harmful if not handled correctly.

Here are some safety measures to keep in mind when using pressure treated wood indoors:

  • Wear protective gear: When cutting or sanding pressure treated wood, wear a dust mask, goggles, and gloves to protect yourself from inhaling dust or getting chemicals on your skin.
  • Wash your hands and clothes: After working with pressure treated wood, wash your hands thoroughly with mild soap and water. Also, wash your work clothes separately from other clothes to avoid contaminating them with the chemicals.
  • Keep pressure treated wood away from food: Do not use pressure treated wood in areas where it may come into contact with food or food preparation surfaces.
  • Treat the wood with a sealant: To reduce the risk of exposure to the chemicals in pressure treated wood, apply a pigmented, wood-penetrating oil sealant annually. This will also help to preserve the wood and extend its lifespan.
  • Properly dispose of scraps: When cutting pressure treated wood, be sure to properly dispose of any scraps or sawdust. Do not burn pressure treated wood, as this can release harmful chemicals into the air.

By following these safety measures, you can reduce the risk of exposure to the chemicals in pressure treated wood and safely use it indoors for your projects.

Environmental Impact of Using Pressure Treated Wood Indoors

environmental-impact-of-using-pressure-treated-wood-indoors

Using pressure treated wood indoors can have potential environmental impacts that you should be aware of. While treated wood is known for its ability to resist rot and pests, it also contains chemicals that can be harmful to both the environment and human health.

One of the main concerns with using pressure treated wood indoors is the release of chemicals into the air. The chemicals used to treat the wood, such as chromated copper arsenate (CCA) and alkaline copper quaternary (ACQ), can be released into the air as the wood dries out or is sanded or cut. This can result in indoor air pollution, which can be harmful to your health.

In addition to the impact on indoor air quality, using pressure treated wood indoors can also have a negative impact on the environment. The chemicals used to treat the wood can leach into the soil if the wood is disposed of improperly. This can lead to contamination of groundwater and soil, which can have long-term effects on the environment.

It’s important to note that while the use of pressure treated wood indoors is not recommended, there are alternatives available. For example, there are non-toxic wood treatments available that can be used to protect wood from rot and pests without the use of harmful chemicals. Additionally, there are many types of wood that are naturally resistant to rot and pests, such as cedar and redwood, which can be used indoors without the need for treatment.

Overall, while pressure treated wood may seem like a convenient and cost-effective option for indoor projects, it’s important to consider the potential environmental and health impacts before making a decision. By choosing alternative materials and treatments, you can help reduce your impact on the environment and protect your health and the health of those around you.

Frequently Asked Questions

Can pressure treated wood be safely used for indoor projects?

Pressure treated wood can be used indoors in some instances, but not always. You should be very careful when using treated wood inside because of the potential dangers. Never use it for projects that come close to your food, young children, or pets. You should also avoid using it for projects that require frequent handling, such as furniture or flooring.

Is pressure treated wood toxic to humans?

Pressure treated wood contains chemicals that can be harmful to humans if ingested or inhaled. The chemicals used to treat the wood include copper, chromium, and arsenic, which can cause health problems such as skin irritation, respiratory issues, and even cancer. It is important to take proper precautions when handling pressure treated wood, such as wearing gloves and a mask.

Can pressure treated wood be used for furniture?

While pressure treated wood can be used for outdoor furniture, it is not recommended for indoor furniture. The chemicals used in the treatment process can be harmful to humans, and the wood can also release toxic fumes over time. If you want to use wood for indoor furniture, it is best to use untreated or naturally treated wood.

Can pressure treated wood be used for flooring?

Pressure treated wood is not recommended for indoor flooring. The chemicals used in the treatment process can be harmful to humans, and the wood can also release toxic fumes over time. If you want to use wood for indoor flooring, it is best to use untreated or naturally treated wood.

What are the risks of using pressure treated wood indoors?

The risks of using pressure treated wood indoors include exposure to harmful chemicals, which can cause health problems such as skin irritation, respiratory issues, and even cancer. The wood can also release toxic fumes over time, which can be harmful to humans. In addition, the wood may not be suitable for certain indoor projects, such as furniture or flooring.

Are there any alternatives to pressure treated wood for indoor use?

There are several alternatives to pressure treated wood for indoor use, including untreated or naturally treated wood, composite wood, and engineered wood. These materials are generally safer and more suitable for indoor projects than pressure treated wood. It is important to choose the right material for your project based on its intended use and the potential risks associated with the material.

Blog

Can Purple Heart Wood Make Safe and Durable Cutting Boards?

If you’re in the market for a new cutting board, you might be wondering if purple heart wood is a good choice. This type of wood is known for its distinctive purple color, which can add a unique touch to your kitchen. But is it safe to use for cutting food?

The good news is that purple heart wood is generally considered safe for cutting boards. In fact, it’s a popular choice among woodworkers because it’s dense, durable, and resistant to bacteria. However, there are a few things you should keep in mind if you decide to use purple heart wood for your cutting board.

Understanding Purple Heart Wood

Purple Heart wood, also known as Peltogyne, is a hardwood species that is native to Central and South America. It is known for its beautiful deep purple color, which can vary in shade depending on the age of the wood and the specific species.

While Purple Heart wood is mainly used for flooring, furniture, and construction, it can also be used for cutting boards. However, there are some things you need to consider before using Purple Heart wood for this purpose.

One of the main concerns with using Purple Heart wood for cutting boards is its hardness. Purple Heart wood is very hard, which can make it difficult to work with and can cause damage to your knives. However, this also means that it is very durable and can last a long time with proper care.

Another concern is the potential toxicity of Purple Heart wood. The dust from Purple Heart wood can cause skin irritation and respiratory problems, so it is important to wear a mask and take other safety precautions when working with it. Additionally, some people may have an allergic reaction to the wood.

If you decide to use Purple Heart wood for a cutting board, it is important to ensure that it is properly finished with a food-safe finish. An unfinished Purple Heart cutting board can absorb water and bacteria, which can be harmful to your health.

Overall, while Purple Heart wood can be used for cutting boards, it is important to consider its hardness and potential toxicity before making a decision. With proper care and safety precautions, a Purple Heart cutting board can be a beautiful and durable addition to your kitchen.

Properties of Purple Heart Wood

properties-of-purple-heart-wood

Purple Heart Wood is a hardwood that is known for its unique and beautiful purple color. It is a popular choice for furniture, flooring, and decorative items. But can it be used for cutting boards? Let’s take a look at some of the properties of Purple Heart Wood to find out.

Durability

Purple Heart Wood is known for its durability. It is a very hard wood that is resistant to scratches and dents. This makes it a good choice for cutting boards that will be used frequently. However, it is important to note that Purple Heart Wood can be brittle, so it is important to handle it with care.

Hardness

Purple Heart Wood is a very hard wood. It has a Janka hardness rating of 1860, which is higher than most other hardwoods. This means that it is resistant to wear and tear, and can withstand heavy use. However, its hardness also means that it can be difficult to work with, so it is important to use sharp tools when working with Purple Heart Wood.

Water Resistance

Purple Heart Wood is naturally resistant to water. It has a tight grain that helps to prevent water from penetrating the wood. This makes it a good choice for cutting boards that will be used to prepare food. However, it is important to note that Purple Heart Wood can still be damaged by prolonged exposure to water, so it is important to dry it thoroughly after each use.

In summary, Purple Heart Wood is a durable and hard wood that is resistant to scratches, wear and tear, and water. While it can be used for cutting boards, it is important to handle it with care and to dry it thoroughly after each use.

Purple Heart Wood in Kitchenware

purple-heart-wood-in-kitchenware

If you are looking for a unique and beautiful cutting board, you may have come across purple heart wood. This exotic hardwood is known for its striking purple color and durability, making it a popular choice for kitchenware. Here’s what you need to know about using purple heart wood for cutting boards:

Durability

Purple heart wood is known for its durability and resistance to wear and tear. It is a dense hardwood that can withstand heavy use and is less prone to scratches and dents than softer woods. This makes it an excellent choice for cutting boards, which can take a lot of abuse in the kitchen.

Safety

When it comes to using purple heart wood for cutting boards, safety is a concern. While the wood itself is not toxic, it can cause skin irritation in some people. Additionally, an unfinished purple heart cutting board can absorb water and harbor bacteria, making it unsanitary for food preparation. To ensure the safety of your cutting board, it is important to coat it with a food-safe finish before use.

Maintenance

Like any cutting board, a purple heart wood cutting board requires proper maintenance to ensure its longevity and safety. To clean your cutting board, simply wash it with warm, soapy water and dry it thoroughly after each use. Avoid soaking the board in water or putting it in the dishwasher, as this can cause warping and damage to the wood. Additionally, it is recommended to oil your cutting board periodically to prevent it from drying out and cracking.

In conclusion, purple heart wood can be a beautiful and durable choice for a cutting board. However, it is important to take proper safety precautions and maintenance to ensure its longevity and safety in the kitchen.

Benefits of Purple Heart Wood Cutting Boards

benefits-of-purple-heart-wood-cutting-boards-1

When it comes to choosing a cutting board, there are many options available. However, purple heart wood cutting boards stand out for their unique properties. Here are some benefits of using purple heart wood for cutting boards:

1. Durability

Purple heart wood is known for its hardness and durability. It is one of the hardest woods available, which means it can withstand heavy use without showing signs of wear and tear. This makes it an excellent choice for cutting boards that will be used frequently.

2. Resistance to Water and Stains

Purple heart wood has a natural resistance to water and stains. This means that it won’t absorb liquids or food particles, making it easier to clean and maintain. Additionally, the natural oils in the wood help to prevent bacteria growth, which is important for a cutting board that is used for food preparation.

3. Unique Appearance

One of the most distinctive features of purple heart wood is its deep, rich purple color. This makes it an attractive choice for cutting boards, as it adds a touch of elegance to your kitchen. Over time, the wood will darken to a deep brown color, which only adds to its beauty.

4. Eco-Friendly

Purple heart wood is a sustainable choice for cutting boards. It is harvested from South and Central America, where it is grown in abundance. Additionally, the wood is not treated with any chemicals or preservatives, making it a natural and eco-friendly choice.

In conclusion, purple heart wood cutting boards are a durable, water-resistant, and attractive option for your kitchen. Their unique properties make them stand out from other types of cutting boards, and their eco-friendliness is an added bonus.

Potential Drawbacks of Purple Heart Wood Cutting Boards

benefits-of-purple-heart-wood-cutting-boards

While purple heart wood is a beautiful and durable hardwood, there are a few potential drawbacks to using it for cutting boards.

One of the main concerns is the color change that can occur with exposure to light and air. Freshly cut purple heart wood is a vibrant purple color, but this can quickly fade to a dark brown or even ash-gray when used on outdoor decking or garden furniture. If you want to maintain the purple color of your cutting board, you will need to treat it with a UV inhibitor. However, this can potentially affect the food-grade quality of the board.

Another potential issue is the toxicity of the wood. While purple heart wood is not toxic, it can cause skin irritation and respiratory issues in some people due to the dust it produces when cut or sanded. It is important to wear proper protective gear when working with this wood to avoid any negative health effects.

Additionally, purple heart wood is a very hard and dense material, which can make it difficult to work with and maintain. It can be challenging to cut and shape, and it may require more frequent sharpening of your cutting tools.

Finally, purple heart wood is not as readily available as some other types of hardwoods, which can make it more expensive and harder to find.

Overall, while purple heart wood can make a beautiful and durable cutting board, it is important to consider these potential drawbacks before making your final decision.

Caring for Purple Heart Wood Cutting Boards

If you have a cutting board made of purple heart wood, you know it’s a beautiful and durable addition to your kitchen. However, to keep it looking and functioning its best, you need to take proper care of it. Here are some tips for caring for your purple heart wood cutting board:

Cleaning

When it comes to cleaning your purple heart wood cutting board, the key is to avoid using harsh chemicals or abrasive scrubbers that can damage the wood. Instead, use a gentle dish soap and warm water to clean the board after each use. You can also use a mixture of vinegar and water to disinfect the board if needed. Just be sure to rinse the board thoroughly and dry it completely before storing it.

Oil Treatment

To keep your purple heart wood cutting board looking its best, it’s important to oil it regularly. Food-grade mineral oil is a great choice for this task, as it will help to protect the wood from moisture and prevent it from drying out. To oil your cutting board, simply apply a thin layer of oil to the surface of the board and let it soak in overnight. Then, wipe away any excess oil with a clean cloth.

Storage

When you’re not using your purple heart wood cutting board, it’s important to store it properly to prevent it from warping or cracking. Store the board in a dry place away from direct sunlight or heat sources. You can also prop the board up on its side to allow air to circulate around it.

Maintenance

Regular maintenance is key to keeping your purple heart wood cutting board in good condition. Check the board periodically for any signs of wear or damage, such as cracks or splinters. If you notice any issues, sand the affected area lightly with a fine-grit sandpaper and reapply mineral oil as needed.

By following these simple tips, you can keep your purple heart wood cutting board looking beautiful and functioning well for years to come.

Alternatives to Purple Heart Wood for Cutting Boards

If you’re looking for a wood that’s safe for cutting boards but don’t want to use purple heart wood, there are plenty of other options to consider. Here are some alternatives that you might want to consider:

1. Hard Maple

Hard maple is one of the most popular woods for cutting boards, and for good reason. It’s extremely durable, resistant to scratches and dents, and has a tight grain that makes it easy to clean. Plus, it doesn’t absorb moisture as quickly as some other woods, which means it’s less likely to warp or crack over time.

2. Walnut

Walnut is another popular choice for cutting boards, thanks to its rich, dark color and beautiful grain patterns. It’s also a very hard wood, which means it’s resistant to scratches and dents. However, it’s important to note that walnut can be a bit softer than some other hardwoods, which means it may not be as durable in the long run.

3. Cherry

Cherry wood is a great option for cutting boards if you’re looking for a wood with a warm, reddish-brown color. It’s also a very hard wood, which means it’s resistant to scratches and dents. However, like walnut, it can be a bit softer than some other hardwoods, which means it may not be as durable in the long run.

4. Bamboo

Bamboo is a great option for cutting boards if you’re looking for a sustainable, eco-friendly choice. It’s extremely durable, resistant to scratches and dents, and has a tight grain that makes it easy to clean. Plus, it’s naturally antimicrobial, which means it’s less likely to harbor bacteria than some other woods.

5. Teak

Teak is a very hard wood that’s resistant to scratches and dents, making it a great choice for cutting boards. It’s also naturally resistant to moisture, which means it’s less likely to warp or crack over time. However, it can be a bit more expensive than some other woods, so it may not be the best choice if you’re on a tight budget.

Overall, there are plenty of great alternatives to purple heart wood for cutting boards. Whether you’re looking for a wood that’s durable, eco-friendly, or just has a beautiful grain pattern, there’s a wood out there that’s perfect for your needs.

Frequently Asked Questions

Can purple heart wood be safely used for cutting boards?

Yes, purple heart wood can be used for cutting boards, but it is not recommended. The wood is very dense, making it difficult to clean thoroughly, and it can dull knives quickly. Additionally, the dust from the wood can cause nausea and may not be food-grade quality unless treated with a UV inhibitor.

What are the benefits of using purple heart wood for cutting boards?

Purple heart wood is known for its beautiful purple color, making it an attractive option for cutting boards. It is also a durable and long-lasting wood that can withstand heavy use.

How does purple heart wood compare to other woods commonly used for cutting boards?

Compared to other woods commonly used for cutting boards, such as maple and walnut, purple heart wood is much harder and denser. This can make it more difficult to work with and may dull knives more quickly.

What is the best way to finish a purple heart wood cutting board?

The best way to finish a purple heart wood cutting board is to use a food-safe film-building finish, such as mineral oil or beeswax. This will help protect the wood and keep it looking beautiful for years to come.

Are there any special considerations when working with purple heart wood for cutting boards?

When working with purple heart wood for cutting boards, it is important to wear a dust mask to avoid inhaling the dust, which can cause nausea. Additionally, the wood is very hard and dense, so it may be more difficult to work with than other woods.

What are the potential drawbacks of using purple heart wood for cutting boards?

The potential drawbacks of using purple heart wood for cutting boards include the fact that it is very dense and can dull knives quickly. It is also difficult to clean thoroughly and may not be food-grade quality unless treated with a UV inhibitor. Finally, it can be more expensive than other woods commonly used for cutting boards.

Blog

What's the Strongest, Hardest, Most Durable Wood Out There? A Guide to Finding the Perfect Wood for Your Next Project

Are you looking for the strongest, hardest, and most durable wood out there? Whether you’re a woodworker, builder, or simply curious about the material, knowing which type of wood is the strongest can be useful. While there’s no definitive answer to this question, there are several types of wood that are known for their exceptional strength and durability.

According to ArchDaily, some of the hardest woods in the world include Lignum vitae, Brazilian Ebony, and African Blackwood. These woods are known for their high density, which gives them their exceptional strength. However, keep in mind that the strength and durability of a wood also depend on other factors such as how it’s cut, treated, and used. In this article, we’ll explore some of the strongest and most durable woods out there and what makes them so special.

Understanding Wood Durability

When it comes to choosing the right wood for your project, durability is a crucial factor to consider. Wood durability refers to a wood’s ability to resist decay and natural forces such as weather, insects, and fungi.

One way to measure wood durability is by using the Janka hardness test, which measures the force required to embed a small steel ball into the wood. The higher the Janka rating, the harder and more durable the wood.

However, it’s important to note that hardness and durability are not always the same thing. Some woods may be hard but not very durable, while others may be less hard but highly durable.

Another factor to consider is the natural durability of the wood species. Some woods have natural resistance to decay and insects, while others may require treatment to improve their durability.

Below is a table that shows the natural durability of some common wood species:

Wood Species Durability
Cedar Highly durable
Redwood Highly durable
Teak Highly durable
White Oak Highly durable
Black Locust Highly durable
Mahogany Moderately durable
Cherry Moderately durable
Maple Moderately durable
Pine Low durability
Spruce Low durability

Keep in mind that the natural durability of wood can vary depending on the growing conditions and location of the tree. It’s always best to consult with a wood expert or do your research before choosing a wood species for your project.

The Importance of Wood Density

the-importance-of-wood-density

When it comes to determining the strength, hardness, and durability of wood, density is a crucial factor to consider. The density of wood refers to the amount of mass or weight of the wood per unit volume.

A wood’s density is determined by the proportion of wood substance and void volume, as well as the content of extractives. Generally, the higher the density of the wood, the stronger and harder it is likely to be.

For example, lignum vitae is one of the heaviest and hardest woods in the world, with a density of around 1.3 g/cc. In contrast, balsa wood, which is known for its lightness, has a density of only around 0.1 g/cc.

The density of wood can also affect its durability. Denser woods tend to be more resistant to rot, decay, and insect damage than less dense woods. This is because the extractives that are responsible for the wood’s density can also act as natural preservatives.

In addition to strength and durability, wood density can also affect its workability and appearance. Denser woods can be more difficult to cut, shape, and sand, while less dense woods may be more prone to splitting or warping.

Overall, when choosing a type of wood for a particular project, it’s important to consider its density and how it will affect the wood’s strength, durability, workability, and appearance.

The Role of Wood Hardness

When it comes to determining the strength and durability of wood, hardness plays a crucial role. Hardness is defined as the measure of a wood’s resistance to indentation, and it is a key factor in determining the wood’s ability to withstand wear and tear, impact, and compression.

One of the most widely used methods for measuring wood hardness is the Janka hardness test. This test involves measuring the force required to embed a steel ball halfway into a wood sample. The Janka hardness rating is expressed in pounds-force (lbf) and is used to compare the hardness of different wood species.

According to the Janka hardness scale, some of the hardest and most durable woods include hickory, mesquite, and Brazilian walnut. These woods have a Janka hardness rating of over 2000 lbf, which means they are highly resistant to wear and tear and can withstand heavy foot traffic, furniture, and other heavy objects.

On the other end of the spectrum, some of the softest woods include balsa, pine, and poplar, which have a Janka hardness rating of less than 500 lbf. These woods are not as durable and are more prone to scratches, dents, and other forms of damage.

It’s important to note that while hardness is a critical factor in determining wood strength and durability, it is not the only factor. Other factors such as density, moisture content, and grain pattern also play a role in determining a wood’s overall strength and durability.

In conclusion, when it comes to selecting the strongest, hardest, and most durable wood for your project, it’s essential to consider the wood’s hardness rating. By choosing a wood with a high Janka hardness rating, you can ensure that your project will withstand wear and tear and last for years to come.

The Strength Factor in Wood

the-strength-factor-in-wood

When it comes to wood, strength is a crucial factor to consider. The strength of a particular type of wood determines its durability and ability to withstand pressure or weight. Here are some key factors that contribute to the strength of wood:

  • Density: The denser the wood, the stronger it tends to be. Dense woods have a higher concentration of fibers, making them more resistant to wear and tear.
  • Moisture Content: Wood with a lower moisture content tends to be stronger than wood with a higher moisture content. This is because water weakens the structural integrity of wood.
  • Grain Orientation: The orientation of the wood grain can affect its strength. Wood with straight, uniform grain tends to be stronger than wood with irregular or cross-grain patterns.
  • Species: Different species of wood have varying levels of strength. Some species, such as oak and hickory, are known for their strength and durability, while others, like balsa, are much weaker.
  • Age: Older trees tend to produce stronger wood than younger trees. This is because the wood fibers become denser and more tightly packed as the tree ages.
  • Treatment: Certain treatments, such as pressure treatment or chemical treatment, can increase the strength and durability of wood.

Considering these factors, it’s clear that there is no one “strongest” wood out there. Rather, the strength of a particular type of wood depends on a variety of factors. When choosing wood for a particular application, it’s important to consider these factors and choose a wood that is strong enough to meet your needs.

World’s Strongest Woods

When it comes to finding the strongest, hardest, and most durable wood out there, it’s important to consider various factors such as density, Janka hardness rating, and modulus of elasticity. Here are a few of the world’s strongest woods that you might want to consider for your next project:

Australian Buloke

Australian Buloke is a hardwood that is native to Australia and is known for its incredible strength and durability. It has a Janka hardness rating of 5,060 lbf, which makes it the world’s hardest wood. It is so strong that it is often used in the construction of bridges, railway sleepers, and even knife handles. The wood is also resistant to rot, decay, and termites, making it an ideal choice for outdoor projects.

Snakewood

Snakewood is an exotic hardwood that is native to South America. It is known for its unique pattern, which resembles the scales of a snake. Snakewood is incredibly dense and hard, with a Janka hardness rating of 3,800 lbf. It is often used in the production of musical instruments, such as guitars and violins, due to its excellent tonal qualities.

Quebracho

Quebracho is a hardwood that is native to South America. It is known for its incredible strength and durability, with a Janka hardness rating of 4,570 lbf. The wood is so strong that it is often used in the production of railroad ties and fence posts. Quebracho is also resistant to rot, decay, and termites, making it an ideal choice for outdoor projects.

Lignum Vitae

Lignum Vitae is a hardwood that is native to Central and South America. It is one of the heaviest and hardest woods in the world, with a Janka hardness rating of 4,390 lbf. The wood is so dense that it sinks in water. Lignum Vitae is often used in the production of bearings, bushings, and pulleys due to its excellent wear resistance.

Schinopsis Brasiliensis

Schinopsis Brasiliensis, also known as Quebracho Colorado, is a hardwood that is native to South America. It has a Janka hardness rating of 3,840 lbf, making it one of the strongest and hardest woods in the world. The wood is often used in the production of flooring, furniture, and tool handles due to its excellent durability and strength.

In conclusion, these are just a few of the world’s strongest woods that you might want to consider for your next project. Keep in mind that each wood has its own unique properties and characteristics, so be sure to choose the one that best suits your needs.

Hardest Woods in the World

hardest-woods-in-the-world

When it comes to finding the hardest woods in the world, there are a few contenders that stand out from the rest. These woods are known for their incredible strength and durability, making them ideal for a variety of applications. Here are some of the hardest woods in the world:

Australian Buloke

Australian Buloke is considered the strongest wood in the world, with a Janka hardness rating of 5,060 lbf (pounds-force). This wood is incredibly dense and heavy, making it difficult to work with, but also extremely durable. Australian Buloke is commonly used for tool handles, knife handles, and other applications where strength and durability are essential.

Snakewood

Snakewood is another incredibly hard and dense wood, with a Janka hardness rating of 3,800 lbf. This wood gets its name from the distinctive snakeskin-like pattern that appears on its surface. Snakewood is often used for high-end musical instruments, such as guitars and violins, as well as for luxury items like pens and jewelry.

Quebracho

Quebracho is a South American hardwood with a Janka hardness rating of 4,570 lbf. This wood is incredibly dense and heavy, and is known for its deep red color. Quebracho is commonly used for flooring, furniture, and tool handles.

Lignum Vitae

Lignum Vitae, also known as Guaiacum, is a Central American hardwood with a Janka hardness rating of 4,390 lbf. This wood is incredibly dense and oily, making it resistant to water and rot. Lignum Vitae is commonly used for boat building, as well as for bearings and other applications where low friction is essential.

Schinopsis Brasiliensis

Schinopsis Brasiliensis, also known as Brazilian Peppertree, is a South American hardwood with a Janka hardness rating of 3,840 lbf. This wood is incredibly dense and hard, and is known for its beautiful red color. Schinopsis Brasiliensis is commonly used for flooring, furniture, and tool handles.

When it comes to finding the hardest woods in the world, these are just a few of the many options available. Whether you’re looking for strength, durability, or beauty, these woods are sure to impress.

Most Durable Woods

When it comes to finding the most durable wood, there are a few species that stand out from the rest. These woods are known for their strength, hardness, and ability to resist decay and damage from the elements. Here are five of the most durable woods you can use for your next woodworking project:

Ipe

Ipe is a hardwood that is native to South America. It is known for its extreme hardness, which makes it resistant to scratches, dents, and other types of damage. Ipe is also highly resistant to decay, insects, and other environmental factors, which makes it an excellent choice for outdoor projects like decks, fences, and furniture.

Teak

Teak is another hardwood that is known for its durability. It is native to Southeast Asia and is often used for outdoor furniture, boats, and other applications that require resistance to moisture and decay. Teak is also resistant to insects and other pests, which makes it a popular choice for outdoor projects.

Black Locust

Black locust is a hardwood that is native to North America. It is known for its strength and durability, and is often used for fence posts, outdoor furniture, and other applications that require resistance to decay and insects. Black locust is also resistant to fire, making it a popular choice for areas that are prone to wildfires.

White Oak

White oak is a hardwood that is native to North America. It is known for its strength and durability, and is often used for flooring, furniture, and other applications that require resistance to wear and tear. White oak is also highly resistant to decay and insects, which makes it a popular choice for outdoor projects like decks and fences.

Cedar

Cedar is a softwood that is native to North America. It is known for its natural resistance to decay, insects, and other environmental factors, which makes it an excellent choice for outdoor projects like fences, decks, and furniture. Cedar is also lightweight and easy to work with, which makes it a popular choice for DIY projects.

Overall, these woods are some of the most durable and long-lasting options you can choose for your woodworking projects. Whether you’re building outdoor furniture, decking, or other structures, these woods will provide you with the strength and durability you need to create a lasting and beautiful finished product.

Factors Affecting Wood Durability

factors-affecting-wood-durability

When it comes to wood durability, there are several factors that come into play. Here are some of the key factors that can affect the durability of wood:

1. Hardness

The hardness of wood is an important factor in determining its durability. Hardwood species are generally more durable than softwood species due to their higher density and strength. The Janka hardness test is a widely accepted measure of wood hardness, which involves measuring the force required to embed a steel ball halfway into the wood.

2. Moisture Content

The moisture content of wood is another important factor in determining its durability. Wood with high moisture content is more prone to rot, decay, and insect infestation. On the other hand, wood with low moisture content is more resistant to these issues.

3. Density

The density of wood is closely related to its hardness and strength. Dense woods are generally more durable than less dense woods. The denser the wood, the less likely it is to warp or crack over time.

4. Grain Orientation

The orientation of wood grain can also affect its durability. Wood with straight grain patterns is generally more durable than wood with irregular or spiral grain patterns. This is because straight-grained wood is less likely to split or crack over time.

5. Natural Resistance

Some wood species are naturally more resistant to rot, decay, and insect infestation than others. For example, cedar and redwood are well-known for their natural resistance to decay and insect damage.

6. Treatment

Wood can be treated with various chemicals to improve its durability. Pressure-treated wood, for example, is treated with preservatives to protect it from rot, decay, and insect damage. However, it’s important to note that treated wood can still be susceptible to weathering and other forms of damage over time.

By considering these factors, you can choose the most durable wood for your project and ensure that it will last for years to come.

Choosing the Right Wood for Your Needs

When it comes to choosing the right wood for your project, there are several factors to consider. The strength, durability, and hardness of the wood are some of the most important things to keep in mind. Here are some tips to help you choose the right wood for your needs:

Consider the Purpose of Your Project

The first thing you need to consider is the purpose of your project. Are you building furniture, constructing a building, or creating a decorative piece? The type of wood you choose will depend on the purpose of your project. For example, denser woods like oak and maple are great for furniture and building, while less dense woods like pine and cedar are better for decorative pieces.

Look at the Wood’s Properties

The properties of the wood, such as texture, color, and density, can also play a role in your decision. Texture determines the condition of the surface and its stability, while color determines the look and style of your project. If the wood won’t be visible, color won’t matter much to your selection process. Density is a wood’s weight and strength. The denser the wood, the sturdier the result of your project.

Consider the Janka Hardness Rating

The Janka hardness rating is a measure of the wood’s hardness and durability. It is determined by the amount of force required to embed a steel ball halfway into the wood. The higher the rating, the harder and more durable the wood is. Some of the hardest woods in the world include Australian Buloke, Baraúna, and Quebracho.

Choose the Right Grade

Finally, you need to consider the grade of the wood. The grade refers to the quality of the wood and can affect its strength, durability, and appearance. The higher the grade, the better the quality of the wood. For example, select grade wood is the highest quality and has the fewest defects, while common grade wood has more defects and may not be as strong or durable.

By considering these factors, you can choose the right wood for your project and ensure that it is strong, durable, and long-lasting.

Frequently Asked Questions

What are some of the hardest woods available for building?

Some of the hardest woods available for building include hickory, maple, oak, and ash. These woods are known for their durability and strength, making them ideal for construction projects.

What is the strongest wood species in the world?

The strongest wood species in the world is generally considered to be Australian Buloke, also known as Ironwood. This wood is incredibly dense and hard, making it resistant to wear and tear.

What is the hardest wood to cut with a chainsaw?

The hardest wood to cut with a chainsaw is generally considered to be ironwood. This wood is incredibly dense and hard, making it difficult to cut through with a chainsaw.

What is the most durable wood for outdoor use?

The most durable wood for outdoor use is generally considered to be teak. This wood is naturally resistant to water, insects, and decay, making it ideal for use in outdoor furniture and decking.

What are some of the densest woods available?

Some of the densest woods available include lignum vitae, quebracho, and African blackwood. These woods are incredibly hard and dense, making them ideal for use in high-stress applications.

What is the strongest wood for furniture making?

The strongest wood for furniture making is generally considered to be hard maple. This wood is incredibly strong and durable, making it ideal for use in furniture that will be subjected to heavy use.

Blog

How Many Ricks of Wood is in a Cord of Wood? – Understanding Cord Measurements for Firewood

If you are someone who uses wood as a source of heat or for your campfire, you might have heard the terms “rick” and “cord” being thrown around. But what do these terms actually mean? Specifically, how many ricks of wood are in a cord of wood?

A cord of wood is a standard measurement used to sell firewood. It is defined as a stack of wood that measures 4 feet high, 4 feet wide, and 8 feet long, which equals 128 cubic feet. However, firewood is often sold in smaller quantities, such as ricks. A rick of wood is a stack of wood that is 4 feet high, 8 feet long, and 16 inches wide.

So, how many ricks of wood are in a cord of wood? The answer is two. A cord of wood is made up of two ricks of wood, each measuring 4 feet high, 8 feet long, and 16 inches wide. Knowing this information can help you better understand how much firewood you need to purchase for your needs.

Understanding Wood Measurements

When it comes to buying firewood, understanding the measurements is crucial. One of the most common measurements is the cord of wood, which is equivalent to 128 cubic feet of stacked firewood. But what about ricks of wood? How many ricks of wood are in a cord of wood?

A rick of wood is a stack of firewood that measures 4 feet high, 8 feet wide, and 16 inches deep. It is also known as a face cord. To calculate how many ricks of wood are in a cord of wood, you need to know the size of the logs.

Here’s a breakdown of the measurements:

  • A standard cord of wood measures 4 feet high, 4 feet wide, and 8 feet long.
  • A rick of wood measures 4 feet high, 8 feet wide, and 16 inches deep.
  • A face cord of wood is another term for a rick of wood.

To calculate how many ricks of wood are in a cord of wood, you need to know the size of the logs. Once you know the size of the logs, you can use the following formula:

(Number of cubic feet in a cord of wood) / (Number of cubic feet in a rick of wood) = Number of ricks of wood in a cord of wood

For example, if the logs are 16 inches long and the cord of wood measures 128 cubic feet, you would calculate:

128 / (4 x 8 x 1.33) = 12 ricks of wood in a cord of wood

It’s important to note that the size of the logs can vary, so the number of ricks in a cord of wood can also vary. It’s always best to measure the logs and calculate the number of ricks to ensure you’re getting the amount of firewood you need.

In conclusion, understanding wood measurements is important when buying firewood. A cord of wood is equivalent to 128 cubic feet of stacked firewood, while a rick of wood measures 4 feet high, 8 feet wide, and 16 inches deep. To calculate how many ricks of wood are in a cord of wood, you need to know the size of the logs and use the appropriate formula.

What is a Cord of Wood

what-is-a-cord-of-wood

If you’re new to buying firewood, you may have heard the term “cord of wood” but aren’t sure what it means. A cord of wood is a unit of measurement used to describe the amount of firewood you’re buying. It’s a standardized unit that is used across the industry to ensure that customers are getting a fair amount of wood for their money.

A cord of wood is defined as a stack of wood that measures 4 feet wide, 4 feet tall, and 8 feet long. The wood is usually stacked in a neat, rectangular shape with the pieces of wood lined up parallel to each other. The stack should be tightly packed, with as little space between the pieces of wood as possible.

It’s important to note that a cord of wood is a measure of volume, not weight. The weight of a cord of wood can vary depending on the type of wood you’re buying, how dry it is, and other factors. However, a cord of wood should always contain the same amount of wood, regardless of its weight.

When you’re buying firewood, it’s important to know how much you need. A cord of wood is a large amount of wood, and it may not be necessary for your needs. However, buying in bulk can often save you money in the long run, so it’s worth considering if you have the space to store it.

What is a Rick of Wood

what-is-a-rick-of-wood

If you’re new to buying firewood, you may have heard the term “rick of wood” thrown around. But what exactly does it mean? A rick of wood is a stack of firewood that measures 4 feet high and 8 feet long. The depth of the stack can vary depending on the length of the logs, but it is typically 12, 16, or 24 inches wide.

A rick of wood is also known as a face cord. It is important to note that a rick of wood is always smaller than a full cord of wood, which measures 4 feet high, 4 feet wide, and 8 feet long.

When purchasing firewood, it is essential to know the difference between a rick and a cord. A cord of wood is the standard measurement for firewood, and it is important to ensure that you are getting what you paid for.

In summary, a rick of wood is a smaller stack of firewood than a full cord, measuring 4 feet high and 8 feet long with a varying width of 12, 16, or 24 inches.

Comparing Cords and Ricks

When it comes to buying firewood, you might come across the terms “cord” and “rick.” These terms refer to the amount of wood you’re purchasing, but there are some key differences between the two.

A cord of wood is a standard unit of measurement and is equal to 128 cubic feet. It is typically a pile of wood that measures 4 feet high, 4 feet wide, and 8 feet long. A cord of wood is the most common measurement used in the firewood industry.

On the other hand, a rick of wood is a smaller measurement of firewood. It is a section of a cord that measures 4 feet high and 8 feet long, but the width can vary. A rick of wood is also known as a “face cord” or a “stove cord.”

To better understand the difference between cords and ricks, take a look at the table below:

Cord of Wood Rick of Wood
Measurement 128 cubic feet 1/3 of a cord (approx. 42.7 cubic feet)
Dimensions 4 ft. x 4 ft. x 8 ft. 4 ft. x 8 ft. (width varies)
Amount of Wood Full cord 1/3 of a cord
Common Uses Heating homes, fireplaces, wood stoves Outdoor fire pits, camping, smaller heating needs

It’s important to note that while a cord of wood is a standard unit of measurement, the amount of wood in a cord can vary depending on how it is stacked. Airspaces within a pile of firewood can be up to 50%, which means there may only be 64 cubic feet of actual solid wood contained in one full cord of wood.

In conclusion, if you’re looking to heat your home or use a lot of firewood, a cord of wood is likely the best option. However, if you only need a small amount of wood for outdoor fires or camping, a rick of wood may be all you need.

Factors Affecting Wood Volume

factors-affecting-wood-volume

When it comes to estimating the amount of wood in a cord or rick, there are several factors that can affect the volume of wood you will get. Here are some of the most important factors to keep in mind:

Wood Type

Different types of wood have different densities, which can affect how much wood you get in a cord or rick. For example, hardwoods like oak and maple are denser than softwoods like pine and spruce, so you will get more wood in a cord or rick of softwood than you will in a cord or rick of hardwood.

Log Length

The length of the logs you use can also affect the amount of wood you get in a cord or rick. In general, shorter logs will take up more space than longer logs, so you will get less wood in a cord or rick of short logs than you will in a cord or rick of long logs.

Log Diameter

The diameter of the logs you use can also affect the amount of wood you get in a cord or rick. In general, larger diameter logs will give you more wood than smaller diameter logs, so you will get more wood in a cord or rick of large logs than you will in a cord or rick of small logs.

Splitting Technique

The way you split your logs can also affect the amount of wood you get in a cord or rick. If you split your logs into smaller pieces, you will get more wood in a cord or rick than if you leave them in larger pieces. However, splitting your logs into smaller pieces can be more time-consuming and labor-intensive.

Storage Method

Finally, the way you store your wood can also affect the amount of wood you get in a cord or rick. If you stack your wood tightly and evenly, you will get more wood in a cord or rick than if you stack it loosely or unevenly. Additionally, storing your wood in a dry, sheltered area can help prevent it from shrinking or rotting, which can also affect the amount of wood you get in a cord or rick.

Common Misconceptions

When it comes to buying firewood, there are a few common misconceptions that people have about the measurement of wood. Here are some of the most prevalent misconceptions:

1. A cord of wood is the same as a truckload of wood

Many people assume that a cord of wood is the same as a truckload of wood. However, this is not true. A cord of wood is a specific measurement that refers to a stack of wood that measures 4 feet high, 4 feet wide, and 8 feet long. A truckload of wood can vary in size depending on the truck and how it is loaded.

2. All ricks of wood are the same size

Another common misconception is that all ricks of wood are the same size. However, the size of a rick can vary depending on who is selling the wood. Some sellers may stack their wood higher or wider, which can result in larger or smaller ricks.

3. A face cord is the same as a cord of wood

A face cord is a stack of wood that measures 4 feet high and 8 feet long. However, the width of a face cord can vary depending on the size of the wood being used. While a face cord can be a convenient way to measure wood, it is not the same as a cord of wood.

4. All wood is created equal

Finally, many people assume that all wood is created equal. However, the type of wood you use can have a significant impact on the quality of your fire. Hardwoods like oak and maple burn longer and hotter than softwoods like pine and spruce. Additionally, seasoned wood burns better than green wood, which can produce more smoke and creosote buildup in your chimney.

By understanding these common misconceptions, you can make a more informed decision when buying firewood. Remember to always ask questions and clarify measurements before making a purchase.

Practical Applications

practical-applications

Knowing how many ricks of wood are in a cord is essential for anyone who uses a wood-burning stove or fireplace. Here are a few practical applications of this knowledge:

Buying Firewood

When purchasing firewood, knowing how many ricks are in a cord can help you determine if you are getting a fair price. If a seller quotes you a price per rick, you can calculate how many ricks are in a cord to compare the price to other sellers. Keep in mind that the price per rick may vary based on factors such as the type of wood and the region you live in.

Stacking Firewood

Properly stacking firewood is important to ensure that the wood burns evenly and to prevent pests and moisture from damaging the wood. If you know how many ricks are in a cord, you can estimate how much space you will need to stack your firewood. For example, if you have a cord of wood, you will need to stack it in 3 ricks.

Calculating Fuel Usage

If you use a wood-burning stove or fireplace to heat your home, knowing how many ricks of wood you burn per season can help you estimate your fuel usage and budget for firewood. For example, if you burn 3 ricks of wood per season and each rick costs $50, you can estimate that you will spend $150 per season on firewood.

Understanding Wood Measurements

Knowing how many ricks are in a cord is just one aspect of understanding wood measurements. There are other measurements, such as face cords and full cords, that are used to measure firewood. Understanding these measurements can help you communicate with sellers and ensure that you are getting the amount of wood you need.

Frequently Asked Questions

What is the difference between a rick and a cord of wood?

A cord of wood is a standard unit of measurement that equals 128 cubic feet of firewood. On the other hand, a rick is a stack of wood that is typically 4 feet high, 8 feet long, and 16 inches wide. A cord of wood is made up of 4 large ricks, which are each equal to 32 cubic feet.

How much firewood is in a rick?

A rick of firewood contains about 16 cubic feet of wood. However, the size of a rick can vary depending on the width of the wood pieces.

What size is a rick of firewood?

A standard rick of firewood is typically 4 feet high, 8 feet long, and 16 inches wide. However, the width of the wood pieces can vary, which can affect the size of the rick.

How much is a rick of wood in Oklahoma?

The price of a rick of wood in Oklahoma can vary depending on the type of wood and the location of the seller. On average, a rick of wood in Oklahoma can cost between $50 to $100.

How much is a rick of wood in Tennessee?

The price of a rick of wood in Tennessee can vary depending on the type of wood and the location of the seller. On average, a rick of wood in Tennessee can cost between $50 to $80.

Is 2 ricks of wood a cord?

No, 2 ricks of wood is not a cord. A cord of wood is made up of 4 large ricks, which are each equal to 32 cubic feet. Therefore, 2 ricks of wood would only equal 64 cubic feet, which is half of a cord.

Blog

How to Clean Wood Cabinets with Murphy's Oil Soap: A Step-by-Step Guide

Cleaning wood cabinets is an essential part of maintaining their beauty and prolonging their life. However, with so many cleaning products available in the market, it can be difficult to know which one is best for your cabinets. One popular option is Murphy’s oil soap, a natural and effective cleaner that can remove grime, grease, dirt, and layers of food from your wood cabinets without damaging them.

If you’re wondering how to clean wood cabinets with Murphy’s oil soap, you’ve come to the right place. In this article, we’ll provide you with step-by-step instructions on how to use this product to restore your cabinets to their former glory. We’ll also share some helpful tips and tricks to make the process easier and more effective. Whether you’re a seasoned cleaner or a beginner, you’ll find everything you need to know about cleaning wood cabinets with Murphy’s oil soap in this article.

Understanding Murphy’s Oil Soap

understanding-murphys-oil-soap-scaled-1

Murphy’s Oil Soap is a popular cleaning product for wood cabinets. It is a versatile cleaner that can be used on various surfaces, including wood, tile, and laminate. This soap is made from natural ingredients, such as vegetable oil and coconut oil. It is also free from harsh chemicals, making it a safe option for cleaning your cabinets.

When using Murphy’s Oil Soap, it is essential to follow the instructions carefully. Dilute the soap with water to the recommended ratio, usually 1/4 cup of soap to one gallon of water. Using too much soap can leave a residue on your cabinets, which can attract dust and dirt.

Before applying the soap, remove any loose dirt or debris from your cabinets. You can use a soft-bristled brush or a microfiber cloth to do this. Then, dip your cloth or sponge in the soapy water and wring it out to remove excess water. Gently wipe your cabinets with the cloth, making sure to cover all areas.

After cleaning, rinse your cabinets with clean water to remove any remaining soap residue. Dry your cabinets with a clean, dry cloth to prevent water stains.

Murphy’s Oil Soap is an excellent choice for cleaning your wood cabinets, but it is not suitable for all types of wood. Avoid using it on unfinished or waxed wood, as it can damage the surface. Always test a small, inconspicuous area before using the soap on your entire cabinet to ensure it does not cause any damage.

In summary, Murphy’s Oil Soap is a natural and safe option for cleaning your wood cabinets. Dilute the soap with water, remove loose dirt and debris, gently wipe your cabinets with the soapy water, rinse with clean water, and dry with a clean cloth. Remember to test a small area before using the soap on your entire cabinet.

Preparation Before Cleaning

Before you start cleaning your wood cabinets with Murphy’s Oil Soap, you need to prepare a few things. Here are some helpful tips to ensure that you have everything you need to get started:

  1. Gather Materials: You will need two large buckets, one for the soapy water and the other for clean water. You will also need a sponge or cloth to apply the soap and a dry cloth to wipe away excess water.
  2. Remove Items: Clear out all items from the cabinets to make sure you have easy access to all surfaces. This will also prevent any items from getting damaged or wet during the cleaning process.
  3. Test a Small Area: Before cleaning the entire cabinet, test a small area first. This will ensure that the soap does not damage the wood or finish.
  4. Follow Manufacturer’s Instructions: Be sure to read and follow the manufacturer’s instructions on the bottle of Murphy’s Oil Soap. This will help you determine the correct ratio of soap to water and ensure that you are using the product correctly.
  5. Protect Surrounding Areas: Cover any nearby surfaces or floors with a towel or drop cloth to protect them from any drips or spills during the cleaning process.

By following these simple steps, you will be ready to clean your wood cabinets with Murphy’s Oil Soap and restore their natural beauty.

Cleaning Wood Cabinets with Murphy’s Oil Soap

If you have wood cabinets in your home, you know how important it is to keep them clean and looking their best. Murphy’s Oil Soap is a great option for cleaning your wood cabinets, as it is gentle yet effective. Here’s how you can use Murphy’s Oil Soap to clean your wood cabinets.

Gathering Necessary Tools

Before you begin cleaning your wood cabinets with Murphy’s Oil Soap, you’ll need to gather a few necessary tools. Here’s what you’ll need:

  • Murphy’s Oil Soap
  • Warm water
  • Two buckets
  • A soft cloth or sponge
  • A dry towel

Applying the Soap

Once you have all your tools gathered, it’s time to apply the soap. Follow these steps:

  1. Fill one bucket with water and add Murphy’s Oil Soap. Check the instructions on the product to be sure of the ratio of water to soap.
  2. Use warm water because it will break up oil and help get rid of dirt.
  3. Fill your other bucket with clean, warm water.
  4. Dip your cloth or sponge into the bucket with the soap mixture, and wring it out so it’s not dripping wet.
  5. Begin wiping down your cabinets with the soapy cloth or sponge, making sure to get into all the nooks and crannies.
  6. Don’t forget to clean the handles and knobs of your cabinets too.

Wiping and Drying

After you’ve applied the soap, it’s time to wipe and dry your cabinets. Follow these steps:

  1. Dip your cloth or sponge into the bucket with clean, warm water, and wring it out so it’s not dripping wet.
  2. Wipe down your cabinets with the clean cloth or sponge to remove any soap residue.
  3. Dry your cabinets with a dry towel to prevent any water spots or damage to the wood.

And that’s it! With these simple steps, you can use Murphy’s Oil Soap to clean your wood cabinets and keep them looking their best.

Maintaining Wood Cabinets

maintaining-wood-cabinets

Once you’ve cleaned your wood cabinets with Murphy’s Oil Soap, it’s important to maintain them properly to keep them looking their best. Here are some tips to help you:

1. Avoid Harsh Chemicals

Avoid using harsh chemicals or abrasive cleaners on your wood cabinets, as they can damage the finish and cause discoloration. Instead, stick to gentle cleaners like Murphy’s Oil Soap or a mixture of warm water and vinegar.

2. Clean Up Spills Immediately

If you spill something on your wood cabinets, clean it up immediately to prevent staining and damage. Use a damp cloth and a mild cleaner to gently wipe away the spill.

3. Use Coasters and Placemats

To prevent scratches and water damage, use coasters and placemats on your wood cabinets. This will help protect the surface from heat, moisture, and scratches caused by dishes and glasses.

4. Dust Regularly

Dust your wood cabinets regularly to prevent the buildup of dirt and grime. Use a soft cloth or microfiber duster to gently wipe away dust and debris.

5. Polish Occasionally

To keep your wood cabinets looking shiny and new, polish them occasionally with a high-quality furniture polish. Be sure to follow the manufacturer’s instructions carefully and avoid using too much polish, as it can leave a sticky residue.

By following these simple tips, you can keep your wood cabinets looking beautiful for years to come.

Safety Precautions When Using Murphy’s Oil Soap

Cleaning your wood cabinets with Murphy’s Oil Soap is a great way to keep them looking clean and fresh. However, it’s important to use the product safely to avoid any accidents or damage to your cabinets. Here are some safety precautions you should keep in mind when using Murphy’s Oil Soap:

1. Read the Label

Before using Murphy’s Oil Soap, make sure to read the label carefully. The label will provide you with important information about how to use the product safely and effectively. Pay attention to any warnings or precautions listed on the label.

2. Wear Gloves

Murphy’s Oil Soap can be harsh on your skin, so it’s important to wear gloves when using it. Rubber gloves are the best option, as they will protect your hands from the soap and any dirt or grime you may be cleaning off your cabinets.

3. Test on a Small Area

Before using Murphy’s Oil Soap on your entire cabinet, test it on a small, inconspicuous area first. This will allow you to make sure that the soap is safe for your cabinets and won’t cause any damage or discoloration.

4. Don’t Use Too Much Water

When cleaning your cabinets with Murphy’s Oil Soap, be careful not to use too much water. Too much water can cause warping or damage to your cabinets. Instead, use a lightly damp cloth or sponge to apply the soap, and wring out any excess water before using it on your cabinets.

5. Keep Out of Reach of Children and Pets

Murphy’s Oil Soap should be kept out of reach of children and pets. Store the product in a safe, secure location where it cannot be accidentally ingested or spilled. If swallowed, seek medical attention immediately.

By following these safety precautions, you can safely and effectively clean your wood cabinets with Murphy’s Oil Soap, keeping them looking beautiful for years to come.

When to Seek Professional Help

Cleaning your wood cabinets with Murphy’s oil soap is a simple task that you can do on your own. However, there are some situations where it may be best to seek professional help. Here are some instances where you may want to consider hiring a professional:

The Cabinets Are Extremely Dirty or Stained

If your cabinets are extremely dirty or stained, it may be difficult for you to clean them effectively on your own. In some cases, you may even make the situation worse by using the wrong cleaning products or techniques. A professional cleaner will have the experience and knowledge to properly clean your cabinets and remove any stubborn stains.

The Cabinets Have Sustained Water Damage

Water damage can cause serious problems for wood cabinets. If your cabinets have sustained water damage, it is important to address the issue as soon as possible to prevent further damage. A professional cleaner will be able to assess the damage and determine the best course of action to repair or replace the affected cabinets.

You Are Not Comfortable Cleaning the Cabinets Yourself

If you are not comfortable cleaning your wood cabinets yourself, it may be best to hire a professional. This is especially true if you have expensive or antique cabinets that require special care. A professional cleaner will have the necessary skills and equipment to clean your cabinets safely and effectively.

In any of these situations, it is important to choose a reputable and experienced professional cleaner. Look for someone who specializes in cleaning wood cabinets and has positive reviews from previous customers. By hiring a professional, you can ensure that your cabinets are cleaned properly and maintain their beauty for years to come.

Frequently Asked Questions

What is the best way to clean wood cabinets?

The best way to clean wood cabinets is to use a gentle cleaner that is specifically designed for wood. Murphy’s Oil Soap is a great option because it is gentle and effective. To clean your wood cabinets, mix warm water with Murphy’s Oil Soap and use a soft cloth or sponge to gently wipe down the surfaces. Be sure to avoid using abrasive sponges or harsh chemicals, as these can damage the wood and its finish.

How do you make wood cabinets shine?

To make your wood cabinets shine, you can use a furniture polish or wax. However, it is important to choose a product that is specifically designed for wood and to avoid using products that contain silicone, which can leave a residue on the surface of the wood. Alternatively, you can use a mixture of warm water and vinegar to clean your wood cabinets, which can help to remove dirt and grime and leave the surface looking shiny and clean.

What type of oil is best for wood cabinets?

When it comes to oiling wood cabinets, it is important to choose an oil that is specifically designed for use on wood. Mineral oil is a great option because it is safe, natural, and effective. To oil your wood cabinets, simply apply a small amount of mineral oil to a soft cloth and rub it into the surface of the wood. Be sure to wipe away any excess oil with a clean cloth to avoid leaving a residue.

Is Murphy’s Oil Soap safe for painted cabinets?

Murphy’s Oil Soap is safe for painted cabinets, but it is important to use it correctly to avoid damaging the paint. To clean painted cabinets, mix warm water with Murphy’s Oil Soap and use a soft cloth or sponge to gently wipe down the surfaces. Be sure to avoid using abrasive sponges or harsh chemicals, as these can damage the paint. Additionally, be sure to rinse the cabinets thoroughly with clean water after cleaning to avoid leaving a soapy residue.

How do you clean sticky wood kitchen cabinets?

To clean sticky wood kitchen cabinets, mix warm water with Murphy’s Oil Soap and use a soft cloth or sponge to gently wipe down the surfaces. If the cabinets are particularly sticky, you can add a small amount of baking soda to the mixture to help break down the grime. Be sure to avoid using abrasive sponges or harsh chemicals, as these can damage the wood and its finish.

Do you need to rinse off Murphy’s Oil Soap after cleaning wood cabinets?

Yes, it is important to rinse off Murphy’s Oil Soap after cleaning wood cabinets to avoid leaving a soapy residue. After cleaning, rinse the cabinets thoroughly with clean water and then dry them with a clean cloth. This will help to ensure that your cabinets are clean and free from any residue that could attract dirt and grime.

Blog

how-to-cut-wood-with-a-dremel-a-beginners-guide

Cutting wood with a Dremel is an easy and efficient way to create precise cuts and designs in wood. Whether you are a beginner or an experienced woodworker, a Dremel tool can help you achieve the desired results. With the right attachments and techniques, you can cut wood in various shapes and sizes.

One of the most popular attachments for cutting wood with a Dremel is a wood cutting wheel. This attachment is ideal for making straight, thin cuts in wood up to 1×2 inches. It is also useful for cutting small, square holes or refining old furniture. The carbide wheel can cut every type of wood, from softwood to hardwood, without the risk of tear-out. However, it is important to take safety precautions when using a Dremel tool, such as wearing eye protection and working in a well-ventilated area.

Understanding Your Dremel

When it comes to cutting wood with a Dremel, it’s important to have a good understanding of the tool you’re working with. In this section, we’ll cover some basic information about the Dremel and its attachments that will help you get started with your woodcutting project.

Knowing the Tool

The Dremel is a versatile rotary tool that can be used for a variety of tasks, including cutting, sanding, and polishing. It’s important to know the basics of your Dremel before you start cutting wood. Here are a few things to keep in mind:

  • Power: Different Dremel models have different power ratings. Make sure you’re using a tool with enough power to cut through the type of wood you’re working with.
  • Speed: Dremels have adjustable speed settings. For cutting wood, you’ll want to use a high speed setting.
  • Grip: Make sure you have a firm grip on the Dremel when cutting wood. This will help you maintain control and prevent accidents.

Different Attachments

The Dremel comes with a variety of attachments that can be used for different tasks. When cutting wood, you’ll want to use a cutting wheel attachment. Here are a few types of cutting wheel attachments that you can use:

  • Wood Cutting Wheel: This attachment is specifically designed for cutting wood. It’s a great option for cutting small pieces of wood.
  • Metal Cutting Wheel: This attachment can also be used for cutting wood, but it’s better suited for cutting metal.
  • Diamond Cutting Wheel: This attachment is designed for cutting hard materials like glass and tile, but it can also be used for cutting wood.

Make sure you’re using the right attachment for the job to ensure the best results.

By understanding your Dremel and its attachments, you’ll be better equipped to cut wood safely and efficiently.

Safety Measures

safety-measures-1

When using a Dremel tool to cut wood, it’s important to take safety measures to prevent injury. Here are some safety tips to follow:

Wear Protective Gear

Always wear protective gear when using a Dremel tool. This includes safety glasses to protect your eyes from flying debris and a face mask to prevent inhalation of sawdust. You may also want to wear gloves to protect your hands from the heat generated by the tool.

Use the Right Blade

Make sure you are using the correct blade for the type of wood you are cutting. Carbide blades are a good choice for most woods, but you may need a specialized blade for harder woods. Make sure the blade is securely fastened before you begin cutting.

Secure the Wood

Make sure the wood you are cutting is securely clamped to a work surface. This will prevent the wood from moving while you are cutting and reduce the risk of injury.

Check the Cutting Depth

Before you begin cutting, make sure the cutting depth is set correctly. This will prevent the tool from cutting too deeply and causing damage to the wood or injuring you.

Take Breaks

If you are cutting for an extended period of time, take regular breaks to prevent fatigue and reduce the risk of injury. This will also give you a chance to inspect the tool and blade for signs of wear or damage.

By following these safety measures, you can reduce the risk of injury and ensure a successful and enjoyable woodworking experience.

Preparation Steps

preparation-steps-1

Before you start cutting wood with a Dremel, you need to prepare the area and the wood itself. Here are some steps you can follow to ensure a successful project.

Selecting the Wood

First, you need to select the right type of wood for your project. The Dremel can cut through a variety of woods, including softwood, hardwood, and even laminate. However, some woods may be more difficult to cut than others, so it’s important to choose the right type of wood for your project.
Softwoods like pine and cedar are easier to cut than hardwoods like oak and maple. If you’re new to cutting wood with a Dremel, it’s best to start with a softwood. Once you’ve gained some experience, you can move on to hardwoods.

Marking the Cut

Once you’ve selected your wood, you need to mark the area where you want to make the cut. Use a pencil or a marker to draw a line on the wood where you want to cut. This will help guide your Dremel tool and ensure a straight cut.
If you’re making a curved cut, use a template or a stencil to mark the curve on the wood. You can also use a compass to draw a circle or an arc on the wood.
Make sure your markings are clear and easy to see. If they’re too faint, you may have trouble following the line when you start cutting.
By following these preparation steps, you’ll be ready to start cutting wood with your Dremel tool. Remember to wear safety gear and work in a well-ventilated area to protect yourself from dust and debris.

Cutting Process

cutting-process

Cutting wood with a Dremel is a simple and efficient process. To ensure a smooth and precise cut, it is important to follow a few basic steps. In this section, we will discuss the cutting process in detail, including starting the cut, maintaining the cut, and finishing the cut.

Starting the Cut

Before beginning the cut, it is important to choose the right cutting wheel for the job. For straight, thin cuts, use a wood cutting wheel. The Dremel wood cutting wheel #544 is a popular choice for cutting small pieces of wood quickly and efficiently. The size of the tool blade is determined by the Dremel tool, so make sure to choose the appropriate blade for your tool.
Once you have selected the appropriate cutting wheel, attach it to your Dremel tool and tighten it securely. Next, adjust the depth of the cutting wheel to ensure that it will cut the wood to the desired depth. You can do this by adjusting the height of the cutting wheel using the depth adjustment screw on your Dremel tool.
To begin the cut, position the cutting wheel at the starting point of the cut and slowly lower it onto the wood. Make sure to keep your hands and fingers away from the cutting wheel at all times. Once the cutting wheel has made contact with the wood, slowly move it along the desired cutting path.

Maintaining the Cut

As you continue to cut the wood, it is important to maintain a steady hand and a consistent cutting speed. If you cut too quickly or apply too much pressure, the cutting wheel may become bogged down or jammed, resulting in a rough or uneven cut.
To maintain a smooth and even cut, keep the cutting wheel moving at a steady pace and apply light, consistent pressure to the wood. If you need to make a curved cut, use a grinding or sanding bit to shape the wood to the desired curve before making the cut with the cutting wheel.

Finishing the Cut

Once you have completed the cut, use a sanding or grinding bit to smooth out any rough edges or imperfections in the wood. This will ensure a clean and professional-looking finish.
To finish the cut, remove the cutting wheel from your Dremel tool and replace it with a sanding or grinding bit. Use the bit to carefully sand or grind away any rough edges or imperfections in the wood, working slowly and carefully to avoid damaging the wood.
In conclusion, cutting wood with a Dremel is a simple and efficient process that can produce clean and precise cuts when done correctly. By following the steps outlined in this section, you can ensure a smooth and professional-looking finish for all of your woodworking projects.

Post Cutting Care

After cutting wood with your Dremel, it’s important to take some time to care for your tool. Proper maintenance can help extend the life of your Dremel and keep it in good working condition. Here are some tips for post-cutting care:

Cleaning the Dremel

Cleaning your Dremel after use is important to prevent sawdust and debris from accumulating in the tool. Here’s how to clean your Dremel:
  • Turn off and unplug your Dremel.
  • Use a soft brush or cloth to remove sawdust and debris from the tool.
  • If necessary, use a small amount of rubbing alcohol on a cloth to clean the tool.
  • Be sure to clean the cutting attachments as well.

Storing the Dremel

Proper storage is important to prevent damage to your Dremel and to keep it in good working condition. Here are some tips for storing your Dremel:
  • Store your Dremel in a dry, cool place.
  • Keep the tool in its original case or in a protective case or bag.
  • Store the tool in a place where it won’t be knocked over or damaged.
  • Be sure to store the cutting attachments separately from the tool to prevent damage.
By following these post-cutting care tips, you can help ensure that your Dremel stays in good working condition for years to come.

Frequently Asked Questions

What type of Dremel bit is best for cutting wood?

The best Dremel bit for cutting wood is a carbide cutting wheel. It is effective and can cut through both softwood and hardwood without causing any tear-out. The size of the wheel depends on the thickness of the wood you want to cut.

How do you attach a cutting wheel to a Dremel?

To attach a cutting wheel to a Dremel, first, make sure the tool is turned off and unplugged. Then, unscrew the collet nut and insert the wheel into the collet. Tighten the collet nut securely and make sure the wheel is properly aligned.

Can you use a Dremel to make precise cuts in wood?

Yes, you can use a Dremel to make precise cuts in wood. However, you need to use the right attachment and technique. A carbide cutting wheel or a carving bit can be used for precise cuts. Start by making small cuts and gradually increase the depth until you achieve the desired result.

Is it safe to use a Dremel for cutting wood?

Yes, it is safe to use a Dremel for cutting wood if you follow some safety precautions. Wear safety goggles and a face mask to protect yourself from wood dust. Make sure the tool is properly secured and stable before you start cutting. Always keep your fingers away from the cutting wheel.

What are some tips for cutting wood with a Dremel?

Some tips for cutting wood with a Dremel include using the right attachment, starting with a low speed, and making small cuts. Always maintain a steady hand and keep the tool perpendicular to the wood surface. Use a clamp or vise to secure the wood piece in place.

Can a Dremel be used to cut curves in wood?

Yes, a Dremel can be used to cut curves in wood. Use a small carbide cutting wheel or a carving bit to make small, controlled cuts. Start from the outside edge of the curve and work your way towards the center. Make sure to keep the tool perpendicular to the wood surface for a clean cut.