Rahasia Sukses Poker Online: Cara Ampuh Membaca Lawan di Fase Post-Flop
Di antara seluruh platform penyedia poker online terbaik, fase taruhan post-flop (setelah tiga kartu pertama dibuka) senantiasa diakui sebagai salah

Di antara seluruh platform penyedia poker online terbaik, fase taruhan post-flop (setelah tiga kartu pertama dibuka) senantiasa diakui sebagai salah


Are you tired of struggling to make perfect bows? A wooden bow maker might be just what you need! With a few simple materials and some basic woodworking skills, you can create your very own bow maker to help you create stunning bows every time.
To make a wooden bow maker, you will need a wooden board, a wood dowel, an electric saw, an electric drill, glue, sandpaper, a measuring tape, and a pencil. First, cut the wooden board to a size of 1 by 4 feet. Then, cut the wood dowel to a length of 12 to 18 inches and drill two small holes in the wooden board the same diameter as the dowel. Stick the dowel into the holes and mark it in 1-inch increments to make it easier to measure the size of your bow. Sand the edges of the board and dowel to smooth them out, and your bow maker is ready to use!
Making your own wooden bow maker is not only cost-effective, but it also allows you to customize it to your specific needs. Whether you’re creating bows for wreaths, floral arrangements, or home decor accents, a bow maker can save you time and frustration. So why not give it a try and see how it can improve your bow-making skills?

When it comes to making a wooden bow maker, choosing the right type of wood is crucial. The type of wood you use will affect the durability, flexibility, and overall performance of your bow maker. In this section, we will discuss the two main types of wood: hardwood and softwood.
Hardwood is a popular choice for bow makers due to its strength, durability, and flexibility. Some of the best hardwoods for bow making include Osage Orange, Yew, Maple, Black Locust, Hickory, and Ash. These woods can be easily found depending on where you live.
Each type of hardwood has its own unique characteristics. For example, Osage Orange is known for its bright orange color and high density, making it an excellent choice for a bow maker that needs to be both strong and flexible. Yew, on the other hand, is known for its strength, flexibility, and beautiful grain patterns.
Softwood is another option for bow makers, although it is not as popular as hardwood. Softwood is less dense and less durable than hardwood, but it can still be a good choice for those on a budget or for those who prefer a lighter bow maker.
Some of the best softwoods for bow making include Pine, Cedar, and Spruce. These woods are lightweight and easy to work with, making them a good choice for beginners.
When choosing the type of wood for your bow maker, it is important to consider your skill level, budget, and the type of bow you want to make. Hardwood is generally the better choice for more experienced bow makers who want a high-performance bow maker, while softwood is a good choice for beginners or those on a budget.
When it comes to making a wooden bow maker, choosing the right wood is crucial. Not all woods are created equal, and some are better suited for bow making than others. Here are some factors to consider when choosing the right wood for your bow maker:
The wood you choose should be strong and durable enough to withstand the pressure of holding the bow in place while you tie the ribbon. Some of the best hardwoods for bow making include Osage Orange, Yew, Maple, Black Locust, Hickory, and Ash. These woods have a high modulus of rupture (MOR) and low modulus of elasticity (MOE), meaning they can be bent with relative ease without breaking.
Flexibility is also an important factor to consider when choosing wood for your bow maker. The wood should be flexible enough to bend without breaking, but not so flexible that it loses its shape. Some woods, such as Osage Orange, have a natural elasticity that makes them ideal for bow making.
The moisture content of the wood you choose is also important. Wood that is too dry or too wet can be difficult to work with and may not hold up well over time. Look for wood with a moisture content of around 10-12% for best results.
Finally, consider the availability of the wood you choose. Some woods may be harder to find than others, depending on where you live. Choose a wood that is readily available in your area to make the process easier and more affordable.
In conclusion, choosing the right wood for your bow maker is crucial for ensuring its strength, durability, and flexibility. Consider the factors outlined above when making your choice to ensure the best possible results.
To make a wooden bow maker, you will need a few tools to get started. Here are the main tools that you will need:
A saw is an essential tool for making a wooden bow maker. You will need a saw to cut the wood into the right size and shape. A hand saw or a circular saw can be used, depending on your preference and the type of wood you are using.
A sharp knife is also necessary for making a wooden bow maker. You will need a knife to carve the wood and shape it into the desired form. A good quality carving knife with a sharp blade is recommended.
A rasp is a tool that you will need to shape the wood and smooth out any rough edges. A half-round rasp is ideal for shaping the wood, while a flat rasp is perfect for smoothing out the surface. A rasp is an essential tool for making a wooden bow maker.
Having the right tools is crucial for making a wooden bow maker. With the right tools, you can easily shape the wood and create a bow maker that is both functional and aesthetically pleasing. Make sure to invest in high-quality tools that will last for a long time and make your job easier.
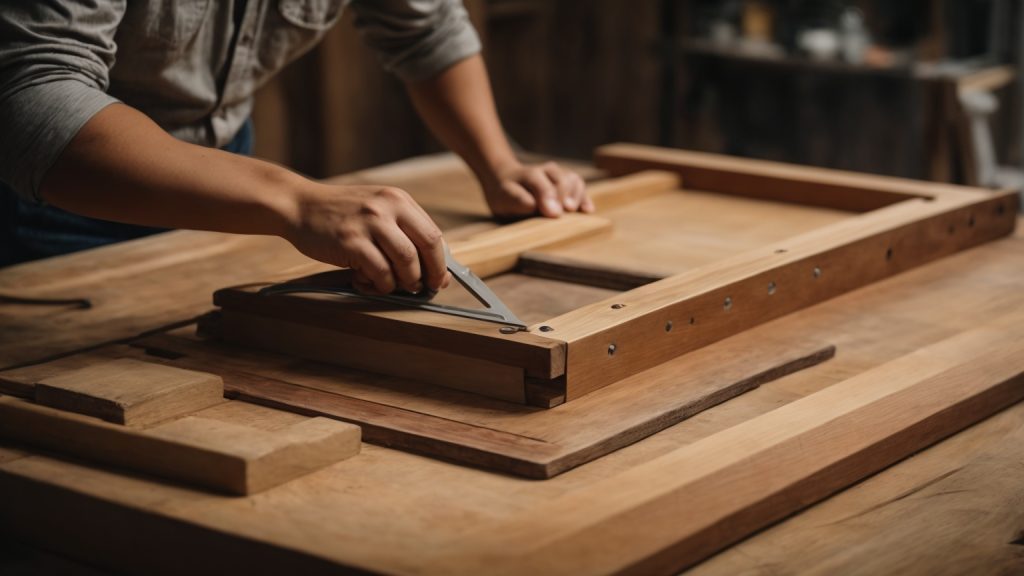
To create the perfect bow shape, you will need to use your wooden bow maker. Follow these simple steps to create the perfect bow:
Creating the perfect bow shape takes practice, but with the help of a wooden bow maker, it can be easy and fun. Experiment with different ribbon sizes and colors to create unique and beautiful bows for any occasion.
Now that you have your wooden board prepared, it’s time to carve the bow. Follow these steps to create a functional and sturdy bow:
Remember to take your time and be patient while carving the bow. It may take several hours or even days to create a well-crafted bow. But with practice and persistence, you will be able to create a beautiful and functional bow that you can be proud of.
Once you have created your wooden bow maker, you will want to make sure that it is sanded and finished properly to ensure that it lasts a long time and looks great. Here are some tips on how to do that:
Sanding is an important step in finishing your wooden bow maker. It helps to smooth out any rough edges and create a polished finish. Here are some tips on how to sand your bow maker:
Finishing your wooden bow maker will help to protect it from the elements and give it a professional look. Here are some tips on how to finish your bow maker:
By following these tips, you can create a beautiful and long-lasting wooden bow maker that will help you create stunning bows every time.
Once you have completed shaping your wooden bow, it’s time to string it. This is where the bowstring comes in. The bowstring is what connects the two ends of the bow and creates the tension necessary for the bow to function.
To string the bow, you will need a bowstring that is the correct length for your bow. You can purchase pre-made bowstrings or make your own using bowstring material.
To attach the bowstring, follow these steps:
It’s important to note that the bowstring will stretch over time, so it’s important to check the tension regularly and adjust as necessary.
With your bow now strung, you’re ready to start practicing your archery skills. Remember to always use caution and proper safety measures when handling a bow and arrow.
When working with wood and power tools, safety should always be your top priority. Here are a few tips to keep in mind when making your wooden bow maker:
By following these safety tips, you can help ensure a safe and enjoyable woodworking experience.
Congratulations on making your own wooden bow maker! Now that you have it, you’ll want to make sure it stays in good condition so you can continue to create beautiful bows. Here are some tips for maintaining your wooden bow maker:
To keep your wooden bow maker in good condition, it’s important to keep it clean. After each use, wipe it down with a damp cloth to remove any excess glue or debris. If necessary, use a soft-bristled brush to remove any stubborn debris. Avoid using harsh chemicals or abrasive cleaners, as they can damage the wood.
When not in use, store your wooden bow maker in a dry, cool place. Avoid exposing it to direct sunlight or extreme temperatures, as this can cause the wood to warp or crack. You may want to consider storing it in a protective case or bag to prevent dust and debris from accumulating on it.
To keep the wood from drying out and cracking, it’s a good idea to oil it periodically. You can use a food-grade mineral oil or a specialized wood oil to keep the wood moisturized. Apply the oil with a soft cloth, and wipe away any excess.
Regularly check your wooden bow maker for any signs of wear and tear. If you notice any cracks, splits, or other damage, stop using it immediately and repair or replace it as necessary. It’s better to catch any problems early on, before they become more serious.
By following these simple tips, you can keep your wooden bow maker in good condition for years to come. Happy bow-making!

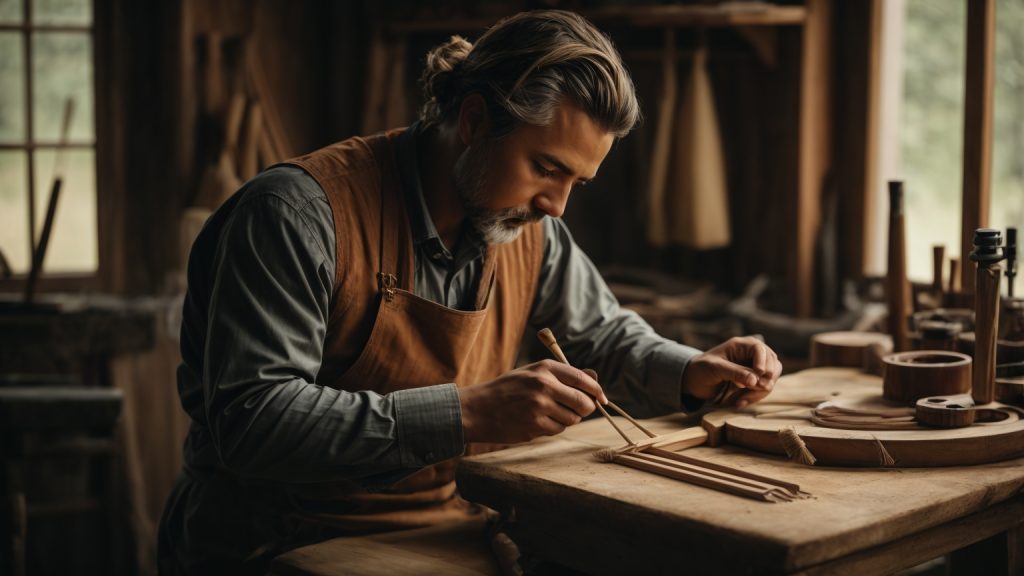
Are you interested in making your own knife handle out of wood? Crafting a wooden handle for your knife is a great way to add a personal touch and improve the grip of your knife. While it may seem like a daunting task, making a wooden knife handle can be done with just a few tools and some basic woodworking skills.
Before you begin, it’s important to choose the right type of wood for your handle. Some popular choices include maple, walnut, and oak. Make sure the wood you choose is strong and durable enough to withstand the rigors of use. Once you have your wood selected, you’ll need to cut it to the right size and shape for your knife. This can be done with a saw or other cutting tool. Next, you’ll need to sand the wood down to a smooth finish and then apply a protective coating to help preserve the wood. With a little patience and some attention to detail, you’ll have a beautiful and functional wooden knife handle in no time.
When it comes to making a knife, the handle is just as important as the blade. A well-designed handle can improve your grip and make the knife more comfortable to use. Wooden knife handles are a popular choice because they are durable, attractive, and easy to work with. In this section, we will discuss the basics of a wooden knife handle.
The first step in making a wooden knife handle is choosing the right wood. You want a wood that is strong, durable, and resistant to moisture. Some popular choices include:
When selecting your wood, make sure it is free of defects such as knots or cracks. You also want to make sure the wood is dry and stable. Green wood or wood with a high moisture content can warp or crack over time.
Once you have selected your wood, you need to prepare it for use. This involves cutting it to the desired size and shape and sanding it smooth. You may also want to add some texture or grip to the handle by carving or sanding in some grooves or ridges.
Attaching the handle to the blade is the final step in making a wooden knife handle. There are a few different methods you can use, including:
No matter which method you choose, make sure the handle is securely attached to the blade and that there are no gaps or spaces between the handle and the blade.
In conclusion, making a wooden knife handle is a fun and rewarding project that can improve the look and feel of your knife. By choosing the right wood, preparing it properly, and attaching it securely to the blade, you can create a handle that is both functional and beautiful.
Choosing the right wood for your knife handle is crucial to ensure durability, strength, and comfort. Here are some factors to consider when selecting the wood for your knife handle:
The hardness of the wood affects the durability and strength of the knife handle. Hardwoods such as cocobolo, ebony, and rosewood are great options for knife handles because of their high density and strength. Softwoods like pine or spruce are not recommended as they can easily dent and scratch.
The grain pattern of the wood can also affect the durability and aesthetics of the knife handle. Straight-grained woods like maple or cherry are easier to work with and provide a classic look. Burls or figured woods like curly maple or birdseye maple can add a unique and eye-catching design to the knife handle.
The wood’s stability is important to consider, especially if you live in an area with high humidity or temperature changes. Woods like ebony and cocobolo are known for their stability, while woods like maple or walnut can be prone to warping or cracking.
The availability of the wood can also be a factor to consider. Some exotic woods like cocobolo or ebony can be expensive and difficult to find. Birch, maple, and walnut are more widely available and affordable options.
Overall, choosing the right wood for your knife handle depends on your personal preferences and needs. Consider the hardness, grain pattern, stability, and availability of the wood before making your final decision.
When making a wooden knife handle, designing it is an important step. The handle should not only look good, but it should also be comfortable and functional. In this section, we will discuss the different aspects of designing your knife handle.
The shape of your knife handle is important because it affects how comfortable it is to hold and use. There are many different shapes you can choose from, but it’s important to consider the type of knife you are making and what it will be used for. For example, a chef’s knife handle may have a different shape than a hunting knife handle.
The size of your knife handle is also important. It should fit comfortably in your hand and be easy to grip. If the handle is too small, it may be difficult to hold onto, and if it’s too large, it may be uncomfortable to use. Consider the size of your own hand when designing your handle.
Ergonomics refers to the study of how people interact with objects and how to make those objects more comfortable, efficient, and safe to use. When designing your knife handle, consider the ergonomics of your design. A well-designed handle will reduce the risk of hand fatigue and strain and make it more comfortable to use for extended periods of time.
In conclusion, designing your knife handle is an important step in the knife-making process. Consider the shape, size, and ergonomics of your design to create a handle that is not only aesthetically pleasing but also comfortable and functional to use.
Before you start making a wooden knife handle, it’s important to gather all the necessary materials and tools. This will ensure that you have everything you need to complete the project successfully. In this section, we’ll cover the two main steps involved in preparing the materials: cutting the wood and gathering other essentials.
The first step in making a wooden knife handle is to select the wood you want to use. You can choose from a variety of woods, including walnut, maple, and oak. Once you’ve chosen your wood, it’s time to cut it to size.
To do this, you’ll need a saw. A bandsaw is ideal for this step as it will give you a clean, straight cut. If you don’t have a bandsaw, a handsaw or jigsaw will also work.
Measure the length of your knife handle and mark the wood accordingly. Use your saw to cut the wood to the desired length. Make sure to wear safety goggles and gloves to protect yourself while cutting the wood.
In addition to the wood, you’ll need a few other essentials to make a wooden knife handle. These include:
Once you have all of these materials, you’re ready to move on to the next step: shaping the wood into a handle.
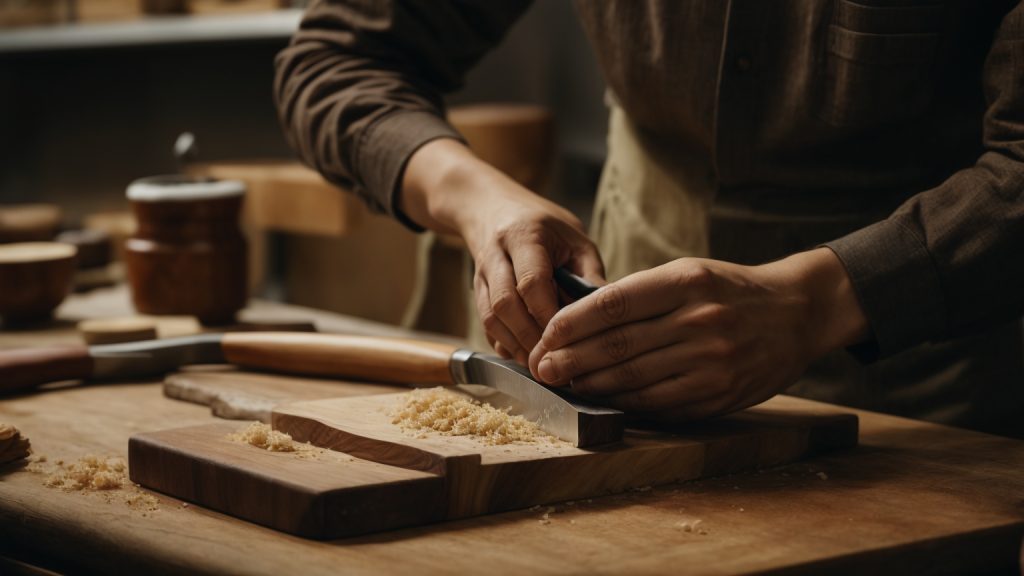
Carving the handle is the most important part of making a wooden knife handle. It requires precision and attention to detail to ensure that the handle is comfortable to hold and fits the knife blade perfectly. Here are some steps to follow when carving the handle:
Carving a wooden knife handle requires patience and practice, but with these steps, you can create a beautiful and functional handle for your knife.
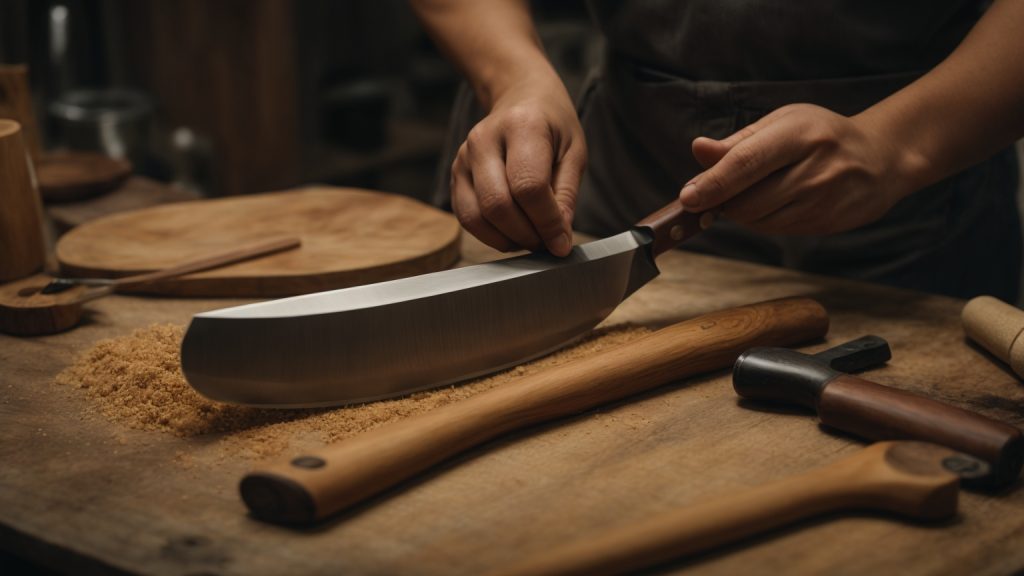
After shaping and attaching the wooden scales to the tang of your knife handle, it is time to sand the handle to a smooth finish. Sanding the handle will not only make it look better but also make it more comfortable to hold.
Start with a coarse grit sandpaper, such as 80 or 120 grit, to remove any rough spots or imperfections on the wood. Sand the handle in the direction of the wood grain, using even pressure. Move on to a finer grit sandpaper, such as 220 or 320 grit, to smooth out the handle further. Finally, use a very fine grit sandpaper, such as 400 or 600 grit, to achieve a smooth finish.
It is important to take your time and not rush the sanding process. Rushing the process can result in uneven sanding and an unsatisfactory finish. Make sure to sand the handle evenly and avoid over-sanding any particular area.
Once you have sanded the handle to your desired smoothness, it is time to apply a finish to protect the wood and enhance its appearance. There are various finishes you can use, such as oils, waxes, and varnishes.
One popular finish is boiled linseed oil. Boiled linseed oil is easy to apply and penetrates the wood to provide a protective layer. Apply the oil generously to the handle, making sure to cover all areas evenly. Let the oil soak into the wood for about 10 to 15 minutes, then wipe off any excess oil with a clean cloth. Repeat this process until the handle has absorbed enough oil.
Another option is to use a wax finish. Wax finishes provide a protective layer and enhance the natural beauty of the wood. Apply the wax to the handle using a clean cloth, making sure to cover all areas evenly. Let the wax dry for a few minutes, then buff the handle with a clean cloth to achieve a shiny finish.
No matter which finish you choose, make sure to follow the manufacturer’s instructions and apply the finish in a well-ventilated area. Allow the finish to dry completely before handling the knife.
Once you have prepared the wood for your knife handle, it’s time to attach it to the blade. This process can be broken down into two main steps: attaching the handle and securing the handle.
To attach the handle, you will need to use epoxy or another strong adhesive. Here’s how to do it:
Once the epoxy has dried, you will need to secure the handle to the tang of the blade. Here are a few different methods you can use:
No matter which method you choose, make sure the handle is securely attached to the blade before using the knife. With a little bit of patience and attention to detail, you can create a beautiful and functional knife that will last for years to come.
Now that you have successfully made your wooden knife handle, it is important to maintain it properly to ensure its longevity. Here are some tips to help you take care of your wooden knife handle:
Even though wooden knife handles are durable, they are not dishwasher safe. You should always wash your knife handle by hand and dry it off quickly after use. This will prevent water from seeping into the wood grain and causing it to warp or crack.
One of the most effective ways to maintain wooden knife handles is by oiling them. Oiling wooden handles helps to protect and nourish the wood. This enhances the handle’s appearance by bringing out the natural patterns and colors of the wood. You can use mineral oil, linseed oil, or even olive oil to oil your handle. Apply the oil generously to the handle and let it soak in for a few hours before wiping off any excess oil.
When storing your knife, make sure to keep it in a dry place away from direct sunlight. Avoid storing it in a damp or humid area, as this can cause the wood to swell and warp. You can also use a knife block or sheath to protect the handle from scratches and dents.
Harsh chemicals can damage the wood and cause it to lose its natural luster. Avoid using bleach, ammonia, or any other abrasive cleaners on your wooden knife handle. Instead, use a mild soap and warm water to clean it.
By following these simple maintenance tips, you can ensure that your wooden knife handle stays in excellent condition for years to come.

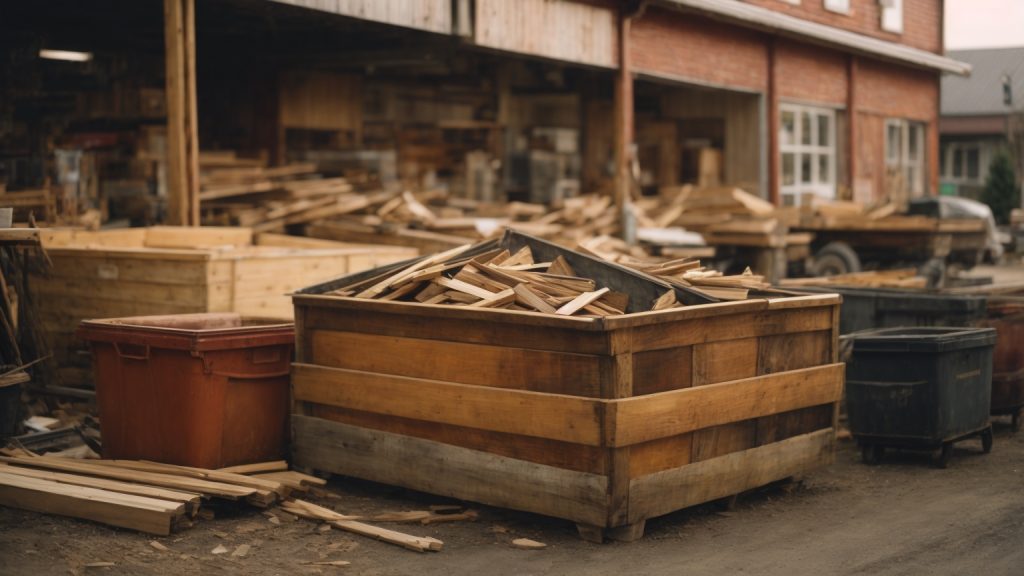
If you’re planning to start a woodworking project, one of the most significant expenses you’ll encounter is the cost of wooden planks. The cost of wooden planks varies depending on several factors such as the type of wood, size, and quality. Wooden planks are used for a wide range of applications, including building furniture, flooring, and constructing decks and fences.
The cost of wooden planks depends on the type of wood you choose. Softwoods such as pine and spruce are less expensive than hardwoods such as oak and mahogany. The size of the wooden planks also plays a role in the cost. The larger the plank, the more expensive it is likely to be. Additionally, the quality of the wooden planks can also affect the cost. Higher quality planks are typically more expensive than lower quality ones.
When it comes to purchasing wooden planks, it’s essential to consider your budget and the project’s requirements. You can purchase wooden planks at home improvement stores such as Home Depot and Lowe’s, as well as specialty lumber yards. It’s essential to compare prices and quality before making a purchase to ensure you’re getting the best value for your money.
Wood planks are a popular choice for flooring, decking, and many other construction projects. However, the cost of wood planks can vary widely depending on a variety of factors. Here are some things to keep in mind when considering the cost of wood planks:
Different types of wood have different costs. For example, pine is generally less expensive than oak. Exotic woods like teak and mahogany can be much more expensive. Keep in mind that the cost of the wood itself is just one factor in the total cost of your project.
Wood is graded based on its quality. Higher-grade wood is more expensive but also tends to be more durable and attractive. Lower-grade wood may be cheaper but may not last as long or look as nice.
The size of the planks you choose can also affect the cost. Larger planks are generally more expensive than smaller ones. Keep in mind that larger planks may require more labor to install, which can also add to the total cost of your project.
The cost of installation can vary depending on the type of wood, the size of the planks, and other factors. Make sure to get an estimate from a qualified professional before starting your project.
There may be additional costs associated with your project, such as the cost of underlayment, adhesives, and finishing materials. Make sure to factor these costs into your budget.
Overall, the cost of wood planks can vary widely depending on a variety of factors. Keep in mind that the cheapest option may not always be the best choice in the long run. It’s important to consider factors like durability, appearance, and installation costs when choosing the right wood planks for your project.
When it comes to purchasing wood planks, there are several factors that can influence the price you pay. Understanding these factors can help you make an informed decision and get the best value for your money. Here are some of the main factors that influence wood plank prices:
The quality of the wood you choose can have a significant impact on the price you pay. Higher quality wood is typically more expensive, but it may be worth the investment if you want a durable and long-lasting product. Lower quality wood may be cheaper initially, but it may not hold up as well over time and could end up costing you more in the long run.
The size of the planks you choose can also impact the price. Larger planks may be more expensive than smaller ones, but they can also cover more area and reduce the amount of labor required for installation. However, smaller planks may be easier to handle and install, which could save you money on installation costs.
The type of wood you choose can also affect the price. Some types of wood are more expensive than others due to their rarity, durability, or unique characteristics. For example, exotic hardwoods like Brazilian cherry or teak can be much more expensive than domestic hardwoods like oak or maple. Additionally, some types of wood may require special treatment or maintenance, which can add to the overall cost.
When considering the factors that influence wood plank prices, it’s important to weigh the pros and cons of each option and determine what will work best for your budget and needs. By doing your research and understanding the costs associated with different types of wood, you can make an informed decision and get the best value for your money.
When it comes to wooden planks, the cost can vary greatly depending on the type of wood. Here are the average prices for some of the most popular types of wood planks:
Pine wood is a popular choice for those on a budget. It is a softwood and is easy to work with, making it a great option for DIY projects. The cost of pine wood planks ranges from $1.50 to $4.50 per square foot, depending on the grade and quality of the wood.
Oak wood is a hardwood that is known for its durability and strength. It is a popular choice for flooring and furniture. The cost of oak wood planks ranges from $5 to $15 per square foot, depending on the grade and quality of the wood.
Teak wood is a hardwood that is known for its resistance to rot and decay. It is a popular choice for outdoor furniture and decking. The cost of teak wood planks ranges from $8 to $30 per square foot, depending on the grade and quality of the wood.
When choosing the type of wood for your project, keep in mind that the cost is not the only factor to consider. You should also consider the durability, strength, and appearance of the wood.
If you’re planning a large-scale woodworking project, buying wood planks in bulk can save you a significant amount of money. However, it’s important to do your research and make sure you’re getting a good deal.
One option for buying wood planks in bulk is to check out your local home improvement stores. Stores like Lowe’s and Home Depot often offer bulk pricing on lumber, and you can save even more if you have a store credit card or sign up for their loyalty program.
Another option is to look for online retailers that specialize in lumber and woodworking supplies. Advantage Lumber is one such retailer that offers bulk pricing on a wide variety of wood species, including popular options like cedar, redwood, and pine.
When buying wood planks in bulk, it’s important to consider the quality of the wood. Make sure you’re getting kiln-dried lumber, which will be more stable and less likely to warp or twist over time. You should also check the wood for knots, cracks, and other defects that could weaken the planks.
Finally, don’t forget to factor in the cost of shipping when buying wood planks online. Some retailers offer free shipping on large orders, while others may charge a flat rate or calculate shipping based on the weight of the lumber.
Overall, buying wood planks in bulk can be a great way to save money on your woodworking projects. Just be sure to do your research and choose a reputable retailer that offers high-quality lumber at a fair price.
If you’re planning to use wood planks for your next project, you might be wondering whether to go for new or reclaimed wood. Here’s a quick cost comparison to help you decide.
New wood is readily available and can be purchased in various sizes and types. The cost of new wood can vary depending on the type of wood, size, and quality. Here are some average costs for new wood planks:
Reclaimed wood is salvaged from old buildings, barns, and other structures. It’s a sustainable option that adds character and history to your project. However, it can be more expensive than new wood due to the time and effort required to source and prepare it. Here are some average costs for reclaimed wood planks:
Keep in mind that the cost of reclaimed wood can vary depending on factors such as the age, condition, and rarity of the wood. Additionally, some suppliers may charge extra for cleaning, milling, and finishing the wood.
Overall, the cost of wood planks depends on your budget, project requirements, and personal preference. New wood is a more affordable option, while reclaimed wood is a sustainable and unique choice that adds character to your project.
If you’re looking to buy wood planks for your next project, there are a few places you can consider. Here are some options:
Home improvement stores like The Home Depot and Lowe’s offer a wide variety of wood planks in different sizes, types, and finishes. You can find common types of wood like pine, cedar, and spruce, as well as more exotic types like mahogany and teak. These stores also offer the option to cut the wood to your desired size, which can be convenient if you don’t have the tools to do it yourself.
Lumber yards are another option for buying wood planks. They typically have a larger selection of wood types and sizes than home improvement stores. You can also find specialty woods like reclaimed barn wood and exotic hardwoods. Lumber yards may also be able to provide custom cuts and milling services.
If you don’t have any local options or prefer the convenience of shopping from home, there are several online retailers that sell wood planks. Some popular options include Amazon, Etsy, and Wayfair. Keep in mind that shipping costs can be high due to the weight and size of the wood, so factor that into your budget.
If you’re looking for a more unique or sustainable option, consider buying wood planks from a local sawmill. These businesses specialize in cutting and milling wood, often from local sources. You can find a variety of wood types and sizes, and may even be able to choose the specific tree the wood came from. Local sawmills also tend to have lower prices than larger retailers.
No matter where you decide to buy your wood planks, make sure to do your research and compare prices and quality. Don’t be afraid to ask questions and seek advice from experts to ensure you’re getting the best value for your money.
Wood planks can be a beautiful addition to any home, but they can also be expensive. Here are some tips to help you save money when purchasing wood planks:
By following these tips, you can save money when purchasing wood planks for your next project.

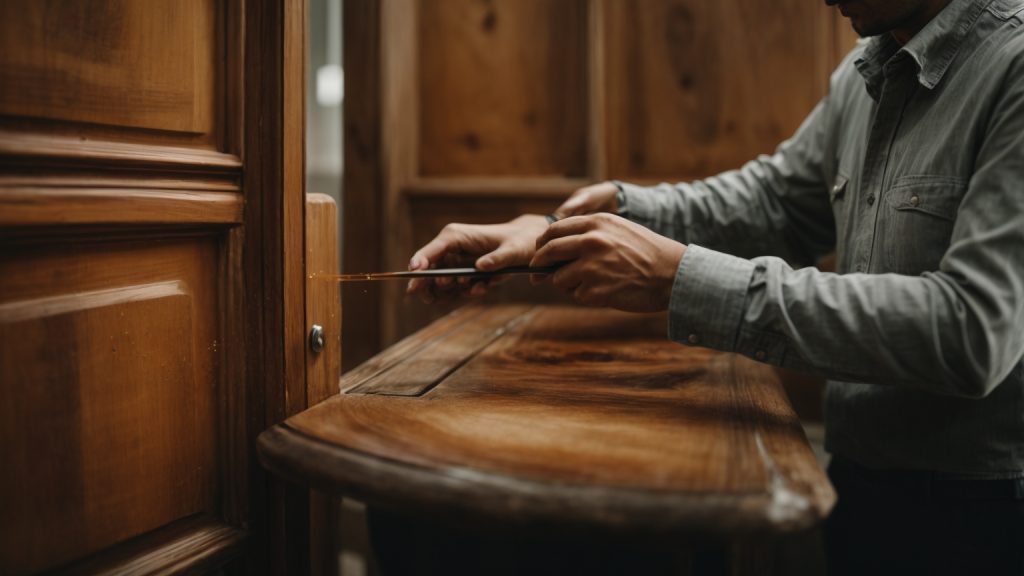
If you have a wooden door, chances are you’ve had to deal with scratches at some point. Whether it’s from your pet’s claws or just general wear and tear, scratches can be unsightly and make your door look old and worn out. Fortunately, fixing scratches on a wooden door is a relatively easy DIY project that you can do yourself with a few simple tools and materials.
One of the easiest ways to fix scratches on a wooden door is to use a wood filler. Wood fillers come in various colors to match the shade of your door, and they can be used to fill in deep scratches and gouges. Once the filler is dry, you can sand it down and paint or stain it to match the rest of your door. Another quick fix for light scratches is to rub a walnut over the scratch, which can help fill in the scratch and mask its appearance.
Before you start fixing scratches on your wooden door, it’s important to clean the area thoroughly. Use a damp cloth to wipe away any dirt or debris, and let the area dry completely before you start working on it. Additionally, make sure you have all the necessary tools and materials on hand, including sandpaper, wood filler, and paint or stain. With a little bit of time and effort, you can restore your wooden door to its former glory and make it look as good as new.
Before you start fixing scratches on your wooden door, you need to identify the type of scratch you are dealing with. This is important because different types of scratches require different methods of repair.
Minor scratches are superficial and only affect the surface of the wood. They are usually caused by light abrasions or contact with sharp objects. You can identify minor scratches by their shallow depth and light color. They are often barely visible, but can still be felt when you run your finger over them.
To fix minor scratches, you can use a wood touch-up marker or crayon that matches the color of your door. Simply apply the marker or crayon to the scratch and wipe away any excess with a clean cloth. If the scratch is still visible, you can lightly sand it down with fine-grit sandpaper and then apply the touch-up marker or crayon again.
Deep scratches are more serious and penetrate deeper into the wood. They are often caused by heavy impacts or contact with sharp objects. You can identify deep scratches by their dark color and visible depth. They are often rough to the touch and can even expose the raw wood underneath.
To fix deep scratches, you will need to use a wood filler. First, clean the scratch with a damp cloth and let it dry completely. Then, apply the wood filler to the scratch, making sure to fill it completely. Smooth out the surface of the filler with a putty knife and let it dry according to the manufacturer’s instructions. Once the filler is dry, sand it down with fine-grit sandpaper until it is smooth and level with the surface of the door. Finally, apply a matching stain or paint to the area to blend it in with the rest of the door.
By identifying the type of scratch on your wooden door, you can choose the appropriate method of repair and achieve the best possible results.
Before you start fixing scratches on your wooden door, you need to gather some necessary materials. Here are the materials that you will need:
For minor scratches, you will need:
| Materials | Description |
|---|---|
| Soft cloth | To clean the surface of the door |
| Walnut | To rub on the scratch |
| Wood filler | To fill in the scratch |
| Sandpaper | To sand down the filled area |
| Paint or stain | To match the color of the door |
For deep scratches, you will need:
| Materials | Description |
|---|---|
| Soft cloth | To clean the surface of the door |
| Wax wood filler stick | To fill in the scratch |
| Sandpaper | To sand down the filled area |
| Paint or stain | To match the color of the door |
It is important to note that the color of the paint or stain should match the color of the door. If you are unsure about the color, you can take a small piece of the door to a hardware store to match the color.
Make sure to wear gloves and eye protection when using wood filler and sandpaper. Also, work in a well-ventilated area to avoid inhaling any harmful fumes.
Now that you have gathered all the necessary materials, you are ready to start fixing the scratches on your wooden door.
If your wooden door has minor scratches, you can easily fix them yourself with a few simple steps. Here’s what you need to do:
First, clean the scratched area with a soft cloth and a mild cleaner. This will remove any dirt or debris from the surface and ensure that the filler adheres properly.
Next, apply a wood filler to the scratched area. You can use a wax wood filler stick or a putty-like wood filler. Choose a color that matches the color of your wooden door. Apply the filler using a putty knife or your finger, making sure to fill the scratch completely.
After the filler has dried, sand the area with fine-grain sandpaper in the direction of the wood grain. This will smooth out the surface and blend the filler with the surrounding wood. Finish by applying a clear coat of polyurethane or wood finish to protect the repaired area and give it a uniform appearance.
With these simple steps, you can fix minor scratches on your wooden door and restore its beauty.
If your wooden door has deep scratches, don’t worry. You can fix them with a few simple steps. Here’s how:
Before you start fixing the scratches, you need to prepare the area. Start by cleaning the door with a damp cloth to remove any dirt or debris. Then, use a sandpaper to sand down the area around the scratches. This will create a smooth surface for the wood filler to adhere to.
Next, apply wood filler to the scratches. You can use a wax wood filler stick or a wood filler paste. If you’re using a wax wood filler stick, rub it over the scratches until they are completely filled in. If you’re using a wood filler paste, apply it to the scratches with a putty knife and smooth it out. Make sure to choose a wood filler that matches the color of your door.
Once the wood filler has dried, sand it down with a sandpaper until it’s flush with the surface of the door. Then, repaint the area with a matching paint or stain. If you’re painting the door, use a brush or roller to apply the paint in thin, even coats. Let each coat dry completely before applying the next one.
By following these simple steps, you can fix deep scratches on your wooden door and make it look as good as new.
Wooden doors are a beautiful addition to any home, but they require proper maintenance to keep them looking their best. Here are some tips on how to maintain your wooden door to prevent scratches and other damage.
Regular cleaning is essential to keep your wooden door looking its best. Dust and dirt can accumulate on the surface of the door, which can scratch the wood over time. To clean your wooden door, simply use a soft cloth or a feather duster to remove any dirt or dust. If the door is particularly dirty, you can use a mild soap and water solution to clean it. Be sure to dry the door thoroughly after cleaning to prevent water damage.
Using protective coatings is another way to maintain your wooden door and prevent scratches. Applying a clear coat of varnish or polyurethane can protect the wood from scratches and other damage. These coatings also help to seal the wood, preventing moisture from penetrating the surface and causing damage. Be sure to follow the manufacturer’s instructions when applying these coatings, and allow them to dry completely before using the door.
Preventing scratches and other damage is the best way to maintain your wooden door. Avoid slamming the door, as this can cause dents and scratches. Also, be careful when moving furniture or other objects near the door, as these can also cause damage. If you have pets, be sure to keep their nails trimmed to prevent scratches on the door. Finally, avoid exposing your wooden door to direct sunlight, as this can cause the wood to fade and dry out over time.
By following these simple tips, you can maintain your wooden door and prevent scratches and other damage. Regular cleaning, using protective coatings, and avoiding damage are all essential to keep your wooden door looking its best for years to come.

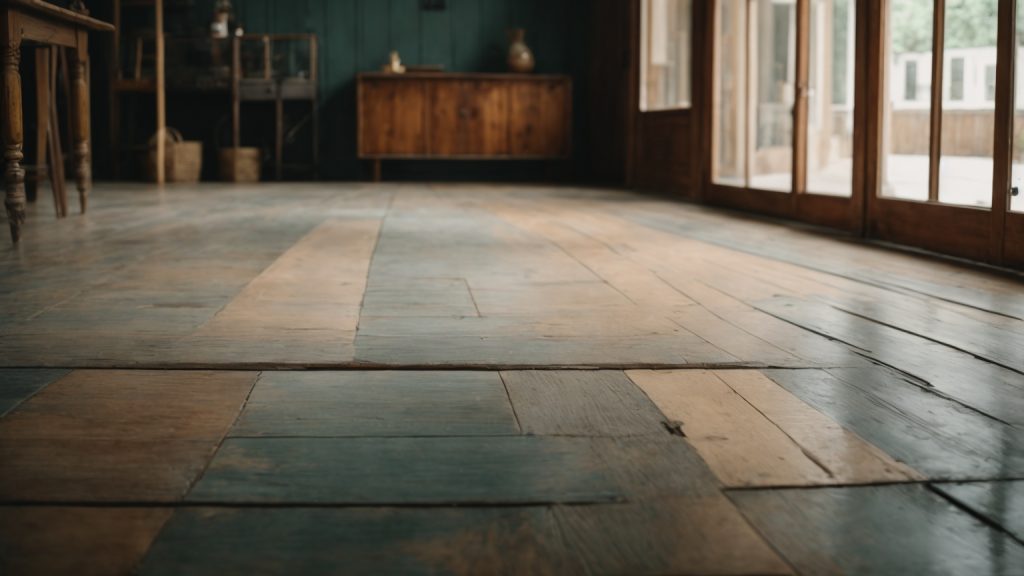
Preparing a wooden floor for tiling can be a daunting task, but with the right tools and knowledge, it can be done with ease. Before you begin, you should inspect the wooden floor to ensure that it is in good condition. Look for any existing nails, trim, or baseboards that may need to be removed or replaced. Also, check for any gaps between boards that need to be filled.
Once you have inspected the floor, the next step is to clean it thoroughly. Remove any dirt, dust, or debris using a broom or vacuum cleaner. You can also use a damp cloth to wipe the floor clean. Make sure that the wooden floor is completely dry before moving on to the next step. Any moisture left on the floor can cause the tiles to lift or warp over time.
Preparing your wooden floor for tiling is a crucial step that should not be overlooked. Proper preparation ensures that your tiles will adhere well, and your floor will be durable and long-lasting. Here are a few reasons why preparation is essential:
Before you start tiling, you need to ensure that your wooden floor is level. If there are any bumps or dips, your tiles will not sit flat, and you will end up with an uneven surface. This can lead to tiles cracking or coming loose over time. By leveling your floor, you can guarantee that your tiles will be installed correctly, and your finished floor will be smooth and even.
Another reason why preparation is important is to ensure that your wooden floor is structurally sound. If there are any weak spots or damage to the wood, your tiles may not adhere correctly, and your floor may not be stable. This can lead to tiles cracking or coming loose over time, which can be dangerous and costly to repair. By addressing any structural issues before tiling, you can guarantee that your floor will be safe and secure.
Wooden floors are susceptible to moisture damage, which can cause the wood to warp or rot over time. If you install tiles on a damp or wet wooden floor, you may end up with mold or mildew growth, which can be harmful to your health. By properly preparing your floor, you can prevent moisture damage and ensure that your tiles will adhere correctly.
Finally, proper preparation is essential for ensuring that your tiles will adhere well to your wooden floor. By cleaning, sanding, and priming your floor, you can create a surface that is ideal for tile installation. This will help your tiles stick better, which will make your finished floor more durable and long-lasting.
Overall, preparation is a crucial step in the tiling process. By taking the time to properly prepare your wooden floor, you can ensure that your tiles will adhere well, and your finished floor will be smooth, even, and long-lasting.
When it comes to tiling a wooden floor, choosing the right materials is crucial to ensure a successful and long-lasting installation. This section will guide you through the process of selecting the right tiles and adhesive for your project.
There are various types of tiles available in the market, each with its own unique properties. Here are some of the most common types of tiles that can be used for tiling a wooden floor:
Choosing the right adhesive is just as important as selecting the right tiles. Here are some factors to consider when selecting an adhesive for tiling a wooden floor:
By considering these factors when selecting your tiles and adhesive, you can ensure a successful and long-lasting installation of your tiled wooden floor.
Before you start tiling your wooden floor, it’s essential to assess the condition of the wood. This step is crucial because any underlying issues with the floor can cause problems with the tiles later on. Here are two sub-sections to help you assess your wooden floor:
The first thing you need to do is check the wooden floor for any damages. Look for any cracks, splits, or chips in the wood. These damages can cause problems with the tiles later on, so it’s essential to address them before you start tiling.
If you find any damages, you’ll need to repair them before you start tiling. You can use wood filler to fill in any cracks or chips in the wood. Once the wood filler has dried, you can sand it down to create a smooth surface.
The next step is to measure the floor area. You’ll need to know the exact dimensions of the floor so you can purchase the correct amount of tiles. Measure the length and width of the room and multiply them together to get the square footage.
It’s also essential to measure any areas where the tiles won’t fit, such as around doorways or cabinets. You’ll need to cut tiles to fit these areas, so it’s important to know the exact dimensions.
By assessing your wooden floor before you start tiling, you can ensure that the surface is smooth and free of any damages. This will help you achieve a professional-looking finish that will last for years to come.
Before you start tiling your wooden floor, it is essential to prepare the surface properly. This process includes cleaning the surface, leveling the floor, and applying primer. Following these steps will ensure a smooth and durable surface for your tiles.
The first step in preparing your wooden floor for tiling is to clean the surface thoroughly. Sweep or vacuum the floor to remove all dust and debris. If there are any stains or spills on the floor, use a damp cloth to wipe them off. Make sure the floor is completely dry before moving on to the next step.
It is essential to have a level surface before laying tiles on a wooden floor. Uneven surfaces can cause tiles to crack or become loose over time. To level the floor, use a self-leveling compound. Mix the compound according to the manufacturer’s instructions and pour it onto the floor. Spread the compound evenly using a trowel. Allow the compound to dry completely before moving on to the next step.
Applying primer to your wooden floor will help the adhesive bond better to the surface. Apply a thin coat of primer using a paintbrush or roller. Make sure to cover the entire surface evenly. Allow the primer to dry completely before laying the tiles.
In conclusion, preparing your wooden floor for tiling is crucial to ensure a smooth and long-lasting surface. By following these steps, you can create a strong foundation for your tiles and avoid any potential issues in the future.
Once you have prepared your wooden floor for tiling, it’s time to start laying out your tiles. This can be a bit tricky, but with some careful planning and measuring, you can create a beautiful and functional tiled surface.
Before you start laying your tiles, it’s important to plan out your layout. This will help you avoid any mistakes or miscalculations that could result in wasted tiles or an uneven surface. Here are some steps to follow when planning your layout:
Once you have your layout planned out, it’s time to start cutting your tiles to fit. This can be a bit tricky, but with the right tools and some patience, you can create a seamless tiled surface. Here are some steps to follow when cutting your tiles:
By following these steps, you can lay out your tiles and cut them to fit with ease. With a little patience and some careful planning, you’ll have a beautiful tiled surface in no time.
Once you have prepared your wooden floor for tiling, it’s time to apply the tiles. This process involves spreading adhesive, placing the tiles, and grouting the tiles. Here are the steps you should follow:
Before you start spreading the adhesive, make sure to read the manufacturer’s instructions carefully. Different types of adhesive require different application techniques. Generally, you will need to apply the adhesive to the floor in sections using a notched trowel.
Start by spreading the adhesive on a small area of the floor, making sure to cover the entire area. Then, use the notched trowel to create ridges in the adhesive. The ridges will help the tiles adhere to the floor.
Once you have spread the adhesive, it’s time to place the tiles. Start by placing the first tile in the corner of the room, using tile spacers to ensure that there is an even gap between each tile.
Continue placing tiles in a straight line, working your way across the room. It’s important to check that each tile is level as you go, adjusting the tile spacers as necessary.
When you reach the end of a row, you may need to cut tiles to fit. Use a tile cutter to make precise cuts, and always wear safety goggles to protect your eyes.
Once the tiles are in place and the adhesive has dried, it’s time to grout the tiles. Grout is a cement-based mixture that fills the gaps between the tiles, helping to keep them in place and preventing water from seeping underneath.
Start by mixing the grout according to the manufacturer’s instructions. Then, use a grout float to apply the grout to the gaps between the tiles. Work in small sections, making sure to remove any excess grout before it dries.
After you have applied the grout, use a damp sponge to wipe away any remaining grout from the surface of the tiles. Let the grout dry completely before walking on the floor.
That’s it! By following these steps, you can successfully apply tiles to your wooden floor.

Are you interested in adding a beautiful pond to your backyard? Building a wooden pond frame is a great way to create a stunning water feature that will enhance the look of your outdoor space. With a little bit of planning and effort, you can create a pond that is both functional and aesthetically pleasing.
One of the first things you’ll need to consider when building a wooden pond frame is the size and shape of your pond. Think about the space you have available, as well as the type of fish or plants you want to include in your pond. You’ll also need to decide on the depth of your pond, as this will impact the type of liner and pump you’ll need to use. Once you have a clear idea of what you want your pond to look like, you can begin gathering the materials you’ll need to build your wooden frame.
If you’re planning to build a pond in your backyard, a wooden frame is a great option to consider. A wooden pond frame offers a natural look that blends well with the surroundings, and it’s also relatively easy to build. Here are some basics you need to understand before building a wooden pond frame:
The first step in building a wooden pond frame is choosing the right wood. You need to choose a wood that is resistant to rot and decay, as it will be exposed to water and moisture. Cedar and redwood are popular choices for wooden pond frames, as they are naturally resistant to rot and decay.
The size and shape of your pond frame will depend on the size and shape of your pond. You need to determine the size and shape of your pond before building the frame. You can use a garden hose or spray paint to mark the outline of your pond. Once you have determined the size and shape, you can start building the frame.
Building a wooden pond frame is relatively easy. You need to start by building the base of the frame, which will support the weight of the pond. You can use pressure-treated lumber for the base, as it is resistant to rot and decay. Once you have built the base, you can start building the walls of the frame. You can use regular lumber for the walls, but make sure to seal it properly to prevent rot and decay.
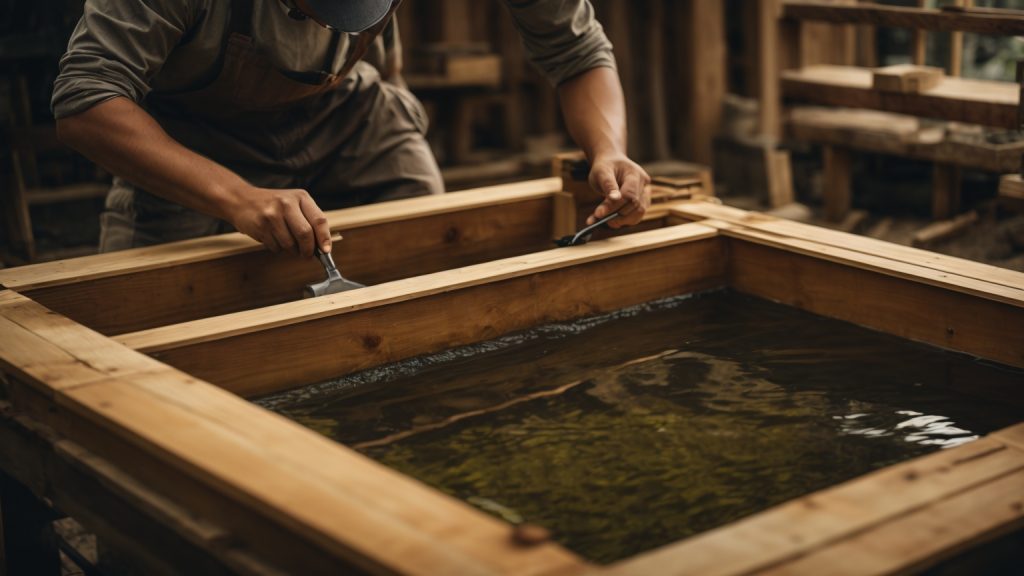
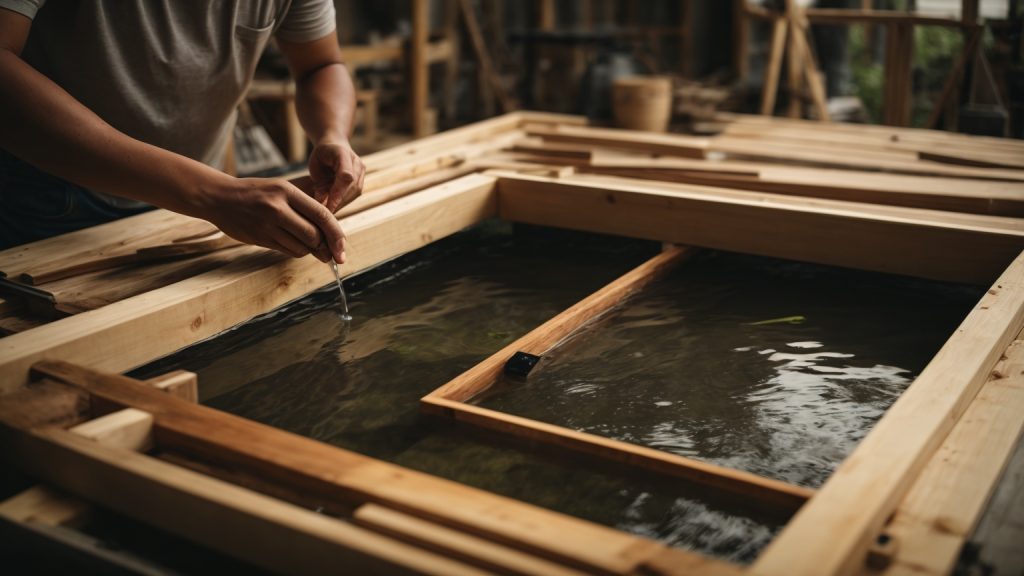
After building the frame, you need to install the liner. A pond liner is a flexible material that is used to hold water in the pond. You can use a rubber liner or a PVC liner for your pond. Make sure to install the liner properly to prevent leaks.
Once you have installed the liner, you can add the finishing touches to your pond. You can add rocks, plants, and other decorations to make your pond look more natural. You can also install a pump and filter to keep the water clean and clear.
Building a wooden pond frame is a fun and rewarding project that can add beauty and serenity to your backyard. With the right tools and materials, you can build a pond that will provide years of enjoyment.
When building a wooden frame for your pond, choosing the right type of wood is crucial. You want to choose a wood that is durable, resistant to rot, and can withstand exposure to water. Here are some options to consider:
Cedar is a popular choice for building pond frames because it is naturally resistant to decay and rot. It also has a pleasant aroma and is known for its beautiful reddish-brown color. Cedar is a bit more expensive than other types of wood, but it is worth the investment for its durability and aesthetic appeal.
Pressure-treated pine is another popular choice for building pond frames. It is treated with chemicals that make it resistant to decay, insects, and rot. Pressure-treated pine is less expensive than cedar, but it is important to note that the chemicals used in the treatment process can be harmful to fish and other aquatic life. Be sure to use a pond liner to protect your fish from any potential harm.
Redwood is a durable and attractive wood that is naturally resistant to decay and insects. It has a rich, reddish color and is often used for outdoor furniture and decks. Redwood is more expensive than pine, but it is a good choice if you want a wood that is both durable and visually appealing.
Other woods that can be used for building pond frames include cypress, oak, and teak. These woods are all durable and resistant to decay, but they can be more expensive than other options.
When choosing the right wood for your pond frame, consider your budget, the durability of the wood, and any potential harm to aquatic life. With the right wood and proper construction, your pond frame will provide a beautiful and functional addition to your backyard oasis.
Before you start building your wooden pond frame, you need to design it. This is an essential step that will ensure that your pond is safe, functional, and aesthetically pleasing. Here are some things to consider when designing your pond frame:
The first thing to consider when designing your pond frame is the size and shape of your pond. You need to decide how big you want your pond to be and what shape you want it to take. The size and shape of your pond will depend on the space available in your yard, the number of fish you want to keep, and your personal preferences.
The next thing to consider is the materials you will use to build your pond frame. Wood is a popular choice for building pond frames because it is durable, easy to work with, and looks great. However, you need to make sure that the wood you choose is suitable for outdoor use and can withstand exposure to water and other elements.
Another important factor to consider when designing your pond frame is the depth of your pond. The depth of your pond will depend on the type of fish you want to keep and the climate in your area. Generally, a depth of at least 2 feet is recommended for most fish species.
Finally, you need to consider how you will filter and aerate your pond. Filtration is important to keep the water clean and clear, while aeration is necessary to provide oxygen to your fish. You can use a variety of filtration and aeration systems, including pumps, filters, and air stones.
By considering these factors when designing your pond frame, you can ensure that your pond is safe, functional, and beautiful. Take your time and plan carefully to create a pond that you will enjoy for years to come.
Building a wooden pond frame requires certain materials to ensure its durability and safety for your aquatic life. Here are the essential materials you will need:
| Materials | Quantity |
|---|---|
| Pressure-treated lumber | Depends on the size of the pond |
| Pond liner | Depends on the size of the pond |
| Rebar stakes | 8-10 pieces |
| Gravel | Enough to cover the bottom of the pond |
| Screws | Enough to secure the lumber |
Pressure-treated lumber is recommended for building the frame as it is resistant to rot and insect damage. The pond liner will serve as a barrier between the wood and water, preventing the wood from rotting. Rebar stakes will be used to secure the frame to the ground, and gravel will provide a stable base for the pond liner. Screws will be used to join the lumber together.
To build a wooden pond frame, you will need the following tools:
A circular saw will be used to cut the lumber to the appropriate size. A power drill will be used to make holes for the screws and to attach the rebar stakes. A level will ensure that the frame is even and balanced. A tape measure will be used to measure the dimensions of the frame and the pond liner. A shovel and wheelbarrow will be needed to move the gravel and soil. A hammer and rubber mallet will be used to secure the rebar stakes and adjust the frame. A utility knife will be used to trim the pond liner. Finally, safety glasses and gloves are recommended to protect yourself while working with the tools and materials.
Before you start building your wooden pond frame, there are a few preparation steps that you need to take. These steps will help ensure that your pond is safe for your fish and will last for years to come.
The first step in preparing for your wooden pond frame is to choose the right location. You want to choose a location that is level and has good drainage. Avoid areas that are prone to flooding or have poor drainage.
Once you have chosen your location, you need to prepare the site. This involves removing any grass or vegetation from the area where your pond will be. You can use a shovel or a sod cutter to remove the grass.
After you have removed the grass, you need to level the area. You can use a rake or a shovel to level the area. Make sure that the area is level and smooth.
The next step in preparing for your wooden pond frame is to treat the wood. You want to use wood that is resistant to rot and decay. Cedar and redwood are good choices for building a wooden pond frame.
Before you start building your pond frame, you need to treat the wood with a wood preservative. This will help protect the wood from rot and decay. You can use a brush or a sprayer to apply the wood preservative.
Make sure that you apply the wood preservative to all sides of the wood, including the ends. You should also let the wood dry for at least 24 hours before you start building your pond frame.
By following these preparation steps, you can ensure that your wooden pond frame is safe and will last for years to come.
Building a wooden frame for your pond is a great way to create a sturdy and long-lasting structure that will keep your pond safe and secure. In this section, we will go over the steps involved in building a wooden pond frame, including the base construction, side construction, and top construction.
The first step in building a wooden pond frame is constructing the base. This is the foundation of your frame and should be built to last. Here are the steps involved in building the base:
Once the base is complete, you can move on to constructing the sides of the frame. This will provide support for the pond liner and prevent it from collapsing. Here are the steps involved in building the sides:
The final step in building the wooden pond frame is constructing the top. This will provide a sturdy surface for the pond liner to rest on. Here are the steps involved in building the top:
Congratulations! You have now completed the construction of your wooden pond frame. With proper maintenance and care, your frame should last for many years to come.
Now that you have built the wooden frame for your pond, it’s time to add the pond liner. Here are the steps to follow:
By following these steps, you can successfully add the pond liner to your wooden pond frame. With the liner in place, you can now add water to your pond and start enjoying your new backyard oasis!
Building a wooden pond frame can be a great addition to your backyard, but it’s important to keep it well-maintained to ensure its longevity. Here are some tips on how to maintain your wooden pond frame:
One of the most important things you can do to maintain your wooden pond frame is to keep it clean. Regularly remove any debris or leaves that fall into the pond, as they can cause blockages and damage to your pump. Use a skimmer net to remove debris from the surface of the water, and a pond vacuum to clean the bottom of the pond.
It’s important to check your pond for leaks regularly. Look for any signs of water loss, such as a drop in water level, wet areas around the pond, or visible cracks. If you find a leak, it’s important to repair it as soon as possible to prevent further damage. You can use a pond sealant to fix small leaks, but larger leaks may require professional help.
Maintaining good water quality is essential for the health of your fish and plants. Test the water regularly to ensure that the pH balance is correct and that the water is not too acidic or alkaline. You should also add beneficial bacteria to the pond to help break down organic matter and keep the water clean.
Wildlife such as raccoons and herons can cause damage to your pond and harm your fish. To protect your pond, install a net over the top to prevent wildlife from accessing it. You can also add floating plants to provide cover for your fish and discourage predators.
By following these tips, you can keep your wooden pond frame in great condition and enjoy it for years to come.

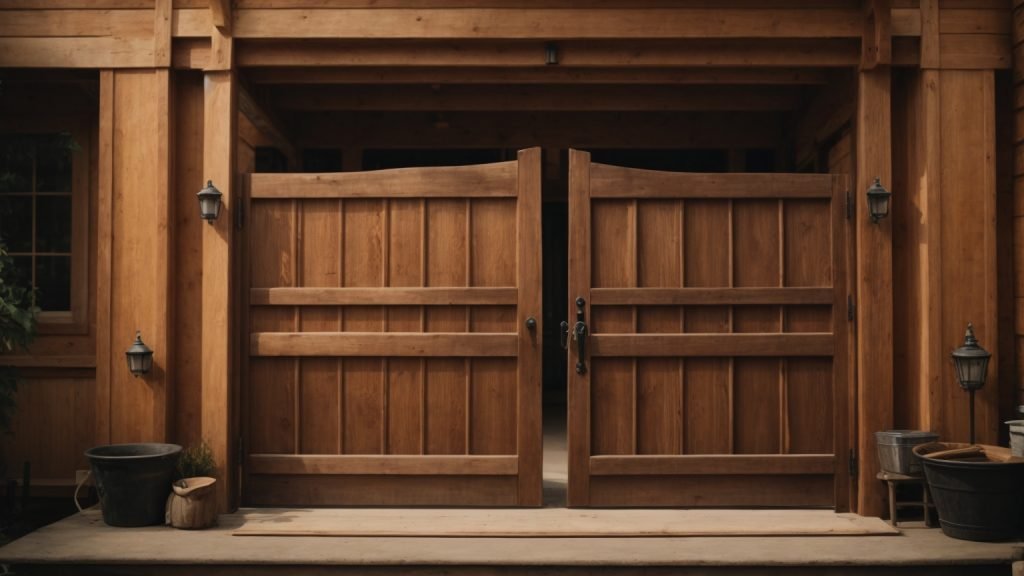
Building a wooden gate door is a great way to add both functionality and aesthetic appeal to your fence. Whether you’re looking to keep your pets and children safe, or simply want to enhance the look of your property, a wooden gate door can be a great addition to your home. With the right tools and materials, building a wooden gate door can be a fun and rewarding DIY project.
Before you get started, it’s important to determine the size and style of gate that you want to build. You’ll also need to gather the necessary tools and materials, which may include a screwdriver, power drill, compound miter saw, carpenter’s level, jigsaw, gate brackets, hinges, and screws. Once you have everything you need, you can begin measuring and cutting the wood to fit your desired dimensions. With a little patience and attention to detail, you can create a beautiful and functional wooden gate door that will last for years to come.
If you’re looking to add some privacy or security to your property, building a wooden gate door is a great option. Not only is it functional, but it can also add a touch of style to your property. However, before you get started, it’s important to understand the basics of building a wooden gate door.
Here are the materials you’ll need to build a wooden gate door:
| Materials | Quantity |
|---|---|
| Wood | Depends on the size of your gate |
| Gate hardware | Hinges, latch, screws, etc. |
| Wood glue | 1 bottle |
| Wood filler | 1 can |
| Sandpaper | 1 pack |
| Paint or stain | 1 can |
Here are the tools you’ll need to build a wooden gate door:
Once you have all the necessary materials and tools, you can move on to building your wooden gate door.
Remember, safety is important when working with power tools. Wear safety glasses, gloves, and ear protection when necessary and follow all safety instructions.
In the next section, we’ll go over the steps you need to follow to build a wooden gate door.
Before starting to build your wooden gate door, it is important to plan and prepare. This will ensure that you have the right materials and tools, and that your gate will function properly and look great. In this section, we will go over some important considerations when planning your wooden gate door.
The first step in planning your wooden gate door is to determine the size you need. Measure the width of the opening where the gate will be installed, and add a few extra inches to allow for clearance and hardware. You should also consider the height of the gate, depending on your needs for privacy and security.
There are many different designs to choose from when it comes to wooden gate doors. You can opt for a traditional, simple design, or get creative with a more ornate style. Consider the overall look of your property and choose a design that complements it. You should also think about the function of the gate – will it be used for security, privacy, or simply as a decorative element?
Choosing the right type of wood is crucial for the durability and longevity of your wooden gate door. Some common options include cedar, redwood, and pressure-treated pine. Each type of wood has its own unique characteristics and benefits, so it’s important to do your research and choose the one that best fits your needs and budget.
In summary, planning your wooden gate door is an important step in the building process. Determine the size you need, choose a design that complements your property, and select the right type of wood for durability and longevity. With these considerations in mind, you’ll be well on your way to building a beautiful and functional wooden gate door.
Before you start building your wooden gate, you need to prepare the wood. This involves cutting and sanding the wood to the right size and shape. Here are the steps you need to follow:
The first step in preparing the wood for your gate is to cut it to the right size. You will need a compound miter saw to make precise cuts. Make sure you measure the wood carefully before cutting it. Here are some tips to keep in mind:
Once you have cut the wood to the right size, it’s time to sand it down. Sanding is important because it removes any rough edges or splinters that could cause injury. Here are some tips to keep in mind:
By following these steps, you can prepare the wood for your wooden gate. Once you have completed these steps, you can move on to the next stage of building your gate.
When it comes to assembling a wooden gate door, there are a few key steps you need to follow to ensure a sturdy and reliable end result. In this section, we’ll walk you through the process of building the frame, attaching the panels, and installing the cross braces.
The first step in assembling your wooden gate door is to build the frame. To do this, you’ll need to measure and cut your wooden boards to the correct length and width. Once you have your boards cut, you can begin assembling the frame.
To assemble the frame, you’ll need to attach the boards together using wood screws or nails. Make sure to use a level to ensure that your frame is square and even. You may also want to add diagonal braces to the corners of your frame for added stability.
Once your frame is assembled, you can begin attaching the panels. To do this, measure and cut your wooden panels to the correct size and shape. Then, attach them to the frame using wood screws or nails.
Make sure to leave a small gap between each panel to allow for expansion and contraction due to changes in temperature and humidity. You may also want to add a diagonal brace across the panels for added stability.
The final step in assembling your wooden gate door is to install the cross braces. Cross braces are wooden boards that run diagonally across the back of the gate to provide added support and prevent sagging.
To install the cross braces, measure and cut your boards to the correct length and angle. Then, attach them to the back of the gate using wood screws or nails. Make sure that the cross braces are securely attached and evenly spaced for maximum stability.
By following these steps, you can assemble a sturdy and reliable wooden gate door that will provide years of use and enjoyment.
Once you have constructed your wooden gate, it’s time to add the finishing touches to make it look great and function properly. This section will cover two essential finishing touches: painting or staining and adding hardware.
Painting or staining your wooden gate can help protect it from the elements and give it a polished look. Before you start, make sure the wood is clean and dry. Here are some tips to help you paint or stain your wooden gate:
Adding hardware to your wooden gate is essential for functionality and security. Here are some hardware options to consider:
When installing hardware, make sure to follow the manufacturer’s instructions carefully. It’s also important to choose hardware that is rust-resistant and can withstand outdoor conditions.
By following these tips, you can add the finishing touches to your wooden gate and enjoy a beautiful and functional addition to your property.
Once you have built your wooden gate door, it’s time to install it. Follow these steps to ensure a secure and functional installation.
Before you install the gate, make sure you have the correct measurements for your opening. The gate should fit snugly within the opening with a small gap for clearance.
Once you have the correct measurements, position the gate in the opening. Use shims to hold the gate in place and ensure it is level.
Attach the hinges to the gate first, then to the post or fence. Make sure the hinges are secured with screws that are long enough to hold the weight of the gate.
Once the hinges are attached, remove the shims and test the gate to ensure it swings freely and smoothly. Adjust the hinges as necessary to ensure the gate is level and swings properly.
Attach the latch to the gate and the post or fence. Make sure the latch is aligned properly and securely fastened. Test the latch to ensure it opens and closes smoothly and securely.
If necessary, add a drop rod to the gate to keep it from sagging. A drop rod is a metal rod that attaches to the bottom of the gate and goes into the ground to keep the gate from sagging over time.
With these steps, you should have a secure and functional wooden gate door. Remember to maintain and inspect your gate regularly to ensure it stays in good condition.
To ensure the longevity and functionality of your wooden gate door, it’s essential to perform regular maintenance. Here are some tips to help you maintain your wooden gate door:
Cleaning your wooden gate door regularly is crucial to prevent dirt and debris from accumulating, which can lead to rot and other damage. Here’s how to clean your wooden gate door:
Performing a yearly inspection of your wooden gate door can help you identify any potential issues early on and prevent costly repairs down the line. Here’s what to look for during your yearly inspection:
If you notice any damage or issues during your inspection, it’s essential to address them promptly to prevent further damage. Here are some tips for repairing damage to your wooden gate door:
By following these tips for maintaining your wooden gate door, you can ensure that it remains functional and beautiful for years to come.
Are you tired of browsing furniture stores for the perfect coffee table, only to be disappointed by the limited options and high prices? Why not make your own wooden coffee table instead? Not only will it be a unique addition to your living space, but it will also be a fun and rewarding DIY project.
Building a wooden coffee table may seem daunting, but with the right tools and materials, it can be a straightforward process. Whether you prefer a simple design or something more intricate, there are plenty of plans and tutorials available to guide you through the process. From selecting the right wood to finishing touches, making your own coffee table allows you to customize every aspect of the piece to fit your personal style and needs.
Before you begin, it’s important to have a clear idea of the size and style you want for your coffee table. Consider the dimensions of your space and the function you want the table to serve. Do you need extra storage? Do you want a specific type of wood or finish? Once you have a solid plan in place, you can start gathering the necessary materials and tools to bring your vision to life.
When it comes to making a wooden coffee table, choosing the right wood is crucial. The type of wood you choose will affect the appearance, durability, and cost of your table. In this section, we’ll discuss the types of wood commonly used for coffee tables and how to choose wood that is both high quality and durable.
There are many types of wood to choose from when making a coffee table. Some popular options include:
These are just a few examples of the many types of wood available. When choosing wood for your coffee table, consider the color, grain pattern, and texture of the wood. You should also think about the style and decor of your room and choose a wood that complements it.
In addition to choosing the right type of wood, it’s important to consider the quality and durability of the wood. Look for wood that is free of knots and cracks, as these can weaken the structure of your table. You should also choose wood that has been properly dried and seasoned to prevent warping and cracking over time.
When it comes to durability, hardwoods like oak and maple are generally the best choice. Softwoods like pine and cedar are less durable and may not hold up as well over time. However, softwoods can be a good option if you’re on a budget or if you’re looking for a more rustic or casual look.
Overall, choosing the right wood for your coffee table is an important decision that will impact the appearance and durability of your table. Take the time to consider your options and choose a wood that meets your needs and fits your style.
Before starting to build your wooden coffee table, you need to gather all the necessary tools. Below are the woodworking tools and safety equipment that you will need.
Make sure to have all the necessary tools and safety equipment before starting your project. It is important to prioritize safety and to use the tools properly to avoid accidents.
When it comes to designing your own wooden coffee table, there are a few things to consider. In this section, we will cover the size and shape of your coffee table, as well as how to add some personal touches to make it unique to your style.
The size and shape of your coffee table will depend on your personal preferences and the space you have available. Here are some things to consider when designing your coffee table:
Once you have an idea of the size and shape you want, you can start planning the materials and construction.
One of the best things about making your own coffee table is the ability to add personal touches that reflect your style. Here are some ideas to consider:
Remember, the design possibilities are endless when it comes to making your own wooden coffee table. Take your time and have fun with the process!
Before you can start building your wooden coffee table, you need to prepare the wood. This involves cutting the wood to size and sanding it to make it smooth.
The first step in preparing the wood is to cut it to the right size. You will need a saw for this, and it’s important to measure carefully to ensure that you get the right dimensions.
When cutting the wood, make sure that you use a straight edge to guide the saw. This will help you to make straight cuts and ensure that your coffee table looks professional.
Once you have cut the wood to the right size, it’s time to sand it. Sanding is important because it helps to smooth out any rough edges and make the wood more comfortable to touch.
To sand the wood, you will need sandpaper and a sanding block. Start with a coarse grit sandpaper and work your way up to a finer grit. This will help you to achieve a smooth finish.
When sanding, make sure that you sand with the grain of the wood. This will help you to avoid creating scratches or marks on the surface of the wood.
By following these steps, you can prepare your wood for building a beautiful and functional coffee table.
Now that you have all the pieces cut, it’s time to assemble the coffee table. This section will guide you through the process of joining the pieces and securing the table top.
Start by assembling the base of the table. Attach the legs to the apron using wood glue and pocket screws. Use a clamp to hold the pieces in place while the glue dries.
Once the base is assembled, attach the tabletop supports. These will hold the tabletop in place. Use wood glue and pocket screws to attach the supports to the apron.
Now it’s time to attach the tabletop. Apply wood glue to the tabletop supports and place the tabletop on top. Use clamps to hold the tabletop in place while the glue dries.
Once the glue is dry, it’s time to secure the tabletop to the base. Flip the table over and use screws to attach the tabletop to the tabletop supports.
To hide the screws, you can add wooden plugs. Use a plug cutter to cut plugs from the same type of wood as your tabletop. Glue the plugs into the holes and sand them flush with the tabletop.
Finish the table with a coat of stain or paint to protect the wood and give it a finished look.
By following these steps, you can assemble your own wooden coffee table that is both functional and beautiful.
After constructing your wooden coffee table, it’s time to add the finishing touches. This step is crucial to protect the wood and enhance its natural beauty. In this section, we’ll cover two important sub-sections: Staining the Wood and Sealing the Wood.
Staining the wood is an optional step that can add color and depth to your coffee table. Before staining, make sure the wood is sanded smooth and free of dust. You can use a pre-stain wood conditioner to ensure an even application of the stain.
When choosing a stain, consider the wood species and the desired color. Test the stain on a scrap piece of wood or an inconspicuous area of the table to ensure you’re happy with the color. Apply the stain with a brush or cloth, following the wood grain. Wipe off any excess stain with a clean cloth and let it dry completely before moving on to the next step.
Sealing the wood is essential to protect it from moisture, scratches, and other damage. There are several options for sealing your coffee table, including polyurethane, varnish, and wax. Polyurethane is a popular choice because it’s durable and easy to apply.
Before applying the sealer, make sure the stain (if applied) is completely dry. Apply the sealer with a brush or cloth, following the wood grain. Let it dry according to the manufacturer’s instructions, then lightly sand the surface with fine-grit sandpaper. Wipe off any dust with a clean cloth and apply a second coat of sealer. Repeat this process until you achieve the desired level of protection.
In conclusion, staining and sealing your wooden coffee table will not only protect it but also enhance its natural beauty. Take your time and follow these steps carefully for a stunning finished product.

Are you struggling with a jammed wooden drawer? It can be frustrating to have a drawer that won’t open or close properly, especially if it’s a drawer you use frequently. Fortunately, there are several simple solutions you can try to get your drawer unstuck and working smoothly again.
One common cause of a jammed wooden drawer is a lack of lubrication. Over time, the wood can dry out and cause the drawer to stick. Applying a lubricant such as paraffin wax or dry spray lubricant can help loosen the drawer and make it easier to open and close. Another cause of a stuck drawer may be misaligned tracks or damaged hardware. In this case, you may need to adjust or replace the tracks or hardware to get the drawer functioning properly again.
By following a few simple steps, you can get your jammed wooden drawer back on track. In this article, we’ll explore some of the most effective methods for fixing a stuck drawer, so you can get back to using your furniture without any frustration. Whether you’re dealing with a minor issue or a more serious problem, we’ve got you covered with practical tips and tricks to help you get the job done.

When you have a jammed wooden drawer, it can be frustrating and time-consuming to try to open it. However, understanding the problem and its causes can help you fix it quickly and easily. In this section, we’ll discuss how to identify the type of jam and determine the cause of the jam.
The first step in fixing a jammed wooden drawer is to identify the type of jam. There are two main types of jams: side-to-side jams and front-to-back jams.
Side-to-side jams occur when the drawer is stuck and won’t move from side to side. This type of jam is often caused by a misaligned drawer slide or a buildup of debris on the slide.
Front-to-back jams occur when the drawer is stuck and won’t move in and out of the cabinet. This type of jam is often caused by a misaligned drawer guide or a buildup of debris on the guide.
Once you’ve identified the type of jam, the next step is to determine the cause of the jam. There are several possible causes for a jammed wooden drawer, including:
By identifying the cause of the jam, you can take the necessary steps to fix it and prevent it from happening in the future. In the next section, we’ll discuss how to fix each type of jam and its causes.
If you’re dealing with a jammed wooden drawer, don’t panic. There are a few basic techniques you can try to open it up without causing any damage. Here are three methods to try:
This is a simple, yet effective way to coax a jammed drawer open. First, try tapping the drawer on the sides with your hand to loosen it up. Then, pull the drawer out slowly and steadily. If the drawer is still stuck, try wiggling it gently from side to side as you pull.
If tapping and pulling doesn’t work, try wiggling the drawer from side to side to loosen it up. Hold onto the drawer with both hands and gently wiggle it back and forth. As you wiggle, try pulling the drawer out slowly and steadily. If the drawer still won’t budge, try pushing it back in slightly and then pulling it out again.
Another way to free up a jammed wooden drawer is to use a lubricant. Rub paraffin wax on the parts of the drawer where the wood meets. You can find paraffin wax at most hobby and craft stores, or in the canning supplies section of your local grocery store. In a pinch, you can also use candles, bar soap, or even dry spray lubricant.
If the drawer is still stuck after trying these methods, it may be time to call in a professional. Don’t force the drawer open, as this can cause damage to the wood and the tracks. With a little patience and persistence, you should be able to open up that stubborn drawer and get back to using your furniture as normal.
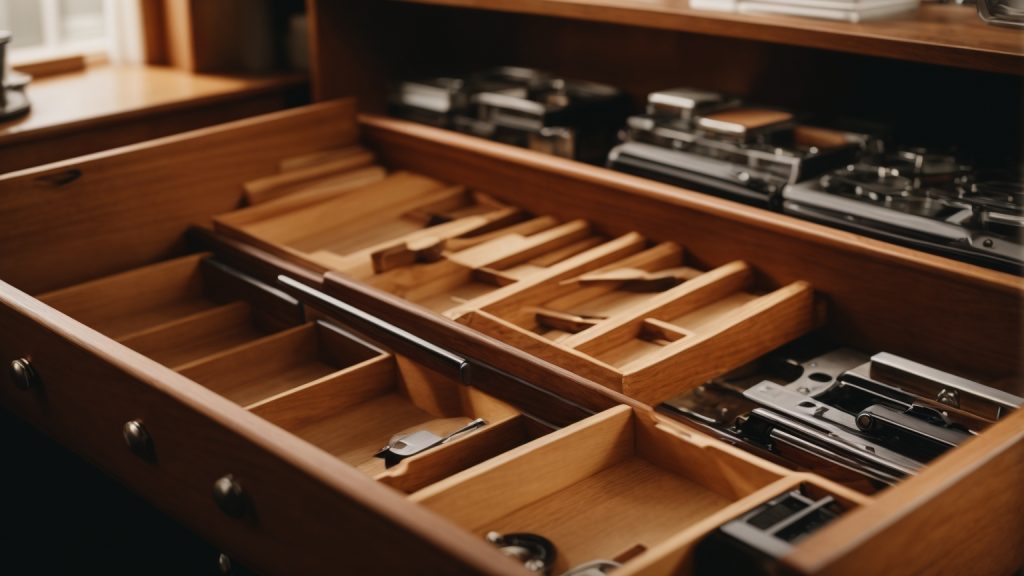
If you’ve tried the basic techniques to open a jammed wooden drawer and they didn’t work, don’t worry. There are still a few advanced techniques you can try to get that drawer open. In this section, we’ll cover two advanced techniques: using tools and dismantling the drawer.
Sometimes, all you need is a little extra force to get a stubborn drawer open. Here are some tools you can use:
When using tools, be careful not to damage the wood or the drawer slides. Use gentle force and stop if you feel resistance.
If all else fails, you may need to dismantle the drawer to get it open. Here’s how:
Remember, dismantling the drawer should be a last resort. If you’re not confident in your ability to reassemble the drawer, consider hiring a professional.
To avoid the frustration of dealing with jammed wooden drawers in the future, there are some preventive measures that you can take. Here are a few tips:
Regular maintenance is key to keeping your wooden drawers in good working condition. Here are some maintenance tasks you should perform on a regular basis:
Proper usage is also important to prevent wooden drawers from becoming jammed. Here are some tips for proper usage:
By following these preventive measures, you can keep your wooden drawers in good working condition and avoid the frustration of dealing with jammed drawers in the future.

If you’re looking to add some privacy to your yard or keep your pets safely contained, building a wooden gate frame is a great DIY project to take on. With the right tools and materials, it’s a project that can be completed in a weekend. In this article, we’ll walk you through the steps to build a sturdy and attractive wooden gate frame that will last for years to come.
First, you’ll need to gather your tools and materials. You’ll need a saw, drill, screws, wood glue, and a level, as well as the wood for your gate frame. You can choose from a variety of wood types, but cedar and redwood are popular choices for their durability and resistance to rot and insects. Once you have your tools and materials, you’re ready to get started on building your gate frame.
Building a wooden gate frame involves several steps, including measuring and cutting your wood, assembling the frame, and attaching hardware like hinges and a latch. With our step-by-step guide, you’ll be able to build a gate frame that fits your space perfectly and functions smoothly. Whether you’re a seasoned DIYer or a beginner, building a wooden gate frame is a satisfying project that will add both function and style to your outdoor space.
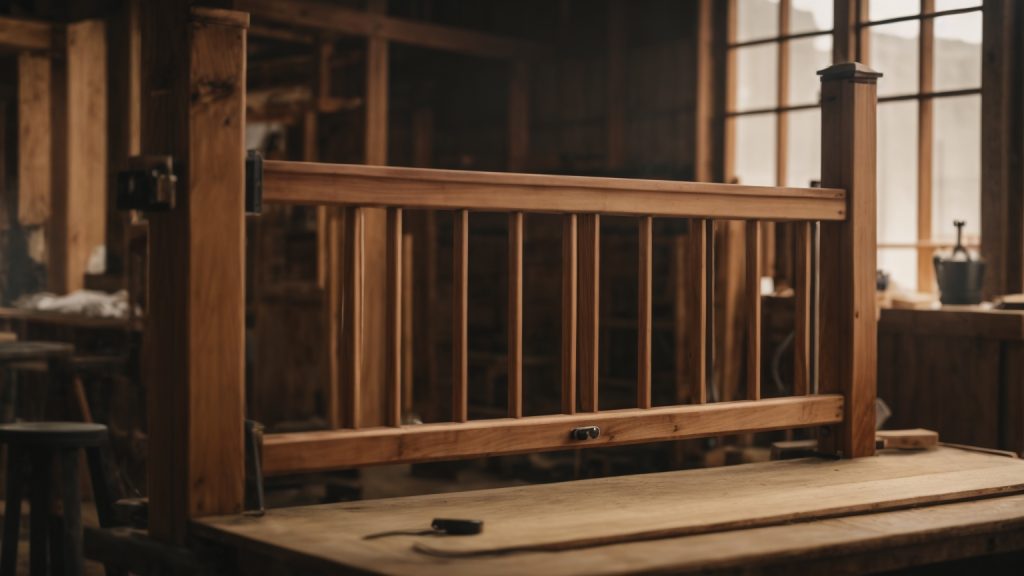
If you’re planning to build a wooden gate, then understanding the basics of a wooden gate frame is essential. A gate frame is the backbone of a gate, and it needs to be sturdy enough to support the weight of the gate and withstand the elements. Here are some important things you need to know about building a wooden gate frame.
The type of wood you choose for your gate frame will affect its strength and durability. You should choose a wood that is strong, durable, and resistant to rot and decay. Some of the best types of wood for gate frames include cedar, redwood, and pressure-treated pine. Cedar and redwood are naturally resistant to rot and decay, while pressure-treated pine has been treated with chemicals to make it resistant to rot and decay.
Before you start building your gate frame, you need to measure the opening where the gate will go. The gate frame should be slightly smaller than the opening to allow for clearance. Once you have your measurements, you can start cutting the wood. You will need to cut four pieces of wood for the frame: two vertical pieces and two horizontal pieces. The vertical pieces should be the same length as the height of the gate, while the horizontal pieces should be the same length as the width of the gate.
To join the wood, you can use a variety of methods, including screws, nails, and dowels. Screws are the best option because they provide a strong and secure connection. You should use at least two screws per joint, and you should pre-drill the holes to prevent the wood from splitting. When joining the wood, make sure that the joints are flush and square.
To add extra strength to the gate frame, you can add bracing. Bracing is a diagonal piece of wood that is attached to the gate frame. It helps to prevent the gate from sagging and adds extra support. To add bracing, measure and cut a diagonal piece of wood that runs from the top corner of the gate frame to the bottom corner. Attach the bracing to the gate frame using screws.
By understanding the basics of a wooden gate frame, you can build a gate that is strong, durable, and will last for years to come. Remember to choose the right wood, measure and cut the wood accurately, join the wood securely, and add bracing for extra strength.
When building a wooden gate frame, selecting the right materials is crucial to ensure durability and longevity. Here are some factors to consider when choosing your materials:
When selecting the wood for your gate frame, you want to choose a type that is strong and resistant to weathering. Cedar and redwood are popular choices for their natural resistance to decay and insects. However, they can be expensive. Pine and spruce are more affordable options, but they require treatment to withstand the elements.
It’s important to choose wood that is straight and free of knots, as this will ensure a sturdy gate frame. You should also consider the thickness of the wood. Thicker wood will provide more stability, but also add weight to the gate.
Choosing the right screws is just as important as selecting the wood. You want to use screws that are strong enough to hold the weight of the gate, but also resistant to rust and corrosion. Stainless steel screws are a great option for their durability and resistance to weathering.
When selecting the size of the screws, you should choose ones that are at least 1 1/2 times the thickness of the wood. For example, if you are using 2x4s for your gate frame, you should use screws that are at least 3 inches long.
By choosing the right materials for your gate frame, you can ensure that your gate will withstand the elements and last for years to come.
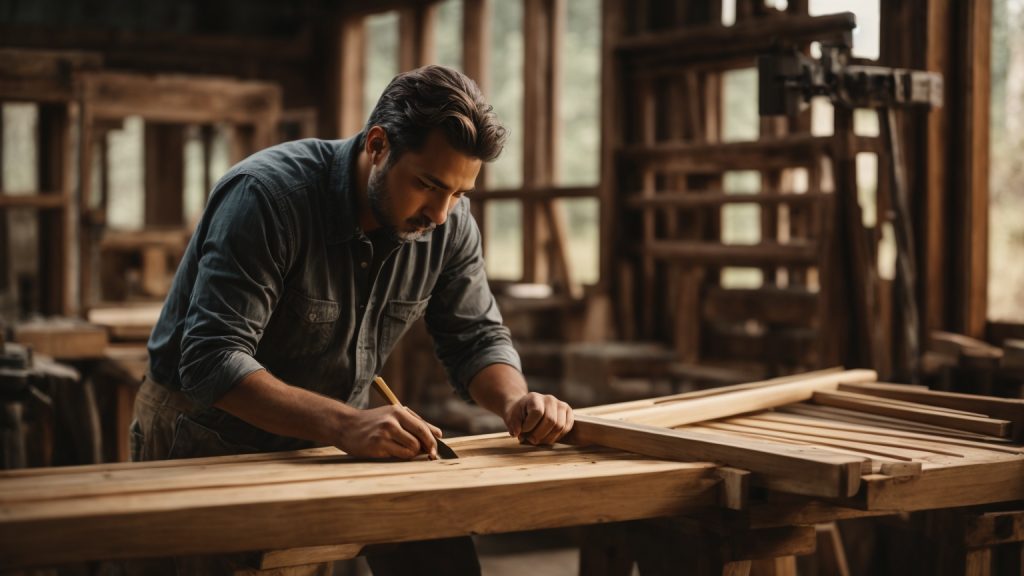
Before you start building your wooden gate frame, you need to create a design. This will help you determine the amount of materials you need and give you a clear idea of what the finished product will look like. Here are some steps to follow when creating your gate frame design:
By following these steps, you can create a design for your wooden gate frame that meets your needs and fits your style. Once you have a design, you can start gathering the materials and building your gate frame.
Before you start building your wooden gate frame, it is important to measure and mark the wood accurately. This will ensure that your gate is the correct size and that all the pieces fit together correctly.
To measure the wood, you will need a tape measure. Measure the height and width of the gate opening, and then add a few inches to each measurement to allow for the gate to swing freely. This will give you the dimensions for the gate frame.
Once you have your measurements, it’s time to mark the wood. Use a pencil to mark the measurements on the wood, making sure that the marks are clear and visible. You can use a straight edge to ensure that your marks are straight and even.
When marking the wood, it’s important to mark the top and bottom of each piece, as well as the ends. This will help you keep track of which piece is which and ensure that everything is lined up correctly.
If you’re using a compound miter saw to cut your wood, you’ll also need to mark the angle of the cuts. Use a protractor to measure the angle, and then mark it on the wood with a pencil.
Overall, measuring and marking the wood accurately is crucial to building a strong and sturdy gate frame. Take your time and double-check your measurements and marks before making any cuts.
Before you start cutting the wood for your gate frame, make sure you have all the necessary tools and materials. You’ll need a saw, measuring tape, pencil, and safety goggles. It’s also important to choose the right type of wood for your gate frame. Cedar and redwood are popular choices because they are durable and resistant to rot and insects.
Once you have your tools and materials ready, it’s time to start cutting the wood. Follow these steps:
With these steps, you should have a sturdy and well-crafted gate frame ready for the next steps in the building process.
Building a wooden gate frame is a simple process that requires some basic carpentry skills and tools. Once you have gathered all the necessary materials, it’s time to assemble the frame. In this section, we will go over the steps to assemble the frame of your wooden gate.
The first step in assembling the frame is to attach the rails to the posts. Rails are the horizontal pieces of wood that run between the posts and provide support for the gate. Here’s how to attach the rails:
Once the rails are attached, it’s time to fit the stiles. Stiles are the vertical pieces of wood that run between the rails and provide the structure for the gate. Here’s how to fit the stiles:
It’s important to make sure that the frame is square and level before proceeding to the next step. Use a carpenter’s level to check that the frame is straight and adjust as necessary.
In conclusion, assembling the frame of your wooden gate is a straightforward process that requires some basic carpentry skills and tools. By following these simple steps, you can build a sturdy and reliable gate frame that will last for years to come.
Once you have built your wooden gate frame, it’s time to add the finishing touches. This will not only improve the appearance of your gate but also protect it from the elements and extend its lifespan. Here are some steps to follow:
Before applying any finish, it’s essential to sand the gate frame. Sanding will smooth out any rough edges and ensure that the finish adheres properly. Here’s how to sand your gate frame:
Make sure to remove all dust and debris from the frame before applying the finish.
There are several options when it comes to finishing your wooden gate frame. You can use paint, stain, or a clear sealer. Here’s how to apply each of these finishes:
Paint is a popular choice for wooden gates as it provides a durable and colorful finish. Here’s how to paint your gate frame:
Stain is another option for finishing your gate frame. It provides a natural and rustic look while also protecting the wood from moisture and UV rays. Here’s how to stain your gate frame:
A clear sealer is a good choice if you want to protect your gate frame without altering its natural color. It provides a transparent and waterproof finish. Here’s how to apply a clear sealer:
By following these steps, you can add the finishing touches to your wooden gate frame and ensure that it looks great and lasts for years to come.
Now that you have built the gate frame, it’s time to install it. Follow these steps to ensure a secure and sturdy installation:
Congratulations! You have successfully installed your wooden gate frame. With proper care and maintenance, your gate will provide years of security and beauty to your property.
Once you have built your wooden gate frame, it is important to maintain it properly to ensure its longevity. Here are some tips to help you keep your wooden gate frame in good condition:
It is important to regularly clean your wooden gate frame to prevent the accumulation of dirt and debris. Use a soft-bristled brush or a cloth to remove any dirt or debris that may have accumulated on the surface. You can also use a mild detergent and water to clean the surface. After cleaning, rinse the surface thoroughly with water and allow it to dry completely.
Applying a protective coating to your wooden gate frame can help to protect it from the elements. You can use a clear wood sealer or a stain to protect the surface. Make sure to apply the coating evenly and follow the manufacturer’s instructions carefully.
Regularly check your wooden gate frame for any signs of damage. Look for cracks, splits, or warping, and address any issues as soon as possible. Small cracks or splits can be filled with wood filler, while more significant damage may require the replacement of the affected parts.
If your wooden gate frame has any moving parts, such as hinges or latches, it is important to lubricate them regularly. Use a lubricant such as WD-40 to keep the moving parts working smoothly.
Moisture can cause wooden gate frames to warp or rot over time. To protect your wooden gate frame from moisture, make sure it is installed with proper drainage and that the ground around it is sloped away from the gate. You can also use a moisture barrier such as a plastic sheet to protect the bottom of the gate from moisture.
By following these maintenance tips, you can keep your wooden gate frame in good condition for years to come.


