Rahasia Sukses Poker Online: Cara Ampuh Membaca Lawan di Fase Post-Flop
Di antara seluruh platform penyedia poker online terbaik, fase taruhan post-flop (setelah tiga kartu pertama dibuka) senantiasa diakui sebagai salah

Di antara seluruh platform penyedia poker online terbaik, fase taruhan post-flop (setelah tiga kartu pertama dibuka) senantiasa diakui sebagai salah


Artikel kali ini akan membahas tentang cara mudah bermain CEME di situs NIRWANAPOKER. Namun sebelum kita membahas cara main nya, kita juga harus tahu dulu apa sih permainan CEME itu? Kenapa harus main permainan ini di situs NIRWANAPOKER? Dan kenapa permainan CEME itu menarik banyak pencinta judi? Kita akan membahas satu per satu secara singkat dan mudah untuk anda pahami.
CEME adalah permainan yang menggunakan kartu DOMINO atau yang sering kita sebut kartu GAPLE. Permainan ini nyatanya sudah ada sejak dulu dan sangat populer. Namun dengan berkembangnya teknologi permainan CEME ini di buat dan dikemas menjadi modern maka dari itu permainan ini sangat menarik perhatian para pejudi khususnya pencinta judi online. Permainan ini dapat anda mainkan di situs NIRWANAPOKER kapan saja dan dimana saja.
NIRWANAPOKER adalah situs yang aman dan nyaman untuk digunakan bermain judi online. Situs ini juga dikenal dengan bonus dan promo nya yang menarik, rating bagus, jenis permainan yang beragam, minimal deposit sangat murah mulai dari 5.000, dan Customer Support 24 jam non stop. Maka dari itu situs poker idn ini sangat cocok digunakan untuk pemain pemula dan pemain yang sudah pro.
Setelah membahas secara singkat tentang permainan CEME dan situs NIRWANAPOKER. Selanjutnya kita akan membahas cara login dan daftar situs NIRWANAPOKER untuk mengakses permainan CEME lewat komputer.

Langkah pertama yaitu cari situs dengan cara ketik NIRWANAPOKER di google crome lalu tekan enter. Gambar diatas adalah hasil pencarian google. Jika tampilan anda mungkin sedikit berbeda dengan gambar diatas itu tidak masalah yang harus anda lakukan adalah pilih saja halaman paling atas daei hasil pencarian google.
Namun biasanya situs ini juga mempunyai beberapa link alternatif yang bisa anda gunakan untuk mengakses situs NIRWANAPOKER ini. Caranya tinggal ketik link alternatifnya di google crome lalu tekan enter. Maka anda akan dibawa ke halaman utama situs NIRWANAPOKER.

Jika anda sudah punya member situs NIRWANAPOKER anda langsung saja login dengan cara masukan usename dan password pada bagian atas sebelah kanan akan tetapi jika anda pemula cari saja menu DAFTAR dan klik menu itu. Disini juga tersedia livechat di bagian pojok kanan bawah yang berfungsi sebagai tempat untuk anda menanyakan seputar situs atau kendala.

Jika sebelumnya ada memilih menu DAFTAR maka tampilan layar anda akan sama seperti gambar diatas. Anda akan di alihkan ke menu Form Pendaftaran yang harus anda isi. Isi semua yang ada di Form Pendaftaran mulai dari USERNAME sampai memasukan kode CAPTCHA. Jika data yang anda masukan sudah benar maka akan muncul contreng berwarna hijau dan apabila data yang anda masukan itu keliru atau kurang tepat akan muncul silang berwarna merah disampingnya. Kalau dirasa sudah tepat semua langsung saja klik tombol DAFTAR dibagian paling bawah yang berwana biru.

Setelah mendaftar dan mempunyai member situs NIRWANAPOKER anda akan masuk kembali ke halaman utama tetapi ada sedikit perbedaan karena di pojok kanan atas sudah ada tampilan profil. Setelah itu anda harus melakukan DEPOSIT agar bisa memainkan permainan yang ada di situs ini. Untuk melakukan DEPOSIT anda harus cari menu deposit di halaman utama situs lalu klik pada menu tersebut agar anda di bawa ke form DEPOSIT.

Setelah masuk ke Form DEPOSIT anda harus memilih mau melakukan transaksi dengan cara yang mana. Sebagai contoh gambar di atas akan melakukan DEPOSIT dengan cara E-Wallet melalui aplikasi dana. Setelah itu memasukan jumlah Deposit yang anda mau dan isi kode validasinya. Jika sudah langsung saja klik KIRIM.
Selanjutnya, proses pengiriman DANA anda tunggu sampai pengiriman tersebut divalidasi. Setelah proses pengiriman tervalidasi kirim bukti berupa screen shot atau foto pengiriman DANA ke LIVECHAT untuk melanjutkan proses DEPOSIT.

Cara mengakses permainan CEME di situs ini adalah dengan cara masuk ke halaman utama situs NIRWANAPOKER. Lalu cari menu Poker dan klik menu tersebut. Maka tampilan layar anda akan sama seperti gambar di atas. Anda akan di bawa ke menu kumpulan permainan yang ada di situs NIRWANAPOKER. Di sini anda harus memilih permainan yang akan dimainkan. Karena kita akan memainkan permainan CEME maka klik MAIN yang ada di bawah gambar permainan CEME. Setelah itu anda akan di minta memasukan 6 DIGIT PIN untuk bisa masuk ke halaman pemilihan meja.

Sebelum bermain anda harus memilih meja terlebih dulu. Jenis pemilihan meja pada permainan ini ada beberapa diantaranya SMALLEST, SMALL, MEDIUM, LARGE hingga VIP. Anda dapat mencari meja dengan cara ketik nama meja yang anda mau di sebelah kanan yang bertulis Cari meja atau dan bisa juga dengan cara di scroll ke bawah untuk menemukan dan mempertimbangkan meja yang akan anda mainkan. Setelah anda menemukan meja yang anda inginkan klik MAIN pada pilihan meja tersebut. Setelah itu anda akan di antar menuju meja permainan CEME.

Jumlah pemain pada permainan ini adalah 2 sampai 8 orang sudah termasuk 1 pemain yang berperan menjadi Dealer. Pada awal permainan seluruh pemain akan memasang taruhan. Setelah itu masing-masing pemain dibagi 2 buah kartu DOMINO yang ditutup di atas meja.

Setelah semua pemain mendapatkan 2 kartu, Seluruh pemain di beri waktu untuk mengintip kartu tersebut. Sesudah selesai mengintip, semua pemain termasuk dealer wajib membuka dan memperlihatkan kartu di atas meja.

Babak Showdown atau sering disebut babak penentuan adalah babak terakhir dari permainan ini. Di babak ini semua pemain dan dealer sudah membuka semua kartu di atas meja. Lalu perhitungan dimulai untuk menentukan pemenang di permainan CEME ini. Pemain yang memiliki nilai paling tinggi otomatis menjadi pemenang dan mendapat kan taruhan dari pemain lain.
Cara menghitung pemenang di permainan CEME ini sangat mudah. Anda tinggal menghitung jumlah titik pada kartu yang berada di kanan dan kiri. Nilai tertinggi pada permainan ini adalah 9. jika jumlah titik kartu kanan dan kiri lebih dari 10 maka nilai yang diambil adalah digit terakhir dari jumlah kartu tersebut. Contohnya:

Ada beberapa tips yang dapat anda pertimbangkan dalam permainan ini. Diantaranya:
Kesimpulan, Situs Nirwanapoker memberikan akses mudah dan pengalaman menarik bagi para pemain. Permainan CEME online dapat dimainkan dari mana saja dan kapan saja di situs ini. Dengan berbagai fitur yang tersedia dan keamanan yang terjamin anda dapat bermain dengan tenang. Yuk tunggu apalagi gabung sekarang juga di situs NIRWANAPOKER dan dapatkan bonus menarik lainnya!

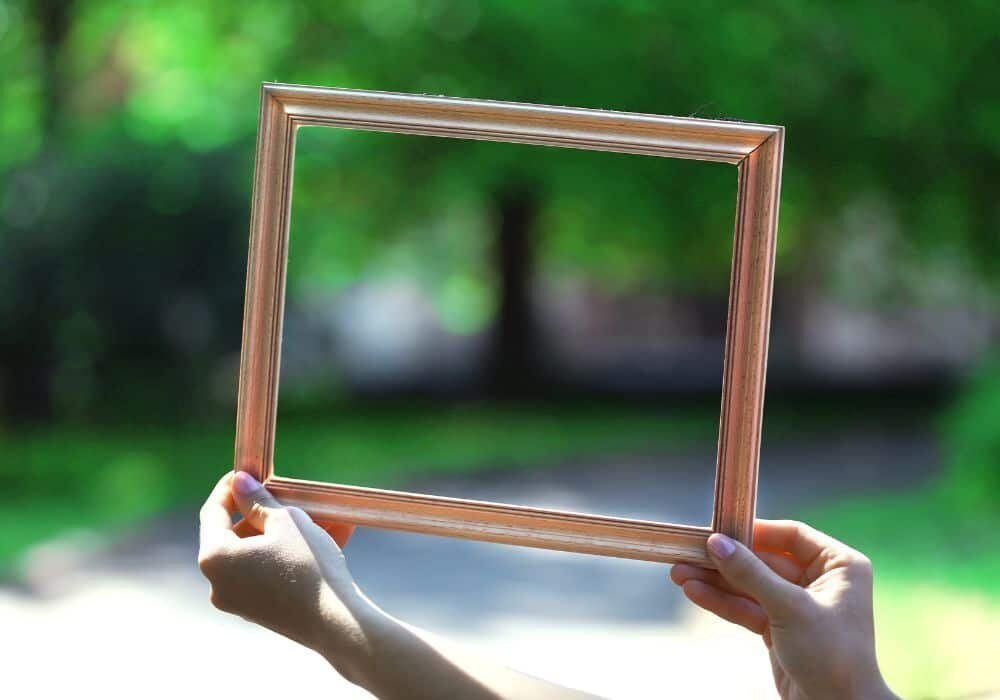
If you’re looking for a way to display your favorite photos or artwork, making a wooden frame is a simple and rewarding DIY project. With just a few basic tools and some inexpensive materials, you can create a custom frame that perfectly fits your style and decor.
To get started, you’ll need to choose the wood for your frame. Pine boards or plywood are affordable options that are easy to cut and paint, while hardwoods like oak or maple will give your frame a more polished look. Once you have your wood, you can cut it to size using a circular saw or miter saw. If you don’t have access to these tools, most home improvement stores will cut the wood for you.
Once you have your wood cut to size, it’s time to assemble the frame. There are several ways to do this, including using screws and carpenter’s glue or using a handheld router to create a groove for the glass and artwork to sit in. Whichever method you choose, be sure to measure carefully and use clamps to hold the pieces in place while the glue dries. With a little patience and some attention to detail, you’ll have a beautiful wooden frame that you can be proud to display in your home or give as a gift.
When it comes to making a wooden frame, choosing the right type of wood is crucial. Different types of wood have different properties and characteristics that affect their durability, strength, and appearance. Here are the three main types of wood you should consider:
Hardwood comes from deciduous trees, which are trees that lose their leaves in the fall. Hardwood is known for its strength and durability, making it a great choice for furniture and other high-traffic items. Some common types of hardwood include oak, maple, cherry, and walnut. Hardwood is more expensive than softwood, but it can also be more beautiful and long-lasting.
Softwood comes from coniferous trees, which are trees that have needles instead of leaves. Softwood is generally less expensive than hardwood and is often used for construction, such as framing and decking. Some common types of softwood include pine, spruce, and cedar. Softwood is less dense than hardwood, which means it is more susceptible to dents and scratches.
Engineered wood is made by bonding together layers of wood veneers or fibers with adhesives. This type of wood is often used for furniture and other decorative items because it can be made to look like hardwood at a lower cost. Some common types of engineered wood include plywood, particleboard, and MDF (medium-density fiberboard). Engineered wood is often more stable and consistent than natural wood, which means it is less likely to warp or shrink.
When choosing the type of wood for your frame, consider the look you want to achieve, the durability you need, and your budget. Remember that different types of wood have different strengths and weaknesses, so choose wisely.
When it comes to making a wooden frame, choosing the right wood is crucial. The type of wood you choose will affect the overall look and durability of your frame. Here are some factors to consider when selecting the right wood for your frame:
Different types of wood have different characteristics that can affect the look and feel of your frame. Some common woods used for frames include:
The thickness of the wood you choose will affect the overall weight and sturdiness of your frame. Thicker wood will be heavier and more durable, while thinner wood will be lighter and easier to work with.
The grain pattern of the wood can also affect the look of your frame. Some woods, like oak, have a distinctive grain pattern that can add character to your frame. Other woods, like maple, have a more subtle grain pattern that can provide a smoother, more uniform look.
The finish you choose for your frame can also affect the look and durability of your frame. Some common finishes include:
Overall, choosing the right wood for your frame will depend on your personal preferences and the look you are trying to achieve. Consider the characteristics of different woods and finishes to find the perfect fit for your project.

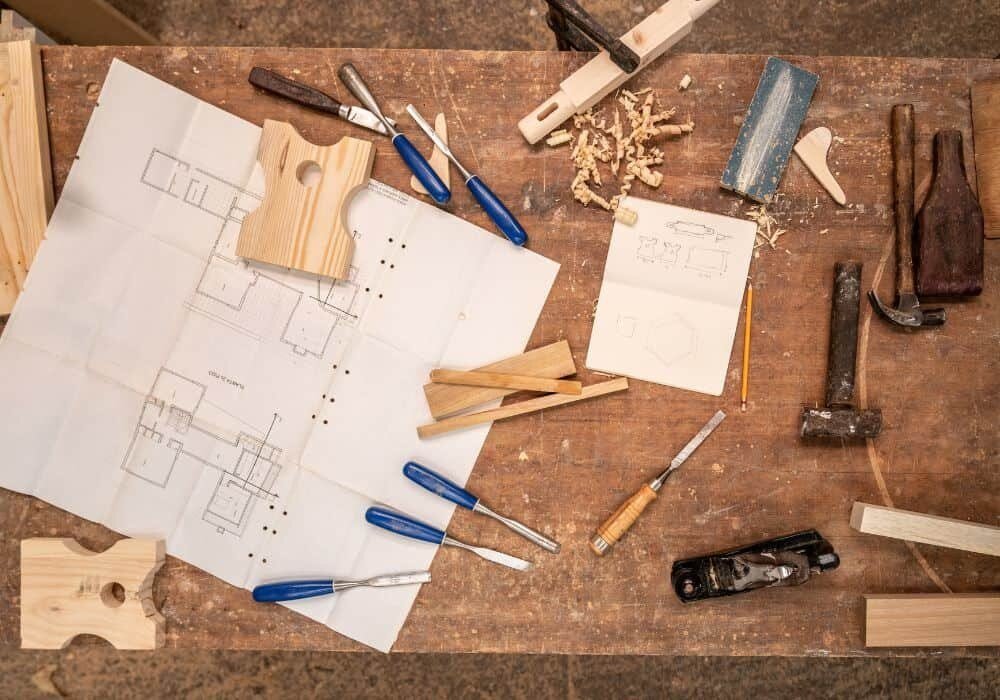
To make a wooden frame, you will need a few tools to help you along the way. Here are the essential tools you will need to make a wooden frame:
A saw is one of the most important tools you’ll need when making a wooden frame. A circular or miter saw is recommended to cut the wood according to the cut list. You can obtain cheap scrap wood, pine boards, or plywood at many home improvement or hardware stores.
A hammer is a necessary tool for driving in nails to hold the frame together. A claw hammer is the most common type of hammer, and it has a claw on the back for removing nails.
Nails are needed to hold the frame together. The size of the nails will depend on the thickness of the wood you are using. It is recommended to use finishing nails for a more professional look.
Remember to always wear protective gear, such as safety goggles and gloves, when using power tools or handling sharp objects. With these essential tools, you will be well on your way to creating a beautiful wooden picture frame.
Before you start cutting the wood, make sure you have all the necessary tools and materials. You will need a saw, measuring tape, pencil, and the wood you will be using to make your frame.
The first step is to measure and mark the wood to the desired length. Use the measuring tape to measure the length you need and then mark it with a pencil. Make sure the marks are straight and even, so your cuts will be accurate.
Once you have marked the wood, it’s time to start cutting. Use a saw to cut the wood to the desired length. If you are using a circular saw, make sure the blade is set to the correct depth and angle before you start cutting. If you are using a hand saw, make sure you have a firm grip on the saw and use long, even strokes to make your cuts.
When cutting the wood, be sure to follow all safety precautions. Wear safety glasses and keep your fingers away from the blade. If you are using a power saw, make sure the blade is sharp and the saw is properly maintained.
After you have cut the wood to the desired length, you may need to make additional cuts to create the desired shape for your frame. Use the same techniques as before to make these cuts, and be sure to measure and mark the wood accurately before you start cutting.
Overall, cutting the wood is an important step in making a wooden frame. Take your time and be careful to ensure your cuts are accurate and safe.

Now that you have all the necessary materials and have cut your wood to the appropriate lengths, it’s time to assemble your wooden frame.
Congratulations! You have now successfully assembled your own wooden frame.
Once you have joined the wooden pieces of your frame together, it’s time to sand it down. Sanding is a crucial step in creating a custom frame that looks professional and polished. However, it’s also where a frame can easily be ruined, so it’s important to take your time and be careful.
The first thing to keep in mind is that over-sanding is a common mistake that novice sanders make. If you sand too much, you can end up with a frame that is uneven or has rough spots. So, start with a coarse grit sandpaper and work your way up to a finer grit as you go. This will help you avoid removing too much material at once.
When sanding your frame, you should also pay attention to the direction of the grain. Sanding with the grain will help you achieve a smoother finish and prevent the wood from splintering or tearing. You can use a sanding block or a power sander to make the process easier, but be careful not to apply too much pressure or you could damage the wood.
Another thing to consider is the type of wood you are sanding. Some woods, like oak or maple, are harder and more difficult to sand than others. If you’re working with a harder wood, you may need to use a finer grit sandpaper or spend more time sanding to get the desired finish.
Finally, it’s important to clean your frame thoroughly after sanding. Use a tack cloth or a soft brush to remove any dust or debris, and make sure the surface is completely smooth before moving on to the next step. With these tips in mind, you should be able to sand your wooden frame like a pro!
When it comes to creating a wooden frame, the finishing touches are what can really make it stand out. Here are some tips to help you add those final touches to your wooden frame.
Staining your wooden frame can help bring out the natural beauty of the wood and give it a more polished look. Here are some steps to follow when staining your wooden frame:
Polishing your wooden frame can give it a smooth, shiny finish and make it look more professional. Here are some steps to follow when polishing your wooden frame:
Remember to always work in a well-ventilated area and wear protective gear such as gloves and a mask when working with stains and polishes. With these tips, you can add the perfect finishing touches to your wooden frame and make it look like a professional piece of art.
When working with wood, it is important to take safety precautions to prevent accidents and injuries. In this section, we will cover two important safety precautions: protective gear and safe handling.
Wearing the right protective gear can help prevent injuries. Here are some items you should consider wearing when working with wood:
Make sure your protective gear fits properly and is in good condition. Replace any damaged or worn-out gear.
In addition to wearing protective gear, it is important to handle wood safely. Here are some tips:
By following these safety precautions, you can help prevent accidents and injuries when making wooden frames.

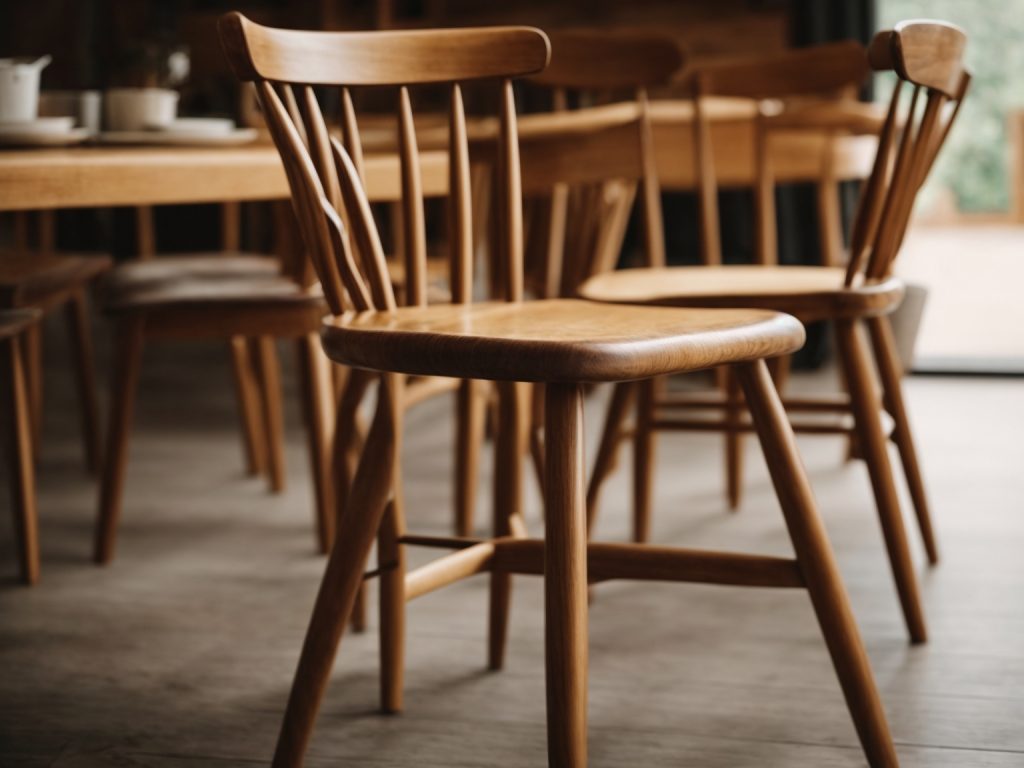
If you have wooden chairs in your home, you know that they can accumulate dirt, dust, and grime over time. Cleaning them may seem like a daunting task, but with the right tools and techniques, it can be a breeze. In this article, we will provide you with tips and tricks on how to clean your wooden chairs effectively and efficiently.
One of the most important things to keep in mind when cleaning wooden chairs is to avoid using harsh chemicals that can damage the wood. Instead, opt for gentle cleaners that are specifically designed for wood. You can use an oil-based cleaner or a mixture of dish soap and water to remove dirt and grime from the surface of the wood. It is also important to avoid using too much water, as this can cause the wood to warp or become discolored.
Another important aspect of cleaning wooden chairs is to pay attention to the details. Make sure to clean not only the surface of the wood but also the crevices and corners where dirt can accumulate. Use a soft-bristled brush or a toothbrush to get into hard-to-reach areas. By following these tips, you can keep your wooden chairs looking clean and beautiful for years to come.
When it comes to cleaning wooden chairs, it is essential to understand the type of wood and finish you are dealing with. Different types of wood and finishes require different cleaning methods to avoid damaging the wood. In this section, we will discuss how to identify your wood and determine the finish.
The first step in cleaning your wooden chair is to identify the type of wood it is made of. Different types of wood have different characteristics, and some are more delicate than others. Here are some common types of wood used in furniture:
To identify your wood, you can look for clues such as the color, grain pattern, and texture. You can also consult a furniture expert or use a wood identification guide.
Once you have identified your wood, the next step is to determine the finish. The finish is the protective layer applied to the wood to enhance its appearance and protect it from damage. Here are some common types of finishes:
To determine the finish, you can look for clues such as the color, texture, and sheen. You can also consult a furniture expert or use a finish identification guide.
In conclusion, understanding the type of wood and finish is crucial in cleaning wooden chairs. By identifying your wood and determining the finish, you can choose the appropriate cleaning method and avoid damaging the wood.
Before you start cleaning your wooden chairs, it’s important to gather all the necessary cleaning supplies. Here are some things you’ll need:
When it comes to cleaning wooden chairs, you want to make sure you’re using the right cleaner. Here are a few options:
In addition to choosing the right cleaner, you’ll also need the right tools to clean your wooden chairs. Here are a few options:
By gathering the right cleaning supplies and tools, you’ll be well on your way to cleaning your wooden chairs like a pro.
Before diving in and cleaning your wooden chairs, there are a few pre-cleaning steps you should take to ensure that the process goes smoothly. These steps include removing dust and checking for scratches.
The first step in cleaning your wooden chairs is to remove any dust that may have accumulated on them. Dust can scratch the surface of the wood, so it’s important to remove it before you start cleaning. Here are a few methods you can use to remove dust from your wooden chairs:
Before you start cleaning your wooden chairs, it’s important to check for any scratches or other damage to the surface. Scratches can be caused by everyday wear and tear, pets, or furniture moving. Here’s how to check for scratches:
By taking these pre-cleaning steps, you’ll ensure that your wooden chairs are ready for a deep clean. Removing dust and checking for scratches will help you avoid causing further damage to the surface of the wood.
When your wooden chair needs a thorough cleaning, follow these steps to get it looking like new again.
By following these steps, you can deep clean your wooden chair and restore its natural beauty. Remember to always test any new cleaner on a small, inconspicuous area of the chair before using it on the entire surface.
After cleaning your wooden chair, it is important to dry it properly to prevent any water damage and to give it a shiny finish. Here are some tips on how to properly dry and polish your wooden chair.
To dry your wooden chair, use a clean and dry cloth to wipe off any excess water. Make sure to dry all the nooks and crannies of the chair, including the corners and edges. If there are any hard-to-reach areas, use a soft-bristled brush to gently remove any remaining water.
After drying, leave the chair in a well-ventilated area to air dry completely. Avoid exposing the chair to direct sunlight or heat as this can cause the wood to warp or crack.
To give your wooden chair a shiny finish, you can use a polish or wax. Apply a small amount of polish or wax onto a clean and dry cloth and rub it onto the chair in a circular motion. Make sure to cover all areas of the chair, including the legs and backrest.
Once you have applied the polish or wax, use a clean cloth to buff the chair in a circular motion. This will help to remove any excess polish or wax and give the chair a shiny finish.
Remember to always read the instructions on the polish or wax before using it on your wooden chair. Some polishes or waxes may not be suitable for certain types of wood or finishes.
By following these proper drying techniques and polishing tips, you can keep your wooden chair looking clean and shiny for years to come.
Wooden chairs are an elegant addition to any home. However, they require maintenance to keep them looking their best. Here are some tips on how to maintain your wooden chairs.
Routine cleaning is essential to maintain the beauty and longevity of your wooden chairs. Dust and dirt can accumulate on the surface of the chairs, which can lead to scratches and damage. Follow these steps to clean your wooden chairs:
Preventing damage is key to maintaining the beauty and longevity of your wooden chairs. Here are some tips on how to prevent damage to your wooden chairs:
By following these tips, you can maintain the beauty and longevity of your wooden chairs for years to come.

Are you interested in making your own wooden rings on a lathe? With the right tools and techniques, you can create beautiful and unique rings that are perfect for gifts or personal use. In this article, we will guide you through the process of making wooden rings on a lathe, including the materials you need, the steps involved, and some tips for getting the best results.
Before you get started, it’s important to choose the right type of wood for your rings. Hardwoods like maple, oak, and walnut are good choices because they are durable and have a fine grain that looks great when polished. You will also need a lathe, which is a machine that rotates the wood while you shape it with cutting tools. Other tools you may need include a drill press, sandpaper, and finish such as wax or oil.
Once you have your materials and tools ready, you can start making your wooden rings. The process involves cutting the wood to the right size, drilling a hole in the center, and shaping it on the lathe. With some practice and patience, you can create rings that are truly one-of-a-kind. So let’s get started and learn how to make wooden rings on a lathe!

If you’re new to woodworking, using a lathe can seem intimidating at first. However, with a little bit of practice, you’ll soon be able to create beautiful wooden rings that will impress your friends and family. Here are some basic concepts you need to understand before you begin:
The lathe is made up of several components, including the headstock, tailstock, tool rest, and bed. The headstock holds the spindle, which rotates the wood. The tailstock supports the other end of the wood and can be moved along the bed to accommodate different lengths of wood. The tool rest is used to hold the cutting tool in place, and the bed provides a stable platform for the lathe.
Before you begin using the lathe, it’s important to take some safety precautions. Make sure you wear eye protection, as wood chips and dust can fly off the lathe and into your eyes. You should also avoid wearing loose clothing or jewelry that could get caught in the lathe. Finally, make sure the lathe is properly secured to a sturdy workbench or stand to prevent it from moving while you’re working.
There are several types of cutting tools you can use to create wooden rings, including gouges, scrapers, and parting tools. Gouges are used for roughing out the shape of the ring, while scrapers are used for smoothing and refining the shape. Parting tools are used to cut the ring off the wood once it’s complete.
When selecting wood for your ring, it’s important to choose a species that is hard enough to withstand wear and tear. Some good options include maple, cherry, and walnut. You should also choose a piece of wood that is straight and free of knots or defects.
By understanding the basic components of a lathe, taking proper safety precautions, selecting the right cutting tools, and choosing the right wood, you’ll be well on your way to creating beautiful wooden rings that you can be proud of. With practice and patience, you’ll soon be able to create rings that are as unique as they are beautiful.
When making wooden rings on a lathe, it is essential to choose the right wood for your project. Here are some factors to consider when selecting the wood for your ring:
Choose a type of wood that is hard enough to withstand everyday wear and tear. Softer woods, such as pine or cedar, may be easier to work with, but they are not durable enough for a ring that will be worn regularly. Hardwoods like oak, cherry, or walnut are better choices for making wooden rings.
The grain pattern of the wood can add character and uniqueness to your ring. Some woods, such as burl or spalted wood, have distinctive patterns that can make your ring stand out. However, keep in mind that highly figured woods can be more difficult to work with and may require more sanding and finishing.
The color of the wood can also play a role in the final appearance of your ring. Choose a wood that complements your skin tone and personal style. Woods like ebony or rosewood can add a touch of elegance to your ring, while lighter woods like maple or birch can give it a more natural look.
Consider using sustainably sourced wood for your ring. Some types of wood, such as ebony or rosewood, may be endangered or illegally harvested. Look for wood that has been certified by organizations like the Forest Stewardship Council (FSC) or the Sustainable Forestry Initiative (SFI).
By considering these factors, you can choose the right wood for your wooden ring project. Remember to take your time and select a wood that fits your style and needs.
Before you start turning your wooden ring on a lathe, you need to prepare the wood. Here are some steps to follow:
The first step in preparing the wood is to choose the right type of wood. You can use any type of wood, but some are better than others. Hardwoods like walnut, cherry, and maple are popular choices because they are durable and have a beautiful grain pattern.
Once you have chosen the wood, the next step is to cut it into the right size and shape. You can use a saw or a knife to cut the wood into a block that is slightly larger than the finished ring size. Make sure that the wood is cut straight and even.
After cutting the wood, you need to drill a hole in the center of the block. The hole should be slightly larger than the size of the mandrel you will be using on the lathe. This will allow you to mount the wood securely on the lathe.
Once you have drilled the hole, you can mount the wood on the lathe using a mandrel. Make sure that the wood is mounted securely and that the mandrel is centered in the hole.
Now that the wood is mounted on the lathe, you can start turning it into a ring. Use a roughing gouge to shape the wood into a cylinder and then use a skew chisel to create the desired shape. Be sure to work slowly and carefully to avoid damaging the wood or injuring yourself.
By following these steps, you can prepare the wood for turning a beautiful wooden ring on a lathe.
Once you have the wood mounted on the lathe, it’s time to start shaping the ring. This process involves two main steps: Mounting the Wood and Carving the Ring.
To mount the wood on the lathe, you will need to use a chuck or a faceplate. A chuck is a device that holds the wood securely in place while it spins on the lathe. A faceplate is a flat metal plate that is screwed onto the end of the wood. This allows you to mount the wood on the lathe and shape it with a variety of tools.
Once you have the wood mounted on the lathe, you can start shaping the ring. Start by using a roughing gouge to remove any excess wood and create a cylinder shape. Be sure to take your time and work slowly so that you don’t accidentally remove too much wood.
Once you have a cylinder shape, you can start carving the ring. Use a parting tool to create a groove where you want the ring to be. This will help guide your cuts and ensure that you create a uniform ring.
Next, use a spindle gouge to shape the ring. Start at the top of the ring and work your way down to the bottom. Be sure to keep the tool at a consistent angle and work slowly to create a smooth surface.
As you work, you can use a caliper to measure the diameter of the ring and ensure that it is the correct size. You can also use sandpaper to smooth out any rough spots or imperfections.
Overall, shaping a wooden ring on a lathe can be a fun and rewarding process. With a little practice and patience, you can create beautiful and unique rings that are sure to impress.
Once you have turned your wooden ring on the lathe, sanding is the next crucial step in the process. Sanding the ring will help to smooth out any rough spots, remove any tool marks, and bring out the natural beauty of the wood grain. Here are some tips to help you sand your wooden ring to perfection.
Choosing the right sandpaper is important when sanding your wooden ring. You will want to start with a coarse grit sandpaper, such as 120-grit, and work your way up to a finer grit, such as 320-grit or higher. Here is a table to help you choose the right sandpaper for your wooden ring:
| Grit | Use |
|---|---|
| 120-150 | Coarse sanding, removing tool marks, shaping |
| 180-220 | Medium sanding, smoothing out rough spots |
| 320-400 | Fine sanding, getting a smooth finish |
When sanding your wooden ring, it is important to use the right technique. Here are some tips to help you get the best results:
By following these tips, you can sand your wooden ring to a smooth, beautiful finish.

When it comes to finishing your wooden ring, there are a few things to keep in mind. First, you want to choose a finish that will protect the wood from moisture and wear, while also enhancing its natural beauty. Second, you want to apply the finish carefully and evenly, to avoid any drips or bubbles that could ruin the final product.
There are many different finishes you can use for your wooden ring, but some are better suited than others. Here are a few options to consider:
Once you have chosen your finish, it’s time to apply it to your wooden ring. Here are some tips to help you get the best results:
With these tips in mind, you should be able to finish your wooden ring with a beautiful, durable coating that will protect it for years to come.
When working with a lathe, it is important to prioritize safety measures to avoid any accidents or injuries. In this section, we will discuss the personal protective equipment and lathe safety practices that you should follow when making wooden rings on a lathe.
Wearing the right personal protective equipment (PPE) is crucial when working with a lathe. Here are some essential PPEs that you should wear:
Apart from wearing PPE, there are several safety practices that you should follow when working with a lathe. Here are some of the most important ones:
By following these safety measures, you can ensure a safe and enjoyable experience when making wooden rings on a lathe.

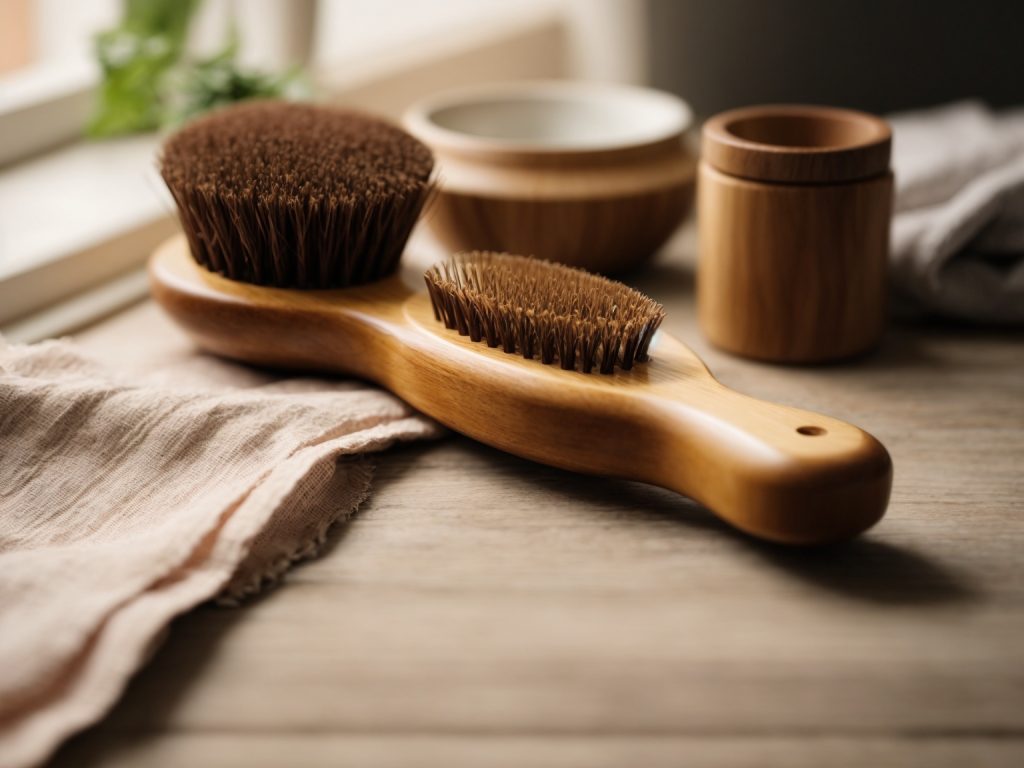
Cleaning a wooden hairbrush may seem like a daunting task, but it’s actually quite simple once you know what to do. Wooden hairbrushes are great for distributing natural oils throughout your hair, but they can also collect dirt, oil, and hair over time. To keep your wooden hairbrush clean and functioning properly, it’s important to clean it regularly.
To begin cleaning your wooden hairbrush, start by removing any hair tangled around the bristles. This can be done using a comb or your fingers. Once the hair has been removed, you can begin cleaning the brush itself. One effective method is to mix water and tea tree oil and use a cloth to wipe down the brush. This will help remove any built-up dirt and oil. Another option is to use a gentle shampoo and warm water to clean the brush. Just be sure to rinse thoroughly and allow the brush to dry completely before using it again.
If you own a wooden hairbrush, it’s important to understand how to properly care for it. Wooden hairbrushes are known for their durability and natural bristles, which make them a popular choice among those who want to maintain healthy hair. Here are a few things you should know about your wooden hairbrush:
Wooden hairbrushes are made from a variety of woods such as bamboo, beech, and olive. These woods are known for their durability and ability to withstand wear and tear. The bristles of a wooden hairbrush can be made from natural materials such as boar hair, or synthetic materials such as nylon.
Using a wooden hairbrush has several benefits for your hair. The natural bristles help to distribute the natural oils from your scalp throughout your hair, which can help to prevent breakage and split ends. Wooden hairbrushes are also gentle on the scalp, which can help to reduce irritation and dandruff.
Cleaning your wooden hairbrush is important to maintain its effectiveness and longevity. To clean your brush, start by removing any loose hair and debris with a comb. Then, fill a sink or bowl with warm water and a few drops of shampoo. Soak the brush for a few minutes, then use a toothbrush to gently scrub the bristles. Rinse the brush thoroughly and allow it to air dry.
By understanding the material, benefits, and cleaning process of your wooden hairbrush, you can keep it in great condition and enjoy its benefits for years to come.
Keeping your hairbrush clean is crucial for maintaining healthy hair and scalp. Here are a few reasons why cleaning your hairbrush should be a regular part of your hair care routine:
Hair products like hairspray, gel, and mousse can leave residue on your hairbrush, which can build up over time. This buildup can make your hair look dull and lifeless, and can even cause your hair to become greasy and oily. By cleaning your hairbrush regularly, you can prevent product buildup and keep your hair looking healthy and shiny.
Your hairbrush can also collect dirt, oil, and dead skin cells from your scalp. If left untreated, these can contribute to dandruff and other scalp issues. Cleaning your hairbrush removes these impurities, helping to keep your scalp healthy and free from irritation.
Cleaning your hairbrush regularly can help to extend its lifespan. Over time, dirt and product buildup can cause the bristles to become clogged, making it less effective at detangling and smoothing your hair. By cleaning your hairbrush, you can keep the bristles clean and free from debris, ensuring that it works as well as it did when you first bought it.
By taking the time to clean your hairbrush regularly, you can keep your hair looking and feeling its best. So, make it a part of your hair care routine today!
Cleaning your wooden hairbrush is an essential task to keep your brush in good condition and prevent any damage to your hair. To get started, you will need to gather the necessary cleaning materials. Here are some tips on how to choose the right cleaning solution and select the right tools for cleaning your wooden hairbrush.
When it comes to cleaning your wooden hairbrush, you need to choose a cleaning solution that is gentle and effective. Here are some options to consider:
In addition to a cleaning solution, you will also need some tools to help you clean your wooden hairbrush. Here are some options to consider:
By using the right cleaning solution and tools, you can keep your wooden hairbrush clean and in good condition. Make sure to clean your brush regularly to prevent any damage to your hair and keep it looking its best.
Cleaning a wooden hairbrush is an important part of maintaining its longevity and functionality. Here is a simple step-by-step guide to help you clean your wooden hairbrush effectively:
The first step in cleaning your wooden hairbrush is to remove any hair that is stuck in the bristles. You can use a comb or your fingers to do this. Simply run the comb or your fingers through the bristles to remove any hair.
After removing the hair, you can apply a cleaning solution to the brush. You can use a mixture of warm water and mild shampoo or a solution of baking soda and water. Apply the cleaning solution to the bristles of the brush and use a toothbrush to scrub the bristles gently.
After scrubbing the bristles, rinse the brush thoroughly with warm water. Make sure to remove all the cleaning solution from the bristles. Then, use a clean towel to dry the brush. You can also leave the brush to air dry for a few hours before using it again.
Cleaning your wooden hairbrush regularly will help to keep it clean and free from bacteria, dirt, and oils. By following these simple steps, you can keep your wooden hairbrush in good condition for many years to come.
Taking care of your wooden hairbrush is essential to keep it in good condition and prolong its lifespan. Here are some tips on how to maintain your wooden hairbrush:
Cleaning your wooden hairbrush regularly will help remove any buildup of dirt, oil, and hair products. Here are the steps to follow:
Proper storage of your wooden hairbrush is also important to keep it in good condition. Here are some tips on how to store your wooden hairbrush:
By following these simple tips, you can keep your wooden hairbrush clean and in good condition for years to come.
Cleaning a wooden hairbrush may seem like a straightforward task, but there are some common mistakes that you should avoid to ensure that you do not damage the brush or compromise its quality. Here are some of the mistakes that you should avoid when cleaning your wooden hairbrush:
One of the biggest mistakes that people make when cleaning their wooden hairbrush is using harsh chemicals. These chemicals can damage the brush and cause it to lose its natural oils, which can lead to cracking and splitting. Instead of using harsh chemicals, use a mild soap or shampoo to clean your brush. You can also use a mixture of water and vinegar to remove any buildup or residue on the brush.
Another mistake that people make when cleaning their wooden hairbrush is soaking it in water. Wooden brushes are not designed to be soaked in water, as this can cause the wood to swell and crack. Instead of soaking your brush, use a damp cloth or toothbrush to clean the bristles and remove any buildup or residue.
Using excessive force when cleaning your wooden hairbrush can also damage the brush and cause it to lose its natural oils. Instead of scrubbing the brush vigorously, use gentle strokes to clean the bristles and remove any buildup or residue. You can also use a toothbrush to gently clean the bristles.
After cleaning your wooden hairbrush, it is important to allow it to dry completely before using it again. If you do not allow the brush to dry completely, it can become moldy or develop a musty smell. To dry your brush, place it in a well-ventilated area and allow it to air dry completely.
By avoiding these common mistakes, you can ensure that your wooden hairbrush remains in good condition and continues to provide you with the benefits of natural bristles.

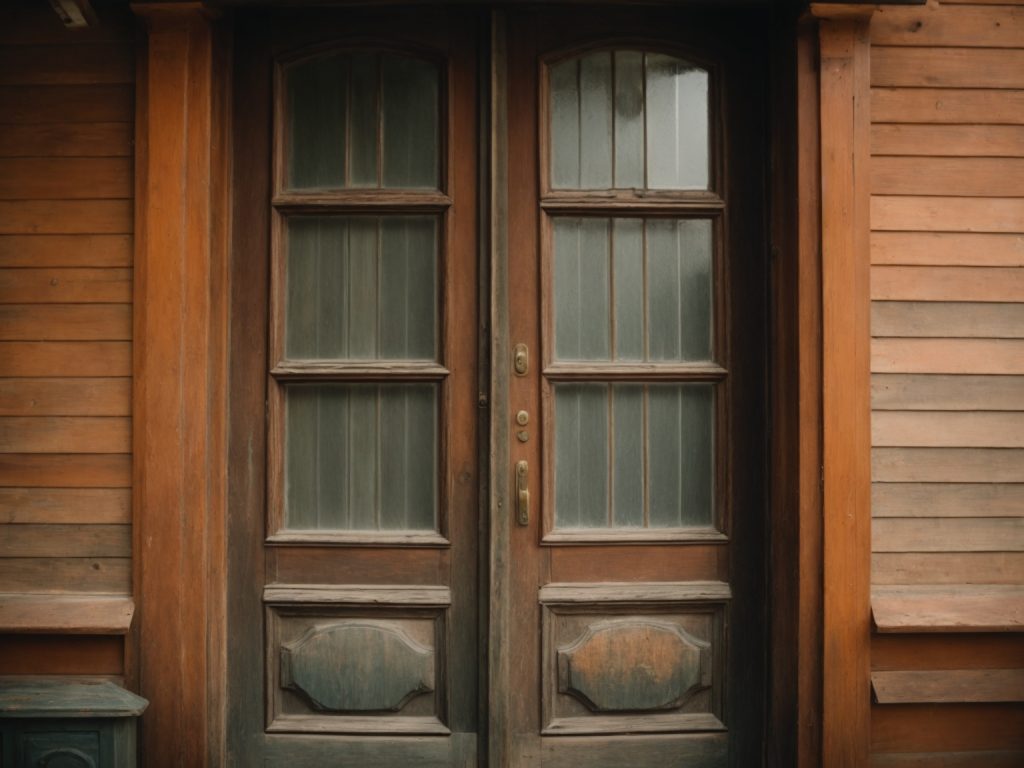
Is your wooden front door looking weathered and worn? If so, you’re not alone. Over time, exposure to the elements can cause wood doors to fade, crack, and peel. However, there’s good news! Restoring a weathered wooden front door is a simple and affordable process that can breathe new life into your entryway.
One easy step to restore your weathered wood door is to use a product called Sun Shield. This product can help to restore the finish of your door, making it look like new again. Additionally, you can refinish your door by sanding it down with a random-orbit sander and applying a fresh coat of varnish. By following these simple steps, you can restore your weathered wooden front door and make a great first impression on your guests.
If your wooden front door is looking weathered and worn, it’s important to understand the type of damage it has sustained before attempting to restore it. Here are some common types of damage that can occur:
The sun’s UV rays can cause wood to dry out, fade, and crack over time. If your front door is exposed to direct sunlight for long periods of time, it’s likely that it has sustained sun damage.
Rain, snow, and other types of weather can also take a toll on your front door. Moisture can cause wood to swell, warp, and rot, which can lead to structural damage over time.
Daily use can cause your front door to become scratched, dented, or chipped. This type of damage is usually cosmetic, but it can still detract from the overall appearance of your door.
Termites and other wood-boring insects can cause serious damage to your front door over time. If you notice small holes or sawdust around your door, it’s possible that insects are present.
By understanding the type of damage your front door has sustained, you can choose the right restoration method and materials to bring it back to life.
Restoring a weathered wooden front door is a simple DIY task that can be accomplished with a few basic tools and materials. Here’s what you’ll need:
Before you begin, make sure you have all the necessary materials and tools. You may already have some of them on hand, but if not, they can be easily found at your local hardware or home improvement store.
When choosing your materials, consider the type of wood your door is made of and the look you want to achieve. If you prefer a natural wood look, choose a stain that complements the wood’s natural color. If you prefer a painted finish, choose a high-quality paint that is designed for exterior use.
Using a clear coat or sealant will help protect your door from future weather damage and ensure that your hard work lasts for years to come.
Before you start restoring your weathered wooden front door, you need to prepare it properly. Here are the steps you should follow:
By following these steps, you can prepare your weathered wooden front door for restoration.
If your wooden front door is covered in old paint, it’s important to strip it off before refinishing the wood. Here are the steps you need to follow to strip the old paint off your front door.
Before you start stripping the paint off your front door, it’s important to take some safety measures to protect yourself from the chemicals involved in the process. Here are some things you should do:
Here’s how to strip the old paint off your front door:
Remember to dispose of the paint stripper and any paint chips in accordance with your local regulations. With the old paint stripped off, your front door is now ready for refinishing.
When restoring a weathered wooden front door, sanding is a crucial step to prepare the surface for refinishing. Here are some tips to help you sand your door effectively and efficiently.
Before starting, it’s important to choose the right sandpaper grit for your door. A lower grit sandpaper, such as 60 or 80, is best for removing old paint or finish. Once the old finish is removed, switch to a higher grit sandpaper, such as 120 or 150, to smooth out the surface and prepare it for refinishing.
When sanding your door, it’s important to use a consistent and even pressure. Sand with the grain of the wood to avoid creating scratches or marks on the surface. Use a sanding block or tool to ensure an even finish. Be sure to sand all areas of the door, including the edges and corners.
After sanding, use a tack cloth or a damp cloth to remove any dust or debris from the surface. This will ensure a smooth and even finish when refinishing your door.
Remember, sanding is a crucial step in restoring a weathered wooden front door. With the right sandpaper and technique, you can achieve a beautiful and long-lasting finish.
If your wooden front door has been exposed to the elements for a long time, it can develop cracks, splits, and rot. These issues can make your door look unsightly and can even compromise its structural integrity. Fortunately, there are steps you can take to address these problems and restore your door to its former glory.
If your door has developed cracks or splits, you can fix them using wood filler. Here’s how:
If your door has developed rot, you will need to remove the affected wood and replace it with new wood. Here’s how:
By following these steps, you can address weather damage to your wooden front door and restore its appearance and function.
Now that you have cleaned and sanded your weathered wooden front door, it’s time to prime it. Priming the door is an essential step that will help the new paint or stain adhere better and last longer. Here are a few steps to follow when priming your door:
By following these steps, you can ensure that your weathered wooden front door is properly primed and ready for the final coat of paint or stain.
If you want to restore your weathered wooden front door, painting it is a great option. Here are some tips to help you get started.
When choosing a paint for your front door, it’s important to select an exterior-grade paint that can withstand the elements. Look for a paint that is specifically designed for use on wood and offers UV protection to prevent fading from the sun.
Consider the color of your door and the style of your home when selecting a paint color. A bright color can add a pop of personality to your home, while a more neutral color can create a classic look.
Before you start painting, make sure your door is clean and dry. Sand any rough spots or peeling paint to create a smooth surface.
Apply a primer to the door to help the paint adhere and create a more even finish. Once the primer is dry, apply the paint in thin, even coats. It’s better to apply multiple thin coats than one thick coat, which can lead to drips and an uneven finish.
Use a high-quality brush or roller to apply the paint, and work in the direction of the wood grain. Be sure to paint the edges of the door as well.
Allow each coat of paint to dry completely before applying the next coat. Once you’re happy with the coverage, allow the final coat to dry for at least 24 hours before reattaching any hardware or closing the door.
By following these tips, you can restore your weathered wooden front door with a fresh coat of paint.
Once you’ve restored your weathered wooden front door, it’s important to maintain it properly to keep it looking beautiful and protect it from the elements. Here are some tips for maintaining your restored door:
Regular cleaning is essential to keep your door looking great. Here’s what you need to do:
It’s a good idea to give your door an annual check-up to make sure it’s still in good condition. Here’s what you need to do:
By following these simple maintenance tips, you can keep your restored wooden front door looking beautiful for years to come.

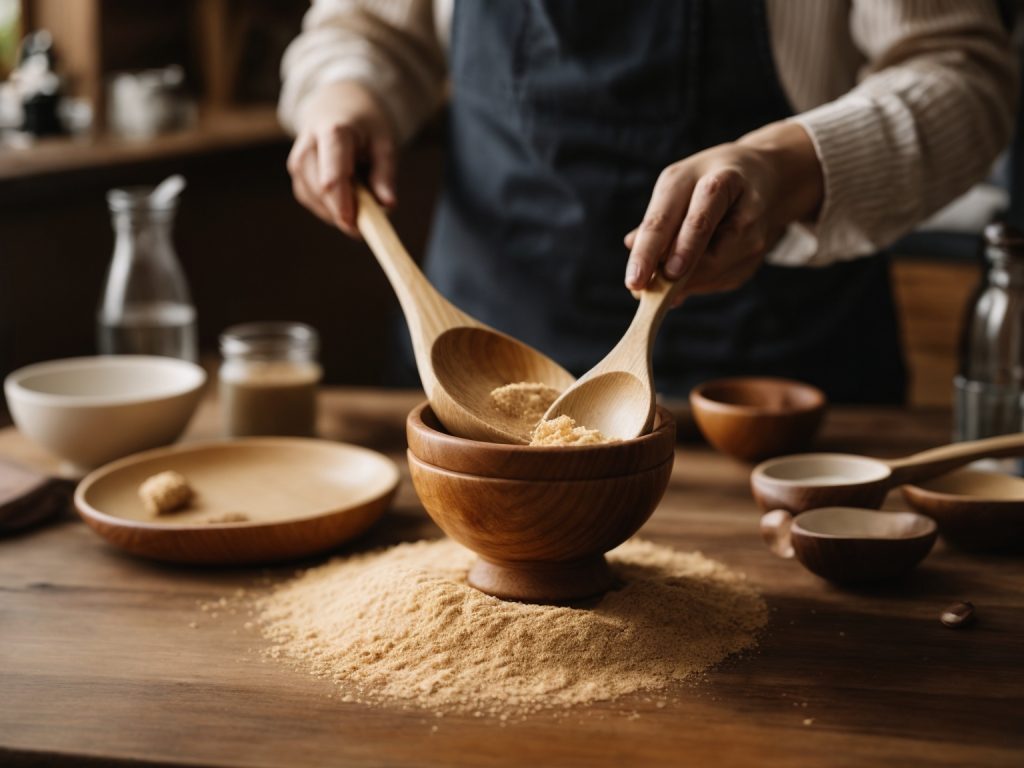
If you’re an avid cook, you know how important it is to have clean and well-maintained kitchen utensils. Wooden spoons are a staple in any kitchen, but they can be tricky to clean. Not only can they absorb flavors and odors, but they can also harbor bacteria if not cleaned properly. In this article, we’ll walk you through some simple steps to keep your wooden spoons clean and in good condition.
First and foremost, it’s important to wash your wooden spoons after each use. Use warm water and soap to remove any food residue, and then rinse thoroughly. Never put your wooden spoons in the dishwasher, as the high heat can cause them to warp or crack. Instead, wash them by hand and let them air dry.
If your wooden spoons are looking a bit worse for wear, don’t worry! There are a few simple steps you can take to restore them to their former glory. Some methods include soaking your spoons in a mixture of water and vinegar or hydrogen peroxide, while others suggest using a paste made of baking soda and lemon juice. We’ll go over these methods in more detail later in the article. By following these tips, you can keep your wooden spoons clean and in great condition for years to come.
Wooden spoons are a staple in most kitchens, and for good reason. They are versatile, durable, and gentle on your cookware. However, they require proper care and maintenance to ensure their longevity. One of the most important aspects of caring for wooden spoons is cleaning them regularly.
When you use wooden spoons to cook, they come into contact with various types of food, including acidic and oily substances. Over time, these substances can build up on the surface of the spoon, leading to discoloration, odors, and even mold growth. If left uncleaned, these spoons can become a breeding ground for harmful bacteria that can cause foodborne illnesses.
Regular cleaning of wooden spoons is essential to remove any build-up of food, oils, and bacteria. By cleaning your wooden spoons after each use, you will prevent any harmful substances from accumulating on the surface of the spoon. This will not only keep your spoons looking clean and new but also ensure that they are safe to use.
When cleaning wooden spoons, it is important to avoid using harsh chemicals or abrasive sponges, as these can damage the surface of the spoon. Instead, use mild soap and warm water to gently clean the spoon. You can also soak the spoon in a 50/50 mix of water and hydrogen peroxide or distilled white vinegar for a deep clean.
In conclusion, cleaning your wooden spoons regularly is crucial to maintaining their longevity and ensuring that they are safe to use. By taking the time to clean your spoons properly, you will not only keep them looking new but also protect your health and the health of those who use your kitchen.
Cleaning your wooden spoons is a simple process that only requires a few materials. Here are the things you’ll need:
Dish soap is an essential ingredient for cleaning your wooden spoons. It helps to remove dirt, grime, and bacteria from the surface of the spoon.
You’ll also need water to rinse off the soap and any debris from the spoon. Make sure to use warm water, as hot water can damage the wood.
A non-abrasive sponge is perfect for cleaning wooden spoons. It’s gentle enough to avoid scratching the wood, but tough enough to remove any tough stains.
For a deep clean, you can use hydrogen peroxide or distilled white vinegar. These products have antibacterial properties that help to kill germs and bacteria on the surface of the spoon.
To keep your wooden spoons in good condition, you’ll need to oil them periodically. Mineral, walnut, tung, or linseed oil are all excellent options for this. They help to keep the wood moisturized and prevent it from drying out and cracking.
After cleaning and oiling your wooden spoons, you’ll need a clean cloth to wipe off any excess oil and make sure the spoon is dry before using it again.
By having these materials on hand, you’ll be able to keep your wooden spoons clean and in good condition for years to come.
Before you start cleaning your wooden spoons, there are a few pre-cleaning steps you should take to ensure that the spoons are properly cleaned and maintained.
The first step is to rinse the spoons under running water to remove any food particles or debris that may be stuck on them. You can use a non-abrasive sponge to gently scrub the surface of the spoons to remove any stubborn residue. Avoid using harsh detergents or abrasive cleaners as they can damage the wood and cause it to crack or split.
After rinsing the spoons, inspect them for any signs of damage. Check for cracks, splits, or splinters in the wood. If you find any damage, it’s best to discard the spoon as it can be a breeding ground for bacteria.
If the spoons are in good condition, you can proceed to the next step of cleaning them. Remember, it’s important to take care of your wooden spoons to extend their lifespan and ensure that they remain safe to use in your kitchen.
When it comes to deep cleaning your wooden spoons, there are a few things to keep in mind. Here are two effective methods for deep cleaning your wooden spoons:
To deep clean your wooden spoons with mild soap, follow these steps:
Another effective method for deep cleaning your wooden spoons is by using vinegar. Here’s how to do it:
Remember, it’s important to avoid soaking your wooden spoons in water, as this can cause them to warp and crack. By following these deep cleaning methods, you can help extend the lifespan of your wooden spoons and keep them looking like new.
After washing your wooden spoons, it is important to dry them properly to prevent warping, cracking, or mold growth. Here are some tips for drying your wooden spoons:
By following these simple tips, you can ensure that your wooden spoons stay in good condition and last for years to come.
To keep your wooden spoons in good condition, it is essential to clean them regularly. Hand wash your wooden spoons with warm water and soap after each use. Avoid using harsh detergents or abrasive sponges that can damage the wood’s surface. Rinse the spoons thoroughly and dry them with a clean towel or air dry them.
If you notice any stubborn stains or food residue on the spoons, soak them in a mixture of warm water and vinegar for about 15 minutes before washing them. You can also use a non-abrasive sponge or a soft-bristled brush to scrub off any remaining stains. Make sure to rinse the spoons thoroughly and dry them completely before storing them.
Wooden spoons can dry out over time, which can cause them to split or crack. To prevent this from happening, it is essential to treat your wooden spoons with oil periodically. Mineral, walnut, tung, or linseed oil are all good options for treating wooden spoons.
To oil your wooden spoons, apply a small amount of oil to a clean cloth and rub it into the spoon’s surface. Make sure to coat the entire spoon, including the handle and any crevices or joints. Let the oil soak in for a few minutes, then wipe off any excess oil with a clean cloth. Repeat this process once a month or as needed to keep your wooden spoons in good condition.
By following these maintenance tips, you can extend the lifespan of your wooden spoons and keep them looking and functioning like new for years to come.
When it comes to cleaning wooden spoons, there are a few common mistakes that people often make. Avoiding these mistakes will help ensure that your wooden spoons remain in good condition for years to come.
One of the biggest mistakes people make when cleaning wooden spoons is using harsh cleaners. Harsh cleaners can damage the wood and cause it to dry out, crack, or split. Instead, use mild dish soap and warm water to clean your wooden spoons.
Another mistake people often make is soaking wooden spoons in water for extended periods. This can cause the wood to absorb too much moisture, which can lead to warping or cracking. Instead, wash your wooden spoons by hand and dry them immediately afterward.
Putting wooden spoons in the dishwasher is a big no-no. The high heat and harsh detergents can damage the wood and cause it to split or crack. Instead, wash your wooden spoons by hand and dry them immediately afterward.
When drying your wooden spoons, avoid using high heat sources like ovens or microwaves. High heat can cause the wood to dry out too quickly, which can lead to cracking or splitting. Instead, air dry your wooden spoons or use a soft towel to dry them by hand.
By avoiding these common mistakes, you can help ensure that your wooden spoons remain in good condition for years to come.
Cleaning wooden spoons is an essential part of maintaining their longevity and hygiene. Here are some frequently asked questions about how to clean wooden spoons.
You should clean your wooden spoons after each use to prevent the buildup of bacteria and food residue. It’s best to wash them by hand with warm, soapy water and let them air dry completely before storing them.
No, you should never put wooden spoons in the dishwasher. The high heat and harsh detergents can damage the wood and cause it to warp or crack. Hand washing is the best way to clean wooden spoons.
To remove stains from wooden spoons, mix equal parts baking soda and water to form a paste. Apply the paste to the stained area and let it sit for a few minutes before rinsing it off with warm water. For tougher stains, you can also try rubbing the area with a slice of lemon or a few drops of vinegar.
To prevent wooden spoons from drying out and cracking, it’s important to oil them regularly. Use a food-safe oil like mineral oil, walnut oil, or linseed oil. Apply a small amount of oil to a clean cloth and rub it into the wood, making sure to cover the entire surface. Let the oil soak in for a few hours before wiping off any excess with a clean cloth.
No, you should never use bleach to clean wooden spoons. Bleach is too harsh and can damage the wood, causing it to become brittle and crack. Stick to gentle, natural cleaning methods like soap and water or vinegar and baking soda.

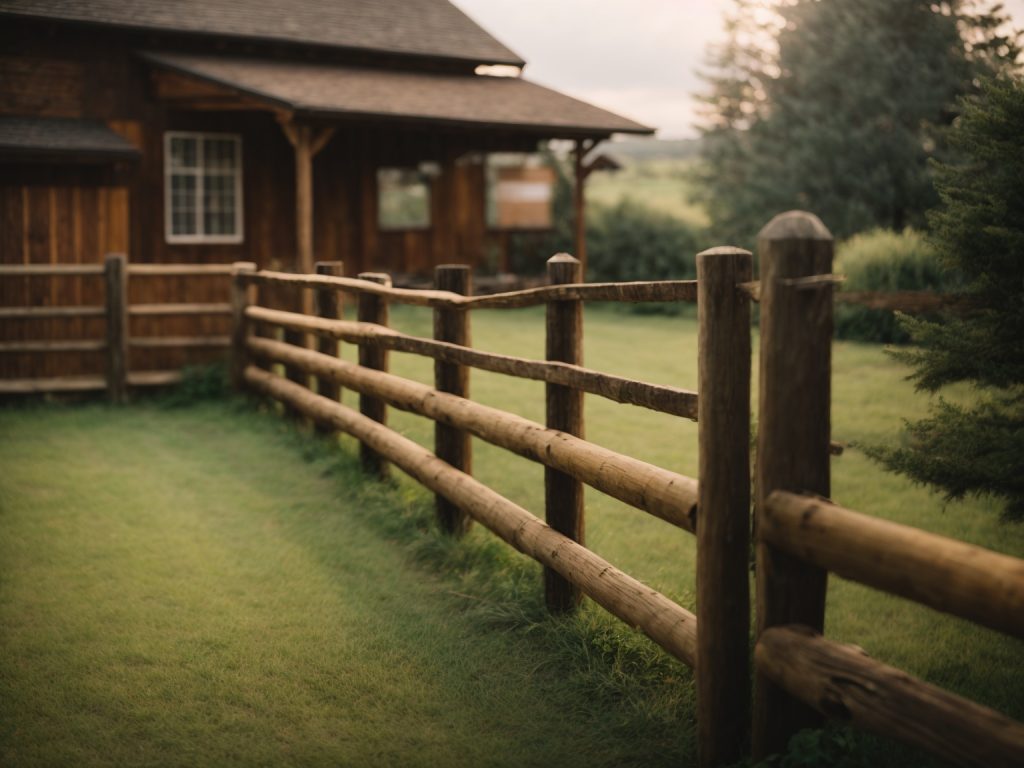
If you’re looking to add some privacy to your yard or simply want to create a boundary around your property, building a wooden fence might be just what you need. A wooden fence is not only functional, but it can also add aesthetic appeal to your home. However, building a fence can be a daunting task, especially if you’ve never done it before. In this article, we’ll provide you with a step-by-step guide on how to build a wooden fence.
Before you start building your fence, it’s important to do some preparation work. This includes checking with your local authorities to ensure that you’re allowed to build a fence on your property and that you’re following any regulations or guidelines. You’ll also need to determine the location and dimensions of your fence, as well as the type of wood you want to use. Once you have all of this information, you can start gathering your materials and tools.
Building a wooden fence can be a fun and rewarding DIY project, but it does require some time and effort. In the following sections, we’ll take you through the steps of building a wooden fence, from setting the posts to attaching the pickets. By the end of this article, you’ll have the knowledge and skills you need to build a beautiful and functional wooden fence for your home.
If you’re looking to build a wooden fence, it’s important to understand the basics before you get started. In this section, we’ll cover the types of wood commonly used for fencing and the benefits of choosing a wooden fence.
When it comes to choosing the right wood for your fence, there are a few options to consider. Some of the most popular types of wood for fencing include:
There are several benefits to choosing a wooden fence for your property. Some of the most notable include:
Overall, building a wooden fence can be a great way to improve the look and function of your property. By choosing the right wood and understanding the benefits of a wooden fence, you can create a beautiful and functional fence that will last for years to come.
Before you start building your wooden fence, you need to plan it out carefully. This will help you avoid mistakes and ensure that your fence is sturdy and meets local regulations. Here are some important things to consider when planning your fence:
The first step in planning your fence is to determine its layout. You need to decide where you want to place your fence and how long it should be. This will help you calculate the amount of materials you need to buy.
To determine the layout, you can use stakes and string to mark the boundaries of your fence. You can also use a measuring tape to measure the length of each side. Make sure to keep the corners at a 90-degree angle to ensure that your fence is square.
Before you start building your fence, you need to check local regulations to make sure that your fence meets the requirements. This includes checking for any height restrictions, setback requirements, and other regulations that may apply in your area.
You can check with your local zoning department or homeowners’ association to find out what regulations apply in your area. Make sure to obtain any necessary permits before you start building your fence.
When building your fence, it’s important to have the right tools. This includes a post hole digger, a level, a saw, and a drill. Make sure to choose high-quality tools that are suitable for the job.
You may also need to rent a power auger if you have a large fence to build. This will help you dig the post holes more quickly and efficiently.
By carefully planning your fence, checking local regulations, and choosing the right tools, you can ensure that your wooden fence is built to last.
When building a wooden fence, purchasing quality materials is essential to ensure that your fence lasts for many years to come. Here are some tips to help you select the right materials for your project.
Choosing the right type of wood is crucial to the longevity and appearance of your fence. Some popular options include cedar, redwood, and pressure-treated pine. Cedar and redwood are naturally resistant to decay and insect damage, while pressure-treated pine has been treated with chemicals to resist rot and decay.
When selecting your wood, look for boards that are straight, free of knots, and have minimal warping or twisting. You may also want to consider the grade of the wood, which can affect its appearance and durability. Higher grades of wood will have fewer knots and defects, but may also be more expensive.
In addition to your wood, you will also need to purchase hardware to assemble your fence. This includes posts, rails, pickets, and fasteners such as nails or screws. When selecting your hardware, make sure that it is compatible with the type of wood you have chosen.
You will also need to consider the size and spacing of your hardware. For example, if you are building a fence with 6-foot pickets, you will need to purchase rails that are long enough to accommodate the pickets. You may also want to consider using metal brackets or connectors to reinforce your fence and ensure that it stays sturdy over time.
Overall, taking the time to carefully select your materials and hardware will help ensure that your wooden fence is both beautiful and durable.
Before you start building your wooden fence, it’s important to prepare the ground. This will help ensure that your fence is stable, level, and long-lasting. In this section, we will cover two important sub-sections: “Clearing the Area” and “Measuring and Marking”.
The first step in preparing the ground is to clear the area where you will be building your fence. This means removing any plants, rocks, or other debris that may be in the way. You’ll want to clear a path that is at least 3 feet wide so that you have enough space to work.
If there are any large rocks or tree stumps in the way, you may need to remove them using a shovel, pickaxe, or other digging tool. Make sure to wear gloves and eye protection when doing this, as it can be dangerous work.
Once you’ve cleared the area, you’ll want to make sure that the ground is level. Use a level to check for any high or low spots, and use a shovel to fill in any holes or low spots. This will help ensure that your fence is straight and level.
The next step is to measure and mark the area where you will be building your fence. Use a measuring tape to measure the length of your fence line, and mark the corners and end points with stakes or flags.
Next, use a string line to mark the exact location of your fence line. Tie one end of the string to a stake or flag at one corner of your fence line, and stretch the string to the opposite corner. Make sure the string is level and straight, and tie it off at the other end.
Use a tape measure to measure the distance between the string and the ground at each stake or flag. This will help you determine how deep to dig your fence post holes.
By following these steps to prepare the ground, you’ll be well on your way to building a sturdy and long-lasting wooden fence.
Building a wooden fence can be a challenging task, but with the right tools and a little bit of patience, you can create a beautiful fence that will last for years to come. In this section, we will cover the three main steps to building a wooden fence: setting the posts, attaching the rails, and installing the pickets.
The first step in building a wooden fence is to set the posts. This is a critical step because it will determine the stability and durability of your fence. Here are the steps to set the posts:
Once the posts are set, you can attach the rails. The rails are the horizontal pieces of wood that connect the posts and provide support for the pickets. Here are the steps to attach the rails:
The final step in building a wooden fence is to install the pickets. The pickets are the vertical pieces of wood that are attached to the rails and provide privacy and security. Here are the steps to install the pickets:
By following these steps, you can build a beautiful and sturdy wooden fence that will enhance the look of your property and provide privacy and security for years to come.
To ensure that your wooden fence lasts as long as possible, you will need to take proper care of it. This includes regular cleaning, applying protective sealant, and repairing any damage that may occur.
Cleaning your wooden fence regularly is important to prevent the buildup of dirt, grime, and other debris that can cause damage over time. Here are some tips for cleaning your fence:
Applying a protective sealant to your wooden fence can help to prevent damage from the sun, moisture, and other elements. Here are some tips for applying sealant:
Even with proper care, your wooden fence may become damaged over time. Here are some tips for repairing damage:
By following these tips for maintaining your wooden fence, you can help to ensure that it lasts for many years to come.

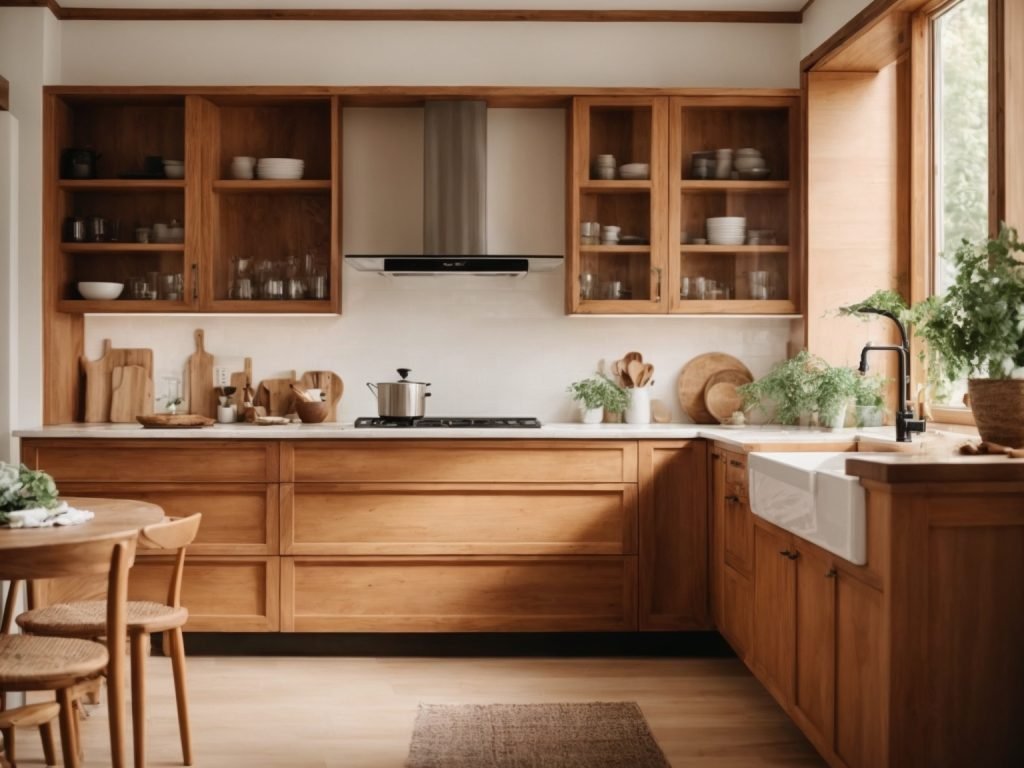
Cleaning wooden cabinets can be a daunting task, but it’s an essential part of maintaining the look and quality of your kitchen. Over time, cabinets can accumulate dirt, grease, and grime, making them look dull and worn out. Fortunately, with the right tools and techniques, you can easily clean your wooden cabinets and restore their natural shine.
To start, it’s important to gather the necessary cleaning supplies. You’ll need a soft cloth or sponge, a mild soap or cleaning solution, and warm water. Avoid using harsh chemicals or abrasive materials that can damage the wood surface. Before you begin, remove any items from your cabinets and clear the surrounding area to prevent any spills or accidents.
Next, wipe down the cabinets with a damp cloth or sponge to remove any loose dirt or debris. Then, apply the cleaning solution to the cloth or sponge and gently scrub the cabinet surfaces, working in small sections. Be sure to rinse the cloth or sponge frequently and change the water as needed to avoid spreading dirt or grime. By following these simple steps, you can keep your wooden cabinets looking clean and polished for years to come.
If you have wooden cabinets in your kitchen, it’s important to understand how to properly clean and maintain them. Wooden cabinets can add warmth and beauty to your kitchen, but they also require special care to keep them looking their best. In this section, we’ll cover the basics of wooden cabinets, including the types of wood commonly used and the cleaning challenges you may encounter.
Wooden cabinets can be made from a variety of different woods, each with its own unique properties and characteristics. Some of the most common types of wood used for cabinets include:
When it comes to cleaning wooden cabinets, the type of wood you have will determine the best cleaning methods to use. Some woods are more sensitive to moisture than others, so it’s important to use the right cleaning products and techniques to avoid damaging your cabinets.
Wooden cabinets can be challenging to clean because they’re prone to collecting dust, grease, and grime. Here are some common cleaning challenges you may encounter when cleaning your wooden cabinets:
To keep your wooden cabinets looking their best, it’s important to clean them regularly and take steps to prevent damage. By using the right cleaning products and techniques, you can help ensure that your cabinets stay beautiful and functional for years to come.
When it comes to cleaning your wooden cabinets, having the right supplies on hand can make all the difference. Here are some essential cleaning supplies you will need:
Having these essential cleaning supplies on hand will make it easier for you to keep your wooden cabinets looking clean and shiny. Remember to always follow the manufacturer’s instructions when using commercial cleaning products.
Cleaning your wooden cabinets can be a daunting task, but with the right tools and techniques, you can have them looking brand new in no time. Follow these simple steps to clean your wooden cabinets effectively.
Before you start cleaning your cabinets, it is essential to remove any dust or debris. Dusting your cabinets will prevent any damage to the wood and ensure that your cleaning solution works effectively. Use a soft cloth or a microfiber duster to remove any dust or debris from your cabinets. Be sure to get into all the nooks and crannies, including the corners and edges.
Once you have dusted your cabinets, it’s time to apply the cleaning solution. You can use a mixture of warm water and mild dish soap or a wood cleaner diluted in warm water. Apply the solution to a soft cloth or a sponge, and gently rub it onto the surface of the cabinets. Be sure to cover all areas of the cabinets, including the doors, drawers, and shelves.
After applying the cleaning solution, it’s time to wipe and dry your cabinets. Use a clean, dry cloth to wipe away any excess cleaning solution. Be sure to dry the cabinets thoroughly to prevent any water damage. You can also use a furniture polish or wax to give your cabinets a shine and protect the wood.
In conclusion, cleaning your wooden cabinets is a simple process that can be done with the right tools and techniques. By following these simple steps, you can have your cabinets looking brand new in no time.
Taking preventive measures and performing regular maintenance can help keep your wooden cabinets looking beautiful for years to come. Here are some tips to help you keep your cabinets in top shape.
Dust and dirt can accumulate on your cabinets over time, causing them to look dull and dirty. To prevent this, it’s important to dust your cabinets regularly. You can use a soft, dry cloth or a feather duster to remove dust and dirt from your cabinets. Be sure to dust the entire surface of the cabinet, including the corners and crevices.
Spills can happen at any time, and if they’re not cleaned up immediately, they can cause damage to your wooden cabinets. To prevent this, it’s important to clean up spills as soon as they happen. Use a soft, damp cloth to wipe up spills, and be sure to dry the area thoroughly to prevent water damage.
Polishing and conditioning your wooden cabinets can help keep them looking their best. There are a variety of products on the market that can help you do this, including furniture polish and conditioning oils. Be sure to choose a product that is safe for use on wooden surfaces, and follow the manufacturer’s instructions carefully.
By following these simple tips, you can help keep your wooden cabinets looking beautiful and in top condition for years to come. Regular maintenance and preventive measures are key to ensuring that your cabinets stay looking their best.
Wooden cabinets are a beautiful addition to any kitchen, but they can be difficult to clean, especially when it comes to tough stains. Here are some tips on how to deal with different types of tough stains.
Grease stains are one of the most common types of stains on kitchen cabinets. To remove them, you will need a degreaser. Here’s how to do it:
If the stain is particularly stubborn, you can try using baking soda. Mix baking soda with water to form a paste, apply it to the stain, and let it sit for a few minutes before wiping it away.
Water stains are another common problem when it comes to wooden cabinets. Here’s how to remove them:
If the stain is particularly stubborn, you can try using toothpaste. Apply a small amount of toothpaste to the stain and rub it in with a soft cloth. Wipe the area clean with a damp cloth and dry with a clean, dry cloth.
Ink stains can be difficult to remove from wooden cabinets. Here’s how to do it:
If the stain is particularly stubborn, you can try using a mixture of baking soda and water to form a paste. Apply the paste to the stain and let it sit for a few minutes before wiping it away with a damp cloth.

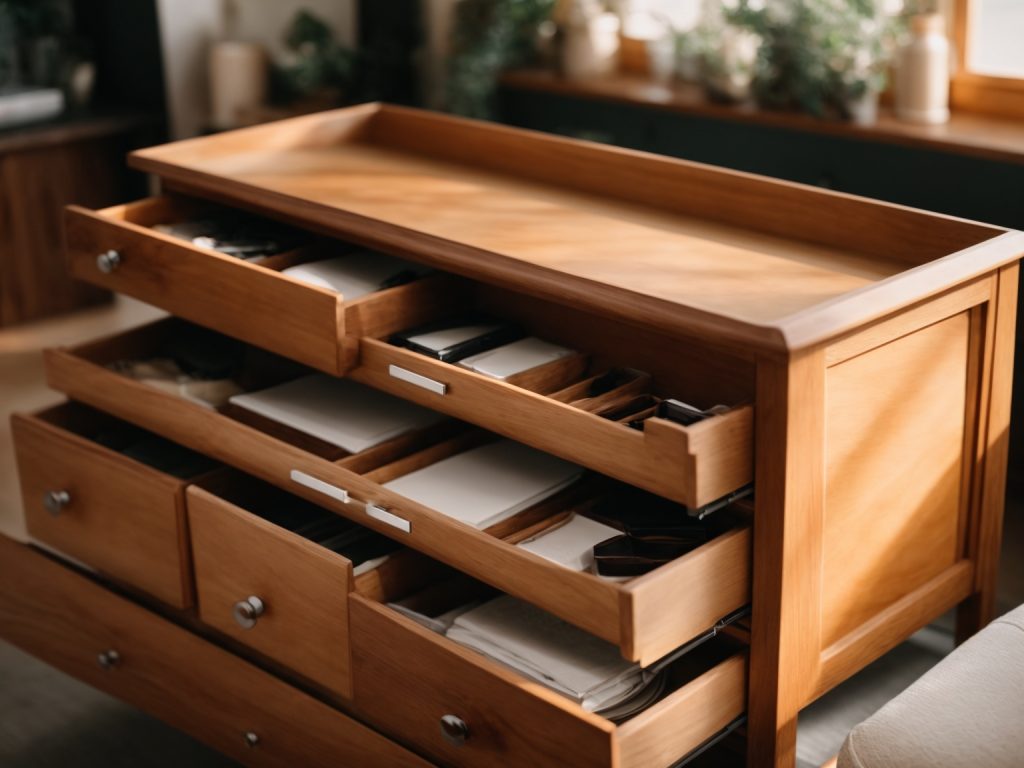
Are you tired of struggling to open and close your wooden drawers? Sticky drawers can be frustrating and time-consuming, especially when you use them regularly. Fortunately, there are simple and affordable ways to make your wooden drawers slide more easily.
One common cause of sticky drawers is debris or material that has jammed the drawer and prevents it from sliding properly. Before attempting any fixes, check the guides for any paper or other material that may be causing the issue. If you find any debris, remove it carefully to avoid damaging the drawer or the guides.

When your wooden drawers start to stick, it can be frustrating and time-consuming to open and close them. Fortunately, there are several ways to make wooden drawers slide more easily. Before you can fix the problem, it’s important to understand what’s causing it. Here are some things to consider:
The first step in fixing sticking drawers is to identify where the problem is occurring. Is the drawer sticking when you try to open or close it? Is it rubbing against the sides of the cabinet or the other drawers? Is it getting caught on something inside the drawer itself? Once you know where the sticking point is, you can start to address the problem.
Another important factor to consider is the material your drawers are made of. Different types of wood and finishes can affect how easily your drawers slide. For example, unfinished wood may be more prone to swelling and warping, which can cause drawers to stick. If your drawers are made of a softer wood, they may be more likely to wear down over time, causing the tracks to become misaligned.
By understanding the problem and assessing the material, you can start to take steps to make your wooden drawers slide more easily. From lubricating the tracks to sanding down the sides of the drawer, there are several simple fixes you can try to get your drawers working smoothly again.
Before you start fixing your wooden drawers, you need to gather some essential tools. Here are the tools you will need to make your wooden drawers slide easier:
To make your wooden drawers slide easier, you may need to sand the sides of the drawers. You will need to choose the right sandpaper to get the job done. Here are some things to consider when choosing sandpaper:
Wax can help lubricate the sides of your wooden drawers and make them slide easier. Here are some things to consider when selecting a suitable wax:
By gathering the necessary tools, you can make your wooden drawers slide easier and improve the functionality of your furniture.
Before you start making your wooden drawers slide easier, you need to prepare them properly. This section will guide you through the preparation process, which includes emptying the drawers and removing them from the cabinet.
The first step in preparing your wooden drawers for easier sliding is to empty them. Remove all the items from the drawers and place them in a safe place. This will make it easier for you to work on the drawers without any obstructions.
Once you have emptied the drawers, you need to remove them from the cabinet. Depending on the type of drawer you have, this may involve removing screws or pulling out the drawer from its runners. Refer to the manufacturer’s instructions or seek professional help if you are unsure how to remove the drawers safely.
Once you have removed the drawers, inspect them for any damage or wear and tear. If you notice any issues, such as loose joints or broken parts, you may need to repair or replace them before proceeding with the sliding process.
By properly preparing your wooden drawers, you can ensure that you have a smooth and hassle-free experience when making them slide easier.
If your wooden drawers are sticking or not sliding smoothly, one of the reasons could be rough surfaces. The edges of the drawers might be rough or uneven, causing friction and making it difficult for the drawers to slide in and out. Smoothening the surfaces of the drawers can help reduce friction and make them slide easier. Here are some tips on how to do it:
The first step in smoothening the surfaces of your wooden drawers is to sand the edges. You can use sandpaper or a sanding block to sand the edges of the drawers. Start with a coarse grit sandpaper and then move to a finer grit. Sand the edges until they are smooth and even. Be careful not to sand too much, as this can damage the wood.
After sanding the edges of the drawers, it’s important to clean them thoroughly. Use a soft cloth or a vacuum cleaner to remove any dust or debris from the drawers. You can also use a damp cloth to wipe down the drawers. Make sure the drawers are completely dry before moving on to the next step.
By smoothening the surfaces of your wooden drawers, you can reduce friction and make them slide easier. Sanding the edges and cleaning them afterwards is a simple and effective way to achieve this.
Once you have identified the cause of your wooden drawers sticking, it’s time to apply the solution. Here are the steps to follow:
One way to make wooden drawers slide easier is by applying furniture wax to the edges of the drawers. This helps to reduce friction between the drawer and the frame. Here’s how to do it:
Once you have waxed the edges of the drawers, it’s time to reinstall them. Here are the steps to follow:
By following these simple steps, you can make your wooden drawers slide easier and avoid the frustration of sticky drawers. Remember to clean and maintain your drawers regularly to keep them in good condition.
To ensure your wooden drawers slide smoothly, it’s important to perform regular maintenance. Here are some tips to keep your drawers in good working order.
Dirt and debris can accumulate in the tracks of your drawers, causing them to stick and slide less easily. To prevent this, make sure to clean out the tracks regularly. You can use a soft brush or cloth to remove any debris, and then wipe the tracks down with a damp cloth.
Periodic waxing can help reduce friction and make your drawers slide more easily. To wax your drawers, you can use a paraffin wax or a specialized drawer wax. Apply the wax to the tracks and the sides of the drawers, and then use a soft cloth to buff it in. Be sure to follow the manufacturer’s instructions when using a specialized wax.
By following these maintenance tips, you can keep your wooden drawers sliding smoothly for years to come.


