Rahasia Sukses Poker Online: Cara Ampuh Membaca Lawan di Fase Post-Flop
Di antara seluruh platform penyedia poker online terbaik, fase taruhan post-flop (setelah tiga kartu pertama dibuka) senantiasa diakui sebagai salah

Di antara seluruh platform penyedia poker online terbaik, fase taruhan post-flop (setelah tiga kartu pertama dibuka) senantiasa diakui sebagai salah


If you have petrified wood that you no longer need, you may be judi slot terbaru wondering where you can sell it. There are several options available to you, both online and offline. You can sell your petrified wood to collectors, lapidary artists, or even to furniture makers who use it to create unique pieces of art.
One of the best places to sell petrified wood is online. There are several websites that specialize in buying and selling petrified wood, such as FossilEra, Shpock, and LetGo. These websites allow you to list your petrified wood for sale and connect with potential buyers from all over the world. You may also want to consider selling your petrified wood on online auction sites like eBay, where you can set a reserve price and let buyers bid on your item.
Another option is to sell your petrified wood offline. You can try idn poker selling it at local rock and mineral shows, flea markets, or antique shops. You can also reach out to local lapidary clubs or rockhounding groups to see if they know of anyone who may be interested in buying your petrified wood. With a little bit of effort and research, you can find the right buyer for your petrified wood and turn it into cash.
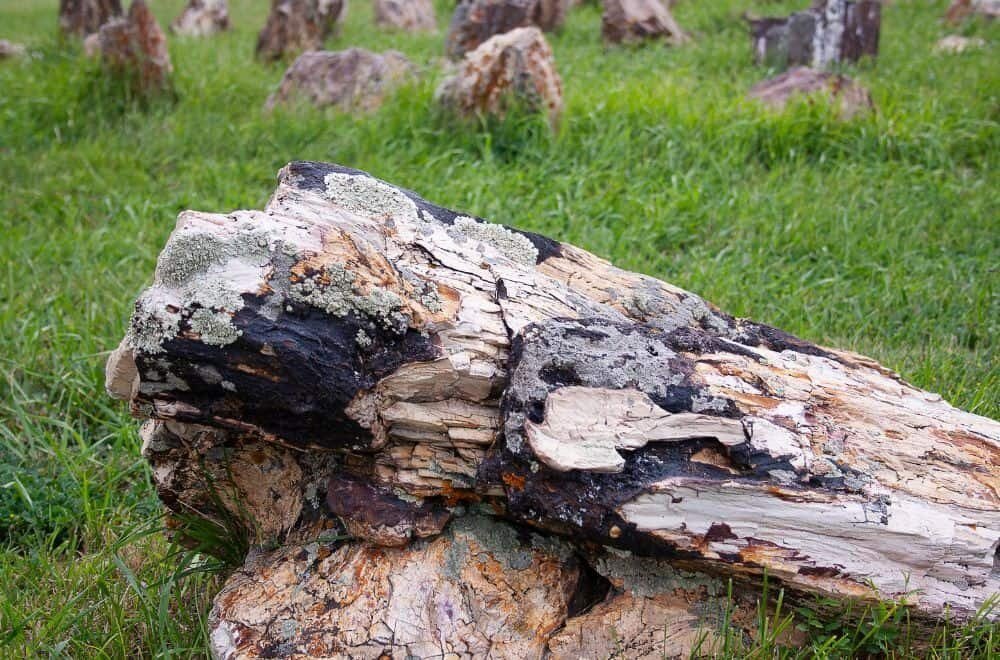
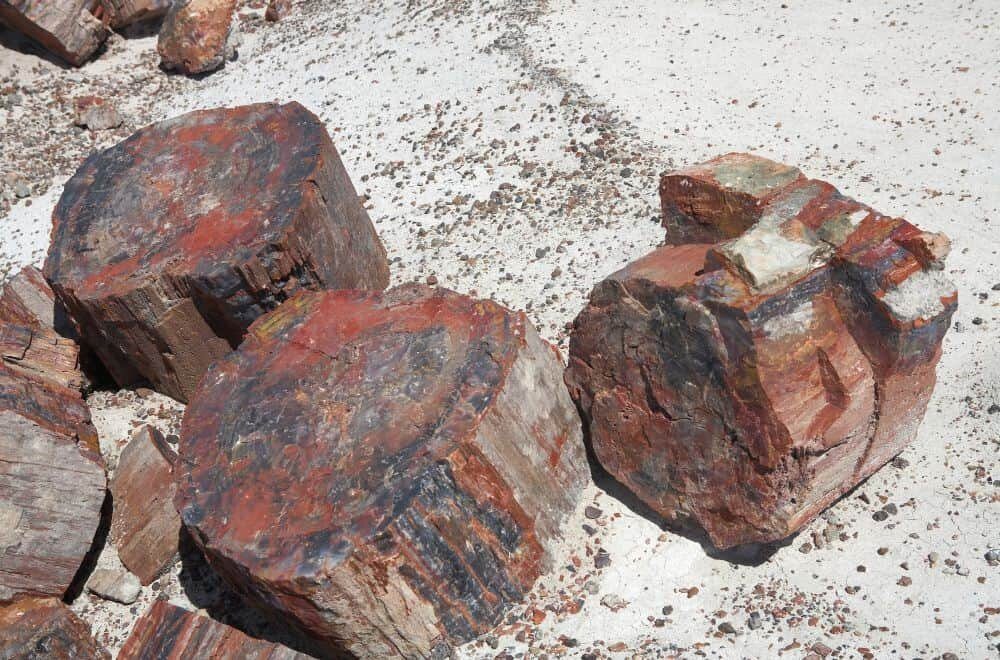
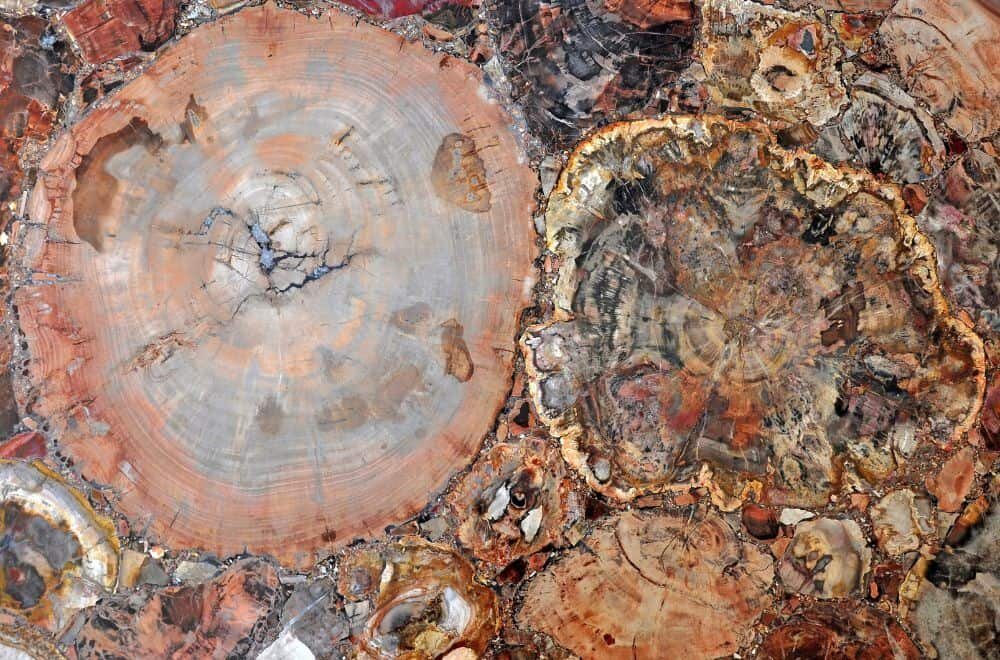
Petrified wood is ancient wood that has been transformed into stone through the process of permineralization. This process occurs when minerals, such as silica, replace the organic matter in the wood over a long period of time. The result is a fossilized piece of wood that retains the original structure and texture of the wood, but with a stone-like appearance.
Petrified wood can be found in various colors, ranging from brown and black to red, yellow, and even blue. The colors are determined by the minerals that were present during the petrification process. Petrified wood can also have unique patterns and markings, such as tree rings, knots, and even insect burrows.
Setiap langkah tim Garuda di kualifikasi Piala Dunia selalu mengundang decak kagum dan semangat tinggi dari suporter. Cobalah untuk terlibat lebih dalam dengan memasang taruhan judi bola online yang bisa memberi tambahan pendapatan melalui halaman idn sport. Banyak kalangan kini menjadikan setiap pertandingan sebagai peluang emas untuk meraih cuan. Performa tim yang terus berkembang memberi banyak peluang bagi penggemar untuk membuat prediksi. Kendati begitu, penting untuk tidak terbawa emosi dalam mengambil keputusan taruhan.
The value of petrified wood is determined by several factors, including the size, color, and quality of the specimen. High-quality specimens with vibrant colors and intricate patterns can be worth a significant amount of money, especially in the world of lapidary and jewelry-making.
Petrified wood is a popular collector’s item and can be found in museums and private collections all over the world. It is also used for decorative purposes, such as in furniture, sculptures, and even flooring. If you have a piece of petrified wood that you no longer want or need, you may be able to sell it for a profit. The next section will provide more information on where to sell petrified wood.
Petrified wood is a fascinating and beautiful natural wonder that has been around for millions of years. It is a type of fossil that has been preserved over time, and it is highly valued by collectors and enthusiasts. If you have petrified wood and are wondering about its value, there are a few things to consider.
The value of link resmi nirwanapoker petrified wood depends on several factors, including its size, weight, color, and quality. Here are some of the key factors that can affect the value of petrified wood:
The value of petrified wood can vary widely depending on the factors listed above. According to experts, petrified wood can be worth anywhere from $0.25 to $10 per pound, with rare and exotic specimens commanding even higher prices.
If you are looking to sell your petrified wood, it is important to do your research and find a reputable dealer or collector who can give you a fair price. You can also consider selling your petrified wood online through sites like eBay or Etsy, but be sure to take clear photos and provide accurate descriptions to attract potential buyers.
In conclusion, petrified wood is a valuable and beautiful natural wonder that can be a great addition to any collection or home decor. By understanding the factors that affect its value and doing your research, you can ensure that you get a fair price for your petrified wood.
If you are considering selling petrified wood, it is important to be aware of the legal aspects surrounding its sale. In this section, we will discuss the laws governing the sale of petrified wood in the United States and internationally.
In the United States, the collection of petrified wood is allowed on public lands with some restrictions. According to the Bureau of Land Management, petrified wood may be collected up to 25 pounds plus one piece per person per day, with a maximum of 250 pounds per person per year. However, permits are required for pieces over 250 pounds. It is also important to note that petrified wood may not be traded, bartered, or sold without a permit.
If you plan on selling petrified wood, it is crucial to ensure that you have the necessary permits and that the wood was legally obtained. Trading, bartering, or selling any fossil material removed from National Forest System lands is prohibited, except for petrified wood. Therefore, if you collected petrified wood from a national forest, you will need to have a permit to sell it.
If you plan on selling petrified wood internationally, it is important to be aware of the laws governing its sale in the country where you plan to sell it. Some countries, such as Australia, have strict laws governing the sale and export of petrified wood. In Australia, it is illegal to export petrified wood without a permit. Additionally, some countries may require documentation proving that the petrified wood was legally obtained.
It is important to research the laws governing the sale of petrified wood in the country where you plan to sell it to avoid any legal issues. It is also important to ensure that the wood was legally obtained and that you have the necessary permits and documentation.
In conclusion, before selling petrified wood, it is important to be aware of the legal aspects surrounding its sale. In the United States, permits are required for the sale of petrified wood, while other countries may have stricter laws governing its sale and export. By doing your research and obtaining the necessary permits and documentation, you can ensure that you are selling petrified wood legally and ethically.
If you have some petrified wood that you want to sell, there are a few options available to you. Here are some places where you can sell your petrified wood.
Online marketplaces are a great place to sell petrified wood. Here are some popular options:
Local antique shops are another option for selling petrified wood. Here are some tips for finding the right shop:
Gem and mineral shows are events where vendors sell all kinds of rocks, minerals, and fossils. If you have petrified wood that you want to sell, a gem and mineral show could be a good place to do it. Here are some tips for selling at a gem and mineral show:
Remember, when selling petrified wood, it’s important to be honest about the quality and condition of the wood. Don’t make exaggerated or false claims about the value of your petrified wood. With a little effort, you can find the right buyer for your petrified wood and make a nice profit.
When it comes to selling petrified wood, pricing is an important factor to consider. You want to make sure you’re getting a fair price for your specimens, but you also want to make sure you’re not pricing them too high and turning away potential buyers. Here are some tips to help you price your petrified wood:
The quality of your petrified wood is one of the biggest factors that will affect its value. If your specimens are of good lapidary quality and can be converted into jewelry, you can expect to sell them for between $.25 and $10 per pound. However, if the quality is poor and the specimens are not suitable for jewelry making, you may only be able to sell them for a few cents per pound.
The size of your petrified wood specimens is also a factor to consider when pricing them. Larger specimens will typically command a higher price than smaller ones. However, larger specimens may also be more difficult to sell, as they may be too large for some buyers to handle.
It’s always a good idea to research market prices before pricing your petrified wood. Look at what other sellers are asking for similar specimens and use that as a starting point. Keep in mind that prices can vary depending on the location and the demand for petrified wood in your area.
While it’s important to get a fair price for your petrified wood, it’s also important to be realistic. Don’t price your specimens too high, as this may turn away potential buyers. On the other hand, don’t price them too low, as this may make buyers suspicious of the quality.
Pricing petrified wood can be a bit tricky, but with these tips, you should be able to get a fair price for your specimens. Remember to consider the quality, size, and market prices, and be realistic in your pricing. Good luck!
If you have a collection of petrified wood and you’re considering selling it, there are a few things you should keep in mind to ensure you get the best price possible. Here are some tips for selling petrified wood successfully:
Before you start selling your petrified wood, it’s important to know its value. The value of petrified wood can vary depending on several factors, including the size, color, and rarity of the specimen. Do some research to determine the value of your petrified wood based on these factors, and use this information to set a fair price for your collection.
To get the best price for your petrified wood, you need to find the right buyer. Look for buyers who specialize in petrified wood or who have a specific interest in the type of wood you have. You can try selling your petrified wood online, through auction sites, or at trade shows and conventions.
When selling your petrified wood, it’s important to present it in the best possible light. Clean your specimens thoroughly and arrange them in an attractive display. Take high-quality photos that showcase the unique features of each piece, and provide detailed descriptions of their size, color, and other characteristics.
When selling petrified wood, it’s important to be honest about its condition and any flaws it may have. Don’t try to hide imperfections or damage, as this can lead to unhappy customers and negative reviews. Be upfront about any flaws or repairs and price your specimens accordingly.
Selling petrified wood can take time, so be patient and don’t get discouraged if your collection doesn’t sell right away. Keep looking for the right buyer and be willing to negotiate on price if necessary. With a little patience and persistence, you can successfully sell your petrified wood collection.
If you are planning to sell petrified wood, there are a few challenges that you may encounter along the way. Here are some of the potential challenges that you need to be aware of:
One of the biggest challenges in selling petrified wood is finding the right market. Not everyone is interested in buying petrified wood, so you need to find the right audience who will appreciate and value your product. You can start by researching online and finding potential buyers who are interested in petrified wood. You can also participate in trade shows, exhibitions, and events related to fossils and minerals to meet potential buyers.
Another challenge in selling petrified wood is determining its value. The value of petrified wood can vary greatly depending on various factors such as size, color, pattern, and rarity. You need to have a good understanding of these factors to accurately determine the value of your petrified wood. You can consult with experts in the field or use online resources to get an idea of the current market value of petrified wood.
There are also legal restrictions that you need to be aware of when selling petrified wood. It is illegal to collect petrified wood from national parks and protected federal lands without proper permits. You need to make sure that the petrified wood that you are selling is legally obtained and that you have the necessary permits and documentation to prove it. You should also be aware of the regulations and restrictions in your state or country regarding the sale of petrified wood.
Finally, shipping and handling can also be a challenge when selling petrified wood. Petrified wood is heavy and fragile, so you need to make sure that it is properly packaged and shipped to avoid damage during transit. You also need to factor in the cost of shipping and handling when pricing your product, as it can be a significant expense.
Overall, selling petrified wood can be a rewarding and profitable venture, but it is important to be aware of the potential challenges and take the necessary steps to overcome them.
There are several places where you can sell petrified wood, including online marketplaces like eBay, Etsy, and Amazon. You can also sell petrified wood at rock and mineral shows, gem and jewelry shows, and local flea markets. Another option is to sell petrified wood to museums, collectors, and gift shops.
When selling petrified wood, it’s important to accurately describe the piece, including its size, weight, and any unique features. You should also take high-quality photos of the piece from different angles and in good lighting. It’s also a good idea to research the market value of similar pieces to ensure you’re pricing your petrified wood competitively.
Collectors, museums, gift shops, and rock and mineral enthusiasts are all potential buyers of petrified wood. You can find them at rock and mineral shows, gem and jewelry shows, and online marketplaces like eBay and Etsy. You can also join Facebook groups dedicated to petrified wood selling and connect with potential buyers in your area.
The value of petrified wood is determined by several factors, including its size, weight, color, rarity, and the quality of the lapidary work. The value can range from $0.25 to $10 per pound depending on these factors. It’s important to accurately describe the piece and research the market value of similar pieces to determine its worth.
Collectors are often looking for unique and rare types of petrified wood, such as rainbow petrified wood, blue forest petrified wood, and fossilized palm wood. These pieces often have unique patterns and colors that make them highly sought after.
Petrified wood can be used in a variety of creative ways, such as bookends, coasters, and jewelry. It can also be displayed on its own as a decorative piece or incorporated into a larger art piece. Some people even use petrified wood as a building material for walls, floors, and countertops.

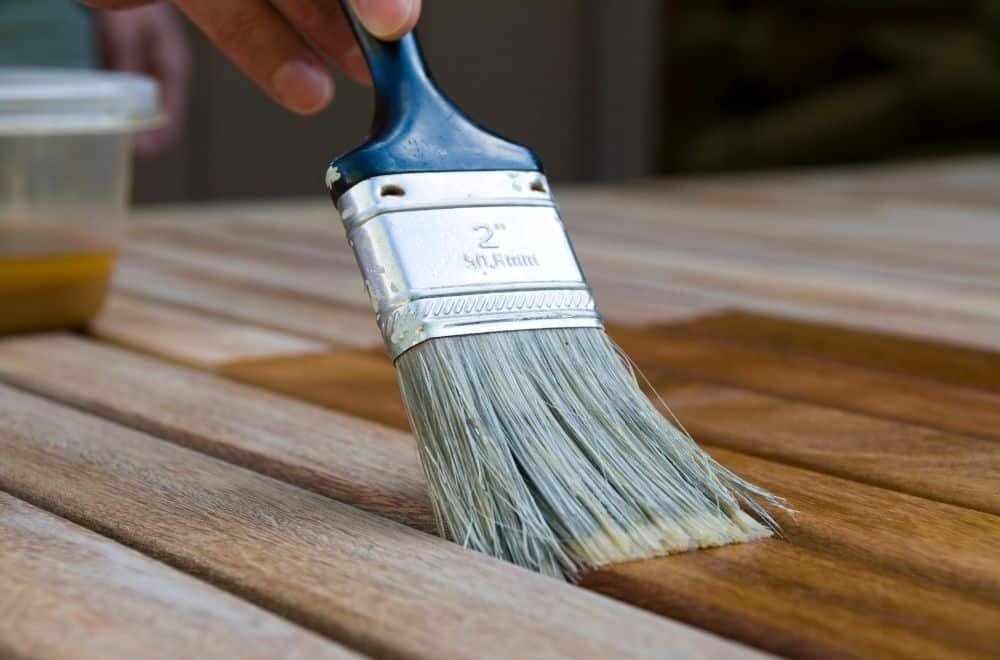
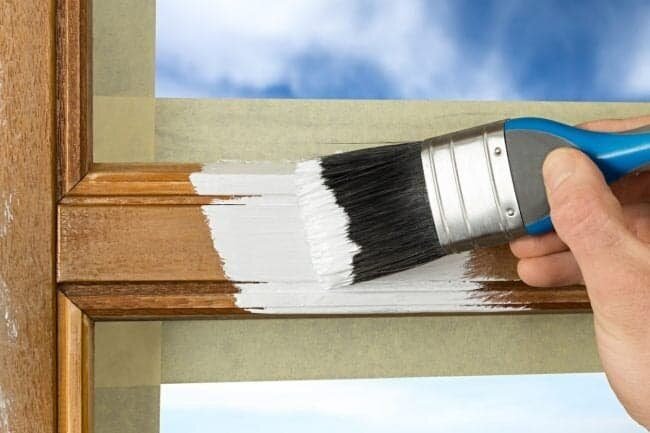
Are you considering staining your wood and then applying Danish oil after? This is a common question among woodworkers who want to achieve a specific look for their projects. While some people swear by this technique, others are hesitant to try it out. In this article, we will explore whether it is okay to stain wood and then apply Danish oil after, and what you need to know before attempting this technique.
According to woodworking experts, it is possible to apply Danish oil over a stained wood surface. However, there are some important factors to consider before you start. First, you need to ensure that the stain is completely dry before applying the Danish oil. This is because the oil can prevent the stain from drying properly, resulting in a sticky and uneven finish. Additionally, you need to make sure that the stain and the oil are compatible with each other. Some types of stains may not work well with Danish oil, so it’s important to test the combination on a small area first.
Overall, staining wood and then applying Danish oil after can be a great way to enhance the appearance of your project. However, it’s important to follow the right steps and use the right products to achieve the desired results. In the following sections, we will explore the benefits and drawbacks of this technique, as well as some tips for getting the best possible finish.
Wood staining is a process of adding color to the wood. It is done by applying a pigmented solution to the surface of the wood. The pigments in the solution penetrate the wood and give it a colored appearance. Wood stains come in a variety of colors and shades, and they can be used to enhance the natural beauty of the wood or to give it a completely different look.
There are many benefits to staining wood. Here are a few:
Overall, wood staining is a great way to add color and protection to your wood projects. However, it’s important to note that not all stains are created equal, and some may not be compatible with certain finishes, such as Danish oil. Always read the label and do a test on a small, inconspicuous area before applying any stain or finish to your project.

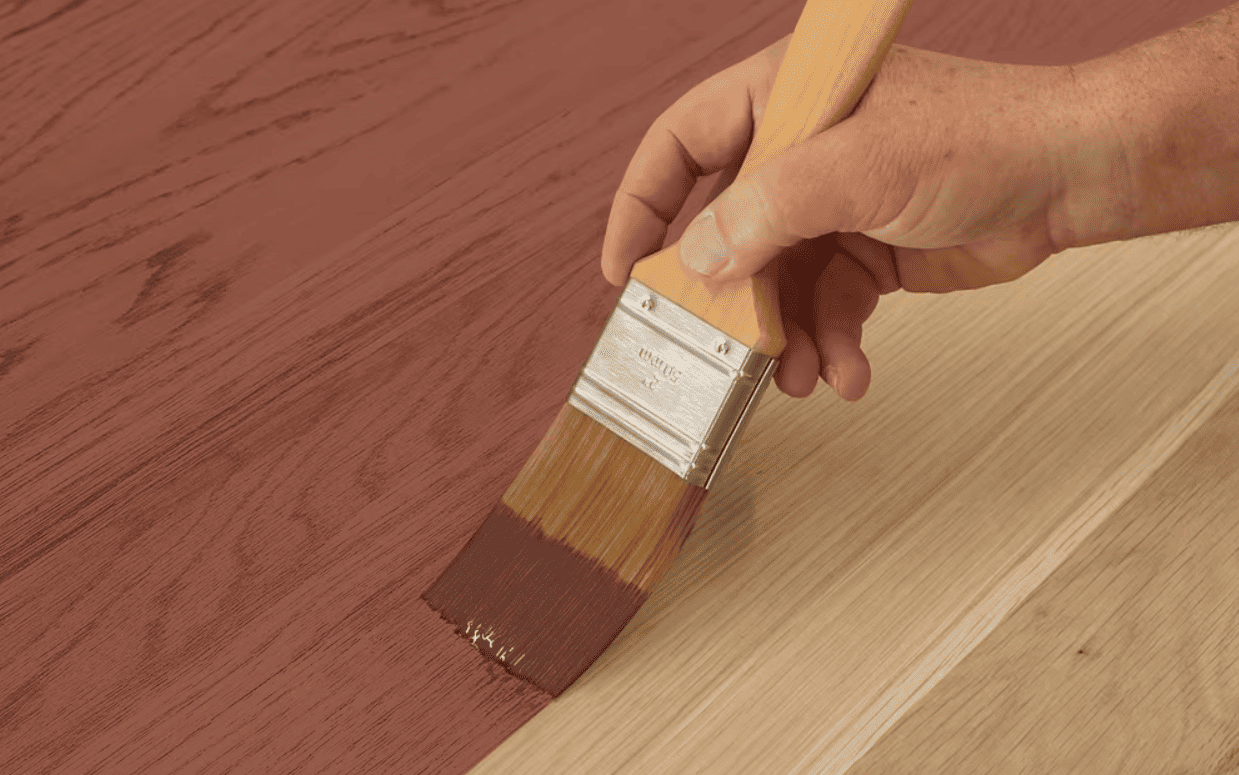
If you’ve decided to apply Danish oil over your stained wood, you’ll be pleased to know that it’s a relatively straightforward process. Here’s what you need to know:
Danish oil is a type of wood finishing oil that is made up of a blend of oils and varnish. It’s a popular choice for finishing wood because it provides a durable, water-resistant finish while also enhancing the natural beauty of the wood.
Applying Danish oil to your stained wood can offer several benefits. Here are a few:
When applying Danish oil over stained wood, it’s important to make sure that the stain is completely dry before you start. This will help ensure that the oil adheres properly and doesn’t create any unwanted effects.
To apply Danish oil, simply brush or wipe it onto the wood in a thin, even layer. Let it sit for a few minutes, then wipe off any excess with a clean cloth. Repeat this process until you’ve achieved the desired level of sheen and protection.
Overall, applying Danish oil over stained wood can be a great way to enhance the natural beauty of your wood while also providing a durable, water-resistant finish. With a little bit of patience and attention to detail, you can achieve a beautiful result that will last for years to come.

If you are wondering whether it is okay to apply Danish oil over stain, the answer is yes. However, it is important to understand the process of staining and applying Danish oil to achieve the best results. Here is a breakdown of the process:
Before you start staining, it is important to prepare the wood surface properly. This involves sanding the wood to remove any rough spots or imperfections. You can use a sandpaper with a grit of 120 to 150 for this purpose. After sanding, wipe the wood surface with a clean cloth to remove any dust or debris.
Once the wood is properly prepared, you can start staining. Here are the steps to follow:
Once the stain is dry, you can apply Danish oil to the wood surface. Here are the steps to follow:
It is important to note that Danish oil is a blend of oil and varnish, which can enhance the appearance of the stain and add a rich, low-luster sheen. However, ensuring the stain is completely dry before applying Danish oil is crucial to avoid any issues with the finish.
When it comes to staining and applying Danish oil to wood, there are a few considerations you should keep in mind to ensure a successful and safe project. In this section, we’ll cover some important factors to consider before starting your project.
Choosing the right stain is crucial to achieving the desired color and finish for your project. Here are some things to keep in mind when selecting a stain:
Danish oil is a popular finish for wood projects because it provides protection while enhancing the natural beauty of the wood. Here are some things to consider when choosing a Danish oil:
Staining and applying Danish oil can be hazardous if proper safety precautions are not taken. Here are some safety tips to keep in mind:
By considering these factors before staining and applying Danish oil to your wood project, you can ensure a beautiful and safe finished product.
Yes, you can apply Danish oil over water-based stain, but it’s important to make sure the stain is completely dry before applying the oil. Water-based stains can take longer to dry than oil-based stains, so it’s important to be patient and wait until the stain is completely dry before applying the oil.
To apply Danish oil, you can use a brush, cloth, or foam applicator. Apply a thin, even coat of oil to the wood, working with the grain. Let the oil soak into the wood for about 15 minutes, then wipe off any excess with a clean cloth. Repeat the process until you achieve the desired level of sheen.
Yes, you can use Danish oil after staining. In fact, Danish oil can enhance the appearance of the stain, adding a rich, low-luster sheen. However, it’s important to make sure the stain is completely dry before applying the oil.
Yes, you should stain wood before oiling. Staining the wood first will help to bring out the natural beauty of the wood and provide a consistent color. Applying oil over the stain will help to protect the wood and enhance its natural beauty.
It is not recommended to apply Danish oil over polyurethane. Polyurethane creates a hard, protective layer on top of the wood, which can prevent the oil from penetrating the wood. If you want to use Danish oil, it’s best to apply it to bare wood or wood that has been stained but not finished with polyurethane.
Yes, you can use tinted Danish oil to add color to your wood. Tinted Danish oil is available in a variety of colors and can be used to enhance the natural beauty of the wood or to add a pop of color. Just like regular Danish oil, it’s important to make sure the wood is clean and dry before applying the tinted oil.
Mari bergabung di Slot88 resmi permainan paling fun di slot! Temukan keseruan dan peluang emas meraih kemenangan serta hadiah menarik di setiap putaran. Jangan lewatkan momen istimewa ini, segera kunjungi link Slot88 resmi dan mulailah petualanganmu! Ayo bergabung sekarang dan tunjukkan keberuntunganmu!

Are you planning to build a subwoofer box? If so, you might be wondering what type of wood is best for this project. The choice of wood is important because it can affect the sound quality of your subwoofer. In this article, we will discuss the different types of wood that are suitable for subwoofer boxes and why they are the best options.
One of the most popular types of wood for subwoofer boxes is Baltic Birch plywood. This hardwood is known for its density and remarkable rigidity, which makes it an excellent choice for subwoofer boxes. It is also highly resistant to distortion and warping, which helps to keep vibrations to a minimum. Baltic Birch plywood is available in varying thicknesses, which makes it easy to choose the right size for your subwoofer box.
Another type of wood that is suitable for subwoofer boxes is Medium Density Fiberboard (MDF). MDF is made from wood fibers that are bonded together with resin, which gives it a smooth and uniform surface. This type of wood is dense and heavy, which makes it an excellent choice for subwoofer boxes. MDF is also affordable and easy to work with, which makes it a popular choice for DIY projects. However, it is important to note that MDF can be susceptible to moisture damage, so it is important to seal it properly.
When it comes to enhancing your audio experience, a subwoofer can make a world of difference. However, to get the most out of your subwoofer, you need to pair it with the right subwoofer box. In this section, we’ll explore the purpose of a subwoofer box and the different types available.
A subwoofer box, also known as an enclosure, is designed to house a subwoofer and optimize its performance. The box serves several purposes, including:
Without a subwoofer box, your subwoofer may not produce the desired sound quality, and you may even risk damaging it.
There are several types of subwoofer boxes to choose from, each with its own advantages and disadvantages. The most common types include:
| Type | Description | Pros | Cons |
|---|---|---|---|
| Sealed | Fully enclosed box | Accurate, tight bass | Less efficient, requires more power |
| Ported | Box with a vent or port | Louder, more efficient | Larger size, can produce unwanted noise |
| Bandpass | Two-chamber box with a port | Loudest, most efficient | Limited frequency range, can produce unwanted noise |
| Free-air | Mounted on a board or panel | Space-saving, easy installation | Limited bass response, can produce unwanted noise |
When selecting a subwoofer box, consider your listening preferences, available space, and the specifications of your subwoofer. Keep in mind that the type of wood used to construct the box can also affect sound quality. In the next section, we’ll explore the best types of wood for subwoofer boxes.
When it comes to building a subwoofer box, the type of wood you choose can have a significant impact on the sound quality. Identifying quality wood is essential for achieving the best possible results. In this section, we will discuss the three key factors to consider when identifying quality wood for a subwoofer box: wood density, wood durability, and wood acoustics.
The density of the wood is one of the most critical factors to consider when building a subwoofer box. The denser the wood, the better it will be at reducing vibrations and preventing sound distortion. The table below shows the densities of some common types of wood used for subwoofer boxes.
| Wood Type | Density (lbs/ft3) |
|---|---|
| Baltic Birch Plywood | 60-70 |
| Medium-Density Fiberboard (MDF) | 45-50 |
| Pine | 25-30 |
| Oak | 45-50 |
| Maple | 45-55 |
The durability of the wood is another crucial factor to consider when building a subwoofer box. The box needs to be able to withstand the constant vibrations produced by the subwoofer without falling apart. Some types of wood are more durable than others, and the table below shows the durability of some common types of wood used for subwoofer boxes.
| Wood Type | Durability |
|---|---|
| Baltic Birch Plywood | High |
| Medium-Density Fiberboard (MDF) | Medium |
| Pine | Low |
| Oak | High |
| Maple | High |
The acoustics of the wood are also important when building a subwoofer box. The wood needs to be able to resonate with the sound produced by the subwoofer and enhance the overall sound quality. The table below shows the acoustics of some common types of wood used for subwoofer boxes.
| Wood Type | Acoustics |
|---|---|
| Baltic Birch Plywood | Excellent |
| Medium-Density Fiberboard (MDF) | Good |
| Pine | Fair |
| Oak | Good |
| Maple | Good |
In conclusion, when identifying quality wood for a subwoofer box, you should consider the wood density, wood durability, and wood acoustics. Baltic Birch Plywood is often considered the best option due to its high density, durability, and excellent acoustics. MDF is also a popular choice due to its affordability and good performance. Ultimately, the choice of wood will depend on your budget, personal preferences, and the specific requirements of your subwoofer system.

When it comes to building a subwoofer box, choosing the right wood is crucial. The type of wood you use can affect the sound quality and durability of your subwoofer box. In this section, we’ll discuss the three most common types of wood used for subwoofer boxes: Medium-Density Fibreboard (MDF), Plywood, and Particle Board.
MDF is the most commonly used wood for subwoofer boxes. This manufactured wood is very durable and dense, which helps bring out the best sound quality from your subwoofer. MDF is made by breaking down hardwood or softwood residuals into wood fibres, often in a defibrator, combining it with wax and a resin binder, and forming panels by applying high temperature and pressure. MDF is also relatively inexpensive compared to other types of wood.
Plywood is another popular choice for subwoofer boxes. It is made by gluing together thin layers of wood veneer, with the grain of each layer running in a different direction. Plywood is strong, lightweight, and has good acoustic properties. However, it is more expensive than MDF and can be more difficult to work with due to its tendency to splinter.
Particle board is a type of engineered wood made from wood chips, sawmill shavings, and sawdust. It is less dense than MDF and plywood, making it a less popular choice for subwoofer boxes. However, it is still used by some builders due to its low cost and ease of use.
In summary, MDF is the most popular and best overall material for subwoofer boxes for many reasons. It is dense, thick, and durable, which helps bring out the best sound quality from your subwoofer. Plywood is also a good choice but is more expensive and can be more difficult to work with. Particle board is a less popular choice due to its lower density, but it is still used by some builders due to its low cost and ease of use.
When it comes to building a subwoofer box, choosing the right type of wood is crucial for achieving the best sound quality. Here are some factors to consider when selecting the best wood for your subwoofer box:
The size of your subwoofer will determine the size of the box you need to build. A larger subwoofer will require a bigger box to allow for proper air displacement, which means you will need a thicker and more durable wood to withstand the pressure. On the other hand, a smaller subwoofer can be housed in a smaller and lighter box, which means you can use a less expensive and lighter wood.
The type of music you listen to will also play a role in determining the best type of wood for your subwoofer box. If you listen to music that emphasizes bass, such as hip-hop or EDM, you will need a thicker and denser wood to minimize vibrations and distortion. On the other hand, if you listen to music that is more focused on vocals and instruments, you can use a lighter and less dense wood.
Your budget will also play a role in determining the type of wood you can use for your subwoofer box. While some types of wood are more expensive than others, they may offer better sound quality and durability. However, if you are on a tight budget, you can still achieve good sound quality by using a less expensive wood, such as MDF or pine.
In conclusion, choosing the right type of wood for your subwoofer box is crucial for achieving the best sound quality. Consider the size of your subwoofer, the type of music you listen to, and your budget constraints when selecting the best wood for your subwoofer box.
Baltic Birch is a popular choice for subwoofer boxes due to its density, rigidity, and varying thicknesses. This wood delivers exceptional acoustic performance and reduces vibrations to a minimum. It is also highly durable and resistant to distortion and warping, making it an excellent option for subwoofer enclosures.
The thickness of the wood used in a subwoofer box can significantly impact its performance. Thicker wood can provide more rigidity and reduce resonance, resulting in better sound quality. However, thicker wood can also add weight to the enclosure, making it challenging to move around.
Medium-density fiberboard (MDF) is a popular choice for speaker boxes due to its affordability, availability, and ease of use. It is also highly durable and provides excellent sound quality. MDF can be cut and shaped easily, making it an ideal material for creating custom speaker enclosures.
Using lightweight materials for a subwoofer box can make it easier to move around and transport. Lightweight materials can also reduce the overall weight of the enclosure, making it less likely to damage the vehicle or mounting surface. However, lightweight materials may not be as durable or rigid as heavier options, which can impact sound quality.
There are several subwoofer box designs that can help achieve deep bass, including sealed enclosures, ported enclosures, and bandpass enclosures. Each design has its advantages and disadvantages, and the best option will depend on your specific needs and preferences.
Several materials can be used to cover a subwoofer box, including carpet, vinyl, and paint. Carpet is a popular choice for its durability and easy installation. Vinyl can provide a sleek and modern look, while paint allows for complete customization of the enclosure’s appearance.

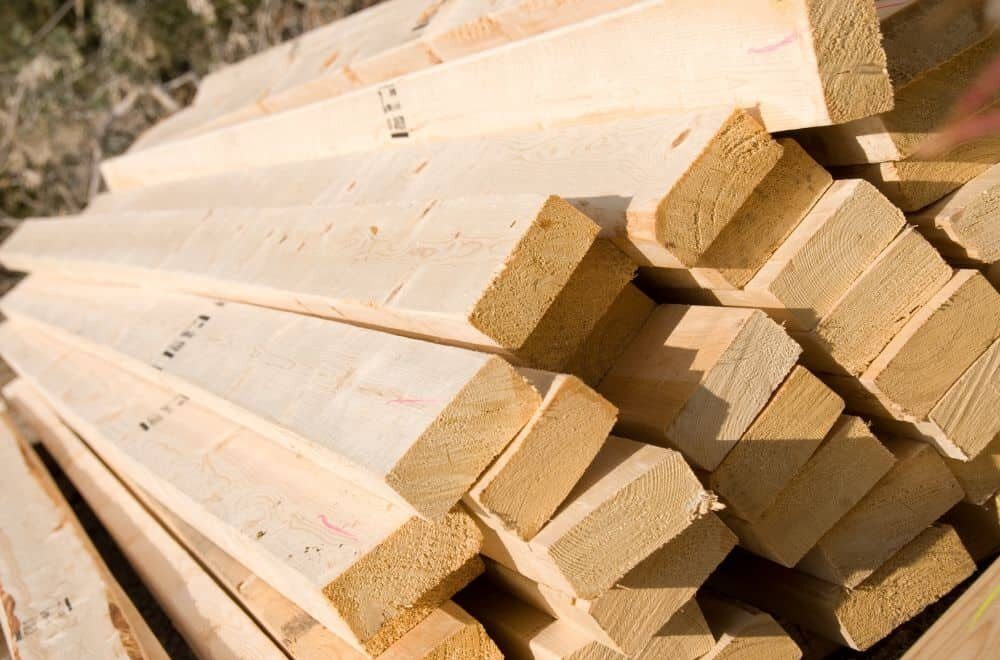
Have you ever wondered why a 2×4 piece of wood used in construction is not actually 2 inches by 4 inches? It’s a common misconception that can lead to confusion for those new to woodworking or DIY projects. The truth is, a 2×4 piece of lumber is actually 1.5 inches by 3.5 inches.
The reason for this difference in size lies in the milling process. When a piece of lumber is first cut, it is rough and uneven on all sides. To make it more uniform and aesthetically pleasing, the lumber is planed down on all four sides. This process removes approximately 0.5 inches from each side, resulting in the final size of a 2×4 piece of lumber.
While the actual size of a 2×4 piece of wood may be smaller than expected, it is still a widely used and versatile building material. Understanding the true dimensions of lumber can help ensure accurate measurements and successful construction projects.
When it comes to construction, the 2×4 piece of wood is one of the most commonly used materials. However, despite its name, a 2×4 is not actually 2 inches by 4 inches. So, why do we call it a 2×4 in the first place?
The term “2×4” dates back to the early 20th century when lumber was cut using a rough-cut method. At that time, a 2×4 piece of wood did actually measure 2 inches by 4 inches. However, as the lumber industry evolved, so did the way lumber was cut and processed.
Today, a 2×4 piece of wood is actually 1.5 inches by 3.5 inches. This is because lumber mills now use a planing process to smooth out the rough surfaces of the wood, which reduces its overall size. This process is necessary to make the wood more uniform and easier to work with.
While the size of a 2×4 piece of wood has changed over time, its popularity in construction has remained constant. Despite the fact that it is not actually 2 inches by 4 inches, the 2×4 remains a staple in construction projects due to its affordability, availability, and versatility.
In fact, the 2×4 is so popular that it has become a symbol of construction itself. It is often used in movies, TV shows, and other forms of media to represent the construction industry as a whole. Despite its humble origins, the 2×4 has become an iconic part of the construction world and will likely continue to be used for many years to come.
When you go to a lumber yard or hardware store to buy wood, you’ll quickly realize that the pieces of wood are not always what they seem. In particular, a 2×4 piece of lumber is not actually 2 inches by 4 inches. This can be confusing for those who are new to woodworking or construction.
To understand why this is the case, it’s important to know about standard lumber sizes. Lumber is typically sold in nominal sizes, which are rounded up to the nearest inch. These nominal sizes are used to describe the size of the wood before it is planed and sanded to make it smooth and uniform.
Here are some common nominal sizes for softwood lumber:
As you can see, these sizes are all rounded up to the nearest inch. For example, a 1×4 piece of lumber is actually 3/4 inch thick and 3 1/2 inches wide. A 2×6 piece of lumber is actually 1 1/2 inches thick and 5 1/2 inches wide.
It’s important to note that these nominal sizes can vary slightly depending on the manufacturer and the region. However, they generally follow these standard sizes.
Now that you understand nominal sizes, you can see why a 2×4 piece of lumber is not actually 2 inches by 4 inches. The nominal size of a 2×4 is 2 inches by 4 inches, but after it is planed and sanded, it is actually 1 1/2 inches thick and 3 1/2 inches wide.
In conclusion, understanding standard lumber sizes is important when working with wood. Nominal sizes are used to describe the size of the wood before it is planed and sanded, while actual sizes describe the size of the wood after it has been processed. Knowing this information will help you choose the right size of lumber for your project and avoid confusion when buying wood.
When lumber is harvested, it is typically cut into rough, oversized pieces that are known as “green” lumber. These pieces are then taken to a sawmill, where they are cut down to more manageable sizes. The first cut is typically a rough cut that removes the bark and outer layers of the log, leaving a rough, uneven surface.
Once the log has been rough cut, the pieces are sent through a planer, which smooths the surface and removes any remaining rough spots. This process is known as milling, and it is what gives lumber its final dimensions and smooth surface.
During the milling process, the lumber is cut down to its final size. In the case of a 2×4, the lumber starts out as a rough-cut piece that is 2 inches thick and 4 inches wide. However, as the piece is milled down, it is planed on all four sides to create a smooth, finished surface. This planing process removes some of the wood, resulting in a final size of 1.5 inches by 3.5 inches.
It is important to note that the milling process can vary depending on the type of lumber being produced. Some types of lumber may be milled to different sizes or shapes, depending on their intended use. Additionally, the milling process can also affect the strength and durability of the final product, so it is important to choose the right type of lumber for your project.
When working with wood, it is important to understand that it is a natural material and will undergo dimensional changes due to moisture content. Wood will expand or shrink depending on the moisture content of the surrounding environment.
Tangential shrinkage, which is the shrinkage across the width of the board, can vary from about 3% up to around 12%. Most woods fall in the range of about 6% to 10% tangential shrinkage. Accordingly, volumetric shrinkage is typically within the range of 9% to 15% for most wood species.
Wood expands and contracts mostly across its width. Wider boards expand and contract more than narrower ones. Therefore, it is important to take into consideration the width of the board when calculating the amount of shrinkage or expansion that will occur.
To calculate the amount of wood shrinkage or expansion, you need to measure the board’s width and find the average yearly change in moisture content. Wet air expands wood, while dry air shrinks it. It is important to note that changes in moisture content can occur due to changes in temperature or humidity levels.
It is also important to note that the nominal size of lumber, such as a 2×4, is not the actual size of the board. The actual size of a 2×4 is 1.5 inches by 3.5 inches. This is due to the milling process, which removes material from the board to create a smooth surface and uniform size.
Understanding wood shrinkage is important when working with wood in construction. It can affect the quality and stability of a structure if not taken into consideration during the design and building process.
When working with 2x4s or any other construction materials, it’s important to take safety measures to prevent accidents and injuries. Here are a few safety tips to keep in mind:
Always wear appropriate protective gear when working with 2x4s. This includes safety glasses, earplugs or earmuffs, a dust mask, work gloves, and steel-toed boots. Protective gear can help prevent injuries from flying debris, loud noises, dust, and heavy objects.
Make sure you’re using the right tools for the job. Using the wrong tool can not only damage the 2x4s but also increase the risk of accidents. Always use sharp tools and keep them clean and well-maintained. Be sure to follow the manufacturer’s instructions when using power tools.
Follow safety guidelines when working with 2x4s. This includes using proper lifting techniques, not working alone, and never standing on the top rung of a ladder. Always read and follow the safety instructions on any equipment you use.
Secure the 2x4s properly to prevent them from falling or shifting during construction. Use clamps to hold the 2x4s in place and make sure they’re level before attaching them to other materials. Avoid placing your hands or feet between the 2x4s or under them while they’re being moved or secured.
Be aware of your surroundings when working with 2x4s. Make sure the area is clear of debris and other hazards. Keep children and pets away from the work area and never leave tools or materials unattended. Always be alert and focused on the task at hand.
By following these safety measures, you can help prevent accidents and injuries when working with 2x4s or any other construction materials.
When it comes to the dimensions of 2×4 lumber, economic factors play a significant role. The lumber industry has been using the current standard dimensions for decades, and changing them now would be costly and impractical.
The standard dimensions of 1.5 inches by 3.5 inches are efficient for the industry because they allow for more lumber to be produced from each log. If the dimensions were increased to 2 inches by 4 inches, the amount of lumber produced from each log would decrease, resulting in higher costs for both the manufacturer and the consumer.
Additionally, the standard dimensions of 2×4 lumber have become an industry standard, and changing them would require changes in building codes, architectural plans, and other construction-related documents. This would be a time-consuming and expensive process, further adding to the economic factors involved in maintaining the current dimensions.
Overall, while the dimensions of 2×4 lumber may not be exactly 2 inches by 4 inches, they are efficient and cost-effective for the lumber industry and the construction industry as a whole.
When it comes to the production of lumber, environmental considerations are important. The process of cutting down trees and turning them into lumber can have a significant impact on the environment.
One way that the lumber industry is addressing these concerns is by implementing sustainable forestry practices. This involves planting new trees to replace those that are harvested, as well as using more efficient methods of harvesting and processing lumber.
In addition to sustainable forestry practices, the lumber industry is also working to reduce waste. This includes using more of the tree, such as the bark and sawdust, for other products like wood pellets and paper.
Another environmental consideration is the transportation of lumber. Shipping lumber long distances can contribute to greenhouse gas emissions and other environmental impacts. To reduce these impacts, many builders and contractors are choosing to use locally-sourced lumber whenever possible.
Overall, while the production and use of lumber does have environmental impacts, the industry is taking steps to address these concerns and promote sustainability. By choosing sustainably-sourced and locally-sourced lumber, you can help reduce the environmental impact of your construction projects.
The actual dimensions of a 2×4 piece of wood are 1.5 inches by 3.5 inches. This is because the lumber mills trim off rough or warped surfaces of a 2×4 to give it a more polished and finished look. By planning the lumber on all four sides, the original 2×4 is now reduced to 1.5 inches by 3.5 inches.
The reason why a 2×4 piece of wood is not actually 2 inches by 4 inches is because of the way lumber is processed. The lumber mills trim off rough or warped surfaces of a 2×4 to give it a more polished and finished look. By planning the lumber on all four sides, the original 2×4 is now reduced to 1.5 inches by 3.5 inches.
The dimensions of a 2×4 piece of wood have not changed. They have always been 1.5 inches by 3.5 inches.
The term ‘two by four’ is a colloquialism that has been used to describe a piece of lumber that is 2 inches by 4 inches in size. However, as we have established, the actual dimensions of a 2×4 piece of wood are 1.5 inches by 3.5 inches.
The standard lengths of lumber available in the market vary from 8 feet to 16 feet. However, longer or shorter lengths may also be available upon request.
Lumber sizes are not the actual size they are named after because of the way lumber is processed. The lumber mills trim off rough or warped surfaces of a piece of wood to give it a more polished and finished look. By planning the lumber on all four sides, the original size of the wood is reduced. This is why a 2×4 piece of wood is not actually 2 inches by 4 inches.

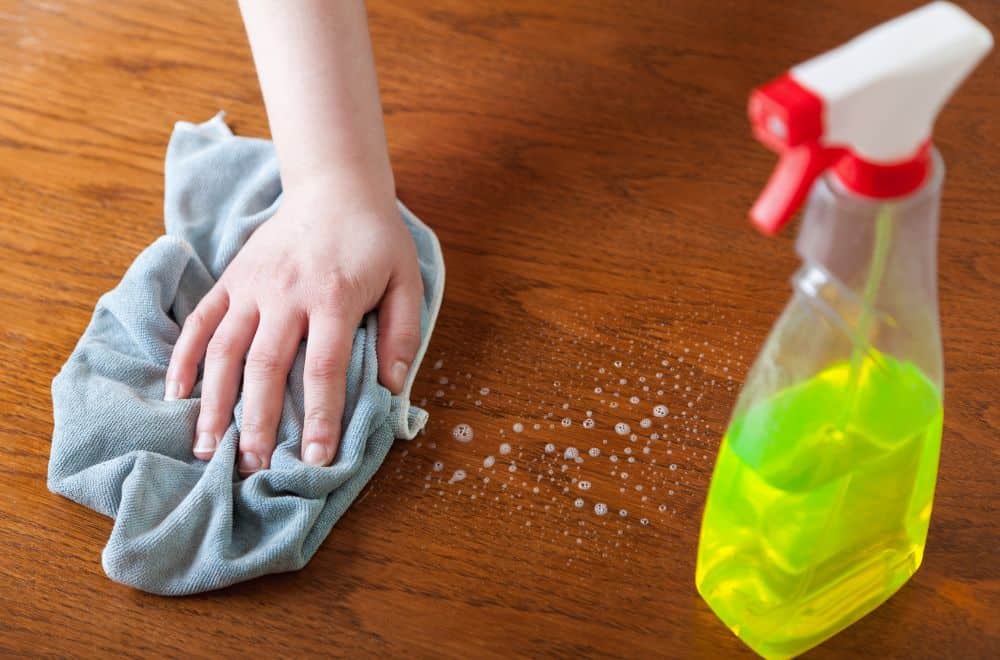
Are you dealing with unsightly white rings on your polished wood table caused by alcohol stains? Don’t worry, there are several ways to remove them. Whether you accidentally spilled a drink or a guest left a wet glass on the table, these stains can be frustrating to deal with. Luckily, with a few simple steps, you can restore your table to its former glory.
One effective method for removing alcohol stains from a polished wood table is using cooking oil. By gently rubbing a few drops of oil onto the stain, you can begin to lift it from the wood. Another option is to use hot water or a steam iron to remove the stain. It’s important to act quickly and treat the stain as soon as possible to increase your chances of success. With a little patience and elbow grease, you can make your table look as good as new.
If you have a polished wood table, you may have experienced the frustration of finding white rings or other alcohol stains on it. Alcohol stains can occur when a liquid containing alcohol is left on the surface of the wood, causing the finish to dissolve and leave a mark.
It is important to understand that alcohol stains are different from water stains. Water stains are caused by moisture penetrating the finish and leaving a mark on the wood. Alcohol stains, on the other hand, are caused by the alcohol in a liquid dissolving the finish and leaving a mark on the wood.
Alcohol stains can be particularly frustrating to remove because they often penetrate the finish and can be difficult to remove without damaging the wood. However, with the right approach, it is possible to remove alcohol stains from polished wood tables.
There are several methods that you can use to remove alcohol stains from wood, including using steel wool, cooking oil, hot water, or a steam iron. Each method has its own advantages and disadvantages, so it is important to choose the method that is best suited to your specific situation.
In the next section, we will explore some of the most effective methods for removing alcohol stains from polished wood tables.
Removing alcohol stains (white rings) from a polished wood table requires some materials that you can easily find at home or purchase from a local store. Here are the materials you will need:
You will need soft cloths to apply the cleaning solution and to wipe the surface of the table. Make sure the cloths are clean and free of any debris that could scratch the surface of the table.
Toothpaste or baking soda can be used as an abrasive to remove the stain. Apply a small amount of toothpaste or baking soda to the stain and rub gently with a soft cloth.
Olive oil or mineral oil can be used as a lubricant to help the abrasive work more effectively. Apply a small amount of oil to the stain before using the abrasive.
White vinegar can be used to dissolve the stain. Mix equal parts of white vinegar and water and apply the solution to the stain. Let it sit for a few minutes, then wipe clean with a soft cloth.
Lemon juice can also be used to dissolve the stain. Squeeze fresh lemon juice onto the stain and let it sit for a few minutes. Wipe clean with a soft cloth.
A hair dryer can be used to dry the surface of the table after cleaning. Set the hair dryer to low heat and hold it a few inches away from the surface of the table. Move the hair dryer back and forth until the surface is dry.
With these materials, you can effectively remove alcohol stains (white rings) from a polished wood table.
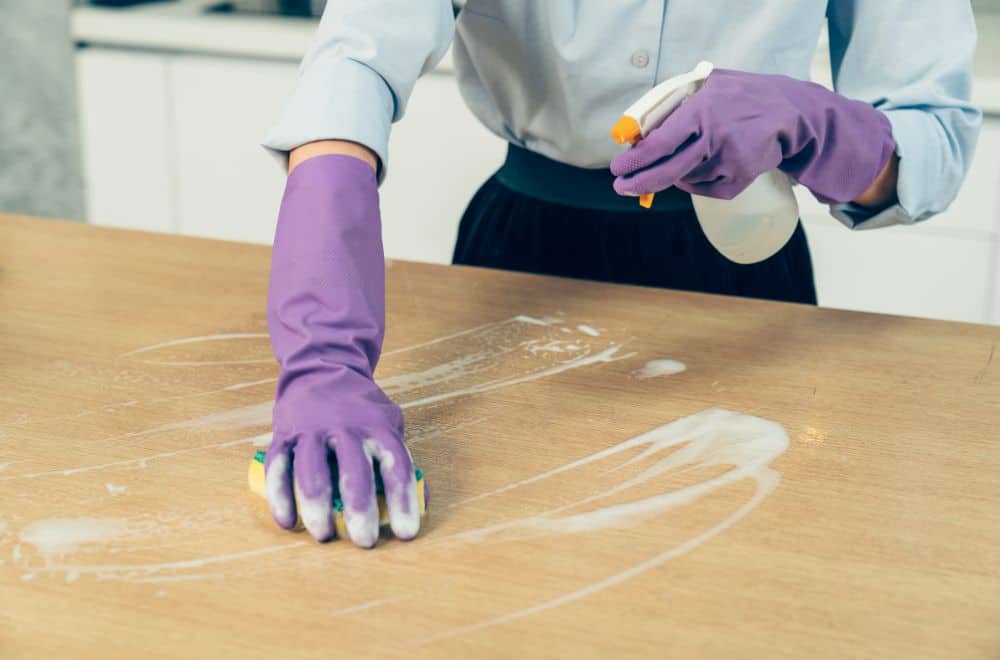
Before attempting to remove alcohol stains from your polished wood table, you need to gather the necessary materials and take some precautions to avoid causing further damage. Here are some steps to follow:
Remember to never use harsh chemicals or abrasive materials on polished wood as they can cause further damage. Always test cleaning solutions on a small, discreet area before using them on the entire stained area.

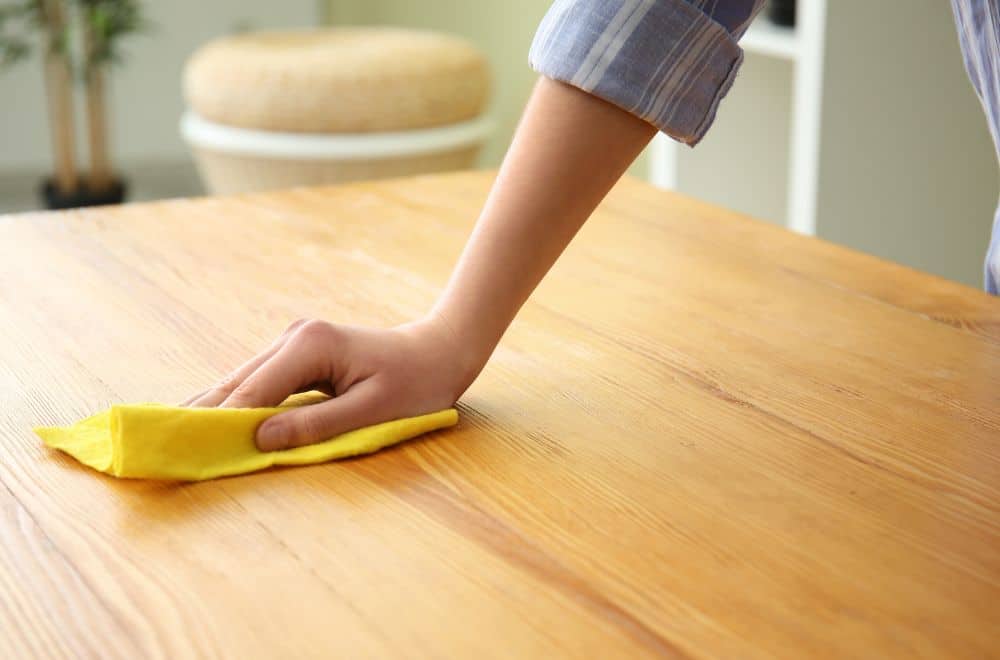
If you have white rings on your polished wood table from alcohol stains, don’t worry, you can remove them easily. Follow these simple steps to clean and polish your table.
By following these simple steps, you can remove alcohol stains from your polished wood table and restore its beauty. Remember to be gentle when cleaning the stain and to use a soft cloth to avoid scratching the surface of the wood.
To avoid future alcohol stains on your polished wood table, there are a few preventative measures you can take. Here are some tips to help keep your table looking its best.
One of the easiest ways to prevent alcohol stains on your wood table is to use coasters. Coasters provide a barrier between your drink and the table, preventing any condensation or spills from coming into contact with the wood. Make sure to use coasters for all drinks, including water and non-alcoholic beverages, as they can also cause damage to the finish of your table.
Keeping your table clean is essential to prevent any stains from setting in. Wipe up any spills or condensation as soon as possible using a soft cloth. Avoid using harsh chemicals or abrasive cleaners, as they can damage the finish of your table. Instead, use a mild soap and water solution or a specialized wood cleaner. Make sure to dry the table thoroughly after cleaning to prevent any water damage.
Storing your alcoholic beverages properly can also help prevent stains on your wood table. Keep them in a cool, dry place away from direct sunlight. Avoid storing them on or near your table, as any spills or leaks can cause damage to the finish. If you do need to keep them on the table, make sure to use a tray or other protective surface to prevent any damage.
By following these simple preventative measures, you can help keep your polished wood table looking its best for years to come.
Removing alcohol stains from a polished wood table can be a tricky task. While there are various DIY methods that you can try, there may be instances where calling a professional may be necessary. Here are a few scenarios where you should consider seeking professional help:
If the alcohol stain has caused extensive damage to the wood, such as deep discoloration or warping, it may be best to call in a professional. They will be able to assess the damage and provide the best course of action to restore the table to its original condition.
If the table is an antique or has sentimental value, it is advisable to seek professional help. Antique furniture requires special care and attention, and attempting to remove the stain on your own may cause further damage to the piece.
If you have never attempted to remove an alcohol stain from a wood table before, it may be best to leave it to the professionals. They have the necessary experience and expertise to handle the job effectively and efficiently.
If the table is expensive, it is best not to take any risks and call in a professional. Attempting to remove the stain on your own may cause irreversible damage to the table, which may end up costing you more in the long run.
In conclusion, while there are various DIY methods to remove alcohol stains from a polished wood table, it is important to know when to call in a professional. Consider the extent of the damage, the value of the table, and your experience before attempting to remove the stain on your own. Remember, it is always better to be safe than sorry.
There are several methods that can be effective in removing white rings from polished wood tables. One method involves using a cloth dampened with denatured alcohol and gently wiping over the damaged area. Another method involves using a cloth with a few drops of cooking oil or traditional wood oils and gently rubbing the oil over the stain. It may take a minute of rubbing the oil in for the stain to fully disappear.
Rubbing alcohol can be used to remove stains from finished wood, but it is important to use it sparingly and to not let it sit on the wood for too long. It is also important to test a small, inconspicuous area first to ensure that the alcohol does not damage the finish.
Yes, furniture oil can be used to remove alcohol stains from wood tables. Simply apply a small amount of furniture oil to a clean, dry cloth and gently rub the oil onto the stained area.
If the wood has been severely damaged by alcohol, it may be necessary to sand down the affected area and refinish the wood. However, for minor damage, one can try using a mixture of equal parts vinegar and olive oil. Simply apply the mixture to the damaged area and let it sit for a few hours before wiping it off with a clean cloth.
Isopropyl alcohol can damage a polyurethane finish if it is used in excess or left on the wood for too long. It is important to test a small, inconspicuous area first to ensure that the alcohol does not damage the finish.
One effective method for removing wine rings from a wooden table is to mix equal parts baking soda and water to form a paste. Apply the paste to the stain and let it sit for a few hours before wiping it off with a clean, damp cloth.

Are you wondering if you can put wooden spoons in the dishwasher? Wooden spoons are a popular kitchen tool that many people use for cooking and baking. They are durable, long-lasting, and gentle on non-stick cookware. However, when it comes to cleaning, there seems to be some confusion about whether or not you can put wooden spoons in the dishwasher.
The answer is, it depends. While some wooden spoons can go in the dishwasher, most cannot. The heat and moisture from the dishwasher can cause the spoon to warp, split, or crack, reducing its lifespan. Additionally, the dishwasher can cause wooden spoons to discolor, making them look old and worn out. In this article, we will explore whether or not wooden spoons can go in the dishwasher, the potential risks, and how to properly care for your wooden spoons.
Wooden spoons are a staple in many kitchens around the world. They have been used for centuries and are popular for a variety of reasons. If you are wondering whether or not you can put wooden spoons in the dishwasher, it is important to understand a few things about them first.
One of the main benefits of using wooden spoons in cooking is their versatility. They come in various shapes and sizes, ranging from small spoons used for tasting to large spoons used for stirring large pots of soup or sauce. Wooden spoons are also gentle on cookware and will not scratch non-stick surfaces.
Another benefit of using wooden spoons is that they do not conduct heat. This means that you can leave a wooden spoon in a hot pot without worrying about it getting too hot to handle. Wooden spoons are also less likely to melt or warp when exposed to high temperatures.
Not all wooden spoons are created equal. The type of wood used to make a wooden spoon can affect its durability and effectiveness. Some of the most common types of wood used for wooden spoons include:
To keep your wooden spoons in good condition, it is important to take proper care of them. Here are a few tips for caring for your wooden spoons:
By understanding the benefits of using wooden spoons in cooking, the types of wood used for wooden spoons, and how to care for them, you can make an informed decision about whether or not to put them in the dishwasher.
When it comes to cleaning your kitchen utensils, the dishwasher can be a lifesaver. It saves time and effort, and it can sanitize your dishes. However, not all kitchen tools are dishwasher-safe. Before you put your wooden spoons in the dishwasher, it’s important to know some basic dishwasher rules.
First, check the manufacturer’s instructions. Some wooden utensils are dishwasher-safe, but most are not. If you’re not sure, it’s better to err on the side of caution and wash them by hand.
Second, consider the dishwasher’s settings. The hot water and high pressure in the dishwasher can damage some wooden spoons. If your dishwasher has a gentle cycle, you may be able to use it for your wooden spoons.
Third, use a dishwasher basket or utensil holder. This will keep your wooden spoons from getting tossed around and damaged in the dishwasher.
Finally, make sure your wooden spoons are completely dry before storing them. Moisture can cause them to warp or crack over time.
In summary, while some wooden utensils can go in the dishwasher, most cannot. It’s important to check the manufacturer’s instructions and consider the dishwasher’s settings before putting your wooden spoons in the dishwasher. Using a dishwasher basket or utensil holder and ensuring your wooden spoons are completely dry before storing them can help prevent damage.
If you’re wondering whether or not you can put your wooden spoons in the dishwasher, it’s important to consider the potential effects that the dishwasher can have on them. While some wooden utensils can handle the heat and water exposure, most will not fare well. Here are the three main types of damage that your wooden spoons may experience if you put them in the dishwasher:
Wooden spoons are susceptible to water damage, which can cause them to warp, crack, or split. The high heat and moisture in the dishwasher can be especially damaging to wooden utensils. The hot water and detergent can strip the spoon of its natural oils, which can cause it to dry out and become brittle over time.
The high heat in the dishwasher can also cause damage to your wooden spoons. The heat can cause the wood to expand and contract, which can lead to warping or cracking. Additionally, the heat can cause the natural oils in the wood to evaporate, which can make the spoon more susceptible to damage.
The dishwasher detergent can also cause chemical damage to your wooden spoons. Many detergents contain harsh chemicals that can strip the wood of its natural oils and cause it to dry out. Additionally, the chemicals can cause the wood to become discolored or even break down over time.
To avoid damaging your wooden spoons, it’s best to wash them by hand with soap and water. Make sure to dry them thoroughly after washing and avoid leaving them soaking in water for extended periods of time. If your wooden spoons do get wet, you can use a towel to wipe off any excess moisture and then let them air dry.
Overall, while it may be tempting to put your wooden spoons in the dishwasher for convenience, it’s best to avoid doing so if you want to keep them in good condition for years to come.

Wooden spoons are an essential kitchen tool that can last for years if properly cared for. Here are some tips to help you maintain the quality and longevity of your wooden spoons.
Hand washing is the best way to clean wooden spoons. Use warm water and mild dish soap to gently scrub the spoon. Avoid soaking the spoon in water for an extended period, as this can cause the wood to warp or crack. Rinse the spoon thoroughly with warm water and dry it immediately.
After washing your wooden spoon, dry it thoroughly. Use a clean towel to wipe off any excess water, then allow the spoon to air dry completely. Avoid using a dishwasher to dry wooden spoons, as the heat can cause the wood to crack or warp.
To maintain the quality of your wooden spoons, it’s essential to keep them well-maintained. Here are some tips to help you do this:
By following these simple tips, you can keep your wooden spoons in excellent condition for years to come.
If you are looking for alternatives to wooden spoons, there are several options available to you. Here are two popular alternatives:
Silicone spoons are a great alternative to wooden spoons. They are heat-resistant, non-stick, and easy to clean. They are also safe for use with non-stick cookware and will not scratch or damage the surface.
One of the benefits of silicone spoons is that they come in a variety of colors, making it easy to color-code your kitchen tools. This can be especially helpful if you have a lot of utensils and need an easy way to keep them organized.
Stainless steel spoons are another great alternative to wooden spoons. They are durable, easy to clean, and will not absorb flavors or odors like wooden spoons can.
One of the benefits of stainless steel spoons is that they are dishwasher safe, making them easy to clean. They are also great for use with high-heat cooking, as they will not melt or warp like some other materials.
When choosing a stainless steel spoon, look for one that is made from high-quality stainless steel and has a comfortable handle. A good stainless steel spoon should feel sturdy in your hand and be easy to grip.
Overall, both silicone and stainless steel spoons are great alternatives to wooden spoons. They are durable, easy to clean, and safe for use with a variety of cookware. Consider adding them to your kitchen tool collection today!
It depends on the type of wooden spoon you have and the dishwasher’s settings. Some wooden spoons can go in the dishwasher, while others cannot. Check the manufacturer’s instructions to determine if your wooden spoon is dishwasher safe.
As mentioned earlier, it depends on the type of wooden spoon you have and the dishwasher’s settings. Some wooden spoons can go in the dishwasher, while others cannot. However, it is generally recommended to wash wooden spoons by hand to avoid warping, cracking, or splitting.
To clean wooden spoons, wash them by hand with hot, soapy water. Avoid soaking wooden spoons in water for long periods of time, as this can cause them to warp. Rinse the spoons thoroughly and dry them with a clean towel. You can also use a mixture of baking soda and water to remove stains from wooden spoons.
To care for wooden utensils, wash them by hand with hot, soapy water and dry them with a clean towel. Avoid soaking wooden utensils in water for long periods of time, as this can cause them to warp. Apply a food-grade mineral oil to the utensils regularly to prevent them from drying out and cracking.
It is generally not recommended to wash wooden cutting boards in the dishwasher, as the heat and pressure can cause them to warp or crack. Instead, wash them by hand with hot, soapy water and dry them with a clean towel. Apply a food-grade mineral oil to the cutting board regularly to prevent it from drying out and cracking.
To remove bad smells from new wooden spoons, wash them by hand with hot, soapy water and dry them with a clean towel. You can also try rubbing the spoons with a lemon or lime wedge, or soaking them in a mixture of water and vinegar for a few minutes before washing them again.

Are you tired of the look of your painted wood furniture or deck? Do you want to add some depth and character to your surfaces? If so, you may be wondering if you can stain over painted wood. The good news is that it is possible, but there are some important factors to consider before you start.
Firstly, it’s important to note that not all types of stain will work over painted wood. Regular wood stain requires the ability to penetrate the wood grain, which is not possible on a painted surface. Instead, you will need to use a gel stain that sits on top of the paint and does not require penetration. Additionally, the type of paint used on the surface will affect the success of staining over it. Oil-based paints will not allow the stain to adhere properly, while water-based paints are more compatible with gel stains.
Before you begin staining over painted wood, you will need to properly prepare the surface. This includes cleaning and sanding the surface to remove any dirt, debris, or glossy finish that could interfere with the stain. It’s also important to test a small, inconspicuous area first to ensure that the stain adheres properly and achieves the desired color. With the right materials and preparation, you can successfully stain over painted wood and transform the look of your surfaces.
If you have a piece of furniture or a wooden deck that has been painted, you may be wondering if you can change its color without having to strip the paint. Staining over painted wood is a great solution for those who want to change the color of their wooden surfaces without having to go through the hassle of removing the old paint.
Staining over painted wood can also be a great way to add depth and texture to your wooden surfaces. Unlike paint, which sits on top of the wood, stain penetrates the wood fibers, highlighting the natural grain and texture of the wood. This can give your furniture or deck a more rustic and natural look.
Another advantage of staining over painted wood is that it can be a cost-effective way to update your wooden surfaces. Instead of buying new furniture or replacing your deck, you can simply stain over the existing paint to give it a fresh new look.
Staining over painted wood can also be a great way to protect your wooden surfaces from the elements. Most stains contain a sealant that can help protect the wood from moisture, UV rays, and other environmental factors that can cause it to deteriorate over time.
Overall, staining over painted wood can be a great way to update, protect, and enhance the natural beauty of your wooden surfaces.

Before you start staining over painted wood, it is essential to prepare the surface properly. This will ensure that the stain adheres well and provides an even finish. Here are two critical steps to follow when preparing a painted surface for staining:
The first step is to clean the painted surface thoroughly. This will remove any dirt, grime, or debris that may be on the surface. You can use a mild detergent and warm water to clean the surface. Make sure to rinse the surface well and let it dry completely before proceeding to the next step.
The second step is to sand the painted surface lightly. This will help to remove any gloss or sheen from the surface and provide a rougher texture for the stain to adhere to. Use a fine-grit sandpaper (220 grit or higher) to sand the surface. Sand in the direction of the wood grain, and be careful not to sand too aggressively, as this can damage the surface.
After sanding, make sure to remove any dust or debris from the surface. You can use a tack cloth or a soft-bristled brush to remove any dust or debris. This will ensure that the surface is clean and ready for staining.
In summary, cleaning and sanding the painted surface are two critical steps to follow when preparing a surface for staining. By following these steps, you can ensure that the stain adheres well and provides an even finish.
When it comes to staining over painted wood, choosing the right type of stain is crucial. There are three main types of stains to consider: oil-based, water-based, and gel stain. Each type has its own unique characteristics and benefits. Here’s what you need to know about each one:
Oil-based stains are the most commonly used type of stain for staining over painted wood. They are known for their durability and ability to penetrate deeply into the wood, providing long-lasting protection against the elements. Oil-based stains are also easy to apply and provide a beautiful, natural finish.
When choosing an oil-based stain, look for one that is specifically formulated for use on painted surfaces. This will ensure that the stain adheres properly and provides the best possible finish. Some popular oil-based stain brands include Minwax, Cabot, and Olympic.
Water-based stains are another option for staining over painted wood. They are known for their ease of use and fast drying time. Water-based stains are also environmentally friendly and offer a wide range of color options.
When choosing a water-based stain, look for one that is specifically formulated for use on painted surfaces. This will ensure that the stain adheres properly and provides the best possible finish. Some popular water-based stain brands include Varathane, General Finishes, and Minwax.
Gel stains are a thicker, more viscous type of stain that can be used to achieve a variety of finishes, from a natural wood look to a painted look. They are easy to apply and provide great coverage, making them a popular choice for DIY projects.
When choosing a gel stain, look for one that is specifically formulated for use on painted surfaces. This will ensure that the stain adheres properly and provides the best possible finish. Some popular gel stain brands include General Finishes, Minwax, and Varathane.
Overall, when choosing a stain for staining over painted wood, it’s important to consider the type of wood you’re working with, the look you want to achieve, and the level of protection you need. With the right stain and proper application techniques, you can transform your painted wood surfaces into beautiful, long-lasting works of art.
Staining over painted wood is possible, but it requires a different process than staining unfinished wood. Here are the steps to follow when staining over painted wood:
Staining over painted wood can be a great way to update the look of your furniture or home decor. Just be sure to follow the proper process to achieve a beautiful and long-lasting finish.
After staining your painted wood, it’s essential to take proper care of the finish to ensure it lasts for years to come. Here are some post-staining care tips to keep in mind:
To protect your newly stained surface, it’s crucial to seal the stain with a clear coat. This will help prevent the stain from fading or chipping away over time. Here are some tips for sealing your stain:
To keep your stained surface looking great, it’s essential to maintain the finish regularly. Here are some tips for maintaining your stained surface:
By following these post-staining care tips, you can ensure that your stained painted wood looks great and lasts for years to come.
Yes, you can apply gel stain over painted wood. However, it’s important to prepare the surface of the wood properly before applying the gel stain. This includes cleaning the surface thoroughly and sanding it lightly to create a rough surface for the stain to adhere to.
Yes, it’s possible to stain over primer. However, it’s important to use a high-quality primer that is compatible with the stain you plan to use. Additionally, you should ensure that the primer is completely dry before applying the stain.
Some popular wood stain colors include dark walnut, ebony, provincial, and weathered gray. However, the best color for your project will depend on your personal preferences and the type of wood you are staining.
Yes, solid stain can be applied over paint. However, it’s important to prepare the surface of the wood properly before applying the stain. This includes cleaning the surface thoroughly and sanding it lightly to create a rough surface for the stain to adhere to.
To achieve an antique look by staining over paint, you can use a technique called “dry brushing.” This involves lightly brushing the stain onto the surface of the painted wood, then using a dry brush to remove some of the stain, leaving behind a subtle, antique-looking finish.
Yes, you can use stain over paint on exterior surfaces. However, it’s important to use a high-quality stain that is designed to withstand outdoor conditions. Additionally, you should ensure that the surface of the wood is properly prepared before applying the stain.

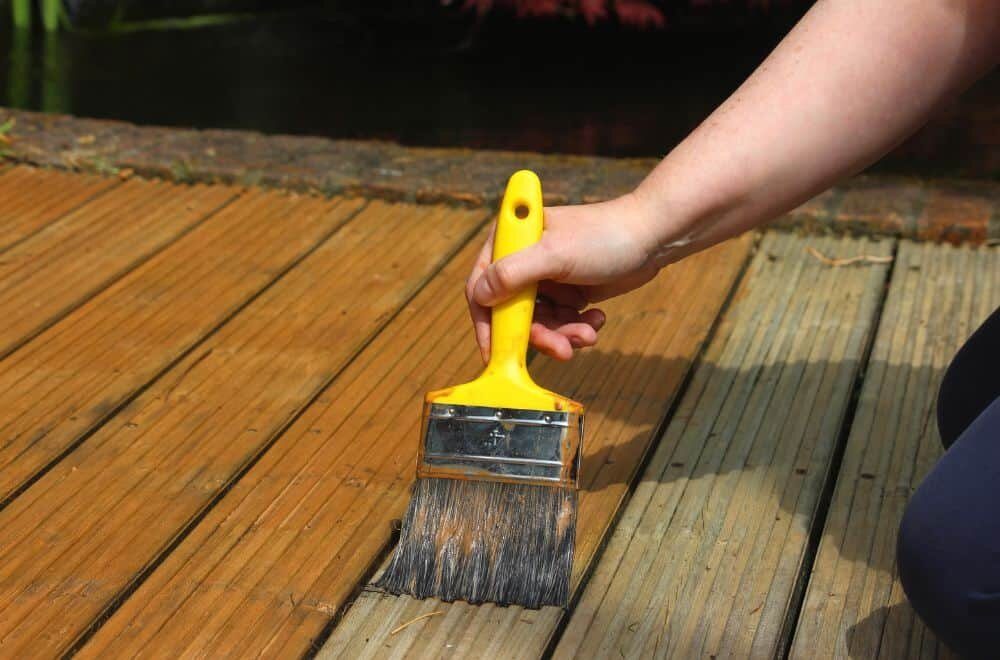
Are you wondering whether you need to use one or two coats of Ready Seal wood stain/sealer? While one coat may be sufficient in some cases, it is generally recommended to use two coats for the best results. Applying two coats will create a consistent, long-lasting finish that will protect your exterior wood surfaces.
Situs kami juga sangat mudah digunakan. Dengan antarmuka yang user-friendly, Anda dapat dengan cepat mengakses data Macau 4D kapan saja dan di mana saja. Kami memahami betapa pentingnya kecepatan dan efisiensi dalam dunia toto, sehingga kami berkomitmen untuk memberikan layanan yang cepat dan responsif. Selain itu, tim kami selalu siap sedia data macau 4d untuk membantu Anda dengan segala pertanyaan atau kebutuhan yang mungkin Anda miliki.
If the wood surface is rough or porous, or if you are applying the Ready Seal to a large area, it is especially important to use two coats. This will ensure that the wood is fully covered and protected from the elements. However, if the wood is brand new or smooth-milled, it may only require one coat initially, as it takes a few years for the pores of the wood to fully open up.
Ultimately, the number of coats you need to apply will depend on the condition of your wood surface and the size of the area you are covering. By following the recommended guidelines and using the appropriate number of coats, you can ensure that your wood surfaces are protected and look their best for years to come.
Ready Seal is a wood stain and sealer that is designed to protect and enhance the natural beauty of wood. It is a unique blend of oil-based stains and sealers that penetrate deep into the wood fibers, providing long-lasting protection against the elements. Ready Seal is easy to apply and dries quickly, making it an ideal choice for both professional contractors and do-it-yourselfers.
Using Ready Seal wood stain/sealer has many benefits. Here are a few:
In summary, using Ready Seal wood stain/sealer is a great way to protect and enhance the natural beauty of your wood surfaces. With its easy application and long-lasting protection, it’s no wonder that Ready Seal is a popular choice among homeowners and contractors alike.
When it comes to applying Ready Seal wood stain/sealer, it is recommended to use two coats for the best results. In this section, we will explore why two coats are recommended and the impact of using two coats on wood protection.
Using two coats of Ready Seal wood stain/sealer ensures that the wood is fully covered and protected. The first coat penetrates the wood and prepares it for the second coat. The second coat provides a consistent finish and adds an extra layer of protection against weathering and UV rays.
Jangan lewatkan kesempatan untuk meningkatkan strategi permainan Anda dengan data SGP terpercaya dari situs toto slot resmi kami. Bergabunglah dengan komunitas kami sekarang dan rasakan perbedaan dalam cara Anda bermain dan menang. Dengan data yang akurat dan layanan yang prima, Anda dapat meraih kemenangan lebih sering di situs toto dan menikmati setiap momen permainan. Daftar sekarang dan nikmati keuntungan dari live draw SGP yang akurat dan cepat!
Another reason why two coats are recommended is that it allows you to achieve a more even finish. If you only apply one coat, you may end up with uneven areas that are more prone to wear and tear.
Using two coats of Ready Seal wood stain/sealer can significantly improve the protection of your wood. The first coat penetrates the wood and seals it from the inside out. The second coat provides an extra layer of protection that helps to prevent moisture from penetrating the wood.
By using two coats, you can also extend the life of your wood. The extra layer of protection helps to prevent damage from weathering, UV rays, and other environmental factors that can cause wood to deteriorate over time.
In summary, using two coats of Ready Seal wood stain/sealer is recommended for the best results. It provides a more even finish and improves the protection of your wood. By following this recommendation, you can ensure that your wood stays in great condition for years to come.
If you’re wondering whether one coat of Ready Seal is enough for your wood staining project, the answer is: it depends. In some cases, one coat is sufficient, while in others, it may be necessary to apply two coats for optimal results.
If you’re staining a new, smooth wood surface, one coat of Ready Seal may be enough. This is because the wood is less porous and will absorb the stain more evenly. Additionally, if you’re looking for a lighter, more natural finish, one coat may be enough to achieve the desired look.
There are both advantages and disadvantages to applying only one coat of Ready Seal. Here are a few to consider:
Ultimately, the decision to apply one or two coats of Ready Seal will depend on your specific project and preferences. Consider the type of wood you’re staining, the look you want to achieve, and the level of protection you need before making your decision.
When it comes to applying Ready Seal wood stain/sealer, you may be wondering if you should use one coat or two. While one coat may seem like a quicker and more cost-effective option, there are benefits to using two coats as recommended. In this section, we will compare the durability, cost-effectiveness, and time consumption of using one coat versus two coats.
One of the main benefits of using two coats of Ready Seal is increased durability. The second coat helps to provide an extra layer of protection against weathering, UV rays, and other environmental factors. This means that your wood will be better protected and will last longer with two coats of Ready Seal rather than just one.
While using two coats of Ready Seal may seem more expensive upfront, it can actually be more cost-effective in the long run. With two coats, your wood will be better protected and will require less maintenance over time. This means that you may save money on repairs and replacements in the future.
Using two coats of Ready Seal will take more time than using just one coat. However, the extra time spent applying the second coat can be worth it in the long run. With two coats, you will have better protection and a longer-lasting finish on your wood.
In summary, while using one coat of Ready Seal may seem like a quicker and more cost-effective option, using two coats can provide increased durability, cost-effectiveness, and a longer-lasting finish. Consider these factors when deciding whether to use one coat or two.
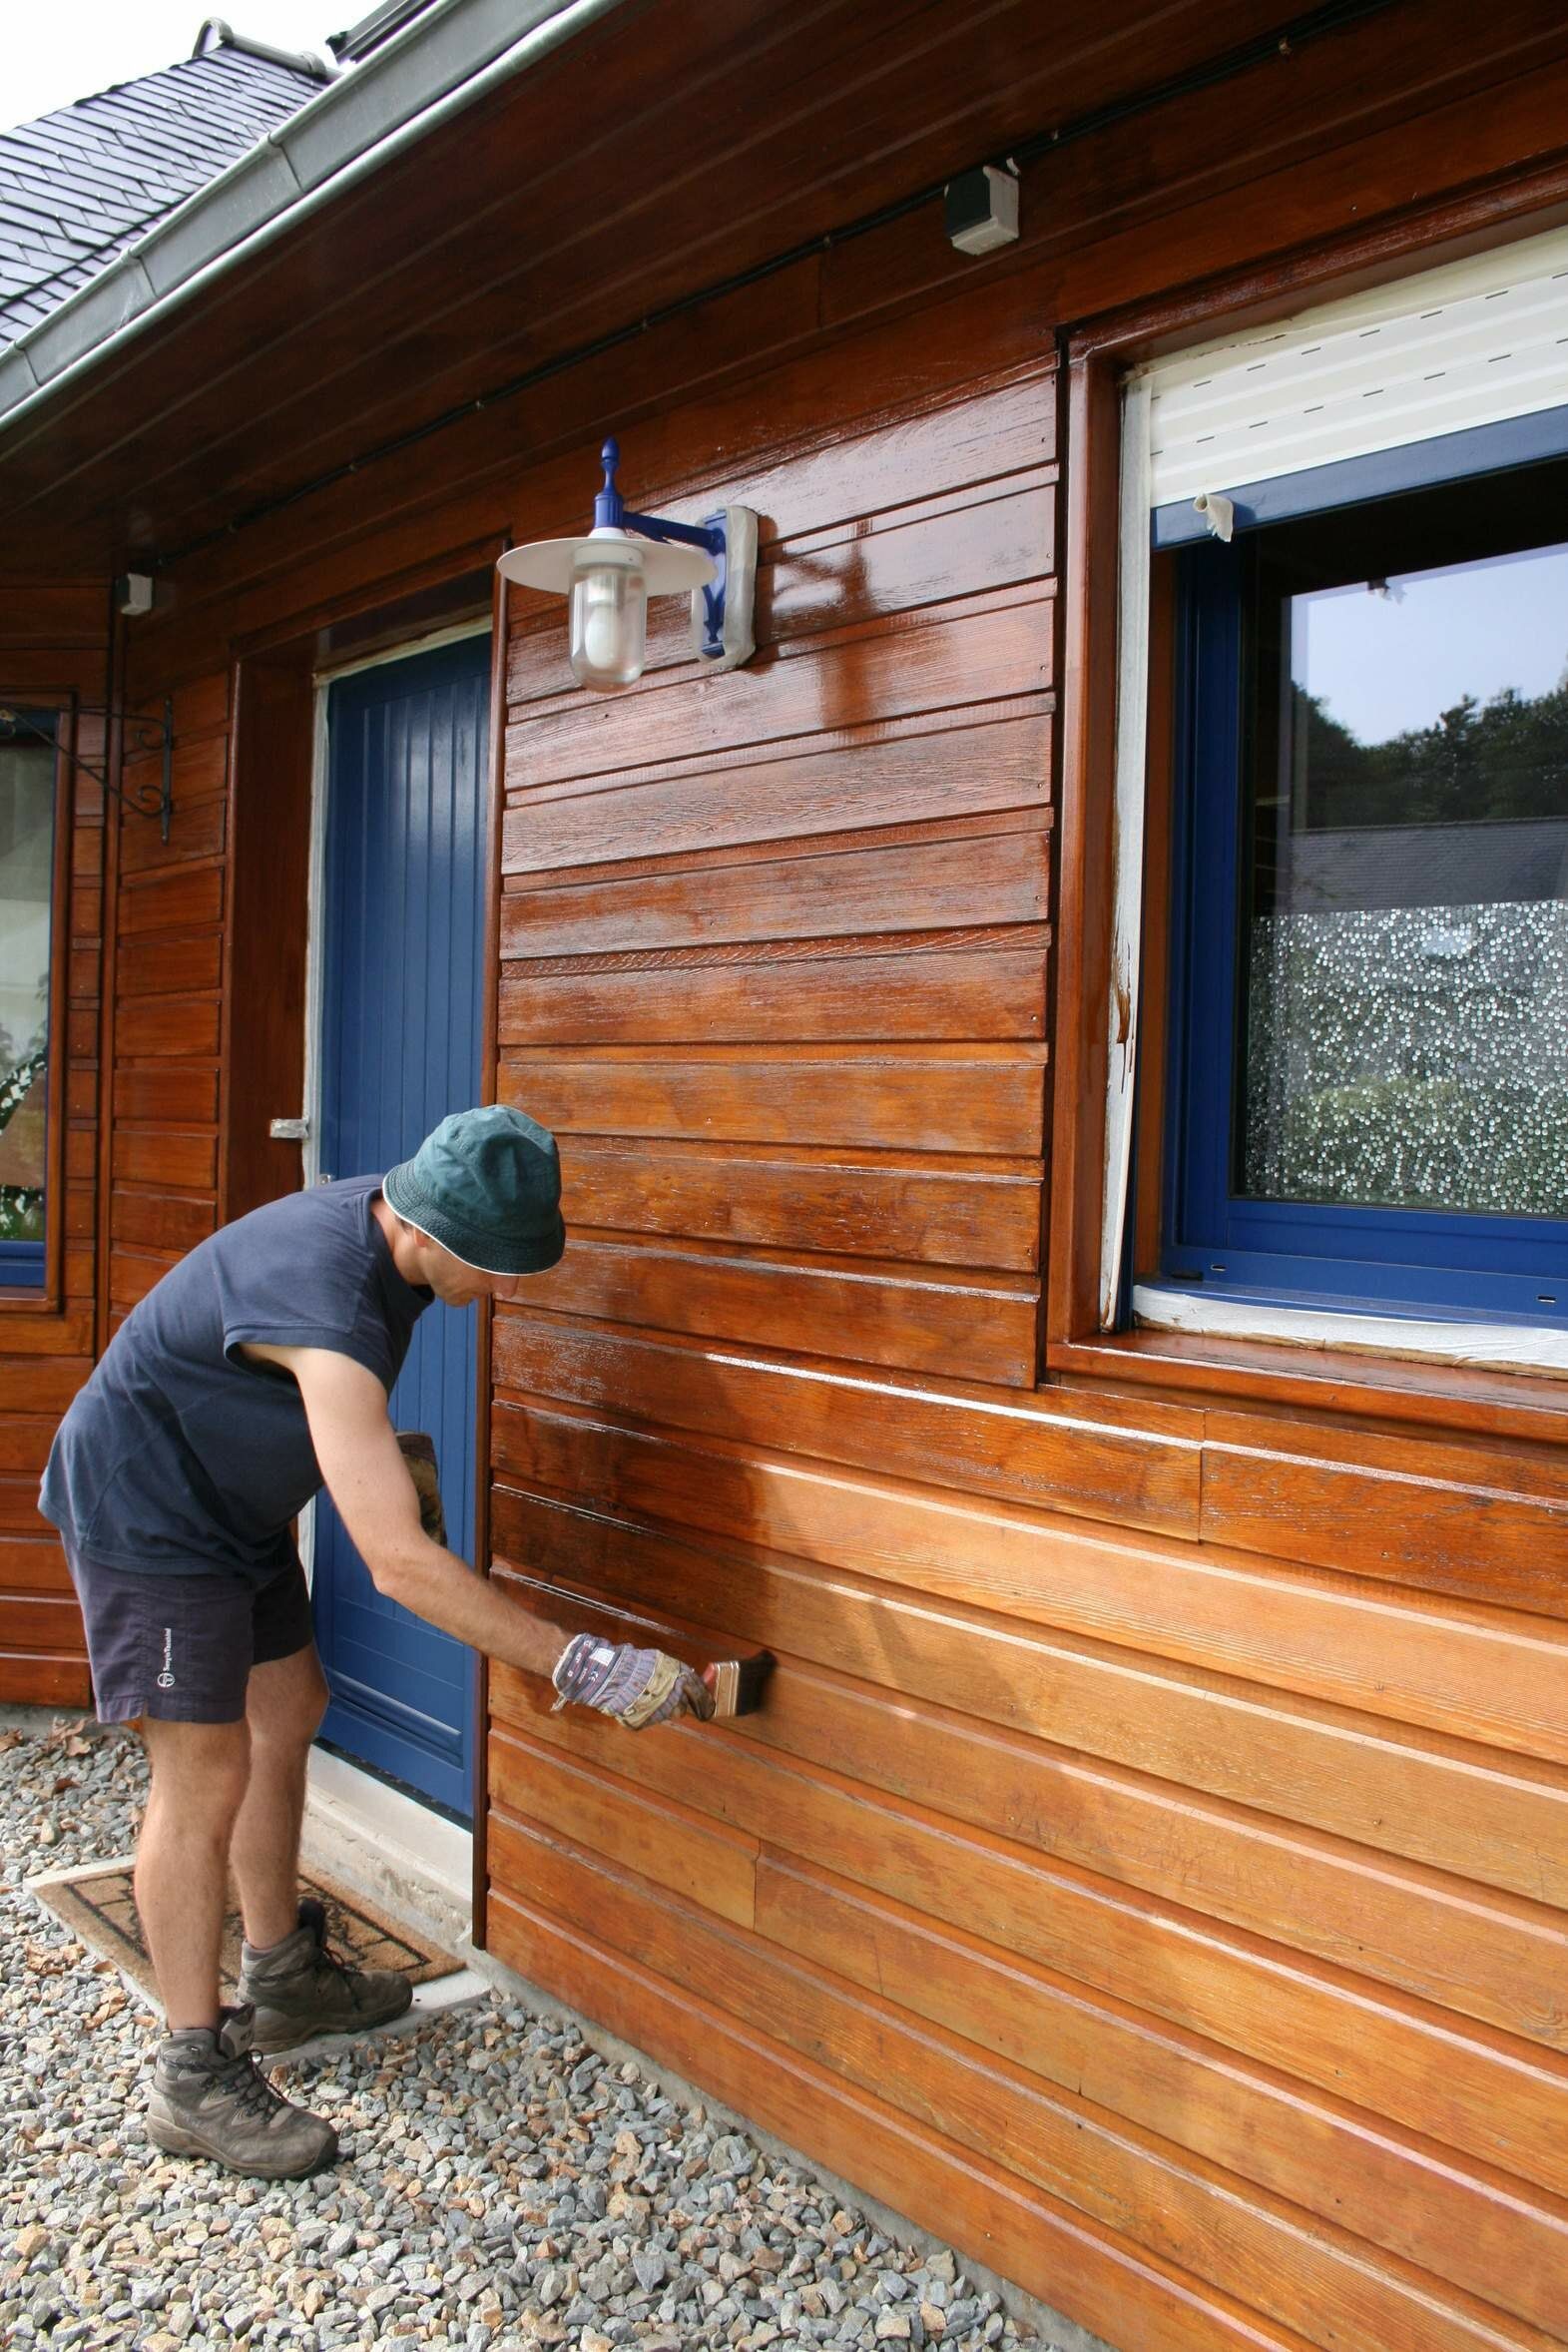
When applying Ready Seal Wood Stain/Sealer, it is essential to follow the manufacturer’s recommendations to achieve the desired results. Here are some tips to help you apply Ready Seal Wood Stain/Sealer effectively:
Before applying Ready Seal, make sure the surface is clean, dry, and free of any dust, dirt, or other debris. If the surface is rough, sand it down to a smooth finish. If the wood is new, allow it to weather for at least six months before applying Ready Seal.
When applying Ready Seal, it is recommended to use a brush, roller, or sprayer. Pour the stain/sealer into a paint tray or bucket and start applying it to the wood surface. Make sure to apply it evenly and avoid overlapping the strokes.
While Ready Seal can be applied in a single coat, it is recommended to use two coats for the best results. The second coat will provide better protection and coverage, especially on rough or weathered wood.
When pouring Ready Seal into a paint tray or bucket, make sure to pour it slowly and carefully. Pouring too fast can cause the stain/sealer to splash and spill, which can be difficult to clean up.
When using a sprayer to apply Ready Seal, make sure to use a cardboard or spray shield to control overspray. Overspraying can cause the stain/sealer to coat unintended areas, which can be difficult to remove.
By following these tips, you can ensure that your Ready Seal Wood Stain/Sealer application is effective and long-lasting.
The number of coats of wood sealer you should use depends on the type of wood and the condition of the surface. In general, it is recommended to apply two coats of sealer to achieve a consistent, long-lasting finish.
While one coat of Ready Seal may be sufficient for some projects, it is recommended to use two coats for best results. This will ensure that the surface is adequately protected and that the color is consistent.
Yes, it is recommended to use two coats of Ready Seal on exterior wood surfaces. This will create a consistent, long-lasting finish. If the wood surface is rough, or if you are applying the Ready Seal to a large area, it is especially important to use two coats.
To achieve the best results, it is recommended to use two coats of stain and sealer on exterior wood surfaces. This will create a consistent, long-lasting finish.
The coverage of Ready Seal will vary depending on the type of wood and the condition of the surface. On average, one gallon of Ready Seal will cover approximately 150-200 square feet with one coat.
Ready Seal is available in a variety of colors, including natural cedar, pecan, dark walnut, redwood, light oak, mahogany, burnt hickory, and mission brown.

If you’re planning to stain your deck, you may be wondering how long it takes for the stain to dry. The drying time for wood stain on a deck depends on several factors, including the type of wood, the type of stain, and the weather conditions. In general, you can expect wood stain to take anywhere from 24 to 48 hours to dry on a deck.
One of the most important factors that affects the drying time of wood stain on a deck is the type of wood you’re working with. Hardwood decks tend to dry faster than softwood decks, since hardwood is less porous and absorbs less moisture. Softwood decks, on the other hand, are more porous and tend to take longer to dry. Additionally, the type of stain you use can also affect the drying time. Oil-based stains generally take longer to dry than water-based stains, but they also tend to be more durable.
If you’re planning on staining your deck, it’s important to understand what wood stain is and how it works. Wood stain is a type of finish that is applied to wood surfaces to enhance their natural color, protect them from the elements, and improve their durability. Stains are available in a wide range of colors and finishes, from clear to opaque, and can be oil-based or water-based.
When you apply wood stain to a deck, it penetrates the wood fibers and enhances the natural grain pattern. The stain also provides a layer of protection against moisture, UV rays, and other environmental factors that can cause damage to the wood. The type of stain you choose will depend on the look you want to achieve and the level of protection you need.
Oil-based stains are a popular choice for decks because they penetrate deeply into the wood and provide long-lasting protection. They are also easy to apply and can be used on a variety of wood types. However, they do take longer to dry than water-based stains, and they can emit strong odors during the application process.
Water-based stains are another option for deck staining. They dry faster than oil-based stains and emit fewer odors. They are also easier to clean up with soap and water. However, they don’t penetrate the wood as deeply as oil-based stains, which means they may not provide as much protection against the elements.
In general, it’s best to choose a stain that is specifically designed for outdoor use and can withstand the elements. Look for stains that offer UV protection and are resistant to mildew, mold, and other types of damage. It’s also important to follow the manufacturer’s instructions for application and drying times to ensure that your deck looks great and stays protected for years to come.
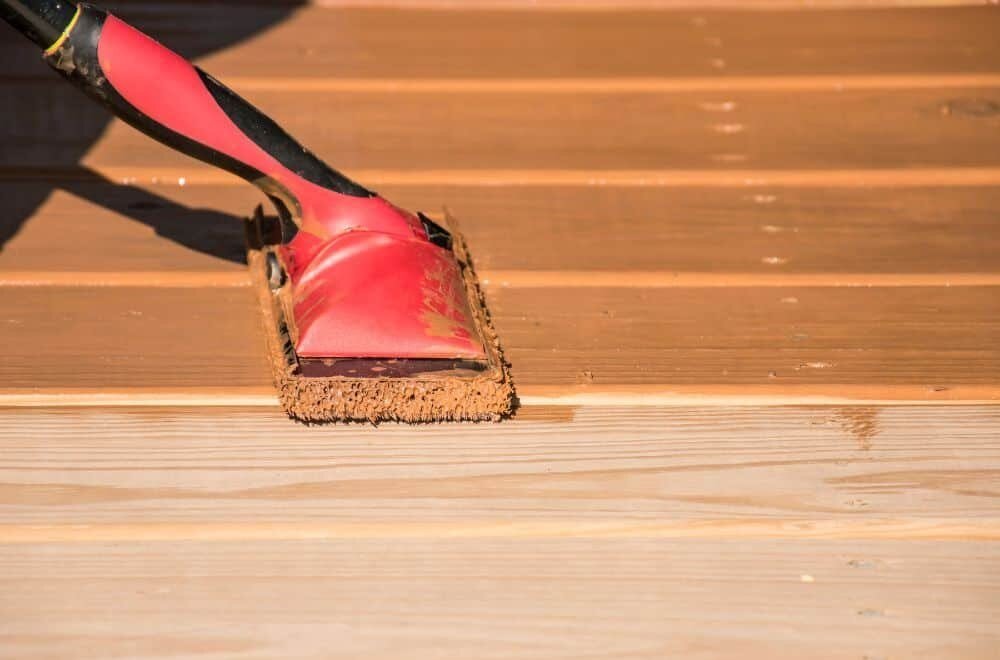
When it comes to staining a deck, one of the most important things to consider is how long it will take for the stain to dry. The drying time can vary depending on several factors, including the type of wood stain you use, the weather conditions, and the type of wood you are staining.
Different types of wood stains have different drying times. For example, water-based wood stains generally dry faster than oil-based stains. Water-based stains can take around 3-4 hours to dry to the touch and up to 24-48 hours to fully cure. Oil-based stains, on the other hand, can take anywhere from 24-48 hours to dry and up to 72 hours to fully cure.
The weather conditions can also affect the drying time of your wood stain. High humidity levels can extend the drying time of water-based stains by several hours. Similarly, if the temperature is too cold, the stain may not dry properly. Ideally, the temperature should be between 50-90°F with low humidity levels for optimal drying conditions.
The type of wood you are staining can also affect the drying time of your wood stain. Softwoods such as pine and cedar tend to absorb stain more quickly than hardwoods like oak and maple. This means that softwoods may dry faster, but they may also require more coats of stain to achieve the desired color. Hardwoods, on the other hand, may take longer to dry, but they may require fewer coats of stain.
In summary, the drying time of wood stain on a deck can vary depending on several factors, including the type of wood stain, weather conditions, and wood type. By considering these factors, you can ensure that your deck stain dries properly and looks great for years to come.
When it comes to staining a deck, one of the most important things to consider is drying time. You don’t want to apply a second coat of stain too soon, or you risk ruining the finish. On the other hand, you don’t want to wait too long either, as this can cause the wood to become too dry and prevent the stain from soaking in properly.
On average, wood stain takes about 24 to 48 hours to dry completely on a deck. However, the exact drying time can vary depending on several factors, including the type of wood, the type of stain, and the weather conditions.
For example, if you are staining a softwood like pine, it will likely dry faster than a hardwood like oak. Similarly, if you are using an oil-based stain, it will typically take longer to dry than a water-based stain.
In addition to these factors, the temperature and humidity levels can also affect the drying time of wood stain. If it is hot and dry outside, the stain will dry faster, while cooler and more humid conditions will slow down the drying process.
To ensure that your deck stain dries properly, it is important to follow the manufacturer’s instructions carefully. This may include waiting a certain amount of time between coats, as well as avoiding heavy foot traffic or exposure to water until the stain is fully dry. By doing so, you can help ensure that your deck looks beautiful and lasts for years to come.
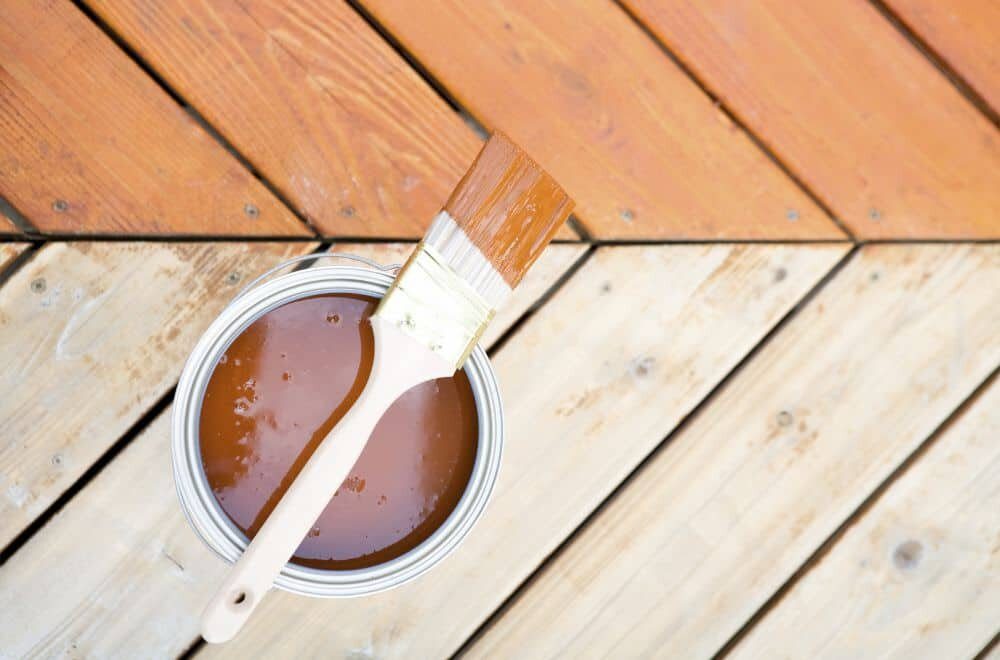
After applying wood stain to your deck, you might be wondering how long it will take to dry. It’s important to let the stain dry completely before walking on it or placing any furniture on it, as it can easily smudge or transfer onto other surfaces. Here are some ways to tell if your wood stain is dry:
One of the easiest ways to tell if your wood stain is dry is to touch it. If it feels dry to the touch, then it’s likely dry. However, be careful not to press too hard or scratch the surface with your fingernail, as this can cause damage.
Another way to tell if your wood stain is dry is to look for glossiness. If the stain is still shiny or glossy, then it’s likely still wet. Once it dries, the glossiness will disappear.
If the wood stain is still wet, it will have a strong odor. Once it dries, the smell will dissipate. You can also try smelling the surface of the wood from a few inches away to see if it still has a strong odor.
Performing a tape test is a good way to check if the wood stain is dry. Simply place a piece of tape onto the surface of the wood and then peel it off. If the tape comes off cleanly without any stain residue, then the stain is dry.
If you have a moisture meter, you can use it to check the moisture content of the wood. If the moisture content is below 15%, then the wood stain is likely dry. However, keep in mind that moisture meters can be expensive and may not be necessary for most DIY projects.
By following these tips, you can ensure that your wood stain is dry before moving on to the next step of your deck project. Remember to be patient and let the stain dry completely before using the deck.
When staining a deck, you want to make sure it dries as quickly as possible so you can enjoy it sooner. Here are some tips to help speed up the drying process:
Water-based stains dry faster than oil-based stains. If you’re in a hurry, opt for a water-based stain. However, keep in mind that oil-based stains tend to last longer and provide better protection for your deck.
The weather can greatly affect how quickly your stain dries. Choose a day with low humidity and moderate temperatures. Avoid staining on a rainy or excessively hot day.
Applying thick coats of stain can prolong the drying time. Instead, apply thin coats and let each coat dry completely before applying the next one.
A fan can help circulate air and speed up the drying process. If you don’t have a fan, simply leave the deck open to the air and avoid covering it with a tarp or other material.
Adding heat can help dry the stain faster. You can use a heat gun or a hair dryer on a low setting to gently warm the surface of the deck. Just be careful not to overheat the wood or the stain.
By following these tips, you can help your deck stain dry faster and enjoy your newly stained deck sooner.
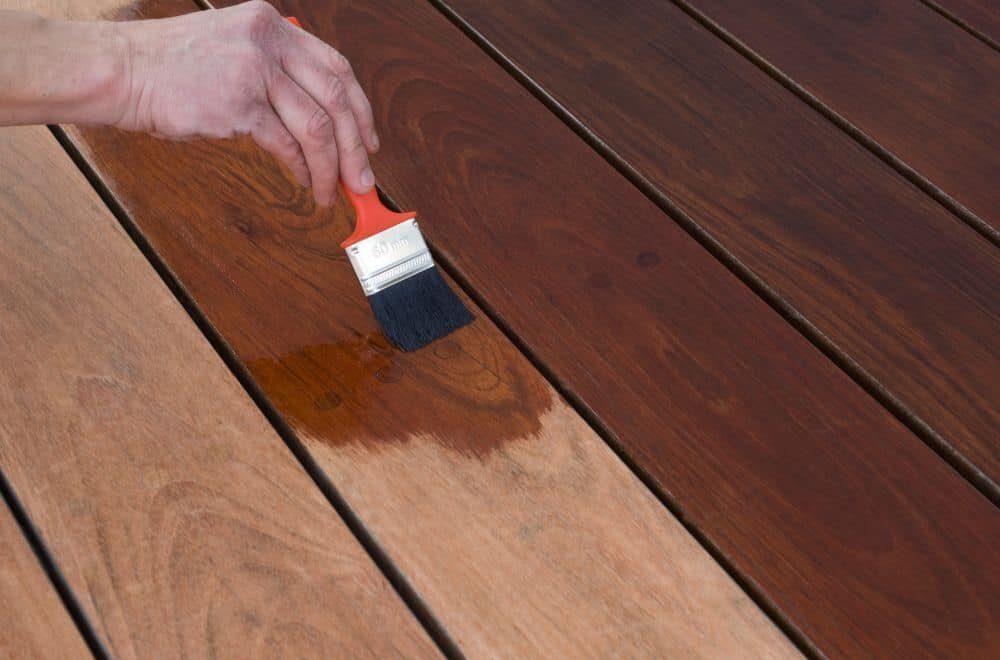
When it comes to wood stain, it’s important to take certain safety measures during the drying process. Here are a few things to keep in mind:
Make sure the area where you’re staining your deck is well-ventilated. This will help prevent the buildup of fumes, which can be harmful if inhaled. Consider opening windows and doors, or using a fan to circulate air.
Wear protective gear, such as gloves and a mask, to prevent skin and respiratory irritation. Some wood stains contain chemicals that can be harmful if they come into contact with your skin or if you inhale them.
Keep children and pets away from the area where you’re staining your deck. Wood stain can be toxic if ingested, so it’s important to keep it out of reach.
Always follow the manufacturer’s instructions when it comes to drying times and safety precautions. Different types of wood stains may have different drying times and require different safety measures.
By following these safety measures, you can ensure that the wood stain on your deck dries properly and without any harm to yourself or others.
The drying time for deck stain can vary depending on several factors, such as the type of stain, humidity, temperature, and the porosity of the wood. On average, it may take 24 to 48 hours for deck stain to dry to the touch. However, it’s important to note that it may take up to 72 hours for the stain to fully cure.
It’s best to wait at least 24 hours before walking on a newly stained deck. This will give the stain enough time to dry and cure properly. However, if the weather is humid or if the temperature is below 50°F, it’s best to wait longer to ensure that the stain has fully cured.
If it rains on a freshly stained deck, it can ruin the finish and cause water damage to the wood. It’s best to avoid staining your deck if rain is in the forecast for the next 24 to 48 hours. If it does rain unexpectedly, cover your deck with a tarp or plastic sheeting to protect it from the rain.
Behr solid stain can take anywhere from 24 to 48 hours to dry before it’s safe from rain. However, it’s important to check the manufacturer’s instructions for specific drying times and other recommendations.
Cabot deck stain can take anywhere from 24 to 48 hours to dry to the touch. However, it may take up to 72 hours for the stain to fully cure. It’s important to follow the manufacturer’s instructions for specific drying times and other recommendations.
It’s important to wait at least 24 hours before applying a second coat of deck stain. This will give the first coat enough time to dry and cure properly. However, it’s best to check the manufacturer’s instructions for specific recommendations on when to apply a second coat of stain.

If you’re working with wood, you may encounter gaps that need to be filled. These gaps can be caused by a variety of factors, including wood shrinkage, warping, or damage. Filling large gaps in wood can be a daunting task, but it’s important to choose the right filler for the job to ensure a successful repair.
There are several options available for filling large gaps in wood, including epoxy fillers, powdered fillers, and wood putty. Each type of filler has its own unique properties and advantages, so it’s important to consider the specific needs of your project before choosing a filler. Factors to consider include the size of the gap, the type of wood, and the desired appearance of the finished repair.
When selecting a filler, it’s also important to consider the strength and durability of the product. Some fillers may be more suitable for high-traffic areas or outdoor use, while others may be better suited for indoor projects. By taking the time to carefully evaluate your options and choose the right filler for your project, you can ensure a successful repair that will last for years to come.
If you’ve ever worked with wood, you’ve probably encountered gaps. These gaps can be frustrating, especially when they’re large. But understanding why gaps occur and how they can affect your project can help you choose the best way to fill them.
Large wood gaps can be caused by a variety of factors. Some of the most common causes include:
Unfilled gaps can have several negative effects on your project, including:
By understanding the causes and effects of large wood gaps, you can choose the best method for filling them and ensure that your project looks and performs its best.
When it comes to filling large gaps in wood, it’s important to choose the right filler for your project. Here are three options to consider:
Wood putty is a popular choice for filling small to medium-sized gaps in wood. It’s made from a mixture of wood particles and a binding agent, such as linseed oil or epoxy. Wood putty is easy to apply and can be sanded and painted over once it dries. However, it’s not the best option for larger gaps as it can crack and shrink over time.
For larger gaps or holes, epoxy resin is a more durable and long-lasting option. Epoxy is a two-part adhesive that hardens when mixed together. It’s strong, waterproof, and can be sanded and painted over once it dries. Epoxy resin is also heat-resistant, making it a good choice for outdoor projects. However, it can be more difficult to work with and requires careful mixing and application.
Another option for filling large gaps is to create a mixture of sawdust and wood glue. This method is cost-effective and easy to make at home. Simply mix sawdust with wood glue to create a thick paste and apply it to the gap. Once it dries, sand it down and paint over it if desired. However, this method may not be as strong or long-lasting as other options and may not work well for larger gaps.
When choosing the right filler for your project, consider the size of the gap, the type of wood you’re working with, and the desired finish. Always follow the manufacturer’s instructions and take necessary safety precautions when working with any type of filler.
Before applying wood filler to large gaps, it is important to prepare the surface properly. Here are the steps to follow:
Once you have prepared the surface, you can start applying the wood filler. Here are the steps to follow:
Once the wood filler has dried, you can finish the surface to match the rest of the wood. Here are the steps to follow:
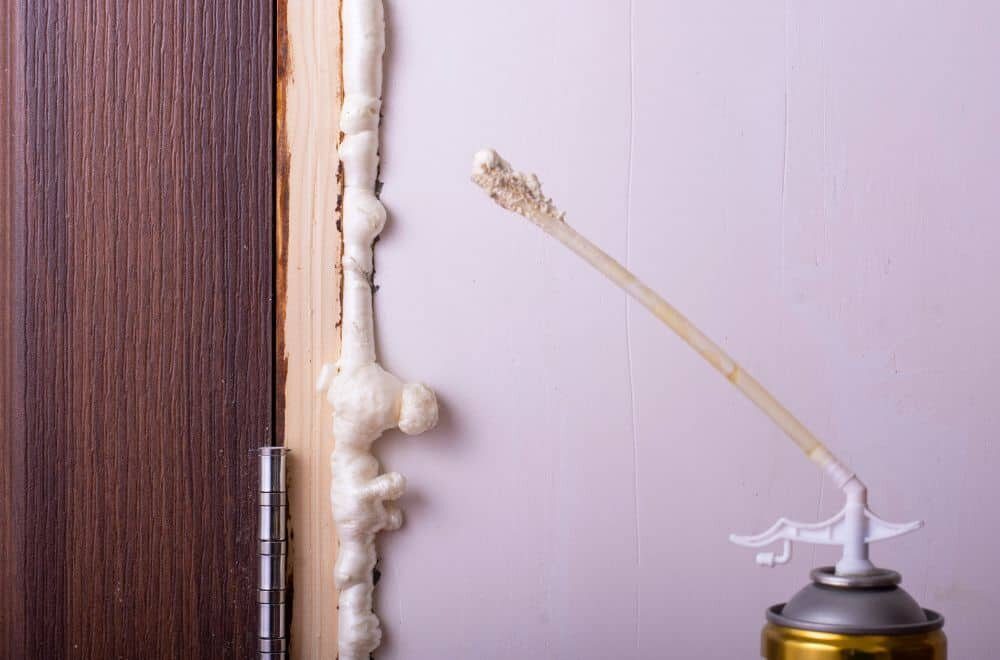
When working with wood, safety should always be a top priority. Here are a few safety measures to keep in mind when filling large gaps in wood:
Before starting any woodworking project, it’s important to wear the appropriate protective gear. This includes safety glasses to protect your eyes from flying debris, a dust mask to prevent inhalation of sawdust, and gloves to protect your hands from sharp tools and splinters.
When filling large gaps in wood, you may be working with wood glue or other chemicals that can emit fumes. It’s important to work in a well-ventilated area, such as a workshop or garage, to prevent inhalation of these fumes.
Using the right tools for the job can help prevent accidents and injuries. When filling large gaps in wood, use a putty knife or scraper to apply the filler, and a sandpaper to smooth it out.
When using wood filler or other products, be sure to follow the manufacturer’s instructions carefully. This includes using the product in the recommended amounts, allowing sufficient drying time, and disposing of any leftover materials properly.
After filling large gaps in wood, be sure to clean up any leftover materials, such as sawdust or wood filler. This will help prevent accidents and keep your work area clean and safe.
By following these safety measures, you can ensure a safe and successful woodworking project.
To ensure that your wood stays in good condition, it is important to perform regular maintenance. Here are some tips to keep in mind:
By following these maintenance tips, you can help ensure that your wood stays in good condition for years to come.
There are several products that you can use to fill large gaps in wood, including wood filler, epoxy, and caulk. The best product for filling large gaps in wood depends on the size of the gap, the type of wood, and the intended use of the wood. For example, wood filler is a good choice for filling small to medium-sized gaps in indoor wood projects, while epoxy is a better choice for filling larger gaps in outdoor wood projects.
To fill large gaps in outdoor wood, you should use a product that is specifically designed for outdoor use, such as epoxy or a high-quality outdoor wood filler. Before applying the filler, make sure the wood is clean and dry. Apply the filler using a putty knife, and then smooth it out with a damp cloth. Allow the filler to dry completely before sanding and painting or staining the wood.
The best wood filler for large holes in outdoor projects is an epoxy-based filler. Epoxy is a durable and weather-resistant material that can withstand exposure to the elements. It is also strong enough to support heavy loads, making it ideal for filling large holes in outdoor projects like decks and fences.
To fill gaps in wood furniture, you should use a wood filler that matches the color of the wood. Start by cleaning the area around the gap with a damp cloth, and then apply the filler using a putty knife. Make sure to apply enough filler to completely fill the gap. Once the filler has dried, sand it down until it is flush with the surrounding wood.
The best wood filler for large gaps in floors is a two-part epoxy filler. This type of filler is strong and durable, and can withstand the heavy foot traffic that floors are subjected to. It is also water-resistant, which is important for areas like kitchens and bathrooms.
To fill large gaps in exterior wood trim effectively, you should use a high-quality exterior wood filler. Before applying the filler, make sure the area around the gap is clean and dry. Apply the filler using a putty knife, and then smooth it out with a damp cloth. Allow the filler to dry completely before sanding and painting the trim.


