Rahasia Sukses Poker Online: Cara Ampuh Membaca Lawan di Fase Post-Flop
Di antara seluruh platform penyedia poker online terbaik, fase taruhan post-flop (setelah tiga kartu pertama dibuka) senantiasa diakui sebagai salah

Di antara seluruh platform penyedia poker online terbaik, fase taruhan post-flop (setelah tiga kartu pertama dibuka) senantiasa diakui sebagai salah


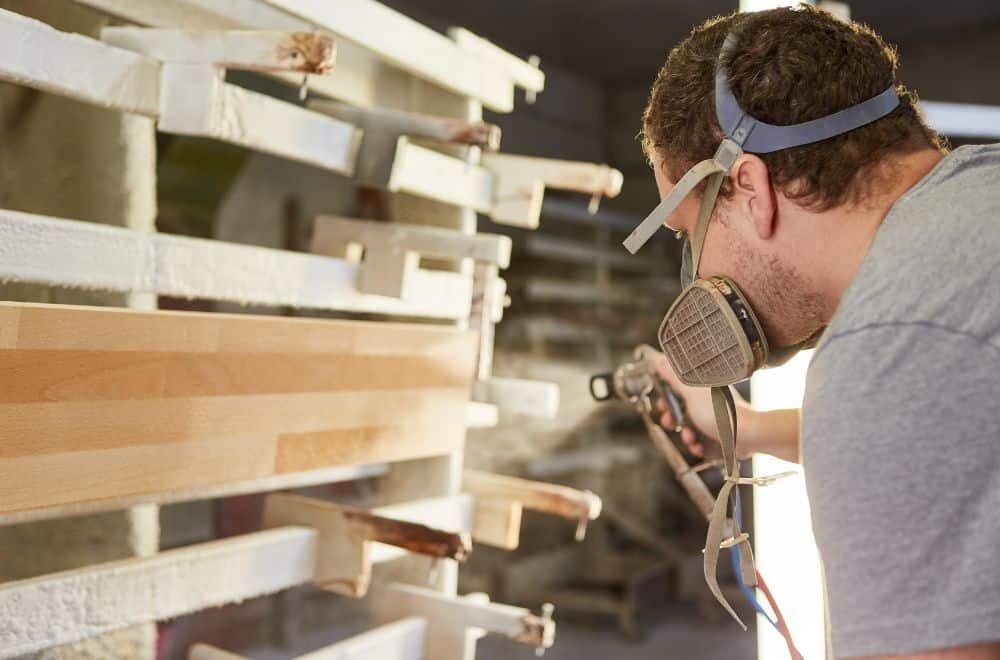
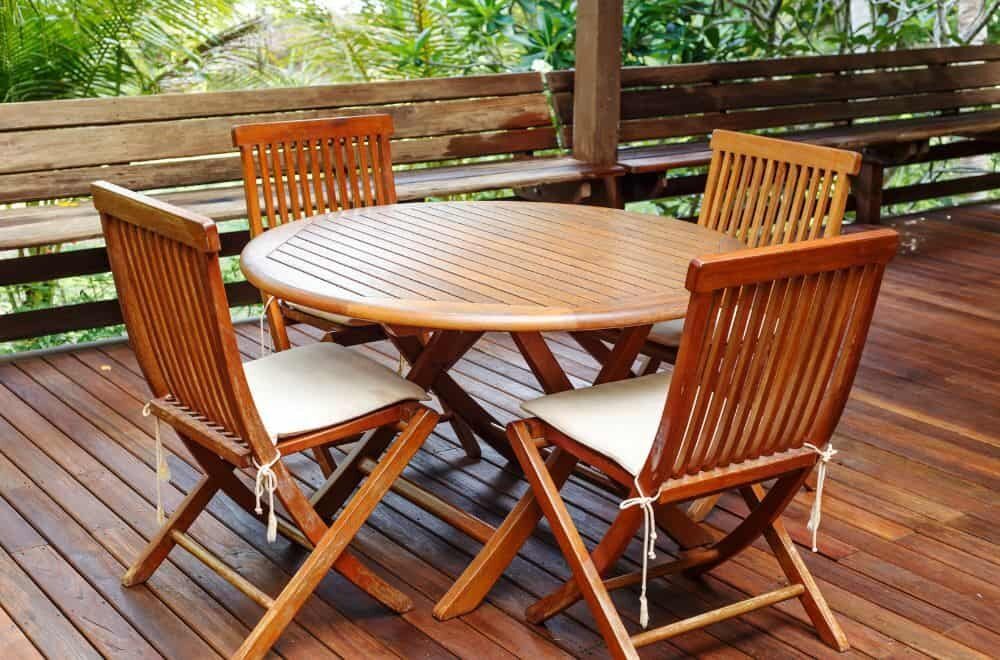
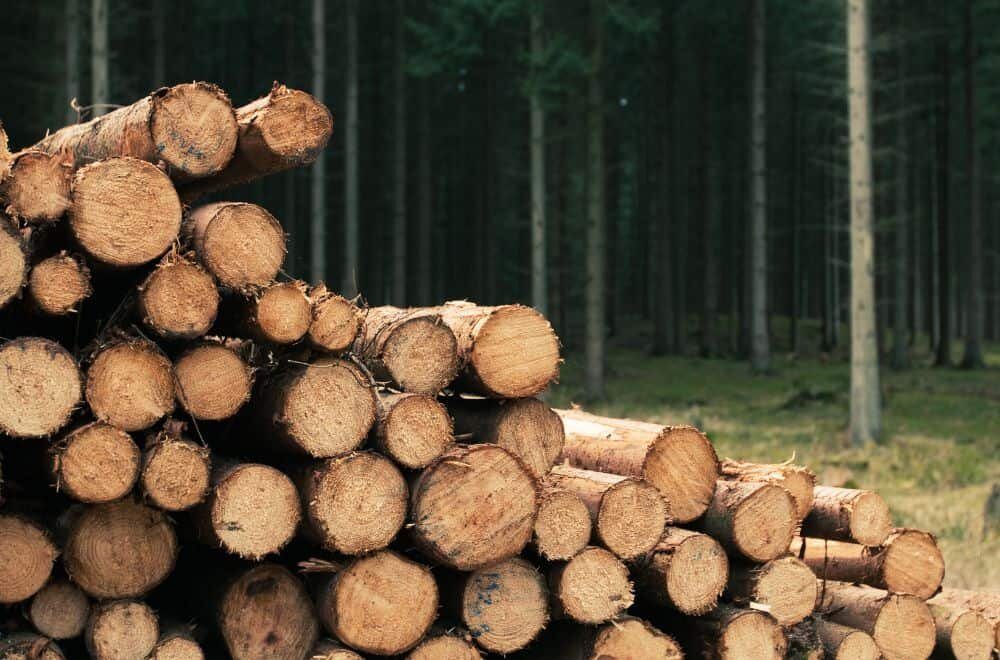
If you have outdoor wood furniture, you likely want to protect it from the elements. Water and sun damage can cause your furniture to deteriorate quickly, leaving it looking worn and unattractive. While there are many finishes you can use to protect your furniture, tung oil is often touted as one of the best. But is it really the best option for protecting outdoor wood furniture?
Tung oil is a natural drying oil that is derived from the tung tree nut. It is often used as a finish for wood furniture because it is waterproof and can protect against water damage. Additionally, tung oil can enhance the natural color of the wood, giving it a beautiful, rich finish. But while tung oil is a popular choice for indoor furniture, is it really the best option for outdoor use? In this article, we will explore whether a tung oil finish can protect outdoor wood furniture from water and sun damage, or if there is something better.
If you’re looking for a natural finish for your outdoor wood furniture, tung oil is a great option. It is a natural drying oil that is extracted from the seeds of the tung tree. Here’s what you need to know about tung oil finish.
Tung oil has been used for centuries in China and other parts of Asia for wood finishing. It was introduced to the Western world in the early 1900s and has gained popularity as a natural finish for wood. Tung oil is a renewable resource that is eco-friendly and non-toxic.
Tung oil is a slow-drying oil that penetrates deep into the wood, providing a durable and protective finish. It is resistant to water, mildew, and insects, making it an excellent choice for outdoor furniture. Tung oil also enhances the natural beauty of the wood by bringing out its grain and color.
One thing to keep in mind is that tung oil takes longer to dry than other finishes, so you’ll need to be patient when applying it. It can take up to 30 days to fully cure, so avoid exposing your furniture to moisture during this time.
Overall, tung oil is a great natural finish for outdoor wood furniture. It provides protection against water and sun damage and enhances the natural beauty of the wood.

If you’re looking for a natural and effective way to protect your outdoor wood furniture from water and sun damage, tung oil may be a great option. Here’s what you need to know about using tung oil on your outdoor furniture.
Before applying tung oil to your outdoor furniture, it’s important to prepare the surface. Make sure it’s clean, dry, and free of any previous finishes. You can use sandpaper to smooth out any rough spots and create a surface that will better absorb the oil.
To apply tung oil, you can use a brush, cloth, or sprayer. Apply a thin layer of oil to the surface, making sure to cover the entire piece of furniture. Let it dry for at least 24 hours before applying another coat. Most outdoor furniture will require at least three coats of tung oil to provide adequate protection.
One of the biggest advantages of tung oil is its ability to resist water damage. Unlike other finishes, tung oil penetrates deep into the wood, creating a protective barrier that can withstand exposure to rain, snow, and other forms of moisture. This can help prevent warping, cracking, and other types of damage that can occur when outdoor furniture is exposed to water.
In addition to protecting against water damage, tung oil can also help prevent sun damage. The oil creates a natural barrier that blocks harmful UV rays, which can cause fading, discoloration, and other types of damage to outdoor furniture. While tung oil won’t completely prevent sun damage, it can help extend the life of your furniture and keep it looking great for years to come.
Overall, tung oil can be a great choice for protecting your outdoor wood furniture from water and sun damage. Just be sure to follow the application process carefully and apply multiple coats for the best results.
When it comes to protecting outdoor wood furniture from water and sun damage, there are a few different finishes to choose from. Here, we’ll compare tung oil with three other popular finishes: teak oil, spar varnish, and linseed oil.
Teak oil is a popular choice for outdoor furniture because it contains a high amount of natural oils, which helps to make it water-resistant. However, teak oil is not actually extracted from the teak tree. Instead, it is typically a blend of linseed oil, tung oil, and other ingredients.
Compared to tung oil, teak oil tends to be easier to apply and dries more quickly. However, it may not provide quite as much protection against water and sun damage as tung oil. Additionally, teak oil may need to be reapplied more frequently than tung oil to maintain its protective properties.
Spar varnish is a popular finish for boats and other outdoor wood surfaces because it is designed to be extremely durable and resistant to water and sun damage. However, it can be quite difficult to apply and requires a lot of preparation to get the best results.
Compared to spar varnish, tung oil is much easier to apply and can provide similar levels of protection against water and sun damage. Additionally, tung oil is a more eco-friendly option than spar varnish, which often contains harsh chemicals.
Linseed oil is another natural oil that is sometimes used to protect outdoor wood furniture. Like tung oil, it is a slow-drying oil that can take several days to cure. However, linseed oil is not as water-resistant as tung oil and may not provide as much protection against sun damage.
Compared to linseed oil, tung oil is generally considered to be a superior choice for protecting outdoor wood furniture. Tung oil is more water-resistant and provides better protection against sun damage. Additionally, tung oil is less likely to go rancid than linseed oil, which can become sticky and unpleasant over time.
Overall, tung oil is a great choice for protecting outdoor wood furniture from water and sun damage. While there are other finishes to choose from, tung oil is a natural, eco-friendly option that provides excellent protection and a beautiful, transparent finish.
When it comes to protecting your outdoor furniture from water and sun damage, choosing the right finish is essential. There are several options available, but not all of them are suitable for outdoor use. In this section, we will discuss some of the most popular finishes for outdoor furniture and their benefits.
Tung oil is a natural and environmentally friendly option for outdoor furniture. It provides excellent protection against water damage, UV rays, and other outdoor hazards. Additionally, tung oil gives outdoor furniture a beautiful, natural matte finish that can really enhance its overall appearance. However, it is important to note that tung oil takes a few days to dry and up to 30 days to cure completely.
Teak oil is another popular option for protecting outdoor furniture. It is said to be the best oil for outdoor furniture as it waterproofs wood and protects against sun damage. Teak oil is easy to apply and dries quickly. However, it may need to be reapplied more frequently than other finishes.
Varnish is a synthetic finish that provides excellent protection against water and sun damage. It is available in gloss, satin, and matte finishes, and can be applied with a brush or spray gun. However, varnish can be difficult to apply evenly and may require several coats.
Paint is a popular finish for outdoor furniture as it provides excellent protection against water and sun damage. It is available in a wide range of colors and can be applied with a brush or spray gun. However, paint can be difficult to apply evenly and may require several coats.
Stain is a popular finish for outdoor furniture as it enhances the natural beauty of the wood while providing protection against water and sun damage. It is available in a wide range of colors and can be applied with a brush or spray gun. However, stain may need to be reapplied more frequently than other finishes.
In conclusion, there are several options available for protecting your outdoor furniture from water and sun damage. Each finish has its own benefits and drawbacks, so it is important to choose the right one for your specific needs. Consider the level of protection you need, the look you want to achieve, and the maintenance required before making a decision.
Yes, tung oil is a great option for protecting outdoor wood furniture from water and sun damage. It creates a hard, durable finish that can withstand the elements and is water-resistant. Tung oil also provides natural UV protection, making it a popular choice for outdoor furniture.
Other popular options for protecting outdoor wood furniture include teak oil, Danish oil, and linseed oil. Teak oil is great for waterproofing wood and protecting against sun damage. Danish oil contains resins and either linseed oil or tung oil in the mix, which can protect against the elements really well. Linseed oil is another natural oil that can be used to protect outdoor wood furniture.
Tung oil can last up to several years on outdoor wood furniture, depending on the conditions it is exposed to. However, it is recommended to apply a fresh coat of tung oil every year or so to maintain its protective qualities.
It is generally not recommended to apply tung oil over other finishes on outdoor wood furniture. Tung oil works best when applied directly to bare wood. If you want to switch to tung oil from another finish, it is recommended to sand the furniture down to bare wood before applying the tung oil.
Polymerized tung oil is a more durable and water-resistant version of regular tung oil. It can provide better protection against water and sun damage than regular tung oil. However, it can also be more expensive and harder to find.
Before applying tung oil, make sure the surface of the furniture is clean and dry. Sand the furniture down to bare wood if necessary. Apply the tung oil with a clean cloth, working in small sections at a time. Let the oil soak in for a few minutes before wiping off any excess with a clean cloth. Repeat the process until the entire surface is covered. Allow the furniture to dry completely before using it.

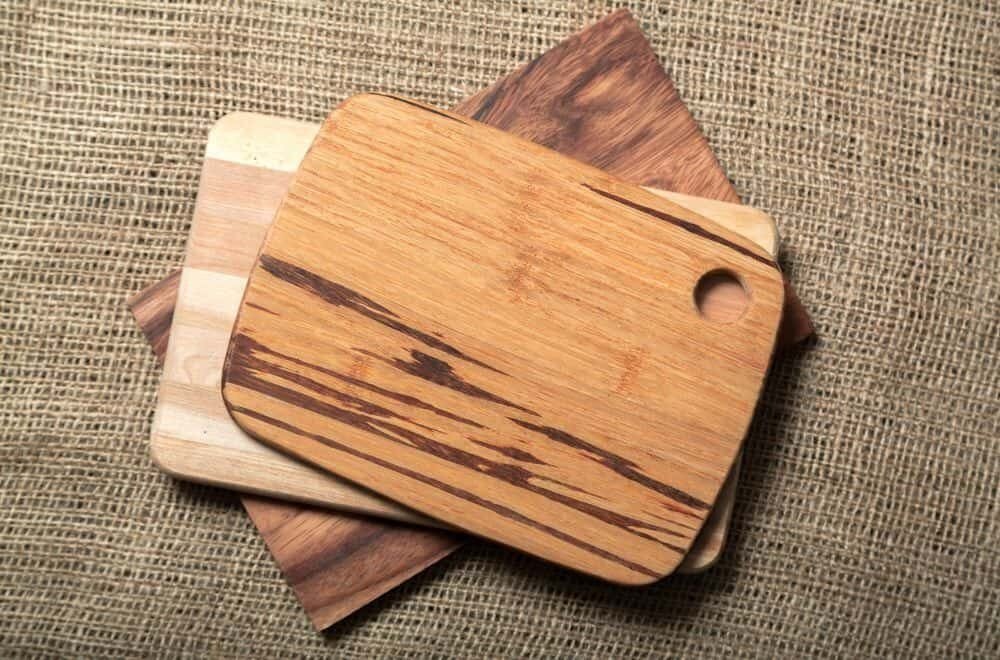
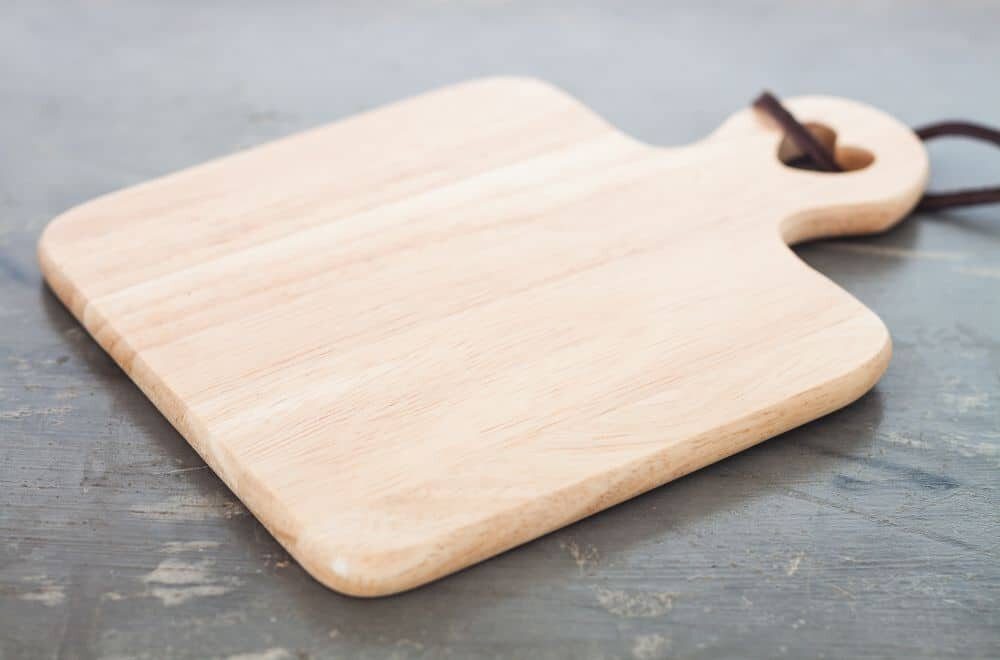
Are you tired of constantly hand-washing your wooden cutting boards? Do you find yourself wondering which ones are safe to put in the dishwasher? Look no further, as we have done the research for you. In this article, we will explore which kitchen wood cutting boards are dishwasher safe and provide you with some top picks for your next purchase.
When it comes to wooden cutting boards, not all are created equal. Some are specifically designed to be dishwasher safe, while others may not hold up as well. It is important to read the manufacturer’s instructions before placing your cutting board in the dishwasher. Additionally, certain types of wood may be more prone to warping or cracking when exposed to water, so it is important to choose a high-quality board made from a durable wood.
Our research has led us to some great options for those looking for a dishwasher safe wooden cutting board. From composite materials to treated hardwoods, there are a variety of options to choose from. Keep reading to discover our top picks for the best dishwasher safe wooden cutting boards on the market.
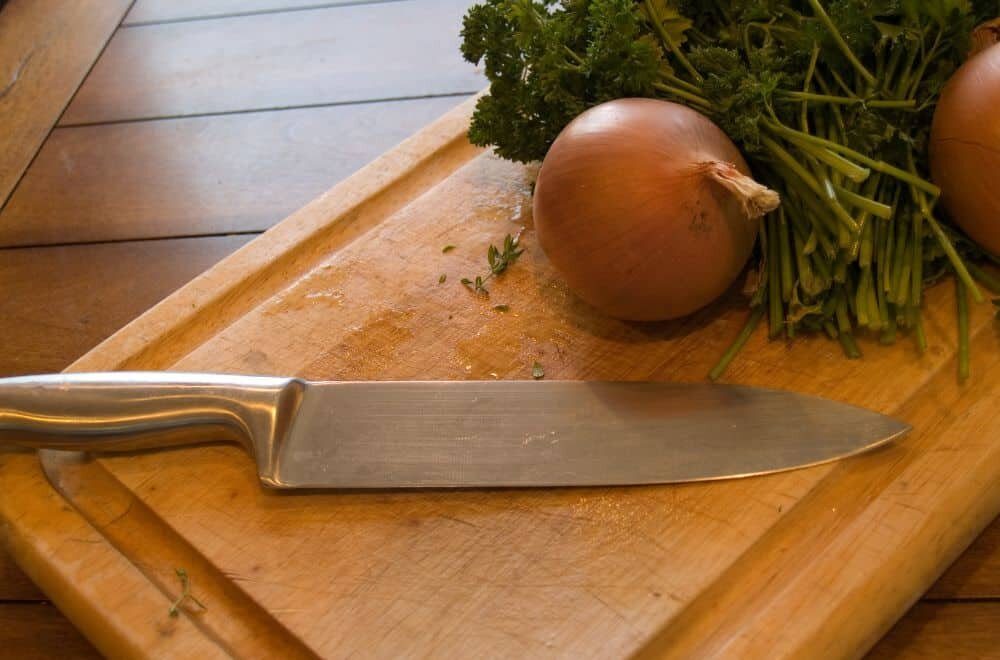
When it comes to cleaning your wooden cutting board, you may wonder if it’s safe to put it in the dishwasher. While some wood cutting boards are dishwasher safe, others are not. It’s important to understand the difference so you can properly care for your cutting board and avoid damaging it.
Dishwasher safe wood cutting boards are typically made from hardwoods such as maple, walnut, or cherry. These woods are dense and have a tight grain, which makes them less prone to warping or cracking when exposed to water and heat.
In addition, dishwasher safe wood cutting boards are often treated with food-safe finishes that help protect the wood from moisture and bacteria. These finishes can include mineral oil, beeswax, or a combination of both.
To determine if your wood cutting board is dishwasher safe, check the manufacturer’s instructions or look for a label that indicates it’s safe for dishwasher use. If there’s no label or instructions, it’s best to assume that the cutting board is not dishwasher safe.
Another way to test if your wood cutting board is dishwasher safe is to expose a small area of the board to hot water and detergent for a short period of time. If the wood appears to be unaffected, it’s likely safe to put in the dishwasher. However, if the wood becomes discolored, warped, or cracked, it’s best to avoid putting it in the dishwasher.
If your wood cutting board is dishwasher safe, there are a few things to keep in mind when cleaning it:
By following these tips, you can safely clean your dishwasher safe wood cutting board and ensure it lasts for years to come.

When it comes to wood cutting boards that are dishwasher safe, there are a few different types to consider. Here are some of the most common options:
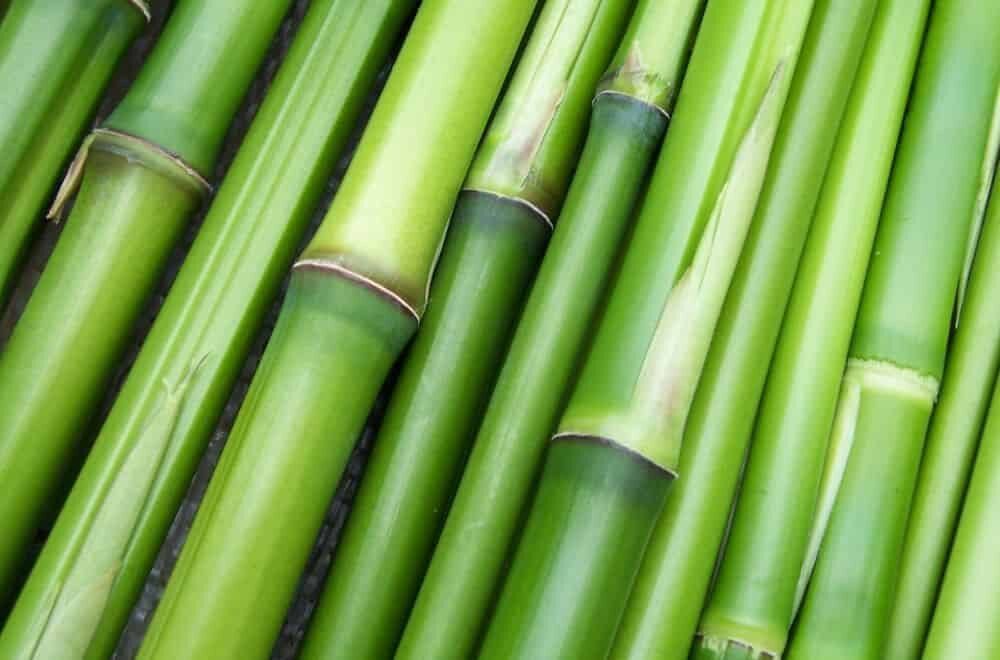
Bamboo cutting boards are a popular choice for those looking for a sustainable and eco-friendly option. Bamboo is a fast-growing plant that is highly renewable, making it a great choice for those who want to reduce their environmental impact. Bamboo cutting boards are also naturally antimicrobial, which means they are less likely to harbor bacteria than other types of cutting boards.
Teak cutting boards are known for their durability and resistance to moisture. Teak is a dense hardwood that is naturally resistant to water and other liquids, making it a great choice for cutting boards that will be exposed to moisture on a regular basis. Teak cutting boards also have a beautiful, rich color that can add a touch of elegance to your kitchen.
Maple cutting boards are another popular choice for those looking for a durable and long-lasting option. Maple is a hardwood that is known for its strength and resistance to wear and tear. Maple cutting boards are also easy to clean and maintain, making them a great choice for those who want a low-maintenance option.
Cherry cutting boards are a beautiful and elegant option for those who want a cutting board that looks as good as it performs. Cherry is a hardwood that has a rich, reddish-brown color and a beautiful grain pattern. Cherry cutting boards are also naturally resistant to bacteria and other microbes, making them a great choice for those who want a cutting board that is both functional and beautiful.
No matter which type of wood cutting board you choose, it’s important to make sure that it is dishwasher safe before putting it in the dishwasher. Not all wood cutting boards are designed to withstand the heat and moisture of a dishwasher, so be sure to check the manufacturer’s instructions before cleaning your cutting board in the dishwasher.
When it comes to cleaning kitchen tools, the dishwasher is a convenient option for many people. However, not all wood cutting boards are dishwasher safe. Here are some tips to help you identify which wood cutting boards can be safely washed in the dishwasher.
Some wood cutting boards come with a dishwasher safe label. This label indicates that the board has been tested and deemed safe to be washed in the dishwasher. If you are looking to purchase a new wood cutting board and want to be able to clean it in the dishwasher, look for this label.
If your wood cutting board does not have a dishwasher safe label, check the manufacturer’s instructions. The instructions should indicate whether or not the board can be washed in the dishwasher. If the instructions do not mention the dishwasher, it is best to assume that the board is not dishwasher safe.
Some types of wood are more resistant to water and heat than others. For example, bamboo is a popular material for cutting boards because it is durable and resistant to water. If you are looking for a wood cutting board that can be washed in the dishwasher, consider choosing one made from bamboo or another type of wood that is known to be dishwasher safe.
If you are unsure whether or not your wood cutting board is dishwasher safe, look for signs of damage. If the board has cracks, splits, or other types of damage, it may not be safe to wash in the dishwasher. Additionally, if the board has been treated with oil or other types of finish, it may not be dishwasher safe.
By following these tips, you can identify which wood cutting boards are safe to wash in the dishwasher. Remember, if you are unsure whether or not a board is dishwasher safe, it is always best to err on the side of caution and wash it by hand.
Using a dishwasher safe wood cutting board has several benefits that make it a great addition to your kitchen.
One of the biggest advantages of using a dishwasher safe wood cutting board is that it is more hygienic than other materials. Wood is naturally antibacterial, which means it can kill bacteria that may be present on the surface of the board. Additionally, dishwasher safe wood cutting boards can be easily sanitized in the high-heat cycle of your dishwasher, which is an effective way to kill bacteria and other harmful microorganisms.
Another benefit of using a dishwasher safe wood cutting board is its durability. Wood is a long-lasting material that can withstand the wear and tear of daily use. It is less likely to develop deep grooves or scratches that can harbor bacteria or other contaminants. Additionally, wood cutting boards are less likely to dull your knives compared to other materials like glass or ceramic.
Dishwasher safe wood cutting boards are also convenient to use and maintain. They can be easily cleaned in the dishwasher, which saves you time and effort. Additionally, wood cutting boards are relatively lightweight and easy to move around your kitchen. They also look great and can add a natural, rustic touch to your kitchen decor.
In summary, using a dishwasher safe wood cutting board is a great choice for anyone looking for a hygienic, durable, and convenient cutting surface. With its natural antibacterial properties, long-lasting durability, and easy maintenance, a dishwasher safe wood cutting board is a smart investment for any home cook.
If you have a dishwasher safe wood cutting board, you’re in luck! These boards are designed to withstand the high temperature and pressure of a dishwasher, making them easy to clean and maintain. However, it’s still important to take proper care of your board to ensure it lasts as long as possible.
Here are some tips for caring for and maintaining your dishwasher safe wood cutting board:
By following these simple care and maintenance tips, you can keep your dishwasher safe wood cutting board looking and performing its best for years to come.
When it comes to finding a dishwasher safe wood cutting board, there are a few popular brands that you might want to consider. Here are some of the top options:
Totally Bamboo is a popular brand that offers a variety of bamboo cutting boards that are dishwasher safe. They are made from eco-friendly, sustainable bamboo and come in a range of sizes and styles.
Ironwood Gourmet is another brand that offers dishwasher safe wood cutting boards. Their boards are made from acacia wood and come in a variety of sizes and shapes. They also offer a range of other kitchen accessories made from wood.
Epicurean is a brand that offers cutting boards made from a composite material that is dishwasher safe. Their boards come in a variety of colors and styles, and are designed to be durable and long-lasting.
Teakhaus is a brand that offers a range of dishwasher safe wood cutting boards made from teak wood. Their boards are designed to be durable and resistant to moisture, making them a great choice for use in the kitchen.
John Boos is a brand that offers a range of wood cutting boards that are dishwasher safe. Their boards are made from a variety of woods, including maple and cherry, and come in a range of sizes and styles.
Totally Kitchen is a brand that offers a range of dishwasher safe bamboo cutting boards. Their boards are designed to be lightweight and easy to use, and come in a range of sizes and shapes.
These are just a few of the popular brands that offer dishwasher safe wood cutting boards. When shopping for a cutting board, be sure to look for one that is made from a durable, long-lasting material and is designed to withstand repeated use and cleaning in the dishwasher.
If you are looking for a wood cutting board that is dishwasher safe, there are a few things to keep in mind before making a purchase. Here are some considerations to help you choose the right cutting board for your needs:
When it comes to wood cutting boards, not all types of wood are created equal. Some woods are more porous and absorbent than others, which can make them more prone to warping, cracking, and harboring bacteria. For dishwasher safe wood cutting boards, look for hardwoods with tight grains, such as maple, birch, and beech. Bamboo is also a safe option, as it is a grass and not a wood.
The finish on a wood cutting board is important for both aesthetics and durability. A good finish will help protect the wood from moisture, stains, and scratches, and can also make the board easier to clean. Look for cutting boards with a food-safe finish, such as mineral oil or beeswax, that can withstand repeated washings in the dishwasher.
The size and thickness of a cutting board can affect its durability and usefulness. A thicker board may be more durable and less prone to warping, but it may also be heavier and harder to maneuver. A larger board can provide more workspace, but it may also be more difficult to clean and store. Consider your cooking needs and kitchen space when choosing the size and thickness of your cutting board.
While dishwasher safe wood cutting boards are convenient, they still require some maintenance to keep them in good condition. Be sure to follow the manufacturer’s instructions for cleaning and care, and avoid using abrasive cleaners or utensils that can scratch the surface of the board. Regular oiling can help keep the wood moisturized and prevent cracking and warping over time.
By considering these factors when buying a dishwasher safe wood cutting board, you can choose a board that is both functional and durable, and that will provide you with years of use in your kitchen.
When it comes to choosing a cutting board, many people opt for wood because of its natural beauty and durability. However, some may be concerned about the environmental impact of using wood cutting boards that are dishwasher safe.
Fortunately, many wood cutting boards that are dishwasher safe are made from sustainably sourced materials. This means that the wood used to make the cutting board comes from forests that are managed in a way that ensures the health and productivity of the ecosystem.
In addition, using a dishwasher to clean your wood cutting board can actually be more environmentally friendly than washing it by hand. This is because dishwashers are designed to use less water and energy than washing dishes by hand.
However, it’s important to note that not all wood cutting boards are dishwasher safe. Some may warp or crack in the high heat and humidity of the dishwasher. Be sure to check the manufacturer’s instructions before putting your wood cutting board in the dishwasher.
Overall, using a dishwasher safe wood cutting board can be a great choice for both your kitchen and the environment. Just be sure to choose a sustainably sourced board and follow the manufacturer’s instructions for cleaning.
No, wooden cutting boards should not be washed in the dishwasher. The high temperature and moisture in the dishwasher can cause the wood to warp, crack or split.
If you’re looking for a cutting board that can go in the dishwasher, you should choose a non-porous material such as plastic, glass or acrylic. These materials are easy to clean and won’t absorb bacteria or odors.
Bamboo cutting boards should not be washed in the dishwasher. Like wooden cutting boards, bamboo is a natural material that can warp, crack or split in the dishwasher.
To clean a wooden cutting board, you should wash it with warm, soapy water and dry it immediately. Avoid soaking the board in water, as this can cause it to warp or crack. You can also sanitize the board by wiping it down with a solution of one tablespoon of unscented, liquid chlorine bleach per gallon of water.
Plastic cutting boards are a popular choice because they are affordable, lightweight, and easy to clean. They are also non-porous, which means they won’t absorb bacteria or odors.
It’s a good idea to replace your cutting board every few years, depending on how often you use it. If your cutting board is showing signs of wear and tear, such as cracks or deep grooves, it’s time to replace it. A worn-out cutting board can harbor bacteria and make your food unsafe to eat.

Are you wondering how much it costs to cut wood at Lowe’s? If you’re planning a DIY project that involves cutting wood, you may be considering having it cut at Lowe’s. Lowe’s offers wood cutting services at many of their locations, which can save you time and effort. However, you may be wondering how much it will cost you to have your wood cut.
The cost of cutting wood at Lowe’s varies by location and the type of wood you need cut. In general, Lowe’s will cut store-bought wood for you, but there may be store-specific policies to charge a small fee. The fee can vary from store to store, but typically ranges from 25 cents to 50 cents per cut. If you need multiple cuts, the cost can add up quickly. However, there are ways to increase your chances of getting multiple free cuts, such as being friendly and courteous to the staff.
If you’re looking to cut wood for your next project, Lowes offers wood cutting services to help you get the job done. Here’s what you need to know about their wood cutting services:
Lowes offers two types of wood cutting services: in-store and online. In-store wood cutting services are available at most Lowes locations, while online wood cutting services are only available for select products.
If you need wood cut in-store, simply bring your lumber to the store and a Lowes associate will cut it to your desired size. The first few cuts are typically free, but additional cuts may cost a fee. The cost of in-store wood cutting services varies depending on the size of the material being worked with, but usually ranges between $5 – $13 per cut.
If you need wood cut for an online purchase, Lowes offers online wood cutting services for select products. Simply select the online wood cutting option when purchasing your product and enter your desired measurements. The wood will be cut to your specifications before it is shipped to you.
It’s important to note that Lowes wood cutting services have some limitations. For example, Lowes will only cut wood that is purchased from their store. Additionally, they may not be able to cut certain types of wood or materials, such as pressure-treated lumber or metal.
In summary, Lowes offers convenient wood cutting services for your next project. Whether you need in-store or online wood cutting services, Lowes has you covered. Just be aware of the limitations and costs associated with these services before you get started.
If you’re planning to have your wood cut at Lowes, you might be wondering how much it will cost. The price of wood cutting at Lowes depends on various factors, including the type of wood, size of wood, and quantity of wood. In this section, we’ll explore each of these factors in detail.
The type of wood you want to cut is a significant factor in determining the cost of wood cutting at Lowes. Some types of wood are harder and denser than others, making them more challenging to cut. As a result, they may cost more to cut. Here is a breakdown of some common types of wood and their estimated cost for cutting at Lowes:
| Type of Wood | Estimated Cost per Cut |
|---|---|
| Pine | $0.25 – $0.50 |
| Oak | $0.50 – $1.00 |
| Maple | $0.75 – $1.25 |
| Cherry | $1.00 – $1.50 |
| Mahogany | $1.50 – $2.00 |
The size of the wood you want to cut is another factor that affects the cost of wood cutting at Lowes. Larger pieces of wood take more time and effort to cut, which can increase the cost. Here is a breakdown of estimated costs for different sizes of wood:
| Size of Wood | Estimated Cost per Cut |
|---|---|
| 2×4 | $0.25 – $0.50 |
| 4×4 | $0.50 – $1.00 |
| 4×6 | $0.75 – $1.25 |
| 6×6 | $1.00 – $1.50 |
| 8×8 | $1.50 – $2.00 |
The quantity of wood you want to cut is also a factor that affects the cost of wood cutting at Lowes. If you need a large amount of wood cut, you may be eligible for a discount. However, if you only need a few cuts, the cost per cut may be higher. Here is a breakdown of estimated costs for different quantities of wood:
| Quantity of Wood | Estimated Cost per Cut |
|---|---|
| 1-10 cuts | $0.25 – $1.00 |
| 11-20 cuts | $0.20 – $0.80 |
| 21-30 cuts | $0.15 – $0.60 |
| 31+ cuts | $0.10 – $0.40 |
Keep in mind that these estimated costs are subject to change and may vary depending on your location and the specific Lowes store you visit. It’s always a good idea to call your local Lowes store and ask about their wood cutting services and pricing before visiting.

If you’re looking for a place to cut your wood, you might be wondering how Lowe’s compares to other wood cutting services. Here’s a quick comparison:
Home Depot is a popular alternative to Lowe’s for wood cutting services. They offer free wood cutting services, but they have a limit of two cuts per board. If you need more than two cuts, they charge $0.25 per cut. Home Depot also offers custom cuts for an additional fee.
Menards is another option for wood cutting services. They offer free wood cutting services, but they have a limit of four cuts per board. If you need more than four cuts, they charge $0.25 per cut. Menards also offers custom cuts for an additional fee.
Ace Hardware is a smaller chain than Lowe’s or Home Depot, but they also offer wood cutting services. They charge $1 per cut, but they do not have a limit on the number of cuts. Ace Hardware also offers custom cuts for an additional fee.
Independent lumber yards may also offer wood cutting services. Prices and policies vary, so it’s best to check with your local lumber yard for more information.
Overall, Lowe’s is a great option for wood cutting services if you’re looking for free cuts and standard cuts. If you need custom cuts or more than a few cuts, you may want to consider other options like Home Depot or Menards.

Cutting wood at Lowes can be a convenient service, but it can also add up quickly if you have a lot of cuts to make. Here are some tips to help you save money on wood cutting at Lowes:
Lowes offers a certain number of free cuts for each piece of lumber you purchase. Take advantage of this service by planning your cuts ahead of time and getting as many cuts as you can during your visit.
Straight cuts are usually cheaper than angled cuts, so try to stick to straight cuts whenever possible. If you need angled cuts, try to make them yourself with a handsaw or miter saw to save money.
If you have a specific blade you want to use for your cuts, bring it with you to Lowes. This can save you money on blade rental fees and ensure that you get the exact cut you want.
Check online or in-store for coupons or discounts on wood cutting services at Lowes. You may be able to save a percentage off your total cost or get a certain number of cuts for free.
For larger projects, consider renting a table saw from Lowes instead of paying for each individual cut. This can be a cost-effective option if you have a lot of cuts to make and can also save you time.
By following these tips, you can save money on wood cutting services at Lowes and get the cuts you need for your project.

In addition to wood cutting services, Lowes offers a variety of other services to help make your home projects easier. Here are some of the additional services and costs you can expect at Lowes:
Lowes offers delivery services for a variety of products, including appliances, furniture, and building materials. Delivery fees vary depending on the distance and the size of the item being delivered. For example, delivery fees for appliances start at $59, while delivery fees for building materials start at $79.
Lowes offers installation services for a variety of products, including appliances, flooring, and fencing. Installation fees vary depending on the product being installed and the complexity of the installation. For example, installation fees for appliances start at $99, while installation fees for flooring start at $1.99 per square foot.
Lowes offers repair services for a variety of products, including appliances, plumbing, and electrical. Repair fees vary depending on the product being repaired and the extent of the damage. For example, repair fees for appliances start at $129, while repair fees for plumbing start at $99.
Lowes offers design services for a variety of projects, including kitchen and bathroom remodels. Design fees vary depending on the scope of the project and the amount of time required for the design process. For example, design fees for a kitchen remodel start at $199.
Lowes offers rental services for a variety of tools and equipment, including power tools, lawn and garden equipment, and trucks. Rental fees vary depending on the item being rented and the length of the rental period. For example, rental fees for a power drill start at $10 for four hours, while rental fees for a pickup truck start at $19 for the first 75 minutes.
Overall, Lowes offers a variety of additional services to help make your home projects easier. While fees vary depending on the service and the location, Lowes strives to provide affordable and convenient services for all customers.
Yes, Lowes charges for cutting wood. However, the cost varies depending on the type of material you want to cut and the quantity.
The cost of cutting wood at Lowes ranges from $0.25 to $1 per cut. If you need special cutting instructions like exact measurements or angles, you may have to pay an additional fee.
No, you cannot bring lumber from home and expect Lowes to cut it for free. You must purchase your lumber from Lowes in order to score free wood-cutting services before you take it home.
You can find wood cutting services near you by searching online or checking with your local hardware store. Lowes and Home Depot both offer wood cutting services, but you can also check with other hardware or lumber stores in your area.
To find a Lowes store near you, visit the Lowes website and use their store locator tool. Enter your zip code or city and state to find the nearest Lowes store.
Yes, Menards also offers wood cutting services. The cost and policies may vary by location, so it’s best to check with your local Menards store for more information.

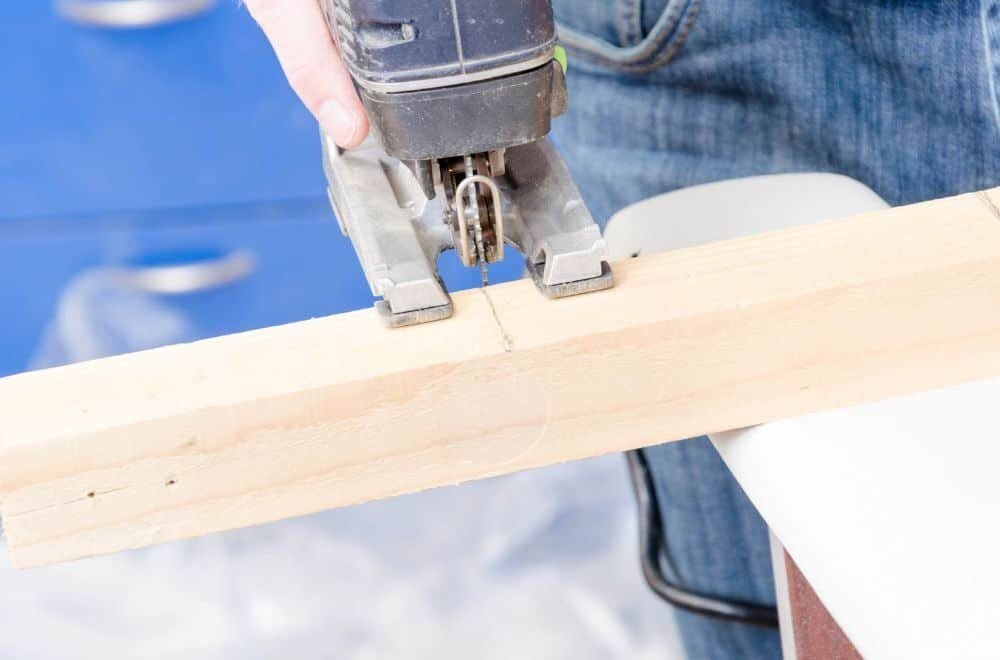
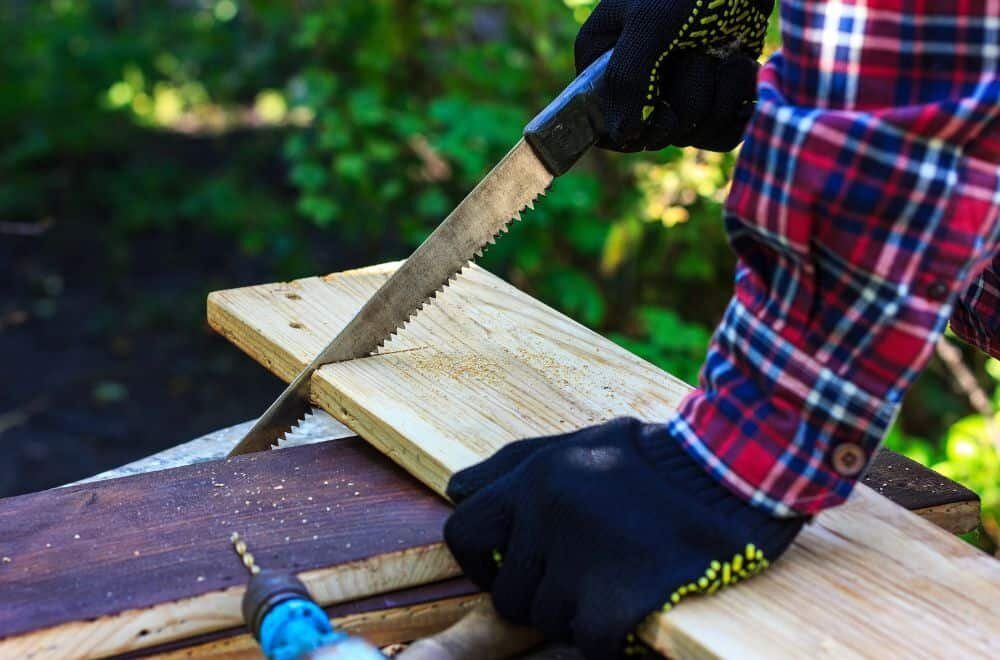
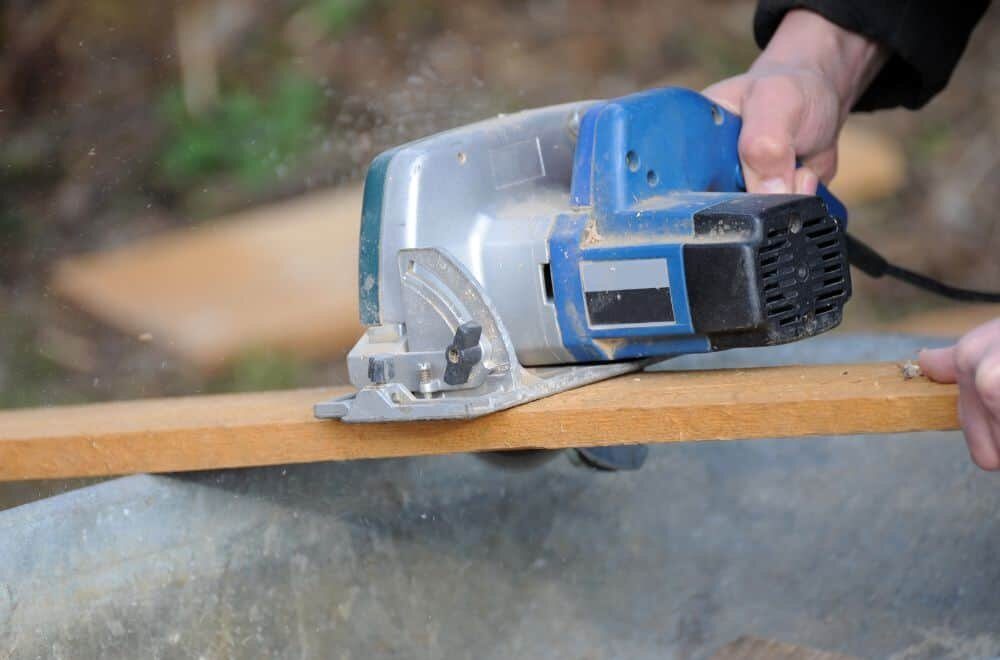
When it comes to cutting shapes out of wood, having the right saw can make all the difference. With so many different types of saws available, it can be difficult to determine which one is the best for your project. In this article, we will explore the five main types of saws used for cutting shapes out of wood, and discuss how, why, and when each one is used.
The first type of saw we will look at is the jigsaw. Jigsaws are versatile and can be used for a variety of cutting tasks, including cutting curves and intricate shapes out of wood. They are handheld and easy to maneuver, making them a great choice for DIY projects or smaller woodworking tasks. However, jigsaws are not as precise as some other saws and may not be the best choice for larger or more complex projects.
When it comes to cutting shapes out of wood, there are several types of saws to choose from. Each saw has its own strengths and weaknesses, so it’s important to understand the differences between them before making a choice.
The jigsaw is a versatile saw that is commonly used for cutting curves and intricate shapes out of wood. It’s a handheld saw that is easy to maneuver and control, making it a great choice for beginners. Jigsaws come with interchangeable blades, which can be swapped out depending on the type of wood you’re cutting. They are also relatively affordable, making them a popular choice for DIY enthusiasts.
The scroll saw is another popular choice for cutting shapes out of wood. It’s a motorized saw that uses a thin blade to make intricate cuts. The scroll saw is ideal for cutting tight curves and angles, and it’s also great for cutting intricate designs. The blade on a scroll saw is easy to change, which makes it a versatile tool for cutting different types of wood.
The band saw is a powerful saw that is capable of making precise cuts through thick pieces of wood. It’s a stationary saw that uses a continuous looped blade to cut through wood. The band saw is ideal for cutting straight lines and curves, and it’s also great for cutting thick pieces of wood. It’s a more expensive tool than the jigsaw or scroll saw, but it’s a worthwhile investment for serious woodworkers.
When choosing a saw for cutting shapes out of wood, consider the type of cuts you’ll be making and the type of wood you’ll be cutting. Each saw has its own strengths and weaknesses, so it’s important to choose the right tool for the job.
When it comes to cutting shapes out of wood, choosing the right saw is crucial to achieving accurate and precise cuts. There are several factors to consider when selecting a saw, including the material you are working with, the complexity of the shape you need to cut, and the safety features of the saw.
The type of wood you are working with will have a significant impact on the saw you choose. Hardwoods, such as oak or maple, require a saw with a powerful motor and sharp blades to make clean cuts. Softer woods, such as pine or cedar, can be cut with a less powerful saw, but you will still need sharp blades to avoid splintering or tearing the wood.
The complexity of the shape you need to cut will also play a role in selecting the right saw. A scroll saw is ideal for intricate designs and curves, while a band saw is better suited for straight cuts and thicker materials. A jigsaw can handle both straight and curved cuts, but it may not be as precise as a scroll saw for intricate shapes.
Safety should always be a top priority when working with power tools, and saws are no exception. Look for saws with safety features such as blade guards, anti-kickback devices, and dust collection systems. Wear appropriate safety gear, including eye protection and earplugs, and follow proper safety procedures when using any saw.
In summary, selecting the right saw for cutting shapes out of wood requires consideration of the material, shape complexity, and safety features. Choose a saw that is appropriate for the type of wood you are working with, can handle the complexity of the shape you need to cut, and has appropriate safety features to protect you while you work.

To keep your saw in good working condition and ensure it lasts for many years, you need to maintain it properly. Here are some tips on maintaining your saw:
The blade is the most important part of your saw, and you need to take good care of it. Here are some tips for blade care:
In addition to blade care, you need to inspect your saw regularly to ensure it’s in good working condition. Here are some tips for regular inspection:
By following these tips for blade care and regular inspection, you can ensure your saw is in good working condition and lasts for many years.
When it comes to finding the best saw for cutting shapes out of wood, choosing a reliable brand is key. Here are some of the top saw brands to consider:
Bosch is a well-known brand in the power tool industry, and their saws are no exception. They offer a range of saws, including jigsaws and scroll saws, that are designed for precision cutting. Bosch saws are known for their durability and ease of use, making them a popular choice among woodworkers.
DeWalt is another trusted brand in the power tool industry, and their saws are no exception. They offer a range of saws, including circular saws and miter saws, that are designed for both accuracy and power. DeWalt saws are known for their high-quality construction and long-lasting performance.
Makita is a popular brand among woodworkers, and for good reason. They offer a range of saws, including jigsaws and circular saws, that are designed for precision cutting. Makita saws are known for their powerful motors and easy-to-use features, making them a great choice for both beginners and experienced woodworkers.
Overall, when choosing a saw for cutting shapes out of wood, it’s important to consider factors such as durability, precision, and ease of use. By choosing a trusted brand like Bosch, DeWalt, or Makita, you can feel confident that you’re getting a high-quality saw that will meet your needs.
When choosing the best saw for cutting shapes out of wood, there are a few factors to consider. This section will guide you through some of the most important aspects to keep in mind when making your purchase.
Price is an important factor to consider when buying a saw for cutting shapes out of wood. While there are many affordable options available, keep in mind that cheaper saws may not be as durable or precise as more expensive models. On the other hand, a higher price tag does not always guarantee better quality. Consider your budget and look for a saw that offers the features you need at a price you can afford.
A warranty can provide peace of mind and protect your investment. Look for a saw that comes with a warranty, and make sure you understand the terms and conditions. Some warranties may only cover certain parts or have limitations on use, so be sure to read the fine print.
Customer reviews can provide valuable insight into the quality and performance of a saw. Look for reviews from people who have used the saw for similar projects to the ones you have planned. Pay attention to any recurring issues or complaints, as these may be indicators of potential problems.
When looking at customer reviews, keep in mind that not all reviews are created equal. Look for reviews from verified purchasers, and consider the overall rating as well as the number of reviews. A product with a high rating and a large number of reviews is generally a good indicator of quality.
Overall, when choosing the best saw for cutting shapes out of wood, it’s important to consider your budget, the warranty, and customer reviews. By taking these factors into account, you can make an informed decision and find a saw that meets your needs and expectations.
There are several saw options available for cutting shapes out of wood. Scroll saws are considered the best for intricate and delicate cuts. Jigsaws are also a popular option for cutting curves and shapes. Band saws are suitable for cutting thick pieces of wood, while circular saws are great for cutting straight lines.
Scroll saws are the best option for cutting curves in wood. They have thin blades that can make intricate cuts with ease. Jigsaws are also a good option for cutting curves, but they are not as precise as scroll saws.
For wood crafts, a scroll saw is recommended. It is versatile and can make intricate cuts with ease. Jigsaws and band saws are also good options, depending on the type of project you are working on.
If you are a beginner, a jigsaw is a good option for cutting wood. It is easy to use and can make straight and curved cuts. Circular saws are also beginner-friendly and can make straight cuts with ease.
For cutting small pieces of wood, a scroll saw is the most efficient. It has a thin blade that can make intricate cuts with ease. Jigsaws are also a good option for cutting small pieces of wood.
A scroll saw is the best tool for cutting letters out of wood. It can make intricate cuts and curves with ease, making it perfect for cutting letters and other intricate designs. Jigsaws are also a good option, but they are not as precise as scroll saws.

If you’re an archery enthusiast, you know that finding the right bow is crucial to your success. But what about the wood used to make the bow? The type of wood used can affect the bow’s performance, durability, and overall feel. So, what is the best wood for making bows?
According to The Wood Database, the best bow woods tend to be those that have a low MOE (modulus of elasticity) and a high MOR (modulus of rupture). This means that the wood will bend easily without breaking. The top five woods for making bows are osage orange, black locust, ash, yew, and hickory. However, many experts consider yew to be the best choice, with hickory coming in a close second.
When choosing the best wood for making a bow, there are a few factors to consider. These include the bow’s intended purpose, your skill level, and the availability of the wood. While yew may be the best choice for some, it may not be the most practical option for others. Ultimately, the best wood for making a bow is one that fits your specific needs and preferences.

When it comes to making bows, the type of wood you choose is crucial to the success of your project. Not all woods are created equal, and some are better suited for bow-making than others. Here are some key things to keep in mind when selecting the best wood for your bow:
The density of the wood you choose will have a significant impact on the performance of your bow. A denser wood will generally produce a faster, more powerful shot, while a less dense wood will be slower and less powerful. However, denser woods are also heavier, which can make the bow harder to handle and less comfortable to shoot.
Another critical factor to consider is the flexibility of the wood. A good bow wood should be able to bend and flex without breaking, which requires a delicate balance between strength and flexibility. Some woods are naturally more flexible than others, while others may need to be treated or backed with another material to achieve the desired level of flexibility.
Finally, you’ll want to consider the availability of the wood you choose. Some types of wood may be more readily available in your area than others, while others may be more expensive or harder to find. Keep in mind that using a rare or exotic wood may not necessarily make your bow better, and it may be more practical to work with a more readily available material.
Overall, the best wood for making bows will depend on your specific needs and preferences. Consider the density, flexibility, and availability of different types of wood to find the one that best suits your needs.
If you’re looking for the traditional choice of wood for making bows, then yew is the way to go. Yew has been used for centuries to make some of the best bows in history. In this section, we’ll discuss the characteristics and benefits of yew for making bows.
Yew is a softwood that is native to Europe and can be found in other parts of the world. It has a straight grain and is relatively easy to work with, making it a popular choice for bow making. Yew wood is also known for its flexibility, which is essential for making bows that can bend without breaking.
One of the unique characteristics of yew is its sapwood and heartwood. The sapwood is the outer layer of the tree, and the heartwood is the inner layer. The sapwood of yew is white, while the heartwood is reddish-brown. The heartwood is much denser than the sapwood, which gives yew its strength and durability.
Yew wood has several benefits when it comes to making bows. Here are some of the advantages of using yew for bow making:
In conclusion, yew is the traditional choice for making bows. Its strength, flexibility, resilience, and appearance make it an excellent choice for bow making. If you’re looking to make a bow that is both functional and beautiful, then yew is the way to go.
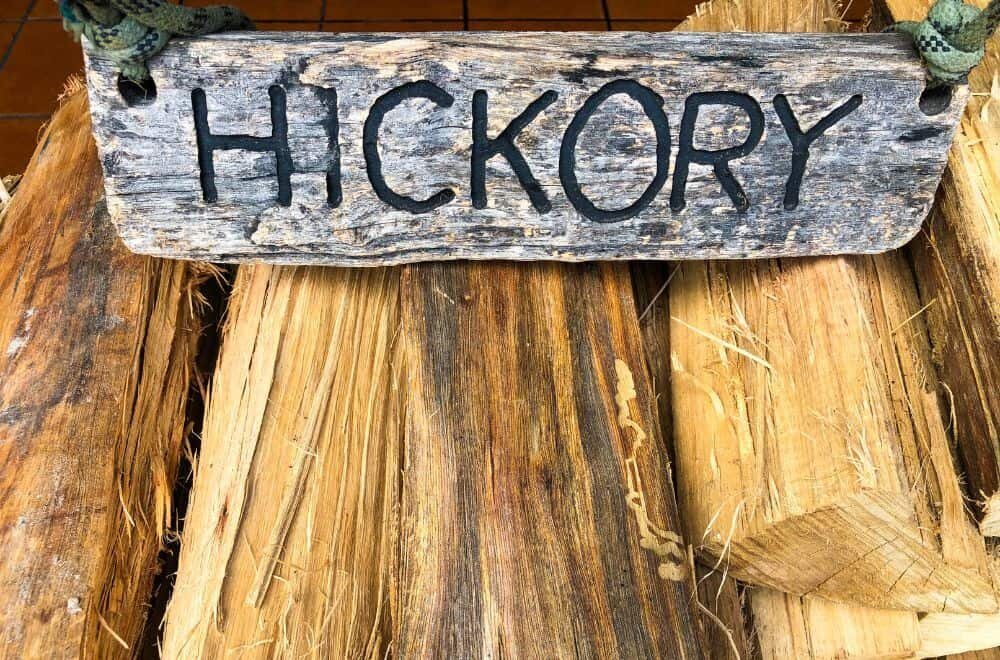
If you’re looking for a classic American wood for your bow, hickory is a great option. With its straight grain and high density, hickory is a popular choice for bow makers. Here are some characteristics and benefits of using hickory for your bow.
Hickory is a hardwood that is native to North America. It is a dense wood with a straight grain, which makes it ideal for making bows. Hickory has a high modulus of elasticity (MOE), which means that it is stiff and doesn’t bend easily. This stiffness allows for a fast and powerful shot.
Hickory is also known for its shock resistance. When a bow is fired, it creates a lot of energy that is transferred to the wood. If the wood is not able to absorb this energy, it can cause the bow to break. Hickory, however, is able to absorb this energy and prevent the bow from breaking.
One of the biggest benefits of using hickory for your bow is its durability. Hickory is a strong wood that can withstand a lot of wear and tear. This means that your bow will last longer and require less maintenance than other woods.
Another benefit of hickory is its availability. Hickory is a common wood that can be found in many parts of North America. This means that it is easy to find and relatively inexpensive compared to other woods.
Hickory is also easy to work with. It can be shaped and sanded to create a smooth finish. This makes it a great option for beginner bow makers who are just starting out.
Overall, hickory is a great choice for anyone looking to make a classic American bow. Its straight grain, high density, and shock resistance make it a durable and reliable wood for bow making.
If you are looking for a wood that can withstand the test of time, Osage Orange is the one for you. This wood is known for its durability and strength, making it a popular choice for bow making. In this section, we will explore the characteristics and benefits of Osage Orange for bows.
Osage Orange, also known as hedge apple, horse apple, or bodark, is a small deciduous tree native to North America. It grows to an average height of 10-15 meters and has a dense, tight-grained wood that is bright yellow-orange in color. The wood is known for its high density and hardness, which makes it difficult to work with but ideal for bow making.
There are several benefits to using Osage Orange for bow making. Firstly, it is a very strong and durable wood that can withstand the stress of shooting arrows. This means that bows made from Osage Orange can last for many years without losing their shape or strength.
Secondly, Osage Orange has excellent elastic properties, which means that it can store and release energy efficiently. This makes it an ideal wood for making bows that are powerful and accurate.
Finally, Osage Orange has a unique and attractive appearance, with its bright yellow-orange color and tight grain pattern. This makes it a popular choice for bow makers who want to create a bow that not only performs well but also looks great.
In conclusion, if you are looking for a wood that is strong, durable, and efficient, Osage Orange is the ideal choice for making bows. Its unique characteristics and benefits make it a popular choice among bow makers and archers alike.
If you’re looking for a sustainable alternative to traditional hardwoods for making bows, bamboo is a great option to consider. Bamboo is a fast-growing plant that can be harvested and replenished quickly, making it a much more sustainable option than traditional hardwoods, which can take decades to grow.
Bamboo is a type of grass that grows in a variety of climates and conditions. It is known for its strength and flexibility, which make it an ideal material for making bows. Bamboo is also lightweight, which can be an advantage for archers who prefer a lighter bow.
One of the unique characteristics of bamboo is its growth pattern. Bamboo grows in segments, which are called nodes. The nodes are solid and provide strength to the bamboo. The spaces between the nodes are hollow, which makes the bamboo lightweight and flexible.
There are several benefits to using bamboo for making bows. Here are a few:
When using bamboo for making bows, it’s important to select the right type of bamboo. Moso bamboo is a popular choice for bow making because it has a straight grain and is relatively easy to work with. Other types of bamboo, such as Tonkin bamboo, can also be used for making bows.
Overall, bamboo is a sustainable and practical alternative to traditional hardwoods for making bows. Its strength, flexibility, and lightweight nature make it an excellent choice for archers who are looking for a more natural and eco-friendly option.
When selecting the best wood for making bows, there are several factors to consider. These factors include:
Strength and flexibility are the most important factors to consider when choosing the best wood for making bows. The wood should be strong enough to withstand the tension and compression forces that come with bending the bow. At the same time, it should be flexible enough to bend without breaking.
The density and weight of the wood are also important factors to consider. A denser wood will be stronger and more durable, but it will also be heavier. A lighter wood will be easier to handle, but it may not be as strong or durable.
The grain orientation of the wood is another important factor to consider. The wood should have a straight, even grain that runs the length of the bow. This will help to ensure that the bow is strong and durable.
The moisture content of the wood is also important. The wood should be dry, with a moisture content of less than 10%. This will help to ensure that the bow is stable and will not warp over time.
Finally, you should consider the availability and cost of the wood. Some woods may be more expensive or harder to find than others. You should choose a wood that is readily available and within your budget.
By considering these factors, you can choose the best wood for making a bow that is strong, durable, and easy to work with.

Once you have found the perfect wood for your bow, it is important to maintain it properly to ensure its longevity. Here are some tips on how to maintain your wooden bow:
Moisture can cause your wooden bow to warp or crack. It is important to keep your bow dry at all times. Store it in a dry place and avoid exposing it to extreme temperatures or humidity.
Oiling the bow can help protect it from moisture and keep it in good condition. Use a soft cloth to apply a thin layer of oil to the bow. Be sure to use a non-toxic oil that is safe for use on wood.
Regularly inspect your bow for any signs of damage. Look for cracks, warping, or any other signs of wear and tear. If you notice any damage, it is important to address it immediately to prevent further damage.
Using a bowstringer is the safest way to string and unstring your bow. It helps prevent damage to the bow and ensures that the string is properly seated on the bow.
When not in use, store your bow properly to prevent damage. Use a bow case or bag to protect it from dust, moisture, and other elements. Avoid storing it in direct sunlight or near a heat source.
By following these tips, you can help ensure that your wooden bow stays in good condition for years to come.
There are several types of wood that are commonly used for making bows, including Osage orange, black locust, ash, yew, hickory, oak, and maple. Each of these woods has its own unique characteristics and advantages.
Yes, hickory can be a good choice for making bows. It is a strong and durable wood that is also relatively lightweight. Hickory bows can be fast and accurate, making them a popular choice for many archers.
Laminated bows are made by gluing together multiple layers of wood to create a stronger and more stable bow. The best woods for laminated bows are those that have a high strength-to-weight ratio, such as bamboo, maple, and fiberglass. The advantages of laminated bows include increased durability, improved accuracy, and greater consistency.
Some popular woods used for making crossbows include ash, maple, and yew. These woods are strong and durable, making them ideal for withstanding the high forces involved in crossbow shooting.
Cherry wood can be a viable option for bow making, but it is not as commonly used as some other types of wood. Cherry has a relatively low strength-to-weight ratio compared to other woods, which can make it less suitable for making high-performance bows.
The fastest woods for making bows are those that have a high modulus of elasticity (MOE) and a low density. Some examples of woods with these characteristics include bamboo, carbon fiber, and fiberglass. These woods can produce bows that are extremely fast and accurate, but they may also be more expensive and difficult to work with than traditional woods.

Hanging a thin piece of wood on a wall can be a tricky task, especially if you want to ensure that it is secure and won’t fall off. There are several methods that you can use to hang a thin piece of wood on a wall, such as using adhesive, double-sided tape, or wire. However, it is important to choose the right method based on the weight of the wood and the type of wall you are hanging it on.
One popular method for hanging a thin piece of wood on a wall is using a French cleat. This involves cutting a 45-degree bevel on a piece of hardwood, which is then attached to the wall. The other half of the cleat is attached to the back of the wood, allowing it to slide onto the cleat and be held securely in place. This method is particularly useful for heavy pieces of wood that need to be securely attached to the wall.
Another option for hanging a thin piece of wood on a wall is using velcro wall hangers. These hangers are designed to hold lightweight items, such as pictures or posters, but can also be used for thin pieces of wood. They are easy to install and remove, making them a good choice if you want to change the position of the wood frequently. However, they may not be suitable for heavier pieces of wood.

When it comes to hanging a thin piece of wood on a wall, it’s important to understand the type of wall you are working with. Different wall types require different methods of hanging, and using the wrong method can result in damage to your wall or your artwork. Here are some common wall types and the best ways to hang a thin piece of wood on them.
Drywall is the most common type of wall found in modern homes. It’s made of gypsum plaster sandwiched between two layers of paper, and it’s relatively easy to hang things on. Here’s how to hang a thin piece of wood on drywall:
Plaster walls are common in older homes, and they can be a bit trickier to hang things on than drywall. Here’s how to hang a thin piece of wood on a plaster wall:
Brick walls are common in older homes and commercial buildings, and they require a different approach to hanging things than drywall or plaster. Here’s how to hang a thin piece of wood on a brick wall:
By understanding the type of wall you are working with and using the appropriate hanging method, you can safely and securely hang a thin piece of wood on your wall.
When hanging a thin piece of wood on a wall, it’s important to choose the right type of wood. Here are some factors to consider:
The thickness of the wood you choose will affect how it hangs on the wall. Thinner pieces of wood may require additional support, while thicker pieces may be too heavy to hang securely. A 1/4″ thickness is a common choice for thin wood pieces.
Different types of wood have different characteristics that can affect how they hang on the wall. Here are some popular options:
The grain pattern of the wood you choose can also affect its appearance and hanging capabilities. Here are some common grain patterns:
Finally, consider the finish of the wood you choose. A smooth and polished finish can add a sleek look to your space, while a rough and rustic finish can add character and charm. Just be sure to choose a finish that complements the overall style of your room.
By considering these factors, you can choose the right type of wood for your thin piece and ensure it hangs securely and looks great on your wall.
To hang a thin piece of wood on a wall, you’ll need a few essential tools to ensure a secure and level installation. Here are the tools you’ll need:
A drill is essential for creating holes in the wall to anchor the screws that will hold the wood in place. Make sure to use a drill bit that is slightly smaller than the diameter of the screws you will be using to ensure a snug fit.
A level is crucial for ensuring that the wood is hung straight and level. A small bubble level is usually sufficient for this task.
If you plan to hang the wood on a stud wall, a stud finder will help you locate the studs behind the drywall. This will allow you to anchor the screws directly into the studs for a more secure installation.
The type of screws you use will depend on the weight of the wood and the type of wall you are hanging it on. For lightweight wood and drywall, picture hanging strips or adhesive hooks may be sufficient. For heavier wood and stud walls, use wood screws that are long enough to anchor securely into the studs.
By having these tools on hand, you’ll be able to hang your thin piece of wood securely and level on any type of wall.
Before you hang a thin piece of wood on a wall, you need to locate the studs. This is important because hanging the wood on drywall alone can result in it falling off the wall. Here are some ways to locate the studs:
Remember to mark the location of the studs with a pencil or tape measure so that you can easily refer to them when hanging the thin piece of wood on the wall.

Before hanging a thin piece of wood on a wall, there are a few steps you should take to ensure that the wood is ready for mounting.
First, you should sand the wood to ensure that it is smooth and free of any rough spots or splinters. Use a fine-grit sandpaper to gently sand the surface of the wood until it is completely smooth. Be sure to sand the edges of the wood as well to prevent any sharp edges from causing injury.
Once the wood is sanded, you can choose to stain or paint it to give it a finished look. If you choose to stain the wood, be sure to apply a clear coat of polyurethane to protect the wood and prevent any damage from moisture or humidity.
If you choose to paint the wood, be sure to use a primer to help the paint adhere to the surface. Apply two coats of paint, allowing each coat to dry completely before applying the next.
Before mounting the wood on the wall, you will need to add hardware to the back of the wood to hang it securely. There are several options for hardware, including keyhole slots, D-rings, or sawtooth hangers.
If you choose to use keyhole slots, be sure to measure and mark the location of the slots on the back of the wood before drilling the holes. Use a drill bit that is slightly larger than the diameter of the screws you will be using to mount the wood.
Once the hardware is attached, your thin piece of wood is ready to be mounted on the wall.
To hang a thin piece of wood on a wall, you will need to drill holes in the wood and the wall. Here’s how to do it:
By following these steps, you can easily drill the necessary holes to hang your thin piece of wood securely on the wall.
When it comes to mounting a thin piece of wood on a wall, there are a few options to choose from. Here are some methods you can try:
If the wood is lightweight and the wall is made of drywall, you can use picture hanging strips or adhesive hooks. These are easy to use and won’t damage your walls. Simply attach the strips or hooks to the back of the wood and press firmly onto the wall.
For a more permanent solution, you can glue a strip of wood to the back of the thin piece of wood. This will add support and make it easier to hang. You can then attach your hanging hardware to the strip of wood.
If your piece of wood has keyhole slots, you can use them to hang the wood on the wall. First, measure the distance between the slots and mark the wall where you want the wood to hang. Then, attach screws or hooks to the wall and hang the wood on them.
If you have a heavy piece of wood, you can use a French cleat to mount it on the wall. A French cleat is a type of hardware that consists of two pieces of wood, one attached to the back of the wood and the other attached to the wall. The two pieces interlock to provide a secure mount.
With these methods, you can easily mount a thin piece of wood on a wall. Just make sure to choose the right method for your specific piece of wood and wall type.
When hanging a thin piece of wood on a wall, it is important to take safety precautions to prevent any accidents or damage to your walls. Here are some tips to keep in mind:
Before you start hanging the wood, it’s important to know its weight. This will help you choose the right hardware and ensure that the wood is properly secured. You can use a bathroom scale to weigh the wood.
Make sure to use the appropriate hardware for the weight of the wood. For a thin piece of wood, you can use picture hangers, sawtooth hangers or adhesive strips. If the wood is heavier, use wall anchors or toggle bolts to secure it to the wall.
If possible, hang the wood on a wall stud. This will provide extra support and stability. You can use a stud finder to locate the studs in your wall.
To ensure that the wood is straight, use a level to mark the position of the hangers or hardware. This will help you avoid any crooked or uneven hanging.
When drilling or hammering into the wall, wear protective gear such as safety glasses and gloves to prevent any injuries.
By following these safety precautions, you can hang your thin piece of wood on the wall safely and securely.
There are several ways to hang a thin piece of wood on a wall. One is to use wood glue to attach a strip of wood to the back of the wood piece and then hang it on a nail or hook. Another way is to use picture hangers or adhesive strips that are specifically designed for hanging lightweight objects on walls.
To hang a wood shelf on a wall, you can use brackets or cleats. Brackets are L-shaped metal or wood pieces that attach to the wall and support the shelf. Cleats are strips of wood that are attached to the wall and the shelf, providing a secure hold.
There are several methods for hanging things on walls without causing damage, such as using adhesive strips, suction cups, or removable hooks. These options are great for renters or anyone who wants to avoid drilling holes in their walls.
To hang plywood art on a wall, you can use a strip of wood trim material that is glued on the back side of the plywood with carpenter’s glue. Then, you can hang the piece on a nail or hook. Alternatively, you can use a French cleat system, which involves mounting a cleat to the wall and attaching another cleat to the back of the plywood.
The best way to hang something on a stud is to use a stud finder to locate the stud and then use a screw or nail to attach the object to the stud. This will provide a secure hold and prevent damage to the wall.
To hang thin wood panels on a wall, you can use adhesive strips or picture hangers. Another option is to use a French cleat system, which involves mounting a cleat to the wall and attaching another cleat to the back of the wood panel.

Are you planning a DIY project that requires cutting wood? If so, you may be wondering if Lowe’s offers a wood cutting service. The good news is that Lowe’s does offer this service to its customers.
With Lowe’s wood cutting service, you can purchase the lumber you need and have it cut down to size at the store. This can be especially helpful if you don’t have the tools or space to cut the wood yourself. Plus, it can save you time and effort, allowing you to focus on other aspects of your project.
Keep in mind that while Lowe’s offers wood cutting services, there may be limitations on what they can cut. For safety reasons, they may not be able to cut smaller pieces of wood. However, for larger pieces, such as those needed for framing or decking, Lowe’s can be a great resource for getting the job done.
Lowe’s is a home improvement retail store that offers a wide range of products and services to help customers with their home projects. The company was founded in 1946 and has since grown to become one of the largest home improvement retailers in the world.
Lowe’s stores offer a variety of products, including building materials, tools, appliances, and home decor items. They also provide a range of services to help customers complete their projects, such as installation services, repair services, and design services.
Lowe’s is committed to providing customers with high-quality products and services at affordable prices. The company prides itself on its knowledgeable and helpful staff, who are always available to answer questions and provide assistance.
Overall, Lowe’s is a one-stop-shop for all your home improvement needs. Whether you’re looking to renovate your kitchen, update your bathroom, or complete any other home project, Lowe’s has everything you need to get the job done.

When it comes to home improvement projects, Lowe’s has got you covered. They offer a wide range of services to make your DIY projects easier and more convenient. Here are some of the services that Lowe’s offers:
One of the most popular services that Lowe’s offers is wood cutting. If you need to cut lumber to a specific size, Lowe’s can do it for you. They offer free wood cutting for any lumber purchased in-store so that it can fit inside your car. However, cutting pieces to size may cost extra depending on location.
Lowe’s also offers free pipe threading and cutting for any size of galvanized or black iron pipe. This service involves a machine-based cutting operation with a metal wheel that creates threads in the ends of pipes.
In addition to wood and pipe cutting, Lowe’s can cut other materials as well, such as mini-blinds, rope, chain, and more.
If you’re not comfortable with installing your purchases yourself, Lowe’s also offers installation services for a variety of products, including flooring, cabinets, countertops, and more.
If you need help with designing your home improvement project, Lowe’s has got you covered. They offer design services for kitchens, bathrooms, and other areas of your home.
If you need a tool for a one-time project, Lowe’s has a rental program that allows you to rent tools for a specified period of time.
Overall, Lowe’s offers a variety of services to make your home improvement projects easier and more convenient. Whether you need help with cutting materials, installation, design, or rentals, Lowe’s has got you covered.
If you’re planning a home improvement project that involves wood, you might be wondering if Lowe’s offers a wood cutting service. The good news is that Lowe’s does offer wood cutting services at all of its locations.
Whether you need to transport your lumber in a small car or you want to save yourself some time, Lowe’s wood cutting services can be extremely useful in a pinch. Plus, the service is available to all customers who purchase wood at Lowe’s, so you don’t need to be a professional contractor to take advantage of it.
When you visit your local Lowe’s store, you’ll find that the wood cutting service is located in the lumber department. The store associates will be happy to assist you with your wood cutting needs, and they can make a certain number of cuts for free.
However, there are some restrictions that apply to the wood cutting service. For example, the cuts must be straight and square, and the wood must be purchased at Lowe’s. Additionally, the number of free cuts may vary by store, so it’s always a good idea to check with your local store for details.
Overall, Lowe’s wood cutting service is a convenient and helpful option for anyone who needs to cut wood for a home improvement project. So if you’re planning a project that involves wood, be sure to take advantage of this service at your local Lowe’s store.

If you are planning to buy lumber from Lowe’s and want to get it cut to the desired size, then you can avail the wood cutting service offered by the store. Here’s how you can get your wood cut at Lowe’s:
It’s important to note that Lowe’s wood cutting service is free of charge and is available at all their stores. However, the store may have certain limitations on the number of cuts they can make or the size of the lumber they can cut. It’s best to check with your local Lowe’s store for more details on their wood cutting service.
If you’re planning a DIY project that involves cutting wood, you may be wondering whether you should do it yourself or pay someone else to do it for you. Lowe’s wood cutting service can be a great option for those who want to save time and effort while ensuring accurate and precise cuts. Here are some of the benefits of using Lowe’s wood cutting service:
One of the biggest advantages of using Lowe’s wood cutting service is convenience. You don’t have to worry about buying or renting expensive saws and other equipment, or spending hours cutting wood yourself. Instead, you can simply bring your lumber to Lowe’s and have their trained associates cut it for you. This can save you a lot of time and effort, especially if you’re working on a large project.
Another benefit of using Lowe’s wood cutting service is the accuracy of the cuts. Lowe’s associates are trained to offer precise and accurate cuts, so you can be sure that your lumber will be cut to the exact measurements you need. This can be especially important if you’re working on a project that requires a high degree of precision, such as building furniture or installing cabinets.
Using Lowe’s wood cutting service can also be cost-effective. While there may be a fee for the service, it is often much cheaper than buying or renting your own saws and other equipment. Additionally, Lowe’s often offers discounts and promotions on their wood cutting service, so you can save even more money.
Lowe’s wood cutting service also offers a variety of options to choose from. You can select the type of wood you want to cut, as well as the size and shape of the cuts. This allows you to customize your lumber to your exact specifications, making it easier to complete your project.
Finally, Lowe’s wood cutting service offers high-quality cuts. Their saws are well-maintained and their associates are trained to provide clean, accurate cuts every time. This means that you can be confident that your lumber will be cut to the highest standards, ensuring that your project will look great and last for years to come.
While Lowe’s wood cutting service can be a convenient option for those who need lumber cut to size, there are some limitations to keep in mind. Here are a few things to consider:
Lowe’s wood cutting service is designed to handle basic cuts only. This means that you may not be able to get more complex cuts, such as angled or beveled cuts, made at the store. If you need more specialized cuts, you may need to seek out a professional carpenter or woodworking shop.
While Lowe’s promises “clean cuts every time,” it’s important to keep in mind that the accuracy and precision of the cuts may not always be perfect. Store associates are trained to complete simple cuts quickly, which can sometimes lead to slight variations in the measurements. If you need very precise cuts, you may want to consider doing the cutting yourself or seeking out a professional.
Not all Lowe’s stores offer wood cutting services, and the availability of the service can vary from store to store. Before you make a trip to the store, it’s a good idea to call ahead and confirm that the service is available at your location.
While Lowe’s wood cutting service is generally free, there may be some instances where you will need to pay for the service. For example, if you need a large amount of lumber cut or if you need more complex cuts made, you may be charged a fee. It’s important to ask about any potential fees before you have your wood cut to avoid any surprises at the checkout.
If you are unable to use Lowe’s wood cutting service, there are several alternatives available to you. Here are a few options:
Home Depot offers wood cutting services at some of its locations. These services vary from store to store, and many are switching to a fee-based model. However, most stores will cut your wood so that it fits in your car and will also give you a set number of cuts if they have the time to do so.
Menards is another home improvement retailer that offers wood cutting services. They will cut your wood to size for free, but they do not offer more advanced cuts. However, Menards will only cut wood that is purchased from them.
Many local hardware stores offer wood cutting services. These stores may have more flexibility in terms of the types of cuts they can make and the materials they can cut. However, the quality of service may vary, so it is best to call ahead and check if they offer wood cutting services.
If you have a saw at home, cutting your own wood is always an option. However, it is important to have the proper tools and knowledge to do so safely. Always wear protective gear, such as safety glasses and gloves, and follow the manufacturer’s instructions for your saw.
If you need more advanced cuts or have a large project, it may be worth hiring a professional. A carpenter or woodworker will have the expertise and tools to make precise cuts and ensure your project is completed to your satisfaction.
If you’re considering using Lowe’s wood cutting service, you might be wondering what other customers have experienced. Here are a few things to keep in mind:
Remember that every store may have slightly different policies and procedures for their wood cutting service, so it’s always a good idea to check with your local store before making any assumptions. And if you do decide to use the service, be sure to communicate clearly with the staff about your needs and expectations to ensure the best possible outcome.
Yes, Lowe’s offers wood cutting services for its customers. They can cut wood to fit inside your car, making it easier for you to transport it home.
Lowe’s offers basic wood cutting services for its customers. However, they do not offer custom wood cutting services. They can make simple straight cuts and rough cuts, but they cannot make more advanced cuts such as angled or curved cuts.
Lowe’s can cut most types of wood that they sell in their store. This includes lumber, plywood, and particleboard. However, they may not be able to cut certain types of wood that are too thick or too large to fit in their saws.
Lowe’s offers free wood cutting services for any lumber purchased in-store. However, fees for wood cutting services may vary across different locations. It is best to check with your local Lowe’s store for more information.
No, you do not need to bring your own wood to Lowe’s for cutting. You can purchase the wood you need at Lowe’s and they will cut it for you in-store.
The turnaround time for wood cutting services at Lowe’s may vary depending on the store’s workload. However, they typically aim to complete wood cutting services within a reasonable amount of time. It is best to check with your local Lowe’s store for more information on turnaround times.

Are you wondering if polyurethane makes wood waterproof? This is a common question among those who are looking to protect their wooden surfaces from water damage. While polyurethane is known for its ability to protect wood from scratches and discoloration, it’s important to understand that it does not make wood completely waterproof.
Polyurethane is a synthetic resin that forms a hard, protective film on the surface of wood. This film is resistant to scratches and discoloration from fungi and mildew, and it also makes it more difficult for water to penetrate the wood. However, polyurethane only makes wood water-resistant, not waterproof. This means that while it can repel water and prevent water absorption, it will never fully block it.
If you are a woodworker or DIY enthusiast, you must have heard about polyurethane. Polyurethane is a synthetic resin that is used to protect and enhance the beauty of wood. It is a popular choice for finishing woodwork, as it provides a durable, long-lasting finish.
Polyurethane is available in two forms: oil-based and water-based. Oil-based polyurethane is more durable and provides a richer finish, while water-based polyurethane dries faster and has a lower odor.
Polyurethane is a clear, protective coating that is applied to the surface of wood. It forms a hard, durable film that protects the wood from scratches, stains, and moisture. Polyurethane also enhances the natural beauty of wood by adding depth and richness to its color.
Polyurethane is available in different sheens: gloss, semi-gloss, and satin. Gloss provides a high shine, while semi-gloss and satin provide a more subtle shine. The sheen you choose depends on your personal preference and the type of wood you are working with.
When applying polyurethane, it is important to follow the manufacturer’s instructions carefully. Polyurethane should be applied in thin, even coats, and each coat should be allowed to dry completely before applying the next coat. Sanding between coats is also recommended to ensure a smooth, even finish.
In summary, polyurethane is a clear, protective coating that is used to protect and enhance the beauty of wood. It is available in different forms, sheens, and can be applied to different types of wood. When applying polyurethane, it is important to follow the manufacturer’s instructions carefully to ensure a durable, long-lasting finish.
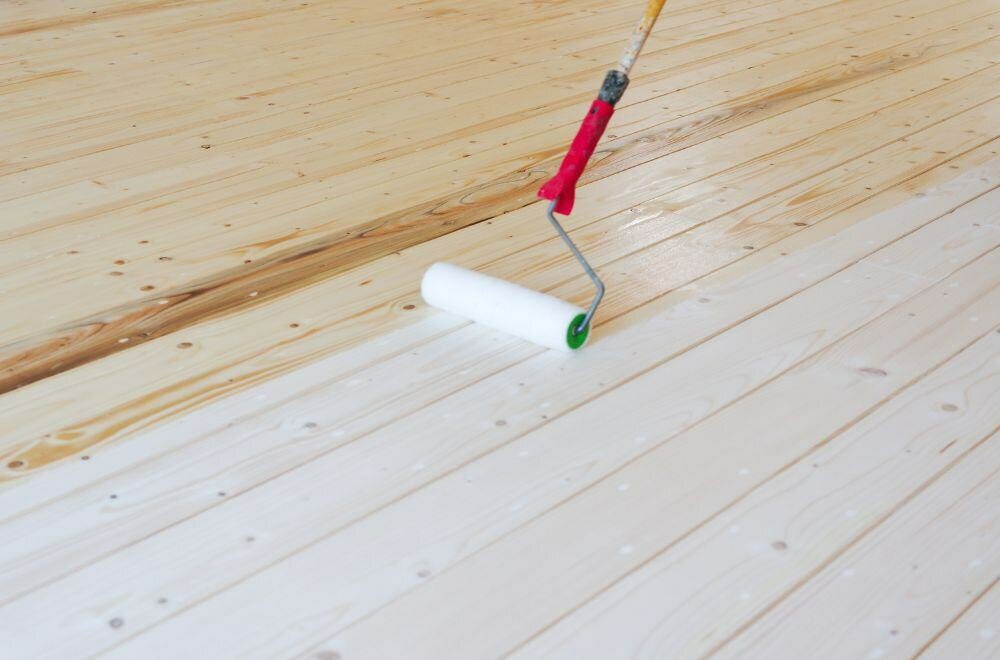
Polyurethane is a popular choice for finishing wood because of its durability and protection against scratches and discoloration. However, it is important to note that polyurethane does not make wood completely waterproof.
When polyurethane is applied to wood, it creates a protective layer that repels water and prevents water absorption. This layer can help to make the wood water-resistant, but it cannot make the wood completely waterproof.
It is important to note that polyurethane may interact differently with different types of wood. Some woods may absorb the polyurethane differently, which can affect the level of water resistance provided by the finish.
Additionally, the thickness of the polyurethane layer can also affect its water resistance. A thicker layer of polyurethane may provide more protection against water damage than a thinner layer.
Overall, while polyurethane can provide some level of water resistance to wood, it is important to use additional waterproofing methods if you need to protect the wood from prolonged exposure to water.
Polyurethane is a popular finish for wood because it provides excellent protection against scratches, discoloration, and water damage. While it doesn’t make wood completely waterproof, it does make it water-resistant. But how does it work?
Polyurethane is a type of plastic that forms a protective layer over the wood. This layer repels water and prevents it from being absorbed by the wood. When water comes into contact with the polyurethane, it beads up and rolls off the surface, rather than soaking into the wood fibers.
The polyurethane layer also helps to seal the wood, preventing moisture from getting in and causing damage. This is important because when wood absorbs water, it can swell, warp, and even rot over time. By keeping moisture out, polyurethane helps to preserve the integrity of the wood.
To get the best water resistance from polyurethane, it’s important to apply several coats. Each coat builds up the protective layer, making it thicker and more effective. You should also make sure to sand the wood between coats to ensure a smooth surface and good adhesion.
Overall, polyurethane is an excellent choice for protecting wood from water damage. While it’s not 100% waterproof, it does provide a high level of water resistance that can help to extend the life of your wood projects.
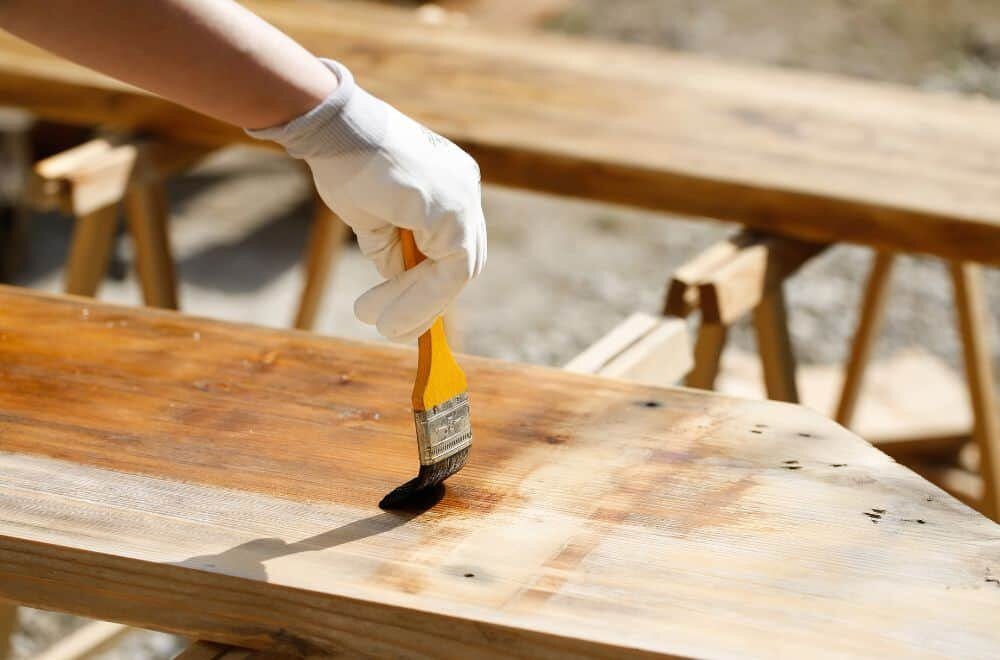
When it comes to wood waterproofing, polyurethane is a popular option due to its water-resistant properties. However, not all polyurethane products are created equal. Here are two types of polyurethane that you can use for wood waterproofing:
Oil-based polyurethane is a popular choice for wood waterproofing due to its durability and resistance to wear and tear. This type of polyurethane is made from a combination of synthetic resin and oil, which makes it more resistant to water than other types of polyurethane.
One of the benefits of oil-based polyurethane is that it provides a glossy finish that can enhance the natural beauty of the wood. However, it can also yellow over time, which may not be desirable for some wood types. Additionally, oil-based polyurethane has a strong odor and requires proper ventilation during application.
Water-based polyurethane is another option for wood waterproofing. This type of polyurethane is made from a combination of synthetic resin and water, which makes it less harmful to the environment than oil-based polyurethane. It also dries faster and has a lower odor, making it easier to work with.
Although water-based polyurethane is less durable than oil-based polyurethane, it still provides a good level of water resistance. It also dries clear, which makes it a good option for wood types that you don’t want to yellow over time.
In summary, both oil-based and water-based polyurethane can be used for wood waterproofing. Oil-based polyurethane is more durable and provides a glossy finish, while water-based polyurethane is less harmful to the environment and dries faster. Which one you choose will depend on your personal preference and the type of wood you are working with.

When it comes to applying polyurethane on wood, there are a few steps that you need to follow to ensure a smooth and even finish. In this section, we will guide you through the preparation, application, and drying and curing process of polyurethane on wood.
Before applying polyurethane on wood, it is important to prepare the surface properly. Here are the steps you need to follow:
Once you have prepared the surface, it’s time to apply the polyurethane. Here are the steps you need to follow:
After applying the final coat of polyurethane, it’s time to let it dry and cure. Here are the steps you need to follow:
By following these steps, you can ensure a smooth and even finish when applying polyurethane on wood.
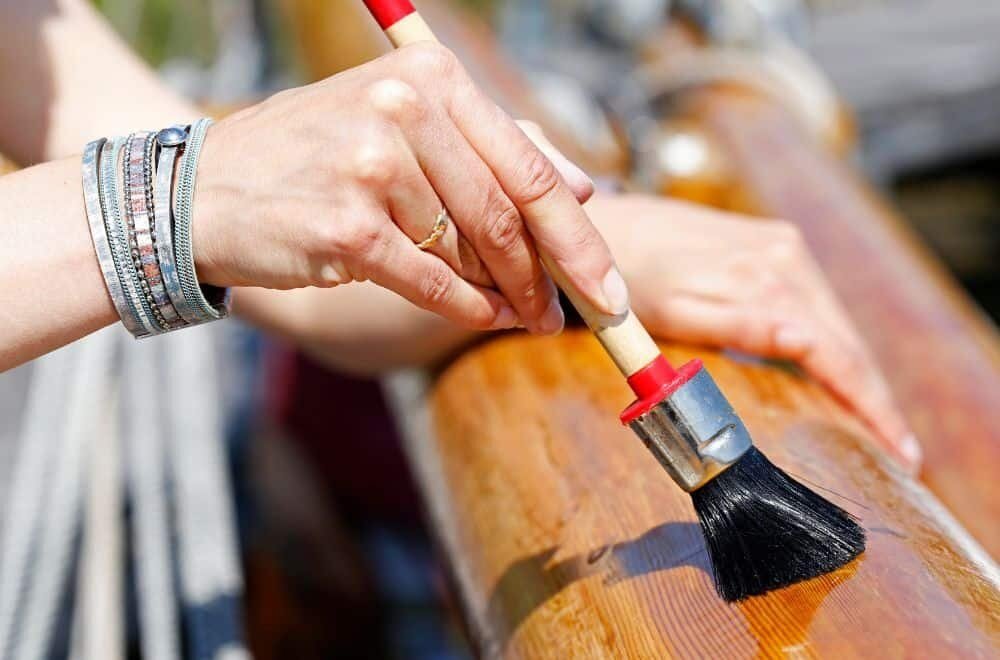
Polyurethane is a popular coating for wood surfaces due to its numerous benefits. Here are some benefits of using polyurethane on wood:
Polyurethane forms a protective layer on wood, helping to protect it against moisture, sunlight, and other environmental elements. It also protects wood from scratches and discoloration, making it an excellent choice for high-traffic areas.
Polyurethane enhances the natural beauty of wood by adding a clear, glossy finish. It gives wood richness and depth while preserving its natural grain and texture.
Polyurethane is easy to apply and dries quickly, making it a popular choice for DIY projects. It can be applied with a brush, roller, or spray gun, and it is available in both water-based and oil-based formulas.
Polyurethane is one of the toughest clear coatings available, making it a long-lasting solution for protecting wood surfaces. It can withstand heavy use and exposure to the elements, making it an ideal choice for outdoor furniture and decks.
In summary, polyurethane is an excellent choice for protecting and enhancing the natural beauty of wood surfaces. Its durability, ease of application, and ability to protect against damage make it a popular choice for both DIY and professional projects.
While polyurethane is a popular choice for finishing wood due to its waterproofing properties, there are some potential drawbacks to consider before using it on your project.
One of the most common complaints about polyurethane is that it can yellow over time, especially when exposed to sunlight. This can be particularly noticeable on lighter woods, such as pine or maple. While there are some polyurethane formulas that claim to be non-yellowing, it’s important to keep in mind that all polyurethane is susceptible to this issue to some degree.
Polyurethane can be difficult to apply evenly, especially for novice woodworkers. It can also be prone to drips and runs, which can be frustrating to deal with. Additionally, because polyurethane dries quickly, it can be challenging to correct any mistakes once they’ve been made.
Some polyurethane formulas contain volatile organic compounds (VOCs), which can be harmful to your health if inhaled. If you’re working with polyurethane in a poorly ventilated area, it’s important to take precautions such as wearing a respirator mask and opening windows to increase air flow.
While polyurethane is waterproof, it may not be suitable for use on outdoor projects. Exposure to sunlight and other weather conditions can cause the finish to break down over time, which can lead to cracking, peeling, and other issues. If you’re planning to use polyurethane on an outdoor project, it’s important to choose a formula that’s specifically designed for outdoor use.
Overall, polyurethane can be a great choice for finishing wood, but it’s important to be aware of its potential drawbacks before you start your project. By considering these factors and taking the necessary precautions, you can ensure that your finished product looks great and lasts for years to come.
If you want to make wood waterproof for outdoor use, you have several options. One of the most effective ways to waterproof wood is by using a sealant or a waterproofing product. You can choose from a wide range of options, including oil-based and water-based products.
The best waterproof finish for wood will depend on the specific project and the type of wood you are using. Some of the most popular waterproof finishes for wood include polyurethane, varnish, and epoxy. Each of these finishes has its own unique properties and benefits, so it’s important to choose the right one for your project.
Yes, oil-based polyurethane is a good waterproofing option for wood. It creates a protective barrier that repels water and prevents it from penetrating the wood. However, it’s important to note that oil-based polyurethane can yellow over time, so it may not be the best choice for lighter-colored woods.
Yes, polyurethane can be used to create a waterproof seal on wood. When applied correctly, polyurethane creates a protective barrier that prevents water from penetrating the wood. However, it’s important to note that polyurethane is not completely waterproof and may not provide complete protection in all situations.
Some types of wood are naturally waterproof and do not require additional waterproofing treatments. These include teak, cedar, and redwood. These woods have natural oils and resins that repel water and prevent rot and decay.
The best way to permanently waterproof wood is by using a combination of sealant and waterproofing products. This will create a protective barrier that repels water and prevents it from penetrating the wood. It’s also important to choose a type of wood that is naturally resistant to water and rot, such as teak or cedar.

When it comes to woodworking, knowing how long you should let wood glue dry before sanding is crucial to ensuring the strength and durability of your project. While it may be tempting to rush through the process, taking the time to properly let the glue dry can make all the difference in the final result.
Most wood glues only need clamps on them for about 30 minutes to 1 hour. After that point, you can do some light sanding, as long as you do not subject the joints to stress. The glue has not cured fully at that point, so the joint does not have full strength. It will reach full strength in about 24 hours.
However, it’s important to note that different types of wood glue may have different drying times. For example, cyanoacrylate, better known as superglue, can dry enough to fix small repairs in seconds, though full cure might still take anywhere from 8 to 24 hours. It’s always best to consult the manufacturer’s instructions for specific drying times and recommendations.
When working on woodworking projects, one of the most important things to consider is the type of glue you use. Wood glue is a popular adhesive that is used to bond wood pieces together. It is a versatile and strong adhesive that can be used for a variety of woodworking projects.
There are different types of wood glue available, and each type has its own unique properties. Some wood glues are fast-drying, while others take longer to dry. Some are water-resistant, while others are waterproof. It is important to choose the right type of wood glue for your project to ensure a strong and lasting bond.
Wood glue is made from a combination of water, resin, and sometimes filler materials. When the glue is applied to wood, the water evaporates, leaving behind a strong bond between the wood pieces. The bond created by wood glue is often stronger than the wood itself, making it an ideal adhesive for woodworking projects.
One of the benefits of wood glue is that it can be sanded and painted once it has dried. This makes it an ideal adhesive for projects that require a smooth finish. However, it is important to allow the glue to dry completely before sanding or painting to avoid damaging the bond.
When using wood glue, it is important to follow the manufacturer’s instructions carefully. This will ensure that you use the glue correctly and achieve the best possible results. Some wood glues require clamping, while others do not. It is important to understand the requirements of the glue you are using to ensure a strong bond.
Overall, wood glue is a versatile and strong adhesive that is ideal for woodworking projects. By understanding the properties of wood glue and choosing the right type for your project, you can achieve a strong and lasting bond between wood pieces.

When working on a woodworking project, you want to make sure that you are using the right techniques to achieve the best results. One of the most important steps in woodworking is gluing pieces of wood together. However, knowing how long to let the glue dry before sanding can be tricky. In this section, we will discuss the ideal drying time for wood glue.
The general rule of thumb is to let freshly applied wood glue dry for a minimum of 24 hours before unclamping the attached pieces. This is the recommended time for most wood glue brands. Some people in woodworking circles may find this timing overkill, but it is always safer to err on the side of caution. Some wood glue brands have specific recommendations for their products, so it is important to follow the manufacturer’s instructions.
It is important to note that the drying time of wood glue can vary depending on several factors, such as the type of glue, temperature, and humidity. For example, Titebond recommends clamping unstressed joints for between 30-60 minutes and allowing them to cure for 24 hours, while stressed joints should be clamped for 24 hours and allowed an additional 24 hours to cure before stress is applied.
If you are working on a project that requires sanding, it is important to let the wood glue dry completely before sanding. You need to let wood glue dry for at least 1 hour before sanding to avoid shrinkage when curing. The safest time to sand wood glue is after 24 hours of application, as the volume of the adhesive is not going to change.
In summary, the ideal drying time for wood glue is at least 24 hours before unclamping the attached pieces. However, it is important to follow the manufacturer’s instructions and take into consideration the type of glue, temperature, and humidity. Remember to let the wood glue dry completely before sanding to avoid any issues.
When it comes to wood glue, the drying time can vary depending on several factors. Here are the main factors that can affect how long wood glue should dry before sanding:
Different types of wood glue have different drying times. For example, polyvinyl acetate (PVA) glue, which is one of the most popular types of wood glue, dries when exposed to air and can take anywhere from 15 minutes to 24 hours to dry completely, depending on the thickness of the glue layer and environmental conditions. On the other hand, epoxy glue can take several hours to several days to dry completely.
The temperature and humidity of the environment can also affect how long wood glue should dry before sanding. In general, the ideal temperature for drying wood glue is between 60°F and 80°F, and the ideal humidity is between 40% and 60%. If the temperature is too low or the humidity is too high, the drying time can be longer than usual. Conversely, if the temperature is too high or the humidity is too low, the drying time can be shorter than usual.
The thickness of the glue layer can also affect how long wood glue should dry before sanding. In general, the thicker the glue layer, the longer it will take to dry. As a rule of thumb, you should allow one hour of drying time for every 1/16 inch of glue layer thickness. However, this can vary depending on the type of glue and environmental conditions.
In summary, the drying time for wood glue can vary depending on several factors, including the type of glue, environmental conditions, and thickness of the glue layer. It’s important to take these factors into consideration when using wood glue to ensure that it dries completely before sanding.
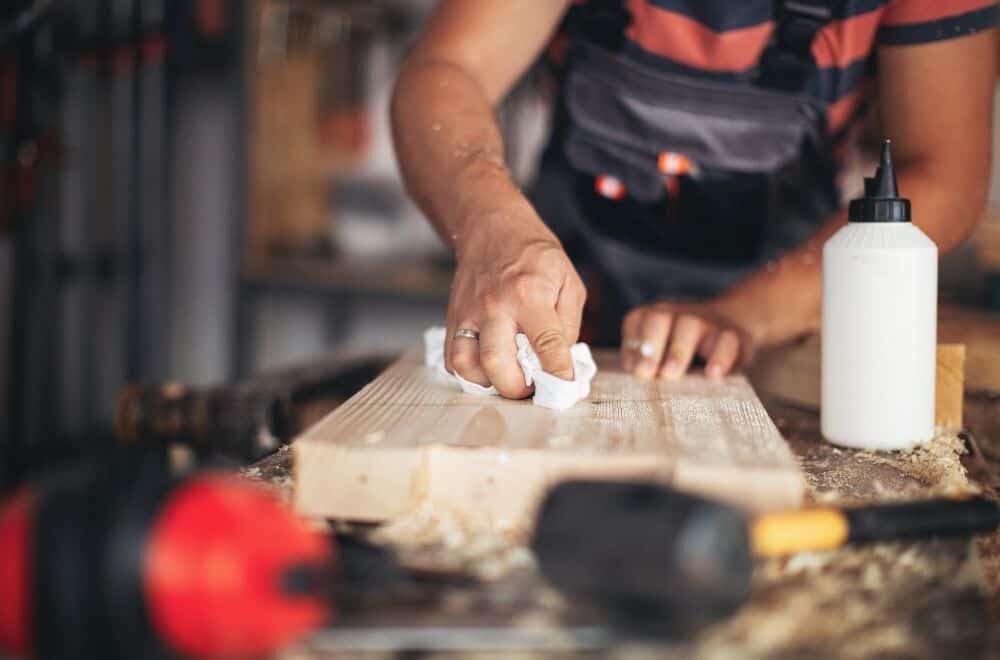
Before you start sanding your wood glue, there are a few things you should do to prepare. This will ensure that your sanding process goes smoothly and that you achieve the desired results.
The first step in preparing to sand your wood glue is to check its dryness. If the glue is not completely dry, sanding it can cause damage to the joint and ruin your project. Most wood glues take around 24 hours to dry completely, but it’s always best to check the manufacturer’s instructions to be sure.
To check the dryness of your glue, gently press your finger onto the glue joint. If it feels tacky or sticky, it’s not dry yet and you should wait a little longer before sanding. If it feels hard and dry, you can proceed with sanding.
When sanding wood glue, it’s important to take safety measures to protect yourself from inhaling dust and debris. Here are some tips to keep in mind:
By taking these safety measures, you can ensure that your sanding process is safe and effective.
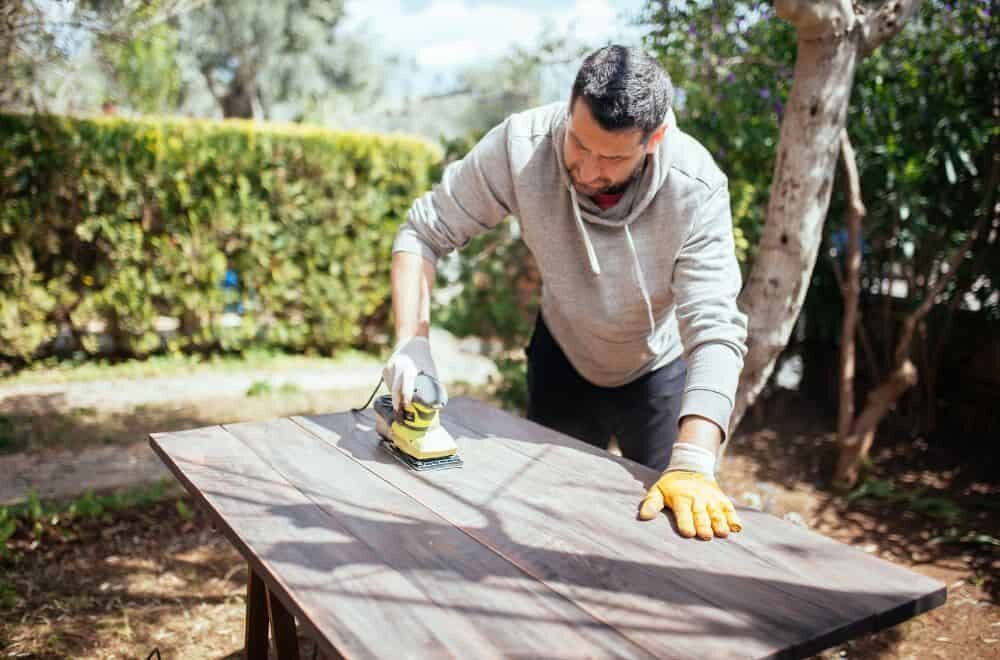
After allowing the wood glue to dry for at least 24 hours, it is now safe to sand the surface. Sanding is an essential part of woodworking, and it helps to achieve a smooth, even surface. In this section, we will discuss the sanding process after glue drying.
The first step in sanding after glue drying is to choose the right sandpaper grit. The grit you choose will depend on the type of wood and the finish you want to achieve. If you want a smooth finish, start with a low grit sandpaper, such as 80 or 100. If you are sanding a hardwood, you may need to start with a higher grit, such as 120 or 150.
As you progress through the sanding process, move up to a higher grit sandpaper. For example, if you start with 80 grit, move up to 120 grit, then 220 grit, and so on. The higher the grit, the smoother the surface will be.
To sand the surface, start with a sanding block or an orbital sander. Hold the sander at a 45-degree angle to the surface and move it in a circular motion. Be sure to apply even pressure to avoid creating uneven spots.
As you sand, periodically check the surface to see if it is smooth and even. If you notice any rough spots, continue sanding until they are gone. Be careful not to sand too much in one area, as this can create a dip in the surface.
Once you have finished sanding with the orbital sander, switch to a sandpaper sheet and sand by hand. This will help you to reach any tight spots that the sander may have missed. Use a light touch and sand in the direction of the grain.
In conclusion, sanding after glue drying is an essential part of woodworking. Choosing the right sandpaper grit and using the correct sanding technique will help you to achieve a smooth, even surface. Remember to take your time and be patient, as rushing the sanding process can result in a less-than-perfect finish.
The drying time for wood glue before sanding depends on several factors such as humidity, temperature, wood type, and the type of glue used. Typically, it takes around 24 hours for most wood glues to dry before sanding. However, some rapid-set epoxy can dry in about 6 hours. It is best to follow the manufacturer’s instructions for the specific glue you are using to ensure optimal results.
The recommended dry time for wood filler before sanding can vary depending on the brand and type of filler used. Generally, it is recommended to let the wood filler dry for at least 24 hours before sanding. However, some fillers may require longer drying times. It is best to consult the manufacturer’s instructions for the specific wood filler you are using.
Gorilla Glue is a type of polyurethane glue that requires moisture to activate and cure. The drying time for Gorilla Glue can vary depending on the amount of moisture present. Typically, it takes around 24 hours for Gorilla Glue to dry before sanding. However, it is best to follow the manufacturer’s instructions for the specific glue you are using to ensure optimal results.
Titebond 3 is a waterproof wood glue that is commonly used in woodworking projects. The drying time for Titebond 3 before sanding is around 24 hours. However, it is best to follow the manufacturer’s instructions for the specific glue you are using to ensure optimal results.
Yes, dried wood glue can be sanded. However, it is important to ensure that the glue is completely dry before sanding to avoid compromising the strength and durability of the joint. Partially dried or uncured wood glue can result in a weak joint that may fail over time.
It is recommended to let wood glue cure for at least 24 hours before sanding. However, the curing time can vary depending on several factors such as humidity, temperature, and the type of glue used. It is best to follow the manufacturer’s instructions for the specific glue you are using to ensure optimal results.

If you’re a pipe smoker, you know that the type of wood used to make your pipe can have a significant impact on the smoking experience. The right wood can enhance the flavor of your tobacco and provide a smooth, enjoyable smoke. But with so many types of wood available, it can be tough to know which one is the best for your needs. In this article, we’ll take a closer look at some of the best types of wood for making smoking pipes.
One of the most popular woods for pipe making is briar. This dense, hard wood is known for its ability to absorb moisture, which can help to keep the tobacco dry and prevent tongue bite. Briar pipes are also prized for their durability and natural beauty, with the wood developing a unique patina over time. But while briar is a popular choice, it’s not the only option available. Other woods, such as pear, olive, and cherry, can also make excellent smoking pipes.
When choosing the best type of wood for your pipe, there are a few factors to consider. First, you’ll want to think about the density of the wood, as this can impact the weight and feel of the pipe. You’ll also want to consider the grain pattern, as this can affect the appearance of the finished product. And of course, you’ll want to choose a wood that will enhance the flavor of your tobacco and provide a smooth, enjoyable smoke. With these factors in mind, let’s explore some of the best types of wood for making smoking pipes.
If you are new to smoking pipes, you may be wondering what types of wood are best for making smoking pipes. Smoking pipes are typically made from a variety of materials, including briar, meerschaum, clay, cherrywood, olive wood, and more. However, briar and meerschaum are the most popular materials used in pipe making.
Briar is a type of wood that comes from the root burl of the Mediterranean heath tree. It is a dense, hard, and heat-resistant wood that is perfect for making smoking pipes. Briar pipes are known for their durability, heat resistance, and ability to absorb moisture, which results in a cool and dry smoking experience.
Meerschaum, on the other hand, is a soft, white, and porous mineral that is found in Turkey. Meerschaum pipes are known for their ability to absorb nicotine and tar, resulting in a smooth and mild smoking experience. However, meerschaum pipes are fragile and require careful handling.
Cherrywood and olive wood are also popular materials used in pipe making. Cherrywood pipes are similar in density and color to briar pipes and are known for their sweet and fruity aroma. Olive wood pipes are known for their unique grain patterns and durability.
When choosing a wood for your smoking pipe, it is important to consider the characteristics of each wood and how they will affect your smoking experience. Briar and meerschaum are the most popular materials for a reason, but cherrywood and olive wood can also provide a unique and enjoyable smoking experience.

When it comes to smoking pipes, the type of wood used can greatly affect the smoking experience. Here are some of the best types of wood for smoking pipes:
Briar wood is the most popular material for smoking pipes. It is a type of wood harvested from the root burl of the Mediterranean heath tree. Briar wood is dense, hard, and heat-resistant, making it ideal for pipe-making. It also has a unique grain pattern that adds to the beauty of the pipe. Briar pipes are known for their ability to absorb moisture, resulting in a cool and dry smoke.
Cherry wood is another popular material for smoking pipes. It is a hardwood that is similar in density and color to briar wood. Cherry wood pipes are known for their ability to impart a sweet, fruity flavor to the smoke. However, they are less heat-resistant than briar pipes and can crack if exposed to high temperatures.
Maple wood is a light-colored hardwood that is often used for smoking pipes. It is a hard and durable wood that is resistant to heat and moisture. Maple pipes are known for their smooth and mellow smoke.
Olive wood is a dense and hard wood that is often used for smoking pipes. It has a unique grain pattern that adds to the beauty of the pipe. Olive wood pipes are known for their ability to absorb moisture, resulting in a cool and dry smoke. They also have a mild, nutty flavor that adds to the smoking experience.
Black walnut wood is a dark-colored hardwood that is sometimes used for smoking pipes. It is a hard and durable wood that is resistant to heat and moisture. Black walnut pipes are known for their smooth and mellow smoke.
Overall, the type of wood used for a smoking pipe can greatly affect the smoking experience. Briar wood is the most popular material, but other woods such as cherry, maple, olive, and black walnut can also make excellent pipes. It is important to choose a wood that is heat-resistant, durable, and able to absorb moisture for a cool and dry smoke.

When selecting the best wood for smoking pipes, there are several factors you should consider. These factors include heat resistance, flavor influence, and durability.
One of the most important factors to consider when choosing wood for smoking pipes is heat resistance. The wood you choose must be able to withstand high temperatures without cracking or burning. Some woods are more heat resistant than others, so it’s important to choose the right one for your needs.
Another important factor to consider when choosing wood for smoking pipes is the flavor influence. Different woods have different flavors, and this can have a significant impact on the taste of your tobacco. Some woods, like cherry and apple, have a sweet and fruity flavor, while others, like oak and hickory, have a stronger, smokier flavor.
Finally, when choosing wood for smoking pipes, it’s important to consider durability. You want a wood that is strong and sturdy, and that will last for a long time. Some woods are more durable than others, so it’s important to choose one that can withstand the wear and tear of regular use.
In summary, when choosing the best wood for smoking pipes, you should consider heat resistance, flavor influence, and durability. By taking these factors into account, you can choose a wood that will provide a great smoking experience and last for years to come.

Taking care of your wooden smoking pipe is essential to ensure it lasts for years to come. Proper maintenance will also help improve the quality of your smoking experience. Here are a few tips to help you care for your wooden smoking pipe:
Cleaning your wooden smoking pipe regularly is essential to maintain its quality. You should clean your pipe after every use to remove any ash or residue left behind. You can use a pipe cleaner or a soft-bristled toothbrush to clean the bowl and stem of your pipe. Be gentle when cleaning your pipe to avoid damaging the wood.
Using the right cleaning products is essential to ensure your wooden smoking pipe remains in excellent condition. You can use isopropyl alcohol and salt to clean your pipe effectively. Mix the salt and alcohol in a bowl and soak your pipe in the solution for a few hours. After soaking, use a pipe cleaner to remove any residue left behind.
Storing your wooden smoking pipe properly is essential to prevent damage to the wood. You should store your pipe in a cool, dry place away from direct sunlight. Avoid storing your pipe in a humid environment as this can cause the wood to warp and crack.
Overheating your wooden smoking pipe can cause damage to the wood and affect the quality of your smoking experience. To avoid overheating, take short, slow puffs when smoking your pipe. You should also avoid smoking your pipe for extended periods to prevent overheating.
By following these simple tips, you can ensure your wooden smoking pipe remains in excellent condition and provides you with a high-quality smoking experience for years to come.
There are several types of wood that are commonly used for making smoking pipes. Briar wood is the most popular material due to its durability and heat resistance. Other popular woods include pear, cherry, olive, and maple. Ultimately, the best type of wood for your smoking pipe will depend on your personal preferences and smoking habits.
The most common materials for crafting tobacco pipes are briar wood, meerschaum, and clay. Briar wood is the most popular due to its durability and heat resistance, while meerschaum is prized for its ability to absorb moisture and provide a cool smoke. Clay pipes are also popular due to their affordability and unique designs.
Briar wood is the most popular material for pipe making due to its durability, heat resistance, and ability to absorb moisture. However, it can be expensive and difficult to work with due to its hardness. Additionally, briar wood pipes require a break-in period to build up a carbonized lining before they can be smoked.
Apple wood can be used for smoking pipes, but it is not as common as briar wood or other hardwoods. Apple wood is known for its sweet aroma and mild flavor, but it is not as durable as other hardwoods and may not hold up as well over time.
In addition to briar wood, some other recommended woods for making tobacco pipes include pear, cherry, olive, and maple. These woods are known for their durability, heat resistance, and ability to absorb moisture.
Some woods should be avoided when making smoking pipes due to their toxicity or lack of durability. Softwoods such as pine and cedar should be avoided as they can impart a harsh taste and may not hold up well over time. Additionally, woods such as yew and ebony should be avoided due to their toxicity.


