Rahasia Sukses Poker Online: Cara Ampuh Membaca Lawan di Fase Post-Flop
Di antara seluruh platform penyedia poker online terbaik, fase taruhan post-flop (setelah tiga kartu pertama dibuka) senantiasa diakui sebagai salah

Di antara seluruh platform penyedia poker online terbaik, fase taruhan post-flop (setelah tiga kartu pertama dibuka) senantiasa diakui sebagai salah


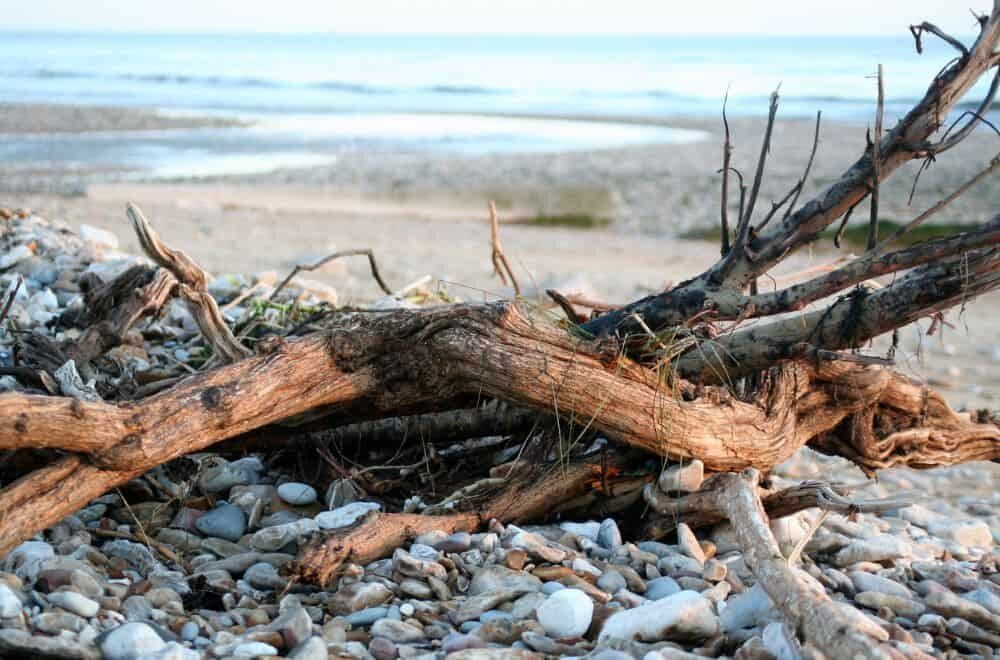
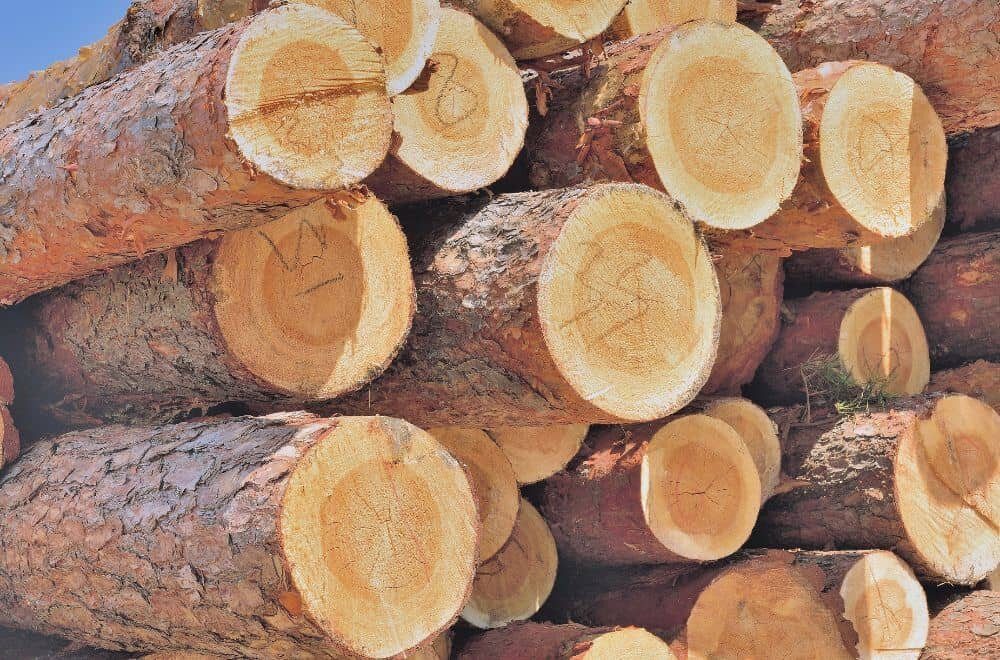
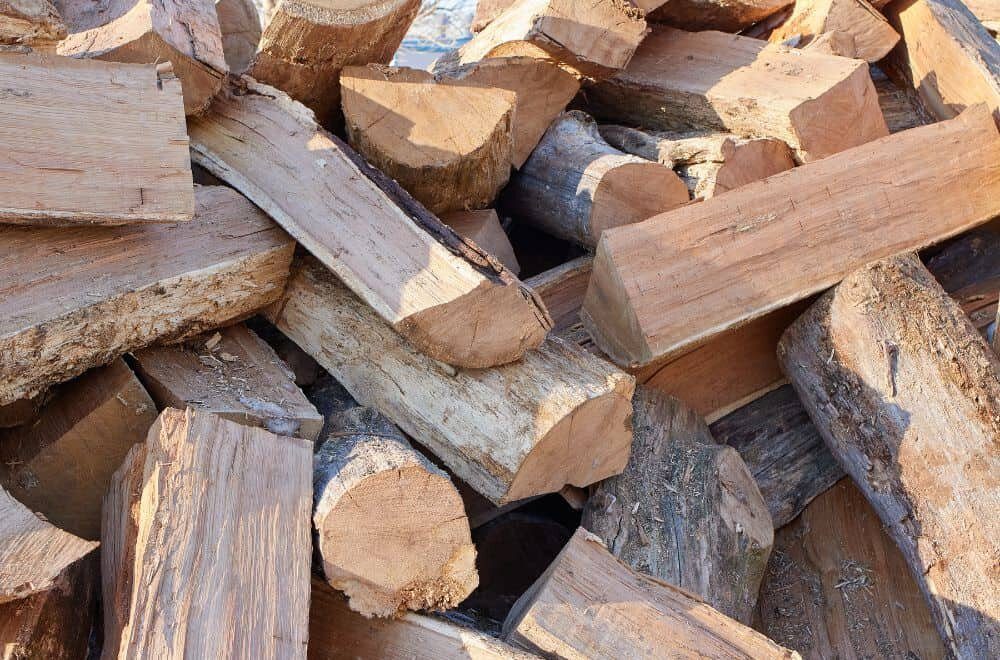
Looking to buy large driftwood logs? Whether you’re an interior designer looking for unique pieces to incorporate into your projects, or a homeowner looking to add a touch of rustic charm to your home decor, finding large (4′ and bigger) driftwood logs can be a challenge. But don’t worry, we’ve got you covered.
There are several online businesses that specialize in selling driftwood logs of various sizes, including large and extra-large pieces. Coastal Driftwood, for example, offers a wide selection of driftwood logs in various sizes, including large pieces that are perfect for use in furniture making or as decorative accents. Another option is Outer Banks Driftwood, which offers a variety of large driftwood logs that are ideal for use in landscaping projects or as focal points in outdoor spaces.
Whether you’re looking for a single large driftwood log or a bulk order, there are plenty of options available to suit your needs. When shopping for large driftwood logs online, be sure to read reviews and check the seller’s return policy to ensure you’re getting a quality product. With a little bit of research and some patience, you’re sure to find the perfect large driftwood log for your project or decor.
Driftwood is a type of wood that has been washed up onto shore by the tide or currents of a body of water. It can come from trees that have fallen into rivers or lakes, or from pieces of wood that have broken off from boats or other structures. Over time, the wood is smoothed and polished by the action of the water, giving it a unique and beautiful appearance.
There are many different types of driftwood, each with its own unique characteristics. Some of the most common types include:
When looking for large driftwood logs, it is important to consider the type of wood and its characteristics to ensure that it will meet your needs. You can find driftwood for sale at specialty stores, online retailers, and even on the beach if you are lucky.

If you’re looking to buy large driftwood logs, there are a few places you can check, depending on your location and preferences. Here are two main places where you can start your search:
One of the best places to find driftwood logs is on the beach or near rivers. Driftwood is carried by the water and deposited on the shore, making it easy to find and collect. However, keep in mind that collecting driftwood from public beaches or rivers may be illegal in some areas, so be sure to check local regulations before you start collecting.
If you’re lucky enough to live near a beach or river, take a walk along the shore and look for large driftwood logs that have washed up. You can also ask local fishermen or beachcombers if they know of any good spots to find driftwood.
If you’re not near a beach or river, you can also find large driftwood logs in forests and mountains. Look for areas that have been hit by storms or floods, as these are more likely to have large pieces of driftwood.
When searching in forests or mountains, it’s important to be respectful of the environment and follow any local regulations. Don’t cut down live trees or damage the natural habitat while searching for driftwood.
Once you have found the driftwood logs you want to buy, you can also check online retailers like Coastal Driftwood, Etsy, and Amazon to see if they have any available for purchase. Keep in mind that buying driftwood online may be more expensive due to shipping costs.
In conclusion, finding large driftwood logs can be a fun and rewarding experience, whether you’re searching on the beach or in the forest. Just be sure to follow local regulations and be respectful of the environment while collecting.

If you’re looking to buy large driftwood logs online, there are a few e-commerce platforms and specialty online stores that you can check out.
Many e-commerce platforms offer a wide variety of products, including large driftwood logs. Here are a few platforms that you can explore:
If you’re looking for a more specialized selection of large driftwood logs, you can check out these online stores:
When buying large driftwood logs online, be sure to check the seller’s reviews and ratings before making a purchase. You should also pay attention to shipping costs and delivery times to ensure that you get your log in a timely and cost-effective manner. With a little research, you can find the perfect large driftwood log for your project.

If you’re looking for large driftwood logs, you may want to check out your local craft stores and garden centers. Here are a few options to consider:
Craft stores often carry a variety of natural materials, including driftwood. Some stores may even have large pieces available for purchase. Here are a few craft stores you might want to check out:
When visiting these stores, be sure to ask an associate if they carry large driftwood logs. If they don’t have any in stock, they may be able to special order them for you.
Garden centers often carry natural materials for landscaping and outdoor decor, including driftwood. Here are a few garden centers you might want to check out:
When visiting these garden centers, be sure to ask an associate if they carry large driftwood logs. If they don’t have any in stock, they may be able to order them for you or recommend a local supplier.
Keep in mind that availability may vary by location and season. It’s always a good idea to call ahead or check the store’s website before making a trip. Happy hunting!
If you’re looking to buy large driftwood logs, there are a few things you should keep in mind to ensure you get a quality product that meets your needs. Here are some tips to help you make the right choice.
When buying large driftwood logs, it’s important to check for quality. Look for logs that are sturdy and free of cracks or other damage. You should also check for signs of rot or decay, as these can weaken the log and make it more likely to break or fall apart over time.
Size is an important consideration when buying large driftwood logs. Make sure you measure the space where you plan to use the log to ensure it will fit properly. You should also consider the weight of the log, as larger logs can be quite heavy and may require special equipment to move.
Driftwood logs can vary widely in price, depending on their size and quality. It’s important to understand pricing before you make a purchase so you can be sure you’re getting a fair deal. Some factors that can affect pricing include the rarity of the wood, the size of the log, and the location where it was harvested.
To get the best deal, shop around and compare prices from different vendors. You may also be able to negotiate a better price if you’re buying multiple logs or if you’re willing to purchase logs that are slightly imperfect or damaged.
By following these tips, you can find the perfect large driftwood log for your needs and ensure that you get a quality product that will last for years to come.
Finding large driftwood logs for sale can be a challenge, but there are a few places you can look. Check with your local garden centers, nurseries, and landscaping companies to see if they have any available. You can also try searching online for driftwood suppliers or checking out online marketplaces such as Etsy or Amazon.
If you’re looking to purchase driftwood online, there are several reputable stores to choose from. Some popular options include Coastal Driftwood, Outer Banks Driftwood, and BuyDriftwoodForSale.com. These stores offer a variety of sizes and types of driftwood, so you’re sure to find something that fits your needs.
When it comes to landscaping with driftwood, there are a few types that work particularly well. Manzanita, grapevine, and ghostwood are all great options, as they are durable and weather-resistant. They also have interesting shapes and textures that can add visual interest to your landscape design.
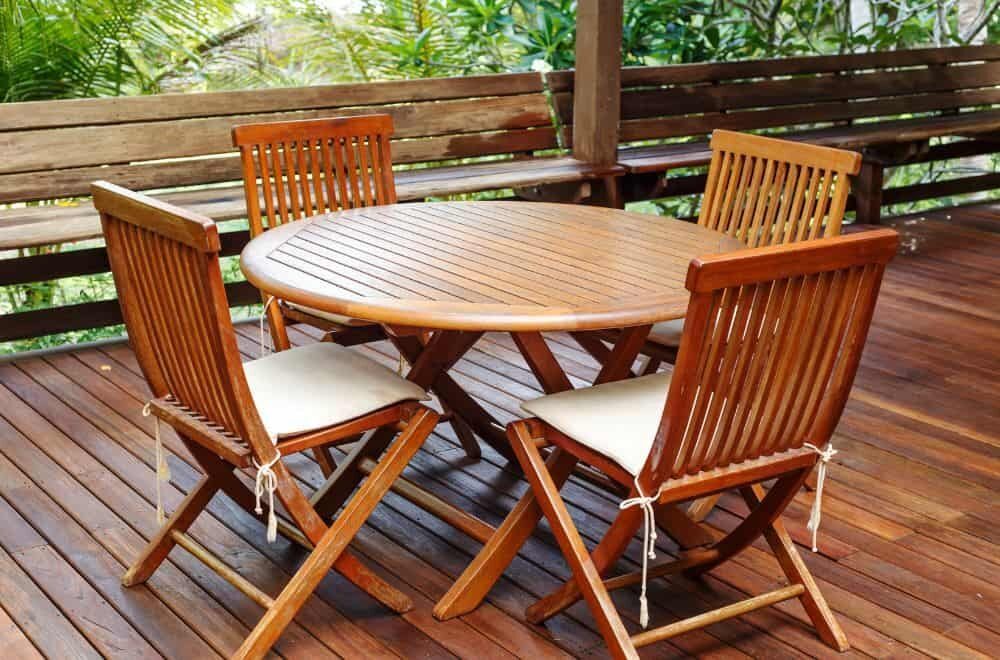
Large driftwood logs can be used in a variety of creative ways. They can be used as accent pieces in your landscaping, as supports for climbing plants, or as natural sculptures in your yard. You can also use them to create unique furniture pieces or to add rustic charm to your home decor.
The cost of large driftwood logs can vary depending on their size and availability. On average, you can expect to pay anywhere from $50 to $200 for a large driftwood log. However, prices can be higher or lower depending on the supplier and the specific piece of driftwood.
Transporting and storing large driftwood logs can be tricky, as they can be heavy and unwieldy. If you’re transporting them in a vehicle, make sure to secure them tightly to prevent them from shifting during transit. When storing them, make sure they are in a dry, well-ventilated area to prevent mold growth. You can also apply a coat of sealant to help protect the wood and extend its lifespan.

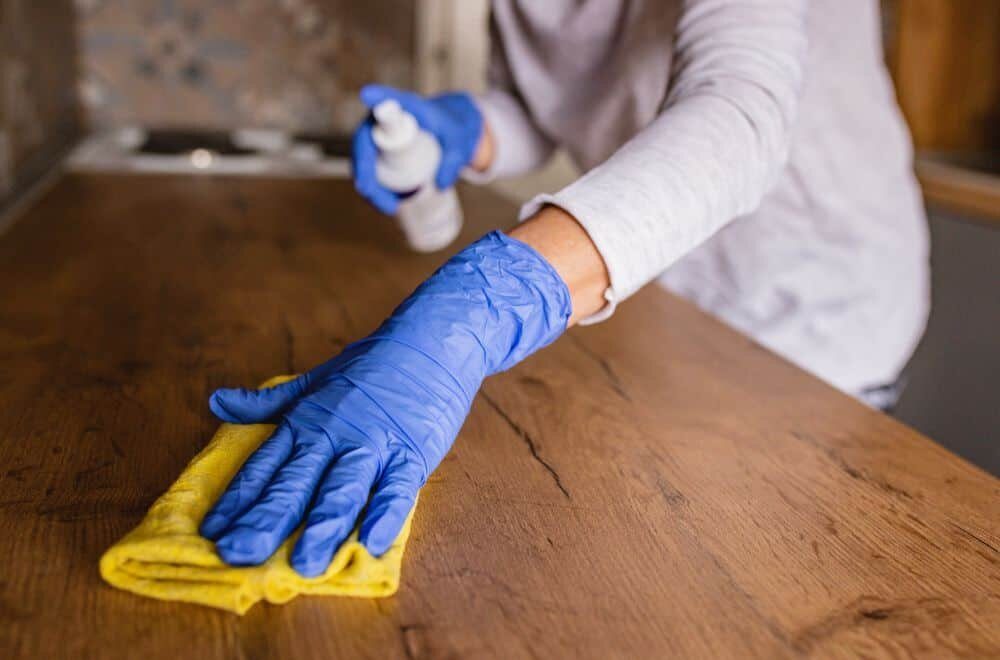
Are you wondering if it’s safe to use Lysol spray on your wooden furniture? The answer is not straightforward. Lysol is a popular disinfectant used for cleaning and sanitizing surfaces. However, when it comes to wood furniture, you need to be cautious as it can cause damage if not used correctly.
The type of wood and the finish on the furniture determine whether it’s safe to use Lysol spray. If the wood is unfinished or porous, Lysol can soak deep into the pores and cause damage. On the other hand, if the wood is finished or sealed, Lysol is safe to use. In this article, we’ll explore whether you can use Lysol spray on wood furniture and the proper usage of Lysol spray on finished wood.
If you are looking for a quick and effective way to disinfect your wooden furniture, Lysol spray might seem like a good option. However, before you start spraying, it’s important to understand what Lysol spray is and how it works.
Lysol spray is a disinfectant that is designed to kill germs and bacteria on surfaces. It contains active ingredients like alkyl dimethyl benzyl ammonium chloride and ethanol that help to break down and destroy the cell walls of germs and bacteria, rendering them harmless.
When you spray Lysol on a surface, it creates a fine mist that settles on the surface and begins to work immediately. The active ingredients in Lysol spray can kill up to 99.9% of germs and bacteria, making it a powerful tool in the fight against illness and disease.
However, it’s important to note that Lysol spray is not a miracle cure-all. While it can be effective at killing germs and bacteria on surfaces, it is not a substitute for proper cleaning and hygiene practices. Regular cleaning with soap and water is still the best way to keep your wooden furniture clean and free from germs.
In addition, it’s important to use Lysol spray correctly to avoid damaging your wooden furniture. Always follow the instructions on the label and never use undiluted Lysol spray on wooden surfaces. Diluting Lysol spray with water can increase its cleaning power, but it can also be dangerous for your wooden furniture if used too frequently.
When it comes to cleaning wood furniture, it’s important to understand the basics. Wood is a porous material that can absorb moisture and chemicals, which can cause damage to the furniture. Here are a few things to keep in mind when cleaning wood furniture:
By following these basic guidelines, you can keep your wood furniture looking great for years to come.
Using Lysol on wood furniture can have potential effects on the surface, depending on the type of wood and the frequency of use. Here are some things to keep in mind:
To avoid these potential effects, it’s important to use Lysol on wood furniture sparingly and with caution. If you do need to disinfect a piece of wood furniture, consider using a diluted solution of Lysol and water, and be sure to wipe the surface clean with a damp cloth afterward to remove any residue.
In general, it’s a good idea to consult with a professional before using any cleaning or disinfecting product on wood furniture, especially if you’re unsure about the type of wood or finish. With proper care and maintenance, your wood furniture can remain beautiful and functional for many years to come.

If you’re hesitant to use Lysol spray on your wooden furniture, there are alternative methods for cleaning it. Here are a few options to consider:
Damp dusting is a great way to clean your wooden furniture without damaging it. To do this, you’ll need a microfiber cloth and some clean water. Simply dampen the cloth with water and wipe down the furniture. This will help remove any dust or dirt that has accumulated on the surface.
Another option is to use a mixture of dish soap and water. Mix a few drops of dish soap with some warm water and use a cloth to wipe down the furniture. This will help remove any dirt or grime that has built up on the surface.
Vinegar is a natural cleaning agent that can be used to clean wooden furniture. Mix equal parts water and vinegar and use a cloth to wipe down the furniture. This will help remove any dirt or grime that has built up on the surface.
Using furniture polish is a great way to clean and protect your wooden furniture. Simply spray the polish onto a cloth and wipe down the furniture. This will help remove any dust or dirt that has accumulated on the surface and will also help protect the wood from future damage.
Remember to always test any cleaning solution on a small, inconspicuous area of the furniture before using it on the entire piece. This will help ensure that the solution doesn’t damage the wood.

If you’re considering using Lysol spray on your wood furniture, there are a few precautions you should take to ensure that you don’t damage your furniture or harm yourself. Here are some things to keep in mind:
Before you use Lysol on your wood furniture, test it on a small, inconspicuous area first. This will help you determine if the spray is safe to use on your furniture without causing any damage or discoloration.
When using Lysol on your wood furniture, it’s important to protect yourself. Wear hand gloves, a dust mask, and eye protection to avoid any adverse effects that may come with the use of the spray.
Lysol spray should only be used as a spot treatment and not as a general cleaning product. Overuse can damage the wood or cause discoloration. It’s recommended to only use Lysol spray on your wood furniture when necessary.
After spraying Lysol on your wood furniture, it’s important to wipe off the liquid with a damp cloth or paper towel. This will help prevent any damage or discoloration to the wood.
Lysol spray has a strong smell that may linger for some time. To remove the smell, turn on a fan or open a window to allow for proper ventilation.
By following these precautions, you can safely use Lysol spray on your wood furniture without causing any damage or harm to yourself.

If you want to keep your wood furniture looking great, you need to take care of it properly. Here are some professional tips to help you do just that:
Dust can scratch and damage the finish on your wood furniture, so it’s important to dust it regularly. Use a soft cloth or a microfiber duster to remove dust, and be sure to get into all the nooks and crannies.
When you need to clean your wood furniture, use a gentle cleaner that is specifically designed for wood. Avoid using harsh chemicals or abrasive cleaners that can damage the finish.
If you spill something on your wood furniture, be sure to wipe it up immediately. Liquids can seep into the wood and cause damage, so it’s important to act quickly.
Direct sunlight can fade and damage the finish on your wood furniture. If possible, keep your furniture out of direct sunlight or use window coverings to block the sun.
To prevent scratches and water damage, use coasters and placemats on your wood furniture. This will help protect the finish and keep your furniture looking great.
By following these professional tips for wood furniture care, you can help ensure that your furniture looks great for years to come.
No, it is not advisable to use Lysol on wooden furniture. The reason is that if it is natural wood and not just laminate wood, Lysol can soak deep into the pores of the wood and cause damage to it. Manufacturers ask to dilute Lysol with water to increase its cleaning power which can also be dangerous for your wooden surfaces.
Yes, Lysol spray can leave stains or discoloration on wood if it is not used properly. It is not recommended to use Lysol on wooden furniture as it can penetrate deep into the pores of the wood and cause damage to it. If you must use Lysol on wood, dilute it with water and test it on a small and inconspicuous area first.
There are several disinfectants that are safe to use on wood furniture, such as vinegar, hydrogen peroxide, and rubbing alcohol. These disinfectants are effective in killing germs and bacteria without damaging the wood. It is important to dilute these disinfectants with water and test them on a small and inconspicuous area first.
Yes, Lysol residue can be removed from wood surfaces with the help of a mild detergent and warm water. It is important to avoid using harsh chemicals or abrasive materials that can damage the wood. After cleaning, rinse the area thoroughly with water and dry it with a soft cloth.
No, Fabuloso should not be used on wood floors. Fabuloso is a multi-purpose cleaner that contains harsh chemicals that can damage the wood. It is important to use a cleaner that is specifically designed for use on wood floors.
To remove Lysol stains from unfinished wood, mix equal parts of vinegar and water and apply the solution to the stained area. Let it sit for a few minutes, then wipe it away with a clean cloth. Repeat the process until the stain is completely removed.

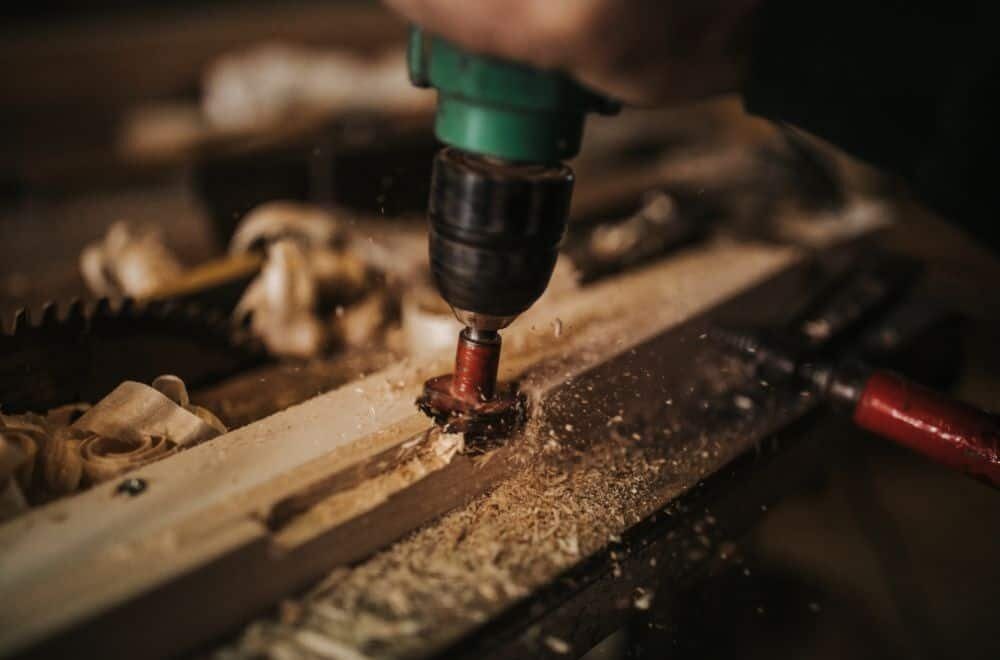
Attaching wood to metal without screws can be a challenging task, especially if you don’t have the right tools and knowledge. However, there are several methods you can use to successfully attach wood to metal without screws. In this article, we will explore some of the most popular methods and provide you with step-by-step instructions on how to use them.
One of the most common methods of attaching wood to metal without screws is using adhesives. There are several types of adhesives available on the market, including two-part glue, Gorilla Glue, or Super Glue, and Liquid Nails. These adhesives are designed to create a strong bond between the wood and metal surfaces, allowing you to attach them without using screws.
Another popular method of attaching wood to metal without screws is using cleat hinging. This method involves using cleats and plates to hinge the wood to the metal, allowing you to attach them together without using screws. Cleat hinging is a practical solution that offers several advantages, including the ability to hinge wood in any direction, to hinge wood together, and the ability to use cleats and plates on either side of your joint.
When it comes to attaching wood to metal without screws, it’s important to understand the materials you’re working with. Both wood and metal have unique properties that can affect the strength and durability of your attachment.
There are many types of wood to choose from when attaching it to metal. Some common types include:
When selecting wood for your project, consider the density, porosity, and moisture content. These factors can affect how well the wood will bond with the metal.
There are also many types of metal to choose from when attaching it to wood. Some common types include:
When selecting metal for your project, consider the thickness, hardness, and corrosion resistance. These factors can affect how well the metal will bond with the wood.
By understanding the properties of the wood and metal you’re working with, you can select the best adhesive and attachment method for your project.
Before attaching wood to metal without screws, it’s important to prepare both surfaces properly. This will ensure a strong and long-lasting bond. The preparation process involves cleaning the surfaces and marking the attachment points.
The first step in the preparation process is to clean the surfaces that will be bonded. Any dirt, grease, or rust can weaken the bond between the wood and metal. Here’s how you can clean the surfaces:
For the wood surface, use a clean cloth to wipe away any dust or debris. If the wood has a smooth surface, sand it lightly to create a rough surface for better adhesion.
Once the surfaces are clean, the next step is to mark the attachment points. This will help you align the wood and metal correctly when bonding them together. Here’s how you can mark the attachment points:
After marking the attachment points, you’re ready to attach the wood to the metal without screws.
When it comes to attaching wood to metal without screws, there are several techniques you can use. In this section, we will explore three popular methods: using adhesives, using metal brackets, and using welding.
One of the most common ways to attach wood to metal without screws is by using adhesives. There are many different types of adhesives that can be used for this purpose, including two-part glue, Gorilla Glue, and Liquid Nails.
Before applying adhesive, it is important to use an adhesive primer to promote better adhesion between the metal and wood surfaces. Once the primer is applied, you can then apply the adhesive to attach the wood to the metal without screws.
Another option for attaching wood to metal without screws is by using metal brackets. These brackets can be attached to the metal using screws or welding, and then the wood can be attached to the brackets using screws or adhesive.
Metal brackets come in a variety of shapes and sizes, so you can choose the one that best fits your needs. They are also very strong and durable, making them a good choice for heavy-duty applications.
Finally, welding is another option for attaching wood to metal without screws. This method involves melting the metal and wood together using heat, creating a strong bond that is difficult to break.
Welding requires some specialized equipment and training, so it may not be the best option for everyone. However, if you have experience with welding or are willing to learn, it can be a very effective way to attach wood to metal without screws.
Overall, there are several different techniques you can use to attach wood to metal without screws. Each method has its own advantages and disadvantages, so be sure to choose the one that best fits your needs and skill level.
When attaching wood to metal without screws, it is important to take the necessary safety measures to prevent any injuries or accidents. Here are some safety measures you should follow:
When using adhesives or glues to attach wood to metal, it is important to have proper ventilation in the work area. This will help prevent any harmful fumes from accumulating and causing health problems. Make sure to work in a well-ventilated area or use a fan to circulate the air.
It is important to use protective gear when working with adhesives or glues. This will help prevent any skin or eye irritation or injury. Here are some protective gear you should consider using:
Make sure to read the instructions on the adhesive or glue you are using and follow any safety precautions mentioned. Taking these safety measures will help ensure a safe and successful project.
After attaching wood to metal without screws, it is important to take care of the newly joined surface to ensure its longevity. Here are some post-attachment care tips:
It is important to inspect the joined surface regularly to ensure that the bond is still strong and there is no damage. Inspect for any signs of cracking, splitting, or warping in the wood or metal. If you notice any issues, it is best to address them immediately to prevent further damage.
Here are some maintenance tips to keep your wood and metal joint in good shape:
By following these post-attachment care tips, you can ensure that your wood and metal joint remains strong and durable for years to come.
Attaching wood to metal without using screws can be done using adhesives, nails, or brackets. Adhesives such as epoxies, wood glue, and liquid nails provide a strong bond when attaching wood to metal. Nails and brackets can also be used, but they may require pre-drilling and can cause damage to the metal surface.
Some alternatives to using screws when attaching wood to metal include welding, riveting, and using metal clips or clamps. These methods provide a strong and durable connection, but may require specialized tools and expertise.
The best way to attach wood to a metal gate depends on the weight of the wood and the type of gate. For lighter weight wood, adhesives such as epoxy or liquid nails can be used. For heavier weight wood, metal clips or clamps may be necessary. It is important to ensure that the connection is strong and secure to prevent the wood from falling off the gate.
To attach plywood to metal tubing without screws, adhesives such as epoxy or liquid nails can be used. It is important to ensure that the metal surface is clean and free of debris before applying the adhesive. Clamps or metal clips can also be used to hold the plywood in place while the adhesive sets.
Yes, it is possible to fasten sheet metal to wood without using screws. Adhesives such as epoxy or liquid nails can be used to create a strong bond between the metal and wood surfaces. Metal clips or clamps can also be used to hold the sheet metal in place while the adhesive sets.
Some techniques for connecting wood to a steel I-beam include using metal brackets or hangers, drilling holes in the beam and using bolts, or using adhesives such as epoxy or liquid nails. It is important to ensure that the connection is strong and secure to prevent the wood from falling off the beam.

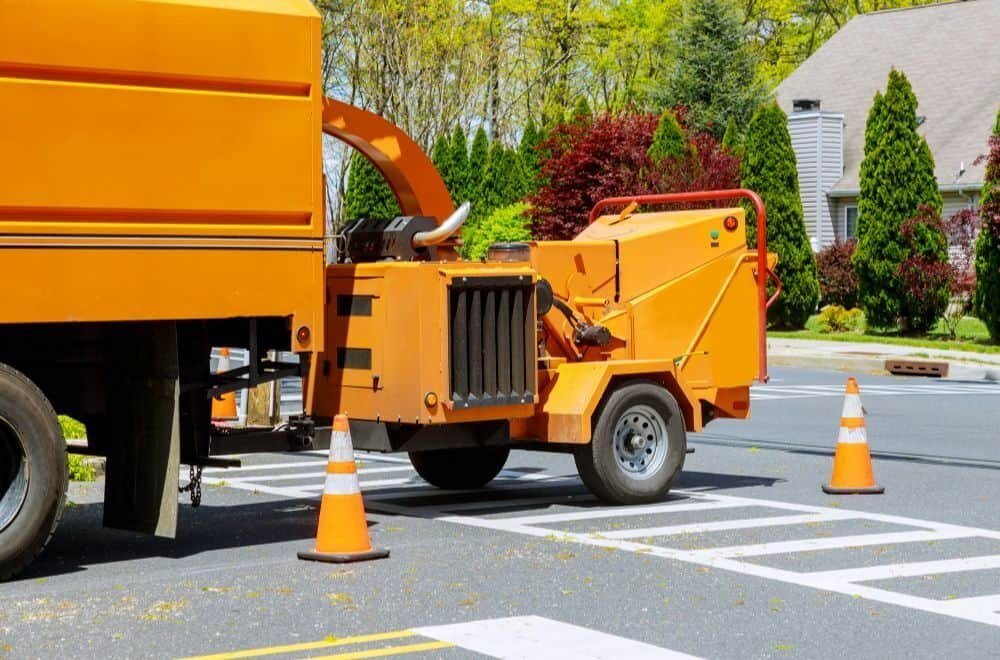
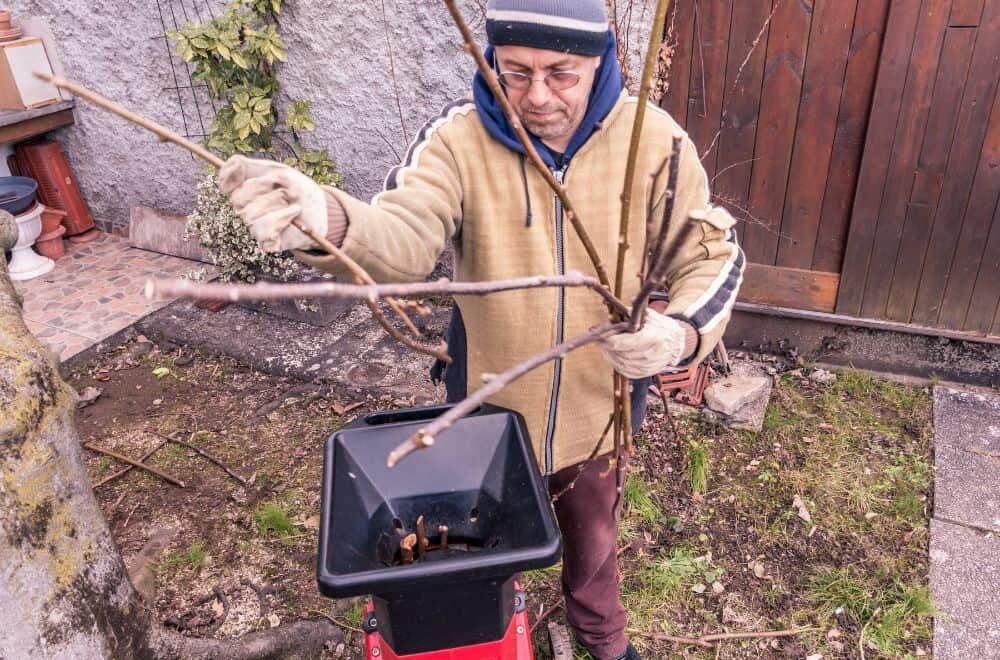
Are you planning to tackle a landscaping project that involves clearing out shrubs, bushes, and trees? If so, you may need to rent a wood chipper to make the job easier and more efficient. Home Depot is a popular home improvement store that offers wood chipper rentals at affordable rates.
The cost to rent a wood chipper from Home Depot varies depending on the type of chipper you need, the duration of the rental, and your location. According to the Home Depot website, wood chipper rentals start at $63 for 4 hours, $90 per day, $360 per week, and $1,080 for 4 weeks. However, keep in mind that a deposit or credit card hold may be required, and a valid identification is necessary at pickup.
Before renting a wood chipper, it’s important to determine the size and type of chipper you need for your project. Home Depot offers a variety of wood chipper options, including electric and gas-powered models, as well as different sizes for different branches and debris. With the right wood chipper rental, you can make your landscaping project a success without breaking the bank.
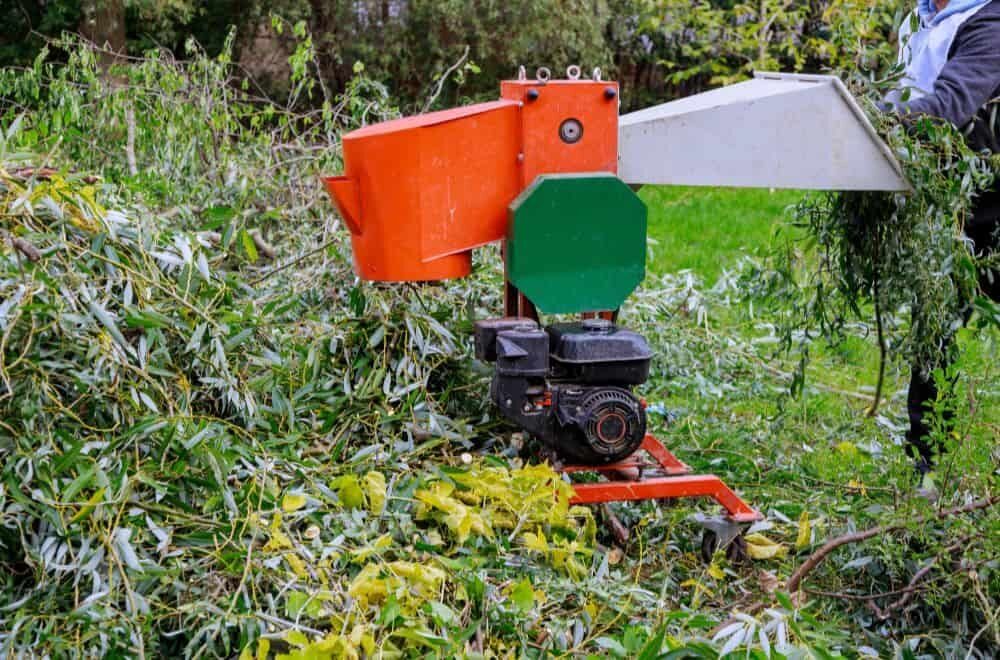
If you’re planning to rent a wood chipper from Home Depot, it’s important to understand what you’re getting yourself into. A wood chipper is a powerful machine that can turn tree branches, leaves, and other yard debris into mulch or wood chips. Here are a few things you should know about wood chippers before renting one:
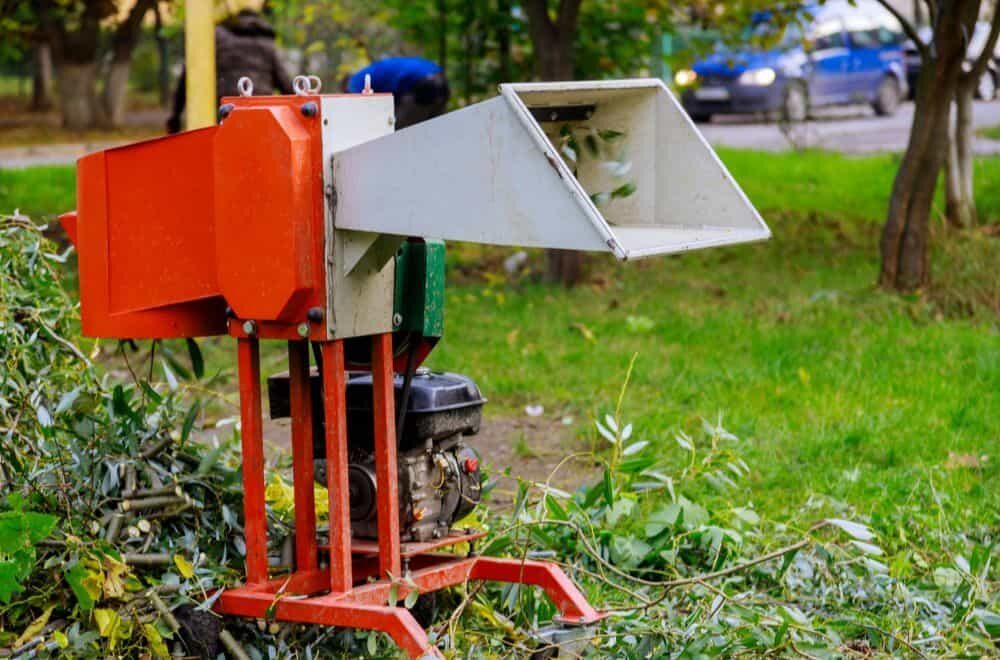
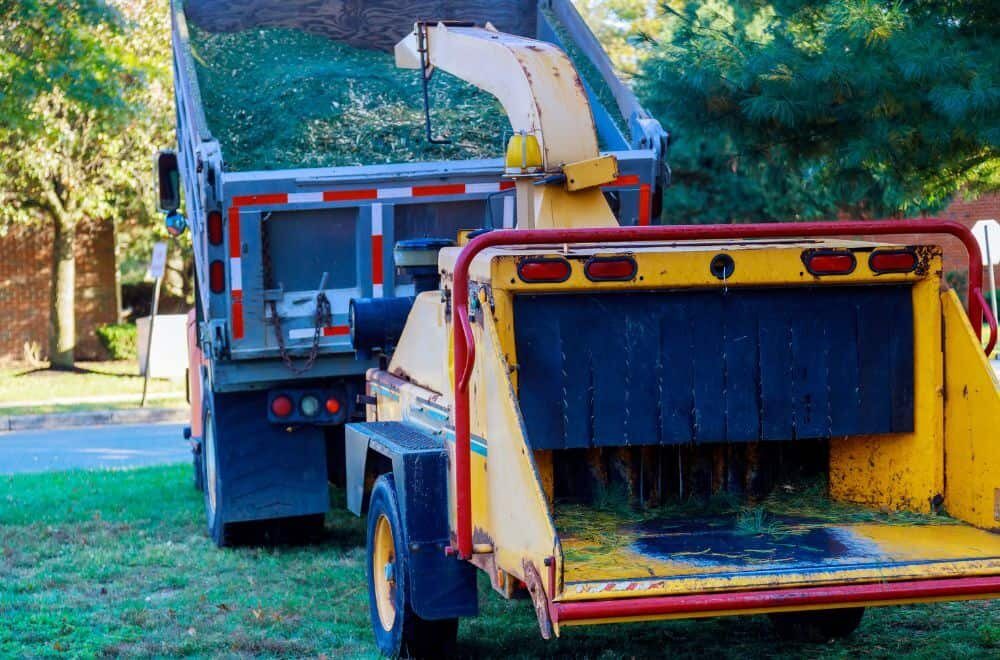
There are two main types of wood chippers: disk chippers and drum chippers. Disk chippers are more common and are designed for handling larger branches and pieces of wood. Drum chippers are better for handling smaller branches and leaves. When choosing a wood chipper, consider the size of the branches and debris you’ll be chipping and choose a machine that can handle the job.
Wood chippers are available in both gas and electric models. Gas-powered chippers are more powerful and can handle larger branches, but they’re also louder and require more maintenance. Electric chippers are quieter and easier to maintain, but they’re not as powerful and may struggle with larger branches.
The cost to rent a wood chipper from Home Depot can vary depending on the size of the machine and how long you need it for. On average, you can expect to pay anywhere from $75 to $420 per day to rent a wood chipper. Some Home Depot locations may offer weekly or monthly rates, which can save you money if you need the machine for an extended period of time.
Wood chippers are powerful machines that can be dangerous if not used properly. Before using a wood chipper, be sure to read the manufacturer’s instructions and follow all safety precautions. Wear protective gear, such as gloves and safety glasses, and keep loose clothing and jewelry away from the machine. Never put your hands or feet near the chipper while it’s in operation, and be sure to turn off the machine and unplug it before performing any maintenance or cleaning.
Renting a wood chipper from Home Depot is a straightforward process that can be completed in just a few steps. Here’s what you need to know:
Before heading to your local Home Depot store, it’s a good idea to check the availability of the wood chipper you need. You can do this by visiting Home Depot’s website or by calling the store directly.
Once you’ve confirmed that the wood chipper you need is available, you’ll need to decide how long you want to rent it for. Home Depot offers rental periods ranging from 4 hours to 4 weeks, so you can choose the option that best fits your needs.
To reserve your rental, you’ll need to provide some basic information, including your name, address, and phone number. You’ll also need to provide a valid form of identification, such as a driver’s license or passport.
On the day of your rental, you’ll need to bring your ID to the Home Depot store where you reserved your wood chipper. A store associate will help you complete the rental agreement and provide you with any additional information you need to know.
When your rental period is up, simply return the wood chipper to the Home Depot store where you picked it up. Make sure to return it on time to avoid any late fees.
Overall, renting a wood chipper from Home Depot is a simple and convenient process. By following these steps, you can get the equipment you need to complete your project quickly and easily.
When it comes to renting a wood chipper from Home Depot, there are several factors that can affect the cost. Here are some of the main things to consider:
The size and capacity of the wood chipper you need will have a significant impact on the rental price. Generally, the larger the machine, the more expensive it will be to rent. Home Depot offers wood chippers with capacities ranging from 2 inches to 12 inches, with prices varying accordingly.
The length of time you need the wood chipper will also affect the cost. Home Depot offers daily, weekly, and monthly rental options. The longer you rent the machine, the cheaper the daily rate will be. However, keep in mind that if you only need the chipper for a few hours, you will still be charged for a full day.
If you need the wood chipper delivered to your location or picked up after the rental period, there will be an additional fee. The cost of delivery and pickup will depend on your location and the distance from the nearest Home Depot store.
There may be additional fees associated with renting a wood chipper from Home Depot. For example, if you damage the machine during the rental period, you may be charged a repair fee. You may also need to purchase fuel for the chipper, which will be an additional expense.
Overall, the cost to rent a wood chipper from Home Depot will depend on a variety of factors. It’s important to consider your specific needs and budget when choosing a machine and rental duration.
When renting a wood chipper from Home Depot, you have the option to choose from different rental durations, including daily, weekly, and monthly rentals. The rental duration you choose will affect the overall cost of your rental.
According to the Home Depot website, the rental prices for a wood chipper start at $69 per day, $276 per week, and $825 per month. Keep in mind that these prices may vary depending on the location and availability of the equipment.
If you only need the wood chipper for a short period, a daily rental may be the best option for you. However, if you have a larger project and need the wood chipper for a longer amount of time, a weekly or monthly rental may be more cost-effective.
It’s important to note that additional fees may apply, such as delivery and pickup fees, environmental fees, and damage waiver fees. Be sure to read the rental agreement carefully and ask any questions you may have before renting the equipment.
Here’s a breakdown of the rental durations and prices for a wood chipper from Home Depot:
| Rental Duration | Price |
|---|---|
| Daily | $69+ |
| Weekly | $276+ |
| Monthly | $825+ |
Remember, these prices may vary depending on the location and availability of the equipment. It’s always best to check with your local Home Depot store for the most accurate pricing information.
Overall, renting a wood chipper from Home Depot can be a cost-effective option for your landscaping and property maintenance needs. Just be sure to choose the rental duration that best fits your project and budget, and read the rental agreement carefully before signing.
When renting a wood chipper from Home Depot, you may be required to pay a deposit and purchase insurance. Here’s what you need to know:
Home Depot typically requires a deposit when renting equipment. The amount of the deposit varies depending on the equipment and the rental duration. For a wood chipper, you can expect to pay a deposit of around $150 to $200. The deposit is refundable as long as the equipment is returned in the same condition it was rented in.
Home Depot offers damage protection insurance for an additional fee. This insurance covers accidental damage to the equipment during the rental period. The cost of the insurance varies depending on the equipment and the rental duration. For a wood chipper, you can expect to pay around $15 to $25 per day for insurance.
It’s important to note that the damage protection insurance does not cover intentional damage, theft, or loss of the equipment. If you do not purchase the insurance and the equipment is damaged during the rental period, you will be responsible for the cost of repairs or replacement.
In addition to damage protection insurance, Home Depot also offers liability insurance. This insurance covers damage or injury to third parties caused by the equipment during the rental period. The cost of liability insurance varies depending on the equipment and the rental duration.
Before renting a wood chipper from Home Depot, be sure to ask about the deposit and insurance requirements. Make sure you understand what is covered by the insurance and what is not. By taking these steps, you can ensure a hassle-free rental experience and avoid any unexpected costs.
When renting a wood chipper from Home Depot, there are some additional costs you may need to consider. Here are some of the potential costs you may encounter:
When you rent a wood chipper from Home Depot, you will be required to pay a deposit. The deposit amount varies depending on the rental duration and the type of equipment you are renting. For example, if you rent a wood chipper for one day, you will have to pay a deposit of $160. This deposit will be returned to you when you bring back the equipment in the same condition.
If you don’t have a way to transport the wood chipper, Home Depot offers delivery options for an additional fee. The delivery fee varies depending on your location and the equipment you are renting. You can check the delivery fee for your area by contacting your local Home Depot store.
Most wood chippers require fuel to operate. Home Depot rents out gas-powered wood chippers, which means you will need to purchase gasoline to run the equipment. The cost of gasoline varies depending on your location and the current market price.
Home Depot offers optional damage protection insurance for an additional fee. This insurance covers accidental damage to the equipment you are renting. The cost of insurance varies depending on the rental duration and the type of equipment you are renting.
If you don’t return the wood chipper on time, you may be charged a late fee. The late fee varies depending on the rental duration and the type of equipment you are renting. It’s important to return the equipment on time to avoid any additional charges.
When it comes to renting a wood chipper, Home Depot is not the only option available. Other rental services like United Rentals and The Pricer also offer wood chipper rentals. Here’s a quick comparison of Home Depot’s rental service with other rental services.
United Rentals is a well-known rental service that offers a variety of equipment rentals, including wood chippers. Their lineup of chippers and stump grinders is made up of rugged and reliable land clearing equipment designed for chopping and mulching brush, tree limbs, or trunks. They offer both gas and electric models to choose from.
United Rentals’ rental rates for wood chippers are slightly higher than Home Depot’s rates. For example, a 6-inch capacity chipper runs $185 per day, $740 per week, and $2,220 per month. However, they offer a wider range of chippers and stumpers to choose from, and their equipment is generally more heavy-duty and reliable.
The Pricer is another rental service that offers wood chipper rentals. According to their website, it would cost you around $1,200 to rent the wood chipper for a whole month, almost $390 for a week, and just $100 for one day. They also require a deposit of $160, which will be returned to you when you bring back the wood chipper in the same condition.
Compared to Home Depot, The Pricer’s rental rates are higher for longer rental periods, but slightly lower for shorter rental periods. They offer a similar range of wood chippers to choose from, but their rental process may be a bit more complicated due to the deposit requirement.
Overall, Home Depot’s rental service offers competitive rates and a good selection of wood chippers to choose from. However, if you’re looking for more heavy-duty equipment or a wider range of options, United Rentals may be a better choice. The Pricer may also be a good option if you’re only looking to rent a wood chipper for a short period of time and don’t mind the deposit requirement.
Renting a wood chipper from Home Depot can be a great option for many homeowners and DIY enthusiasts who need to clear their yards of debris. Here are some pros and cons to consider before renting a wood chipper:
Overall, renting a wood chipper from Home Depot can be a great option for many homeowners and DIY enthusiasts. It’s important to weigh the pros and cons and determine if renting is the best option for your specific needs and budget.
If you are considering renting a wood chipper from Home Depot but are unsure if it’s the right choice for you, there are a few alternatives you can consider.
If you have a lot of trees on your property and plan to do a lot of chipping, buying a wood chipper may be a better long-term investment. While the initial cost may be high, owning a wood chipper can save you money in the long run, especially if you plan to use it frequently.
Here are some things to consider when buying a wood chipper:
If you only need to chip a few branches or don’t want to invest in a wood chipper, you can hire a tree service to do the work for you. Tree services have the equipment and expertise to quickly and safely remove branches and turn them into mulch.
Here are some things to consider when hiring a tree service:
If you only need to chip a few branches and don’t want to spend any money, you can ask a friend or neighbor if you can borrow their wood chipper. This is a great option if you only need to chip branches once or twice a year.
Here are some things to consider when borrowing a wood chipper:
The rental cost for a small wood chipper at Home Depot can vary depending on the size of the chipper and the duration of the rental. On average, you can expect to pay anywhere between $75 to $420 per day for a wood chipper rental.
Renting a commercial wood chipper from Home Depot can be more expensive than renting a small wood chipper. The cost can vary depending on the size of the chipper and the duration of the rental. On average, you can expect to pay around $165 per day, $740 per week, and $1,850 per month for a six-inch capacity chipper.
The largest size of tree that can be chipped with a wood chipper depends on the size of the chipper. A small wood chipper may only be able to handle branches up to two inches in diameter, while a larger commercial chipper can handle branches up to six inches in diameter.
Whether it is worth buying a wood chipper instead of renting one depends on your needs. If you have a lot of trees and branches to chip, buying a wood chipper may be a better investment in the long run. However, if you only need to chip branches occasionally, renting a wood chipper may be a more cost-effective option.
Small wood chippers are generally effective for chipping small to medium-sized branches and leaves. However, they may not be as effective for chipping larger branches or thicker branches. It is important to choose the right size wood chipper for your needs.
You can find a 4” wood chipper for rent near you by checking with local equipment rental companies or by searching online. Home Depot and other hardware stores may also offer wood chipper rentals.

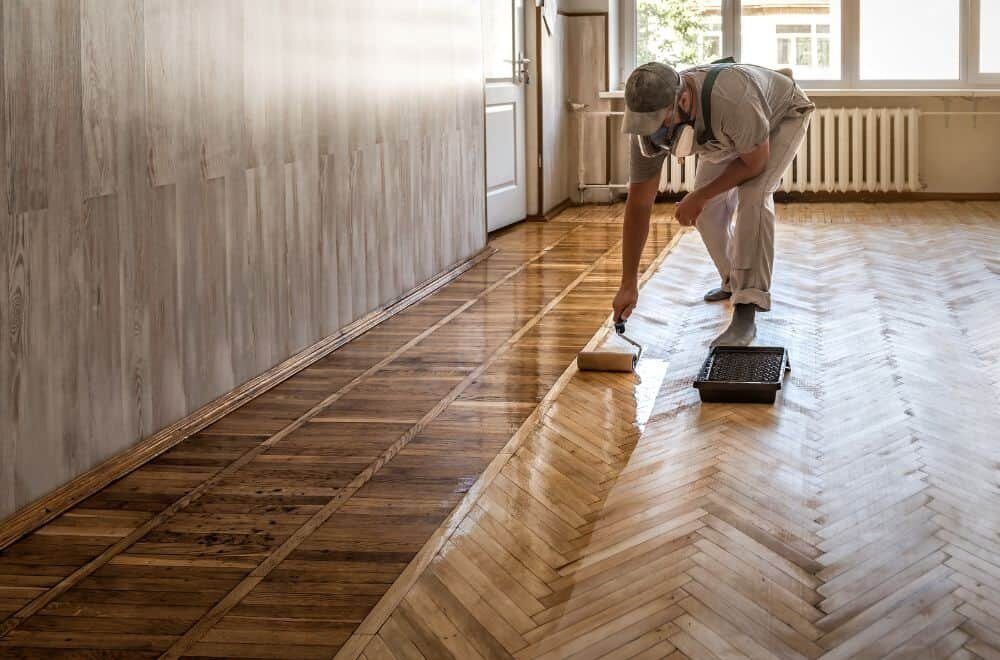
Lacquering over painted wood can be a daunting task, but with proper preparation and technique, you can achieve a beautiful and long-lasting finish. Whether you’re looking to revitalize an old piece of furniture or add a glossy finish to a new project, lacquer can be a great option. However, it’s important to note that not all paints are compatible with lacquer, so it’s crucial to choose the right type of paint and lacquer for your project.
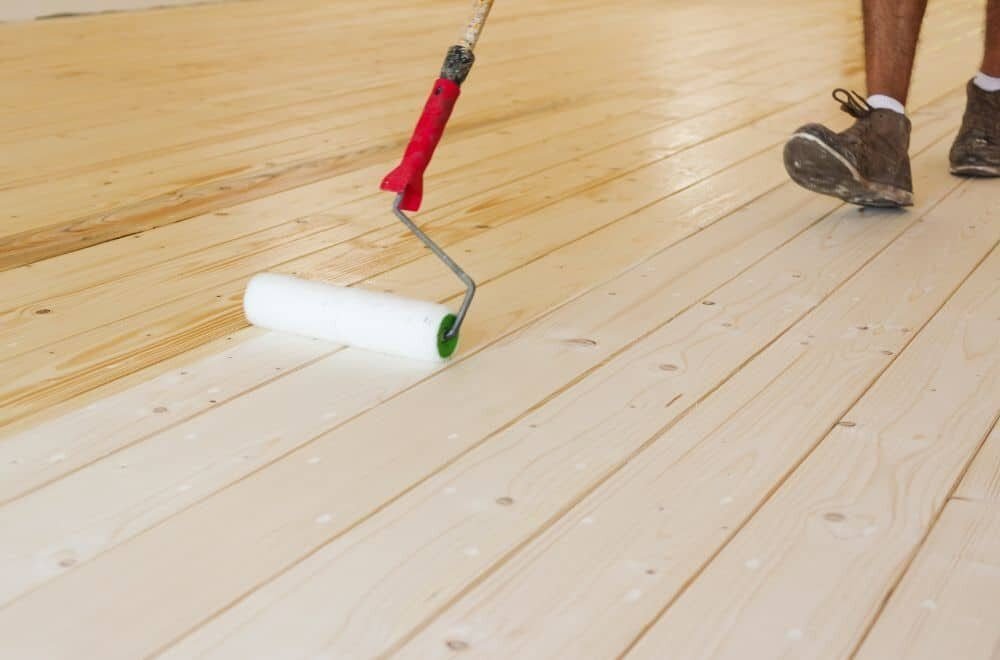
Before you begin, make sure the painted surface is clean and free of any dirt, dust, or debris. Sand the surface lightly to create a rough texture that will help the lacquer adhere properly. If there are any cracks or holes in the surface, fill them in with wood filler and sand them down until they’re smooth. Once the surface is prepped, you can apply a coat of lacquer using a spray gun or brush, depending on your preference. It’s important to apply thin, even coats and allow each coat to dry completely before applying the next.
When it comes to refinishing painted wood, lacquer is a popular choice due to its durability and ability to provide a strong, shiny finish. However, it’s important to understand the basics of both lacquer and paint before attempting to apply one over the other.
Lacquer is a type of finish that is commonly used on wood and metal surfaces. It’s a clear, protective coating that provides a hard, glossy finish. Lacquer is typically applied in thin layers using a spray gun or brush, and it dries quickly.
One of the benefits of lacquer is its durability. It’s resistant to scratches and wear, making it ideal for high-traffic areas. It also provides a smooth, even finish that enhances the natural beauty of the wood.
Paint is a mixture of pigments, binders, and solvents that is used to color and protect surfaces. It’s available in a wide range of colors and finishes, from matte to high gloss.
When painting over wood, it’s important to choose the right type of paint. Latex-based paints are the best option for applying lacquer over painted wood, as they provide a good base for the lacquer to adhere to. Oil-based paints, on the other hand, can cause issues with adhesion and should be avoided.
In addition to the type of paint, the condition of the painted surface is also important. The surface should be clean, dry, and free of any loose or flaking paint. Any imperfections should be sanded and filled before applying lacquer.
By understanding the basics of lacquer and paint, you can ensure that you’re using the right materials and techniques to properly lacquer over painted wood.
If you want to protect your painted wood surfaces and give them a glossy finish, lacquering over them can be a great option. However, it is important to do it properly to avoid any issues. Here are some reasons why it is important to properly lacquer over painted wood:
Lacquer is a hard, durable finish that can protect your painted wood surfaces from wear and tear. When applied properly, it can make the surface more resistant to chipping, fading, and other types of damage. This can help extend the life of your painted wood surfaces and save you money in the long run.
Lacquer can give your painted wood surfaces a glossy, professional-looking finish. This can make them look more attractive and add value to your home or business. Additionally, lacquer can help bring out the natural beauty of the wood grain, making your surfaces look even more appealing.
Lacquered surfaces are easy to clean and maintain. They can be wiped down with a damp rag or a spray-and-wipe furniture polish. However, it is important to avoid using cleaners containing ammonia, bleach, alcohol, or acetone, as they can damage the lacquer finish.
Lacquer can be applied to a variety of painted wood surfaces, including furniture, cabinets, and floors. It can be used on both indoor and outdoor surfaces, making it a versatile option for many different projects.
In summary, properly lacquering over painted wood can improve durability, enhance appearance, provide easy maintenance, and offer versatility. If you want to give your painted wood surfaces a long-lasting, professional-looking finish, consider using lacquer.
Before you start lacquering over painted wood, you need to properly prepare the surface. This will ensure that the lacquer adheres well and provides a smooth finish. Here are the two main preparation steps you should follow:
The first step is to clean the surface thoroughly. Any dirt, dust, or grease on the surface can affect the adhesion of the lacquer. Here’s how you can clean the surface:
The second step is to sand the surface. Sanding will help the lacquer adhere better to the surface and also remove any imperfections. Here’s how you can sand the surface:
By following these preparation steps, you can ensure that the surface is clean, smooth, and ready for lacquering. This will help you achieve a professional-looking finish that is durable and long-lasting.

When it comes to lacquering over painted wood, choosing the right lacquer is crucial. Not all lacquers are created equal, and using the wrong one can result in a poor finish or even damage to your painted surface. Here are some key factors to consider when choosing a lacquer for your project:
The type of paint you used on your wood surface will determine the type of lacquer you should use. If you used oil-based paint, you should use a lacquer that is also oil-based. If you used water-based paint, you should use a water-based lacquer. Using the wrong type of lacquer can cause the paint to peel or crack.
Lacquers come in a range of sheens, from matte to high-gloss. Consider the look you want to achieve and choose a lacquer with the appropriate sheen. Keep in mind that high-gloss finishes tend to show imperfections more easily than matte finishes.
Some lacquers dry faster than others, which can be an important factor if you are working on a time-sensitive project. Check the drying time of the lacquer before you buy it, and make sure it fits your needs.
Volatile organic compounds (VOCs) are chemicals that can be harmful to human health and the environment. Many lacquers contain VOCs, so if you are concerned about the impact of your project on the environment or your health, look for a low-VOC or no-VOC lacquer.
Finally, consider the application method you plan to use. Some lacquers are designed for spray application only, while others can be brushed on. Make sure the lacquer you choose is compatible with your application method.
By considering these factors, you can choose a lacquer that will give you a beautiful, durable finish on your painted wood surface.
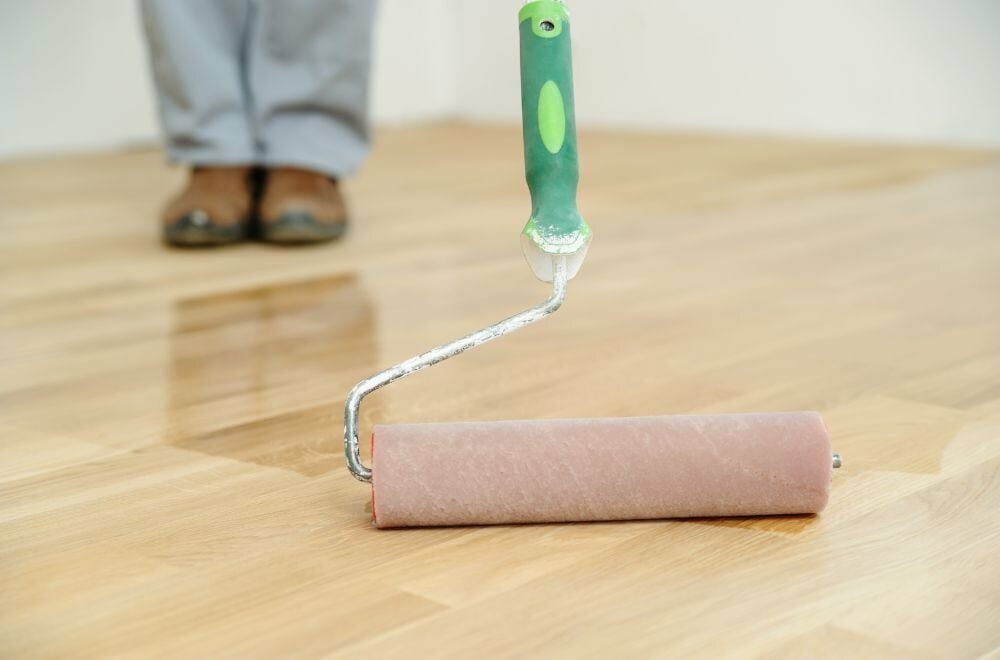
When it comes to lacquering over painted wood, the application process is crucial for achieving a smooth and durable finish. Here are the steps you need to follow to apply the lacquer properly:
Before applying the lacquer, you need to prime the surface to ensure that the lacquer adheres properly. To do this, you can use a sanding block to lightly sand the surface of the painted wood. Then, wipe the surface clean with a tack cloth to remove any dust or debris.
Once the surface is clean, apply a coat of primer using a brush or spray can. Make sure to choose a primer that is compatible with both the paint and the lacquer you plan to use. Let the primer dry completely before moving on to the next step.
After the primer has dried, it’s time to apply the first coat of lacquer. Use a high-quality brush or spray gun to apply a thin, even coat of lacquer. Be sure to follow the manufacturer’s instructions for the lacquer you are using, as drying times and application methods can vary.
After the first coat has dried, use a fine-grit sandpaper to lightly sand the surface. This will help the next coat of lacquer adhere properly and create a smooth finish. Be sure to wipe away any dust or debris with a tack cloth before applying the next coat.
Repeat the process of applying a coat of lacquer, letting it dry, and sanding between coats until you have achieved the desired level of coverage and smoothness.
Once you have applied the final coat of lacquer, let it dry completely before handling or using the painted wood. It’s important to be patient during this process to ensure that the lacquer has fully cured and hardened.
Overall, with the right tools and techniques, lacquering over painted wood can be a great way to achieve a durable and attractive finish. Just be sure to follow the steps carefully and choose high-quality products for the best results.
When working with lacquer and painted wood, it’s important to take necessary safety measures to avoid any accidents or health hazards. Here are some safety measures you should follow:
Lacquer fumes can be harmful if inhaled in large quantities. Therefore, it’s important to work in a well-ventilated area to avoid any health hazards. Open windows and doors or use a fan to circulate the air in the room.
Wearing protective gear is essential when working with lacquer and painted wood. Wear a respirator mask to avoid inhaling any fumes and gloves to protect your hands from the chemicals. Additionally, wear protective eyewear to avoid any splashes or drips of lacquer getting into your eyes.
Keep your work area clean and free from any debris or flammable materials. Lacquer is highly flammable, so avoid smoking or using any open flames in the work area.
Store lacquer in a cool, dry place away from any heat sources or direct sunlight. Keep lacquer containers tightly closed to avoid any spills or leaks.
By following these safety measures, you can ensure a safe and successful lacquering process.
Once you have properly lacquered over painted wood, it’s important to maintain it to ensure its longevity. Here are some tips for maintaining your lacquered painted wood:
By following these simple tips, you can keep your lacquered painted wood looking beautiful for years to come.
The best way to apply lacquer over painted wood is to start by cleaning the surface thoroughly. Then, sand the painted surface with fine-grit sandpaper to create a rough surface that the lacquer can adhere to. Apply a thin coat of lacquer and allow it to dry completely before applying additional coats.
It is recommended to apply at least two coats of lacquer over painted wood. However, the number of coats may vary depending on the desired finish and the type of lacquer being used. Be sure to read the manufacturer’s instructions for specific recommendations.
Yes, you can use lacquer over latex or enamel paint. However, it is important to ensure that the painted surface is clean and free of debris before applying the lacquer. Additionally, it is recommended to test a small area before applying lacquer to the entire surface.
It is not recommended to lacquer over gloss paint. The glossiness of the paint may prevent the lacquer from adhering properly, resulting in a poor finish. It is recommended to sand the gloss paint before applying lacquer.
The type of clear coat that should be used on painted wood depends on the desired finish. Lacquer is a popular choice for a high-gloss finish, while polyurethane is a good option for a durable, protective finish. Be sure to choose a clear coat that is compatible with the type of paint used.
Yes, clear lacquer can be sprayed over chalk paint. However, it is important to ensure that the chalk paint is fully cured before applying the lacquer. Additionally, it is recommended to test a small area before applying lacquer to the entire surface.

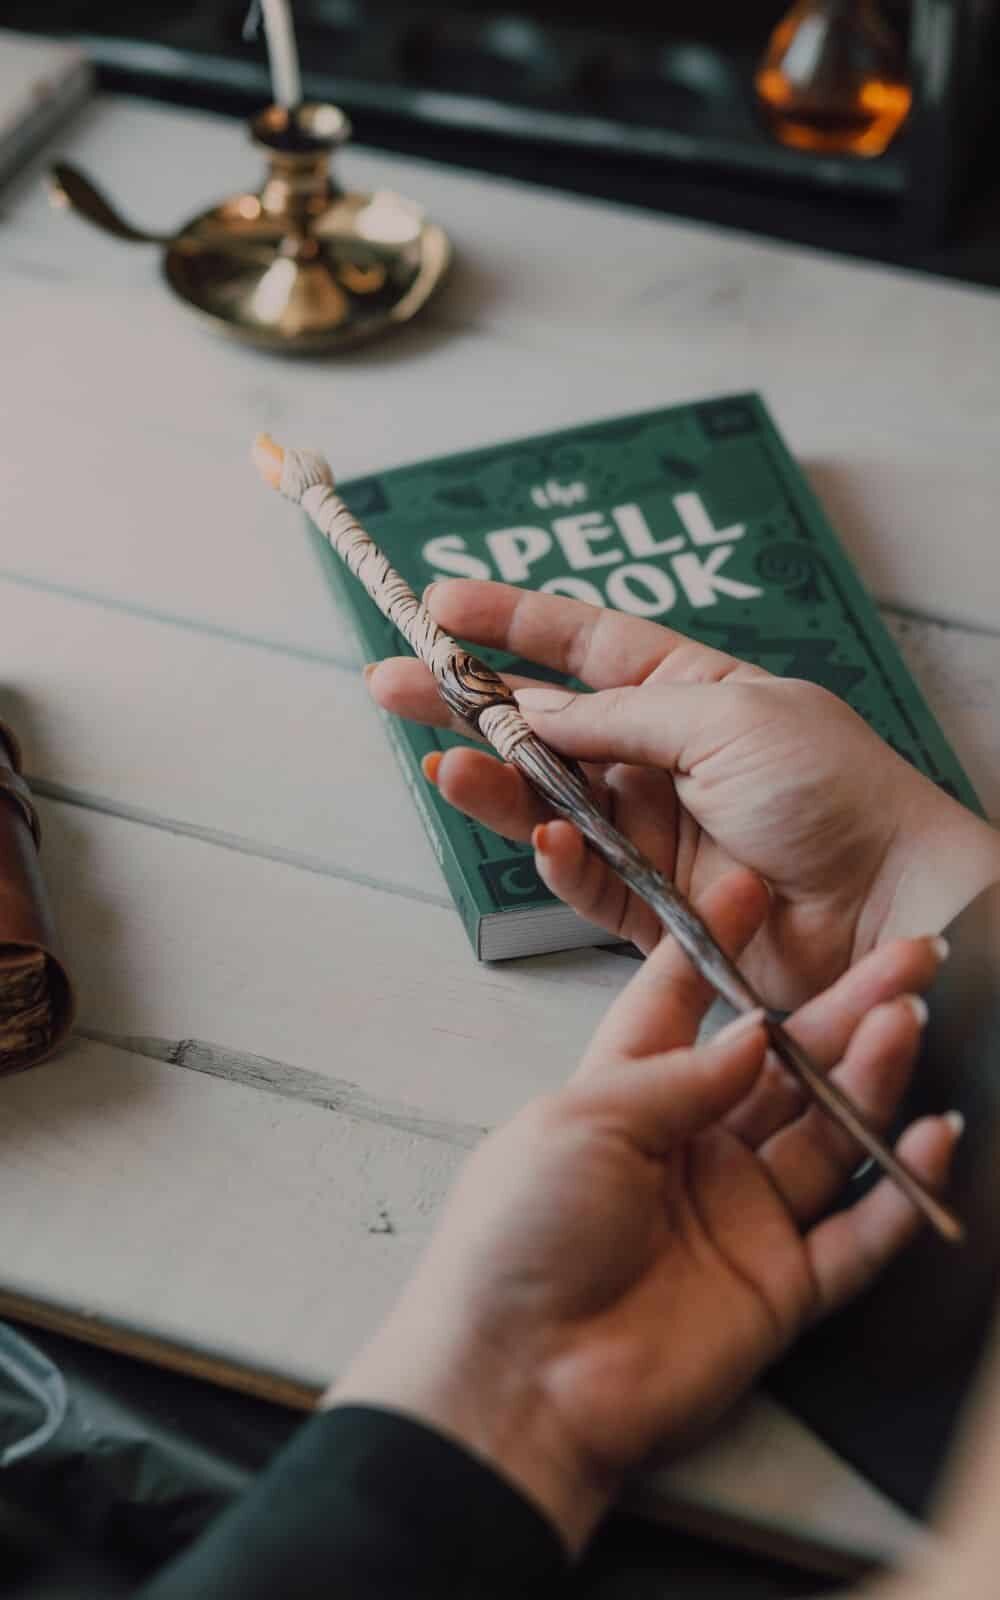
Are you a wizard or a witch looking for the perfect wand? One of the most important factors in choosing a wand is the type of wood it is made from. Each type of wood has its own unique properties and characteristics that can influence the power and effectiveness of the wand. In this article, we will explore the best wood for a wizard’s wand and what makes it so special.
One of the most popular woods for a wizard’s wand is yew wood. This wood is often used for death magic and protection spells, and it is known for its ability to absorb negative energy. Yew wands are often used by those seeking justice or revenge. If you are looking for a wand that will help you tap into your darker side, yew is the perfect choice.
Another great wood for a wizard’s wand is cherry wood. Cherry wands are known for their power and versatility. They are often used by those with strong wills and clear goals. Cherry wands are also excellent for divination and healing magic. If you are looking for a wand that can help you achieve your goals and unlock your full potential, a cherry wand may be the perfect choice for you.
When it comes to choosing the best wood for a wizard’s wand, there are several factors to consider. Each wood has its own unique qualities and characteristics that can affect the wand’s performance and the wizard’s ability to use it effectively.
One important factor to consider is the type of magic the wizard will be using the wand for. For example, Alder wood is known to be the best wood for non-verbal magics, while the aspen wand is particularly suited to martial magic.
Another factor to consider is the personality and characteristics of the wizard. Some woods are said to be better suited to certain types of wizards or personalities. For example, the cherry wood wand is said to be best suited to those with a strong, independent streak, while the willow wand is said to be best suited to those who are gentle and peaceful.
Here are some of the most common wand woods and their characteristics:
| Wood | Characteristics |
|---|---|
| Alder | Best for non-verbal magics |
| Aspen | Best for martial magic |
| Cherry | Best for strong, independent personalities |
| Elder | Powerful and rare |
| Fir | Good for transfiguration |
| Holly | Good for defensive magic |
| Oak | Strong and powerful |
| Willow | Good for gentle and peaceful personalities |
Ultimately, the best wood for a wizard’s wand will depend on a variety of factors, including the wizard’s personality, the type of magic they will be using the wand for, and personal preference. It’s important to choose a wand that feels right and resonates with the wizard’s own unique energy and personality.

When it comes to choosing the best wood for a wizard’s wand, there are several characteristics that you should consider. A wand made from the right wood can greatly enhance a wizard’s magical abilities, making it crucial to choose the right one. Here are the key properties of ideal wand woods:
A wand made from durable wood is essential for a wizard who wants to use it for a long time. The last thing you want is for your wand to break in the middle of a duel or spell-casting. Some of the most durable woods for wands include oak, holly, and ebony. These woods are strong and sturdy, making them perfect for wands that will be used frequently.
Flexibility is another important property to consider when choosing a wand wood. A wand that is too stiff can be difficult to use, while one that is too flexible may not provide enough control. Some of the best woods for flexibility include willow, ash, and cherry. These woods are known for their ability to bend without breaking, making them perfect for wands that require precision and control.
The magical affinity of a wand wood refers to its ability to enhance certain magical abilities. Each wood has its unique properties, which can greatly affect the type of magic a wizard can perform. For example, a wand made from holly wood is known to be particularly good for defensive spells, while a wand made from cherry wood is said to be excellent for healing magic. Some of the other woods and their magical affinities include:
In conclusion, choosing the right wood for a wizard’s wand is crucial for enhancing their magical abilities. By considering the durability, flexibility, and magical affinity of different woods, you can choose the perfect wood for your wand.
When it comes to choosing the best wood for a wizard’s wand, there are a variety of options to consider. Each wood has its own unique properties and associations that can enhance the magic and power of a wand. Here are some of the most popular wand woods and what makes them special:
Oak is a classic choice for wand wood, and for good reason. It is a sturdy and reliable wood that is associated with strength, endurance, and protection. Oak wands are often wielded by those who are seeking to overcome obstacles or face challenges head-on. They are also well-suited for defensive spells and protective magic.
Holly is another popular choice for wand wood, particularly for those who value intuition and insight. Holly wands are said to enhance the wielder’s ability to perceive the truth and make wise decisions. They are also associated with protection and healing, making them a good choice for those who want to use their magic to help others.
Yew is a powerful and ancient wood that has been used for centuries in the crafting of magical wands. It is associated with death and rebirth, and is said to have the ability to channel and manipulate powerful energies. Yew wands are often used by those who are seeking to delve into the mysteries of life and death, or to access the power of the spirit realm.
Elder is a rare and highly sought-after wood for wand-making. It is associated with transformation, evolution, and spiritual growth. Elder wands are said to be particularly well-suited for divination and prophecy, and are often used by those who seek to gain insight into the future. They are also associated with healing and protection, making them a versatile choice for a wide range of magical practices.
When choosing the best wood for your wizard’s wand, it is important to consider your own unique goals, intentions, and preferences. Whether you choose oak, holly, yew, elder, or another type of wood entirely, your wand will be a powerful tool for channeling and focusing your magical energy.
When it comes to choosing the perfect wand, the type of wood used is just as important as the core. The wood chosen can reflect the personality of the wizard and affect the wand’s magical abilities. Here are some things to consider when choosing the right wand wood for you.
The type of wood used in a wand can reflect the personality of the wizard. For example, if you are a brave and daring wizard, you may want to consider a wand made from Ash wood. Ash wands are known for their ability to channel powerful spells and their connection to the element of fire.
If you are a more reserved and introspective wizard, a wand made from Willow wood may be a better fit. Willow wands are known for their flexibility and adaptability, making them a good choice for wizards who value versatility and creativity.
The type of wood used in a wand can also affect the wizard’s magical strengths. For example, if you are a wizard who excels in divination and seeking guidance from beyond, a wand made from Sycamore wood may be a good choice. Sycamore wands are known for their connection to the underworld and the afterlife.
If you are a wizard who specializes in martial magic and dueling, a wand made from Aspen wood may be the perfect fit. Aspen wands are highly prized for their fine-grained wood and outstanding charmwork, making them a popular choice among accomplished duelists.
It’s important to remember that the type of wood used in a wand is just one factor to consider. The wand’s core, length, and other materials can also affect its magical abilities. Take the time to consider all of these factors when choosing the perfect wand for you.
Once you have found the perfect wand with the best wood for your magical abilities, it is important to take care of it properly. Here are some tips to keep your wand wood in top condition:
Wand woods are sensitive to temperature changes, so it is best to avoid exposing them to extreme heat or cold. Keep your wand away from direct sunlight, fireplaces, and heaters. If your wand gets wet, dry it off immediately to prevent warping or cracking.
To keep your wand looking and functioning its best, it is important to clean it regularly. Use a soft cloth or brush to remove any dirt or debris that may have accumulated on the surface. You can also use a mild soap and water solution to gently clean the wand, but be sure to dry it thoroughly afterwards.
When you are not using your wand, it is important to store it properly to prevent damage. Avoid leaving it out in the open where it can be knocked over or stepped on. Instead, keep it in a protective case or display stand that will keep it safe and secure.
Finally, it is important to use your wand responsibly to prevent damage to the wood or any other components. Avoid using your wand as a tool for non-magical purposes, and be careful not to accidentally cast spells that could harm the wand or yourself. With proper care and attention, your wand wood will remain a powerful tool for many years to come.
Some rare and powerful woods for a wizard’s wand include elder, yew, and blackthorn. These woods are known for their strength and magical properties. However, they are also difficult to come by and are often reserved for the most skilled and experienced wizards.
The best wand woods are those that are strong, flexible, and have magical properties that complement the wizard’s personality and abilities. They should also be able to channel and amplify the wizard’s magic, making it more powerful and effective.
The type of wood used for a wizard’s wand can greatly affect its properties and abilities. Each wood has its own unique magical properties that can enhance or detract from the wizard’s abilities. For example, yew wood is known for its ability to absorb negative energy, making it a good choice for those seeking protection or justice.
The rarest and most sought-after wood for wand-making is the legendary wood of the elder tree. It is said to be the most powerful and magical of all wand woods, but it is also the most difficult to come by. Only the most skilled and experienced wand makers are able to work with elder wood.
The most popular wand cores include phoenix feather, dragon heartstring, and unicorn hair. Each core has its own unique properties and can greatly affect the wand’s power and abilities. For example, dragon heartstring is known for its power and durability, while unicorn hair is known for its loyalty and stability.
The ideal length for a wizard’s wand is typically between nine and fourteen inches. This length allows for a good balance between control and power, making it easier for the wizard to perform spells and magic. However, the length of the wand can also vary depending on the wizard’s preferences and abilities.

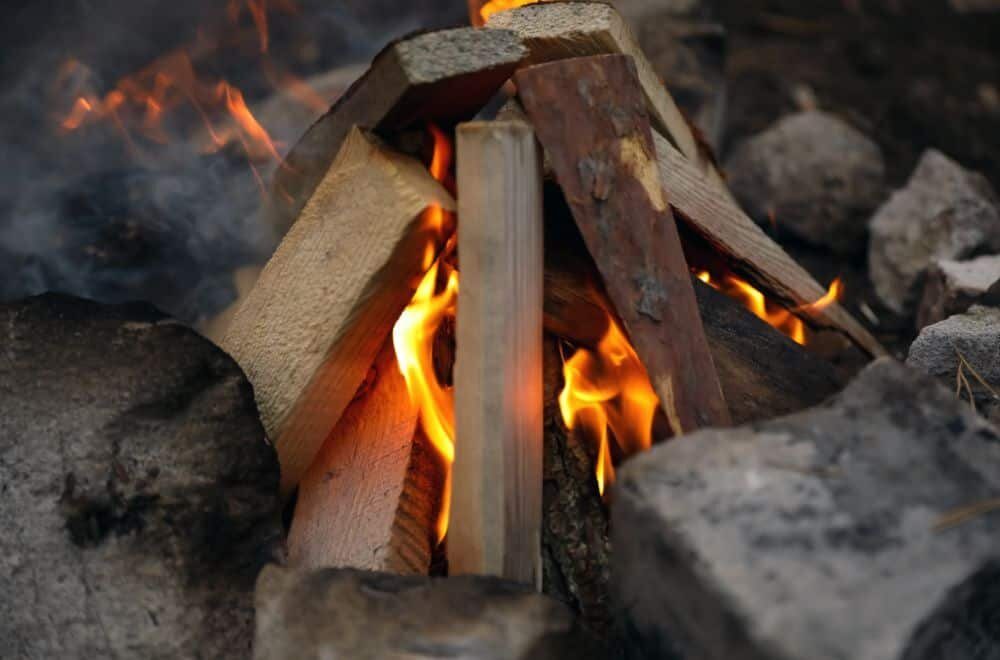
Are you wondering if it’s safe to burn old pressure-treated wood? This is a common question among homeowners who are looking for ways to dispose of their old deck or fence. While burning wood is a convenient and cost-effective way to get rid of it, you need to be careful when it comes to pressure-treated wood.
Pressure-treated wood is a type of wood that has been treated with chemicals to make it more resistant to rot, insects, and decay. The chemicals used in the treatment process can be harmful to humans and the environment. As a result, burning pressure-treated wood can release toxic fumes and pollutants into the air, which can be dangerous to your health. So, can you burn old pressure-treated wood? Let’s find out.
If you are wondering whether you can burn old pressure treated wood, you first need to understand what pressure treated wood is. Pressure treated wood is a type of wood that has been treated with chemicals to make it more durable and resistant to rot, decay, and insect damage. The process involves placing the wood in a vacuum chamber, then forcing a preservative into the wood under high pressure.
The chemicals used in pressure treated wood can vary, but they typically include copper, chromium, and arsenic. These chemicals are toxic and can be harmful to humans and the environment if they are released into the air or water. For this reason, it is important to handle pressure treated wood with care and dispose of it properly.
When it comes to burning pressure treated wood, it is generally not recommended. The chemicals used in the treatment process can release toxic fumes when burned, which can be harmful to your health and the environment. In addition, the chemicals can leave behind residue in your fireplace or wood stove, which can be difficult to clean and may cause damage over time.
If you do decide to burn pressure treated wood, it is important to take precautions to minimize the risks. You should only burn pressure treated wood in a well-ventilated area, such as an outdoor fire pit. You should also wear protective clothing, such as gloves and a mask, to minimize your exposure to the chemicals. Finally, you should dispose of the ashes and any remaining wood residue properly, according to your local regulations.
Overall, while it is technically possible to burn pressure treated wood, it is not recommended due to the potential health and environmental risks. If you need to dispose of old pressure treated wood, it is best to do so through your local waste management program or a hazardous waste disposal facility.

Burning pressure-treated wood can pose potential risks to your health and the environment. Here are some of the potential risks you should be aware of:
Pressure-treated wood contains chemicals that can be harmful to your health when burned. The chemicals used to treat the wood include copper, chromium, and arsenic, which can cause respiratory problems, skin irritation, and other health issues.
When pressure-treated wood is burned, it releases toxic chemicals into the air, which can contribute to air pollution. The chemicals released can also harm plant and animal life in the surrounding area.
The ash produced by burning pressure-treated wood can also pose a risk to the environment. The ash may contain toxic chemicals that can contaminate soil and water sources. It is important to dispose of the ash properly to prevent environmental damage.
Burning pressure-treated wood may also be illegal in some areas. Check with your local authorities to see if there are any restrictions or regulations regarding the burning of pressure-treated wood.
In conclusion, burning pressure-treated wood can pose potential risks to your health and the environment. It is important to take proper precautions and safety measures if you choose to burn pressure-treated wood.
If you have old pressure treated wood that you need to dispose of, it is important to do so safely and responsibly. Burning pressure treated wood is not recommended as it releases harmful chemicals into the air. Here are some proper disposal methods for old pressure treated wood:
If you have leftover pressure treated wood that is still in good condition, consider selling it to someone who can use it. You can post an ad on local classifieds websites or social media groups to find potential buyers.
Another option is to give away your old pressure treated wood for free. You can post an ad on local classifieds websites or social media groups to find someone who can use it.
Pressure treated wood can be recycled and used for other purposes such as mulch or animal bedding. Contact your local recycling center to find out if they accept pressure treated wood.
Some local authorities have special landfills that accept pressure treated wood. Contact your local authorities to find out if this option is available in your area.
If you have a small amount of pressure treated wood to dispose of, you can contact your trash service to see if they will pick it up. Make sure to follow any guidelines they provide for proper disposal.
Remember, it is important to dispose of pressure treated wood safely and responsibly to protect the environment and your health.
If you have old pressure-treated wood lying around and you’re wondering what to do with it, you may be tempted to burn it. However, burning pressure-treated wood is not recommended due to the chemicals that are used to treat the wood. These chemicals can be harmful to both you and the environment.
Fortunately, there are several alternatives to burning pressure-treated wood that you can consider. Here are a few options:
One option is to dispose of the pressure-treated wood in a landfill. While this is not the most environmentally friendly option, it is a safe way to get rid of the wood. Check with your local landfill to see if they accept pressure-treated wood and if there are any special requirements for disposal.
Another option is to recycle the pressure-treated wood. Some recycling centers will accept pressure-treated wood, although this can vary depending on your location. Check with your local recycling center to see if they accept pressure-treated wood and what their requirements are.
If the pressure-treated wood is still in good condition, you may be able to repurpose it for another use. For example, you could use it to build a raised garden bed or a compost bin. Just be sure to take precautions when handling the wood, such as wearing gloves and a mask.
If you’re looking for a way to keep warm, consider using premium firewood instead of pressure-treated wood. Premium firewood is made from high-quality hardwoods and is free from chemicals and other harmful substances. Plus, it burns hotter and longer than pressure-treated wood, so you’ll get more warmth for your money.
In conclusion, burning pressure-treated wood is not recommended due to the chemicals that are used to treat the wood. Instead, consider one of the alternatives listed above to safely and responsibly dispose of your old pressure-treated wood.
Burning pressure treated wood is illegal in the United States due to the hazardous chemicals that are released into the air. The U.S. Environmental Protection Agency has classified pressure-treated lumber as hazardous waste, and it should be disposed of accordingly.
When you burn pressure treated wood, toxic chemicals are released into the air, which can cause serious health problems. The smoke and ash from burning pressure treated wood can contain arsenic, creosote, and other toxic preservatives, which can cause chronic respiratory diseases and cancer.
It is important to note that burning pressure treated wood can also harm the environment. The toxic chemicals released into the air can contaminate soil and water, which can have long-term effects on the ecosystem.
If you are caught burning pressure treated wood, you could face legal consequences. Depending on where you live, you could be fined or face other penalties. It is important to check with your local authorities to determine the laws and regulations regarding the disposal of pressure treated wood.
In conclusion, burning pressure treated wood is not only illegal, but it is also hazardous to your health and the environment. It is important to dispose of pressure treated wood properly and follow the laws and regulations in your area.
When it comes to burning pressure treated wood, there are some serious environmental concerns that you should be aware of. Here are two main ways that burning pressure treated wood can impact the environment:
Burning pressure treated wood releases a range of harmful chemicals into the air. These chemicals can cause respiratory problems, especially for people with pre-existing health conditions like asthma. They can also contribute to smog and acid rain.
The chemicals that are released when you burn pressure treated wood include:
Another major concern with burning pressure treated wood is soil contamination. When you burn pressure treated wood, the ash that is left behind can contain high levels of toxic chemicals like arsenic, copper, and chromium. These chemicals can leach into the soil and contaminate groundwater.
If you plan to burn pressure treated wood, it is essential that you dispose of the ash properly. Do not use it as fertilizer or compost, and do not dump it in areas where it can contaminate water sources.
In summary, burning pressure treated wood can have serious environmental consequences. If you must burn pressure treated wood, take steps to minimize the impact on the air and soil by following proper disposal methods.
When working with pressure-treated wood, it is important to take the necessary safety measures to protect yourself and others from potential harm. Here are some safety measures you should consider:
When cutting or sanding pressure-treated wood, wear a dust mask and goggles to protect your eyes and lungs from sawdust and other airborne particles. Additionally, wear gloves to protect your hands from splinters and chemicals.
Pressure-treated wood contains chemicals that can be harmful if inhaled. Therefore, it is essential to work in a well-ventilated area to avoid inhaling fumes. If possible, work outdoors or in a well-ventilated workshop.
After working with pressure-treated wood, be sure to clean up thoroughly. Sweep up any sawdust and dispose of it properly. Wash your hands and any exposed skin with soap and water.
Burning pressure-treated wood can release harmful chemicals into the air, which can be hazardous to your health and the environment. Therefore, it is best to avoid burning pressure-treated wood altogether.
When disposing of pressure-treated wood, do not burn it or throw it in the trash. Instead, take it to a hazardous waste facility or contact your local waste management company for proper disposal instructions.
By following these safety measures, you can protect yourself and others from potential harm when working with pressure-treated wood.
It is not recommended to burn pressure treated wood, even if it is 20 years old. This is because pressure treated wood contains chemicals that can be harmful when burned. The chemicals used to treat the wood, such as copper and chromium, can release toxins into the air when burned, which can be harmful to your health.
No, it is not safe to burn 15 year old pressure treated wood. The chemicals used to treat the wood do not break down over time, so they can still be harmful when burned. In addition, older pressure treated wood may contain higher levels of chemicals, which can make it even more dangerous to burn.
No, it is not safe to burn 30 year old pressure treated lumber. The chemicals used to treat the wood do not break down over time, so they can still be harmful when burned. In addition, older pressure treated wood may contain higher levels of chemicals, which can make it even more dangerous to burn.
No, it is not safe to burn treated wood after 10 years. The chemicals used to treat the wood do not break down over time, so they can still be harmful when burned. In addition, older treated wood may contain higher levels of chemicals, which can make it even more dangerous to burn.
The best way to dispose of pressure treated wood is to take it to a hazardous waste facility. These facilities are equipped to handle materials that are potentially harmful to the environment and human health. You can also contact your local waste management authority for guidance on how to dispose of pressure treated wood in your area.
Pressure treated wood is typically green or brown in color, and may have small indentations or markings on the surface. You can also check for a stamp or label on the wood that indicates it has been pressure treated. If you are unsure whether wood is pressure treated, it is best to assume that it is and take the necessary precautions when handling or disposing of it.

Looking for sawdust or wood flour for your DIY project? You’re not alone. Many people are searching for the best places to buy sawdust, and it can be a bit overwhelming. Fortunately, there are many options available, from specialized suppliers to general hardware stores.
If you’re looking for a specific type of sawdust or wood flour, it’s best to start with specialized suppliers. These suppliers often have a wider variety of options available, and they can help you find the right product for your project. However, if you’re just looking for general sawdust or wood flour, you may be able to find it at your local hardware store.
When buying sawdust or wood flour, it’s important to consider the quality of the product. Look for sawdust that is clean, dry, and free of contaminants. You may also want to consider the size of the particles, as finer particles are better for certain applications. With a little research and some careful consideration, you can find the perfect sawdust or wood flour for your project.
Sawdust and wood flour are both byproducts of woodworking and are commonly used for various purposes. Sawdust is the small pieces of wood that are produced when a saw cuts through a piece of wood. Wood flour, on the other hand, is made by grinding wood chips into a fine powder.
Sawdust and wood flour are used in a variety of applications, including as a filler, binder, and reinforcement in composite materials. They are also used in the production of paper, particleboard, and other wood-based products.
One of the main differences between sawdust and wood flour is the particle size. Sawdust particles are larger and more irregular in shape, while wood flour particles are much smaller and more uniform in size. This makes wood flour a better choice for applications where a smooth, consistent finish is desired.
Another difference between sawdust and wood flour is the type of wood used. Sawdust can be made from any type of wood, while wood flour is typically made from hardwoods such as oak, maple, and birch. This is because hardwoods have a higher density and are more durable than softwoods, making them better suited for applications that require strength and durability.
When purchasing sawdust or wood flour, it is important to consider the quality of the product. Look for products that are free from contaminants such as dirt, rocks, and other debris. It is also important to choose a product that is consistent in particle size and free from clumps.
In terms of availability, sawdust and wood flour can be purchased from a variety of sources, including hardware stores, woodworking suppliers, and online retailers. When purchasing online, be sure to read reviews and compare prices to ensure that you are getting a quality product at a fair price.

If you’re looking to buy sawdust or wood flour, your local hardware store is a great place to start. Here are some options to consider:
Big box retailers like Home Depot and Lowe’s typically carry bags of wood shavings meant for animal bedding and mulch for landscaping purposes. While they may not carry sawdust or wood flour specifically, these products can often be used interchangeably in certain applications. Be sure to check the label to ensure that the product you’re buying is suitable for your needs.
Independent hardware stores may be a better option if you’re looking for a specific type of sawdust or wood flour. These stores often carry a wider variety of products than big box retailers, and may be more knowledgeable about the different types of sawdust and wood flour available. Some independent stores may also offer custom milling services, allowing you to get the exact type of sawdust or wood flour you need for your project.
When shopping for sawdust or wood flour at a hardware store, be sure to ask for assistance if you’re not sure what you’re looking for. The staff should be able to help you find the right product for your needs, and may even be able to offer advice on how to use it.

If you’re looking to buy sawdust or wood flour online, there are a few popular marketplaces that you can check out. Here are some of the best options:
Amazon is one of the largest online marketplaces in the world, and it’s a great place to find sawdust and wood flour. You can easily search for products using keywords like “wood flour” or “sawdust,” and you’ll be presented with a wide range of options from different sellers. Some of the top-rated products on Amazon include System Three Wood Flour and The Sausage Maker Hickory Sawdust.
eBay is another popular online marketplace where you can find sawdust and wood flour. You can search for products using keywords like “wood flour” or “sawdust,” and you’ll be presented with a wide range of options from different sellers. One advantage of eBay is that you can often find products at lower prices than on other marketplaces.
Etsy is a popular online marketplace for handmade and vintage items, but it’s also a great place to find sawdust and wood flour. Many sellers on Etsy specialize in woodworking and offer a wide range of products, including sawdust and wood flour. You can search for products using keywords like “wood flour” or “sawdust,” and you’ll be presented with a variety of options from different sellers.
Overall, online marketplaces are a convenient and easy way to buy sawdust and wood flour. Just be sure to read product descriptions carefully and check seller ratings before making a purchase.

If you’re looking for a more specialized source for sawdust or wood flour, you might want to check out some woodworking stores. These stores often carry a variety of woodworking supplies, including different types of sawdust and wood flour. Here are a few specialty woodworking stores where you might be able to find what you’re looking for:
When you visit a specialty woodworking store, be sure to ask the staff if they carry the type of sawdust or wood flour that you need. They may be able to point you in the right direction or even order it for you if they don’t have it in stock.

Agricultural supply stores are a great place to look for sawdust or wood flour. These stores cater to farmers and ranchers and carry a wide variety of products, including animal feed, equipment, and supplies. They may also sell sawdust or wood flour as a byproduct of their other products.
Some popular agricultural supply stores that you may want to check out include Tractor Supply Co. and Rural King. Tractor Supply Co. offers Flake Premium Pine Animal Shavings in 8 cu. ft. bags, while Rural King carries a range of farm supplies, including hay hooks and pest control products.
If you’re looking for bulk sawdust supply, Ecostrat is a reliable nationwide supplier with over 20 years of experience. They offer more than 1,000 sources of contracted quality supply and deliver more than 500,000 tons of wood fiber each year.
When purchasing sawdust or wood flour from an agricultural supply store, it’s important to check the quality and source of the product. Look for suppliers that offer top quality bulk sawdust at competitive prices and have a good reputation in the industry. You may also want to consider whether the sawdust or wood flour is green or dry, and whether it is hardwood or softwood.
Overall, agricultural supply stores can be a convenient and affordable option for purchasing sawdust or wood flour. Just be sure to do your research and choose a reputable supplier that meets your specific needs.
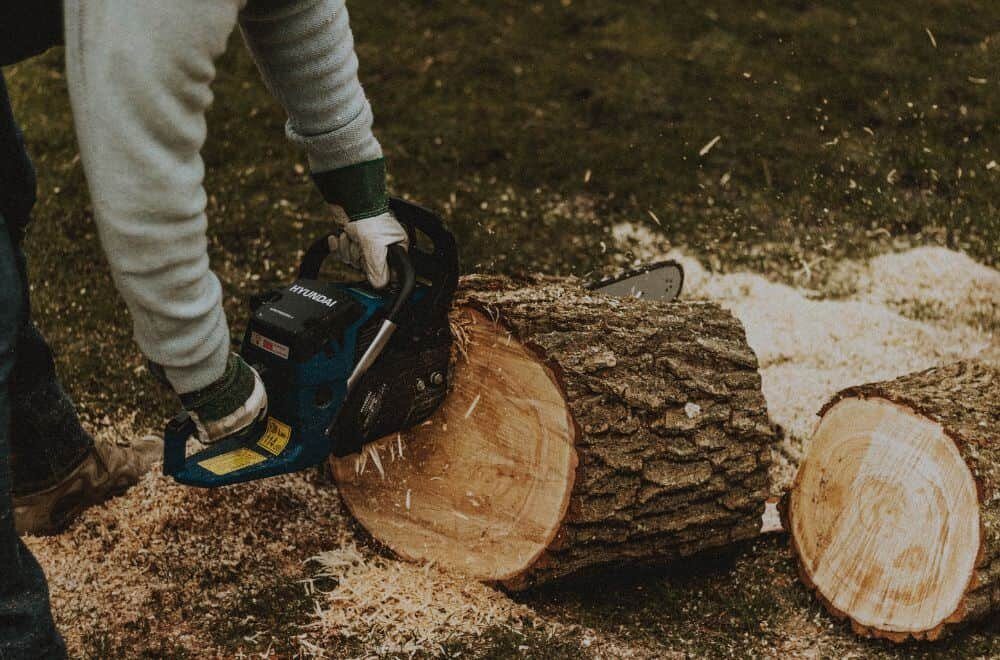
If you can’t find sawdust or wood flour in your local stores, you can make your own DIY sawdust and wood flour at home. Here are some methods you can try:
One of the easiest ways to make sawdust is by sanding wood. You can use an orbital sander or a belt sander to create sawdust. Make sure to use a fine-grit sandpaper to get a fine sawdust. You can also use a hand sanding block for smaller projects.
If you have a planer, you can use it to create wood shavings. You can then use a grinder or a mortar and pestle to turn the shavings into sawdust or wood flour.
You can also use a grinder to create sawdust or wood flour. You can use a coffee grinder or a food processor to grind small amounts of wood. For larger amounts, you can use a hammer mill or a wood chipper.
After creating sawdust or wood flour, you may need to sift it to remove any large particles. You can use a fine mesh sieve or a flour sifter to sift the sawdust or wood flour.
Making your own sawdust or wood flour can be a cost-effective solution if you can’t find them in stores. Just make sure to wear a mask and eye protection when creating sawdust to protect yourself from dust particles.
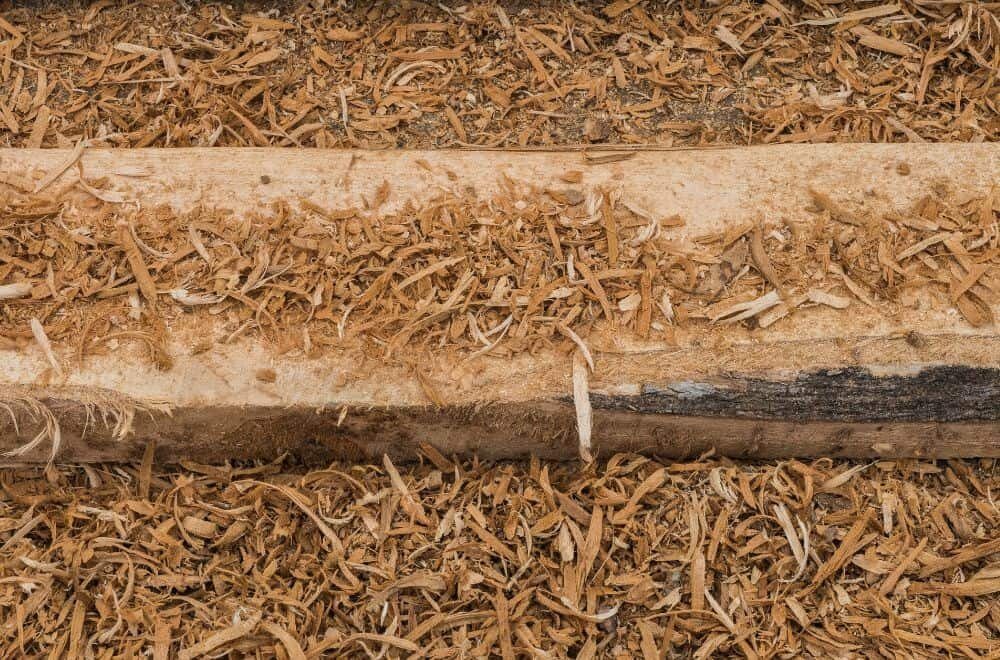
When buying sawdust or wood flour, it’s important to take safety precautions to ensure that you are not putting yourself or others at risk. Here are some safety tips to keep in mind:
By following these safety tips, you can ensure that you are buying and handling sawdust and wood flour in a safe and responsible manner.
In conclusion, sawdust and wood flour are versatile materials that can be used for a variety of purposes. Whether you are a DIY enthusiast, a woodworker, or a gardener, you can benefit from having sawdust or wood flour on hand.
If you are looking to buy sawdust or wood flour, there are several places you can look. Online retailers like Amazon and Etsy offer a wide selection of sawdust and wood flour, while lumber companies like Weaber and Roberts Lumber may also sell sawdust as a byproduct.
When buying sawdust or wood flour, it is important to consider the type of wood it is made from, as different types of wood can have different properties and uses. Additionally, be sure to check the quality of the sawdust or wood flour, as lower quality materials may contain contaminants or impurities.
Overall, sawdust and wood flour can be a valuable addition to your toolkit. With a bit of research and careful consideration, you can find the right sawdust or wood flour for your needs and start exploring all the creative ways you can use these versatile materials.
Home Depot does not typically sell sawdust or wood flour. However, they do sell wood chips and shavings that can be used for various purposes.
Sawdust is the byproduct of cutting or sanding wood, while wood flour is a fine sawdust that has been sifted to remove larger particles. Wood flour is often used as a filler in adhesives and coatings.
Wood flour can be used as a filler in adhesives, coatings, and composites. It can also be used as a bulking agent in animal feed or as a soil amendment.
You can obtain sawdust by cutting or sanding wood. Many woodworking shops and lumberyards also sell sawdust or wood flour.
Some woodworking shops and lumberyards may give away sawdust for free or for a small fee. You can also check with local tree removal services to see if they have any sawdust available.
You can check with local lumberyards or woodworking shops to see if they sell bulk sawdust or wood flour. Online marketplaces such as Amazon and Etsy also offer sawdust for sale in various quantities.

When it comes to buying firewood, understanding the measurement of a cord is crucial. A cord is a standard unit of measurement for firewood, but it can be confusing to determine how much wood you’re actually getting. One common question people have is how many pieces of wood are in a cord.
The number of pieces of wood in a cord can vary depending on the type of wood and how it is split. A full cord of wood typically contains 600-800 pieces of split firewood, while a face cord (or rick) contains 200-275 pieces. It’s important to note that a cord is measured by the total volume of wood, so the number of pieces will change depending on the size of the logs and how they are stacked.
If you’re a homeowner with a fireplace or wood stove, you’ve probably heard the term “cord of wood” before. But what exactly is a cord of wood, and how much firewood does it actually contain? In this section, we’ll break down the basics of a cord of wood, including how it’s measured and what you can expect in terms of quantity.
A cord of wood is a unit of measurement used to describe a quantity of firewood. Specifically, it refers to a stack of wood that measures 4 feet high, 4 feet wide, and 8 feet long. This stack contains a total of 128 cubic feet of wood, which is equivalent to approximately 3.62 cubic meters.
The number of pieces of wood in a cord can vary depending on a few factors, including the size and shape of the wood, as well as how it’s split. As a general rule of thumb, a cord of wood typically contains between 400 and 700 pieces of firewood. However, this number can fluctuate based on the type of wood being used, as well as how it’s stacked and stored.
While a cord of wood is the most common unit of measurement for firewood, there are a few other terms you might hear when buying or selling firewood. These include:
Overall, understanding the basics of a cord of wood can help you make informed decisions when buying firewood for your home. Whether you’re looking for a full cord, a face cord, or a bundle of firewood, knowing how much wood you’re getting and how it’s measured can help ensure that you get the best value for your money.
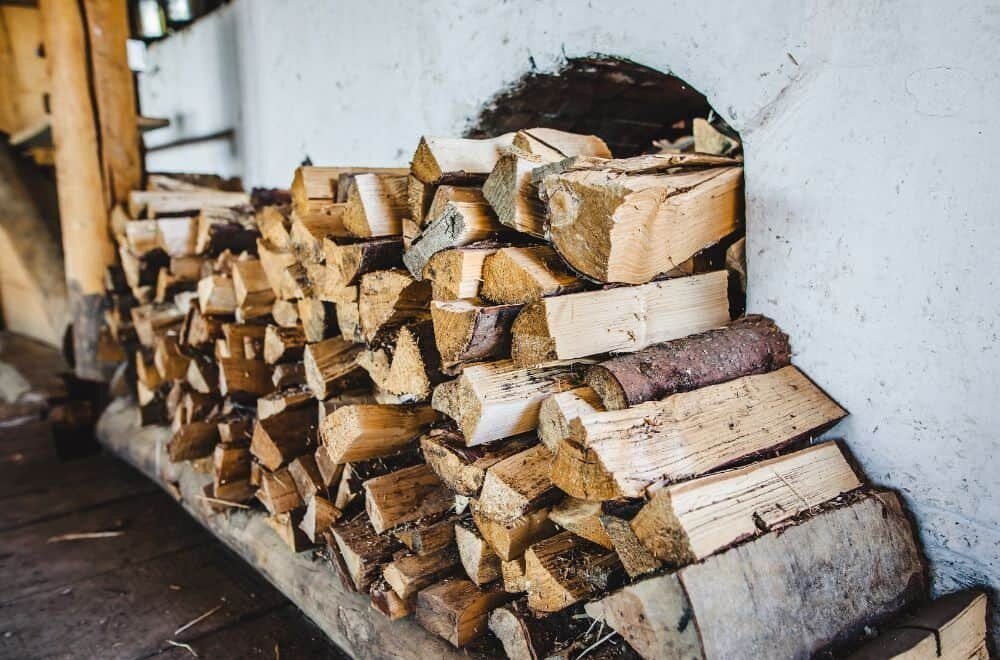
When it comes to firewood, a cord is the standard unit of measurement. A cord is defined as a stack of wood that measures 4 feet wide, 4 feet tall, and 8 feet long. This means that a cord of wood has a total volume of 128 cubic feet.
It’s important to note that there are different types of cords, such as full cords and face cords. While they have the same height and length measurements as a standard cord, they differ in depth. A face cord, for example, is only 16 inches deep, while a full cord is 4 feet deep.
To help you visualize the dimensions of a cord, here’s a breakdown:
| Dimension | Measurement |
|---|---|
| Width | 4 feet |
| Height | 4 feet |
| Depth | 8 feet (for a full cord) or 16 inches (for a face cord) |
It’s also worth noting that while a cord is the standard unit of measurement for firewood, there are other measurements that are sometimes used, such as a rick or a truckload. However, these measurements are not standardized and can vary depending on the supplier.
In summary, a cord of wood is a stack of wood that measures 4 feet wide, 4 feet tall, and 8 feet long, with a total volume of 128 cubic feet. Different types of cords, such as face cords and full cords, differ in depth.

When purchasing firewood, it’s important to know what type of wood you are getting. Different types of wood have different burning characteristics, such as heat output and burn time. Here are the two main types of wood you’ll find in a cord:
Hardwood is denser and heavier than softwood and tends to burn longer and hotter. It’s a good choice for heating your home because it produces a lot of heat and burns slowly. Hardwood also produces less smoke and creosote than softwood, which is better for your chimney and the environment. Some common types of hardwood you might find in a cord include oak, maple, hickory, and birch.
Softwood is lighter and less dense than hardwood and tends to burn faster and cooler. It’s a good choice for starting fires because it ignites easily and produces a lot of flames. Softwood also tends to be less expensive than hardwood. However, it produces more smoke and creosote than hardwood, which can be a problem for your chimney and the environment. Some common types of softwood you might find in a cord include pine, spruce, and fir.
When choosing between hardwood and softwood, it’s important to consider your specific needs and preferences. If you’re looking for a long-lasting fire with high heat output, hardwood is the way to go. If you’re looking for a quick and easy fire to start, softwood might be the better choice.
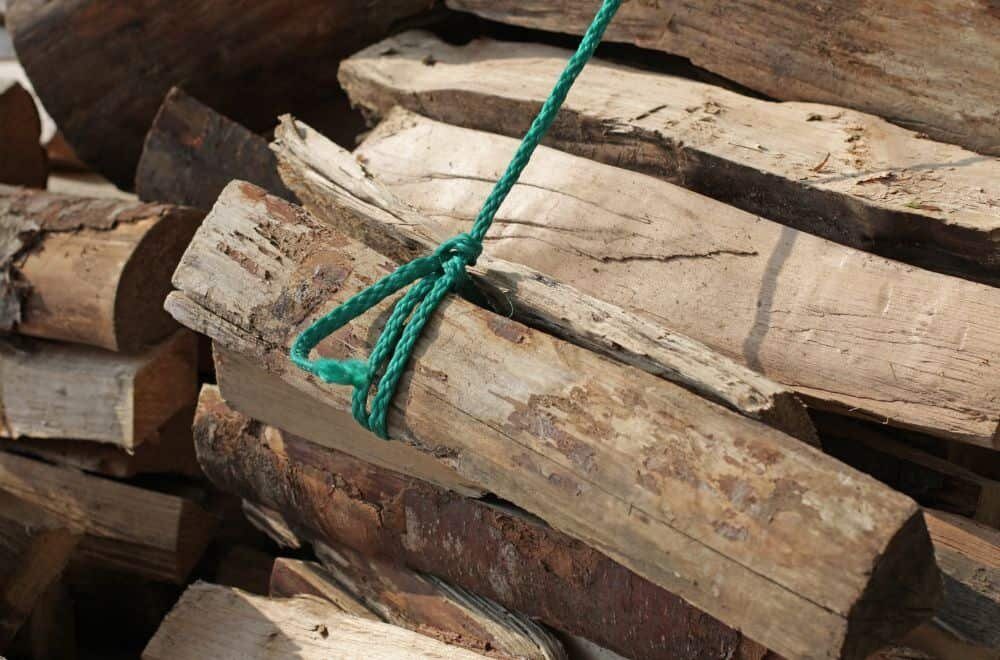
When it comes to buying firewood, it’s important to know how much you’re getting for your money. One common way to measure firewood is by the cord, but how many pieces of wood are actually in a cord?
The exact number of pieces in a cord can vary depending on the size and shape of the wood, but there are some general estimates that can be helpful. According to our search results, a full cord of wood typically contains 600-800 pieces of split firewood, while a face cord (or rick) contains 200-275 pieces.
It’s important to note that these estimates are based on split wood, which is easier to dry and burn. If the wood is not split, the number of pieces in a cord will be significantly less.
If you’re buying firewood, you can ask the seller how many pieces are in a cord to get a better idea of what you’re getting. However, keep in mind that the number of pieces can vary depending on the type of wood and how it’s split.
Here are some other factors that can affect the number of pieces in a cord:
In conclusion, while there is no exact answer to how many pieces of wood are in a cord, there are some general estimates that can be helpful. By understanding the factors that can affect the number of pieces, you can make a more informed decision when buying firewood.

The number of pieces of wood in a cord can vary depending on several factors. Here are some of the main factors that can affect the total number of pieces in a cord:
The size and shape of the logs used to make up a cord of wood can have a significant impact on the total number of pieces. If the logs are cut into smaller pieces, there will be more pieces in the cord. Conversely, if the logs are cut into larger pieces, there will be fewer pieces in the cord.
The moisture content of the wood can also affect the total number of pieces in a cord. As wood dries, it typically shrinks in volume. This means that a cord of dried wood can contain more pieces than a cord of green wood, as the dried pieces take up less space.
The method used to cut the wood can also affect the total number of pieces in a cord. For example, if the wood is split by hand, there may be more irregularly shaped pieces, which can result in a higher total number of pieces. On the other hand, if the wood is cut using a machine, the pieces may be more uniform in size and shape, resulting in a lower total number of pieces.
Different wood species can also have different densities, which can affect the total number of pieces in a cord. For example, a cord of oak, which is a dense hardwood, may contain fewer pieces than a cord of pine, which is a less dense softwood.
Overall, the total number of pieces in a cord of wood can vary depending on a range of factors. It’s important to keep these factors in mind when purchasing firewood to ensure that you’re getting the right amount for your needs.
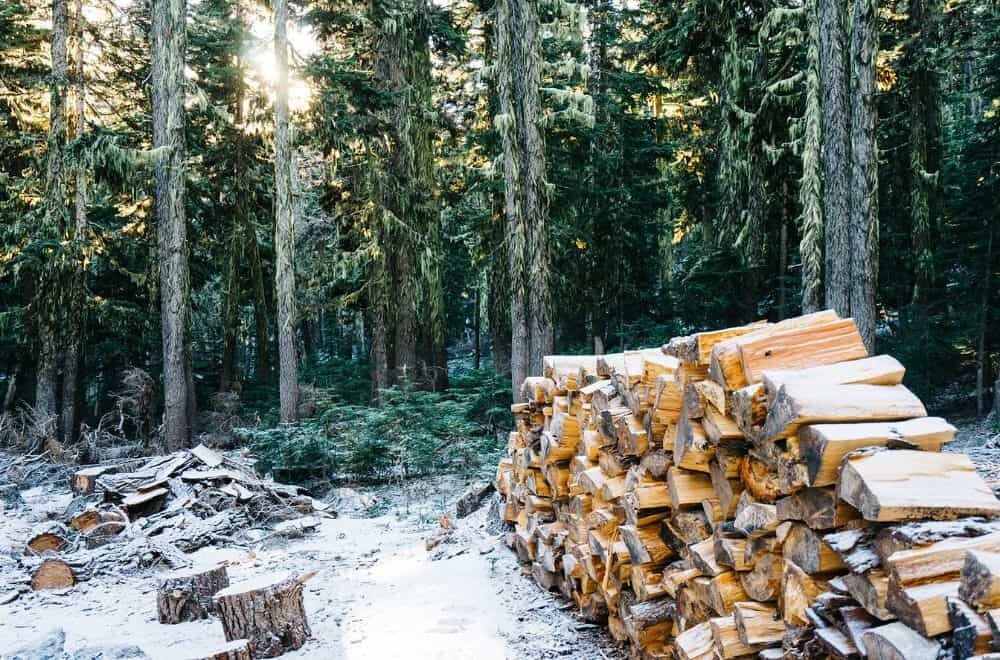
A cord of wood is a significant amount of firewood that can serve a variety of practical purposes. Here are some common applications of a cord of wood:
One of the primary uses of a cord of wood is for heating your home. Depending on the size and insulation of your home, a cord of wood can last anywhere from a few weeks to a few months. It’s important to note that the number of pieces of wood in a cord can vary depending on the size and shape of the wood, but a full cord typically contains 600-800 pieces of split firewood.
If you enjoy cooking with wood, a cord of wood can provide you with plenty of fuel for your outdoor grill or indoor wood-fired oven. Different types of wood can impart different flavors to your food, so it’s worth experimenting with different types of wood to find what tastes best to you.
A cord of wood can also be used for recreational purposes, such as building campfires or bonfires. This is a great way to spend time with friends and family while enjoying the warmth and ambiance of a crackling fire.
If you’re a woodworker or crafter, a cord of wood can provide you with a ready supply of raw materials. You can use the wood to make furniture, carvings, toys, and other items.
Finally, if you have access to a large supply of firewood, you may be able to sell it for a profit. It’s important to check local regulations and obtain any necessary permits before selling firewood.
Overall, a cord of wood can be a versatile and valuable resource for a variety of practical applications.
A cord of wood is a stack of wood that measures 4 feet wide, 4 feet tall, and 8 feet long. The volume of a cord is 128 cubic feet.
A full cord of wood typically contains 600-800 pieces of split firewood. However, the number of pieces will change depending on the type of wood and how it is split.
A face cord, also known as a rick, is one-third of a full cord of wood. It is a stack of wood that measures 4 feet high, 8 feet long, and the depth of the firewood pieces. The number of pieces within a cord can vary depending on the size and shape of the wood, ranging from around 200 to over 400 pieces.
To measure a cord of wood, stack the firewood in a line or row, making sure the pieces are tightly packed together. Then, measure the length, width, and height of the stack in feet and multiply the three numbers together to get the volume in cubic feet. If the stack measures 4 feet by 4 feet by 8 feet, it is a full cord of wood.
The length of time a cord of wood will last depends on many factors, including the type of wood, the efficiency of your stove or fireplace, and how often you use it. On average, one cord of wood can last anywhere from a few weeks to a few months.
You can find cord of firewood for sale at local nurseries, home improvement stores, and online retailers. Be sure to check the regulations on the sale of firewood in your state or country to ensure you are getting a fair deal.

Are you wondering what the difference is between a wood drill bit and a metal drill bit? While both types of drill bits might look similar, there are significant differences that make them suitable for different materials. Understanding these differences can help you choose the right drill bit for your project and achieve the best results.
One of the most significant differences between wood and metal drill bits is the shape of their tips. Wood drill bits have a small spur or point in the center that helps keep the bit stable and centered while drilling. On the other hand, metal drill bits have a chisel-like tip that is designed to cut through tough metal surfaces without breaking or dulling. Additionally, metal drill bits are often coated with a stronger metal such as titanium or black oxide to increase their strength and heat resistance.
Another key difference between wood and metal drill bits is their finish. Metal drill bits often have a black or gold finish, while wood drill bits have a shiny silver finish. This is because metal drill bits need extra strength and heat resistance to prevent damage during use, while wood drill bits do not require the same level of protection. Understanding these differences can help you choose the right drill bit for your project and ensure that you achieve the best results.

When it comes to drilling, one of the most important tools you will need is a drill bit. Drill bits come in different shapes and sizes, and are made from different materials. Two of the most common types of drill bits are wood and metal drill bits. In this section, we will discuss the differences between the two.
Wood drill bits are designed specifically for drilling into wood. They have a spur in the center that helps to keep the bit stable during drilling. This spur also helps to guide the bit through the wood, preventing it from wandering off course. Wood drill bits are typically made from high-speed steel (HSS) or carbon steel, and are available in different sizes and shapes.
Metal drill bits, on the other hand, are designed for drilling into metal. They have a twist bit with conical cutting tips followed by spiral flutes, which helps to remove the metal shavings as you drill. Metal drill bits are typically made from HSS, cobalt steel, or titanium, and are available in different sizes and shapes.
One of the main differences between wood and metal drill bits is their geometry. Wood drill bits have a spur in the center, while metal drill bits have a twist bit with conical cutting tips followed by spiral flutes. Another difference is their color. Wood drill bits are typically silver in color, while metal drill bits are often black, golden, or coppery in color.
It is important to use the right type of drill bit for the material you are drilling into. Using the wrong type of drill bit can result in damage to the bit or the material, or can cause the bit to break. Make sure to choose the right drill bit for the job, and always follow the manufacturer’s instructions for use.

Wood drill bits are designed to drill holes in wood. They are different from metal drill bits in terms of their geometry, material, and purpose. In this section, we will discuss the characteristics and usage of wood drill bits.
Wood drill bits have the following characteristics:
Wood drill bits come in different sizes and shapes. The most common types of wood drill bits are twist bits, spade bits, and auger bits. Twist bits are the most versatile and can be used for drilling different types of wood. Spade bits are used for drilling larger holes, while auger bits are used for drilling deep holes.
Wood drill bits are used for different purposes, such as:
When using wood drill bits, it is important to choose the right size and type of bit for the job. You should also use the right speed and pressure when drilling to avoid damaging the bit or the wood.
In summary, wood drill bits are designed to drill holes in wood and have a pointed tip, center spur, two cutting edges, and a shank. They come in different sizes and shapes and are used for different purposes such as making holes for screws or nails, creating dowel holes, and making decorative holes.
Metal drill bits are designed to drill into metal materials. They are made of harder and denser materials than wood drill bits. Here are some characteristics and usage of metal drill bits.
Metal drill bits have the following characteristics:
When drilling into metal materials, it is important to use the correct type of drill bit. Here are some tips for using metal drill bits:
In summary, metal drill bits are designed to drill into metal materials and have different characteristics and usage than wood drill bits. Make sure to use the correct size, lubricant, and speed when using metal drill bits to prevent damage and ensure a successful drilling experience.
When it comes to drilling, it’s important to choose the right drill bit for the job. Wood and metal drill bits are two of the most commonly used types, but there are some key differences between them. In this section, we’ll take a closer look at the material composition, design and structure, and performance and functionality of wood and metal drill bits.
The first major difference between wood and metal drill bits is their material composition. As the names suggest, wood drill bits are designed for use with wood, while metal drill bits are designed for use with metal. Wood drill bits are typically made from high-speed steel (HSS) or carbon steel, while metal drill bits are made from HSS, cobalt, or titanium.
One way to tell the difference between a wood drill bit and a metal drill bit is by their color. Wood drill bits are usually silver in color, while metal drill bits are often black or gold. This is because metal drill bits are coated with a stronger metal, like titanium or black oxide, to give them extra strength and heat resistance.
Another key difference between wood and metal drill bits is their design and structure. Wood drill bits have a spur in the center that helps to penetrate the wood and keep the bit stable during drilling. Metal drill bits, on the other hand, are twist bits with conical cutting tips followed by spiral flutes.
Wood drill bits also tend to have a wider angle on the point of the bit, which helps to prevent the bit from getting stuck in the wood. Metal drill bits, on the other hand, have a sharper angle on the point of the bit, which allows them to penetrate metal more easily.
The final difference between wood and metal drill bits is their performance and functionality. Wood drill bits are designed to drill through wood quickly and cleanly, while metal drill bits are designed to drill through metal without getting damaged.
Wood drill bits are generally not suitable for drilling through metal, as they can become dull or damaged quickly. Metal drill bits, on the other hand, can be used to drill through wood, but they may not be as effective as wood drill bits.
In summary, wood and metal drill bits have some key differences in their material composition, design and structure, and performance and functionality. It’s important to choose the right drill bit for the job to ensure that you get the best results.
No, wood drill bits should not be used on metal. Using a wood drill bit on metal can damage the bit and may not be effective in drilling through the metal.
The best metal drill bit sets are those made of high-speed steel or cobalt. These materials are strong and durable, making them ideal for drilling through metal.
Yes, metal drill bits are generally stronger than wood drill bits. This is because they are made of stronger materials, such as high-speed steel or cobalt, which can withstand the high temperatures and pressure that come with drilling through metal.
Yes, you can use a metal drill bit on wood. However, it may cause splintering or tear-out, especially if the wood is thin or soft. For best results, it is recommended to use a wood drill bit when drilling through wood.
When choosing a drill bit for metal, consider the type of metal you are drilling through and the size of the hole you need. It is also important to choose a drill bit made of a strong material, such as high-speed steel or cobalt.
The best type of drill bit for wood is a brad point bit. This type of bit has a small spur on the tip that helps to guide the bit through the wood, resulting in clean and precise holes. For drilling larger holes in wood, a spade bit or hole saw may also be used.


