fine grit sandpaper

Blog

How to Repaint a Wooden Porch: A Friendly Guide

Repainting your wooden porch is a great way to give it a fresh new look and protect it from the elements. Whether you’re looking to update your porch’s style or simply maintain its structural integrity, repainting is an easy and affordable solution. In this article, we’ll take you through the step-by-step process of repainting a wooden porch, from preparing the surface to choosing the right paint and tools.

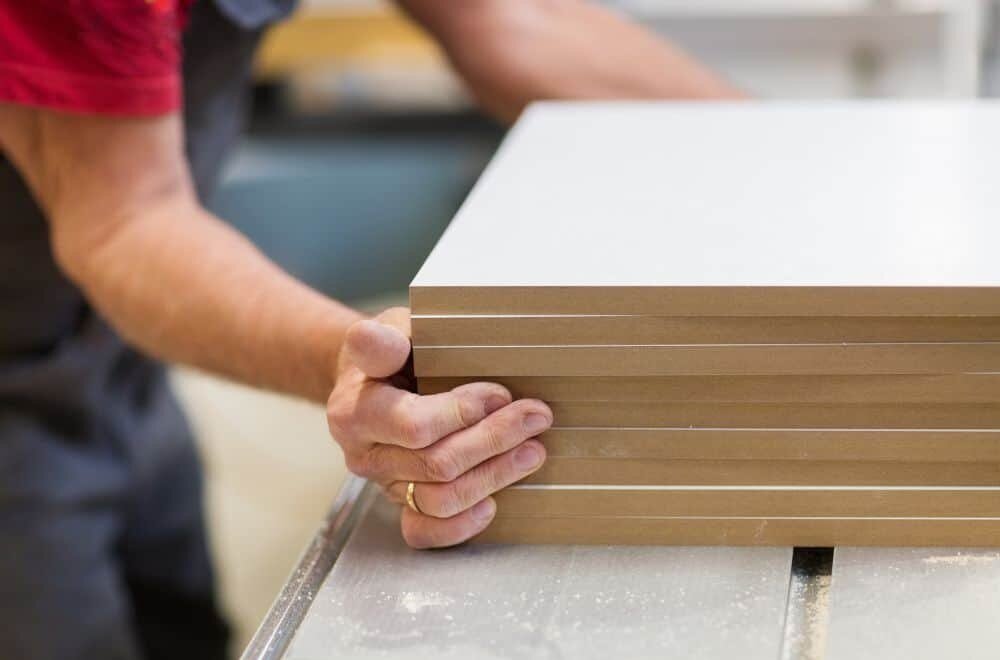
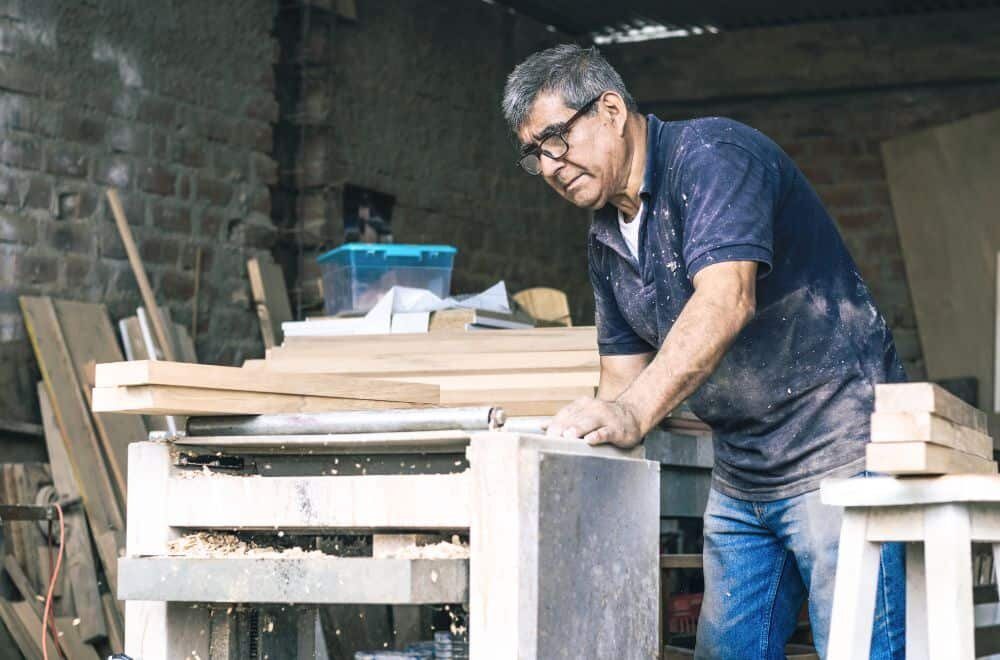
The first step in repainting your wooden porch is to prepare the surface. This involves cleaning the porch thoroughly, removing any old paint or stain, sanding down rough spots, and filling in any cracks or holes. Once the surface is clean and smooth, you’ll need to choose the right paint or stain for your porch. Consider factors like the climate in your area, the amount of foot traffic your porch gets, and the overall style of your home when selecting a paint or stain color.

Once you have your supplies and have prepared the surface, it’s time to get started. Repainting a wooden porch can be a time-consuming process, but the end result is well worth it. With the right tools and techniques, you can transform your porch into a beautiful and functional space that you’ll enjoy for years to come. So grab your paintbrush and let’s get started!

Understanding the Basics of Repainting

When it comes to repainting a wooden porch, there are a few basics you should understand before getting started. In this section, we’ll cover why repainting your porch is important and how to choose the right paint.

Why Repaint a Wooden Porch?

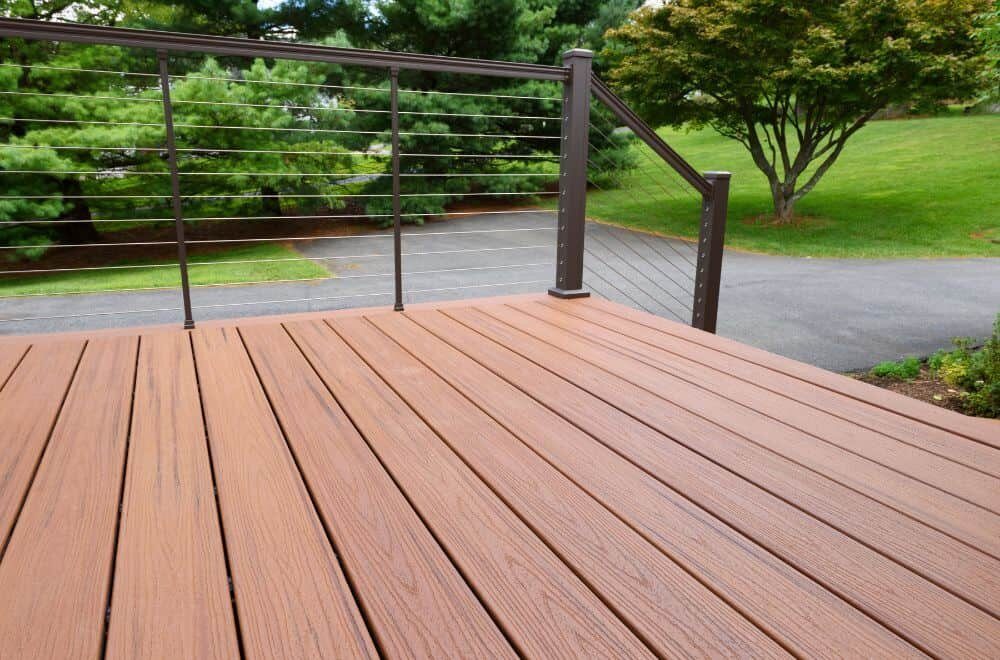
Over time, wooden porches can become weathered and worn, which can lead to damage and deterioration. Repainting your porch can help protect it from the elements and extend its lifespan. Additionally, a fresh coat of paint can give your porch a new look and improve its curb appeal.

Choosing the Right Paint

Choosing the right paint is an important step in repainting your porch. You’ll want to select a paint that is specifically designed for exterior use and can withstand the elements. Look for a paint that is water-resistant and has UV protection to prevent fading.

When it comes to color, consider the style of your home and the surrounding landscape. A neutral color can complement a variety of styles, while a bold color can make a statement. Keep in mind that darker colors may absorb more heat and can be more prone to fading.

In addition to selecting the right paint, you’ll also need to choose the right tools. A high-quality brush and roller can help ensure a smooth, even application. You may also want to consider using a primer to help the paint adhere to the surface and improve its durability.

Overall, repainting your wooden porch is a simple and effective way to protect and enhance your home’s exterior. With the right paint and tools, you can achieve a beautiful and long-lasting finish.

Preparation for Repainting

Before repainting your wooden porch, it is important to properly prepare the surface to ensure a smooth and long-lasting finish. This section will cover the two main steps of porch preparation: inspecting the porch and cleaning and sanding the surface.

Inspecting the Porch

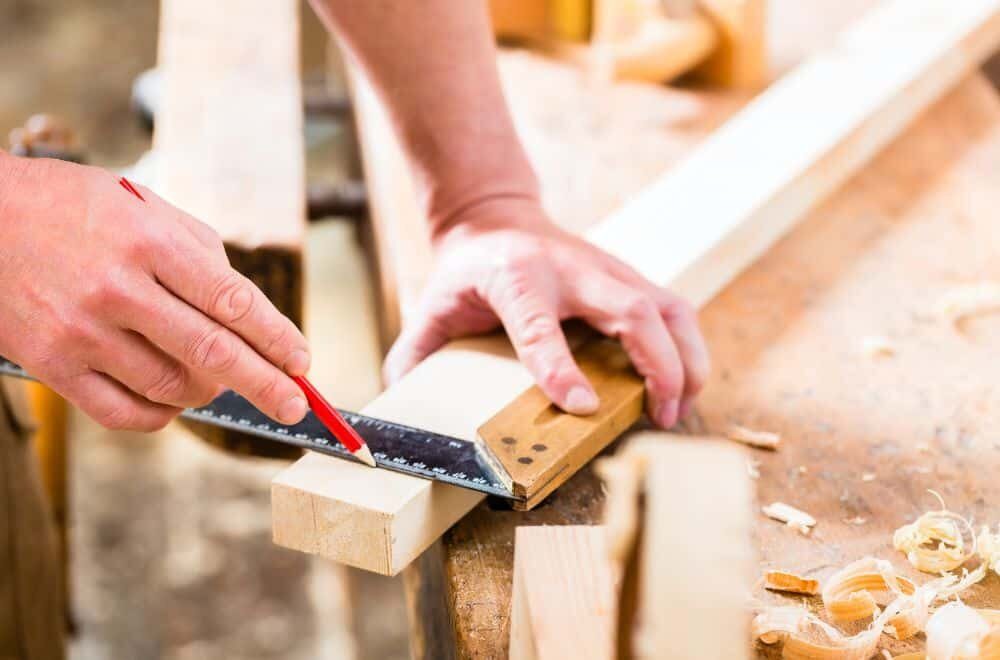
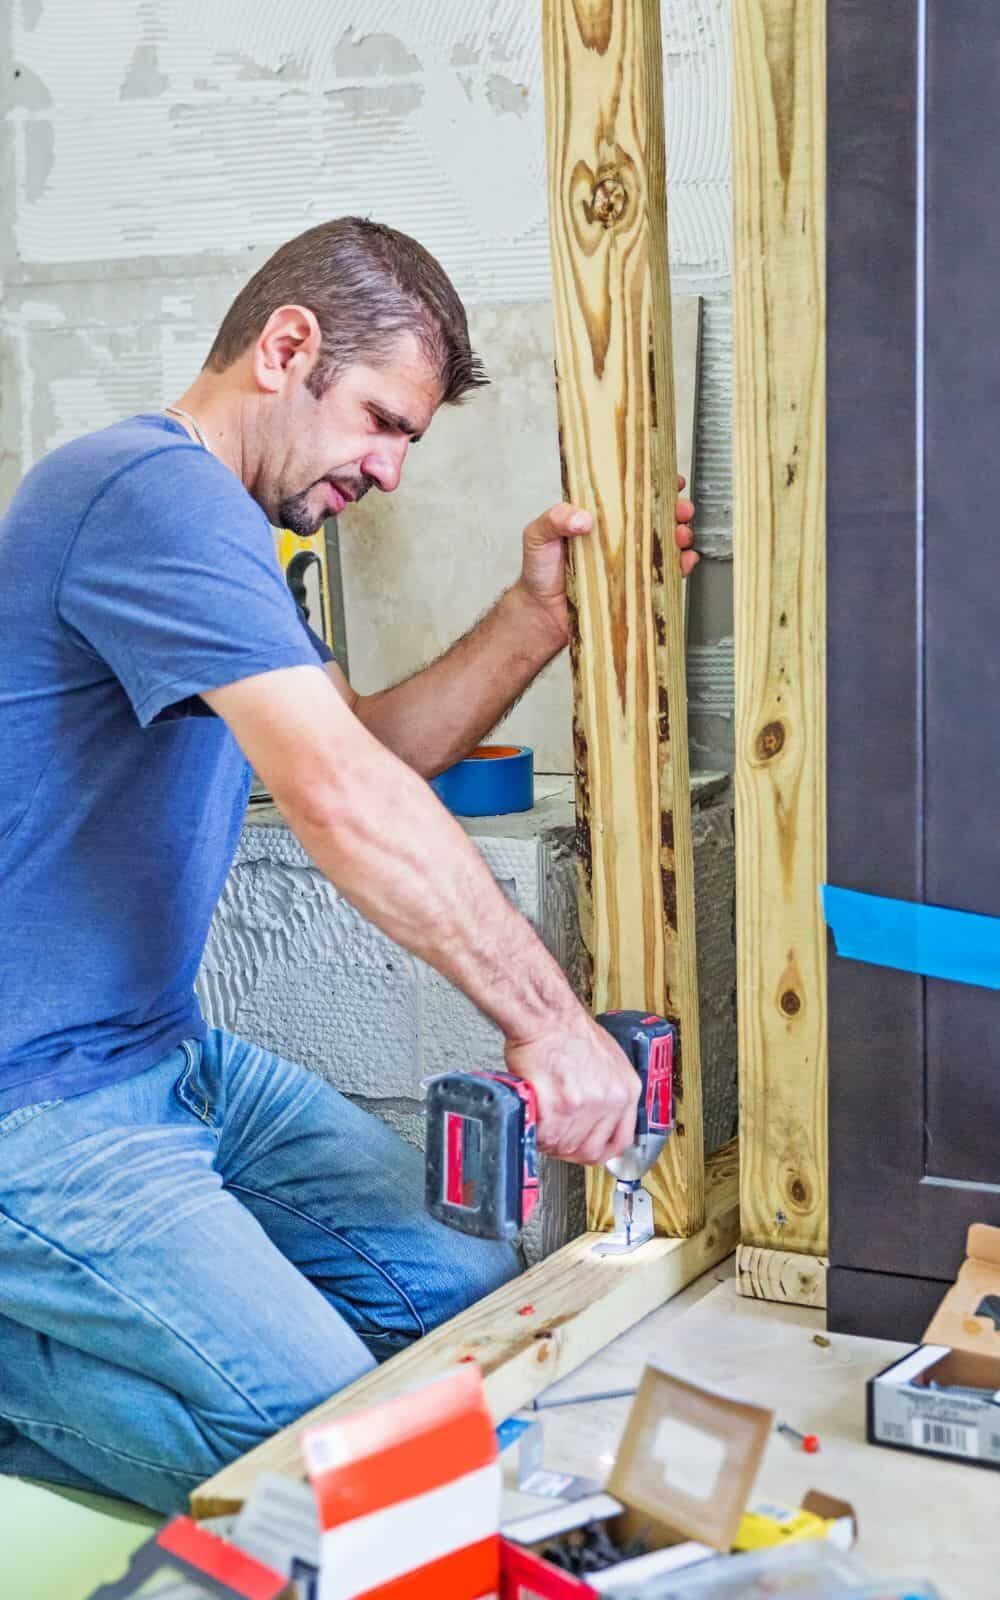
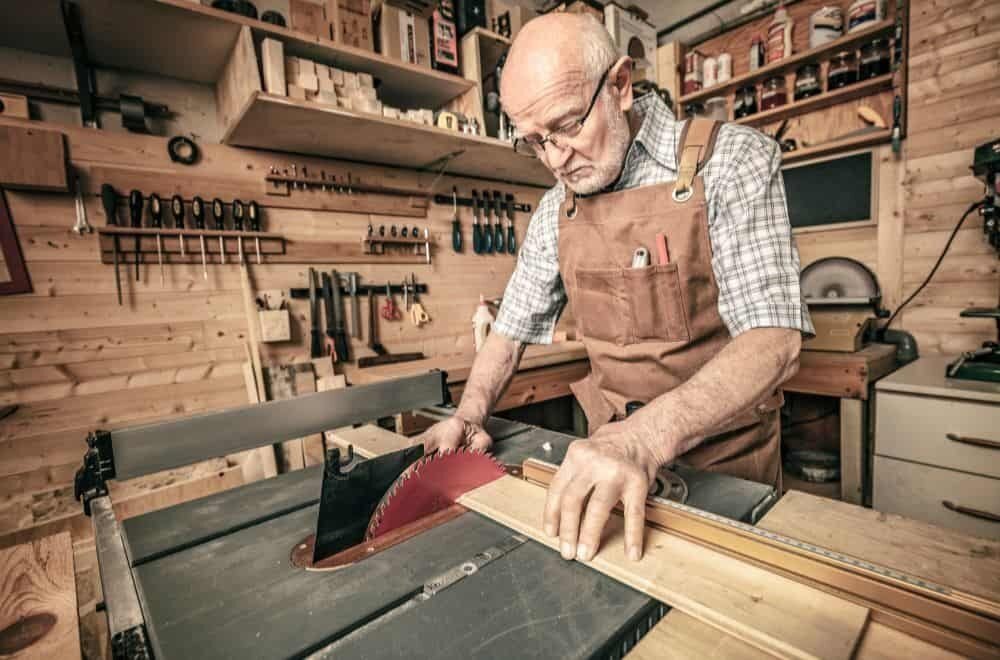
The first step in preparing your porch for repainting is to inspect it thoroughly. Look for any signs of damage, such as cracks, rot, or loose boards. If you find any of these issues, they will need to be repaired before you can begin painting.

Inspect the porch for any nails or screws that are sticking up or are loose. These can be dangerous and should be hammered back in or replaced. Check the porch for any signs of mold or mildew. If you find any, use a mold and mildew cleaner to remove it before painting.

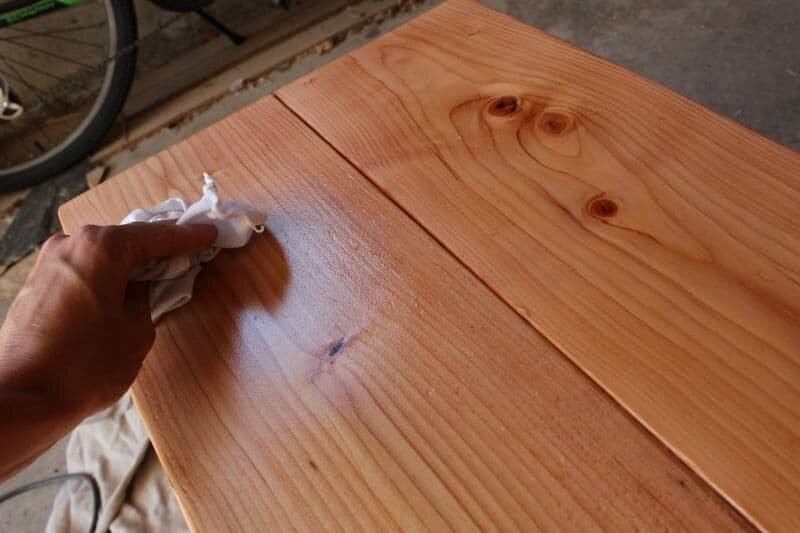
Cleaning and Sanding the Surface

Once you have inspected the porch and made any necessary repairs, it is time to clean and sand the surface. This step is crucial to ensure that the paint adheres properly and lasts a long time.

Start by sweeping the porch to remove any loose debris. Then, use a power washer or a hose with a high-pressure nozzle to thoroughly clean the surface. Allow the porch to dry completely before moving on to the next step.

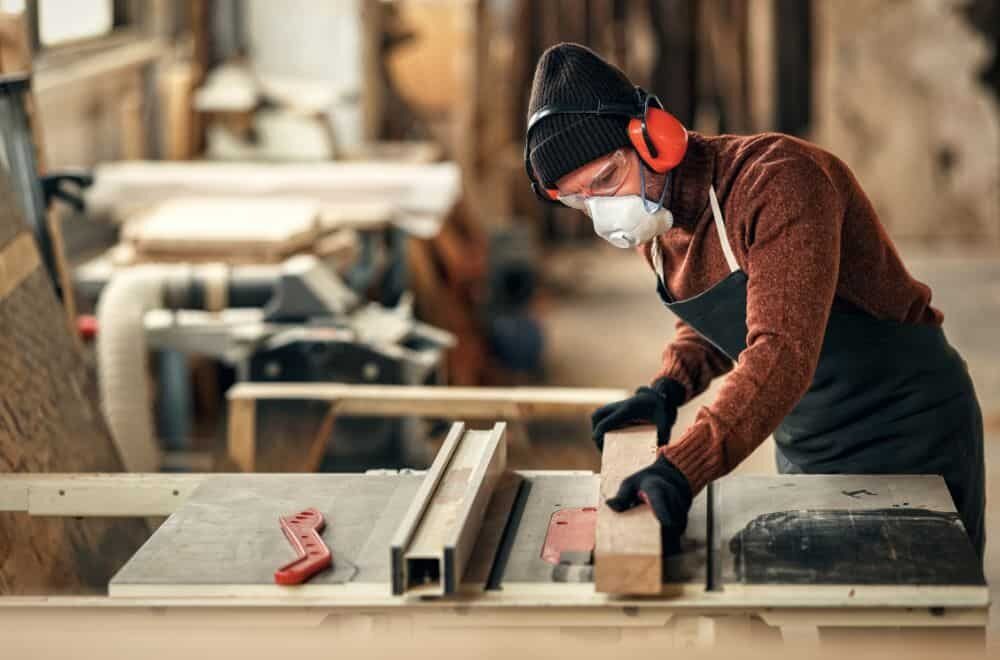
Next, use a paint scraper to remove any loose or peeling paint. Sand the surface using a fine-grit sandpaper to smooth out any rough spots or imperfections. Be sure to wear a mask and safety goggles while sanding to protect yourself from dust and debris.

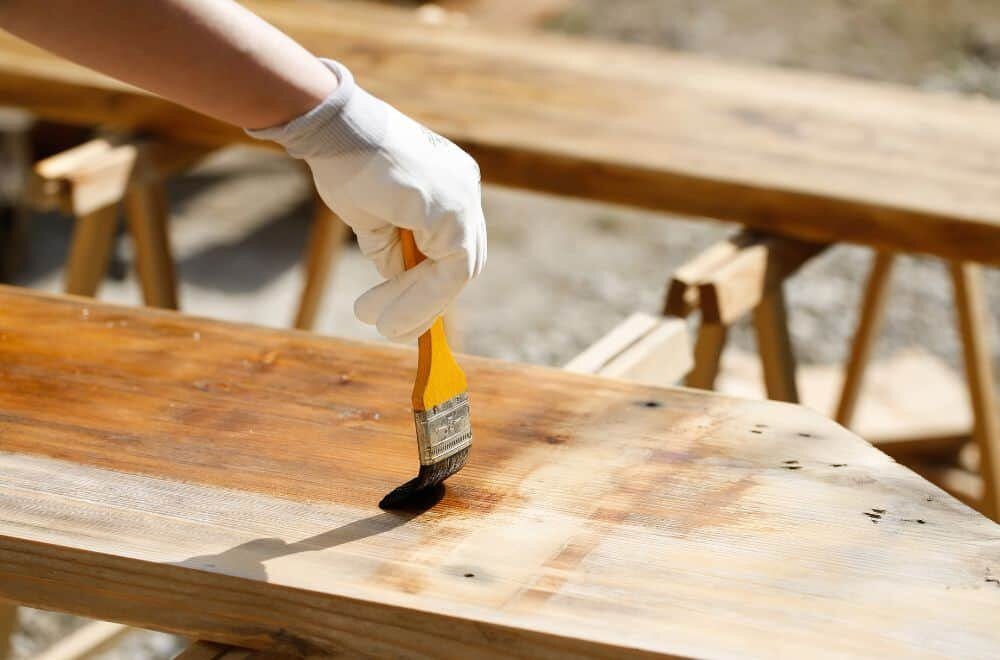
After sanding, wipe the porch down with a damp cloth to remove any dust or debris. Then, apply a wood primer to the surface. This will help the paint adhere better and last longer.

By properly inspecting, cleaning, and sanding your porch, you will ensure a smooth and long-lasting finish when repainting.
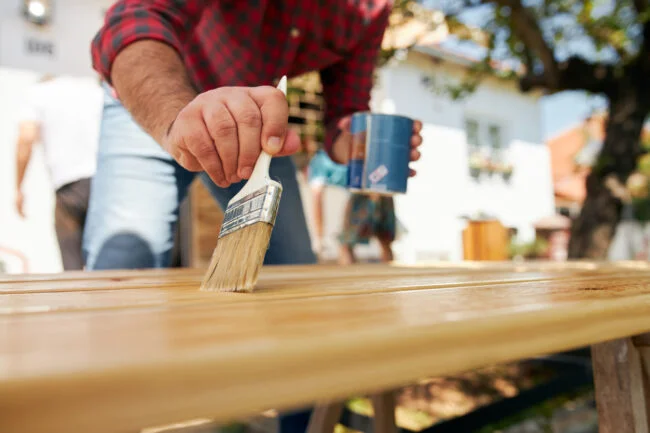
Painting Process

Once you have prepped your wooden porch, it’s time to start painting. Follow these steps to ensure a smooth and long-lasting finish.
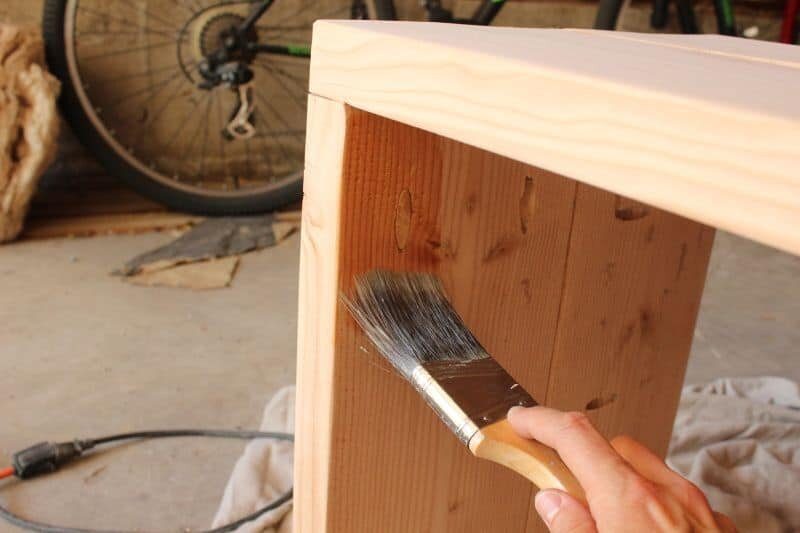
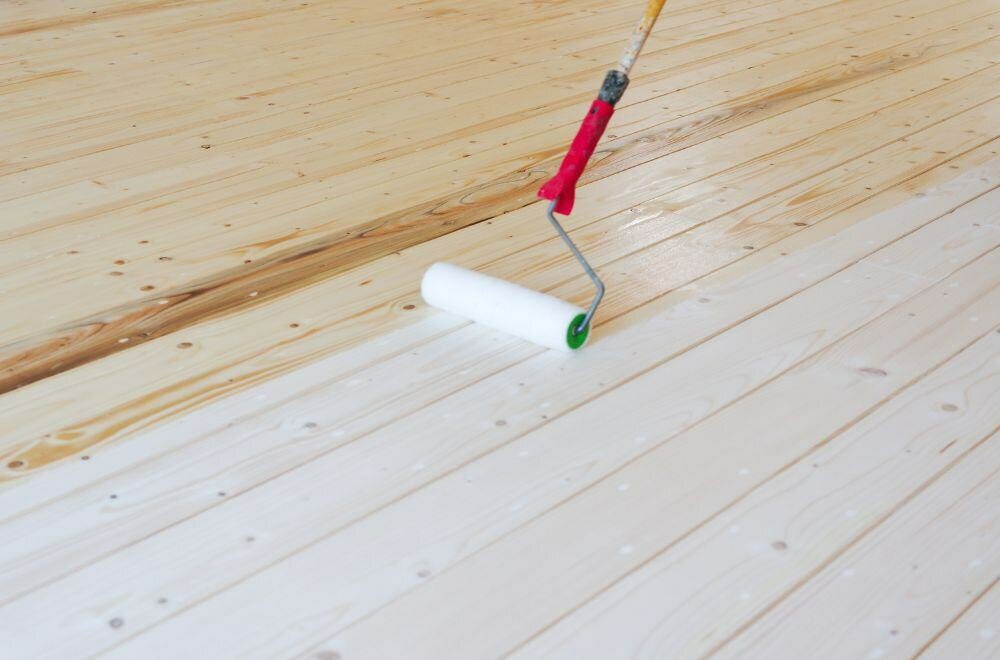
Priming the Surface

Before painting, it’s important to prime the surface. This will help the paint adhere better and last longer. Choose a primer that is suitable for outdoor use and matches the type of paint you will be using.

To prime the surface, follow these steps:

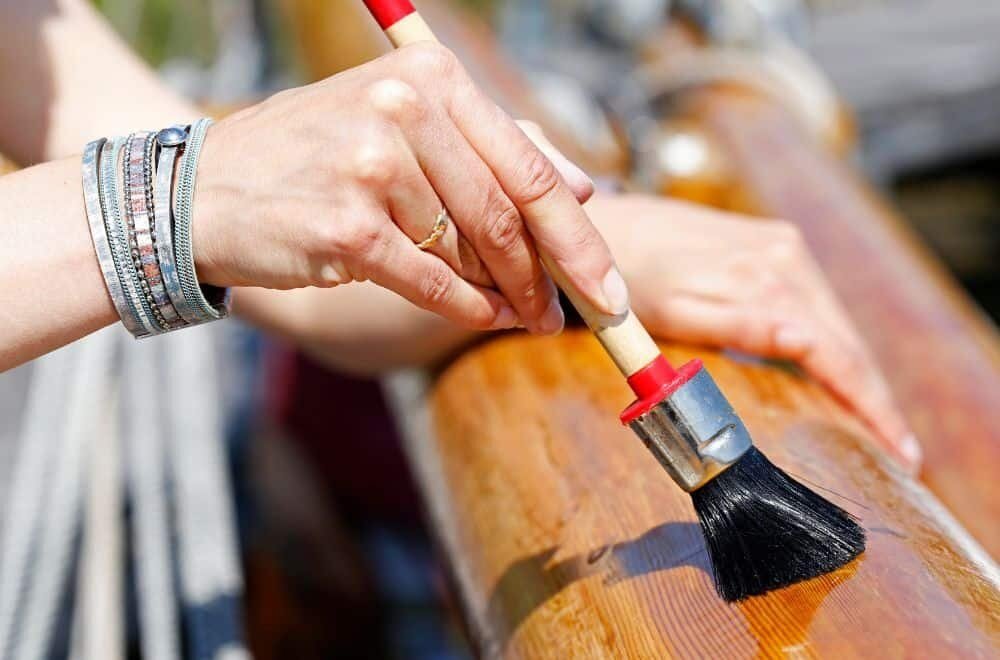
  1. Apply the primer evenly using a brush or roller. Make sure to cover the entire surface.
  2. Let the primer dry completely according to the manufacturer’s instructions.
  3. Inspect the surface for any areas that may need additional priming and apply as necessary.

Applying the First Coat

Once the primer has dried, it’s time to apply the first coat of paint. Use a high-quality paint that is suitable for outdoor use and matches the color you desire.

To apply the first coat, follow these steps:

  1. Apply the paint evenly using a brush or roller. Make sure to cover the entire surface.
  2. Let the first coat dry completely according to the manufacturer’s instructions.
  3. Inspect the surface for any areas that may need additional painting and apply as necessary.

Adding Additional Coats

Depending on the type of paint you are using and the desired finish, you may need to apply additional coats. Follow the manufacturer’s instructions for the recommended number of coats.

To add additional coats, follow these steps:

  1. Apply the paint evenly using a brush or roller. Make sure to cover the entire surface.
  2. Let each coat dry completely according to the manufacturer’s instructions.
  3. Inspect the surface for any areas that may need additional painting and apply as necessary.

Remember to use caution when walking on a freshly painted surface and to allow ample time for drying between coats. With proper preparation and painting techniques, your wooden porch will look great for years to come.

Maintenance Tips

Keeping your wooden porch looking great requires some regular maintenance. Here are some tips to help you keep your porch in top condition.

Regular Cleaning

Cleaning your porch regularly is essential to keep it looking good and prevent damage. Dirt, dust, and debris can build up on your porch and cause it to look dull and dirty. To clean your porch, sweep away any loose debris with a broom or brush. Then, use a pressure washer or hose to wash away any remaining dirt and grime. You can also use a mild detergent to help remove stubborn stains.

Touch-up Painting

Over time, the paint on your porch may start to chip or fade. To keep your porch looking great, it’s important to touch up any areas that need it. Before you begin, make sure the surface is clean and dry. Then, lightly sand the area to remove any loose paint. Apply a coat of primer if necessary, and then paint over the area with a matching color. Be sure to use a high-quality paint that is designed for outdoor use.

Sealing for Protection

Sealing your porch can help protect it from the elements and prevent damage. A good sealant will help prevent water from penetrating the wood, which can cause rot and other damage. Before you seal your porch, make sure it is clean and dry. Apply the sealant with a brush or roller, making sure to cover all surfaces evenly. Be sure to follow the manufacturer’s instructions for best results.

By following these maintenance tips, you can keep your wooden porch looking great for years to come.

Blog

How to Make a Wooden Shield and Sword: A Beginner's Guide

If you’re looking for a fun and easy DIY project to do with your kids, making wooden swords and shields is a great option. Not only will it provide hours of entertainment for your little ones, but it’s also a great way to teach them basic woodworking skills. In this article, we’ll show you how to make a wooden shield and sword, step-by-step.

To make a wooden shield, you’ll need some basic supplies like wood, a saw, sandpaper, and paint. You can choose to make your shield any size or shape you want, but a rectangular shape is a good option for beginners. Once you have your supplies, you’ll need to sketch out a design for your shield and cut it out using a saw. After sanding the edges and painting your shield, it will be ready for battle!

Making a wooden sword is a bit more complicated than making a shield, but it’s still a fun and rewarding project. You’ll need to choose the right type of wood, sketch out a design, and use a saw to cut out the shape of the sword. After sanding and painting your sword, it will be ready to take on any imaginary foe. With these simple steps, you’ll be able to create a set of wooden swords and shields that your kids will love.

Understanding Wood Types

Choosing the Right Wood

Choosing the right wood for your shield and sword is crucial. You want a wood that is strong, durable, and easy to work with. Some of the best types of wood for making shields and swords include:

  • Pine: Pine is a softwood that is easy to work with and has a light color. It is a good choice for beginners.

  • Oak: Oak is a hardwood that is strong and durable. It has a beautiful grain pattern and is a popular choice for shields and swords.

  • Maple: Maple is a hardwood that is strong and durable. It has a fine grain pattern and is a good choice for swords.

  • Ash: Ash is a hardwood that is strong and flexible. It has a beautiful grain pattern and is a good choice for shields.

Properties of Different Woods

Each type of wood has its own unique properties that make it suitable for different purposes. Here are some of the properties of different woods that you should consider when choosing the right wood for your shield and sword:

  • Hardness: The hardness of the wood will determine how well it can withstand impact.

  • Density: The density of the wood will determine how heavy the shield or sword will be.

  • Grain pattern: The grain pattern of the wood will determine how it looks and how it can be carved.

  • Flexibility: The flexibility of the wood will determine how well it can withstand bending and twisting.

  • Availability: The availability of the wood will determine how easy it is to find and how much it will cost.

When choosing the right wood for your shield and sword, consider all of these factors to ensure that you choose a wood that is strong, durable, and easy to work with.

Designing Your Shield and Sword

When it comes to making your wooden shield and sword, the first step is to design them. This is an important step, as it will determine the overall look and feel of your finished products. Here are a few things to keep in mind as you sketch out your design.

Sketching the Design

Before you start cutting any wood, it’s a good idea to sketch out your design on paper. This will give you a chance to play around with different shapes, sizes, and styles until you find something you like. Don’t worry if you’re not an artist – a simple sketch will do. Just make sure to include all the elements you want in your shield and sword, such as the shape, color, and any decorative details.

Size and Proportions

When designing your shield and sword, it’s important to consider their size and proportions. Your shield should be large enough to provide adequate protection, but not so large that it’s cumbersome to carry. A good rule of thumb is to make your shield about the same size as your torso.

As for your sword, it should be proportional to your body size. A sword that’s too long or too short will be difficult to wield effectively. A good length for a wooden sword is around 3 feet.

Overall, the key to designing your shield and sword is to keep it simple. Don’t try to do too much with your design, as this can lead to a cluttered and unappealing finished product. Stick to a few basic elements, such as a simple shape and a few decorative details, and you’ll end up with a shield and sword that look great and are easy to use.

Creating a Wooden Shield

If you’re looking to make a wooden shield, you’re in the right place. With a few tools and some patience, you can create a shield that is both functional and visually appealing. Here are the steps to creating your own wooden shield.

Cutting the Shield Shape

The first step is to cut the shield shape from a piece of wood. You can use a jigsaw or a bandsaw to cut out your shield shape. If you don’t have access to these tools, you can also use a handsaw or a circular saw. Be sure to wear protective gear like gloves and goggles when cutting the wood.

When choosing the size and shape of your shield, consider the purpose of the shield. If you’re making a shield for a child, you may want to make it smaller and lighter. If you’re making a shield for cosplay or LARPing, you may want to make it larger and more detailed.

Sanding and Smoothing

Once you have cut out your shield shape, it’s time to sand and smooth the edges. Use a sanding block or sandpaper to smooth out any rough spots or jagged edges. You can also use a router to add decorative edges to your shield.

After sanding, you can apply a coat of wood stain or paint to give your shield a finished look. Be sure to let the stain or paint dry completely before moving on to the next step.

Adding a Handle

The final step is to add a handle to your shield. You can use a piece of leather or rope to create a handle. Cut the leather or rope to the desired length and attach it to the back of the shield with screws or nails.

Make sure the handle is securely attached and can support the weight of the shield. You may want to test the handle by holding the shield and shaking it to make sure it doesn’t come loose.

With these steps, you can create a wooden shield that is both functional and visually appealing. Whether you’re using it for cosplay, LARPing, or just for fun, your wooden shield will be a unique and impressive addition to your collection.

Creating a Wooden Sword

When it comes to creating a wooden sword, there are a few key steps to keep in mind. This section will cover the process of cutting the sword shape, carving the blade, and creating the hilt.

Cutting the Sword Shape

The first step in creating a wooden sword is to cut the shape of the sword. You can use a saw to cut the shape of the sword from a piece of wood. It’s important to make sure that the wood is thick enough to create a sturdy sword.

Carving the Blade

Once you have cut the shape of the sword, the next step is to carve the blade. You can use a carving knife to carefully carve the blade into shape. It’s important to take your time with this step, as the blade is the most important part of the sword.

Creating the Hilt

The final step in creating a wooden sword is to create the hilt. You can use a drill to create a hole in the handle of the sword, and then insert a piece of wood to create the hilt. You can also use a carving knife to shape the hilt to your liking.

Overall, creating a wooden sword is a fun and rewarding project that can be enjoyed by people of all ages. With a little bit of patience and some basic woodworking skills, you can create a beautiful and functional wooden sword that will be treasured for years to come.

Safety Precautions

When working with tools and wood, it is important to take safety precautions to avoid injuries. Here are some safety tips to keep in mind when making a wooden shield and sword.

Using Tools Safely

When using tools, make sure to wear appropriate safety gear such as safety goggles, gloves, and ear protection. Keep your work area clean and organized to avoid tripping hazards. Always use tools for their intended purpose and follow the manufacturer’s instructions carefully.

When cutting wood, make sure to use a sharp blade and keep your fingers away from the blade. Always cut away from your body and use a sawhorse or clamp to secure the wood. When drilling, use a drill bit that is appropriate for the size of the hole you need and hold the drill with both hands.

Treating the Wood

Before working with wood, inspect it for any defects or knots that could cause the wood to split or break. Sand any rough edges or splinters to avoid getting injured. When applying finishes or stains, make sure to work in a well-ventilated area and wear a mask to avoid inhaling fumes.

When gluing wood together, use a high-quality wood glue and clamp the pieces together tightly. Allow the glue to dry completely before removing the clamps. When assembling the shield or sword, make sure to follow the instructions carefully and use the appropriate hardware and fasteners.

By following these safety precautions, you can avoid injuries and enjoy making your own wooden shield and sword.

Finishing Touches

Painting and Decorating

Once you have completed the construction of your wooden sword and shield, it’s time to add some personality to them. Painting and decorating your wooden sword and shield can make them look more realistic and unique. Here are some tips to guide you:

  • Choose the right paint: Use acrylic paint, which is readily available and easy to work with. It dries quickly and adheres well to wood. You can use spray paint, but it’s not recommended as it can be difficult to control and may cause drips.

  • Select a color scheme: Choose a color scheme that matches your personal style or the theme of your sword and shield. You can use a single color or multiple colors to create a unique design.

  • Add some details: You can use stencils or freehand painting to add details to your sword and shield. Consider adding symbols, patterns, or designs that reflect your personality or the purpose of your sword and shield.

Sealing the Wood

Sealing the wood is an essential step to protect your wooden sword and shield from moisture and damage. Here are some tips to help you seal your wooden sword and shield:

  • Choose the right sealer: Use a sealer that is specifically designed for wood. Polyurethane is a popular choice as it creates a hard, durable finish that resists scratches and dings.

  • Apply the sealer evenly: Use a brush or a clean cloth to apply the sealer evenly to the entire surface of your sword and shield. Be sure to apply a thin coat and allow it to dry completely before applying a second coat.

  • Sand between coats: Sand the surface lightly with fine-grit sandpaper between coats to remove any imperfections or bubbles. This will help to create a smooth, even finish.

By following these tips, you can add some personality to your wooden sword and shield and protect them from damage. Now you are ready to embark on your next adventure!

Blog

How to Season a Wooden Charcuterie Board: Tips and Tricks

Are you looking to season your wooden charcuterie board but not sure where to start? Look no further! Seasoning your board is an important step in ensuring it lasts for years to come. Not only does it help protect the wood from damage, but it also makes it safe for food use by sealing any pores and preventing bacteria from growing.

To begin, make sure your board is clean and dry. You can lightly sand it down with fine-grit sandpaper to remove any rough spots or stains. Then, apply a food-safe oil or wax to the board. Beeswax and mineral oil are popular options that can be easily found at most hardware or kitchen supply stores. Apply the oil or wax in a thin, even layer and let it sit for at least 20 minutes before wiping off any excess.

Remember to regularly maintain your charcuterie board by wiping it down with a damp cloth and reapplying oil or wax as needed. With these simple steps, you can enjoy your beautifully seasoned board for years to come.

Understanding Charcuterie Boards

If you’re a fan of entertaining guests or simply enjoy snacking on a variety of foods, you’ve probably heard of a charcuterie board. A charcuterie board is a wooden board that is typically used to serve a variety of meats, cheeses, fruits, nuts, and other snacks. These boards are becoming increasingly popular, and for good reason. They’re not only practical, but they’re also visually appealing and add a touch of elegance to any gathering.

When it comes to selecting a charcuterie board, there are a few things to consider. First, you’ll want to choose a board that is made from a quality wood, such as acacia or bamboo. These types of wood are durable, easy to clean, and look great. You’ll also want to consider the size of the board. If you’re planning on serving a large group of people, you’ll want a larger board. If you’re serving a smaller group, a smaller board will suffice.

Once you’ve selected your board, it’s important to season it properly. Seasoning your board will help to protect it from moisture and prevent it from warping or cracking over time. To season your board, you’ll want to use a food-grade mineral oil. Apply a small amount of oil to the board and use a clean cloth to work it into the wood. Let the board sit for about 20 minutes, then wipe off any excess oil with a clean cloth. Repeat this process until the board is no longer absorbing the oil.

It’s important to note that you should avoid using vegetable or olive oil to season your board, as these oils can turn rancid over time and leave a bad taste on your food. Stick to food-grade mineral oil for the best results.

In addition to seasoning your board, it’s important to care for it properly. After each use, wash your board with warm, soapy water and dry it thoroughly. Avoid soaking your board in water or putting it in the dishwasher, as this can cause the wood to warp or crack. Instead, use a clean cloth to wipe down your board and store it in a cool, dry place.

By following these simple steps, you can ensure that your charcuterie board stays in great condition and is ready to use whenever you need it.

Choosing the Right Wood

Choosing the right wood for your charcuterie board is crucial to ensure that it lasts for years to come. Here are some factors to consider when selecting wood for your board:

Hardness

You want a wood that is hard enough to withstand the constant cutting and chopping that occurs on a charcuterie board. Softer woods like pine or cedar are not recommended as they will easily scratch and dent. Hardwoods like maple, cherry, and walnut are great options as they are durable and long-lasting.

Grain

The grain of the wood can also affect the durability of your board. Look for wood with a tight and straight grain pattern as this will make it less prone to cracking or warping over time. Avoid woods with an irregular or wavy grain pattern as these may be weaker and more likely to break.

Color

The color of the wood is also an important factor to consider. Some woods like maple and birch have a light, neutral color that can complement a variety of foods. Other woods like cherry and walnut have a darker, richer color that can add a touch of elegance to your presentation. Choose a wood color that complements your personal style and the types of foods you plan to serve.

Sustainability

Lastly, consider the sustainability of the wood you choose. Look for wood that has been sustainably sourced and harvested. Avoid woods that are endangered or over-harvested, such as teak or mahogany. Opt for woods like bamboo or acacia, which are fast-growing and renewable.

By considering these factors, you can choose the right wood for your charcuterie board and ensure that it will last for years to come.

Preparation Before Seasoning

Before seasoning your wooden charcuterie board, it’s important to properly prepare it to ensure the seasoning process is effective. Here are some steps you should follow to prepare your board:

Cleaning the Board

The first step in preparing your board is to clean it thoroughly. Use a mild dish soap and warm water to gently scrub the board, making sure to get into all the crevices. Avoid using harsh chemicals or abrasive sponges, as these can damage the wood. Rinse the board well with water to remove any soap residue.

For a deeper clean, you can use a mixture of white vinegar and water. Simply mix equal parts vinegar and water in a spray bottle and spray the board. Let it sit for a few minutes, then wipe it clean with a damp cloth. This will help to kill any bacteria on the board.

Drying the Board

After cleaning the board, it’s important to let it dry completely before seasoning it. Use a clean, dry towel to wipe the board down and remove any excess water. Then, allow the board to air dry completely before moving on to the seasoning process.

It’s important to note that you should never put a wet board away or store it in a damp area, as this can cause the wood to warp or crack. Always make sure your board is completely dry before storing it.

By following these simple steps to prepare your wooden charcuterie board, you’ll be ready to move on to the seasoning process and ensure your board stays in great condition for years to come.

Choosing Your Seasoning

When it comes to seasoning your wooden charcuterie board, choosing the right oil or wax is key to maintaining its quality and durability. In this section, we’ll explore the different types of oils and waxes you can use to season your board.

Types of Oils

There are several types of oils that work well for seasoning wooden charcuterie boards. Here are a few options to consider:

  • Mineral oil: This is a popular choice for seasoning cutting boards and charcuterie boards. It’s affordable, easy to find, and doesn’t go rancid like vegetable or olive oils. Plus, it’s food-safe and won’t affect the taste of your food.

  • Beeswax and mineral oil blend: This is a great option if you want to add a little extra protection to your board. Beeswax creates a barrier on the surface of the board, while mineral oil penetrates the wood to keep it moisturized.

  • Walnut oil: This oil is a bit more expensive than mineral oil, but it has a pleasant nutty aroma and adds a beautiful sheen to the wood. It’s also high in antioxidants, which can help prevent the wood from deteriorating over time.

Wax Selection

In addition to oils, you can also use wax to season your wooden charcuterie board. Here are a few options to consider:

  • Beeswax: This is a natural wax that creates a protective barrier on the surface of the board. It’s food-safe and won’t affect the taste of your food.

  • Carnauba wax: This wax is derived from the leaves of the carnauba palm and is often used in furniture wax. It creates a hard, durable finish on the wood that can help protect it from scratches and dings.

When choosing a wax, make sure it’s food-safe and won’t affect the taste of your food. Beeswax is a popular choice because it’s natural and safe to use around food.

The Seasoning Process

When it comes to caring for your wooden charcuterie board, seasoning is an important step to ensure its longevity. Seasoning involves applying oil to the board to protect it from moisture and prevent the wood from drying out. Here are the steps to properly season your wooden charcuterie board:

Applying the Oil

  1. Start by cleaning the board thoroughly with warm soapy water and a sponge or cloth.
  2. Dry the board completely with a clean towel.
  3. Apply a food-grade oil, such as mineral oil or butcher block oil, to the board. Use a clean cloth or paper towel to spread the oil evenly over the entire surface of the board.
  4. Be sure to apply oil to the sides and edges of the board as well.
  5. Let the oil soak into the wood for a few hours or overnight.

Curing the Board

  1. After the oil has soaked in, wipe off any excess oil with a clean cloth or paper towel.
  2. Place the board in a warm, dry place for a few days to allow the oil to fully cure.
  3. Avoid using the board during this time to allow the oil to fully penetrate the wood.

Buffing the Board

  1. After the curing process is complete, use a clean cloth or paper towel to buff the board and remove any remaining excess oil.
  2. Your board is now ready to use!

Remember to reapply oil to your board regularly to keep it protected and in good condition. With proper care and maintenance, your wooden charcuterie board will last for years to come.

Maintenance Tips

Regular Re-Seasoning

To keep your wooden charcuterie board in top condition, it’s important to re-season it regularly. This will help prevent the wood from drying out and cracking, and will also help to maintain its natural beauty.

To re-season your board, simply apply a food-safe oil, such as mineral oil or butcher block oil, to the surface of the board. Use a lint-free cloth to rub the oil into the wood, making sure to cover the entire surface of the board. Allow the oil to soak in for a few hours or overnight, then wipe away any excess with a clean cloth.

It’s a good idea to re-season your board every few months, or whenever it starts to look dry or dull. This will help to keep it looking and performing its best for years to come.

Avoiding Cross Contamination

Another important aspect of maintaining a wooden charcuterie board is to avoid cross contamination. This means making sure that you don’t use the same board for different types of food, as this can lead to the transfer of bacteria and other harmful substances.

To avoid cross contamination, it’s a good idea to have separate boards for different types of food, such as one for meats and another for cheeses and fruits. You should also make sure to clean your board thoroughly after each use, using hot water and soap to remove any food particles and bacteria.

Avoid using bleach or other harsh chemicals on your board, as these can damage the wood and make it more susceptible to cracking and warping. Instead, use a gentle soap and warm water, and dry the board thoroughly after cleaning to prevent moisture from seeping into the wood.

By following these simple maintenance tips, you can help to keep your wooden charcuterie board in top condition, ensuring that it looks and performs its best for years to come.

Common Mistakes to Avoid

When it comes to seasoning a wooden charcuterie board, there are a few common mistakes that you should avoid to ensure that your board stays in great condition and lasts for years to come.

Using the Wrong Type of Oil

One of the biggest mistakes that people make when seasoning their charcuterie board is using the wrong type of oil. It is important to use a food-grade oil that will not go rancid, such as butcher block oil. Avoid using vegetable oil or other types of oils that can spoil and turn rancid over time.

Over-Oiling the Board

Another mistake that people often make is over-oiling their board. While it is important to oil your board regularly to keep it in good condition, too much oil can actually damage the wood and cause it to warp or crack. Use a lint-free cloth to apply a thin layer of oil to the board, and wipe off any excess with a clean cloth.

Not Cleaning the Board Properly

Cleaning your charcuterie board is just as important as seasoning it. Make sure to clean your board thoroughly after each use, using a mild soap and warm water. Avoid using harsh detergents or abrasive sponges that can damage the wood. Once the board is clean, dry it thoroughly with a clean towel and allow it to air dry completely before storing it.

Using Harsh Chemicals or Cleaners

Finally, avoid using harsh chemicals or cleaners on your charcuterie board. These can damage the wood and cause it to deteriorate over time. Stick to mild soaps and food-grade oils for cleaning and seasoning your board, and avoid using anything that contains bleach, ammonia, or other harsh chemicals.

By avoiding these common mistakes, you can keep your wooden charcuterie board in great condition and ensure that it lasts for years to come.

Blog

Wood Stain Coats: How Long to Wait Between Applications?

Are you wondering how long you should wait between wood stain coats? Applying wood stain is an excellent way to enhance the natural beauty of wood and protect it from the elements. However, it can be tricky to know exactly when to apply the next coat. The length of time you should wait between coats depends on several factors, including the type of stain you’re using, the humidity and temperature of the environment, and the absorbency of the wood.

While some wood stain products only require a few hours between coats, most manufacturers recommend waiting at least 24 hours before applying the next coat. Waiting a full day between coats is a safe bet to ensure that the first coat has fully dried and cured, allowing the second coat to adhere properly. Keep in mind that if you apply the second coat too soon, it can cause the first coat to become tacky or peel, which can ruin the finish of your project.

Understanding Wood Stain Coats

understanding-wood-stain-coatshow-long-does-it-take-wood-stain-to-dry_3-650x433

When it comes to staining wood, applying multiple coats is often necessary to achieve the desired color and finish. However, it’s important to understand how long to wait between each coat to ensure the best results.

As a general rule, most manufacturers recommend waiting at least 24 hours between coats of wood stain. This allows the first coat to fully dry and cure, creating a strong base for subsequent coats. However, the exact wait time can vary depending on the type of stain, the wood being stained, and environmental factors such as temperature and humidity.

It’s also important to note that applying too many coats of stain can actually have a negative effect on the final result. Too much stain can lead to a buildup of pigment, which can obscure the natural beauty of the wood and create a muddy, unattractive finish. As a general guideline, most experts recommend applying no more than two or three coats of stain.

To ensure the best results when staining wood, it’s important to follow the manufacturer’s instructions carefully and to take your time between coats. Rushing the process can lead to uneven coloring, streaks, and other imperfections. By taking the time to properly apply and dry each coat of stain, you can create a beautiful, durable finish that will last for years to come.

Factors Affecting Waiting Time

When it comes to applying wood stain, waiting time between coats is crucial to achieve the desired finish. Several factors can affect how long you need to wait between coats. In this section, we will discuss the most important factors that can influence the waiting time.

Type of Wood

The type of wood you are staining can significantly affect how long you need to wait between coats. Softwoods such as pine, spruce, and fir tend to absorb the stain more quickly and may require less time between coats. On the other hand, hardwoods such as oak, maple, and cherry may require more time between coats to allow the stain to fully penetrate the wood.

Type of Stain

The type of stain you are using can also impact the waiting time between coats. Oil-based stains tend to dry more slowly and may require more time between coats. Water-based stains, on the other hand, dry more quickly and may require less time between coats. Gel stains typically take the longest to dry, and you may need to wait longer between coats.

Weather Conditions

The weather conditions in your area can also affect how long you need to wait between coats. High humidity and low temperatures can slow down the drying process, while hot and dry weather can speed it up. It’s best to check the manufacturer’s instructions for specific recommendations on waiting time based on weather conditions.

In conclusion, several factors can affect how long you need to wait between wood stain coats. By considering the type of wood, type of stain, and weather conditions, you can determine the optimal waiting time between coats to achieve the desired finish.

General Waiting Time Between Coats

general-waiting-time-between-coats

When staining wood, it is important to know how long to wait between coats to achieve the best results. The waiting time can vary depending on the type of stain you are using, the temperature, and the humidity of the room. In general, it is best to wait at least 24 hours before applying a second coat of stain.

Waiting for a full day allows the first coat of stain to fully dry and cure, ensuring that the second coat will be applied to a stable and consistent base. If the first coat is not completely dry, the second coat may not adhere properly and can result in an uneven finish.

It is important to note that some stain products may require a shorter or longer waiting time between coats. Always refer to the manufacturer’s instructions for specific recommendations on waiting times.

Signs Your Wood is Ready for Another Coat

When staining wood, it’s essential to know when it’s ready for another coat. Applying the second coat too soon can result in a blotchy finish, while waiting too long can cause the first coat to dry out completely, making it difficult for the second coat to adhere properly. Here are some signs to look out for to know when your wood is ready for another coat:

  • Touch Test: The easiest way to check if your wood is ready for another coat is to touch it. If it feels dry to the touch, it’s ready for another coat. If it feels tacky or sticky, it’s not ready yet, and you should wait for it to dry before applying another coat.
  • Color Change: When you apply the first coat of stain, the wood’s color will change. As the stain dries, the color will become more apparent. When the wood’s color is consistent, and there are no splotchy areas, it’s ready for another coat.
  • Absorption Test: To check if the wood is ready for another coat, you can do an absorption test. Apply a small amount of stain to an inconspicuous area of the wood. If the wood absorbs the stain quickly, it’s ready for another coat. If the stain sits on top of the wood, it’s not ready yet.
  • Drying Time: Most stain products have a recommended drying time between coats. It’s best to follow the manufacturer’s instructions to ensure the best results. However, if you’re unsure, waiting at least 24 hours between coats is a safe bet.

In conclusion, knowing when your wood is ready for another coat is crucial for achieving a beautiful and even finish. By using the touch test, color change, absorption test, and following the recommended drying time, you can ensure that your wood is ready for another coat and achieve the desired results.

Tips for Applying Multiple Stain Coats

tips-for-applying-multiple-stain-coats

When it comes to staining wood, applying multiple coats can enhance the color and depth of the finish. However, it’s important to know the proper techniques for applying multiple coats of stain to ensure the best results. Here are some tips to keep in mind:

Proper Preparation

Before you begin staining, make sure the wood is clean and free of any dust or debris. Sand the wood with a fine-grit sandpaper to smooth out any rough spots and ensure even absorption of the stain. It’s also important to choose the right type of stain for your project, whether it’s oil-based, water-based, or gel-based.

Application Technique

When applying multiple coats of stain, it’s important to wait for each coat to dry completely before applying the next. The drying time will vary depending on the type of stain you’re using, so be sure to check the manufacturer’s instructions. Generally, oil-based stains take longer to dry than water-based stains, and gel stains take the longest.

When applying the stain, use a clean brush or rag and work in the direction of the grain. Apply a thin, even coat and wipe away any excess with a clean cloth. If you’re applying more than one coat, lightly sand the surface between coats to smooth out any rough spots.

Safety Measures

Staining wood can be messy and potentially hazardous if proper safety measures aren’t taken. Always wear gloves and protective eyewear when handling stain and make sure the area is well-ventilated. Avoid smoking or using open flames in the area, as some stains are flammable.

In conclusion, applying multiple coats of stain can enhance the beauty of your wood project, but it’s important to take the proper precautions and follow the right techniques for the best results. With these tips in mind, you’ll be able to achieve a beautiful, long-lasting finish on your woodwork.

Frequently Asked Questions

How long to wait between coats of oil-based stain?

The drying time for oil-based stain can vary depending on the humidity and temperature of the environment. Generally, it is recommended to wait at least 8 hours before applying a second coat of oil-based stain. However, it is best to follow the manufacturer’s instructions on the label to ensure the best results.

When to apply second coat of stain on deck?

For a deck, it is recommended to wait at least 24 hours before applying a second coat of stain. This allows the first coat to fully dry and cure, ensuring that the second coat will adhere properly. However, it is important to check the manufacturer’s instructions on the label for specific recommendations.

How long does it take for stain to dry in 50 degree weather?

Stain can take longer to dry in cooler temperatures, such as 50 degrees Fahrenheit. In general, it is best to wait at least 24 hours before applying a second coat of stain in cooler temperatures. However, it is important to check the manufacturer’s instructions on the label for specific recommendations.

How long to wait before applying second coat of Minwax stain?

Minwax stain typically requires a wait time of at least 4-6 hours before applying a second coat. However, it is important to follow the manufacturer’s instructions on the label for specific recommendations.

Can you put 2 coats of stain on wood?

Yes, you can apply 2 coats of stain on wood. However, it is important to wait for the first coat to dry and cure before applying the second coat. This ensures that the second coat will adhere properly and provide the desired color and finish.

Will a second coat of stain make it darker?

Yes, a second coat of stain can make the wood darker. However, it is important to note that the color and darkness of the stain can vary depending on the type of wood and the amount of time the stain is left on. It is recommended to test the stain on a small area before applying it to the entire surface.

Blog

Can You Apply Multiple Coats of Stains to Wood? Exploring the Best Practices

Are you wondering if you can apply more than one coat of stain to your wood project? The answer is yes, you can apply multiple coats of stain to wood, but it is important to do it correctly to achieve the desired results. Applying too many coats can result in an uneven finish, while not applying enough can leave the wood looking dull or unfinished.

When it comes to applying multiple coats of stain, it is important to properly prepare the wood surface before each application. This includes sanding the wood to ensure an even surface and removing any dust or debris. It is also important to apply each coat of stain evenly and allow sufficient drying time between coats.

Keep in mind that the number of coats needed will depend on several factors, including the type of wood, the color of the stain, and the desired finish. Lighter colored stains may only require one or two coats, while darker stains or glossy finishes may require three or more coats. By following the proper techniques and taking these factors into consideration, you can achieve a beautiful, even finish on your wood project.

Understanding Wood Stains

If you’re planning to stain your wood project, you may be wondering if you can apply more than one coat of stain. The answer is yes, you can apply multiple coats of stain to achieve the desired look. However, there are some things you should keep in mind before applying multiple coats of stain.

First, it’s important to understand that wood stains are designed to penetrate the wood fibers and enhance the natural beauty of the wood. Applying too many coats of stain can result in a buildup of the product on the surface of the wood, which can affect the final look and durability of the finish.

Second, the number of coats you apply will depend on the type of stain you’re using and the desired look you want to achieve. Some stains, such as solid color stains, may require two or more coats to achieve full coverage and hide imperfections in the wood. Other stains, such as semi-transparent or transparent stains, may only require one or two coats to achieve the desired color and protection.

When applying multiple coats of stain, it’s important to follow the manufacturer’s instructions and allow each coat to fully dry before applying the next. This will ensure that the stain fully penetrates the wood and doesn’t create a sticky or tacky surface.

In addition, you may want to consider using a wood conditioner between coats of stain. Wood conditioners can help to even out the absorption of the stain and prevent blotching or uneven coloring. However, it’s important to note that wood conditioners should only be applied before the first coat of stain.

Overall, applying multiple coats of stain can be a great way to achieve a rich, deep color and enhance the natural beauty of your wood project. Just be sure to follow the manufacturer’s instructions and take the necessary steps to ensure a smooth and even finish.

The Basics of Applying Wood Stain

the-basics-of-applying-wood-stain

When it comes to staining wood, there are a few basics you should keep in mind to ensure the best results. Here are some tips to help you get started:

1. Sand the Wood

Before applying any stain, make sure to sand the wood thoroughly. This will help to remove any rough spots or imperfections, and will also help the wood to absorb the stain more evenly. You can use a sanding block or a random orbital sander to do the lion’s share of the work. Begin by sanding the project well a few times using progressively finer grits of sandpaper as you go.

2. Apply the Stain

Once the wood is sanded, you can apply the stain. You can use a brush or a rag to apply the stain, depending on your preference. Apply the stain in the direction of the wood grain, and make sure to apply it evenly. If you’re using a brush, use a natural-bristle brush for oil stains and a synthetic-bristle brush for latex stains.

3. Wipe Off the Excess

After applying the stain, you’ll want to wipe off any excess with a clean cloth. This will help to prevent the stain from becoming too dark or blotchy. Make sure to wipe off the excess stain in the direction of the wood grain.

4. Allow the Stain to Dry

Once you’ve wiped off the excess stain, allow the wood to dry completely. This usually takes around 24 hours, but can vary depending on the type of stain and the humidity level in your area. Don’t rush the drying process, as this can cause the stain to become uneven or blotchy.

5. Apply a Second Coat (Optional)

If you want a darker or richer color, you can apply a second coat of stain. However, it’s important to note that adding a second coat of stain will usually darken the overall color. This is because adding more stain to the surface can penetrate deeper into the wood’s pores and deposit more pigment. Make sure to test your color on a scrap piece of wood before applying a second coat to your project.

Multiple Coats of Wood Stain: Pros and Cons

When staining wood, you may wonder if you can apply more than one coat of stain to achieve the desired color and finish. The answer is yes, but there are pros and cons to consider before doing so.

Pros of Applying Multiple Coats of Wood Stain

  • Achieve a darker color: Applying multiple coats of stain can help you achieve a darker and richer color than a single coat.
  • Enhance the wood grain: Each coat of stain can bring out the natural grain of the wood, adding depth and character to your project.
  • Add more protection: Multiple coats of stain can provide more protection from the elements, especially if you use a varnish or drying oil as your topcoat.

Cons of Applying Multiple Coats of Wood Stain

  • Risk of blotchiness: Applying too many coats of stain can cause blotchiness, especially on softwoods like pine and spruce. It’s important to test your stain on a scrap piece of wood before applying it to your project.
  • Longer drying time: Each consecutive coat of stain will take longer to dry, which can prolong the staining process.
  • No added durability: Multiple coats of stain do not build up a protective surface coating, so if you’re after durability, you’ll need to use a film-forming material like a varnish or drying oil.

In summary, applying multiple coats of wood stain can help you achieve a darker color and enhance the natural grain of the wood, but it can also lead to blotchiness and longer drying times. Keep in mind that multiple coats of stain do not add durability, so consider using a topcoat for added protection.

Preparation for Applying Multiple Coats

preparation-for-applying-multiple-coats

When applying stains to wood, you may need to use multiple coats to achieve the desired color and finish. However, before you start applying multiple coats, there are certain preparations you need to make to ensure the best results.

Choosing the Right Stain

Choosing the right stain is crucial when planning to apply multiple coats. While some stains are designed to be applied in a single coat, others may require multiple coats to achieve the desired color and finish. Therefore, it’s important to read the manufacturer’s instructions carefully to determine the recommended number of coats for the stain you’ve chosen.

Wood Condition Considerations

Before applying multiple coats of stain, it’s important to consider the condition of the wood you’re working with. If the wood is rough or porous, you may need to use multiple coats to get even coverage. On the other hand, if the wood has an existing finish, you may need to use multiple coats to fully obscure the old color.

To prepare the wood for staining, you may need to sand it lightly to remove any rough spots or imperfections. You should also clean the wood thoroughly to remove any dirt or debris that may interfere with the staining process.

Safety Measures

When applying multiple coats of stain, it’s important to take appropriate safety measures. This includes wearing protective gloves and eyewear to prevent direct contact with the stain. You should also work in a well-ventilated area to avoid inhaling fumes from the stain.

In addition to these safety measures, you should also follow the manufacturer’s instructions carefully when applying multiple coats of stain. This may include waiting a certain amount of time between coats to allow the stain to dry properly.

By taking these preparation steps, you can ensure that your multiple coats of stain are applied evenly and provide the desired color and finish for your wood project.

Step-by-Step Guide to Applying Multiple Coats

step-by-step-guide-to-applying-multiple-coats

If you want to achieve a darker or richer color for your wood project, applying multiple coats of stain is a great option. However, it’s important to apply each coat correctly to avoid issues like blotching or uneven coloring. Follow these steps to apply multiple coats of stain to your wood:

First Coat Application

Before applying the first coat, make sure your wood is clean and dry. If necessary, sand the surface to remove any roughness or imperfections. Then, apply the first coat of stain using a brush, cloth, or sprayer. Make sure to apply the stain evenly, following the wood grain. Let the stain dry completely before moving on to the next step.

Interim Sanding

After the first coat has dried, lightly sand the surface with fine-grit sandpaper. This will help smooth out any raised grain or rough spots and prepare the surface for the next coat. Make sure to remove any sanding dust before applying the second coat.

Second Coat Application

Apply the second coat of stain in the same manner as the first, making sure to follow the wood grain and apply the stain evenly. Let the second coat dry completely before deciding if you need to apply additional coats.

Additional Coats

Depending on the desired color and the type of wood you’re working with, you may need to apply additional coats of stain. If so, repeat the process of interim sanding and applying the stain until you achieve the desired color. However, be careful not to over-apply the stain, as this can result in a blotchy or uneven finish.

By following these steps, you can achieve a rich, even color for your wood project. Just remember to take your time and apply each coat carefully and evenly.

Maintenance Tips for Stained Wood

After staining your wood, it is important to maintain it properly to ensure it lasts for a long time. Here are some tips to help you maintain your stained wood:

  • Clean Regularly: Dirt and dust can accumulate on your stained wood, making it look dull. To prevent this, clean your wood regularly with a soft cloth or a vacuum cleaner. Avoid using harsh chemicals that can damage the wood or the stain.
  • Avoid Water Damage: Stained wood can be damaged by water, so it is important to keep it dry. Wipe up any spills immediately and avoid placing wet items on the wood surface. If you need to clean the wood with water, use a damp cloth and dry it thoroughly afterward.
  • Protect from Sunlight: Sunlight can cause the stain to fade and the wood to dry out, so it is important to protect your stained wood from direct sunlight. Use curtains or blinds to block out the sun, or move the wood to a shaded area.
  • Reapply Stain: Over time, the stain on your wood may start to fade or wear off. To keep your wood looking its best, you can reapply the stain. Follow the manufacturer’s instructions for applying the stain and make sure to clean the wood thoroughly before applying the new coat.
  • Use Protective Coating: A protective coating can help to protect your stained wood from scratches, dings, and other damage. You can use a clear coat or a tinted coat to enhance the color of the stain. Follow the manufacturer’s instructions for applying the protective coating and allow it to dry completely before using the wood.

By following these maintenance tips, you can keep your stained wood looking beautiful for years to come.

Common Mistakes to Avoid

When it comes to staining wood, there are some common mistakes that many people make. Here are a few things to keep in mind to avoid these mistakes:

Applying Too Many Coats

One of the biggest mistakes people make when staining wood is applying too many coats. While it may seem like adding more coats will make the color richer and deeper, it can actually have the opposite effect. Too many coats can lead to a buildup of stain that can obscure the wood grain and create a splotchy, uneven finish.

Not Sanding Between Coats

Another mistake people make is not sanding between coats. Sanding between coats helps to smooth out any rough spots or raised grain, which can make the final finish look much better. If you skip this step, you may end up with a rough, uneven finish that is difficult to fix.

Using the Wrong Brush

Using the wrong brush can also be a mistake. For example, if you use a natural bristle brush with a water-based stain, the bristles can swell and become misshapen, making it difficult to apply the stain evenly. Make sure you use the right brush for the type of stain you are using.

Not Testing the Stain

Finally, not testing the stain can be a big mistake. Before you apply the stain to your entire project, it’s a good idea to test it on a small, inconspicuous area first. This will help you see how the stain will look on your particular type of wood and whether you like the color. If you don’t test the stain first, you may end up with a finish that you don’t like and have to redo the entire project.

Frequently Asked Questions

How many coats of stain should be applied to wood?

The number of coats of stain that should be applied to wood depends on the type of stain and the desired outcome. In general, one to two coats of stain are sufficient for most projects. However, some stains may require more coats to achieve the desired color or level of protection.

Is one coat of stain enough for wood?

One coat of stain may be enough for some projects, but it depends on the type of stain and the desired outcome. If you want a deeper color or more protection, you may need to apply more than one coat of stain.

Can you apply multiple coats of oil-based stain?

Yes, you can apply multiple coats of oil-based stain. However, you should wait for the first coat to dry completely before applying the second coat. This will ensure that the second coat adheres properly and doesn’t create a blotchy appearance.

How soon can a second coat of stain be applied to wood?

The drying time for stain varies depending on the type of stain and environmental conditions. In general, you should wait at least 24 hours before applying a second coat of stain. However, some stains may dry faster and allow for a second coat to be applied sooner.

Will applying two coats of stain make the color darker?

Applying two coats of stain may make the color darker, but it depends on the type of stain and the desired outcome. Some stains may not darken significantly with a second coat, while others may become much darker.

Can different types of stains be layered on wood?

Different types of stains can be layered on wood, but it may not always produce the desired outcome. For example, layering a water-based stain over an oil-based stain may not work well, as the water-based stain may not adhere properly. It’s best to stick with the same type of stain or consult with a professional if you want to layer different types of stains.

Blog

How to Hang a Thin Piece of Wood on a Wall: Simple Tips and Tricks

Hanging a thin piece of wood on a wall can be a tricky task, especially if you want to ensure that it is secure and won’t fall off. There are several methods that you can use to hang a thin piece of wood on a wall, such as using adhesive, double-sided tape, or wire. However, it is important to choose the right method based on the weight of the wood and the type of wall you are hanging it on.

One popular method for hanging a thin piece of wood on a wall is using a French cleat. This involves cutting a 45-degree bevel on a piece of hardwood, which is then attached to the wall. The other half of the cleat is attached to the back of the wood, allowing it to slide onto the cleat and be held securely in place. This method is particularly useful for heavy pieces of wood that need to be securely attached to the wall.

Another option for hanging a thin piece of wood on a wall is using velcro wall hangers. These hangers are designed to hold lightweight items, such as pictures or posters, but can also be used for thin pieces of wood. They are easy to install and remove, making them a good choice if you want to change the position of the wood frequently. However, they may not be suitable for heavier pieces of wood.

Understanding Wall Types

understanding-wall-types

When it comes to hanging a thin piece of wood on a wall, it’s important to understand the type of wall you are working with. Different wall types require different methods of hanging, and using the wrong method can result in damage to your wall or your artwork. Here are some common wall types and the best ways to hang a thin piece of wood on them.

Drywall

Drywall is the most common type of wall found in modern homes. It’s made of gypsum plaster sandwiched between two layers of paper, and it’s relatively easy to hang things on. Here’s how to hang a thin piece of wood on drywall:

  1. Find the studs: Use a stud finder to locate the studs behind the drywall. This will give you a secure anchor point for your screws or nails.
  2. Mark the location: Use a pencil to mark the location of the studs on the wall.
  3. Drill pilot holes: Use a drill to make pilot holes in the wood where you want to attach it to the wall.
  4. Attach the wood: Use screws or nails to attach the wood to the wall, making sure to drive them into the studs.

Plaster

Plaster walls are common in older homes, and they can be a bit trickier to hang things on than drywall. Here’s how to hang a thin piece of wood on a plaster wall:

  1. Find the studs: Use a stud finder to locate the studs behind the plaster. If you can’t find the studs, use a toggle bolt or molly bolt to anchor your screws or nails.
  2. Mark the location: Use a pencil to mark the location of the studs or anchor points on the wall.
  3. Drill pilot holes: Use a drill to make pilot holes in the wood where you want to attach it to the wall.
  4. Attach the wood: Use screws or nails to attach the wood to the wall, making sure to drive them into the studs or anchor points.

Brick

Brick walls are common in older homes and commercial buildings, and they require a different approach to hanging things than drywall or plaster. Here’s how to hang a thin piece of wood on a brick wall:

  1. Use a masonry bit: Use a masonry bit and drill to make pilot holes in the brick where you want to attach the wood.
  2. Insert anchors: Insert plastic or metal anchors into the pilot holes.
  3. Attach the wood: Use screws or nails to attach the wood to the anchors.

By understanding the type of wall you are working with and using the appropriate hanging method, you can safely and securely hang a thin piece of wood on your wall.

Choosing the Right Wood

choosing-the-right-wood

When hanging a thin piece of wood on a wall, it’s important to choose the right type of wood. Here are some factors to consider:

Thickness

The thickness of the wood you choose will affect how it hangs on the wall. Thinner pieces of wood may require additional support, while thicker pieces may be too heavy to hang securely. A 1/4″ thickness is a common choice for thin wood pieces.

Type of Wood

Different types of wood have different characteristics that can affect how they hang on the wall. Here are some popular options:

  • Plywood: A strong and lightweight option that is easy to work with.
  • MDF: A dense and stable option that is resistant to warping and cracking.
  • Hardwood: A durable and attractive option that can add a high-end look to your space.

Grain Pattern

The grain pattern of the wood you choose can also affect its appearance and hanging capabilities. Here are some common grain patterns:

  • Plain sawn: A simple and traditional pattern that can add texture and interest to your space.
  • Quarter sawn: A more stable and uniform pattern that is less likely to warp or twist.
  • Rift sawn: A unique and modern pattern that can add a contemporary look to your space.

Finish

Finally, consider the finish of the wood you choose. A smooth and polished finish can add a sleek look to your space, while a rough and rustic finish can add character and charm. Just be sure to choose a finish that complements the overall style of your room.

By considering these factors, you can choose the right type of wood for your thin piece and ensure it hangs securely and looks great on your wall.

Required Tools

required-tools

To hang a thin piece of wood on a wall, you’ll need a few essential tools to ensure a secure and level installation. Here are the tools you’ll need:

Drill

A drill is essential for creating holes in the wall to anchor the screws that will hold the wood in place. Make sure to use a drill bit that is slightly smaller than the diameter of the screws you will be using to ensure a snug fit.

Level

A level is crucial for ensuring that the wood is hung straight and level. A small bubble level is usually sufficient for this task.

Stud Finder

If you plan to hang the wood on a stud wall, a stud finder will help you locate the studs behind the drywall. This will allow you to anchor the screws directly into the studs for a more secure installation.

Screws

The type of screws you use will depend on the weight of the wood and the type of wall you are hanging it on. For lightweight wood and drywall, picture hanging strips or adhesive hooks may be sufficient. For heavier wood and stud walls, use wood screws that are long enough to anchor securely into the studs.

By having these tools on hand, you’ll be able to hang your thin piece of wood securely and level on any type of wall.

Locating the Studs

Before you hang a thin piece of wood on a wall, you need to locate the studs. This is important because hanging the wood on drywall alone can result in it falling off the wall. Here are some ways to locate the studs:

  • Use a Stud Finder: A stud finder is a handy tool that can help you locate the studs quickly. Simply place the stud finder on the wall and move it around until it beeps or lights up, indicating the presence of a stud.
  • Knock on the Wall: Another way to locate the studs is to knock on the wall. Start by tapping with your fingertip wherever you need to find a stud and slowly move to the right or to the left. If the tapping sound becomes more solid, you’re approaching a stud. If it sounds hollow, you’re moving away from a stud. Once you’ve found the stud, measure 16 inches to find the next stud, then tap to verify.
  • Look for Outlets or Switches: Electrical boxes are typically attached to studs, so finding a light switch or power outlet can help you locate the studs. Once you’ve found an outlet or switch, measure 16 inches to find the next stud.
  • Measure from Window or Door Trim: Window and door trim are anchored into studs. Sometimes, you can see dimples left by the nail where it is attached, but if not, choose a spot one inch from the edge of your window, and then measure out an additional 16 inches to find the next stud on the wall.

Remember to mark the location of the studs with a pencil or tape measure so that you can easily refer to them when hanging the thin piece of wood on the wall.

Preparing the Wood

preparing-the-wood

Before hanging a thin piece of wood on a wall, there are a few steps you should take to ensure that the wood is ready for mounting.

Sanding

First, you should sand the wood to ensure that it is smooth and free of any rough spots or splinters. Use a fine-grit sandpaper to gently sand the surface of the wood until it is completely smooth. Be sure to sand the edges of the wood as well to prevent any sharp edges from causing injury.

Staining or Painting

Once the wood is sanded, you can choose to stain or paint it to give it a finished look. If you choose to stain the wood, be sure to apply a clear coat of polyurethane to protect the wood and prevent any damage from moisture or humidity.

If you choose to paint the wood, be sure to use a primer to help the paint adhere to the surface. Apply two coats of paint, allowing each coat to dry completely before applying the next.

Adding Hardware

Before mounting the wood on the wall, you will need to add hardware to the back of the wood to hang it securely. There are several options for hardware, including keyhole slots, D-rings, or sawtooth hangers.

If you choose to use keyhole slots, be sure to measure and mark the location of the slots on the back of the wood before drilling the holes. Use a drill bit that is slightly larger than the diameter of the screws you will be using to mount the wood.

Once the hardware is attached, your thin piece of wood is ready to be mounted on the wall.

Drilling the Holes

To hang a thin piece of wood on a wall, you will need to drill holes in the wood and the wall. Here’s how to do it:

  1. Measure the length and width of the wood piece, and determine where you want to hang it on the wall. Mark the spot on the wall where you want to drill the holes.
  2. Choose the right drill bit size for the job. You want a bit that is slightly smaller than the size of the screw you will use to hang the wood. For example, if you plan to use a 1/4 inch screw, use a 3/16 inch drill bit.
  3. Insert the drill bit into the drill and tighten it securely.
  4. Hold the drill perpendicular to the wall and drill a hole at the marked spot. Be sure to drill straight and not at an angle.
  5. Repeat the process for the other holes you need to drill.
  6. If you are drilling into drywall, use a drywall anchor to provide extra support for the screws. Insert the anchor into the hole and then screw the wood piece into the anchor.
  7. If you are drilling into a stud, you can skip the drywall anchor and screw the wood piece directly into the stud.

By following these steps, you can easily drill the necessary holes to hang your thin piece of wood securely on the wall.

Mounting the Wood

mounting-the-wood

When it comes to mounting a thin piece of wood on a wall, there are a few options to choose from. Here are some methods you can try:

1. Picture Hanging Strips or Adhesive Hooks

If the wood is lightweight and the wall is made of drywall, you can use picture hanging strips or adhesive hooks. These are easy to use and won’t damage your walls. Simply attach the strips or hooks to the back of the wood and press firmly onto the wall.

2. Glue a Strip of Wood to the Back

For a more permanent solution, you can glue a strip of wood to the back of the thin piece of wood. This will add support and make it easier to hang. You can then attach your hanging hardware to the strip of wood.

3. Keyhole Slots

If your piece of wood has keyhole slots, you can use them to hang the wood on the wall. First, measure the distance between the slots and mark the wall where you want the wood to hang. Then, attach screws or hooks to the wall and hang the wood on them.

4. French Cleat

If you have a heavy piece of wood, you can use a French cleat to mount it on the wall. A French cleat is a type of hardware that consists of two pieces of wood, one attached to the back of the wood and the other attached to the wall. The two pieces interlock to provide a secure mount.

With these methods, you can easily mount a thin piece of wood on a wall. Just make sure to choose the right method for your specific piece of wood and wall type.

Safety Precautions

When hanging a thin piece of wood on a wall, it is important to take safety precautions to prevent any accidents or damage to your walls. Here are some tips to keep in mind:

1. Determine the weight of the wood

Before you start hanging the wood, it’s important to know its weight. This will help you choose the right hardware and ensure that the wood is properly secured. You can use a bathroom scale to weigh the wood.

2. Use appropriate hardware

Make sure to use the appropriate hardware for the weight of the wood. For a thin piece of wood, you can use picture hangers, sawtooth hangers or adhesive strips. If the wood is heavier, use wall anchors or toggle bolts to secure it to the wall.

3. Check the wall for studs

If possible, hang the wood on a wall stud. This will provide extra support and stability. You can use a stud finder to locate the studs in your wall.

4. Use a level

To ensure that the wood is straight, use a level to mark the position of the hangers or hardware. This will help you avoid any crooked or uneven hanging.

5. Wear protective gear

When drilling or hammering into the wall, wear protective gear such as safety glasses and gloves to prevent any injuries.

By following these safety precautions, you can hang your thin piece of wood on the wall safely and securely.

Frequently Asked Questions

What are some ways to hang a thin piece of wood on a wall?

There are several ways to hang a thin piece of wood on a wall. One is to use wood glue to attach a strip of wood to the back of the wood piece and then hang it on a nail or hook. Another way is to use picture hangers or adhesive strips that are specifically designed for hanging lightweight objects on walls.

How can I hang a wood shelf on a wall?

To hang a wood shelf on a wall, you can use brackets or cleats. Brackets are L-shaped metal or wood pieces that attach to the wall and support the shelf. Cleats are strips of wood that are attached to the wall and the shelf, providing a secure hold.

What are some methods for hanging things on walls without causing damage?

There are several methods for hanging things on walls without causing damage, such as using adhesive strips, suction cups, or removable hooks. These options are great for renters or anyone who wants to avoid drilling holes in their walls.

How do I hang plywood art on a wall?

To hang plywood art on a wall, you can use a strip of wood trim material that is glued on the back side of the plywood with carpenter’s glue. Then, you can hang the piece on a nail or hook. Alternatively, you can use a French cleat system, which involves mounting a cleat to the wall and attaching another cleat to the back of the plywood.

What’s the best way to hang something on a stud?

The best way to hang something on a stud is to use a stud finder to locate the stud and then use a screw or nail to attach the object to the stud. This will provide a secure hold and prevent damage to the wall.

How do I hang thin wood panels on a wall?

To hang thin wood panels on a wall, you can use adhesive strips or picture hangers. Another option is to use a French cleat system, which involves mounting a cleat to the wall and attaching another cleat to the back of the wood panel.

Blog

Does Polyurethane Make Wood Waterproof? The Truth Revealed

Are you wondering if polyurethane makes wood waterproof? This is a common question among those who are looking to protect their wooden surfaces from water damage. While polyurethane is known for its ability to protect wood from scratches and discoloration, it’s important to understand that it does not make wood completely waterproof.

Polyurethane is a synthetic resin that forms a hard, protective film on the surface of wood. This film is resistant to scratches and discoloration from fungi and mildew, and it also makes it more difficult for water to penetrate the wood. However, polyurethane only makes wood water-resistant, not waterproof. This means that while it can repel water and prevent water absorption, it will never fully block it.

Understanding Polyurethane

If you are a woodworker or DIY enthusiast, you must have heard about polyurethane. Polyurethane is a synthetic resin that is used to protect and enhance the beauty of wood. It is a popular choice for finishing woodwork, as it provides a durable, long-lasting finish.

Polyurethane is available in two forms: oil-based and water-based. Oil-based polyurethane is more durable and provides a richer finish, while water-based polyurethane dries faster and has a lower odor.

Polyurethane is a clear, protective coating that is applied to the surface of wood. It forms a hard, durable film that protects the wood from scratches, stains, and moisture. Polyurethane also enhances the natural beauty of wood by adding depth and richness to its color.

Polyurethane is available in different sheens: gloss, semi-gloss, and satin. Gloss provides a high shine, while semi-gloss and satin provide a more subtle shine. The sheen you choose depends on your personal preference and the type of wood you are working with.

When applying polyurethane, it is important to follow the manufacturer’s instructions carefully. Polyurethane should be applied in thin, even coats, and each coat should be allowed to dry completely before applying the next coat. Sanding between coats is also recommended to ensure a smooth, even finish.

In summary, polyurethane is a clear, protective coating that is used to protect and enhance the beauty of wood. It is available in different forms, sheens, and can be applied to different types of wood. When applying polyurethane, it is important to follow the manufacturer’s instructions carefully to ensure a durable, long-lasting finish.

Polyurethane and Wood Interaction

polyurethane-and-wood-interaction

Polyurethane is a popular choice for finishing wood because of its durability and protection against scratches and discoloration. However, it is important to note that polyurethane does not make wood completely waterproof.

When polyurethane is applied to wood, it creates a protective layer that repels water and prevents water absorption. This layer can help to make the wood water-resistant, but it cannot make the wood completely waterproof.

It is important to note that polyurethane may interact differently with different types of wood. Some woods may absorb the polyurethane differently, which can affect the level of water resistance provided by the finish.

Additionally, the thickness of the polyurethane layer can also affect its water resistance. A thicker layer of polyurethane may provide more protection against water damage than a thinner layer.

Overall, while polyurethane can provide some level of water resistance to wood, it is important to use additional waterproofing methods if you need to protect the wood from prolonged exposure to water.

How Does Polyurethane Make Wood Waterproof?

Polyurethane is a popular finish for wood because it provides excellent protection against scratches, discoloration, and water damage. While it doesn’t make wood completely waterproof, it does make it water-resistant. But how does it work?

Polyurethane is a type of plastic that forms a protective layer over the wood. This layer repels water and prevents it from being absorbed by the wood. When water comes into contact with the polyurethane, it beads up and rolls off the surface, rather than soaking into the wood fibers.

The polyurethane layer also helps to seal the wood, preventing moisture from getting in and causing damage. This is important because when wood absorbs water, it can swell, warp, and even rot over time. By keeping moisture out, polyurethane helps to preserve the integrity of the wood.

To get the best water resistance from polyurethane, it’s important to apply several coats. Each coat builds up the protective layer, making it thicker and more effective. You should also make sure to sand the wood between coats to ensure a smooth surface and good adhesion.

Overall, polyurethane is an excellent choice for protecting wood from water damage. While it’s not 100% waterproof, it does provide a high level of water resistance that can help to extend the life of your wood projects.

Types of Polyurethane for Wood Waterproofing

types-of-polyurethane-for-wood-waterproofing

When it comes to wood waterproofing, polyurethane is a popular option due to its water-resistant properties. However, not all polyurethane products are created equal. Here are two types of polyurethane that you can use for wood waterproofing:

Oil-Based Polyurethane

Oil-based polyurethane is a popular choice for wood waterproofing due to its durability and resistance to wear and tear. This type of polyurethane is made from a combination of synthetic resin and oil, which makes it more resistant to water than other types of polyurethane.

One of the benefits of oil-based polyurethane is that it provides a glossy finish that can enhance the natural beauty of the wood. However, it can also yellow over time, which may not be desirable for some wood types. Additionally, oil-based polyurethane has a strong odor and requires proper ventilation during application.

Water-Based Polyurethane

Water-based polyurethane is another option for wood waterproofing. This type of polyurethane is made from a combination of synthetic resin and water, which makes it less harmful to the environment than oil-based polyurethane. It also dries faster and has a lower odor, making it easier to work with.

Although water-based polyurethane is less durable than oil-based polyurethane, it still provides a good level of water resistance. It also dries clear, which makes it a good option for wood types that you don’t want to yellow over time.

In summary, both oil-based and water-based polyurethane can be used for wood waterproofing. Oil-based polyurethane is more durable and provides a glossy finish, while water-based polyurethane is less harmful to the environment and dries faster. Which one you choose will depend on your personal preference and the type of wood you are working with.

Application Process of Polyurethane on Wood

application-process-of-polyurethane-on-wood

When it comes to applying polyurethane on wood, there are a few steps that you need to follow to ensure a smooth and even finish. In this section, we will guide you through the preparation, application, and drying and curing process of polyurethane on wood.

Preparation

Before applying polyurethane on wood, it is important to prepare the surface properly. Here are the steps you need to follow:

  1. Sand the surface: Use a fine-grit sandpaper to sand the wood surface. This will help to remove any roughness or imperfections on the surface.
  2. Clean the surface: Use a tack cloth or a lint-free cloth to clean the surface. Make sure there is no dust or debris left on the surface.
  3. Apply a wood conditioner: If you are working with a porous wood like pine, it is recommended to apply a wood conditioner before applying polyurethane. This will help to seal the pores and ensure an even finish.

Application

Once you have prepared the surface, it’s time to apply the polyurethane. Here are the steps you need to follow:

  1. Stir the polyurethane: Use a stir stick to stir the polyurethane thoroughly. Do not shake the can as it can introduce air bubbles.
  2. Apply the polyurethane: Use a brush or a foam applicator to apply the polyurethane on the surface. Apply a thin and even coat, working in the direction of the grain. Do not overwork the polyurethane as it can cause bubbles and streaks.
  3. Sand between coats: Once the first coat is dry, sand the surface lightly with a fine-grit sandpaper. This will help to remove any imperfections and ensure a smooth finish. Apply a second coat of polyurethane and repeat the sanding process.

Drying and Curing

After applying the final coat of polyurethane, it’s time to let it dry and cure. Here are the steps you need to follow:

  1. Let it dry: Polyurethane takes several hours to dry. Make sure to let it dry completely before applying any additional coats.
  2. Let it cure: Polyurethane takes several days to cure completely. Make sure to let it cure before using the surface.
  3. Avoid using the surface: Avoid using the surface for at least 24 hours after applying the final coat of polyurethane. This will ensure that the polyurethane has cured properly.

By following these steps, you can ensure a smooth and even finish when applying polyurethane on wood.

Benefits of Using Polyurethane on Wood

benefits-of-using-polyurethane-on-wood

Polyurethane is a popular coating for wood surfaces due to its numerous benefits. Here are some benefits of using polyurethane on wood:

1. Protection against damage

Polyurethane forms a protective layer on wood, helping to protect it against moisture, sunlight, and other environmental elements. It also protects wood from scratches and discoloration, making it an excellent choice for high-traffic areas.

2. Enhances the natural beauty of wood

Polyurethane enhances the natural beauty of wood by adding a clear, glossy finish. It gives wood richness and depth while preserving its natural grain and texture.

3. Easy to apply

Polyurethane is easy to apply and dries quickly, making it a popular choice for DIY projects. It can be applied with a brush, roller, or spray gun, and it is available in both water-based and oil-based formulas.

4. Long-lasting

Polyurethane is one of the toughest clear coatings available, making it a long-lasting solution for protecting wood surfaces. It can withstand heavy use and exposure to the elements, making it an ideal choice for outdoor furniture and decks.

In summary, polyurethane is an excellent choice for protecting and enhancing the natural beauty of wood surfaces. Its durability, ease of application, and ability to protect against damage make it a popular choice for both DIY and professional projects.

Potential Drawbacks of Polyurethane on Wood

While polyurethane is a popular choice for finishing wood due to its waterproofing properties, there are some potential drawbacks to consider before using it on your project.

1. Yellowing

One of the most common complaints about polyurethane is that it can yellow over time, especially when exposed to sunlight. This can be particularly noticeable on lighter woods, such as pine or maple. While there are some polyurethane formulas that claim to be non-yellowing, it’s important to keep in mind that all polyurethane is susceptible to this issue to some degree.

2. Difficulty of Application

Polyurethane can be difficult to apply evenly, especially for novice woodworkers. It can also be prone to drips and runs, which can be frustrating to deal with. Additionally, because polyurethane dries quickly, it can be challenging to correct any mistakes once they’ve been made.

3. Potentially Harmful Chemicals

Some polyurethane formulas contain volatile organic compounds (VOCs), which can be harmful to your health if inhaled. If you’re working with polyurethane in a poorly ventilated area, it’s important to take precautions such as wearing a respirator mask and opening windows to increase air flow.

4. Not Suitable for Outdoor Use

While polyurethane is waterproof, it may not be suitable for use on outdoor projects. Exposure to sunlight and other weather conditions can cause the finish to break down over time, which can lead to cracking, peeling, and other issues. If you’re planning to use polyurethane on an outdoor project, it’s important to choose a formula that’s specifically designed for outdoor use.

Overall, polyurethane can be a great choice for finishing wood, but it’s important to be aware of its potential drawbacks before you start your project. By considering these factors and taking the necessary precautions, you can ensure that your finished product looks great and lasts for years to come.

Frequently Asked Questions

How can I make wood waterproof for outdoor use?

If you want to make wood waterproof for outdoor use, you have several options. One of the most effective ways to waterproof wood is by using a sealant or a waterproofing product. You can choose from a wide range of options, including oil-based and water-based products.

What is the best waterproof finish for wood?

The best waterproof finish for wood will depend on the specific project and the type of wood you are using. Some of the most popular waterproof finishes for wood include polyurethane, varnish, and epoxy. Each of these finishes has its own unique properties and benefits, so it’s important to choose the right one for your project.

Is oil-based polyurethane a good waterproofing option for wood?

Yes, oil-based polyurethane is a good waterproofing option for wood. It creates a protective barrier that repels water and prevents it from penetrating the wood. However, it’s important to note that oil-based polyurethane can yellow over time, so it may not be the best choice for lighter-colored woods.

Can polyurethane be used to create a waterproof seal on wood?

Yes, polyurethane can be used to create a waterproof seal on wood. When applied correctly, polyurethane creates a protective barrier that prevents water from penetrating the wood. However, it’s important to note that polyurethane is not completely waterproof and may not provide complete protection in all situations.

What are some naturally waterproof types of wood?

Some types of wood are naturally waterproof and do not require additional waterproofing treatments. These include teak, cedar, and redwood. These woods have natural oils and resins that repel water and prevent rot and decay.

What is the best way to permanently waterproof wood?

The best way to permanently waterproof wood is by using a combination of sealant and waterproofing products. This will create a protective barrier that repels water and prevents it from penetrating the wood. It’s also important to choose a type of wood that is naturally resistant to water and rot, such as teak or cedar.

Blog

How to Attach Wood to Metal Without Screws: Alternative Methods

Attaching wood to metal without screws can be a challenging task, especially if you don’t have the right tools and knowledge. However, there are several methods you can use to successfully attach wood to metal without screws. In this article, we will explore some of the most popular methods and provide you with step-by-step instructions on how to use them.

One of the most common methods of attaching wood to metal without screws is using adhesives. There are several types of adhesives available on the market, including two-part glue, Gorilla Glue, or Super Glue, and Liquid Nails. These adhesives are designed to create a strong bond between the wood and metal surfaces, allowing you to attach them without using screws.

Another popular method of attaching wood to metal without screws is using cleat hinging. This method involves using cleats and plates to hinge the wood to the metal, allowing you to attach them together without using screws. Cleat hinging is a practical solution that offers several advantages, including the ability to hinge wood in any direction, to hinge wood together, and the ability to use cleats and plates on either side of your joint.

Understanding the Materials

When it comes to attaching wood to metal without screws, it’s important to understand the materials you’re working with. Both wood and metal have unique properties that can affect the strength and durability of your attachment.

Types of Wood

There are many types of wood to choose from when attaching it to metal. Some common types include:

  • Pine: A softwood that is easy to work with and relatively inexpensive.
  • Oak: A hardwood that is durable and has a beautiful grain pattern.
  • Birch: A hardwood that is strong and lightweight.
  • Maple: A hardwood that is dense and strong.

When selecting wood for your project, consider the density, porosity, and moisture content. These factors can affect how well the wood will bond with the metal.

Types of Metal

There are also many types of metal to choose from when attaching it to wood. Some common types include:

  • Steel: A strong and durable metal that is commonly used in construction.
  • Aluminum: A lightweight metal that is often used in aerospace and automotive applications.
  • Copper: A soft metal that is often used in electrical applications.
  • Brass: A metal alloy that is often used in decorative applications.

When selecting metal for your project, consider the thickness, hardness, and corrosion resistance. These factors can affect how well the metal will bond with the wood.

By understanding the properties of the wood and metal you’re working with, you can select the best adhesive and attachment method for your project.

Preparation Process

preparation-process

Before attaching wood to metal without screws, it’s important to prepare both surfaces properly. This will ensure a strong and long-lasting bond. The preparation process involves cleaning the surfaces and marking the attachment points.

Cleaning the Surfaces

The first step in the preparation process is to clean the surfaces that will be bonded. Any dirt, grease, or rust can weaken the bond between the wood and metal. Here’s how you can clean the surfaces:

  • Use a wire brush to remove any rust or loose paint from the metal surface.
  • Wipe the metal surface with a clean cloth to remove any dust or debris.
  • Sand the metal surface with fine-grit sandpaper to create a rough surface for better adhesion.
  • Use a degreaser to remove any grease or oil from the metal surface.

For the wood surface, use a clean cloth to wipe away any dust or debris. If the wood has a smooth surface, sand it lightly to create a rough surface for better adhesion.

Marking the Attachment Points

Once the surfaces are clean, the next step is to mark the attachment points. This will help you align the wood and metal correctly when bonding them together. Here’s how you can mark the attachment points:

  • Place the wood on the metal surface and align it where you want it to be attached.
  • Use a pencil or marker to mark the attachment points on the metal surface.
  • Remove the wood and use a center punch to create small indentations on the marked attachment points.
  • Drill pilot holes at the marked attachment points on the metal surface.

After marking the attachment points, you’re ready to attach the wood to the metal without screws.

Attachment Techniques

attachment-techniques

When it comes to attaching wood to metal without screws, there are several techniques you can use. In this section, we will explore three popular methods: using adhesives, using metal brackets, and using welding.

Using Adhesives

One of the most common ways to attach wood to metal without screws is by using adhesives. There are many different types of adhesives that can be used for this purpose, including two-part glue, Gorilla Glue, and Liquid Nails.

Before applying adhesive, it is important to use an adhesive primer to promote better adhesion between the metal and wood surfaces. Once the primer is applied, you can then apply the adhesive to attach the wood to the metal without screws.

Using Metal Brackets

Another option for attaching wood to metal without screws is by using metal brackets. These brackets can be attached to the metal using screws or welding, and then the wood can be attached to the brackets using screws or adhesive.

Metal brackets come in a variety of shapes and sizes, so you can choose the one that best fits your needs. They are also very strong and durable, making them a good choice for heavy-duty applications.

Using Welding

Finally, welding is another option for attaching wood to metal without screws. This method involves melting the metal and wood together using heat, creating a strong bond that is difficult to break.

Welding requires some specialized equipment and training, so it may not be the best option for everyone. However, if you have experience with welding or are willing to learn, it can be a very effective way to attach wood to metal without screws.

Overall, there are several different techniques you can use to attach wood to metal without screws. Each method has its own advantages and disadvantages, so be sure to choose the one that best fits your needs and skill level.

Safety Measures

safety-measures1

When attaching wood to metal without screws, it is important to take the necessary safety measures to prevent any injuries or accidents. Here are some safety measures you should follow:

Proper Ventilation

When using adhesives or glues to attach wood to metal, it is important to have proper ventilation in the work area. This will help prevent any harmful fumes from accumulating and causing health problems. Make sure to work in a well-ventilated area or use a fan to circulate the air.

Use of Protective Gear

It is important to use protective gear when working with adhesives or glues. This will help prevent any skin or eye irritation or injury. Here are some protective gear you should consider using:

  • Gloves: Wear gloves to protect your hands from any chemicals in the adhesive or glue.
  • Safety glasses: Wear safety glasses to protect your eyes from any splashes or fumes.
  • Respirator: Use a respirator to protect your lungs from any harmful fumes.

Make sure to read the instructions on the adhesive or glue you are using and follow any safety precautions mentioned. Taking these safety measures will help ensure a safe and successful project.

Post-Attachment Care

post-attachment-care

After attaching wood to metal without screws, it is important to take care of the newly joined surface to ensure its longevity. Here are some post-attachment care tips:

Regular Inspection

It is important to inspect the joined surface regularly to ensure that the bond is still strong and there is no damage. Inspect for any signs of cracking, splitting, or warping in the wood or metal. If you notice any issues, it is best to address them immediately to prevent further damage.

Maintenance Tips

Here are some maintenance tips to keep your wood and metal joint in good shape:

  • Avoid excessive moisture exposure as it can weaken the bond between the wood and metal. If the joint is exposed to moisture, dry it off immediately.
  • Clean the joint regularly with a damp cloth to remove any dirt or debris that may accumulate on the surface.
  • Use a protective coating to prevent the wood from rotting or the metal from rusting. This will also help to maintain the appearance of the joint.
  • Avoid exposing the joint to extreme temperatures as it can cause the wood to expand or contract, which can weaken the bond between the wood and metal.

By following these post-attachment care tips, you can ensure that your wood and metal joint remains strong and durable for years to come.

Frequently Asked Questions

How can I attach wood to metal without using screws?

Attaching wood to metal without using screws can be done using adhesives, nails, or brackets. Adhesives such as epoxies, wood glue, and liquid nails provide a strong bond when attaching wood to metal. Nails and brackets can also be used, but they may require pre-drilling and can cause damage to the metal surface.

What are some alternatives to using screws when attaching wood to metal?

Some alternatives to using screws when attaching wood to metal include welding, riveting, and using metal clips or clamps. These methods provide a strong and durable connection, but may require specialized tools and expertise.

What is the best way to attach wood to a metal gate?

The best way to attach wood to a metal gate depends on the weight of the wood and the type of gate. For lighter weight wood, adhesives such as epoxy or liquid nails can be used. For heavier weight wood, metal clips or clamps may be necessary. It is important to ensure that the connection is strong and secure to prevent the wood from falling off the gate.

How do I attach plywood to metal tubing without screws?

To attach plywood to metal tubing without screws, adhesives such as epoxy or liquid nails can be used. It is important to ensure that the metal surface is clean and free of debris before applying the adhesive. Clamps or metal clips can also be used to hold the plywood in place while the adhesive sets.

Is it possible to fasten sheet metal to wood without using screws?

Yes, it is possible to fasten sheet metal to wood without using screws. Adhesives such as epoxy or liquid nails can be used to create a strong bond between the metal and wood surfaces. Metal clips or clamps can also be used to hold the sheet metal in place while the adhesive sets.

What are some techniques for connecting wood to a steel I-beam?

Some techniques for connecting wood to a steel I-beam include using metal brackets or hangers, drilling holes in the beam and using bolts, or using adhesives such as epoxy or liquid nails. It is important to ensure that the connection is strong and secure to prevent the wood from falling off the beam.

Uncategorized

Can You Put Polyurethane Over Lacquer? (Pros & Cons)

If you’re coming to the end of a woodworking project, you may be thinking about adding an attractive lacquer coat to the finished item to improve the way it looks and to protect it – but you may also be considering adding polyurethane for an extra layer of protection.

But is this a smart idea? Can it help protect the lacquer beneath? And does it even work? To give you all the info you need, in this post, we answer the question, can you put polyurethane over lacquer?

What are polyurethane and lacquer?

Before we talk about whether you can use polyurethane over lacquer, let’s take a step back and think about what they both are to help us understand how they’re usually used and if they can be used together.

Polyurethane

Polyurethane

Image Credit: thisoldhouse

Polyurethane is a versatile plastic polymer that has a wide range of applications. It is used to make synthetic kitchen sponges, and it is also found in shoes, upholstery and plastic straps. And of course, it’s commonly used as a varnish to finish wooden furniture and floors.

Polyurethane comes in two main types – oil-based and water-based. When it is applied to a surface, it then dries as the water or oil content evaporates off.

Following this, it then cures – this means the surface hardens as the polyurethane reacts with the oxygen in the air.

Once dried and cured, it provides a tough and durable protective surface to the wood it covers.

Lacquer

lacquer 
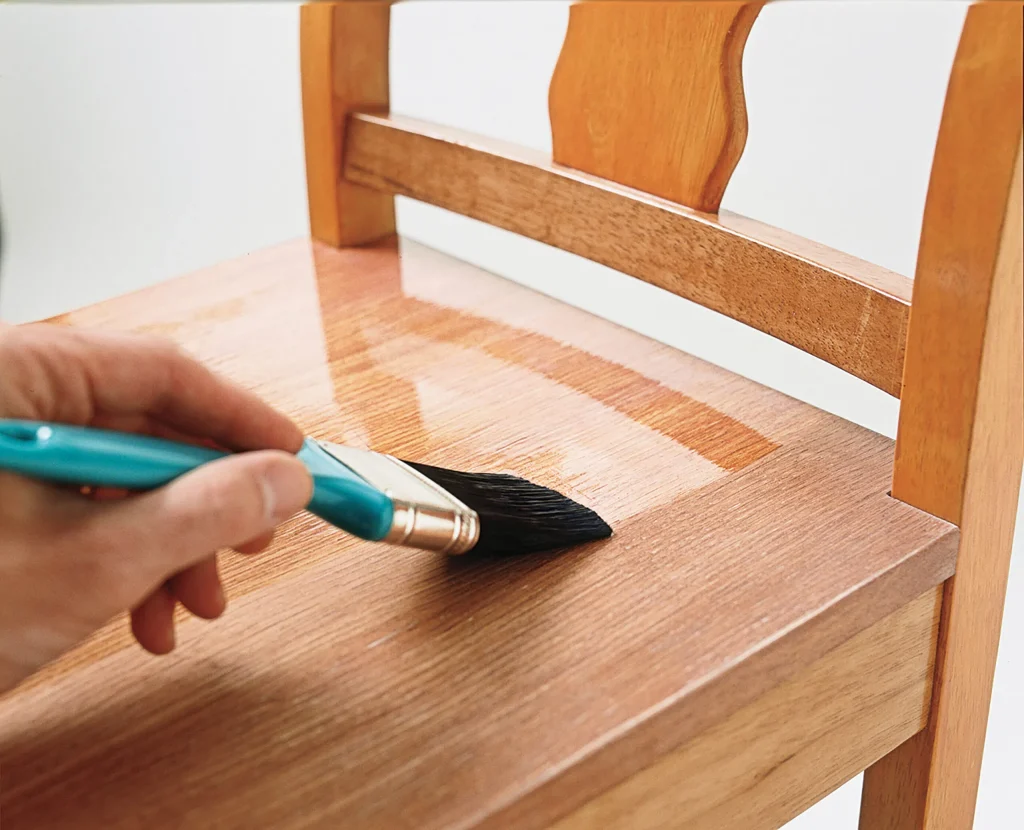
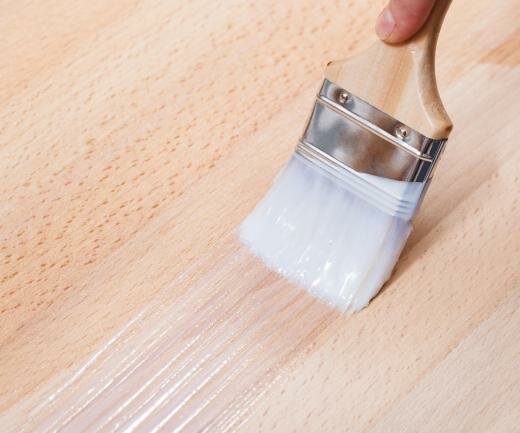
Image Credit: homequestionsanswered

Lacquer is also a popular finish that is applied to wood surfaces to provide an aesthetically pleasing finish while also protecting the wood.

Lacquer techniques have been in use for millennia, with the first known example dating back to Neolithic China from around 5000–4500 BCE.

Traditionally, lacquers have been made from tree sap or the resin secreted by certain beetles, but nowadays, synthetic lacquers are far more common.

Like polyurethane, lacquer also exists as both oil-based and water-based versions.

Lacquer is known to produce particularly attractive finishes and can also help protect the wood surface it covers. However, it can be brittle compared to polyurethane and may also chip or peel off if not applied correctly.

Why you wouldn’t usually want to use polyurethane over lacquer

Image Credit: woodrated

Polyurethane and lacquer are both considered “varnishes” or “finishes”, which means they are intended to be the top coat that’s applied to wood to protect it from water, mold, wood-eating insects and other general wear and tear.

This means that using them together is usually unnecessary – since lacquer is used to protect the wood, it would seem a strange idea to then add another layer of polyurethane over the top.

This is because it would essentially mean you are adding a second protective layer to protect the first protective layer.

Furthermore, by adding polyurethane over the top of lacquer, you would diminish the aesthetic appeal of the lacquer, which is known to be particularly beautiful when used well.

What all this means is that in normal circumstances, although you can use polyurethane over lacquer, it doesn’t necessarily mean you should.

Most of the time, adding two protective layers is just overkill, and it would also make the finished piece less attractive.

Some possible reasons why you still might want to Put Polyurethane Over Lacquer?

some-possible-reasons-why-you-still-might-want-to-put-polyurethane-over-lacquer 
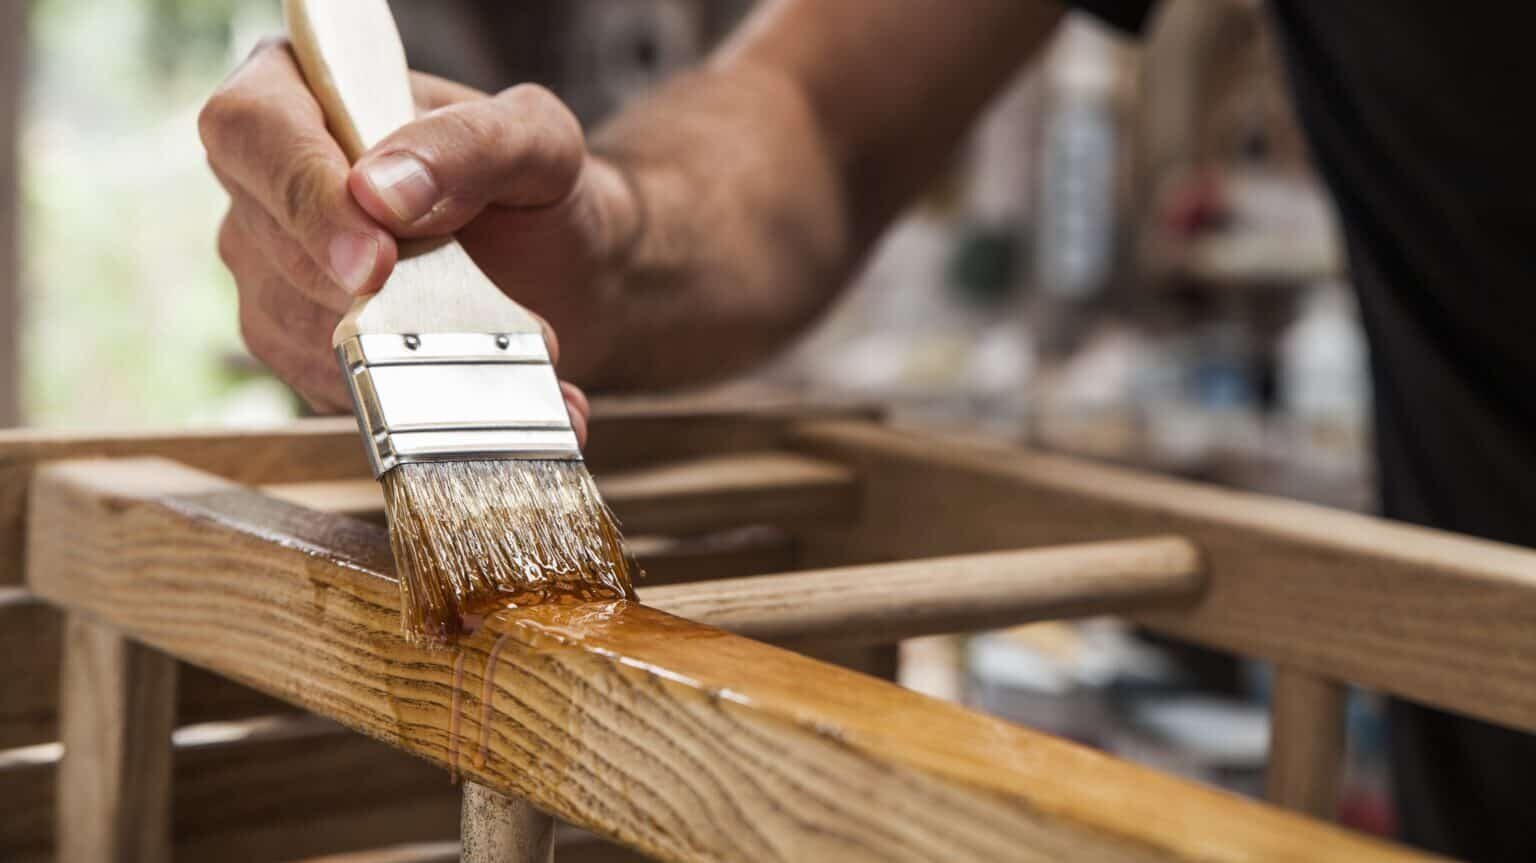
Image Credit: woodfinishingadvice

Having said all this about why it’s normally not necessary or advisable to use polyurethane over lacquer, there are still some situations where you might consider this option, and here are some examples:

1. If the item is for outdoor use

Lacquer is a great option for items that are destined for indoor use, but if you are giving a finish to something that will spend most of its life outdoors, lacquer might not stand up to the kind of wear and tear the item is likely to see.

However, you might still prefer the lacquer-style finish, and in this case, you can achieve something similar by first giving the item a lacquer finish and then protecting it with a few coats of polyurethane.

2. If you need the item to be extra-durable

Similarly, if you want to give an object a lacquer finish but know the object is going to see a lot of use, a good compromise might be to give it a lacquer finish first and then protect this with an outer layer of polyurethane.

3. To protect the surface against oils or acids

Polyurethane is more resistant than lacquer to acids and oils – especially if you choose an oil-based version. For this reason, if you want a lacquer finish but want to protect it against acids and oils, a polyurethane outer layer might be worth trying.

4. If you prefer a low-luster finish

Finally, if you want a lacquer finish with less luster, covering it with a layer or two of polyurethane might help you achieve this effect.

However, there are other ways to achieve something similar, so using polyurethane over lacquer might not be the most efficient way to create this look.

How to Put Polyurethane Over Lacquer?

Image Credit: elitehardwares

For anyone who’s decided that polyurethane over lacquer is something worth trying, now let’s look at how to go about doing it.

Step 1. Lightly sand the surface of the wood before beginning

The secret to success when applying lacquer or polyurethane is to always sand the previous layer before applying the next, and the same applies to the bare wood when you start.

However, you don’t want to scratch the surface – you just want to slightly roughen it to give the first lacquer coat something to bind to.

This means you only need to use fine grit sandpaper – something like 220-grit or 320-grit would be ideal.

Step 2. Apply the first lacquer coat

Next, apply the first lacquer coat and leave it to dry. Once it’s dry, you can consider adding extra coats.

Step 3. Add more lacquer coats

If you want to add more coats of lacquer, you can, and at least a few coats are recommended – you just need to remember to sand each layer lightly as explained above before applying each new coat to give the new coat something to adhere to.

Step 4. Add the polyurethane coats in the same way

Next, add as many coats of polyurethane as you think you need, remembering to sand each layer lightly before adding the next.

Polyurethane takes longer to dry than lacquer, so make sure you give it enough time. Generally speaking, water-based polyurethane will be ready after about six hours, but oil-based polyurethane needs at least 24 hours before it will be ready for the next coat.

Tips for Putting Polyurethane Over Lacquer

tips-for-putting-polyurethane-over-lacquer 
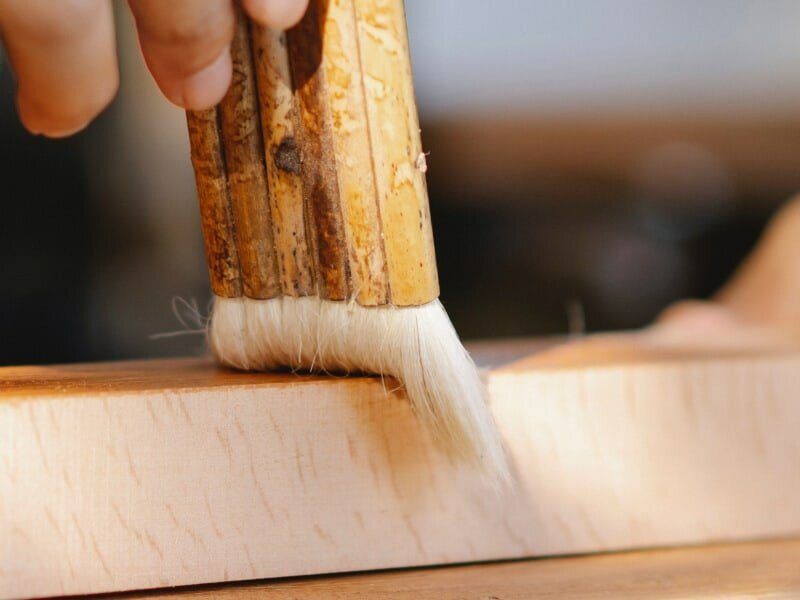
Image Credit: garagesee

To finish, here are a few tips that will help you make a success of your project.

Consider skipping the polyurethane

Before opting for a polyurethane covering over lacquer, think about whether this is really something you want to do.

Modern lacquers are very hard and durable, and usually, they won’t need additional protection provided by an outer layer of polyurethane.

In addition, when lacquer is scratched or damaged, it can only be repaired by adding another layer of lacquer – but if you have covered it in a layer of polyurethane, you won’t be able to do this.

Remember, lacquer is designed to be a protective outer layer in itself, and most people would advise against using polyurethane over lacquer for the reasons we outlined above.

More than this, it requires a lot of extra time and effort for something that won’t necessarily produce great results.

Always sand between every layer

When applying either lacquer or polyurethane, you always need to give each layer a light sanding before applying the next coat – and the same is true when you are applying these two finishes one over the other.

Use the same type of lacquer and polyurethane

One important thing to remember if you’re going to make your lacquer and polyurethane work is that you must use the same type of polyurethane as you do lacquer.

This means if you use a water-based lacquer, you need to use a water-based polyurethane, and if you use an oil-based lacquer, you need to use an oil-based polyurethane – you can’t use one of one and one of the other because they won’t bind together correctly.

Think carefully about how many coats of each to apply

When applying lacquer and polyurethane, you also need to think about how many coats of each you need to apply.

When it comes to lacquer, you’ll usually need to apply at least three coats – although, for something that will see more use, you’ll need to use more.

As far as the polyurethane is concerned, at least two coats are required – but it can’t hurt to add one more if you want some extra protection.

Polyurethane over lacquer can be made to work

As we’ve seen, the technique of adding polyurethane over lacquer is not necessarily a great idea since lacquer looks great and does a good job of protecting wood on its own without any help.

However, if you decide to go ahead and try using polyurethane over lacquer, it can be made to work, and in theory, it should provide an extra level of protection to the lacquer layer beneath it.