wear protective gear

Blog

How to Make a Wooden Letter Opener: A Beginner's Guide

Are you looking for a simple yet beautiful gift idea that you can make using woodworking skills? Consider making a wooden letter opener. A letter opener is a useful tool that can be used to open mail without tearing or damaging the contents inside. Making a wooden letter opener is a great project for any woodworker, whether you are a beginner or an experienced craftsman.

In this article, we will show you how to make a wooden letter opener using basic woodworking tools and techniques. You will learn how to select the right type of wood for your project, how to shape and sand the wood to create a comfortable grip, and how to sharpen the blade to ensure a clean cut every time. Whether you are making a letter opener for yourself or as a gift for someone else, this project is sure to be a hit. So, grab your tools and let’s get started!

Understanding the Materials

When it comes to making a wooden letter opener, the materials you use are just as important as the tools you use. In this section, we will discuss the types of wood you can use and the essential tools you will need to complete the project.

Types of Wood

Choosing the right type of wood is crucial to the success of your project. You want a wood that is dense, straight-grained, and has closed pores. Here are some of the best types of wood for making a wooden letter opener:

  • Maple – Maple is a hard, dense wood that is easy to work with and has a beautiful grain pattern.
  • Cherry – Cherry is a medium-hard wood that is known for its rich, reddish-brown color and smooth grain.
  • Walnut – Walnut is a hard, durable wood that is dark in color and has a beautiful grain pattern.
  • Mahogany – Mahogany is a hard, dense wood that is known for its reddish-brown color and beautiful grain pattern.

Essential Tools

Now that you have chosen your wood, it’s time to gather your tools. Here are the essential tools you will need to make a wooden letter opener:

  • Saw – You will need a saw to cut your wood to the desired length.
  • Chisel – A chisel is used to shape the handle of your letter opener.
  • Sandpaper – Sandpaper is used to smooth out any rough edges and to give your letter opener a polished look.
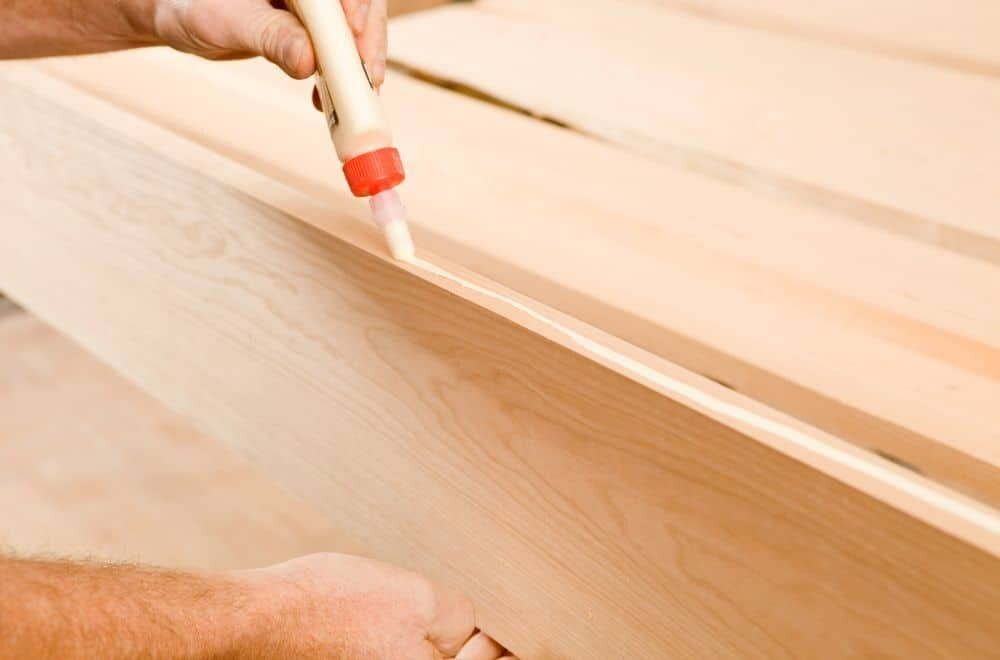
  • Wood glue – Wood glue is used to attach the blade to the handle.
  • Clamps – Clamps are used to hold the blade and handle together while the glue dries.
  • Blade – You will need a metal blade to attach to the handle of your letter opener.

With these materials and tools, you will be able to make a beautiful and functional wooden letter opener.

Safety Precautions

When working with wood, it’s important to take safety precautions to avoid injury. Here are a few things to keep in mind when making a wooden letter opener:

  • Wear protective gear: Always wear safety glasses to protect your eyes from flying wood chips and sawdust. Additionally, it’s a good idea to wear a dust mask to prevent inhaling sawdust.

  • Use sharp tools: Dull tools can cause accidents, so make sure your knives and saws are sharp before starting your project.

  • Keep your work area clean: A cluttered work area can be dangerous, so make sure to keep your workspace clean and organized.

  • Use a vice: When carving or sawing, use a vice to secure the wood in place. This will prevent the wood from slipping and causing an accident.

  • Work slowly and carefully: Take your time when carving or sawing, and always be aware of where your hands are in relation to the tools.

By following these safety precautions, you can ensure that your woodworking project is both fun and safe.

Designing Your Letter Opener

Designing your wooden letter opener is a fun and creative process. You can make it as simple or as complex as you want, depending on your skill level and personal preferences.

First, consider the size and shape of your letter opener. You can make it long and slender, or short and stubby. Think about how you will hold it and how it will fit in your hand. You may want to make a few sketches to help you visualize your design.

Next, choose the type of wood you want to use. Dense, straight-grained woods with closed pores are the best choice for this project. Woods like oak and ash are poor choices because their open pores show up on the blade edge and weaken it. You can also consider using exotic woods for a unique and beautiful look.

Once you have your wood selected, think about the finish you want to apply. You can leave the wood natural for a rustic look, or apply a clear coat to bring out the wood’s natural beauty. You can also stain the wood to match your personal style or the decor of your workspace.

Finally, consider any additional embellishments you want to add to your letter opener. You can carve designs or patterns into the wood, or add decorative elements like beads or metal accents. Just remember to keep the design simple and functional, as the primary purpose of a letter opener is to open letters efficiently.

With these design considerations in mind, you can create a beautiful and functional wooden letter opener that is uniquely yours.

Cutting the Wood

To start making your wooden letter opener, you’ll need to cut the wood to size. You can use any type of wood you like, but hardwoods such as maple or oak are good choices as they are durable and can be easily shaped.

Tools Needed

To cut the wood, you’ll need a few tools:

  • A saw: A hand saw or a jigsaw will work well for this task.
  • Sandpaper: You’ll need sandpaper to smooth out any rough edges after cutting.
  • A ruler or tape measure: You’ll need this to measure the length of the wood.

Steps to Follow

Here are the steps to follow to cut the wood for your letter opener:

  1. Measure and mark the length of the wood using a ruler or tape measure.
  2. Use a saw to cut the wood to the desired length. Take your time and make sure the cut is straight.
  3. Sand the cut edges of the wood to smooth out any rough spots.

Once you have cut the wood to size, you can move on to shaping it into a letter opener.

Sanding and Smoothing

Now that you have shaped your wooden letter opener, it’s time to sand and smooth it. Sanding is an essential step in woodworking that helps to remove any rough edges or splinters from the wood. It also helps to achieve a smooth and polished finish.

To begin, you will need a sandpaper with a grit of 220 or higher. You can use a sanding block or a piece of wood to wrap the sandpaper around it. Start sanding the edges and corners of the letter opener, moving the sandpaper in a circular motion. Be careful not to sand too hard, as this can damage the wood.

Next, move on to the flat surfaces of the letter opener. Sand in the direction of the grain, using long strokes. Make sure to sand evenly, so that the surface is smooth and even. You can use a finer grit sandpaper to achieve a smoother finish.

After sanding, wipe the letter opener with a clean cloth to remove any dust or debris. Then, apply a wood finish or polish to protect the wood and give it a shiny appearance. You can use a wax, oil, or varnish, depending on your preference.

In conclusion, sanding and smoothing your wooden letter opener is an important step in achieving a polished and professional-looking product. Take your time and be patient, and you will be rewarded with a beautiful and functional letter opener that you can be proud of.

Applying Finish

Now that you have completed carving and sanding your wooden letter opener, it’s time to apply a finish that will protect the wood and give it a beautiful, polished look.

Before applying any finish, make sure the wood is clean and free of dust and debris. You can use a tack cloth or a soft-bristled brush to remove any particles that might have settled on the surface.

There are several types of finishes you can use for your letter opener, including:

  • Oil finishes: These finishes penetrate the wood and enhance its natural beauty. They are easy to apply and provide a durable, water-resistant finish. Some popular oil finishes include linseed oil, tung oil, and Danish oil.

  • Wax finishes: These finishes provide a soft, smooth feel to the wood and are great for enhancing its natural color. They are easy to apply and provide a low sheen finish. Some popular wax finishes include beeswax and carnuba wax.

  • Varnish finishes: These finishes provide a hard, durable finish that is resistant to scratches and stains. They are great for high-use items like a letter opener. Some popular varnish finishes include polyurethane and spar varnish.

When applying your chosen finish, be sure to follow the manufacturer’s instructions carefully. Here are some general tips to keep in mind:

  • Apply the finish in a well-ventilated area, and wear protective gloves and a mask to avoid inhaling any fumes.

  • Apply a thin, even coat of finish using a brush or a cloth. Avoid applying too much finish, as this can cause drips and uneven spots.

  • Allow the finish to dry completely before applying a second coat. This can take anywhere from a few hours to a day or more, depending on the type of finish you are using.

  • Sand lightly between coats with a fine-grit sandpaper to remove any rough spots or bubbles.

  • Apply as many coats as necessary to achieve the desired level of protection and sheen.

By following these tips, you can apply a beautiful finish to your wooden letter opener that will protect it for years to come.

Adding Personal Touches

Making your own wooden letter opener is a great way to add a personal touch to your desk or workspace. There are a few ways to customize your letter opener to make it unique and special.

Engraving

One way to add a personal touch to your wooden letter opener is to engrave it. You can use a wood burning tool or a laser engraver to add text or designs to your letter opener. This is a great way to add a name, initials, or a special message to your letter opener.

If you are using a wood burning tool, make sure to practice on a scrap piece of wood first to get a feel for the tool. You can use stencils or freehand your design onto the wood. Once you are happy with your design, carefully burn it into the wood.

If you are using a laser engraver, you can create your design on a computer and upload it to the engraver. The laser will etch your design onto the wood. This method is more precise than using a wood burning tool, but it may not be as hands-on.

Painting

Another way to add a personal touch to your wooden letter opener is to paint it. You can use acrylic paint or wood stain to add color to your letter opener. This is a great way to match your letter opener to your workspace or to add a pop of color.

Before painting your letter opener, make sure to sand it down and wipe it clean. This will help the paint adhere to the wood. You can use painter’s tape to create clean lines and prevent the paint from bleeding onto other parts of the letter opener.

Once you have painted your letter opener, let it dry completely before using it. You can also add a coat of clear varnish to protect the paint and give your letter opener a glossy finish.

By adding a personal touch to your wooden letter opener, you can create a unique and special tool for your desk or workspace. Whether you choose to engrave it or paint it, your letter opener will be a reflection of your personal style and creativity.

Blog

How to Build a Wooden Rocking Chair: A Step-by-Step Guide

Are you looking to add a touch of comfort to your home with a beautiful wooden rocking chair? Building your own rocking chair can be a rewarding and fulfilling project that will provide you with a unique piece of furniture that you can cherish for years to come. Whether you’re an experienced woodworker or a beginner, building a wooden rocking chair is a project that can be accomplished with some patience and attention to detail.

To get started, you’ll need to gather the necessary materials and tools, including wood, screws, a saw, a drill, and sandpaper. There are many different styles and designs of rocking chairs to choose from, so you’ll want to decide on the one that best fits your needs and preferences. You can find plans and instructions online, or you can create your own design if you have some woodworking experience. Once you have your materials and plans in hand, it’s time to get started on your project.

Understanding the Basics

Before you start building a wooden rocking chair, it’s important to understand some basics. This section will cover the types of wood you can use and the tools you will need to get the job done.

Types of Wood

When choosing the type of wood for your rocking chair, consider both the look and durability. Some popular options include:

  • Cherry: A beautiful, reddish-brown wood that is both durable and easy to work with.
  • Maple: A strong, dense wood with a fine grain that is often used for furniture.
  • Oak: A classic, sturdy wood that is resistant to wear and tear.
  • Walnut: A dark, rich wood that is strong and durable.

You can also use other types of wood, but make sure they are strong enough to support the weight of a person and have a tight, even grain.

Tools Needed

To build a wooden rocking chair, you will need some basic tools:

  • Saw: A hand saw or power saw will be necessary to cut the wood to the right size.
  • Drill: You will need a drill to make holes for screws and other fasteners.
  • Screwdriver: A screwdriver will be necessary to tighten screws and other fasteners.
  • Sandpaper: You will need sandpaper to smooth out rough edges and surfaces.
  • Clamps: Clamps will be necessary to hold the wood in place while you work on it.
  • Measuring tape: You will need a measuring tape to ensure that all the pieces are cut to the right size.

Other tools you may need include a chisel, a hammer, and a router. Make sure you have all the necessary tools before you begin.

Now that you understand the basics of building a wooden rocking chair, it’s time to move on to the next step.

Designing Your Rocking Chair

When it comes to building a wooden rocking chair, the design process is crucial. You want to create a chair that is not only comfortable but also aesthetically pleasing and functional. In this section, we will cover the two main aspects of designing your rocking chair: choosing a design and creating a blueprint.

Choosing a Design

Before you start building your rocking chair, you need to choose a design that suits your needs and preferences. There are many different designs to choose from, ranging from traditional to modern styles. Here are some factors to consider when choosing a design:

  • Comfort: The most important factor to consider is comfort. You want to choose a design that will provide adequate support and comfort for your body.
  • Style: Consider the style of your rocking chair and how it will fit in with the rest of your furniture. If you have a traditional home, you may want to choose a classic design. If you have a modern home, you may want to choose a more contemporary design.
  • Materials: Think about the type of wood you want to use for your rocking chair. Different woods have different properties, and some are better suited for certain designs than others.
  • Size: Consider the size of your rocking chair and how it will fit in your space. You want to choose a design that is proportional to the room it will be in.

Creating a Blueprint

Once you have chosen a design for your rocking chair, the next step is to create a blueprint. A blueprint is a detailed plan that outlines the dimensions and specifications of your chair. Here are the steps to creating a blueprint:

  1. Measure and sketch: Measure the dimensions of your chair and sketch a rough outline of your design.
  2. Refine your sketch: Refine your sketch, adding more details and making adjustments to the dimensions as necessary.
  3. Add measurements: Add measurements to your sketch, including the height, width, and depth of each component.
  4. Create a parts list: Create a list of all the parts you will need to build your chair, including the type and quantity of wood, screws, and other materials.
  5. Review and revise: Review your blueprint and make any necessary revisions before you start building.

By following these steps, you can create a detailed blueprint that will guide you through the building process and ensure that your rocking chair turns out just the way you want it.

Preparing the Wood

Before you start building your wooden rocking chair, it’s important to prepare the wood properly. This will ensure that your chair is sturdy and long-lasting. In this section, we’ll cover the two main steps to prepare the wood: selecting the wood and cutting the wood.

Selecting the Wood

The first step in preparing the wood is to select the right type of wood. You want to choose a wood that is strong and durable, but also has a nice grain and texture. Some popular choices for a rocking chair include cherry, oak, and maple.

When selecting your wood, make sure that it is free of knots and cracks. These imperfections can weaken the wood and make it more prone to breaking. You should also choose wood that is straight and has a consistent thickness. This will make it easier to work with when cutting and shaping.

Cutting the Wood

Once you have selected your wood, the next step is to cut it to the right size and shape. You will need to cut several pieces of wood for your rocking chair, including the seat, back, legs, and rockers.

To cut the wood, you will need a saw and a measuring tape. Make sure to measure each piece of wood carefully to ensure that it is the right size. You can use a table saw or a circular saw to make the cuts, but make sure to use a guide to keep your cuts straight and even.

After you have cut your wood to the right size, you can start shaping it. You can use a variety of tools to shape the wood, including a router, chisels, and sandpaper. Make sure to take your time and work carefully to create smooth, even curves and angles.

By following these steps to prepare your wood, you can ensure that your wooden rocking chair is strong, durable, and beautiful. With a little patience and attention to detail, you can create a chair that you will enjoy for years to come.

Building the Chair

Assembling the Pieces

Now that you have cut and shaped all the wooden pieces for your rocking chair, it’s time to start assembling them together. Here are the steps you need to follow:

  1. Begin by attaching the front legs to the seat. Place the seat upside down on a flat surface and align the legs so they are perpendicular to the seat. Use wood glue and screws to secure them in place.

  2. Next, attach the back legs to the seat. Again, use wood glue and screws to secure them in place.

  3. Now it’s time to attach the backrest to the back legs. Align the backrest with the back legs and use wood glue and screws to secure it in place.

  4. Finally, attach the armrests to the front legs. Align them with the legs and use wood glue and screws to secure them in place.

Sanding and Finishing

Once you have assembled the chair, it’s important to sand it down and apply a finish to protect the wood and give it a polished look. Here’s what you need to do:

  1. Start by sanding the entire chair with coarse-grit sandpaper to remove any rough spots or imperfections. Then switch to a finer-grit sandpaper to smooth out the surface.

  2. Once you have finished sanding, wipe down the chair with a damp cloth to remove any dust or debris.

  3. Apply a wood stain or paint to the chair, following the manufacturer’s instructions. Be sure to apply an even coat and let it dry completely before applying a second coat.

  4. Finally, apply a clear coat of polyurethane or another protective finish to the chair to seal the wood and give it a glossy finish.

By following these steps, you can build a beautiful and sturdy wooden rocking chair that will last for years to come.

Safety Measures

When it comes to building a wooden rocking chair, safety should always be your top priority. Here are some safety measures you should take to ensure that you can build your chair without any accidents.

Wear Protective Gear

Before you begin building your rocking chair, make sure to wear protective gear. This includes safety glasses, gloves, and a dust mask. These items will protect you from flying wood chips, sawdust, and other debris that can cause serious injury.

Use Proper Tools

Using the right tools for the job is essential to building a safe and sturdy rocking chair. Make sure your tools are in good condition and that you know how to use them properly. If you’re not sure how to use a tool, ask someone with experience or do some research before you begin.

Follow Instructions Carefully

Make sure to read and follow the instructions carefully. This will help you avoid mistakes that can cause injury. If you’re not sure about something, don’t hesitate to ask for help.

Secure Your Workpiece

Make sure your workpiece is securely clamped or held in place before you begin cutting or drilling. This will prevent the wood from moving or shifting, which can cause the saw or drill to kick back and cause injury.

Take Breaks

Building a wooden rocking chair can be a time-consuming process. It’s important to take breaks and rest your eyes, hands, and back to prevent injury from repetitive motion.

By following these safety measures, you can build a wooden rocking chair without any accidents. Remember to always prioritize safety and take the necessary precautions to protect yourself while building.

Maintaining Your Rocking Chair

Congratulations on building your own wooden rocking chair! Now that you have this beautiful piece of furniture, it’s important to take care of it so it can last for years to come. Here are some tips for maintaining your rocking chair:

Cleaning

Regular cleaning is essential for keeping your rocking chair looking its best. Use a soft cloth or brush to remove any dust or debris from the surface of the chair. You can also use a damp cloth to wipe down the chair, but be sure to dry it thoroughly afterwards to prevent any water damage.

Oiling

Wooden furniture needs to be oiled periodically to keep it from drying out and cracking. Apply a thin layer of oil to your rocking chair using a soft cloth, and then wipe away any excess. Be sure to use an oil that is appropriate for your type of wood.

Tightening Screws and Bolts

Over time, the screws and bolts in your rocking chair may become loose. Periodically check to make sure that they are all tight and secure. If you notice any that are loose, tighten them with a screwdriver or wrench.

Avoiding Sunlight and Moisture

Direct sunlight and moisture can damage the finish and wood of your rocking chair. Try to keep your chair out of direct sunlight, and avoid placing it in areas where it may be exposed to moisture, such as near windows or in a damp basement.

By following these simple maintenance tips, you can keep your rocking chair looking beautiful and functioning properly for years to come.

Blog

How to Make a Wooden Garden Table: A Beginner's Guide

If you’re looking to add a new piece of furniture to your garden, building your own wooden garden table can be a fun and rewarding project. Not only will you have a beautiful and functional table, but you’ll also have the satisfaction of knowing that you built it yourself. In this article, we’ll provide you with step-by-step instructions on how to make your own wooden garden table.

Before you begin, it’s important to decide on the size and style of your table. Consider the dimensions of your garden and how many people you want the table to seat. Once you have a clear idea of what you want, you can start gathering the materials and tools you’ll need. In the following sections, we’ll guide you through the process of measuring and sketching your table, preparing the materials, and assembling your table. With a little bit of effort and patience, you’ll have a beautiful new addition to your garden in no time.

Understanding the Basics of Woodworking

Choosing the Right Wood

When it comes to woodworking, the type of wood you choose is crucial to the success of your project. You want to choose a wood that is strong, durable, and aesthetically pleasing. Some popular choices for wooden garden tables include cedar, redwood, and teak.

Cedar is a popular choice because it is resistant to rot and insects. It is also lightweight and easy to work with. Redwood is another great option because it is naturally resistant to decay and has a beautiful reddish color. Teak is a more expensive option, but it is extremely durable and has a beautiful golden color.

When choosing your wood, make sure to consider the size and shape of your table, as well as the climate in your area. You want to choose a wood that will hold up well in your specific environment.

Safety Measures in Woodworking

Woodworking can be a fun and rewarding hobby, but it is important to take safety precautions to avoid injury. Here are some basic safety measures to keep in mind:

  • Wear protective gear, such as safety glasses and earplugs.
  • Use sharp tools to avoid slipping and causing injury.
  • Keep your workspace clean and organized to avoid tripping hazards.
  • Never work with wood that is damp or wet, as this can cause the wood to warp and become unstable.
  • Always use a saw blade guard and keep your hands away from the blade.
  • Never wear loose clothing or jewelry while working with power tools.

By following these safety measures, you can ensure that your woodworking projects are not only beautiful, but also safe.

Designing Your Garden Table

When it comes to designing your own garden table, there are a few things you need to consider to ensure that your table is both functional and aesthetically pleasing. In this section, we’ll cover two key aspects of designing your garden table: sketching the design and determining the dimensions.

Sketching the Design

Before you start building your garden table, it’s important to have a clear idea of what you want it to look like. Sketching out your design can help you visualize the finished product and make any necessary adjustments before you start cutting wood.

When sketching your design, consider the following:

  • The style of your table (e.g. rustic, modern, etc.)
  • The shape of your table (e.g. square, rectangular, round, etc.)
  • The type of wood you want to use
  • Any additional features you want to include (e.g. a built-in cooler, a parasol hole, etc.)

Once you have a rough sketch of your design, you can start refining it and making any necessary adjustments.

Determining the Dimensions

The next step in designing your garden table is determining the dimensions. The size of your table will depend on a few factors, including the size of your garden and how many people you want to be able to seat.

When determining the dimensions of your table, consider the following:

  • The height of your table (standard height is around 76cm)
  • The length and width of your table (a common size is around 180cm x 90cm)
  • The height of your seats (standard height is around 45cm)

Once you have determined the dimensions of your table, you can start gathering the materials you need and preparing to build your table.

By taking the time to sketch out your design and determine the dimensions of your table, you can ensure that your finished product is both functional and visually appealing.

Gathering Materials and Tools

Before you start building your wooden garden table, you will need to gather all the necessary materials and tools. This will ensure that you have everything you need to complete the project without having to run to the store in the middle of it. Here are the things you need to consider:

List of Required Tools

To make your wooden garden table, you will need the following tools:

Tool Purpose
Circular saw For cutting the wood
Drill For making holes and attaching screws
Screwdriver For tightening screws
Measuring tape For measuring the wood
Pencil For marking the wood
Safety goggles For protecting your eyes
Work gloves For protecting your hands

Make sure you have all the tools before starting the project. If you don’t have any of these tools, you can either borrow them or rent them from a hardware store.

Shopping for Wood and Supplies

To make your wooden garden table, you will need the following materials:

  • 2 pieces of 82 cm (32.3 inches) long of 2.5 x 10 cm (1×4 inches) plank
  • 4 pieces of 177 cm (69.7 inches) long of 2.5 x 10 cm (1×4 inches) plank
  • 4 pieces of 70 cm (27.6 inches) long of 5 x 5 cm (2×2 inches) wooden post
  • 16 wood screws, 5 cm (2 inches) long
  • Wood glue
  • Sandpaper
  • Varnish or paint

When shopping for wood, make sure to choose high-quality wood that is straight and free of knots. You can buy the wood from a lumberyard or a home improvement store. You can also buy the screws, wood glue, sandpaper, and varnish or paint from the same store.

In conclusion, gathering all the necessary materials and tools is the first step in building your own wooden garden table. Make sure you have all the tools and materials before starting the project to avoid any delays.

Building the Table Frame

Cutting the Wood Pieces

The first step in building your wooden garden table is to cut the wood pieces to the correct length. You will need to cut four pieces for the legs, two pieces for the short sides, and two pieces for the long sides.

Measure and mark the pieces according to the dimensions you have decided on. Use a saw to carefully cut the pieces to the correct length. It’s important to make sure that all of the pieces are cut to the same length so that the table will be level.

Assembling the Frame

Once you have cut all of the wood pieces, it’s time to assemble the frame of the table. Start by attaching the legs to the short sides of the table. Use screws to attach the legs to the sides, making sure that they are flush with the top of the sides.

Next, attach the long sides to the legs. Again, use screws to attach the pieces together, making sure that everything is flush and level.

Finally, add support pieces to the frame to make it more stable. You can use additional pieces of wood to create a brace between the legs or add diagonal pieces to the corners of the frame.

Once you have assembled the frame, you can move on to adding the tabletop and finishing the table.

Creating the Table Top

Once you have gathered all the necessary materials and tools, it’s time to start creating the table top. This section will guide you through the process of arranging the planks and attaching the top to the frame.

Arranging the Planks

To create the table top, you will need to arrange the planks in a way that is both aesthetically pleasing and structurally sound. Here’s how you can do it:

  1. Lay out all the planks on a flat surface, making sure they are all facing the same way.
  2. Arrange the planks in the desired pattern, making sure the edges are flush with each other.
  3. Use a straight edge to check that all the planks are level with each other.
  4. Once you’re happy with the arrangement, use clamps to hold the planks in place.

Attaching the Top to the Frame

Now that you have arranged the planks, it’s time to attach the top to the frame. Here’s how you can do it:

  1. Flip the table top over so that the bottom is facing up.
  2. Position the frame upside down on top of the table top, making sure it is centered.
  3. Use screws to attach the frame to the table top, making sure to pre-drill the holes to prevent the wood from splitting.
  4. Flip the table over and admire your handiwork!

By following these simple steps, you can create a beautiful and sturdy wooden garden table that will last for years to come.

Finishing Touches

After building your wooden garden table, it’s time for the finishing touches. This step is crucial as it not only enhances the table’s appearance but also protects it from weather damage. In this section, we’ll go over the two main steps to finish your table: sanding and applying a wood finish.

Sanding the Table

The first step in finishing your wooden garden table is sanding. Sanding smooths out any rough edges, removes any blemishes, and prepares the wood for staining or painting. Here are the steps to sand your table:

  1. Start with coarse-grit sandpaper (80-grit) to remove any rough spots or blemishes.
  2. Move on to medium-grit sandpaper (120-grit) to smooth out the surface.
  3. Finish with fine-grit sandpaper (180-grit) to create a smooth surface for the wood finish.

Make sure to sand in the direction of the grain to avoid scratches or marks on the wood.

Applying Wood Finish

Applying a wood finish is the final step in finishing your garden table. It not only protects the wood from weather damage but also enhances its natural beauty. Here are the steps to apply a wood finish:

  1. Choose the type of wood finish you want to use. Options include varnish, polyurethane, or oil-based finishes.
  2. Apply the first coat of finish with a brush or rag, making sure to follow the grain of the wood.
  3. Let the finish dry completely before applying a second coat.
  4. Repeat the process until you achieve the desired level of protection and shine.

Remember to apply the finish in a well-ventilated area and wear protective gloves and eyewear. Once you’ve finished applying the wood finish, allow it to dry completely before using your new garden table.

By following these simple steps, you can finish your wooden garden table and protect it from the elements for years to come.

Maintaining Your Wooden Garden Table

Regular Cleaning

To keep your wooden garden table looking its best, regular cleaning is essential. Here are some tips for keeping your table clean:

  • Use a soft-bristled brush or sponge to remove dirt and debris from the surface of the table.
  • Mix a mild detergent with warm water and use the solution to clean the table thoroughly.
  • Rinse the table with clean water and allow it to dry completely before using it again.
  • Avoid using harsh chemicals or abrasive cleaners, as they can damage the wood.

Yearly Maintenance Tips

In addition to regular cleaning, there are a few things you can do each year to keep your wooden garden table in top condition. Here are some tips:

  • Apply a high-quality hardwood or teak oil to the table each season to maintain its color and protect it from the elements.
  • Inspect the table for any signs of damage, such as cracks or splits. If you notice any damage, repair it as soon as possible to prevent further damage.
  • Store your table indoors during the winter months to protect it from extreme temperatures and moisture.
  • If your table is exposed to direct sunlight for long periods of time, consider using a tablecloth or umbrella to protect it from fading or discoloration.

By following these simple maintenance tips, you can keep your wooden garden table looking beautiful for years to come.

Blog

How to Make a Wooden Patio Bench: A Simple Guide for DIY Enthusiasts

If you’re looking to add some extra seating to your patio, a wooden bench is a great option. Not only is it sturdy and durable, but it can also add a touch of natural beauty to your outdoor space. Plus, building your own bench allows you to customize it to your specific needs and preferences.

Before you get started, you’ll need to gather some supplies. Depending on the design you choose, you may need wood boards, screws, a saw, a drill, and sandpaper. It’s also important to have a clear idea of the size and style of bench you want, as this will affect the amount of materials you need and the level of difficulty of the project. Once you have everything you need, you can begin building your bench.

Understanding the Basics

When it comes to building a wooden patio bench, there are a few basics you need to understand before you get started. This section will cover the types of wood you can use and the safety measures you should take.

Types of Wood

Choosing the right type of wood is essential for building a sturdy and durable patio bench. Here are some of the most common types of wood used for outdoor furniture:

Type of Wood Characteristics
Cedar Resistant to rot and insects, lightweight, and easy to work with.
Redwood Resistant to decay and insects, durable, and has a natural reddish-brown color.
Teak Extremely durable, resistant to rot and insects, and has a beautiful golden-brown color.
Pine Affordable, easy to work with, and can be stained or painted to match your patio decor.

When choosing your wood, make sure it is kiln-dried to prevent warping and cracking. You should also consider the climate in your area and choose a wood that can withstand the weather conditions.

Safety Measures

Before you start building your patio bench, it is important to take the necessary safety precautions. Here are some tips to keep in mind:

  • Wear protective gear such as safety glasses and gloves to prevent injuries.
  • Use a dust mask when sanding or cutting wood to avoid inhaling sawdust.
  • Always use sharp tools to prevent accidents and make clean cuts.
  • Use clamps to secure the wood in place while you work on it.
  • Follow the manufacturer’s instructions when using power tools.
  • Keep a fire extinguisher nearby in case of emergencies.

By following these safety measures, you can ensure a safe and enjoyable woodworking experience.

Gathering the Materials

Before you start building your wooden patio bench, you need to gather all the materials required for the project. Here are the materials you will need:

Wood

The main material you will need for building your bench is wood. You can use any type of wood you prefer, but cedar, redwood, and teak are popular choices for outdoor furniture due to their durability and resistance to rot and insects. You will need the following pieces of wood:

  • Two 2x4s for the legs, each cut to 16 inches in length
  • Two 2x4s for the seat supports, each cut to 40 inches in length
  • Four 1x4s for the seat slats, each cut to 48 inches in length
  • Two 1x4s for the armrests, each cut to 25 inches in length
  • Two 1x4s for the backrest supports, each cut to 36 inches in length
  • Three 1x4s for the backrest slats, each cut to 48 inches in length

Nails and Screws

You will need nails and screws to hold the bench together. Galvanized or stainless steel screws and nails are recommended for outdoor furniture because they are resistant to rust and corrosion. Here are the nails and screws you will need:

  • 2.5-inch deck screws for attaching the legs to the seat supports and the backrest supports to the seat supports
  • 1.5-inch deck screws for attaching the seat slats to the seat supports and the backrest slats to the backrest supports
  • 2-inch finishing nails for attaching the armrests to the backrest supports

Paint and Finish

To protect your bench from the elements and give it a finished look, you will need to paint or stain it. You can choose any color or finish you like, but make sure to use a paint or stain that is specifically formulated for outdoor use. Here are the materials you will need for painting or staining your bench:

  • Outdoor paint or stain
  • Paintbrush or roller
  • Sandpaper (medium and fine grit)
  • Painters tape (optional)

Now that you have gathered all the necessary materials, you are ready to start building your wooden patio bench.

Creating the Design

Before you start building your wooden patio bench, you’ll need to create a design that fits your needs and style. This section will guide you through the process of creating a design that is functional, comfortable, and aesthetically pleasing.

Measurements

The first step in creating your design is to measure the space where the bench will be placed. This will help you determine the size of the bench and ensure that it fits comfortably in the space. Measure the length, width, and height of the area where the bench will be placed.

Next, consider how many people you want the bench to seat. A standard bench can seat two to three people comfortably, but if you have a larger space, you may want to consider a longer bench that can seat four or more people.

Sketching the Design

Once you have your measurements, it’s time to sketch out your design. You can use graph paper or a design software to create a detailed sketch of your bench. Start by drawing the basic shape of the bench, including the seat and backrest. Then, add details such as armrests, legs, and any decorative elements you want to include.

When sketching your design, keep in mind the style of your outdoor space. If you have a modern patio, you may want to create a bench with clean lines and minimal decoration. If you have a more traditional space, you may want to include decorative elements such as curved arms or intricate details.

Once you have your design sketched out, take some time to review it and make any necessary adjustments. Consider the materials you will be using and make sure your design is feasible. You may also want to share your design with a friend or family member to get their feedback.

By taking the time to create a thoughtful design, you’ll ensure that your wooden patio bench is both functional and beautiful.

Building the Frame

Cutting the Wood

Before you start building your wooden patio bench, you need to cut the wood pieces to the right size. You will need four legs, two seat supports, two back supports, and several slats for the seat and back. The exact dimensions will depend on the design you choose, but here are some general guidelines:

  • Legs: 2×4 boards cut to 16-18 inches long
  • Seat supports: 2×4 boards cut to 48 inches long
  • Back supports: 2×4 boards cut to 36 inches long
  • Seat and back slats: 1×4 or 2×4 boards cut to 48 inches long

Make sure to measure and mark the wood pieces accurately before cutting them with a saw. You can use a circular saw, a miter saw, or a handsaw, depending on your preference and skill level. Always wear safety glasses and gloves when cutting wood.

Assembling the Frame

Once you have all the wood pieces cut to size, you can start assembling the frame of the bench. Follow these steps:

  1. Lay the legs flat on the ground, parallel to each other, with the top ends facing up.
  2. Place the seat supports on top of the legs, perpendicular to them, about 14 inches from the top ends. Use wood screws or bolts to attach the seat supports to the legs.
  3. Attach the back supports to the top ends of the legs, perpendicular to them, using wood screws or bolts. Make sure the back supports are level and centered.
  4. Add additional support pieces if desired, such as diagonal braces or crossbars between the legs.
  5. Install the seat and back slats, starting from the bottom and working your way up. Use wood screws or nails to attach the slats to the supports. Space the slats evenly and make sure they are level.

Once the frame is assembled, you can sand it smooth and apply a protective finish, such as paint or stain. Your wooden patio bench is now ready to use and enjoy!

Adding the Seating

Now that the frame of your wooden patio bench is complete, it’s time to add the seating. This section will cover the steps to attach the slats and secure the seating.

Attaching the Slats

The slats are the individual pieces of wood that make up the seating of the bench. To attach them, follow these steps:

  1. Measure the distance between the inside edges of the frame where the slats will be placed.
  2. Cut the slats to the correct length, making sure they are all the same size.
  3. Lay out the slats on a flat surface and space them evenly, leaving a small gap between each slat for drainage.
  4. Use a pencil to mark where each slat will be attached to the frame.
  5. Pre-drill holes for screws or nails where you made the marks.
  6. Attach the slats to the frame using screws or nails, making sure they are flush with the top of the frame.

Securing the Seating

To ensure that your wooden patio bench is sturdy and safe for sitting, you’ll need to secure the seating. Here’s how:

  1. Turn the bench over so that it is resting on the legs.
  2. Cut two pieces of wood to fit between the legs, one at the front of the bench and one at the back.
  3. Pre-drill holes in the wood where it will be attached to the legs.
  4. Attach the wood to the legs using screws or nails.
  5. Cut two more pieces of wood to fit between the front and back pieces, one on each side.
  6. Pre-drill holes in the wood where it will be attached to the front and back pieces.
  7. Attach the side pieces to the front and back pieces using screws or nails.

Congratulations, you have now completed your wooden patio bench!

Finishing Touches

Once you have completed building your wooden patio bench, it’s time to add the finishing touches to make it look polished and professional. This section will cover the final steps of sanding, painting, and finishing your bench.

Sanding

Before you start painting or staining your bench, it’s important to sand it down to ensure a smooth and even surface. Use a medium-grit sandpaper to remove any rough spots or imperfections. Then, switch to a fine-grit sandpaper to achieve a smooth finish.

To save time, you can use an orbital sander to sand down your bench. However, be sure to pay extra attention to the edges and corners to avoid over-sanding.

Painting and Finishing

Once you have sanded your bench, it’s time to paint or stain it. You can choose to paint your bench in a solid color or use a stain to highlight the natural beauty of the wood.

Before you start painting or staining, be sure to protect your work area with a tarp or drop cloth. Then, use a paintbrush or roller to apply the paint or stain evenly to the surface of your bench. Apply multiple coats as needed, allowing each coat to dry completely before applying the next.

To add an extra layer of protection to your bench, you can apply a clear coat of polyurethane or varnish. This will help protect your bench from the elements and keep it looking great for years to come.

With these finishing touches, your wooden patio bench is now complete and ready to enjoy.

Blog

How to Build a Wooden Desk Chair: A Beginner's Guide

Are you in need of a new desk chair but can’t find one that suits your style or budget? Why not build your own wooden desk chair? Not only will you have a unique piece of furniture, but you will also have the satisfaction of knowing you created it yourself.

Building a wooden desk chair may seem like a daunting task, but with the right tools and materials, it can be a fun and rewarding project. Whether you are an experienced woodworker or a beginner, there are plans and designs available to fit your skill level. From simple designs with clean lines to more complex styles with intricate details, there is a wooden desk chair plan out there for everyone. So why not take the plunge and create a custom desk chair that fits your needs and style perfectly?

Understanding the Basics of a Wooden Desk Chair

If you’re looking to build a wooden desk chair, it’s important to understand the basics before getting started. In this section, we’ll cover the types of wood commonly used for chair building and the essential tools you’ll need to complete the project.

Types of Wood

Choosing the right type of wood for your chair is crucial for both its appearance and durability. Here are some of the most common types of wood used for chair building:

  • Oak: A popular choice for its strength and durability, oak is a hardwood that can withstand heavy use and is resistant to wear and tear.

  • Maple: Another hardwood, maple is known for its tight grain and smooth finish. It’s also a great choice for chairs that will see a lot of use.

  • Cherry: This hardwood has a warm, reddish-brown color and a smooth texture. It’s a popular choice for chairs that will be used in formal settings.

  • Walnut: A dark, rich hardwood, walnut is known for its strength and durability. It’s often used for chairs that will be exposed to moisture, as it’s resistant to warping and cracking.

  • Pine: A softwood with a light color and grain, pine is a popular choice for rustic or casual chairs. It’s not as durable as hardwoods, but it’s more affordable and easier to work with.

Essential Tools

To build a wooden desk chair, you’ll need a few essential tools. Here’s a list of the most important ones:

  • Circular saw: This tool is essential for cutting the wood to the correct size and shape.

  • Jigsaw: A jigsaw is useful for cutting curves and angles in the wood.

  • Drill: You’ll need a drill to create holes for screws and dowels.

  • Kreg jig: This tool helps you create strong joints by drilling pocket holes in the wood.

  • Clamps: Clamps are essential for holding the wood in place while you work on it.

  • Sander: You’ll need a sander to smooth out any rough edges and prepare the wood for finishing.

By understanding the basics of wood selection and having the right tools on hand, you’ll be well on your way to building a beautiful and functional wooden desk chair.

Planning Your Wooden Desk Chair

Before building your wooden desk chair, it is important to plan out your design and gather all the necessary materials. This will ensure that your chair is not only functional but also aesthetically pleasing.

Designing the Chair

The first step in planning your wooden desk chair is to decide on a design. Consider the style of your desk and the overall decor of your workspace. Do you want a chair with a modern, minimalist design or a more traditional look? You can find inspiration online or in furniture design books.

Once you have a general idea of your design, sketch out a few different options. Consider the size of the chair, the type of wood you want to use, and any additional features such as armrests or a swivel base.

Creating a Blueprint

After you have settled on a design, create a blueprint of your chair. This will serve as a guide for your build and help ensure that all the pieces fit together properly.

Your blueprint should include detailed measurements and angles for each piece of the chair. You can use drafting software or simply draw it out by hand. Make sure to include any joints or connections between pieces.

Gathering Materials

Once you have your design and blueprint, it’s time to gather all the necessary materials. This will vary depending on your design, but some common materials include:

  • Wood (such as oak, cherry, or maple)
  • Screws
  • Nails
  • Glue
  • Sandpaper
  • Stain or paint

Make sure to purchase high-quality materials that will last for years to come. You may also want to invest in some woodworking tools if you don’t already have them, such as a saw, drill, and chisel.

By taking the time to plan out your wooden desk chair, you can ensure that your final product is both functional and beautiful. With careful attention to detail and high-quality materials, your chair will be a cherished addition to your workspace.

Building the Chair Frame

When building a wooden desk chair, the frame is the foundation of the entire structure. It is important to take your time and make sure the frame is sturdy and well-built. In this section, we will go over the steps to build the chair frame.

Cutting the Wood

The first step in building the chair frame is to cut the wood to the correct dimensions. You will need four pieces of wood for the legs, four pieces for the horizontal supports, and two pieces for the vertical supports. The dimensions of the wood will depend on the design of the chair.

Make sure to measure the wood carefully and mark it before cutting. You can use a saw or a jigsaw to cut the wood to the correct size. If you are not comfortable using a saw, you can also have the wood cut at a hardware store or lumber yard.

Assembling the Frame

Once you have all the pieces of wood cut to the correct size, it’s time to assemble the frame. Start by attaching the horizontal supports to the legs. You can use pocket hole screws or dowels to attach the pieces of wood together.

Next, attach the vertical supports to the horizontal supports. Make sure the vertical supports are flush with the legs and the horizontal supports. Use pocket hole screws or dowels to attach the pieces of wood together.

Finally, attach the seat and backrest to the frame. You can use pocket hole screws or dowels to attach the pieces of wood together. Make sure the seat and backrest are level and secure.

Congratulations, you have now built the frame for your wooden desk chair. In the next section, we will go over how to finish the chair.

Creating the Seat and Backrest

Now that you have the legs and frame of your wooden desk chair assembled, it’s time to create the seat and backrest. These two pieces will not only provide comfort but also add to the overall aesthetic of your chair.

Seat

The seat of your chair should be sturdy and comfortable. You can achieve this by using a thick piece of wood and adding some cushioning. Here are the steps to create the seat:

  1. Measure and cut a piece of wood to the desired size of your seat.
  2. Sand the edges and surface of the wood to make it smooth.
  3. Attach foam padding to the top of the wood using adhesive.
  4. Cut a piece of fabric to cover the foam padding and wood.
  5. Staple the fabric to the underside of the wood, pulling it taut as you go.
  6. Trim any excess fabric.

Your seat is now complete and ready to be attached to the frame of your chair.

Backrest

The backrest of your chair is just as important as the seat. It should provide support and comfort for your back. Here are the steps to create the backrest:

  1. Measure and cut a piece of wood to the desired size of your backrest.
  2. Use a jigsaw to cut out a curved shape at the top of the wood for added comfort.
  3. Sand the edges and surface of the wood to make it smooth.
  4. Attach foam padding to the back of the wood using adhesive.
  5. Cut a piece of fabric to cover the foam padding and wood.
  6. Staple the fabric to the underside of the wood, pulling it taut as you go.
  7. Trim any excess fabric.

Your backrest is now complete and ready to be attached to the frame of your chair.

With the seat and backrest complete, you are one step closer to having a finished wooden desk chair. The next step is to attach them to the frame and add any finishing touches.

Finishing Touches

Now that you’ve built your wooden desk chair, it’s time to put the finishing touches on it. The final steps of sanding and smoothing, as well as painting or staining, will give your chair the perfect look and feel.

Sanding and Smoothing

Before you can paint or stain your chair, you need to make sure the surface is smooth and free of any imperfections. Start by sanding the entire chair with a coarse grit sandpaper, such as 80 grit. This will remove any rough spots or bumps. Next, move on to a finer grit sandpaper, such as 120 grit, and sand the chair again. Finally, use a very fine grit sandpaper, such as 220 grit, to create a smooth surface.

After sanding, wipe down the chair with a damp cloth to remove any dust. You can also use a tack cloth to ensure the surface is completely clean.

Painting or Staining

Now that your chair is smooth and clean, it’s time to add some color. You can either paint or stain your chair, depending on the look you want to achieve.

If you choose to paint your chair, start by applying a primer. This will help the paint adhere to the surface and create an even finish. Once the primer is dry, apply your chosen paint color. You may need to apply multiple coats to achieve the desired coverage.

If you prefer to stain your chair, apply the stain with a brush or cloth, following the manufacturer’s instructions. Wipe off any excess stain with a clean cloth and allow the chair to dry completely. You can then apply a clear coat of polyurethane to protect the surface and give it a glossy finish.

With these finishing touches, your wooden desk chair is now complete and ready to use. Enjoy your new piece of furniture!

Safety Precautions

Building a wooden desk chair can be a fun and rewarding project, but it is important to take safety precautions to prevent accidents and injuries. Here are some tips to keep in mind as you work on your chair:

Wear Protective Gear

Before you start working on your chair, make sure to wear protective gear, including safety glasses, gloves, and a dust mask. This will help protect your eyes, hands, and lungs from sawdust, wood chips, and other debris that can be generated during the woodworking process.

Use Proper Tools and Equipment

Make sure to use the proper tools and equipment for each step of the chair-building process. This includes using the correct saw blades, drill bits, and sandpaper grits. Using the wrong tool or equipment can not only lead to a poor-quality chair, but it can also be dangerous.

Follow Instructions Carefully

When building your chair, it is important to follow the instructions carefully. This includes measuring and cutting the wood accurately, as well as assembling the chair according to the instructions. Skipping steps or making mistakes can lead to an unstable or unsafe chair.

Keep Your Workspace Clean and Organized

Maintaining a clean and organized workspace is essential for safety. This includes keeping your tools and equipment organized and easily accessible, as well as cleaning up sawdust and wood chips regularly. A cluttered workspace can lead to accidents and injuries.

Take Breaks and Stay Hydrated

Building a chair can be a time-consuming process, so it is important to take breaks and stay hydrated. This will help prevent fatigue and reduce the risk of accidents. Make sure to drink plenty of water and take breaks every hour or so to stretch and rest your eyes and hands.

Blog

How to Make a Wooden Toy Gun: A Simple Guide for Beginners

Are you looking for a fun and creative project to do with your kids? Making a wooden toy gun can be a great way to spend quality time together while also teaching them basic woodworking skills. Not only is it a fun activity, but it can also be a great way to encourage imaginative play and spark creativity.

Before starting, it’s important to note that making a wooden toy gun should only be done for recreational purposes and should never be used as a real weapon. With that said, there are several methods for making a wooden toy gun, including using a 2×4 length of board, carving the gun out of a solid piece of wood, or using plywood and a laser cutter. Each method has its own set of advantages and challenges, so it’s important to choose the one that works best for you and your skill level.

Understanding the Basics of a Toy Gun

If you are interested in making a wooden toy gun, it is essential to understand the basics of a toy gun. In this section, we will cover the parts of a toy gun and safety precautions that you should take.

Parts of a Toy Gun

A toy gun has several parts that work together to create a functional and safe toy. Here are the essential parts of a toy gun:

  • Barrel: This is the long, narrow part of the gun that the projectile (bullet) travels through.
  • Trigger: This is the part of the gun that you pull to make the gun fire.
  • Hammer: This is the part of the gun that strikes the bullet to make it fire.
  • Magazine: This is the part of the gun that holds the bullets.
  • Sights: These are the parts of the gun that help you aim at your target.
  • Safety: This is the part of the gun that helps prevent accidental firing.

Safety Precautions

When making a wooden toy gun, safety should be your top priority. Here are some safety precautions that you should take:

  • Wear protective gear: You should wear protective gear such as safety glasses and gloves to protect yourself from flying wood chips and sawdust.
  • Use appropriate tools: You should use appropriate tools such as a saw, drill, and sandpaper to make your wooden toy gun.
  • Follow instructions carefully: You should follow the instructions carefully to avoid making mistakes that could lead to injury.
  • Keep the gun unloaded: You should keep the gun unloaded at all times, especially when you are not using it.
  • Store the gun safely: You should store the gun in a safe and secure place where children cannot access it.

By understanding the basics of a toy gun and taking safety precautions, you can make a wooden toy gun that is both functional and safe.

Choosing the Right Wood

When it comes to making a wooden toy gun, choosing the right type of wood is crucial. You want a type of wood that is sturdy enough to withstand playtime but also safe for children to handle. In this section, we will discuss the different types of wood you can use for your toy gun and the safety and quality considerations to keep in mind.

Types of Wood

There are several types of wood that are suitable for making a wooden toy gun. Here are some of the most popular options:

  • Maple: Maple is a dense and durable hardwood that is commonly used in furniture making. It has a fine texture and a uniform grain, making it an excellent choice for a toy gun that requires precision cutting.

  • Birch: Birch is a light-colored hardwood that is known for its strength and durability. It has a straight grain and a smooth texture, making it easy to work with.

  • Poplar: Poplar is a lightweight and affordable hardwood that is often used in woodworking projects. It has a straight grain and a medium texture, making it a good choice for a toy gun that requires intricate detailing.

  • Pine: Pine is a softwood that is easy to work with and readily available. It has a straight grain and a coarse texture, making it a good choice for a toy gun that requires a rustic or vintage look.

Wood Safety and Quality

When choosing wood for your toy gun, it is important to consider safety and quality. Here are some things to keep in mind:

  • Avoid toxic woods: Some types of wood, such as yew and oleander, are toxic and should not be used for a toy gun. Stick to non-toxic woods such as maple, birch, poplar, or pine.

  • Check for defects: Look for wood that is free of knots, cracks, and other defects that could compromise the strength and safety of your toy gun.

  • Choose kiln-dried wood: Kiln-dried wood is less likely to warp or crack than air-dried wood, making it a better choice for a toy gun that needs to be sturdy and durable.

  • Consider the grain orientation: The orientation of the grain can affect the strength and stability of your toy gun. Choose wood with a straight and consistent grain for best results.

By keeping these factors in mind, you can choose the right type of wood for your toy gun and ensure that it is safe, sturdy, and durable.

Designing Your Toy Gun

When it comes to creating a wooden toy gun, the design is an essential aspect as it determines the final outcome of your project. Here are some tips to help you design your toy gun.

Sketching the Design

Before you start building your wooden toy gun, you need to sketch out your design. Sketching your design will help you visualize the final product and make any necessary adjustments before you start building. You can use a pencil and paper or a design software like Illustrator to create your design.

When sketching your design, consider the type of gun you want to create, the size, and the proportions. Sketch out the barrel, the trigger, the grip, and any other details you want to include. This will help you create a blueprint for your project.

Size and Proportions

When designing your toy gun, size and proportions are crucial. The size of your toy gun should be appropriate for the age group you are targeting. For example, if you are making a toy gun for a child, you want to make sure it is small enough for them to hold comfortably.

Proportions are also important when it comes to the design of your toy gun. The proportions of your toy gun should be accurate to the real thing. You can use reference images to make sure you get the proportions right.

In summary, designing your wooden toy gun is an important step in the building process. Sketch out your design and consider the size and proportions to create a blueprint for your project.

Carving the Toy Gun

Tools Required

Before you begin carving your wooden toy gun, you will need to gather some essential tools. Here are the tools you will need to make your wooden toy gun:

Tools Description
Wood carving knife A sharp knife with a pointed blade for carving and shaping wood.
Wood chisels Used for removing large amounts of wood and creating straight edges.
Sandpaper Used for smoothing and finishing the wood.
Pencil Used for sketching out the design on the wood.
Ruler Used for measuring and marking the wood.

Carving Techniques

Once you have gathered all of the necessary tools, it’s time to start carving your wooden toy gun. Here are some carving techniques to keep in mind:

  1. Begin by sketching out the design of your toy gun on the wood using a pencil and ruler. Make sure to include all the necessary details such as the barrel, trigger, and handle.

  2. Use a wood carving knife to carefully carve out the basic shape of the gun. Be sure to carve away from your body and keep your fingers out of the way of the blade.

  3. Use wood chisels to remove larger amounts of wood and create straight edges. Be careful not to apply too much pressure, as this can cause the wood to split.

  4. Once you have carved out the basic shape of the gun, use sandpaper to smooth and finish the wood. Start with a coarse grit sandpaper and work your way up to a finer grit for a smooth finish.

  5. Finally, add any additional details to your toy gun using a wood carving knife or chisel. This could include carving out a trigger or adding decorative elements to the handle.

By following these carving techniques and using the right tools, you can create a beautiful and functional wooden toy gun.

Assembling the Toy Gun

Now that you have all the wooden parts cut and sanded, it’s time to assemble your wooden toy gun. Follow these steps to put everything together:

Joining the Parts

  1. Start by attaching the barrel to the main body of the gun using wood glue. Apply a small amount of glue to the end of the barrel and carefully align it with the corresponding hole in the body of the gun. Press the pieces together and hold them in place for a few minutes until the glue sets.
  2. Next, attach the trigger to the main body of the gun using screws. Use a drill to make a small hole where the trigger will be attached. Then, insert the screw into the hole and tighten it with a screwdriver.
  3. Attach the handle to the main body of the gun using wood glue. Apply a small amount of glue to the handle and carefully align it with the corresponding hole in the main body of the gun. Press the pieces together and hold them in place for a few minutes until the glue sets.
  4. Finally, attach the stock to the main body of the gun using screws. Use a drill to make a small hole where the stock will be attached. Then, insert the screw into the hole and tighten it with a screwdriver.

Ensuring Smooth Operation

Once you have assembled all the parts of your wooden toy gun, it’s important to ensure that it operates smoothly. Here are some tips to make sure your toy gun works properly:

  1. Check that the trigger moves smoothly and without resistance. If it feels stiff or difficult to pull, you may need to sand down the trigger or adjust the screw that holds it in place.
  2. Make sure the barrel is straight and aligned with the rest of the gun. If it’s crooked, it may cause the bullets to jam or misfire.
  3. Test the gun by firing a few rounds. If the bullets don’t come out smoothly or if the gun misfires, you may need to adjust the trigger or sand down the barrel to ensure a better fit.

By following these steps, you should be able to assemble a wooden toy gun that looks great and operates smoothly. Just remember to take your time and be careful when attaching the parts, and don’t hesitate to make adjustments if something doesn’t work quite right.

Finishing Touches

Once you have completed the construction of your wooden toy gun, it’s time to add some finishing touches to make it look great and ensure it’s safe to use. In this section, we’ll cover two important steps: sanding and smoothing, and painting and varnishing.

Sanding and Smoothing

Before you paint or varnish your wooden toy gun, you need to sand it down to ensure a smooth finish. Use a fine-grit sandpaper to sand down any rough edges or surfaces, and make sure to sand in the direction of the grain to avoid scratches.

Once you have sanded the entire surface, wipe it down with a damp cloth to remove any dust or debris. Then, use a finer-grit sandpaper to smooth out the surface even further. Repeat this process until you achieve the desired smoothness.

Painting and Varnishing

Now that your wooden toy gun is smooth and ready to be painted, it’s important to choose the right type of paint and varnish. Non-toxic, water-based paints are a great option for toy guns, as they are safe for children to handle.

Before painting, make sure to apply a primer to the surface to ensure the paint adheres properly. Then, use a small brush to paint the gun, taking care to avoid drips or smudges. Allow the paint to dry completely before applying a second coat.

Once the paint is dry, it’s time to apply a varnish to protect the surface and give it a glossy finish. Apply a thin coat of varnish using a brush, and allow it to dry completely before applying a second coat.

By following these simple steps, you can give your wooden toy gun a professional-looking finish that is safe to use and will last for years to come.

Blog

How to Fix Wooden Flooring: A Beginner's Guide to Repairing Your Hardwood Floors

If you have hardwood flooring in your home, you know how beautiful and durable it can be. However, even the best wood floors are subject to damage. Scratches, water damage, gouges, and dents can all take away from the natural beauty of your hardwood floors. Fortunately, many of these issues can be fixed with a little bit of know-how and some DIY effort.

One common issue with hardwood flooring is surface scratches. These can be caused by anything from pet claws to furniture being dragged across the floor. Fortunately, there are several DIY solutions for fixing surface scratches. For example, you can try using a solution such as Lumber Liquidators’ Scratch Away, which can help fade light scratches. For deeper scratches, you may need to sand and refinish the affected area.

Another common issue with hardwood flooring is water damage. Whether it’s from a spill or a leak, water can cause serious damage to wood floors if left untreated. If you notice water damage on your hardwood floors, the first step is to dry the affected area as quickly as possible. Once the area is dry, you can try sanding and refinishing the floor to repair any damage. If the damage is severe, you may need to replace the affected boards.

Understanding the Issue

If you have wooden flooring in your home, you may run into issues with it over time. However, don’t worry, as many common problems can be fixed with a little DIY know-how. Before you start repairing your wooden flooring, it’s important to understand the issue and the type of wooden flooring you have.

Identifying Damage

The first step in repairing wooden flooring is identifying the damage. Common issues include scratches, dents, and gaps between planks. Some damage may be visible, while other issues may be harder to detect. For example, if your flooring is squeaking, it may be a sign that the subfloor is loose.

Types of Wooden Flooring

There are several types of wooden flooring, and the type you have will affect the way you repair it. Solid wood flooring is made from a single piece of wood and can be sanded and refinished several times. Engineered wood flooring is made from multiple layers of wood and is more resistant to moisture and changes in temperature. Laminate flooring is made from a high-density fiberboard core with a photographic layer on top that mimics wood.

Before you start repairing your wooden flooring, make sure you know what type of flooring you have. This will help you choose the right repair method and materials.

In summary, understanding the issue and the type of wooden flooring you have is crucial before attempting any repairs. Take the time to identify the damage and research the best repair methods for your specific flooring type. With a little effort, you can restore your wooden flooring and keep it looking beautiful for years to come.

Tools and Materials Needed

To fix wooden flooring, you will need a few tools and materials. Here is a list of what you will need:

Tools

  • Hammer
  • Pry bar
  • Circular saw or handsaw
  • Chisel
  • Drill
  • Pneumatic or cordless nailer
  • Shop vacuum or dust extractor
  • Drum or belt floor sander
  • Edger sander
  • Protective eye wear and respirator mask

Materials

  • Replacement wood flooring planks
  • Wood filler or wood patch
  • Painter’s tape
  • Plastic sheeting

Before you start the repair process, make sure you have all of the necessary tools and materials. You don’t want to start the project and realize halfway through that you are missing a crucial tool or material.

The tools listed above are necessary for removing damaged planks, cutting replacement planks to size, fastening the new planks in place, and sanding the repaired area to match the surrounding flooring.

The materials listed above are necessary for filling gaps and holes in the repaired area, protecting surrounding surfaces, and ensuring a smooth and even finish.

Overall, having the right tools and materials is essential for successfully repairing wooden flooring. Make sure you have everything you need before starting the repair process.

Preparation Steps

Before you start repairing your wooden flooring, you need to prepare the area and ensure that you are taking the necessary safety measures. Here are the steps you should follow:

Clearing the Area

The first step is to clear the area where you will be working. Remove all furniture, rugs, and other objects from the room. If you cannot move some of the furniture, cover it with plastic sheets to protect it from dust and debris.

Next, remove all the baseboards and trim around the edges of the room. This will give you more space to work and ensure that you can sand and refinish the entire floor. Use a pry bar and a hammer to gently remove the trim. Be careful not to damage it, as you will need to reinstall it later.

Safety Measures

Repairing wooden flooring can be a hazardous task, so it’s important to take some safety precautions. Here are some tips to keep in mind:

  • Wear protective gear such as safety goggles, a dust mask, and earplugs to protect your eyes, lungs, and ears from dust and noise.
  • Turn off the electricity in the room to avoid any accidents with power tools.
  • Use a fire extinguisher in case of any accidents or fires.
  • Keep the room well-ventilated by opening windows or using fans.
  • Use caution when handling power tools, especially the drum sander, which can be heavy and difficult to control.

By following these preparation steps and safety measures, you can ensure that your wooden flooring repair project goes smoothly and safely.

Repairing Minor Damages

If your wooden flooring has minor damages, you can easily repair them yourself. Here are some tips on how to fix scratches and fill gaps.

Fixing Scratches

If you have light surface scratches on your wooden floors, you can make them fade by applying a solution like Lumber Liquidators’ Scratch Away. Start by cleaning the entire area around the scratch to remove all traces of dust and grime on the floor. Pay close attention to the inside of the scratch itself, which should be totally free of dirt if possible.

Apply the Scratch Away solution to a clean, dry cloth and rub it into the scratch. Let it sit for a few minutes, then wipe away any excess solution. Repeat the process until the scratch is no longer visible. You can also use a wax stick that matches the color of your flooring to fill in deeper scratches. Rub the wax stick over the scratch until it is filled, then buff the area with a clean cloth.

Filling Gaps

If you notice gaps between your wooden floorboards, you can fill them in with wood filler. First, clean the gaps with a vacuum or dry-mop to remove any debris. Then, apply the wood filler to the gaps using a putty knife. Make sure to overfill the gaps slightly to allow for shrinkage.

Let the wood filler dry completely according to the manufacturer’s instructions. Once it is dry, sand the surface of the wood filler until it is flush with the surrounding floorboards. You can then stain or paint the wood filler to match the color of your flooring.

By following these tips, you can easily repair minor damages to your wooden flooring and keep it looking great for years to come.

Handling Major Damages

If you have major damages on your wooden flooring, don’t worry. There are a few steps you can take to fix it. This section will cover two of the most common methods for handling major damages: replacing damaged planks and refinishing the floor.

Replacing Damaged Planks

If you have a damaged plank, you can replace it with a new one. Here are the steps to follow:

  1. Remove the damaged plank: Use a circular saw to cut the plank into small pieces. Then, use a chisel to remove the pieces.

  2. Cut the new plank: Use a circular saw to cut the new plank to the correct size.

  3. Install the new plank: Apply adhesive to the back of the new plank and place it in the empty space. Use a hammer and nails to secure it in place.

  4. Sand and finish: Sand the new plank to make it level with the surrounding planks. Then, apply a finish to the entire floor to ensure that the new plank matches the rest of the floor.

Refinishing the Floor

If you have multiple damaged planks or the damage is widespread, refinishing the floor may be the best option. Here are the steps to follow:

  1. Sand the floor: Use a floor sander to sand the entire floor. This will remove the damaged finish and expose the bare wood.

  2. Stain the floor: Apply a stain to the floor to give it the desired color.

  3. Apply the finish: Apply a finish to the floor to protect it from future damage. You can choose between oil-based and water-based finishes. Oil-based finishes are more durable but take longer to dry, while water-based finishes are less durable but dry faster.

By following these steps, you can handle major damages to your wooden flooring and restore it to its former glory.

Maintenance Tips

Keeping your wooden flooring in top condition requires regular maintenance. Here are some tips to help you keep your floors looking great for years to come.

Regular Cleaning

To prevent dirt and grime buildup, it’s important to sweep or vacuum your wooden floors regularly. Use a soft-bristled broom or a vacuum with a hardwood floor attachment to avoid scratching the surface. You can also use a damp mop or cloth to clean up spills and stains, but be sure to avoid using too much water, as it can damage the wood.

For a deeper clean, you can use a hardwood floor cleaner. Be sure to choose a cleaner specifically designed for wooden floors and follow the manufacturer’s instructions carefully. Avoid using harsh chemicals or abrasive cleaners, as they can damage the finish on your floors.

Preventing Scratches and Dents

Preventing scratches and dents on your wooden floors is key to maintaining their beauty and longevity. Here are some tips to help you protect your floors:

  • Use furniture pads or felt protectors on the legs of your furniture to prevent scratches and dents.
  • Avoid wearing high heels or shoes with heavy treads on your wooden floors, as they can cause damage.
  • Place doormats at all entrances to your home to prevent dirt and debris from being tracked onto your floors.
  • Trim your pet’s nails regularly to prevent scratches on your floors.

By following these maintenance tips, you can help keep your wooden floors looking their best for years to come.

Blog

How to Build a Wooden Handrail for Outdoor Steps: A Step-by-Step Guide

If you have outdoor steps that need a handrail, you may be wondering how to go about making one yourself. Building a wooden handrail for your outdoor steps is a great DIY project that can provide safety and style to your home. With a few basic tools and some lumber, you can create a handrail that will last for years to come.

Before you begin building your handrail, it’s important to check with your local building codes to ensure that you are meeting any requirements for handrail height, spacing, and materials. Once you have determined the specifications for your handrail, you can begin gathering your materials. The most common materials for outdoor handrails are pressure-treated lumber and metal balusters, but you can also use other materials like cedar or wrought iron to create a unique look.

Once you have your materials, you can begin building your handrail. The process will involve cutting and assembling the pieces of lumber, attaching the balusters, and securing the handrail to the steps. With some patience and attention to detail, you can create a handrail that will not only provide safety but also enhance the look of your outdoor space.

Understanding the Basics of Handrails

If you have outdoor steps, it’s important to have a handrail for safety purposes. A handrail is a simple wooden structure that runs along the length of the stairs. It provides support and stability to people as they climb up or down the stairs. In this section, we will discuss the basics of handrails and how to make one for your outdoor steps.

Handrail Height and Length

Before you begin building your handrail, it’s important to know the height and length of the handrail. The height of the handrail should be between 34 and 38 inches from the top of the stair tread to the top of the handrail. The length of the handrail should extend the full length of the stairs and extend at least 12 inches beyond the top and bottom steps.

Handrail Materials

The most common material used for handrails is wood. Cedar, redwood, and pressure-treated pine are popular choices for outdoor use because they are resistant to rot and decay. Other materials such as metal or vinyl can also be used for handrails, but they may require more maintenance.

Handrail Design

There are many different designs for handrails, but the most common design is a simple straight railing. The railing should be at least 1.5 inches in diameter to provide a comfortable grip. It’s important to make sure that the handrail is securely attached to the stairs to prevent any accidents.

Building Codes

Before building your handrail, it’s important to check your local building codes to ensure that your handrail meets the required standards. Building codes may vary depending on your location, so it’s important to do your research before beginning any construction.

In summary, a handrail is an important safety feature for outdoor steps. It should be between 34 and 38 inches in height, extend the full length of the stairs, and be securely attached to the stairs. Wood is the most common material used for handrails, and there are many different designs to choose from. Always check your local building codes before beginning any construction.

Choosing the Right Wood

When it comes to choosing the right wood for your outdoor handrail, there are several factors to consider. You want a wood that is durable, weather-resistant, and able to withstand the elements. Here are some popular options:

Cedar

Cedar is a popular choice for outdoor handrails because it is naturally resistant to rot and insects. It has a warm, reddish-brown color and a pleasant aroma. Cedar is also lightweight and easy to work with, making it a great choice for DIY projects.

Redwood

Redwood is another popular choice for outdoor handrails. It has a beautiful, rich color and is naturally resistant to decay and insects. Redwood is also easy to work with and holds up well in wet conditions.

Pressure-Treated Pine

Pressure-treated pine is a budget-friendly option that is treated with chemicals to resist rot and insects. It can be stained or painted to match your outdoor decor. However, it is important to note that the chemicals used in pressure treatment can be harmful to humans and pets, so it is important to wear gloves and a mask when working with it.

Ipe

Ipe is a hardwood that is known for its durability and resistance to rot, insects, and weather. It has a rich, dark color and a beautiful grain pattern. However, it is also one of the most expensive options.

No matter which type of wood you choose, make sure it is properly sealed and maintained to ensure its longevity. Consider the climate and weather conditions in your area when making your decision.

Materials and Tools Needed

When it comes to building a wooden handrail for your outdoor steps, you will need to gather a few materials and tools to get the job done. In this section, we will go over the different materials and tools needed to build a sturdy and reliable handrail for your outdoor steps.

Wood Selection

The first thing you will need to do is select the right type of wood for your handrail. You want to choose a wood that is strong, durable, and able to withstand the elements. Some of the best wood options for outdoor handrails include cedar, redwood, and pressure-treated pine. These woods are all resistant to rot and decay, making them ideal for outdoor use.

Handrail Hardware

In addition to the wood, you will also need to gather some handrail hardware. This includes brackets, screws, and bolts to secure the handrail to the posts. You will also need to purchase a post cap to protect the top of the posts from water damage.

Woodworking Tools

To build your handrail, you will need a few basic woodworking tools. These include a circular saw, a jigsaw, a drill, and a level. You will also need a measuring tape, a pencil, and a square to ensure that your cuts are accurate and your handrail is level.

In summary, to build a wooden handrail for your outdoor steps, you will need to select the right type of wood, gather the necessary hardware, and have the right woodworking tools on hand. With these materials and tools, you will be able to build a sturdy and reliable handrail that will provide safety and support for years to come.

Measuring and Planning

Before you start building your wooden handrail for outdoor steps, you need to measure and plan accordingly. This will ensure that your handrail fits properly and provides the necessary support when climbing or descending stairs.

Step Measurement

The first step is to measure the height and width of your steps. Measure the height from the bottom of the step to the top, and the width from side to side. Make sure to measure each step individually, as they may vary in size.

Once you have your measurements, you can determine the number of posts and rails you will need. As a general rule, you should have a post for every four to six feet of railing, and a rail for every two to three feet of railing.

Handrail Design

The next step is to design your handrail. You can choose from a variety of designs, including straight, curved, or angled. You can also choose from a variety of materials, including wood, metal, or vinyl.

When designing your handrail, it’s important to consider the style of your home and the surrounding landscape. You want your handrail to blend in with the overall aesthetic of your property.

Once you have your design in mind, you can start selecting your materials. Make sure to choose high-quality materials that are durable and weather-resistant. Pressure-treated lumber is a popular choice for outdoor handrails.

In summary, measuring and planning is an essential step in building a wooden handrail for outdoor steps. Make sure to measure your steps carefully and design your handrail to fit your specific needs. With the right materials and design, you can create a beautiful and functional handrail that provides the necessary support and adds value to your home.

Cutting the Wood

Now that you have measured and marked the spots for your handrail, it’s time to start cutting the wood. Here’s how you can do it:

  1. Use a chop saw or a miter saw to cut the pressure-treated lumber into the desired lengths for the rails and posts. Remember to wear protective gear while using the saw.

  2. Use a spade drill bit to drill holes into the posts where the rails will be attached. Make sure to align the holes on both sides of the post.

  3. Use a masonry bit to drill holes into the concrete or brick where the post holders will be installed.

  4. If you need to cut the railings at an angle to fit the slope of the stairs, use a miter saw to make the cuts.

  5. Sand the edges of the wood to smooth out any rough spots or splinters.

  6. Apply a wood stain or sealant to protect the wood from weather damage.

Remember to double-check your measurements and make sure all the pieces fit together before securing them in place. With these steps, you’ll be well on your way to creating a sturdy and attractive handrail for your outdoor steps.

Assembling the Handrail

Now that you have installed the posts for your outdoor handrail, it’s time to assemble the handrail itself. Here’s how you can do it:

Step 1: Measure and Cut Rails and Posts

Measure the distance between the posts to determine the length of the rails. Cut the rails to the appropriate length using a saw. Make sure the rails are level and straight.

Step 2: Place the Post Holders

Place the post holders on the rails. The holders should be placed at regular intervals, depending on the length of the rails. Use a measuring tape to ensure that the holders are evenly spaced.

Step 3: Install the Posts

Insert the posts into the post holders. Make sure that the posts are securely in place. Use a level to ensure that the posts are straight and level.

Step 4: Attach the Handrail

Attach the handrail to the posts using screws. Make sure that the screws are long enough to go through the handrail and into the posts. Use a drill to make pilot holes for the screws.

Step 5: Seal the Handrail

Seal the handrail with a weather-resistant sealant. This will protect the wood from the elements and prevent it from rotting or warping. Apply the sealant with a brush or roller, following the manufacturer’s instructions.

And that’s it! Your outdoor handrail is now complete and ready to use. Remember to check the handrail regularly for any signs of wear or damage, and make repairs as necessary.

Installing the Handrail

Now that you have built your wooden handrail, it’s time to install it on your outdoor steps. Follow these steps to ensure a safe and secure installation:

  1. Measure and mark the placement of the handrail on your steps. Use a level to ensure that the handrail is straight and even.

  2. Pre-drill holes into the handrail and the steps. This will prevent the wood from splitting when you attach the handrail to the steps.

  3. Attach the handrail to the steps using screws and brackets. Make sure the screws are long enough to go through the handrail and into the steps securely.

  4. Test the handrail to make sure it is sturdy and can support weight. If it wobbles or feels loose, reinforce the installation with additional screws or brackets.

  5. Finish the handrail with a weather-resistant sealant or paint to protect it from the elements.

Remember, installing a handrail is an important safety feature for your outdoor steps. It provides stability and support, especially for those with mobility issues or disabilities. Take the time to install it properly to ensure the safety of yourself and your guests.

Finishing Touches

Once you have constructed your wooden handrail for your outdoor steps, it’s time to add the finishing touches to make it look great and protect it from the elements.

Sanding the Handrail

Before applying any finish, it’s important to sand the handrail to ensure a smooth surface. Start with a coarse grit sandpaper and work your way up to a finer grit. Be sure to sand with the grain of the wood to avoid scratches. After sanding, wipe the handrail with a damp cloth to remove any dust.

Applying Wood Stain

Applying wood stain to your handrail will not only give it a beautiful color but also protect it from UV rays and water damage. Choose a stain that is specifically designed for outdoor use and matches the color of your deck or steps. Apply the stain with a brush or rag, following the manufacturer’s instructions. Be sure to apply the stain evenly and wipe off any excess.

Sealing the Wood

After the stain has dried, it’s important to seal the wood to protect it from moisture. Choose a clear, waterproof sealer that is designed for outdoor use. Apply the sealer with a brush or roller, following the manufacturer’s instructions. Be sure to apply an even coat and let it dry completely before using the handrail.

By following these simple steps, you can add the finishing touches to your wooden handrail and ensure that it looks great and lasts for years to come.

Maintenance Tips

Once you have installed your wooden handrail for outdoor steps, it is important to maintain it properly to ensure it lasts for years to come. Here are a few tips to help you keep your handrail in good condition:

Regular Cleaning

Dirt, dust, and other debris can accumulate on your handrail over time, making it look dirty and unappealing. To keep it looking its best, you should clean it regularly. You can use a mixture of water and vinegar or a cleaning solution to wipe down the handrail. Be sure to dry it thoroughly afterward to prevent water damage.

Preventing Stains

Stains can be a common problem with wooden handrails, especially if they are not sealed properly. To prevent stains, you can apply a sealant to the handrail. This will help to protect it from moisture and other elements that can cause damage.

Preventing Drying Out

Wooden handrails can dry out over time, which can cause them to crack and split. To prevent this from happening, you should apply a coat of oil or wax to the handrail every few months. This will help to keep it moisturized and prevent it from drying out.

Regular Maintenance

Regular maintenance is key to keeping your wooden handrail in good condition. This includes checking for any signs of damage, such as cracks or splits, and repairing them as necessary. You should also inspect the handrail for any loose screws or other hardware and tighten them as needed.

By following these simple maintenance tips, you can keep your wooden handrail for outdoor steps looking its best and ensure that it lasts for years to come.

Blog

Why Your Drill Won't Reach the End of a Wood Stud: Explained

Are you having trouble drilling through wood studs? Does your drill bit stop before it reaches the end of the wood, no matter how hard you push? This can be a frustrating problem, but fortunately, there are several reasons why this might be happening and several solutions to try.

One common reason why your drill bit may not be going all the way through the wood is that it is worn. Over time, drill bits can become dull and less effective, making it difficult to penetrate hard materials like wood. Another reason could be that the wood is too dry, making it harder for the drill bit to cut through. Additionally, if you are not applying enough pressure or using the right lubrication, your drill may not be able to complete the job.

Understanding Wood Studs

When it comes to drilling into wood studs, it’s important to understand what you’re working with. Wood studs are vertical framing members that make up the structural framework of a building. They are typically made from softwood lumber, such as pine or fir.

Studs are usually spaced 16 or 24 inches apart, center to center, and are typically 1.5 inches thick and 3.5 inches wide. However, the actual dimensions can vary slightly depending on the type of lumber used and the building code requirements in your area.

When drilling into wood studs, it’s important to keep in mind that they can be prone to splitting. This is especially true if you’re using a drill bit that’s too large for the screw you’re using. To avoid splitting, it’s a good idea to use a pilot hole that’s slightly smaller than the screw you’re using.

Another thing to keep in mind is that wood studs can be prone to knots, which can make them harder to drill into. If you encounter a knot while drilling, you may need to use a bit designed for drilling through knots, or you may need to move your hole slightly to avoid the knot.

Overall, understanding the characteristics of wood studs can help you drill into them more effectively and avoid common issues like splitting and knotting. By taking the time to prepare properly and use the right tools and techniques, you can ensure that your drilling projects are successful and long-lasting.

Identifying the Problem

identifying-the-problem

If you’re having trouble drilling through a wood stud, there could be a few reasons why. Here are some common issues to consider:

Bit Length

One reason your drill may not be going all the way through the stud is that the bit you’re using isn’t long enough. Make sure you’re using a bit that is long enough to reach all the way through the stud. If the bit is too short, it won’t be able to penetrate the entire length of the stud.

Drill Power

Another reason your drill may not be able to drill all the way through the stud is that the drill isn’t powerful enough. If you’re using a low-powered drill, it may not have the torque necessary to drill through the wood. Consider using a more powerful drill to get the job done.

Wood Density

The density of the wood you’re drilling through can also be a factor. If the wood is particularly dense, it may be more difficult to drill through. In this case, you may need to use a more powerful drill or a different type of bit that is better suited for drilling through dense wood.

Overall, there are a few different factors that can cause your drill to have trouble drilling through a wood stud. By considering the length of your bit, the power of your drill, and the density of the wood, you can identify the problem and find a solution that works for you.

Pre-Drilling Techniques

Pre-drilling is an essential technique that you need to master if you want to avoid ruining your wood project. Here are some pre-drilling techniques that you can follow to ensure that your drill bit goes all the way to the end of the bit:

Use a Sharp Drill Bit

A dull drill bit can cause your drill to stop before it reaches the end of the bit. Make sure that you use a sharp drill bit to avoid this problem. You can sharpen your drill bit using a bench grinder or a sharpening stone.

Proper Lubrication

Proper lubrication is crucial to ensure that your drill bit goes all the way to the end of the bit. Lubrication reduces friction and heat, which can cause your drill bit to stop before it reaches the end of the bit. You can use a lubricant such as WD-40 to lubricate your drill bit.

Apply Enough Pressure

Applying enough pressure is another important technique that you need to follow to ensure that your drill bit goes all the way to the end of the bit. You need to apply enough pressure to push the drill bit through the wood. However, be careful not to apply too much pressure, as it can cause your drill bit to break.

Use the Right Drill Bit Size

Using the right drill bit size is also important to ensure that your drill bit goes all the way to the end of the bit. If you use a drill bit that is too small, it can cause your drill to stop before it reaches the end of the bit. On the other hand, if you use a drill bit that is too big, it can cause your screw to become loose.

Conclusion

By following these pre-drilling techniques, you can ensure that your drill bit goes all the way to the end of the bit. Remember to use a sharp drill bit, proper lubrication, apply enough pressure, and use the right drill bit size.

Choosing the Right Drill and Bit

choosing-the-right-drill-and-bit

When it comes to drilling wood studs, choosing the right drill and bit can make all the difference in ensuring a successful outcome. Here are some things to consider when selecting your tools.

Bit Material

The material of the bit can impact its durability and effectiveness. Here are some common bit materials and their benefits:

  • High-Speed Steel (HSS): This is a common material for drill bits and is known for its durability and ability to handle high-speed drilling. HSS bits are suitable for drilling into softwoods and some hardwoods.
  • Cobalt: Cobalt bits are made with a blend of cobalt and steel, making them harder and more resistant to heat than HSS bits. They are ideal for drilling into harder woods and metals.
  • Carbide: Carbide bits are made with a combination of tungsten and carbon, making them extremely durable and able to handle high-speed drilling. They are ideal for drilling into hardwoods, metals, and other tough materials.

Drill Type

The type of drill you use can also impact your drilling success. Here are some common types of drills and their benefits:

  • Cordless Drill: Cordless drills are convenient and portable, making them a popular choice for DIY projects. They are suitable for drilling into softwoods and some hardwoods.
  • Hammer Drill: Hammer drills are designed for drilling into harder materials like concrete and masonry, but they can also be used for drilling into wood studs.
  • Drill Press: A drill press is a stationary tool that allows for precise drilling. It is ideal for drilling into thicker wood studs and for making repeated holes.

When selecting your drill and bit, consider the size and hardness of the wood stud you will be drilling into, as well as the volume of work you will be doing. By choosing the right tools for the job, you can ensure a successful outcome every time.

Safety Measures When Drilling

When drilling wood studs, it is important to take safety measures to avoid accidents and injuries. Here are some safety tips to keep in mind:

Inspect Your Drill

Before using your drill, inspect it for any damage or defects. Make sure the drill bit is sharp and not worn out. Check the power cord for any cuts or frays, and ensure that the plug is not damaged. If you are using a battery-powered drill, make sure the battery is fully charged.

Wear Protective Gear

When drilling, wear protective gear to prevent injuries. This includes safety glasses to protect your eyes from flying debris and gloves to protect your hands from sharp edges. If you are drilling in a noisy environment, wear earplugs to protect your hearing.

Secure Your Workpiece

Make sure your workpiece is securely clamped or held in place before drilling. This will prevent it from moving or spinning while you drill, reducing the risk of accidents.

Use the Right Drill Bit

Using the right drill bit for the job is crucial for safety and efficiency. Make sure the drill bit is appropriate for the material you are drilling, and that it is the correct size and shape for the hole you need to make.

Keep Your Drill Clean

After each use, clean your drill to remove any sawdust or debris that may have accumulated. This will help keep your drill in good working condition and prevent accidents.

By following these safety measures, you can ensure that your drilling experience is safe and efficient. Remember to always prioritize safety when using power tools.

Troubleshooting Common Drilling Issues

troubleshooting-common-drilling-issues

Drilling into wood studs can be a frustrating experience, especially when the drill bit won’t go all the way to the end. Here are some common drilling issues and how to troubleshoot them:

1. Wrong drill bit size

Using the wrong drill bit size is a common issue that can prevent the drill bit from going all the way through the wood stud. Make sure to use the correct size drill bit for the screw or anchor you are using. The drill bit should be slightly smaller than the screw or anchor to allow for a snug fit.

2. Dull drill bit

A dull drill bit can cause the drill to stop before it reaches the end of the wood stud. If your drill bit is dull, it may be time to replace it. You can also sharpen your drill bit using a drill bit sharpener or a sharpening stone.

3. Low drill speed

If your drill speed is too low, the drill bit may not be able to penetrate the wood stud. Make sure to set your drill to the appropriate speed for the size of the drill bit and the material you are drilling into. You can refer to the manufacturer’s instructions for recommended drill speeds.

4. Clogged drill bit

A clogged drill bit can also prevent the drill from going all the way through the wood stud. Make sure to clear any debris from the drill bit before drilling. You can use a brush or compressed air to clear the debris.

5. Binding drill bit

If the drill bit is binding, it may be because the angle of the bit is incorrect. Make sure to hold the drill steady and apply even pressure as you drill. You can also try lubricating the drill bit with a bit of oil to reduce friction.

By troubleshooting these common drilling issues, you can ensure that your drill bit goes all the way through the wood stud. Remember to always follow safety precautions when using power tools and to refer to the manufacturer’s instructions for proper use and maintenance.

Frequently Asked Questions

Why won’t my drill bit go through wood?

If your drill bit won’t go through wood, it could be due to a few reasons. One reason could be that the bit is dull or damaged. Another reason could be that you are not applying enough pressure while drilling. Ensure that you are using the correct type of bit for the type of wood you are drilling into.

How do I get my drill bit to go all the way through wood?

To get your drill bit to go all the way through wood, ensure that you are using a sharp bit and applying enough pressure while drilling. You can also try drilling a pilot hole first to make it easier for the drill bit to go through the wood.

Why is my drill bit not drilling through wood?

If your drill bit is not drilling through wood, it could be due to a few reasons. One reason could be that the bit is dull or damaged. Another reason could be that you are not applying enough pressure while drilling. Ensure that you are using the correct type of bit for the type of wood you are drilling into.

How can I make my drill bit grip better?

To make your drill bit grip better, ensure that it is properly secured in the chuck. You can also try using a bit with a threaded shank, which will help it stay in place better.

What can I do if my screw won’t go all the way into a wood stud?

If your screw won’t go all the way into a wood stud, it could be due to a few reasons. One reason could be that the screw is too long for the thickness of the wood. Another reason could be that the screw is not properly aligned with the pilot hole. Ensure that you are using the correct size and type of screw for the job.

Why won’t my wood screw go all the way in?

If your wood screw won’t go all the way in, it could be due to a few reasons. One reason could be that the screw is too long for the thickness of the wood. Another reason could be that the screw is not properly aligned with the pilot hole. Ensure that you are using the correct size and type of screw for the job.

Blog

What Glue Works Best for Gluing Glass to Wood? A Comprehensive Guide

Are you looking to glue glass to wood, but not sure which glue to use? It can be a tricky process, as glass and wood have very different properties and require a strong adhesive to create a lasting bond. In this article, we will explore the different types of glue that work best for gluing glass to wood and provide you with some tips to ensure a successful bond.

One of the best types of glue to use when attaching glass to wood is epoxy adhesive. Epoxy is known for its strong and durable bonding qualities and can be used on a wide range of surfaces. It dries clear and forms a seriously strong bond. Other popular options include superglue, silicone glue, or even hot glue from a glue gun. Each of these glues has its own unique properties and can work well depending on the specific needs of your project.

Understanding the Materials

understanding-the-materials

Characteristics of Glass

When it comes to gluing glass to wood, it’s important to understand the characteristics of both materials. Glass is a hard, brittle, and transparent material that is commonly used for windows, mirrors, and decorative items. It is made by heating sand, soda ash, and limestone to a high temperature until it melts and then cooling it rapidly to create a solid material.

Glass has a few important properties to consider when gluing it to wood. First, it is non-porous, which means that it doesn’t absorb liquids or gases. This can make it difficult for some adhesives to bond with glass. Second, glass is smooth and slippery, which can make it challenging for some adhesives to grip onto it. Finally, glass is fragile and can crack or shatter easily if it is not handled carefully.

Characteristics of Wood

Wood is a natural material that is commonly used for furniture, flooring, and building structures. It is made up of fibers that are held together by a natural adhesive called lignin. Wood can be soft or hard, depending on the species and how it is treated. It can also be porous or non-porous, depending on the type of wood and how it is finished.

When gluing glass to wood, it’s important to consider the characteristics of the wood as well. First, wood is porous, which means that it can absorb liquids and gases. This can make it easier for some adhesives to bond with wood. Second, wood can be rough or smooth, depending on how it is finished. A rough surface can provide more grip for an adhesive, while a smooth surface can make it more challenging for an adhesive to hold onto the wood. Finally, wood can be flexible or rigid, depending on the thickness and type of wood. It’s important to choose an adhesive that can accommodate the flexibility of the wood to prevent cracking or splitting.

Overall, understanding the characteristics of both glass and wood is important when choosing an adhesive for gluing them together. By considering the porosity, smoothness, and flexibility of each material, you can choose an adhesive that will provide a strong and durable bond.

Types of Glue

When it comes to gluing glass to wood, there are several types of glue that you can use. Each type of glue has its own unique properties that make it suitable for different applications. In this section, we will discuss the most common types of glue used for gluing glass to wood.

Epoxy Resin

Epoxy resin is a popular type of glue for bonding glass to wood. It is a two-part adhesive that consists of a resin and a hardener. When these two components are mixed together, they create a strong and durable bond. Epoxy resin is known for its excellent adhesion to a wide range of surfaces, including glass and wood. It also dries clear, which makes it ideal for applications where appearance is important.

One of the advantages of using epoxy resin is that it can be used on both porous and non-porous surfaces. It is also resistant to water, heat, and chemicals, which makes it suitable for outdoor applications. However, it can take several hours to cure, so you will need to be patient when using this type of glue.

Polyurethane Adhesive

Polyurethane adhesive is another type of glue that can be used for bonding glass to wood. It is a one-part adhesive that cures by reacting with moisture in the air. Polyurethane adhesive is known for its excellent bonding strength and flexibility. It can also be used on a wide range of surfaces, including glass and wood.

One of the advantages of using polyurethane adhesive is that it cures quickly, usually within 24 hours. It is also resistant to water, heat, and chemicals, which makes it suitable for outdoor applications. However, it can be difficult to remove once it has cured, so you will need to be careful when using this type of glue.

Silicone Adhesive

Silicone adhesive is a type of glue that is often used for bonding glass to wood. It is a one-part adhesive that cures by reacting with moisture in the air. Silicone adhesive is known for its excellent flexibility and durability. It can also be used on a wide range of surfaces, including glass and wood.

One of the advantages of using silicone adhesive is that it is easy to apply and can be used on both porous and non-porous surfaces. It is also resistant to water, heat, and chemicals, which makes it suitable for outdoor applications. However, it can take several hours to cure, so you will need to be patient when using this type of glue.

Preparation Before Gluing

preparation-before-gluing

Before you begin gluing glass to wood, there are a few important steps you should take to ensure a successful bond. In this section, we’ll cover the two main steps you should take before applying any glue: cleaning the surfaces and applying the glue.

Cleaning the Surfaces

The first step in preparing to glue glass to wood is to clean the surfaces that will be bonded. Any dirt, dust, or debris on the surfaces can prevent the glue from adhering properly, so it’s important to clean them thoroughly.

To clean the glass surface, use a glass cleaner and a lint-free cloth. Make sure to remove any fingerprints or smudges, as these can also interfere with the bonding process. If the glass surface is particularly dirty, you may need to use a degreaser or rubbing alcohol to remove any stubborn grime.

For the wood surface, use a damp cloth to remove any dust or debris. If the wood is particularly dirty, you can use a mild soap and water to clean it. Be sure to let the wood dry completely before proceeding to the next step.

Applying the Glue

Once the surfaces are clean and dry, it’s time to apply the glue. As we mentioned earlier, epoxy adhesive is the best glue to use for bonding glass to wood. Here’s how to apply it:

  1. Mix the two components of the epoxy adhesive according to the manufacturer’s instructions. Be sure to mix them thoroughly.
  2. Apply a thin layer of the epoxy to the wood surface using a brush or spatula. Make sure to cover the entire surface evenly.
  3. Carefully place the glass onto the wood surface, making sure it is aligned correctly.
  4. Apply pressure to the glass surface to ensure a strong bond. You can use clamps or weights to hold the glass in place while the glue dries.
  5. Allow the glue to dry completely according to the manufacturer’s instructions. This may take several hours or even a full day.

By following these preparation steps, you’ll be well on your way to successfully bonding glass to wood with epoxy adhesive.

Curing and Finishing

Curing Process

After applying the glue to your glass and wood surfaces, it’s important to allow sufficient time for the glue to cure. The curing time can vary depending on the type of glue used. For example, epoxy glue can take up to 24 hours to cure completely. During this time, it’s important to keep the glass and wood surfaces stationary and avoid any movement or jostling that could disrupt the curing process.

To ensure a strong bond, it’s also important to apply pressure to the glued surfaces during the curing process. This can be done by using clamps or weights to hold the surfaces together while the glue cures. Check the manufacturer’s instructions for specific pressure recommendations.

Finishing Touches

Once the glue has fully cured, you can remove any clamps or weights and inspect the bond between the glass and wood surfaces. If necessary, you can use sandpaper to smooth out any rough edges or excess glue that may have seeped out during the gluing process.

To give your project a professional finish, you can also consider painting or staining the wood surface. Be sure to use a paint or stain that is safe for use on glass surfaces if you plan to apply it to the glass as well.

Overall, taking the time to properly cure and finish your glass to wood project will ensure a strong and long-lasting bond that will stand up to everyday use.

Safety Precautions

safety-precautions-1

When working with glue, it’s important to take proper safety precautions to avoid any accidents or injuries. Here are a few safety tips to keep in mind when gluing glass to wood:

1. Wear Protective Gear

Before you start gluing, make sure you’re wearing protective gear such as gloves, goggles, and a mask. This will help protect your skin, eyes, and lungs from any harmful chemicals in the glue.

2. Work in a Well-Ventilated Area

When using glue, it’s important to work in a well-ventilated area to avoid inhaling any fumes. Open windows and doors, or use a fan to circulate the air in the room.

3. Use the Right Amount of Glue

Using too much glue can cause it to seep out and make a mess, while using too little can result in a weak bond. Follow the instructions on the glue packaging to ensure you’re using the right amount.

4. Keep Glue Away from Children and Pets

Glue can be toxic if ingested, so it’s important to keep it out of reach of children and pets. Store your glue in a safe place where it can’t be accidentally accessed.

5. Clean Up Spills Immediately

If you accidentally spill glue, clean it up immediately with a damp cloth. Avoid using hot water, as this can cause the glue to set and become even harder to remove.

By following these safety precautions, you can ensure that your gluing project goes smoothly and safely.

Frequently Asked Questions

What are some effective adhesives for attaching glass to a wooden frame?

Epoxy adhesive is one of the most effective adhesives for attaching glass to a wooden frame. It is strong, durable, and can be applied to a wide range of surfaces. Superglue, silicone glue, and hot glue from a glue gun are also popular options.

Which type of glue is best for attaching wood to a glass mirror?

For attaching wood to a glass mirror, silicone adhesive or clear epoxy is the best option. These adhesives provide a strong and durable bond that can withstand the weight of the mirror.

Can Gorilla Glue be used to attach glass to wood?

Gorilla Glue can be used to attach glass to wood, but it may not be the best option. Gorilla Glue expands as it dries, which can cause the glass to crack or break. It is best to use a clear epoxy or silicone adhesive for attaching glass to wood.

What is the best way to secure glass to a wooden table top?

The best way to secure glass to a wooden table top is to use clear silicone adhesive or clear epoxy. Apply the adhesive to the edges of the glass and press it firmly onto the wooden table top. Allow the adhesive to dry completely before using the table.

Does Liquid Nails work for attaching glass to wood?

Liquid Nails is not recommended for attaching glass to wood. It is designed for use with porous materials and may not provide a strong enough bond for glass.

Is E6000 a suitable adhesive for attaching glass to wood?

E6000 is a suitable adhesive for attaching glass to wood. It is a strong and durable adhesive that can be used on a wide range of surfaces. However, it is important to follow the manufacturer’s instructions carefully and allow the adhesive to dry completely before using the glass.