Month: August 2023

Blog

Why a 2×4 Piece of Wood Isn't Actually 2 Inches by 4 Inches in Construction

Have you ever wondered why a 2×4 piece of wood used in construction is not actually 2 inches by 4 inches? It’s a common misconception that can lead to confusion for those new to woodworking or DIY projects. The truth is, a 2×4 piece of lumber is actually 1.5 inches by 3.5 inches.

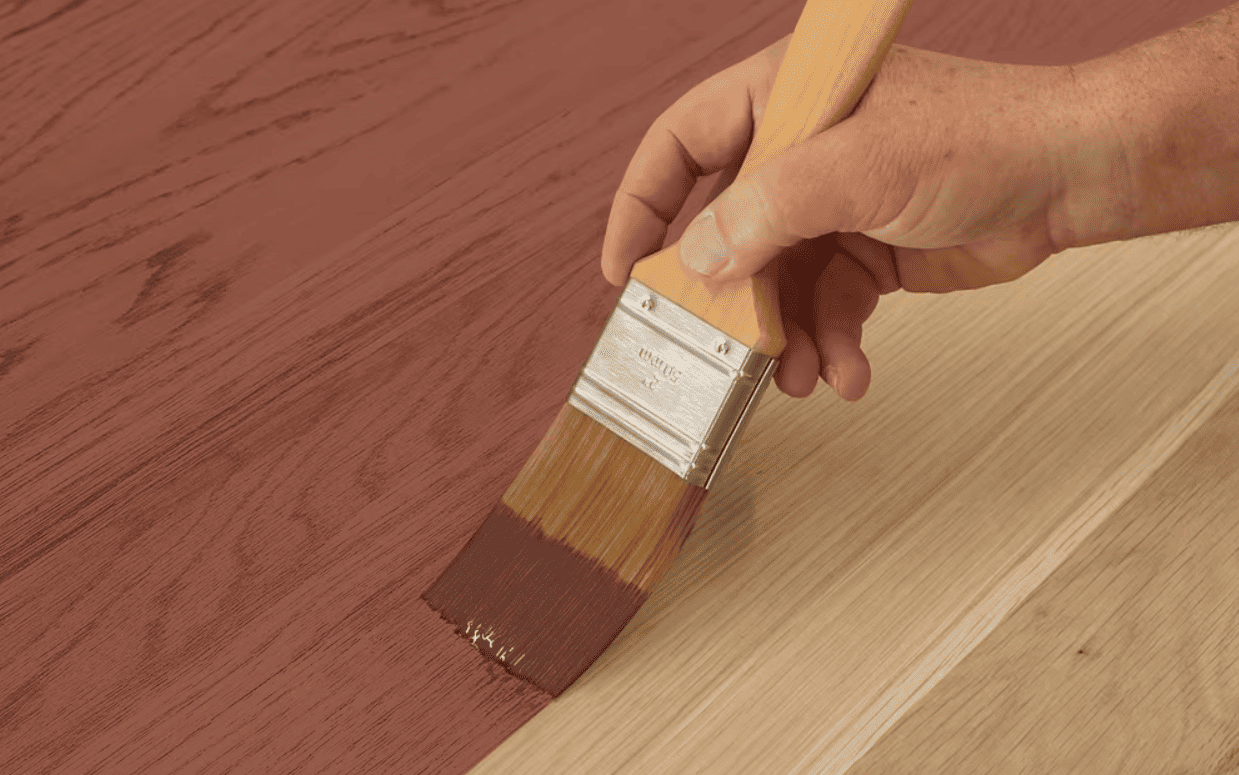
The reason for this difference in size lies in the milling process. When a piece of lumber is first cut, it is rough and uneven on all sides. To make it more uniform and aesthetically pleasing, the lumber is planed down on all four sides. This process removes approximately 0.5 inches from each side, resulting in the final size of a 2×4 piece of lumber.

While the actual size of a 2×4 piece of wood may be smaller than expected, it is still a widely used and versatile building material. Understanding the true dimensions of lumber can help ensure accurate measurements and successful construction projects.

Historical Context

When it comes to construction, the 2×4 piece of wood is one of the most commonly used materials. However, despite its name, a 2×4 is not actually 2 inches by 4 inches. So, why do we call it a 2×4 in the first place?

The term “2×4” dates back to the early 20th century when lumber was cut using a rough-cut method. At that time, a 2×4 piece of wood did actually measure 2 inches by 4 inches. However, as the lumber industry evolved, so did the way lumber was cut and processed.

Today, a 2×4 piece of wood is actually 1.5 inches by 3.5 inches. This is because lumber mills now use a planing process to smooth out the rough surfaces of the wood, which reduces its overall size. This process is necessary to make the wood more uniform and easier to work with.

While the size of a 2×4 piece of wood has changed over time, its popularity in construction has remained constant. Despite the fact that it is not actually 2 inches by 4 inches, the 2×4 remains a staple in construction projects due to its affordability, availability, and versatility.

In fact, the 2×4 is so popular that it has become a symbol of construction itself. It is often used in movies, TV shows, and other forms of media to represent the construction industry as a whole. Despite its humble origins, the 2×4 has become an iconic part of the construction world and will likely continue to be used for many years to come.

Standard Lumber Sizes

standard-lumber-sizes

When you go to a lumber yard or hardware store to buy wood, you’ll quickly realize that the pieces of wood are not always what they seem. In particular, a 2×4 piece of lumber is not actually 2 inches by 4 inches. This can be confusing for those who are new to woodworking or construction.

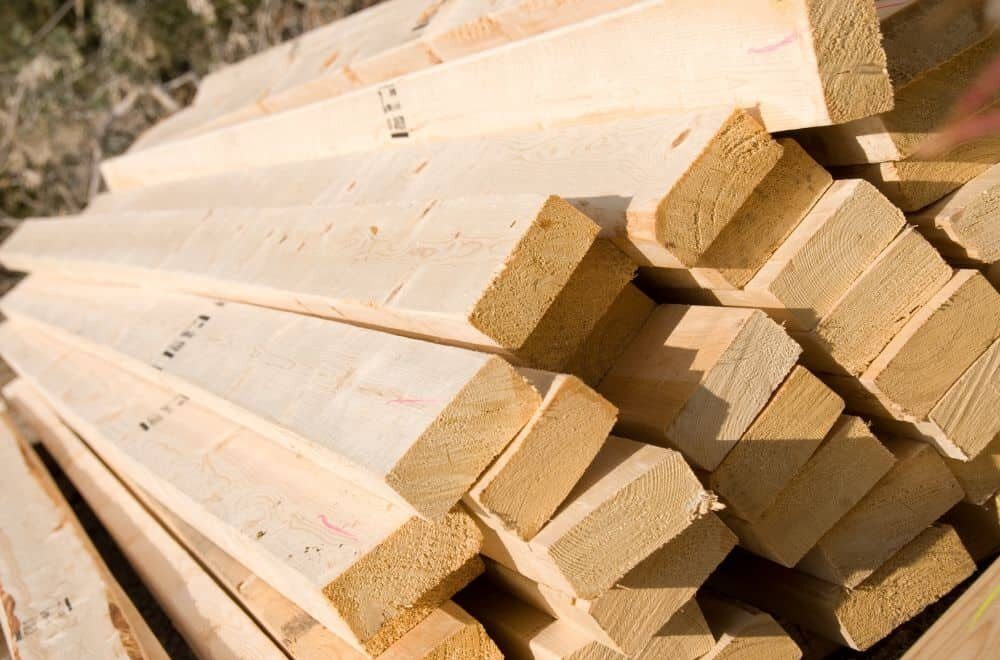
To understand why this is the case, it’s important to know about standard lumber sizes. Lumber is typically sold in nominal sizes, which are rounded up to the nearest inch. These nominal sizes are used to describe the size of the wood before it is planed and sanded to make it smooth and uniform.

Here are some common nominal sizes for softwood lumber:

  • 1×2
  • 1×3
  • 1×4
  • 1×6
  • 1×8
  • 2×2
  • 2×3
  • 2×4
  • 2×6
  • 2×8

As you can see, these sizes are all rounded up to the nearest inch. For example, a 1×4 piece of lumber is actually 3/4 inch thick and 3 1/2 inches wide. A 2×6 piece of lumber is actually 1 1/2 inches thick and 5 1/2 inches wide.

It’s important to note that these nominal sizes can vary slightly depending on the manufacturer and the region. However, they generally follow these standard sizes.

Now that you understand nominal sizes, you can see why a 2×4 piece of lumber is not actually 2 inches by 4 inches. The nominal size of a 2×4 is 2 inches by 4 inches, but after it is planed and sanded, it is actually 1 1/2 inches thick and 3 1/2 inches wide.

In conclusion, understanding standard lumber sizes is important when working with wood. Nominal sizes are used to describe the size of the wood before it is planed and sanded, while actual sizes describe the size of the wood after it has been processed. Knowing this information will help you choose the right size of lumber for your project and avoid confusion when buying wood.

The Process of Milling

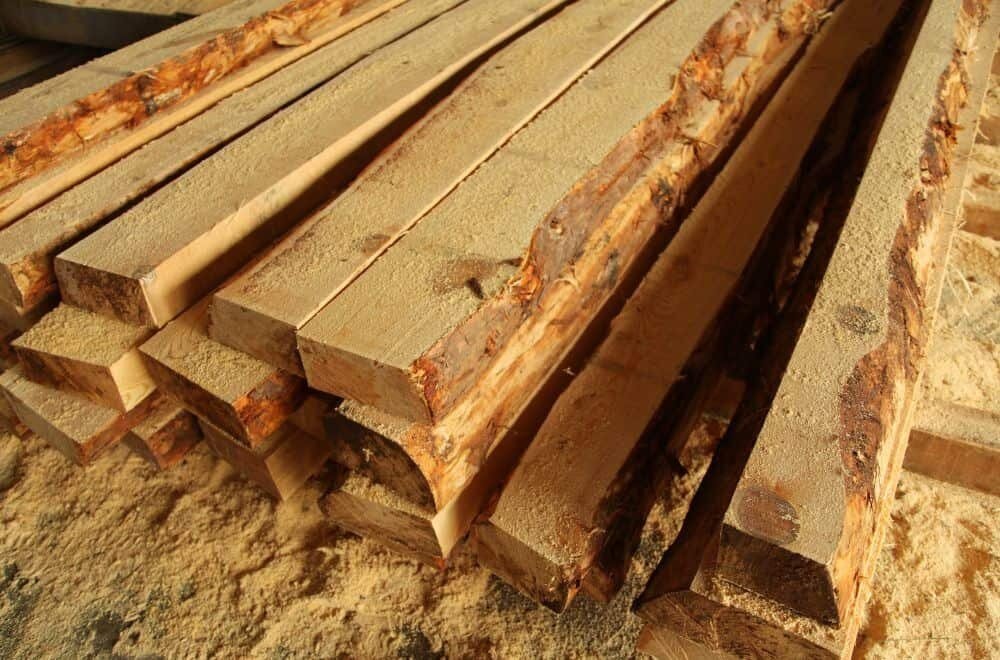
When lumber is harvested, it is typically cut into rough, oversized pieces that are known as “green” lumber. These pieces are then taken to a sawmill, where they are cut down to more manageable sizes. The first cut is typically a rough cut that removes the bark and outer layers of the log, leaving a rough, uneven surface.

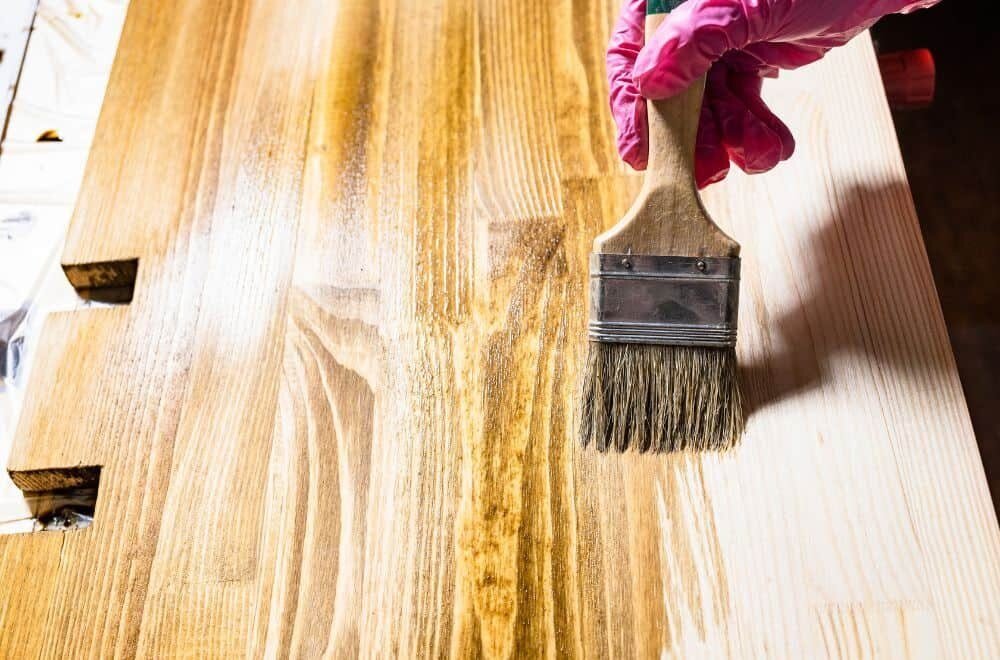
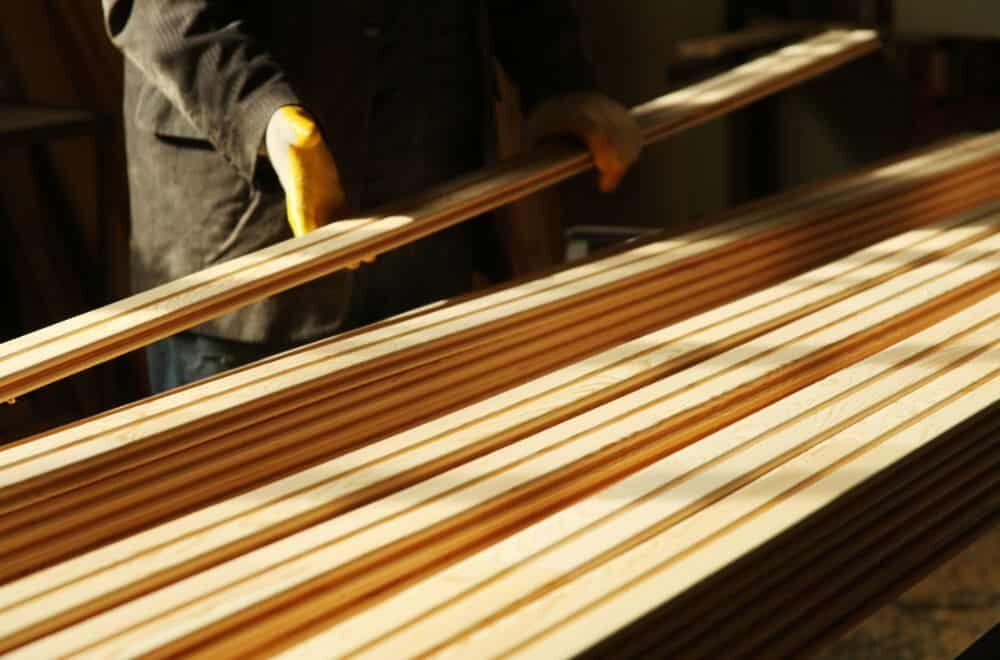
Once the log has been rough cut, the pieces are sent through a planer, which smooths the surface and removes any remaining rough spots. This process is known as milling, and it is what gives lumber its final dimensions and smooth surface.

During the milling process, the lumber is cut down to its final size. In the case of a 2×4, the lumber starts out as a rough-cut piece that is 2 inches thick and 4 inches wide. However, as the piece is milled down, it is planed on all four sides to create a smooth, finished surface. This planing process removes some of the wood, resulting in a final size of 1.5 inches by 3.5 inches.

It is important to note that the milling process can vary depending on the type of lumber being produced. Some types of lumber may be milled to different sizes or shapes, depending on their intended use. Additionally, the milling process can also affect the strength and durability of the final product, so it is important to choose the right type of lumber for your project.

Wood Shrinkage

wood-shrinkage

When working with wood, it is important to understand that it is a natural material and will undergo dimensional changes due to moisture content. Wood will expand or shrink depending on the moisture content of the surrounding environment.

Tangential shrinkage, which is the shrinkage across the width of the board, can vary from about 3% up to around 12%. Most woods fall in the range of about 6% to 10% tangential shrinkage. Accordingly, volumetric shrinkage is typically within the range of 9% to 15% for most wood species.

Wood expands and contracts mostly across its width. Wider boards expand and contract more than narrower ones. Therefore, it is important to take into consideration the width of the board when calculating the amount of shrinkage or expansion that will occur.

To calculate the amount of wood shrinkage or expansion, you need to measure the board’s width and find the average yearly change in moisture content. Wet air expands wood, while dry air shrinks it. It is important to note that changes in moisture content can occur due to changes in temperature or humidity levels.

It is also important to note that the nominal size of lumber, such as a 2×4, is not the actual size of the board. The actual size of a 2×4 is 1.5 inches by 3.5 inches. This is due to the milling process, which removes material from the board to create a smooth surface and uniform size.

Understanding wood shrinkage is important when working with wood in construction. It can affect the quality and stability of a structure if not taken into consideration during the design and building process.

Safety Measures in Construction

When working with 2x4s or any other construction materials, it’s important to take safety measures to prevent accidents and injuries. Here are a few safety tips to keep in mind:

Wear Protective Gear

Always wear appropriate protective gear when working with 2x4s. This includes safety glasses, earplugs or earmuffs, a dust mask, work gloves, and steel-toed boots. Protective gear can help prevent injuries from flying debris, loud noises, dust, and heavy objects.

Use Proper Tools

Make sure you’re using the right tools for the job. Using the wrong tool can not only damage the 2x4s but also increase the risk of accidents. Always use sharp tools and keep them clean and well-maintained. Be sure to follow the manufacturer’s instructions when using power tools.

Follow Safety Guidelines

Follow safety guidelines when working with 2x4s. This includes using proper lifting techniques, not working alone, and never standing on the top rung of a ladder. Always read and follow the safety instructions on any equipment you use.

Secure the 2x4s

Secure the 2x4s properly to prevent them from falling or shifting during construction. Use clamps to hold the 2x4s in place and make sure they’re level before attaching them to other materials. Avoid placing your hands or feet between the 2x4s or under them while they’re being moved or secured.

Be Aware of Surroundings

Be aware of your surroundings when working with 2x4s. Make sure the area is clear of debris and other hazards. Keep children and pets away from the work area and never leave tools or materials unattended. Always be alert and focused on the task at hand.

By following these safety measures, you can help prevent accidents and injuries when working with 2x4s or any other construction materials.

Economic Factors

economic-factors

When it comes to the dimensions of 2×4 lumber, economic factors play a significant role. The lumber industry has been using the current standard dimensions for decades, and changing them now would be costly and impractical.

The standard dimensions of 1.5 inches by 3.5 inches are efficient for the industry because they allow for more lumber to be produced from each log. If the dimensions were increased to 2 inches by 4 inches, the amount of lumber produced from each log would decrease, resulting in higher costs for both the manufacturer and the consumer.

Additionally, the standard dimensions of 2×4 lumber have become an industry standard, and changing them would require changes in building codes, architectural plans, and other construction-related documents. This would be a time-consuming and expensive process, further adding to the economic factors involved in maintaining the current dimensions.

Overall, while the dimensions of 2×4 lumber may not be exactly 2 inches by 4 inches, they are efficient and cost-effective for the lumber industry and the construction industry as a whole.

Environmental Considerations

When it comes to the production of lumber, environmental considerations are important. The process of cutting down trees and turning them into lumber can have a significant impact on the environment.

One way that the lumber industry is addressing these concerns is by implementing sustainable forestry practices. This involves planting new trees to replace those that are harvested, as well as using more efficient methods of harvesting and processing lumber.

In addition to sustainable forestry practices, the lumber industry is also working to reduce waste. This includes using more of the tree, such as the bark and sawdust, for other products like wood pellets and paper.

Another environmental consideration is the transportation of lumber. Shipping lumber long distances can contribute to greenhouse gas emissions and other environmental impacts. To reduce these impacts, many builders and contractors are choosing to use locally-sourced lumber whenever possible.

Overall, while the production and use of lumber does have environmental impacts, the industry is taking steps to address these concerns and promote sustainability. By choosing sustainably-sourced and locally-sourced lumber, you can help reduce the environmental impact of your construction projects.

Frequently Asked Questions

What are the actual dimensions of a 2×4 piece of wood?

The actual dimensions of a 2×4 piece of wood are 1.5 inches by 3.5 inches. This is because the lumber mills trim off rough or warped surfaces of a 2×4 to give it a more polished and finished look. By planning the lumber on all four sides, the original 2×4 is now reduced to 1.5 inches by 3.5 inches.

Why is a 2×4 piece of wood not actually 2 inches by 4 inches?

The reason why a 2×4 piece of wood is not actually 2 inches by 4 inches is because of the way lumber is processed. The lumber mills trim off rough or warped surfaces of a 2×4 to give it a more polished and finished look. By planning the lumber on all four sides, the original 2×4 is now reduced to 1.5 inches by 3.5 inches.

When did the dimensions of a 2×4 piece of wood change?

The dimensions of a 2×4 piece of wood have not changed. They have always been 1.5 inches by 3.5 inches.

What is the history behind calling a 2×4 piece of wood a ‘two by four’?

The term ‘two by four’ is a colloquialism that has been used to describe a piece of lumber that is 2 inches by 4 inches in size. However, as we have established, the actual dimensions of a 2×4 piece of wood are 1.5 inches by 3.5 inches.

What are the standard lengths of lumber available in the market?

The standard lengths of lumber available in the market vary from 8 feet to 16 feet. However, longer or shorter lengths may also be available upon request.

Why are lumber sizes not the actual size they are named after?

Lumber sizes are not the actual size they are named after because of the way lumber is processed. The lumber mills trim off rough or warped surfaces of a piece of wood to give it a more polished and finished look. By planning the lumber on all four sides, the original size of the wood is reduced. This is why a 2×4 piece of wood is not actually 2 inches by 4 inches.

Blog

how-to-remove-alcohol-stains-from-a-polished-wood-table-tips-and-tricks

Are you dealing with unsightly white rings on your polished wood table caused by alcohol stains? Don’t worry, there are several ways to remove them. Whether you accidentally spilled a drink or a guest left a wet glass on the table, these stains can be frustrating to deal with. Luckily, with a few simple steps, you can restore your table to its former glory.

One effective method for removing alcohol stains from a polished wood table is using cooking oil. By gently rubbing a few drops of oil onto the stain, you can begin to lift it from the wood. Another option is to use hot water or a steam iron to remove the stain. It’s important to act quickly and treat the stain as soon as possible to increase your chances of success. With a little patience and elbow grease, you can make your table look as good as new.

Understanding Alcohol Stains on Wood

If you have a polished wood table, you may have experienced the frustration of finding white rings or other alcohol stains on it. Alcohol stains can occur when a liquid containing alcohol is left on the surface of the wood, causing the finish to dissolve and leave a mark.

It is important to understand that alcohol stains are different from water stains. Water stains are caused by moisture penetrating the finish and leaving a mark on the wood. Alcohol stains, on the other hand, are caused by the alcohol in a liquid dissolving the finish and leaving a mark on the wood.

Alcohol stains can be particularly frustrating to remove because they often penetrate the finish and can be difficult to remove without damaging the wood. However, with the right approach, it is possible to remove alcohol stains from polished wood tables.

There are several methods that you can use to remove alcohol stains from wood, including using steel wool, cooking oil, hot water, or a steam iron. Each method has its own advantages and disadvantages, so it is important to choose the method that is best suited to your specific situation.

In the next section, we will explore some of the most effective methods for removing alcohol stains from polished wood tables.

Materials Needed for Removal

materials-needed-for-removal

Removing alcohol stains (white rings) from a polished wood table requires some materials that you can easily find at home or purchase from a local store. Here are the materials you will need:

1. Soft cloths

You will need soft cloths to apply the cleaning solution and to wipe the surface of the table. Make sure the cloths are clean and free of any debris that could scratch the surface of the table.

2. Toothpaste or baking soda

Toothpaste or baking soda can be used as an abrasive to remove the stain. Apply a small amount of toothpaste or baking soda to the stain and rub gently with a soft cloth.

3. Olive oil or mineral oil

Olive oil or mineral oil can be used as a lubricant to help the abrasive work more effectively. Apply a small amount of oil to the stain before using the abrasive.

4. White vinegar

White vinegar can be used to dissolve the stain. Mix equal parts of white vinegar and water and apply the solution to the stain. Let it sit for a few minutes, then wipe clean with a soft cloth.

5. Lemon juice

Lemon juice can also be used to dissolve the stain. Squeeze fresh lemon juice onto the stain and let it sit for a few minutes. Wipe clean with a soft cloth.

6. Hair dryer

A hair dryer can be used to dry the surface of the table after cleaning. Set the hair dryer to low heat and hold it a few inches away from the surface of the table. Move the hair dryer back and forth until the surface is dry.

With these materials, you can effectively remove alcohol stains (white rings) from a polished wood table.

Preparation Before Cleaning

Before attempting to remove alcohol stains from your polished wood table, you need to gather the necessary materials and take some precautions to avoid causing further damage. Here are some steps to follow:

  1. Gather materials: You will need a soft cloth, denatured alcohol, water, and a clean towel.
  2. Test the alcohol: Before applying the alcohol to the stained area, test it on a discreet portion of the wood and let it air dry. This will help you determine if the alcohol will cause any discoloration or damage to the wood.
  3. Protect the surrounding area: To avoid damaging the surrounding area, place a protective covering such as a plastic sheet or newspaper around the stained area.
  4. Clean the surface: Before applying any cleaning solution, clean the surface of the table with a soft cloth and water to remove any dirt or debris.
  5. Apply the cleaning solution: Once the surface is clean and dry, dampen a soft cloth with denatured alcohol and gently rub the stained area. Be careful not to soak the wood grain.
  6. Wipe clean: After rubbing the stained area, use a warm, damp cloth to remove the denatured alcohol, and then wipe with a fresh towel.

Remember to never use harsh chemicals or abrasive materials on polished wood as they can cause further damage. Always test cleaning solutions on a small, discreet area before using them on the entire stained area.

Step by Step Guide to Remove Alcohol Stains

step-by-step-guide-to-remove-alcohol-stains

If you have white rings on your polished wood table from alcohol stains, don’t worry, you can remove them easily. Follow these simple steps to clean and polish your table.

Cleaning the Stain

  1. As soon as you notice the alcohol stain, use a clean cloth to blot the area gently. Don’t rub the stain as this can cause it to spread or set deeper into the wood.
  2. Mix equal parts of baking soda and non-gel toothpaste to make a paste. Apply the paste to the stain and rub it gently with a soft cloth in a circular motion. Let it sit for a few minutes.
  3. Wipe off the paste with a clean damp cloth. Repeat the process if the stain is still visible.
  4. If the stain is stubborn, mix equal parts of white vinegar and olive oil. Apply the mixture to the stain and let it sit for a few minutes. Wipe it off with a clean, damp cloth.

Polishing the Wood

  1. Once the stain is removed, use a soft cloth to apply a small amount of furniture polish to the surface of the table. Rub the polish in a circular motion until it is evenly distributed.
  2. Let the polish sit for a few minutes, then use a clean, dry cloth to buff the surface of the table until it is shiny.
  3. To maintain the shine and protect the surface of your table, use a furniture wax or polish regularly.

By following these simple steps, you can remove alcohol stains from your polished wood table and restore its beauty. Remember to be gentle when cleaning the stain and to use a soft cloth to avoid scratching the surface of the wood.

Preventing Future Stains

To avoid future alcohol stains on your polished wood table, there are a few preventative measures you can take. Here are some tips to help keep your table looking its best.

Using Coasters

One of the easiest ways to prevent alcohol stains on your wood table is to use coasters. Coasters provide a barrier between your drink and the table, preventing any condensation or spills from coming into contact with the wood. Make sure to use coasters for all drinks, including water and non-alcoholic beverages, as they can also cause damage to the finish of your table.

Regular Cleaning

Keeping your table clean is essential to prevent any stains from setting in. Wipe up any spills or condensation as soon as possible using a soft cloth. Avoid using harsh chemicals or abrasive cleaners, as they can damage the finish of your table. Instead, use a mild soap and water solution or a specialized wood cleaner. Make sure to dry the table thoroughly after cleaning to prevent any water damage.

Proper Storage of Alcoholic Beverages

Storing your alcoholic beverages properly can also help prevent stains on your wood table. Keep them in a cool, dry place away from direct sunlight. Avoid storing them on or near your table, as any spills or leaks can cause damage to the finish. If you do need to keep them on the table, make sure to use a tray or other protective surface to prevent any damage.

By following these simple preventative measures, you can help keep your polished wood table looking its best for years to come.

When to Call a Professional

when-to-call-a-professional

Removing alcohol stains from a polished wood table can be a tricky task. While there are various DIY methods that you can try, there may be instances where calling a professional may be necessary. Here are a few scenarios where you should consider seeking professional help:

Extensive Damage

If the alcohol stain has caused extensive damage to the wood, such as deep discoloration or warping, it may be best to call in a professional. They will be able to assess the damage and provide the best course of action to restore the table to its original condition.

Antique Furniture

If the table is an antique or has sentimental value, it is advisable to seek professional help. Antique furniture requires special care and attention, and attempting to remove the stain on your own may cause further damage to the piece.

Lack of Experience

If you have never attempted to remove an alcohol stain from a wood table before, it may be best to leave it to the professionals. They have the necessary experience and expertise to handle the job effectively and efficiently.

Expensive Table

If the table is expensive, it is best not to take any risks and call in a professional. Attempting to remove the stain on your own may cause irreversible damage to the table, which may end up costing you more in the long run.

In conclusion, while there are various DIY methods to remove alcohol stains from a polished wood table, it is important to know when to call in a professional. Consider the extent of the damage, the value of the table, and your experience before attempting to remove the stain on your own. Remember, it is always better to be safe than sorry.

Frequently Asked Questions

What are some effective methods for removing white rings from polished wood tables?

There are several methods that can be effective in removing white rings from polished wood tables. One method involves using a cloth dampened with denatured alcohol and gently wiping over the damaged area. Another method involves using a cloth with a few drops of cooking oil or traditional wood oils and gently rubbing the oil over the stain. It may take a minute of rubbing the oil in for the stain to fully disappear.

Is it safe to use rubbing alcohol on finished wood to remove stains?

Rubbing alcohol can be used to remove stains from finished wood, but it is important to use it sparingly and to not let it sit on the wood for too long. It is also important to test a small, inconspicuous area first to ensure that the alcohol does not damage the finish.

Can furniture oil be used to remove alcohol stains from wood tables?

Yes, furniture oil can be used to remove alcohol stains from wood tables. Simply apply a small amount of furniture oil to a clean, dry cloth and gently rub the oil onto the stained area.

How can I fix wood that has been ruined by alcohol?

If the wood has been severely damaged by alcohol, it may be necessary to sand down the affected area and refinish the wood. However, for minor damage, one can try using a mixture of equal parts vinegar and olive oil. Simply apply the mixture to the damaged area and let it sit for a few hours before wiping it off with a clean cloth.

Will using isopropyl alcohol damage a polyurethane finish on a wood table?

Isopropyl alcohol can damage a polyurethane finish if it is used in excess or left on the wood for too long. It is important to test a small, inconspicuous area first to ensure that the alcohol does not damage the finish.

What is the best way to remove wine rings from a wooden table?

One effective method for removing wine rings from a wooden table is to mix equal parts baking soda and water to form a paste. Apply the paste to the stain and let it sit for a few hours before wiping it off with a clean, damp cloth.

Blog

Can Wooden Spoons Go in the Dishwasher? Tips for Cleaning Your Wooden Utensils

Are you wondering if you can put wooden spoons in the dishwasher? Wooden spoons are a popular kitchen tool that many people use for cooking and baking. They are durable, long-lasting, and gentle on non-stick cookware. However, when it comes to cleaning, there seems to be some confusion about whether or not you can put wooden spoons in the dishwasher.

The answer is, it depends. While some wooden spoons can go in the dishwasher, most cannot. The heat and moisture from the dishwasher can cause the spoon to warp, split, or crack, reducing its lifespan. Additionally, the dishwasher can cause wooden spoons to discolor, making them look old and worn out. In this article, we will explore whether or not wooden spoons can go in the dishwasher, the potential risks, and how to properly care for your wooden spoons.

Understanding Wooden Spoons

Wooden spoons are a staple in many kitchens around the world. They have been used for centuries and are popular for a variety of reasons. If you are wondering whether or not you can put wooden spoons in the dishwasher, it is important to understand a few things about them first.

Benefits of Using Wooden Spoons in Cooking

One of the main benefits of using wooden spoons in cooking is their versatility. They come in various shapes and sizes, ranging from small spoons used for tasting to large spoons used for stirring large pots of soup or sauce. Wooden spoons are also gentle on cookware and will not scratch non-stick surfaces.

Another benefit of using wooden spoons is that they do not conduct heat. This means that you can leave a wooden spoon in a hot pot without worrying about it getting too hot to handle. Wooden spoons are also less likely to melt or warp when exposed to high temperatures.

Types of Wood Used for Wooden Spoons

Not all wooden spoons are created equal. The type of wood used to make a wooden spoon can affect its durability and effectiveness. Some of the most common types of wood used for wooden spoons include:

  • Beechwood: This is a dense and durable hardwood that is resistant to cracking and warping. Beechwood spoons are a popular choice for cooking because they are strong and can withstand high temperatures.
  • Olive wood: This is a beautiful and durable hardwood that is resistant to bacteria. Olive wood spoons are a great choice for serving because they do not absorb odors or flavors.
  • Bamboo: This is a lightweight and eco-friendly option that is great for stirring and mixing. However, bamboo spoons are not as durable as hardwood spoons and may warp or crack over time.

Caring for Wooden Spoons

To keep your wooden spoons in good condition, it is important to take proper care of them. Here are a few tips for caring for your wooden spoons:

  • Hand wash your wooden spoons with warm, soapy water. Avoid soaking them in water for long periods of time.
  • Dry your wooden spoons thoroughly after washing to prevent them from warping or cracking.
  • Apply a food-safe oil, such as mineral oil or beeswax, to your wooden spoons every few months to keep them from drying out.
  • Avoid exposing your wooden spoons to high temperatures, such as in the dishwasher or on a hot stove.

By understanding the benefits of using wooden spoons in cooking, the types of wood used for wooden spoons, and how to care for them, you can make an informed decision about whether or not to put them in the dishwasher.

Dishwasher Basics

When it comes to cleaning your kitchen utensils, the dishwasher can be a lifesaver. It saves time and effort, and it can sanitize your dishes. However, not all kitchen tools are dishwasher-safe. Before you put your wooden spoons in the dishwasher, it’s important to know some basic dishwasher rules.

First, check the manufacturer’s instructions. Some wooden utensils are dishwasher-safe, but most are not. If you’re not sure, it’s better to err on the side of caution and wash them by hand.

Second, consider the dishwasher’s settings. The hot water and high pressure in the dishwasher can damage some wooden spoons. If your dishwasher has a gentle cycle, you may be able to use it for your wooden spoons.

Third, use a dishwasher basket or utensil holder. This will keep your wooden spoons from getting tossed around and damaged in the dishwasher.

Finally, make sure your wooden spoons are completely dry before storing them. Moisture can cause them to warp or crack over time.

In summary, while some wooden utensils can go in the dishwasher, most cannot. It’s important to check the manufacturer’s instructions and consider the dishwasher’s settings before putting your wooden spoons in the dishwasher. Using a dishwasher basket or utensil holder and ensuring your wooden spoons are completely dry before storing them can help prevent damage.

Effects of Dishwasher on Wooden Spoons

If you’re wondering whether or not you can put your wooden spoons in the dishwasher, it’s important to consider the potential effects that the dishwasher can have on them. While some wooden utensils can handle the heat and water exposure, most will not fare well. Here are the three main types of damage that your wooden spoons may experience if you put them in the dishwasher:

Water Damage

Wooden spoons are susceptible to water damage, which can cause them to warp, crack, or split. The high heat and moisture in the dishwasher can be especially damaging to wooden utensils. The hot water and detergent can strip the spoon of its natural oils, which can cause it to dry out and become brittle over time.

Heat Damage

The high heat in the dishwasher can also cause damage to your wooden spoons. The heat can cause the wood to expand and contract, which can lead to warping or cracking. Additionally, the heat can cause the natural oils in the wood to evaporate, which can make the spoon more susceptible to damage.

Chemical Damage

The dishwasher detergent can also cause chemical damage to your wooden spoons. Many detergents contain harsh chemicals that can strip the wood of its natural oils and cause it to dry out. Additionally, the chemicals can cause the wood to become discolored or even break down over time.

To avoid damaging your wooden spoons, it’s best to wash them by hand with soap and water. Make sure to dry them thoroughly after washing and avoid leaving them soaking in water for extended periods of time. If your wooden spoons do get wet, you can use a towel to wipe off any excess moisture and then let them air dry.

Overall, while it may be tempting to put your wooden spoons in the dishwasher for convenience, it’s best to avoid doing so if you want to keep them in good condition for years to come.

Proper Care for Wooden Spoons

proper-care-for-wooden-spoons

Wooden spoons are an essential kitchen tool that can last for years if properly cared for. Here are some tips to help you maintain the quality and longevity of your wooden spoons.

Hand Washing

Hand washing is the best way to clean wooden spoons. Use warm water and mild dish soap to gently scrub the spoon. Avoid soaking the spoon in water for an extended period, as this can cause the wood to warp or crack. Rinse the spoon thoroughly with warm water and dry it immediately.

Drying Process

After washing your wooden spoon, dry it thoroughly. Use a clean towel to wipe off any excess water, then allow the spoon to air dry completely. Avoid using a dishwasher to dry wooden spoons, as the heat can cause the wood to crack or warp.

Maintenance Tips

To maintain the quality of your wooden spoons, it’s essential to keep them well-maintained. Here are some tips to help you do this:

  • Oil your wooden spoons regularly to prevent them from drying out and cracking. Use food-grade mineral oil or coconut oil to coat the spoon, then wipe off any excess oil with a clean towel.
  • Avoid using harsh detergents or bleach to clean wooden spoons, as this can damage the wood.
  • Store your wooden spoons in a dry, cool place, away from direct sunlight or heat sources.
  • If your wooden spoon starts to show signs of wear and tear, such as cracks or splinters, it’s time to replace it.

By following these simple tips, you can keep your wooden spoons in excellent condition for years to come.

Alternatives to Wooden Spoons

If you are looking for alternatives to wooden spoons, there are several options available to you. Here are two popular alternatives:

Silicone Spoons

Silicone spoons are a great alternative to wooden spoons. They are heat-resistant, non-stick, and easy to clean. They are also safe for use with non-stick cookware and will not scratch or damage the surface.

One of the benefits of silicone spoons is that they come in a variety of colors, making it easy to color-code your kitchen tools. This can be especially helpful if you have a lot of utensils and need an easy way to keep them organized.

Stainless Steel Spoons

Stainless steel spoons are another great alternative to wooden spoons. They are durable, easy to clean, and will not absorb flavors or odors like wooden spoons can.

One of the benefits of stainless steel spoons is that they are dishwasher safe, making them easy to clean. They are also great for use with high-heat cooking, as they will not melt or warp like some other materials.

When choosing a stainless steel spoon, look for one that is made from high-quality stainless steel and has a comfortable handle. A good stainless steel spoon should feel sturdy in your hand and be easy to grip.

Overall, both silicone and stainless steel spoons are great alternatives to wooden spoons. They are durable, easy to clean, and safe for use with a variety of cookware. Consider adding them to your kitchen tool collection today!

Frequently Asked Questions

Are wooden spoons dishwasher safe?

It depends on the type of wooden spoon you have and the dishwasher’s settings. Some wooden spoons can go in the dishwasher, while others cannot. Check the manufacturer’s instructions to determine if your wooden spoon is dishwasher safe.

Can I put wooden spoons in the dishwasher?

As mentioned earlier, it depends on the type of wooden spoon you have and the dishwasher’s settings. Some wooden spoons can go in the dishwasher, while others cannot. However, it is generally recommended to wash wooden spoons by hand to avoid warping, cracking, or splitting.

How do I clean wooden spoons?

To clean wooden spoons, wash them by hand with hot, soapy water. Avoid soaking wooden spoons in water for long periods of time, as this can cause them to warp. Rinse the spoons thoroughly and dry them with a clean towel. You can also use a mixture of baking soda and water to remove stains from wooden spoons.

What is the best way to care for wooden utensils?

To care for wooden utensils, wash them by hand with hot, soapy water and dry them with a clean towel. Avoid soaking wooden utensils in water for long periods of time, as this can cause them to warp. Apply a food-grade mineral oil to the utensils regularly to prevent them from drying out and cracking.

Can I wash wooden cutting boards in the dishwasher?

It is generally not recommended to wash wooden cutting boards in the dishwasher, as the heat and pressure can cause them to warp or crack. Instead, wash them by hand with hot, soapy water and dry them with a clean towel. Apply a food-grade mineral oil to the cutting board regularly to prevent it from drying out and cracking.

How do I remove bad smells from new wooden spoons?

To remove bad smells from new wooden spoons, wash them by hand with hot, soapy water and dry them with a clean towel. You can also try rubbing the spoons with a lemon or lime wedge, or soaking them in a mixture of water and vinegar for a few minutes before washing them again.

Blog

Can You Stain Over Painted Wood? A Quick Guide

Are you tired of the look of your painted wood furniture or deck? Do you want to add some depth and character to your surfaces? If so, you may be wondering if you can stain over painted wood. The good news is that it is possible, but there are some important factors to consider before you start.

Firstly, it’s important to note that not all types of stain will work over painted wood. Regular wood stain requires the ability to penetrate the wood grain, which is not possible on a painted surface. Instead, you will need to use a gel stain that sits on top of the paint and does not require penetration. Additionally, the type of paint used on the surface will affect the success of staining over it. Oil-based paints will not allow the stain to adhere properly, while water-based paints are more compatible with gel stains.

Before you begin staining over painted wood, you will need to properly prepare the surface. This includes cleaning and sanding the surface to remove any dirt, debris, or glossy finish that could interfere with the stain. It’s also important to test a small, inconspicuous area first to ensure that the stain adheres properly and achieves the desired color. With the right materials and preparation, you can successfully stain over painted wood and transform the look of your surfaces.

Why Stain Over Painted Wood?

If you have a piece of furniture or a wooden deck that has been painted, you may be wondering if you can change its color without having to strip the paint. Staining over painted wood is a great solution for those who want to change the color of their wooden surfaces without having to go through the hassle of removing the old paint.

Staining over painted wood can also be a great way to add depth and texture to your wooden surfaces. Unlike paint, which sits on top of the wood, stain penetrates the wood fibers, highlighting the natural grain and texture of the wood. This can give your furniture or deck a more rustic and natural look.

Another advantage of staining over painted wood is that it can be a cost-effective way to update your wooden surfaces. Instead of buying new furniture or replacing your deck, you can simply stain over the existing paint to give it a fresh new look.

Staining over painted wood can also be a great way to protect your wooden surfaces from the elements. Most stains contain a sealant that can help protect the wood from moisture, UV rays, and other environmental factors that can cause it to deteriorate over time.

Overall, staining over painted wood can be a great way to update, protect, and enhance the natural beauty of your wooden surfaces.

Preparation for Staining Over Painted Wood

preparation-for-staining-over-painted-wood

Before you start staining over painted wood, it is essential to prepare the surface properly. This will ensure that the stain adheres well and provides an even finish. Here are two critical steps to follow when preparing a painted surface for staining:

Cleaning the Surface

The first step is to clean the painted surface thoroughly. This will remove any dirt, grime, or debris that may be on the surface. You can use a mild detergent and warm water to clean the surface. Make sure to rinse the surface well and let it dry completely before proceeding to the next step.

Sanding the Surface

The second step is to sand the painted surface lightly. This will help to remove any gloss or sheen from the surface and provide a rougher texture for the stain to adhere to. Use a fine-grit sandpaper (220 grit or higher) to sand the surface. Sand in the direction of the wood grain, and be careful not to sand too aggressively, as this can damage the surface.

After sanding, make sure to remove any dust or debris from the surface. You can use a tack cloth or a soft-bristled brush to remove any dust or debris. This will ensure that the surface is clean and ready for staining.

In summary, cleaning and sanding the painted surface are two critical steps to follow when preparing a surface for staining. By following these steps, you can ensure that the stain adheres well and provides an even finish.

Choosing the Right Stain

When it comes to staining over painted wood, choosing the right type of stain is crucial. There are three main types of stains to consider: oil-based, water-based, and gel stain. Each type has its own unique characteristics and benefits. Here’s what you need to know about each one:

Oil-Based Stain

Oil-based stains are the most commonly used type of stain for staining over painted wood. They are known for their durability and ability to penetrate deeply into the wood, providing long-lasting protection against the elements. Oil-based stains are also easy to apply and provide a beautiful, natural finish.

When choosing an oil-based stain, look for one that is specifically formulated for use on painted surfaces. This will ensure that the stain adheres properly and provides the best possible finish. Some popular oil-based stain brands include Minwax, Cabot, and Olympic.

Water-Based Stain

Water-based stains are another option for staining over painted wood. They are known for their ease of use and fast drying time. Water-based stains are also environmentally friendly and offer a wide range of color options.

When choosing a water-based stain, look for one that is specifically formulated for use on painted surfaces. This will ensure that the stain adheres properly and provides the best possible finish. Some popular water-based stain brands include Varathane, General Finishes, and Minwax.

Gel Stain

Gel stains are a thicker, more viscous type of stain that can be used to achieve a variety of finishes, from a natural wood look to a painted look. They are easy to apply and provide great coverage, making them a popular choice for DIY projects.

When choosing a gel stain, look for one that is specifically formulated for use on painted surfaces. This will ensure that the stain adheres properly and provides the best possible finish. Some popular gel stain brands include General Finishes, Minwax, and Varathane.

Overall, when choosing a stain for staining over painted wood, it’s important to consider the type of wood you’re working with, the look you want to achieve, and the level of protection you need. With the right stain and proper application techniques, you can transform your painted wood surfaces into beautiful, long-lasting works of art.

Staining Process

staining-process

Staining over painted wood is possible, but it requires a different process than staining unfinished wood. Here are the steps to follow when staining over painted wood:

Applying the Stain

  1. Choose a gel stain that matches your desired color. Gel stains are thicker and adhere better to painted surfaces than regular stains.
  2. Apply the gel stain with a brush or rag, working in the direction of the grain.
  3. Be sure to apply the stain evenly and avoid overlapping strokes to prevent blotches or streaks.

Wiping Off Excess Stain

  1. After applying the stain, wait a few minutes before wiping off any excess with a clean rag.
  2. Be sure to wipe off all excess stain to prevent it from drying and creating a sticky or tacky surface.
  3. Use a dry brush or rag to remove any leftover stain from corners or crevices.

Drying Time

  1. Allow the stain to dry completely before applying a topcoat or sealant.
  2. The drying time will vary depending on the type of stain and the humidity and temperature of the environment.
  3. Be patient and avoid touching or disturbing the surface until the stain is completely dry.

Staining over painted wood can be a great way to update the look of your furniture or home decor. Just be sure to follow the proper process to achieve a beautiful and long-lasting finish.

Post-Staining Care

After staining your painted wood, it’s essential to take proper care of the finish to ensure it lasts for years to come. Here are some post-staining care tips to keep in mind:

Sealing the Stain

To protect your newly stained surface, it’s crucial to seal the stain with a clear coat. This will help prevent the stain from fading or chipping away over time. Here are some tips for sealing your stain:

  • Wait at least 24 hours after staining before applying a clear coat.
  • Use a high-quality brush or roller to apply the clear coat evenly.
  • Apply two to three coats of clear coat, allowing each coat to dry completely before applying the next.
  • Sand lightly between coats to ensure a smooth finish.

Maintaining the Finish

To keep your stained surface looking great, it’s essential to maintain the finish regularly. Here are some tips for maintaining your stained surface:

  • Avoid using harsh chemicals or abrasive cleaners on your stained surface, as this can damage the finish.
  • Clean your stained surface regularly with a mild soap and water solution.
  • Avoid leaving standing water on your stained surface, as this can cause water damage.
  • Use furniture pads or coasters to protect your stained surface from scratches and dents.
  • If you notice any damage or wear on your stained surface, address it promptly to prevent further damage.

By following these post-staining care tips, you can ensure that your stained painted wood looks great and lasts for years to come.

Frequently Asked Questions

Can you apply gel stain over painted wood?

Yes, you can apply gel stain over painted wood. However, it’s important to prepare the surface of the wood properly before applying the gel stain. This includes cleaning the surface thoroughly and sanding it lightly to create a rough surface for the stain to adhere to.

Is it possible to stain over primer?

Yes, it’s possible to stain over primer. However, it’s important to use a high-quality primer that is compatible with the stain you plan to use. Additionally, you should ensure that the primer is completely dry before applying the stain.

What are some popular wood stain colors?

Some popular wood stain colors include dark walnut, ebony, provincial, and weathered gray. However, the best color for your project will depend on your personal preferences and the type of wood you are staining.

Can solid stain be applied over paint?

Yes, solid stain can be applied over paint. However, it’s important to prepare the surface of the wood properly before applying the stain. This includes cleaning the surface thoroughly and sanding it lightly to create a rough surface for the stain to adhere to.

How can I achieve an antique look by staining over paint?

To achieve an antique look by staining over paint, you can use a technique called “dry brushing.” This involves lightly brushing the stain onto the surface of the painted wood, then using a dry brush to remove some of the stain, leaving behind a subtle, antique-looking finish.

Can you use stain over paint on exterior surfaces?

Yes, you can use stain over paint on exterior surfaces. However, it’s important to use a high-quality stain that is designed to withstand outdoor conditions. Additionally, you should ensure that the surface of the wood is properly prepared before applying the stain.

Blog

Ready Seal Wood Stain/Sealer: One Coat or Two?

Are you wondering whether you need to use one or two coats of Ready Seal wood stain/sealer? While one coat may be sufficient in some cases, it is generally recommended to use two coats for the best results. Applying two coats will create a consistent, long-lasting finish that will protect your exterior wood surfaces.

Situs kami juga sangat mudah digunakan. Dengan antarmuka yang user-friendly, Anda dapat dengan cepat mengakses data Macau 4D kapan saja dan di mana saja. Kami memahami betapa pentingnya kecepatan dan efisiensi dalam dunia toto, sehingga kami berkomitmen untuk memberikan layanan yang cepat dan responsif. Selain itu, tim kami selalu siap sedia data macau 4d untuk membantu Anda dengan segala pertanyaan atau kebutuhan yang mungkin Anda miliki.

If the wood surface is rough or porous, or if you are applying the Ready Seal to a large area, it is especially important to use two coats. This will ensure that the wood is fully covered and protected from the elements. However, if the wood is brand new or smooth-milled, it may only require one coat initially, as it takes a few years for the pores of the wood to fully open up.

Ultimately, the number of coats you need to apply will depend on the condition of your wood surface and the size of the area you are covering. By following the recommended guidelines and using the appropriate number of coats, you can ensure that your wood surfaces are protected and look their best for years to come.

Understanding Ready Seal Wood Stain/Sealer

What Is Ready Seal Wood Stain/Sealer?

Ready Seal is a wood stain and sealer that is designed to protect and enhance the natural beauty of wood. It is a unique blend of oil-based stains and sealers that penetrate deep into the wood fibers, providing long-lasting protection against the elements. Ready Seal is easy to apply and dries quickly, making it an ideal choice for both professional contractors and do-it-yourselfers.

Benefits of Using Ready Seal Wood Stain/Sealer

Using Ready Seal wood stain/sealer has many benefits. Here are a few:

  • Two coats of Ready Seal are recommended for best results. This will create a consistent, long-lasting finish that will protect your wood from the elements.
  • Ready Seal is available in a wide range of colors, so you can choose the one that best complements your home’s exterior.
  • Ready Seal is easy to apply. You can use a brush, roller, or sprayer to apply it to your wood surface.
  • Ready Seal is designed to be used on all types of exterior wood surfaces, including decks, fences, siding, and more.
  • Ready Seal is formulated to stain and seal your projects, all in one step. This means you don’t have to apply a separate sealer after staining your wood.

In summary, using Ready Seal wood stain/sealer is a great way to protect and enhance the natural beauty of your wood surfaces. With its easy application and long-lasting protection, it’s no wonder that Ready Seal is a popular choice among homeowners and contractors alike.

The Recommendation of Two Coats

When it comes to applying Ready Seal wood stain/sealer, it is recommended to use two coats for the best results. In this section, we will explore why two coats are recommended and the impact of using two coats on wood protection.

Why Two Coats Are Recommended

Using two coats of Ready Seal wood stain/sealer ensures that the wood is fully covered and protected. The first coat penetrates the wood and prepares it for the second coat. The second coat provides a consistent finish and adds an extra layer of protection against weathering and UV rays.

Jangan lewatkan kesempatan untuk meningkatkan strategi permainan Anda dengan data SGP terpercaya dari situs toto slot resmi kami. Bergabunglah dengan komunitas kami sekarang dan rasakan perbedaan dalam cara Anda bermain dan menang. Dengan data yang akurat dan layanan yang prima, Anda dapat meraih kemenangan lebih sering di situs toto dan menikmati setiap momen permainan. Daftar sekarang dan nikmati keuntungan dari live draw SGP yang akurat dan cepat!

Another reason why two coats are recommended is that it allows you to achieve a more even finish. If you only apply one coat, you may end up with uneven areas that are more prone to wear and tear.

The Impact of Two Coats on Wood Protection

Using two coats of Ready Seal wood stain/sealer can significantly improve the protection of your wood. The first coat penetrates the wood and seals it from the inside out. The second coat provides an extra layer of protection that helps to prevent moisture from penetrating the wood.

By using two coats, you can also extend the life of your wood. The extra layer of protection helps to prevent damage from weathering, UV rays, and other environmental factors that can cause wood to deteriorate over time.

In summary, using two coats of Ready Seal wood stain/sealer is recommended for the best results. It provides a more even finish and improves the protection of your wood. By following this recommendation, you can ensure that your wood stays in great condition for years to come.

One Coat Application

one-coat-application

If you’re wondering whether one coat of Ready Seal is enough for your wood staining project, the answer is: it depends. In some cases, one coat is sufficient, while in others, it may be necessary to apply two coats for optimal results.

When Is One Coat Sufficient?

If you’re staining a new, smooth wood surface, one coat of Ready Seal may be enough. This is because the wood is less porous and will absorb the stain more evenly. Additionally, if you’re looking for a lighter, more natural finish, one coat may be enough to achieve the desired look.

Pros and Cons of One Coat Application

There are both advantages and disadvantages to applying only one coat of Ready Seal. Here are a few to consider:

Pros

  • Saves time and money: Applying only one coat will save you time and money on materials.
  • Natural look: If you’re looking for a more natural, subtle finish, one coat may be sufficient.

Cons

  • Less protection: One coat of stain may not provide enough protection for your wood surface, leaving it vulnerable to damage from the elements.
  • Uneven coverage: Depending on the type of wood and the application method, one coat may result in uneven coverage and an inconsistent finish.

Ultimately, the decision to apply one or two coats of Ready Seal will depend on your specific project and preferences. Consider the type of wood you’re staining, the look you want to achieve, and the level of protection you need before making your decision.

Comparison Between One Coat and Two Coats

When it comes to applying Ready Seal wood stain/sealer, you may be wondering if you should use one coat or two. While one coat may seem like a quicker and more cost-effective option, there are benefits to using two coats as recommended. In this section, we will compare the durability, cost-effectiveness, and time consumption of using one coat versus two coats.

Durability

One of the main benefits of using two coats of Ready Seal is increased durability. The second coat helps to provide an extra layer of protection against weathering, UV rays, and other environmental factors. This means that your wood will be better protected and will last longer with two coats of Ready Seal rather than just one.

Cost Effectiveness

While using two coats of Ready Seal may seem more expensive upfront, it can actually be more cost-effective in the long run. With two coats, your wood will be better protected and will require less maintenance over time. This means that you may save money on repairs and replacements in the future.

Time Consumption

Using two coats of Ready Seal will take more time than using just one coat. However, the extra time spent applying the second coat can be worth it in the long run. With two coats, you will have better protection and a longer-lasting finish on your wood.

In summary, while using one coat of Ready Seal may seem like a quicker and more cost-effective option, using two coats can provide increased durability, cost-effectiveness, and a longer-lasting finish. Consider these factors when deciding whether to use one coat or two.

Application Tips for Ready Seal Wood Stain/Sealer

application-tips-for-ready-seal-wood-stainsealer

When applying Ready Seal Wood Stain/Sealer, it is essential to follow the manufacturer’s recommendations to achieve the desired results. Here are some tips to help you apply Ready Seal Wood Stain/Sealer effectively:

1. Prepare the Surface

Before applying Ready Seal, make sure the surface is clean, dry, and free of any dust, dirt, or other debris. If the surface is rough, sand it down to a smooth finish. If the wood is new, allow it to weather for at least six months before applying Ready Seal.

2. Apply the Stain/Sealer

When applying Ready Seal, it is recommended to use a brush, roller, or sprayer. Pour the stain/sealer into a paint tray or bucket and start applying it to the wood surface. Make sure to apply it evenly and avoid overlapping the strokes.

3. Use Two Coats

While Ready Seal can be applied in a single coat, it is recommended to use two coats for the best results. The second coat will provide better protection and coverage, especially on rough or weathered wood.

4. Pour Carefully

When pouring Ready Seal into a paint tray or bucket, make sure to pour it slowly and carefully. Pouring too fast can cause the stain/sealer to splash and spill, which can be difficult to clean up.

5. Avoid Over-Spraying

When using a sprayer to apply Ready Seal, make sure to use a cardboard or spray shield to control overspray. Overspraying can cause the stain/sealer to coat unintended areas, which can be difficult to remove.

By following these tips, you can ensure that your Ready Seal Wood Stain/Sealer application is effective and long-lasting.

Frequently Asked Questions

How many coats of wood sealer should I use?

The number of coats of wood sealer you should use depends on the type of wood and the condition of the surface. In general, it is recommended to apply two coats of sealer to achieve a consistent, long-lasting finish.

Is one coat of Ready Seal enough?

While one coat of Ready Seal may be sufficient for some projects, it is recommended to use two coats for best results. This will ensure that the surface is adequately protected and that the color is consistent.

Does Ready Seal require two coats?

Yes, it is recommended to use two coats of Ready Seal on exterior wood surfaces. This will create a consistent, long-lasting finish. If the wood surface is rough, or if you are applying the Ready Seal to a large area, it is especially important to use two coats.

How many coats of stain and sealer do I need?

To achieve the best results, it is recommended to use two coats of stain and sealer on exterior wood surfaces. This will create a consistent, long-lasting finish.

What is the coverage of Ready Seal?

The coverage of Ready Seal will vary depending on the type of wood and the condition of the surface. On average, one gallon of Ready Seal will cover approximately 150-200 square feet with one coat.

What are the available colors of Ready Seal?

Ready Seal is available in a variety of colors, including natural cedar, pecan, dark walnut, redwood, light oak, mahogany, burnt hickory, and mission brown.

Blog

How Long Does It Take for Wood Stain to Dry on a Deck? A Quick Guide

If you’re planning to stain your deck, you may be wondering how long it takes for the stain to dry. The drying time for wood stain on a deck depends on several factors, including the type of wood, the type of stain, and the weather conditions. In general, you can expect wood stain to take anywhere from 24 to 48 hours to dry on a deck.

One of the most important factors that affects the drying time of wood stain on a deck is the type of wood you’re working with. Hardwood decks tend to dry faster than softwood decks, since hardwood is less porous and absorbs less moisture. Softwood decks, on the other hand, are more porous and tend to take longer to dry. Additionally, the type of stain you use can also affect the drying time. Oil-based stains generally take longer to dry than water-based stains, but they also tend to be more durable.

Understanding Wood Stain

If you’re planning on staining your deck, it’s important to understand what wood stain is and how it works. Wood stain is a type of finish that is applied to wood surfaces to enhance their natural color, protect them from the elements, and improve their durability. Stains are available in a wide range of colors and finishes, from clear to opaque, and can be oil-based or water-based.

When you apply wood stain to a deck, it penetrates the wood fibers and enhances the natural grain pattern. The stain also provides a layer of protection against moisture, UV rays, and other environmental factors that can cause damage to the wood. The type of stain you choose will depend on the look you want to achieve and the level of protection you need.

Oil-based stains are a popular choice for decks because they penetrate deeply into the wood and provide long-lasting protection. They are also easy to apply and can be used on a variety of wood types. However, they do take longer to dry than water-based stains, and they can emit strong odors during the application process.

Water-based stains are another option for deck staining. They dry faster than oil-based stains and emit fewer odors. They are also easier to clean up with soap and water. However, they don’t penetrate the wood as deeply as oil-based stains, which means they may not provide as much protection against the elements.

In general, it’s best to choose a stain that is specifically designed for outdoor use and can withstand the elements. Look for stains that offer UV protection and are resistant to mildew, mold, and other types of damage. It’s also important to follow the manufacturer’s instructions for application and drying times to ensure that your deck looks great and stays protected for years to come.

Factors Affecting Drying Time

factors-affecting-drying-time

When it comes to staining a deck, one of the most important things to consider is how long it will take for the stain to dry. The drying time can vary depending on several factors, including the type of wood stain you use, the weather conditions, and the type of wood you are staining.

Type of Wood Stain

Different types of wood stains have different drying times. For example, water-based wood stains generally dry faster than oil-based stains. Water-based stains can take around 3-4 hours to dry to the touch and up to 24-48 hours to fully cure. Oil-based stains, on the other hand, can take anywhere from 24-48 hours to dry and up to 72 hours to fully cure.

Weather Conditions

The weather conditions can also affect the drying time of your wood stain. High humidity levels can extend the drying time of water-based stains by several hours. Similarly, if the temperature is too cold, the stain may not dry properly. Ideally, the temperature should be between 50-90°F with low humidity levels for optimal drying conditions.

Wood Type

The type of wood you are staining can also affect the drying time of your wood stain. Softwoods such as pine and cedar tend to absorb stain more quickly than hardwoods like oak and maple. This means that softwoods may dry faster, but they may also require more coats of stain to achieve the desired color. Hardwoods, on the other hand, may take longer to dry, but they may require fewer coats of stain.

In summary, the drying time of wood stain on a deck can vary depending on several factors, including the type of wood stain, weather conditions, and wood type. By considering these factors, you can ensure that your deck stain dries properly and looks great for years to come.

General Drying Time for Wood Stain

When it comes to staining a deck, one of the most important things to consider is drying time. You don’t want to apply a second coat of stain too soon, or you risk ruining the finish. On the other hand, you don’t want to wait too long either, as this can cause the wood to become too dry and prevent the stain from soaking in properly.

On average, wood stain takes about 24 to 48 hours to dry completely on a deck. However, the exact drying time can vary depending on several factors, including the type of wood, the type of stain, and the weather conditions.

For example, if you are staining a softwood like pine, it will likely dry faster than a hardwood like oak. Similarly, if you are using an oil-based stain, it will typically take longer to dry than a water-based stain.

In addition to these factors, the temperature and humidity levels can also affect the drying time of wood stain. If it is hot and dry outside, the stain will dry faster, while cooler and more humid conditions will slow down the drying process.

To ensure that your deck stain dries properly, it is important to follow the manufacturer’s instructions carefully. This may include waiting a certain amount of time between coats, as well as avoiding heavy foot traffic or exposure to water until the stain is fully dry. By doing so, you can help ensure that your deck looks beautiful and lasts for years to come.

How to Tell if Your Wood Stain is Dry

how-to-tell-if-your-wood-stain-is-dry

After applying wood stain to your deck, you might be wondering how long it will take to dry. It’s important to let the stain dry completely before walking on it or placing any furniture on it, as it can easily smudge or transfer onto other surfaces. Here are some ways to tell if your wood stain is dry:

1. Check the Touch

One of the easiest ways to tell if your wood stain is dry is to touch it. If it feels dry to the touch, then it’s likely dry. However, be careful not to press too hard or scratch the surface with your fingernail, as this can cause damage.

2. Look for Glossiness

Another way to tell if your wood stain is dry is to look for glossiness. If the stain is still shiny or glossy, then it’s likely still wet. Once it dries, the glossiness will disappear.

3. Smell the Surface

If the wood stain is still wet, it will have a strong odor. Once it dries, the smell will dissipate. You can also try smelling the surface of the wood from a few inches away to see if it still has a strong odor.

4. Perform a Tape Test

Performing a tape test is a good way to check if the wood stain is dry. Simply place a piece of tape onto the surface of the wood and then peel it off. If the tape comes off cleanly without any stain residue, then the stain is dry.

5. Use a Moisture Meter

If you have a moisture meter, you can use it to check the moisture content of the wood. If the moisture content is below 15%, then the wood stain is likely dry. However, keep in mind that moisture meters can be expensive and may not be necessary for most DIY projects.

By following these tips, you can ensure that your wood stain is dry before moving on to the next step of your deck project. Remember to be patient and let the stain dry completely before using the deck.

Tips for Quick Drying

When staining a deck, you want to make sure it dries as quickly as possible so you can enjoy it sooner. Here are some tips to help speed up the drying process:

1. Choose the Right Stain

Water-based stains dry faster than oil-based stains. If you’re in a hurry, opt for a water-based stain. However, keep in mind that oil-based stains tend to last longer and provide better protection for your deck.

2. Check the Weather

The weather can greatly affect how quickly your stain dries. Choose a day with low humidity and moderate temperatures. Avoid staining on a rainy or excessively hot day.

3. Apply Thin Coats

Applying thick coats of stain can prolong the drying time. Instead, apply thin coats and let each coat dry completely before applying the next one.

4. Use a Fan

A fan can help circulate air and speed up the drying process. If you don’t have a fan, simply leave the deck open to the air and avoid covering it with a tarp or other material.

5. Add Heat

Adding heat can help dry the stain faster. You can use a heat gun or a hair dryer on a low setting to gently warm the surface of the deck. Just be careful not to overheat the wood or the stain.

By following these tips, you can help your deck stain dry faster and enjoy your newly stained deck sooner.

Safety Measures During Drying

safety-measures-during-drying

When it comes to wood stain, it’s important to take certain safety measures during the drying process. Here are a few things to keep in mind:

Ventilation

Make sure the area where you’re staining your deck is well-ventilated. This will help prevent the buildup of fumes, which can be harmful if inhaled. Consider opening windows and doors, or using a fan to circulate air.

Protective Gear

Wear protective gear, such as gloves and a mask, to prevent skin and respiratory irritation. Some wood stains contain chemicals that can be harmful if they come into contact with your skin or if you inhale them.

Keep Children and Pets Away

Keep children and pets away from the area where you’re staining your deck. Wood stain can be toxic if ingested, so it’s important to keep it out of reach.

Follow Manufacturer’s Instructions

Always follow the manufacturer’s instructions when it comes to drying times and safety precautions. Different types of wood stains may have different drying times and require different safety measures.

By following these safety measures, you can ensure that the wood stain on your deck dries properly and without any harm to yourself or others.

Frequently Asked Questions

How long does it take for deck stain to dry?

The drying time for deck stain can vary depending on several factors, such as the type of stain, humidity, temperature, and the porosity of the wood. On average, it may take 24 to 48 hours for deck stain to dry to the touch. However, it’s important to note that it may take up to 72 hours for the stain to fully cure.

How long should I wait before walking on a newly stained deck?

It’s best to wait at least 24 hours before walking on a newly stained deck. This will give the stain enough time to dry and cure properly. However, if the weather is humid or if the temperature is below 50°F, it’s best to wait longer to ensure that the stain has fully cured.

What happens if it rains on a freshly stained deck?

If it rains on a freshly stained deck, it can ruin the finish and cause water damage to the wood. It’s best to avoid staining your deck if rain is in the forecast for the next 24 to 48 hours. If it does rain unexpectedly, cover your deck with a tarp or plastic sheeting to protect it from the rain.

How long does it take for Behr solid stain to dry before rain?

Behr solid stain can take anywhere from 24 to 48 hours to dry before it’s safe from rain. However, it’s important to check the manufacturer’s instructions for specific drying times and other recommendations.

How long does Cabot deck stain take to dry?

Cabot deck stain can take anywhere from 24 to 48 hours to dry to the touch. However, it may take up to 72 hours for the stain to fully cure. It’s important to follow the manufacturer’s instructions for specific drying times and other recommendations.

How long should deck stain dry before applying a second coat?

It’s important to wait at least 24 hours before applying a second coat of deck stain. This will give the first coat enough time to dry and cure properly. However, it’s best to check the manufacturer’s instructions for specific recommendations on when to apply a second coat of stain.

Blog

What should you use to fill large gaps in wood? A guide to choosing the right wood filler

If you’re working with wood, you may encounter gaps that need to be filled. These gaps can be caused by a variety of factors, including wood shrinkage, warping, or damage. Filling large gaps in wood can be a daunting task, but it’s important to choose the right filler for the job to ensure a successful repair.

There are several options available for filling large gaps in wood, including epoxy fillers, powdered fillers, and wood putty. Each type of filler has its own unique properties and advantages, so it’s important to consider the specific needs of your project before choosing a filler. Factors to consider include the size of the gap, the type of wood, and the desired appearance of the finished repair.

When selecting a filler, it’s also important to consider the strength and durability of the product. Some fillers may be more suitable for high-traffic areas or outdoor use, while others may be better suited for indoor projects. By taking the time to carefully evaluate your options and choose the right filler for your project, you can ensure a successful repair that will last for years to come.

Understanding Wood Gaps

If you’ve ever worked with wood, you’ve probably encountered gaps. These gaps can be frustrating, especially when they’re large. But understanding why gaps occur and how they can affect your project can help you choose the best way to fill them.

Causes of Large Wood Gaps

Large wood gaps can be caused by a variety of factors. Some of the most common causes include:

  • Wood movement: Wood is a natural material that expands and contracts with changes in temperature and humidity. If you don’t account for this movement when building your project, gaps can occur.
  • Drying: As wood dries, it can shrink and crack, leading to gaps.
  • Poor joinery: If your joints aren’t tight, gaps can occur.
  • Knots: Knots can create voids in the wood that can lead to gaps.

Effects of Unfilled Gaps

Unfilled gaps can have several negative effects on your project, including:

  • Weakness: Gaps can weaken your project by reducing the amount of contact between the wood pieces.
  • Appearance: Large gaps can be unsightly and detract from the appearance of your project.
  • Dirt and debris: Gaps can collect dirt and debris, making your project harder to clean.

By understanding the causes and effects of large wood gaps, you can choose the best method for filling them and ensure that your project looks and performs its best.

Choosing the Right Filler

choosing-the-right-filler

When it comes to filling large gaps in wood, it’s important to choose the right filler for your project. Here are three options to consider:

Wood Putty

Wood putty is a popular choice for filling small to medium-sized gaps in wood. It’s made from a mixture of wood particles and a binding agent, such as linseed oil or epoxy. Wood putty is easy to apply and can be sanded and painted over once it dries. However, it’s not the best option for larger gaps as it can crack and shrink over time.

Epoxy Resin

For larger gaps or holes, epoxy resin is a more durable and long-lasting option. Epoxy is a two-part adhesive that hardens when mixed together. It’s strong, waterproof, and can be sanded and painted over once it dries. Epoxy resin is also heat-resistant, making it a good choice for outdoor projects. However, it can be more difficult to work with and requires careful mixing and application.

Sawdust and Glue Mix

Another option for filling large gaps is to create a mixture of sawdust and wood glue. This method is cost-effective and easy to make at home. Simply mix sawdust with wood glue to create a thick paste and apply it to the gap. Once it dries, sand it down and paint over it if desired. However, this method may not be as strong or long-lasting as other options and may not work well for larger gaps.

When choosing the right filler for your project, consider the size of the gap, the type of wood you’re working with, and the desired finish. Always follow the manufacturer’s instructions and take necessary safety precautions when working with any type of filler.

Application Process

application-process-2

Preparation

Before applying wood filler to large gaps, it is important to prepare the surface properly. Here are the steps to follow:

  1. Clean the surface: Use a clean cloth or brush to remove any dust, debris, or loose particles from the gap. You can also use a vacuum cleaner to ensure that the gap is completely clean.
  2. Sand the surface: Use sandpaper to roughen up the surface around the gap. This will help the wood filler adhere better to the surface.
  3. Apply wood conditioner: If you are working with softwood, it is recommended to apply a wood conditioner before applying the wood filler. This will help the wood filler dry evenly and prevent it from soaking into the wood.

Application

Once you have prepared the surface, you can start applying the wood filler. Here are the steps to follow:

  1. Choose the right filler: Select a wood filler that is appropriate for the size of the gap you are filling. For large gaps, use a filler that is specifically designed for this purpose.
  2. Mix the filler: If you are using a two-part wood filler, mix the two components together according to the manufacturer’s instructions. If you are using a pre-mixed filler, you can skip this step.
  3. Apply the filler: Use a putty knife to apply the filler to the gap. Make sure to press the filler firmly into the gap to ensure that it fills the entire space. If the gap is deep, you may need to apply the filler in layers, allowing each layer to dry before applying the next.

Finishing

Once the wood filler has dried, you can finish the surface to match the rest of the wood. Here are the steps to follow:

  1. Sand the surface: Use sandpaper to smooth out the surface of the wood filler. Start with a coarse grit sandpaper and work your way up to a finer grit sandpaper.
  2. Stain or paint the surface: If you want the surface to match the rest of the wood, apply a stain or paint to the surface. Make sure to use a product that is compatible with the wood filler you used.
  3. Seal the surface: Once the stain or paint has dried, apply a sealer to the surface. This will protect the surface from moisture and prevent the wood filler from cracking or shrinking over time.

Safety Measures

safety-measures-3

When working with wood, safety should always be a top priority. Here are a few safety measures to keep in mind when filling large gaps in wood:

1. Wear Protective Gear

Before starting any woodworking project, it’s important to wear the appropriate protective gear. This includes safety glasses to protect your eyes from flying debris, a dust mask to prevent inhalation of sawdust, and gloves to protect your hands from sharp tools and splinters.

2. Work in a Well-Ventilated Area

When filling large gaps in wood, you may be working with wood glue or other chemicals that can emit fumes. It’s important to work in a well-ventilated area, such as a workshop or garage, to prevent inhalation of these fumes.

3. Use the Right Tools

Using the right tools for the job can help prevent accidents and injuries. When filling large gaps in wood, use a putty knife or scraper to apply the filler, and a sandpaper to smooth it out.

4. Follow Manufacturer Instructions

When using wood filler or other products, be sure to follow the manufacturer’s instructions carefully. This includes using the product in the recommended amounts, allowing sufficient drying time, and disposing of any leftover materials properly.

5. Clean Up Thoroughly

After filling large gaps in wood, be sure to clean up any leftover materials, such as sawdust or wood filler. This will help prevent accidents and keep your work area clean and safe.

By following these safety measures, you can ensure a safe and successful woodworking project.

Maintenance Tips

To ensure that your wood stays in good condition, it is important to perform regular maintenance. Here are some tips to keep in mind:

  • Clean your wood regularly with a soft cloth or brush to remove dust and dirt. Avoid using harsh chemicals or abrasive materials that can damage the surface of the wood.
  • Use a wood conditioner or oil to protect the wood from drying out and cracking. Apply the conditioner or oil with a soft cloth, following the manufacturer’s instructions.
  • Keep your wood away from direct sunlight and heat sources, which can cause the wood to warp or fade over time.
  • Repair any cracks or gaps in the wood as soon as possible to prevent further damage. Use a wood filler or putty to fill in the gap, following the manufacturer’s instructions.
  • If you notice any signs of insect damage, such as small holes or sawdust, take action immediately to prevent further infestation. Use an insecticide or contact a professional pest control service for assistance.

By following these maintenance tips, you can help ensure that your wood stays in good condition for years to come.

Frequently Asked Questions

What is the best product for filling large gaps in wood?

There are several products that you can use to fill large gaps in wood, including wood filler, epoxy, and caulk. The best product for filling large gaps in wood depends on the size of the gap, the type of wood, and the intended use of the wood. For example, wood filler is a good choice for filling small to medium-sized gaps in indoor wood projects, while epoxy is a better choice for filling larger gaps in outdoor wood projects.

How do you fill large gaps in outdoor wood?

To fill large gaps in outdoor wood, you should use a product that is specifically designed for outdoor use, such as epoxy or a high-quality outdoor wood filler. Before applying the filler, make sure the wood is clean and dry. Apply the filler using a putty knife, and then smooth it out with a damp cloth. Allow the filler to dry completely before sanding and painting or staining the wood.

What is the best wood filler for large holes in outdoor projects?

The best wood filler for large holes in outdoor projects is an epoxy-based filler. Epoxy is a durable and weather-resistant material that can withstand exposure to the elements. It is also strong enough to support heavy loads, making it ideal for filling large holes in outdoor projects like decks and fences.

How do you fill gaps in wood furniture?

To fill gaps in wood furniture, you should use a wood filler that matches the color of the wood. Start by cleaning the area around the gap with a damp cloth, and then apply the filler using a putty knife. Make sure to apply enough filler to completely fill the gap. Once the filler has dried, sand it down until it is flush with the surrounding wood.

What is the best wood filler for large gaps in floors?

The best wood filler for large gaps in floors is a two-part epoxy filler. This type of filler is strong and durable, and can withstand the heavy foot traffic that floors are subjected to. It is also water-resistant, which is important for areas like kitchens and bathrooms.

How can you fill large gaps in exterior wood trim effectively?

To fill large gaps in exterior wood trim effectively, you should use a high-quality exterior wood filler. Before applying the filler, make sure the area around the gap is clean and dry. Apply the filler using a putty knife, and then smooth it out with a damp cloth. Allow the filler to dry completely before sanding and painting the trim.

Blog

What's the Benefit of Using Metal Studs Over Wood 2×4? The Pros and Cons You Need to Know

Are you considering using metal studs instead of traditional wood 2x4s for your next construction project? Metal studs have become increasingly popular in recent years due to their numerous benefits over wood studs. In this article, we will explore the advantages of using metal studs over wood 2x4s and help you make an informed decision for your next project.

One of the main benefits of using metal studs is their durability. Unlike wood, metal studs are not susceptible to rot, warping, or insect damage, making them a great long-term investment. Additionally, metal studs are fire-resistant, which is especially important in commercial buildings and multi-family dwellings. Metal studs are also resistant to moisture, which makes them ideal for use in areas with high humidity or potential water damage.

Another advantage of metal studs is their ease of installation. Metal studs are lightweight, making them easier to transport and handle on the job site. They also come in a variety of lengths and sizes, making it easier to customize your construction project. Metal studs are also straighter and more uniform than wood studs, which can save time and money on installation.

The Basics of Metal Studs and Wood 2x4s

When it comes to framing walls, metal studs and wood 2x4s are two popular options. Both have their advantages and disadvantages, and your choice will depend on your specific needs and preferences.

Metal Studs

Metal studs are made of galvanized steel strips that are rolled in cold machines. They are typically used in structural buildings, and a heavier gauge is required for added strength. Here are some benefits of using metal studs:

  • They are lightweight and easy to handle, making them ideal for DIY projects.
  • They are resistant to fire, insects, and rot, making them a durable option.
  • They are straight and do not warp or twist, ensuring a consistent finish.

However, there are also some drawbacks to using metal studs:

  • They can be more expensive than wood studs.
  • They conduct heat and cold more easily than wood, which can affect insulation.
  • They require special tools, such as metal-cutting blades, to cut and install.

Wood 2x4s

Wood 2x4s are the traditional choice for framing walls. They are made of solid wood and are known for their strength and durability. Here are some benefits of using wood 2x4s:

  • They are readily available and easy to source, making them a cost-effective option.
  • They are easy to cut and install, requiring only basic tools.
  • They provide good insulation and help regulate temperature.

However, there are also some drawbacks to using wood 2x4s:

  • They are susceptible to fire, insects, and rot, making them less durable than metal studs.
  • They can warp or twist, requiring extra effort to ensure a straight finish.
  • They can be heavier and more difficult to handle than metal studs.

Overall, both metal studs and wood 2x4s have their advantages and disadvantages. Your choice will depend on your specific needs and preferences, as well as your budget and skill level.

Cost Efficiency

cost-efficiency

When it comes to choosing between metal studs and wood 2x4s, cost is a major consideration. Here are some factors to consider when comparing the cost efficiency of metal studs and wood:

Initial Cost

The initial cost of metal studs is often higher than that of wood 2x4s. However, the cost difference has been decreasing over the years. According to HomeDepot.com, as of April 13, 2021, a traditional whitewood 2x4x8 was selling for $6.85 while the equivalent metal stud was $4.38. While the difference may not seem significant, it can add up quickly over a large project.

Long Term Savings

While metal studs may have a higher initial cost, they can provide long-term savings. Metal studs are more durable than wood 2x4s and are not susceptible to rot, warping, or termites. This means that they have a longer lifespan and require less maintenance, which can save you money in the long run.

Another advantage of metal studs is that they are fire-resistant. This can lead to lower insurance premiums and can also provide added safety in the event of a fire.

In addition to their durability and fire resistance, metal studs are also more environmentally friendly than wood 2x4s. They are often made from recycled materials and can be recycled at the end of their lifespan, reducing waste and minimizing the environmental impact of your project.

Overall, while metal studs may have a higher initial cost, they can provide long-term savings and environmental benefits. When considering the cost efficiency of metal studs versus wood 2x4s, it is important to take into account the lifespan, maintenance, and environmental impact of each material.

Durability and Longevity

When it comes to framing walls, metal studs offer several benefits over traditional wood 2x4s. One of the most significant advantages of metal studs is their durability and longevity. Here are a few reasons why:

Resistance to Elements

Metal studs are made from galvanized steel, which is highly resistant to rust and corrosion. Unlike wood, which can warp, rot, or decay over time when exposed to moisture, metal studs can withstand long-term exposure to elements such as rain, humidity, and extreme temperatures. This makes them an excellent choice for buildings in areas with harsh weather conditions.

Structural Integrity

Metal studs are also much stronger than wood 2x4s. They can support more weight and are less likely to bend or break under pressure. This means that metal-framed walls are less likely to develop cracks or other structural problems over time. In addition, metal studs are termite-resistant, which eliminates the need for pest control measures and ensures that your walls remain strong and stable for years to come.

In summary, if you want to build walls that are strong, durable, and long-lasting, metal studs are an excellent choice. They are resistant to the elements, have excellent structural integrity, and are termite-resistant. With metal studs, you can be sure that your walls will stand the test of time and provide a solid foundation for your building.

Ease of Installation

ease-of-installation

When it comes to installation, metal studs have some advantages over wood studs. Here are some things to consider:

Weight Considerations

One of the biggest advantages of metal studs is their weight. They are much lighter than wood studs, which can make them easier to handle and install. This can be especially important if you are working on a large project or if you have to carry the studs up several flights of stairs. Additionally, the lighter weight of metal studs can make them easier to maneuver into place when framing walls.

Tools Required

Another advantage of metal studs is that they require fewer tools to install than wood studs. While you will still need a drill and screws to attach the studs to the wall, you won’t need a saw to cut them to size. Instead, you can use tin snips or a metal-cutting blade on a jigsaw to cut the studs to the appropriate length. This can save you time and money, as you won’t need to purchase or maintain a saw.

Overall, metal studs can be easier to install than wood studs due to their lighter weight and fewer required tools. However, it’s important to note that metal studs can be more difficult to work with in certain situations, such as when installing electrical wiring or drywall. Additionally, metal studs can be more expensive than wood studs, so it’s important to weigh the pros and cons before making a decision.

Environmental Impact

When it comes to comparing metal studs and wood 2x4s, there are a few environmental factors to consider. Here are some key points to keep in mind:

Sustainability

One of the main advantages of metal studs is that they are highly sustainable. Steel is the most recycled material on earth, and metal studs are typically made from recycled steel. In fact, according to the Steel Recycling Institute, steel framing has a recycling rate of more than 90%. This means that using metal studs can help reduce the demand for new steel and conserve natural resources.

In addition to being made from recycled materials, metal studs are also highly durable and long-lasting. This means that they are less likely to need to be replaced or repaired over time, which can help reduce waste and conserve resources.

Waste Production

While metal studs are highly sustainable, they do produce some waste during the manufacturing process. Specifically, the production of metal studs generates scrap metal and other waste materials. However, many manufacturers have implemented recycling programs to help reduce this waste and ensure that as much material as possible is reused or recycled.

In contrast, wood 2x4s can also generate waste during the manufacturing process, such as sawdust and other wood scraps. However, wood is a renewable resource, which means that it can be sustainably harvested and replanted over time.

Overall, when it comes to environmental impact, metal studs have some clear advantages over wood 2x4s. They are highly sustainable, durable, and can help reduce the demand for new steel. However, they do produce some waste during the manufacturing process, which should be taken into consideration.

Fire Safety

fire-safety

When it comes to fire safety, metal studs have both advantages and disadvantages over wood studs. While metal studs are known to be durable under extreme weather conditions, they weaken and break easily in a fire. On the other hand, wood studs are more combustible and can contribute to the spread of fire.

To better understand the differences between metal and wood studs in terms of fire safety, it’s important to look at the combustibility and fire resistance of each material. The combustibility of a material gives an indication of how quickly a fire will grow, while the fire resistance of a material refers to its ability to withstand fire and prevent its spread.

According to the National Fire Protection Association (NFPA), wood is a combustible material with a high rate of heat release, meaning it can contribute to the spread of fire. Metal, on the other hand, is non-combustible and has a low rate of heat release. However, metal studs are not fire-resistant and can weaken and break easily under high temperatures, making them less desirable for load-bearing walls in buildings.

To address these concerns, manufacturers have developed fire-rated metal studs that are designed to withstand fire for a certain amount of time. These fire-rated studs are made with thicker gauge steel and are coated with fire-resistant materials to provide additional protection.

Overall, when it comes to fire safety, both metal and wood studs have their advantages and disadvantages. While metal studs are non-combustible and can withstand extreme weather conditions, they can weaken and break easily in a fire. Wood studs, on the other hand, are more combustible but can be treated with fire-retardant chemicals to improve their fire resistance. Ultimately, the choice between metal and wood studs for framing should be based on the specific needs of the project and the applicable building codes and regulations.

Flexibility in Design

One of the main benefits of using metal studs over wood 2×4 is the flexibility they offer in design. Metal studs come in a variety of sizes and shapes, allowing for more creative and unique designs. They can be bent or curved to create interesting architectural features, such as arches or curved walls.

In addition, metal studs can be easily cut to any length, making them ideal for custom projects. This flexibility allows for more precise and accurate construction, which can save time and money in the long run.

Another advantage of using metal studs is that they are lightweight and easy to handle. This makes them easier to install and maneuver into tight spaces. They can also be easily transported to the job site, which can save on shipping and handling costs.

Metal studs also offer more design options when it comes to electrical and plumbing. Knockouts can be easily made in the studs to allow for wiring and piping to be run through the walls. This can save time and money on installation, as well as provide a cleaner and more organized appearance.

Overall, the flexibility in design that metal studs offer can provide many benefits for construction projects. From unique architectural features to precise and accurate construction, metal studs can help bring your vision to life.

Frequently Asked Questions

Are metal studs more durable than wood studs?

Metal studs are generally considered more durable than wood studs since they are not susceptible to rot, warping, or termite damage. They also have a higher strength-to-weight ratio than wood studs, which means they can support more weight with less material.

What is the lifespan of metal studs compared to wood studs?

Metal studs have a longer lifespan than wood studs since they are not susceptible to rot, warping, or termite damage. They can last for decades without needing to be replaced, whereas wood studs may need to be replaced every 20-30 years.

What are the cost benefits of using metal studs over wood studs?

Metal studs are generally less expensive than wood studs. They are also lighter and easier to transport and install, which can reduce labor costs. Additionally, metal studs are often made from recycled materials, which can make them a more environmentally friendly option.

Can metal studs be used in load-bearing walls?

Yes, metal studs can be used in load-bearing walls. However, it is important to consult a structural engineer or building code official to ensure that the design meets the necessary requirements for strength and stability.

Are metal studs resistant to moisture and mold?

Metal studs are not immune to moisture and mold, but they are less susceptible than wood studs. They do not absorb moisture like wood does, which can help prevent mold growth. However, if moisture does get trapped between the metal studs and the drywall, it can lead to mold growth.

What is the fire-resistance rating of metal studs versus wood studs?

Metal studs have a higher fire-resistance rating than wood studs. They do not contribute to the spread of flames like wood does, and they are less likely to warp or collapse in a fire. However, it is important to note that the fire-resistance rating of metal studs can vary depending on the gauge and thickness of the metal used.

Blog

Matte Polyurethane: The Solution to Shiny Wood Finishes

Are you tired of the traditional glossy finish on your woodwork? Do you wish to have a more subtle, matte look? Fortunately, there are options available for producing a matte polyurethane finish on your woodwork.

Matte polyurethane is a type of finish that does not reflect light, giving it a dull, low-sheen appearance. It is a popular choice for those who want to achieve a more natural, rustic or vintage look on their woodwork. While traditional polyurethane finishes can leave a shiny, plastic-like appearance, matte polyurethane can provide a more subtle, understated look.

If you’re wondering whether matte polyurethane is available, the answer is yes. There are several brands that produce matte polyurethane finishes, such as Rust-Oleum and Minwax. However, it’s important to note that applying a matte polyurethane finish requires a different technique than traditional finishes.

Understanding Polyurethane Finishes

understanding-polyurethane-finishes

What is Polyurethane?

Polyurethane is a type of coating that is commonly used to protect wood surfaces. It is a synthetic material that is created by combining a polyol and a diisocyanate. Once applied to a surface, it forms a hard, durable layer that helps to protect the wood from scratches, dents, and other types of damage.

Polyurethane is available in different types of finishes, including matte, glossy, and semi-glossy. The finish that you choose will depend on your personal preference and the type of look that you are trying to achieve.

Matte vs Glossy Finish

When it comes to polyurethane finishes, there are two main types: matte and glossy. Matte finishes are less reflective and have a dull, low-sheen appearance. Glossy finishes, on the other hand, are highly reflective and have a shiny, polished appearance.

The type of finish that you choose will depend on the look that you are trying to achieve. If you want a more natural look for your wood surface, then a matte finish may be the best option. Matte finishes are also a good choice if you want to minimize the appearance of scratches and other types of damage.

If you want a more polished look for your wood surface, then a glossy finish may be the best option. Glossy finishes are highly reflective and can help to make your wood surface look more vibrant and eye-catching.

Overall, the choice between a matte or glossy finish will depend on your personal preference and the type of look that you are trying to achieve. Both types of finishes offer their own unique benefits, and it is up to you to decide which one is right for your project.

Production of Matte Polyurethane

If you’re looking to achieve a more subtle, less glossy finish on your woodwork, matte polyurethane might be the solution for you. Here’s what you need to know about its production.

Manufacturing Process

Matte polyurethane is produced through a similar process to regular polyurethane. The main difference is the addition of flatting agents, which are clear powders that reduce the glossiness of the finish.

The manufacturing process typically involves the following steps:

  1. Mixing the key ingredients (discussed in the next section) together in a reactor vessel.
  2. Adding flatting agents to the mixture.
  3. Heating the mixture to initiate the reaction that forms the polyurethane.
  4. Applying the resulting mixture to the wood surface.

The exact process can vary depending on the specific manufacturer and product.

Key Ingredients

The key ingredients in matte polyurethane are polyols and isocyanates. Polyols are typically derived from petroleum, while isocyanates are derived from diisocyanates such as toluene diisocyanate (TDI) or methylene diphenyl diisocyanate (MDI).

Other ingredients may also be added to the mixture, such as catalysts to speed up the reaction, surfactants to improve the mixture’s flow, and UV stabilizers to protect against fading.

Overall, matte polyurethane can be a great option for those looking for a more subdued finish on their woodwork. Just be sure to follow the manufacturer’s instructions carefully to achieve the best results.

Application on Wood

application-on-wood-1

When it comes to applying polyurethane on wood, there are some preparation steps and application techniques that can help you achieve a matte finish. Here are some tips to help you get started:

Preparation Steps

Before you apply polyurethane on wood, you need to prepare the surface properly. Here are some preparation steps to follow:

  • Sand the surface: Start by sanding the wood surface with fine-grit sandpaper to remove any rough spots or imperfections. Wipe the surface clean with a tack cloth to remove any dust or debris.
  • Apply a wood conditioner: If you’re working with softwood or porous wood, apply a wood conditioner to the surface. This will help the wood absorb the polyurethane evenly and prevent blotching.
  • Choose a matte polyurethane: Look for a matte or flat polyurethane finish to achieve a non-shiny look. You can also mix a matte additive with a regular polyurethane to create a custom finish.

Application Techniques

Once you’ve prepared the wood surface, it’s time to apply the polyurethane. Here are some application techniques to follow:

  • Apply the polyurethane in thin coats: Use a high-quality brush or a foam applicator to apply the polyurethane in thin, even coats. Avoid applying too much polyurethane at once, as this can lead to drips and bubbles.
  • Sand between coats: Allow each coat to dry completely before sanding the surface lightly with fine-grit sandpaper. This will help the next coat adhere better and make the surface smoother.
  • Apply multiple coats: Apply at least two or three coats of polyurethane to achieve a durable and long-lasting finish. Allow each coat to dry completely before applying the next one.

By following these preparation steps and application techniques, you can achieve a matte polyurethane finish on your wood surface. Remember to work in a well-ventilated area and wear protective gear, such as gloves and a mask, when working with polyurethane.

Benefits of Matte Finish

When it comes to finishing wood, there are a variety of options available. One of the most popular options is matte finish. Matte finish has a number of benefits that make it a great choice for many projects. In this section, we’ll discuss the aesthetic appeal of matte finish, as well as its durability and maintenance.

Aesthetic Appeal

One of the main benefits of matte finish is its aesthetic appeal. Unlike glossy finishes, matte finishes do not reflect light, which gives them a more subdued and natural look. This can be particularly appealing for certain types of wood, such as rustic or reclaimed wood, which may not look as good with a shiny finish.

Matte finishes can also be a good choice if you want to create a more relaxed or casual atmosphere in a room. For example, if you’re finishing a dining room table, you may want to choose a matte finish to create a more intimate and cozy atmosphere.

Durability and Maintenance

Another benefit of matte finish is its durability. Matte finishes are often made with polyurethane, which is a very strong and durable material. This means that matte finishes can provide excellent protection for your wood, and can help prevent scratches, dings, and other types of damage.

Additionally, matte finishes are often easier to maintain than glossy finishes. Because they do not reflect light, they are less likely to show smudges, fingerprints, and other types of marks. This means that you can often get away with cleaning your matte-finished wood less frequently than you would with a glossy finish.

Overall, if you’re looking for a finish that is both aesthetically pleasing and durable, matte finish is a great choice. With its natural look and strong protective properties, it’s no wonder that so many people choose matte finish for their wood projects.

Choosing the Right Finish

choosing-the-right-finish

When it comes to choosing the right finish for your wood project, there are a few things to consider. A matte finish can be a great option if you want to reduce the shine and glare of your wood finish. In this section, we will discuss some of the considerations and popular brands of matte polyurethane finishes.

Considerations

Before choosing a matte polyurethane finish, you should consider the following factors:

  • Durability: Will the finish hold up to wear and tear over time?
  • Application: Is the finish easy to apply? Does it require special tools or equipment?
  • Appearance: Does the finish provide the desired level of shine or matte finish?
  • Cost: How much does the finish cost? Is it worth the investment?

Popular Brands

There are several popular brands of matte polyurethane finishes that you can choose from. Here are a few options to consider:

  • Varathane: Varathane offers a matte finish in both water-borne and standard oil-based formulas. Their finishes are known for their durability and ease of application.
  • Zar: Zar also offers a matte urethane finish that is easy to apply and provides a durable, long-lasting finish.
  • Minwax: Minwax offers a matte finish in their Fast-Drying Polyurethane line. Their finish is known for its fast drying time and durability.
  • General Finishes: General Finishes offers a matte finish in their High-Performance Water-Based Topcoat line. Their finish is water-resistant and provides a durable, long-lasting finish.

When choosing a matte polyurethane finish, it’s important to find a brand that meets your specific needs and preferences. Consider the factors listed above and do your research to find the best option for your project.

Frequently Asked Questions

How can I dull a glossy wood finish without sanding?

If you want to dull a glossy wood finish without sanding, you can use a deglosser or a liquid sander. These products are designed to remove the glossy surface of the finish, allowing you to apply a new coat of polyurethane with a matte finish.

What are some ways to make a shiny wood finish look matte?

There are several ways to make a shiny wood finish look matte. One option is to use a rubbing compound to dull the finish. Another option is to apply a coat of wax or oil to the surface of the finish. You can also use a matte topcoat to cover the shiny finish.

Why does my polyurethane finish look shiny instead of matte?

If your polyurethane finish looks shiny instead of matte, it may be because you used a glossy or semi-glossy polyurethane. To achieve a matte finish, you need to use a polyurethane with a matte sheen.

Is there a type of polyurethane that has a matte finish?

Yes, there are types of polyurethane that have a matte finish. Matte polyurethane leaves the least shiny coating and conveys the look of natural, unfinished wood. It is a good option if you want to achieve a matte finish on your wood surface.

What are some techniques to make a polyurethane finish less shiny?

To make a polyurethane finish less shiny, you can use a rubbing compound or apply a coat of wax or oil to the surface of the finish. You can also use a matte topcoat to cover the shiny finish.

Are there any polyurethane finishes that do not have a shiny appearance?

Yes, there are several types of polyurethane finishes that do not have a shiny appearance. Matte, satin, and semi-gloss polyurethane finishes all have a lower level of sheen and reflectivity than high-gloss polyurethane finishes.

Blog

Wood Stain Over Polyurethane: Is It Possible?

Are you wondering if you can put wood stain over polyurethane? If you have a wood surface that has been coated with polyurethane and you want to change its color, you may be wondering if it’s possible to apply a wood stain over the existing finish. The answer is not straightforward, but it is possible in some cases.

Regular wood stain is a penetrating finish, meaning it needs to penetrate the wood pores to stick. However, since polyurethane forms a moisture-resistant barrier over the surface, the wood stain can’t penetrate it and won’t stick. But, there are some topical stains, such as gel stains, that can stick to polyurethane. In this article, we will explore the options available to you if you want to put wood stain over polyurethane and the benefits of doing so.

Understanding Polyurethane and Wood Stain

When it comes to finishing woodwork, polyurethane and wood stain are two of the most commonly used products. Polyurethane is a clear, protective coating that is applied over wood to protect it from damage and wear. On the other hand, wood stain is a colored liquid that is applied to wood to enhance its natural beauty and add color.

Polyurethane is available in two types: water-based and oil-based. Water-based polyurethane dries faster and has a lower VOC (volatile organic compound) content, making it a more environmentally friendly option. Oil-based polyurethane, on the other hand, takes longer to dry but provides a more durable finish.

Wood stain is also available in two types: oil-based and water-based. Oil-based stains penetrate deeper into the wood grain, providing a richer color and a more natural look. Water-based stains, on the other hand, dry faster and have a lower VOC content.

One common question people have is whether they can put wood stain over polyurethane. The answer is no, regular wood stain won’t stick to polyurethane because it forms a moisture-resistant barrier over the surface. However, topical stains, such as gel stains, can stick to polyurethane because they don’t need to penetrate the wood pores to stick.

If you want to apply wood stain over polyurethane, you’ll need to remove the polyurethane first by sanding or stripping it off. Once the polyurethane is removed, you can apply the wood stain and then apply a new coat of polyurethane over it to protect it.

It’s important to note that when mixing wood stain with polyurethane, you should use the same bases, such as an oil-based stain with only oil-based poly and vice versa. This ensures that the two products will bond properly and provide the best results.

Why Consider Staining Over Polyurethane

why-consider-staining-over-polyurethane

If you have a wood project that has already been coated with polyurethane, you may be wondering if you can add more color to it. The answer is yes, you can stain over polyurethane. Here are a few reasons why you might consider staining over polyurethane:

To Add Color

Polyurethane is a clear coating that protects the wood but doesn’t add any color. If you want to add some color to your wood project, staining over polyurethane is a great option. You can choose from a variety of colors and shades to achieve the desired look.

To Enhance Durability

Staining over polyurethane can actually enhance the durability of the finish. By adding an additional layer of stain, you are also adding an additional layer of protection to the wood. This can help prevent scratches, dents, and other types of damage.

To Refresh the Look

Over time, polyurethane can become dull and worn-looking. Staining over polyurethane can help refresh the look of the wood and make it look new again. It’s a great way to give an old piece of furniture or a wood floor a fresh new look.

To Correct Mistakes

If you’ve already applied polyurethane to your wood project and made a mistake, such as a drip or a spot that didn’t get coated properly, you can fix it by staining over the polyurethane. The stain will help cover up the mistake and make it less noticeable.

Overall, staining over polyurethane is a great option if you want to add color, enhance durability, refresh the look, or correct mistakes. Just make sure to prepare the surface properly and choose the right type of stain for your project.

Preparation Before Staining Over Polyurethane

Before you start staining over polyurethane, it is crucial to prepare the surface properly. This will ensure that the stain adheres well and gives you the desired finish. Here are two important steps you should follow:

Cleaning the Surface

Before you start staining, ensure that the surface is clean and free of any dust, dirt, or debris. Use a soft cloth or a vacuum cleaner to remove any loose particles from the surface. For any stubborn stains, you can use a mild detergent and water solution. Ensure that you wipe off any excess soap with a clean, damp cloth.

Sanding the Surface

Sanding the surface is an essential step before staining. It helps to remove any existing polyurethane and gives the stain a better surface to adhere to. Use a fine-grit sandpaper to sand the surface gently. Ensure that you sand in the direction of the wood grain. Once you have sanded the surface, wipe off any dust with a soft cloth.

In summary, cleaning and sanding the surface are crucial steps in preparing to stain over polyurethane. By following these steps, you can ensure that the stain adheres well and gives you the desired finish.

Choosing the Right Wood Stain

choosing-the-right-wood-stain

When it comes to choosing the right wood stain, there are a few things you should consider. First, you need to decide what type of finish you want. Do you want a clear finish, or do you want a colored finish? If you want a colored finish, what color do you want? Once you have decided on the type of finish you want, you need to choose the right product.

There are two main types of wood stain: oil-based and water-based. Oil-based stains are the traditional choice and are known for their durability and rich color. They are also easier to apply and penetrate the wood more deeply. Water-based stains, on the other hand, are a newer option and are known for their low VOCs and easy cleanup. They also dry faster than oil-based stains.

Another factor to consider is the opacity of the stain. Some stains are more opaque than others, meaning they will hide the natural grain of the wood more. If you want to highlight the natural grain of the wood, you should choose a more transparent stain. If you want a more solid color, you should choose a more opaque stain.

Lastly, consider the type of wood you are staining. Different types of wood absorb stain differently, so you should choose a stain that is specifically designed for the type of wood you are working with. For example, if you are staining pine, you may want to choose a stain that is designed for softwoods.

Overall, choosing the right wood stain is an important part of the staining process. By considering the type of finish, the type of stain, the opacity, and the type of wood, you can ensure that you choose the right product for your project.

Application Process

Applying the Stain

If you want to apply wood stain over polyurethane, you need to follow a few steps to ensure that the stain adheres properly. First, you need to clean the surface of the wood thoroughly to remove any dirt, grime, or wax. You can use a scouring pad dipped in a 5-50 solution of denatured alcohol and water to scrub the surface. After cleaning, let the surface dry for at least two hours.

Next, you need to sand the surface of the wood lightly by hand with 400-grit sandpaper. This step is necessary to remove any glossiness and provide a rough surface for the stain to adhere to. After sanding, wipe the surface with a clean cloth to remove any dust or debris.

Now, it’s time to apply the stain. You can use a brush, foam applicator, or cloth to apply the stain. Make sure to apply the stain in the direction of the wood grain. Apply the stain evenly and wipe off any excess with a clean cloth. If you want a darker color, you can apply a second coat of stain after the first coat has dried.

Drying and Curing Time

After applying the stain, you need to let it dry completely before applying polyurethane. The drying time can vary depending on the type of stain you use, but it usually takes around 24 hours. Make sure to check the manufacturer’s instructions for specific drying times.

Once the stain has dried completely, you can apply polyurethane. Apply the first coat of polyurethane thinly and evenly with a brush or roller, and let it dry for at least six hours. After the first coat has dried, sand the surface lightly with 220-grit sandpaper to remove any bumps or imperfections. Then, apply the second coat of polyurethane and let it dry for another six hours.

In conclusion, applying wood stain over polyurethane requires proper preparation and application techniques. By following the steps outlined above, you can achieve a beautiful and long-lasting finish on your wood projects.

Potential Challenges and How to Overcome Them

potential-challenges-and-how-to-overcome-them

When staining over polyurethane, you may encounter some challenges that can affect the final outcome of your project. Here are some of the potential challenges and how to overcome them:

Uneven Stain Application

One of the challenges you may face when staining over polyurethane is uneven stain application. This can happen when the polyurethane surface is not properly prepared before applying the stain. To avoid this, follow these steps:

  • Sand the polyurethane surface lightly with fine-grit sandpaper to create a rough surface that the stain can adhere to.
  • Clean the surface thoroughly with denatured alcohol and a clean cloth to remove any dirt or debris.
  • Apply a pre-stain conditioner to the surface to help the stain absorb evenly.

Stain Not Adhering Properly

Another challenge you may face is the stain not adhering properly to the polyurethane surface. This can happen when the polyurethane is too smooth or when the stain is not applied properly. To overcome this challenge, follow these steps:

  • Sand the polyurethane surface with coarse-grit sandpaper to create a rough surface that the stain can adhere to.
  • Apply a gel stain, which is thicker and easier to control than traditional liquid stains.
  • Apply the stain in thin, even coats with a brush or rag, making sure to wipe off any excess stain.
  • Allow the stain to dry completely before applying a protective topcoat.

By following these steps, you can overcome the potential challenges of staining over polyurethane and achieve a beautiful, even finish.

Maintenance of Stained Wood Over Polyurethane

maintenance-of-stained-wood-over-polyurethane

If you have a stained wood surface that has been coated with polyurethane, it is essential to maintain it properly to keep it looking its best. Here are some tips to help you maintain your stained wood over polyurethane:

Regular Cleaning

Regular cleaning is essential to keep your stained wood over polyurethane looking its best. You can use a soft cloth or a vacuum cleaner with a soft brush attachment to remove dust and debris from the surface. Avoid using harsh chemicals or abrasive cleaners that can damage the polyurethane coating.

Avoid Excessive Moisture

Excessive moisture can damage the polyurethane coating and cause it to peel or crack. Avoid placing wet items directly on the surface and wipe up spills immediately to prevent them from penetrating the polyurethane coating.

Avoid Direct Sunlight

Direct sunlight can cause the stained wood over polyurethane to fade and lose its color over time. To prevent this, avoid placing the surface in direct sunlight for extended periods. You can also use window treatments or UV-blocking films to protect the surface from sunlight.

Touch-Up as Needed

If the polyurethane coating becomes damaged or begins to peel, you can touch it up with a polyurethane coating designed for stained wood surfaces. Follow the manufacturer’s instructions carefully to ensure a smooth and even application.

Refinish When Necessary

If the stained wood over polyurethane becomes severely damaged or begins to show signs of wear, it may be time to refinish the surface. Refinishing involves removing the old polyurethane coating and applying a new one. This process should be done by a professional to ensure a smooth and even finish.

By following these tips, you can keep your stained wood over polyurethane looking beautiful for years to come.

Frequently Asked Questions

Can I apply gel stain over polyurethane?

Yes, you can apply gel stain over polyurethane. However, before doing so, you need to ensure that the polyurethane is clean and free from any dirt or debris. You can use denatured alcohol or a degreaser to clean the surface. After cleaning, sand the polyurethane lightly with sandpaper to create a rough surface that the gel stain can adhere to. Once the surface is ready, you can apply the gel stain and wipe off the excess.

Is it possible to stain over water-based polyurethane?

Yes, it is possible to stain over water-based polyurethane. However, you need to ensure that the surface is clean and free from any contaminants. You can use a degreaser or denatured alcohol to clean the surface. After cleaning, sand the surface lightly with sandpaper to create a rough surface that the stain can adhere to. Once the surface is ready, you can apply the stain and wipe off the excess.

Can you put gel wood stain over polyurethane?

Yes, you can put gel wood stain over polyurethane. However, you need to ensure that the polyurethane is clean and free from any dirt or debris. You can use denatured alcohol or a degreaser to clean the surface. After cleaning, sand the polyurethane lightly with sandpaper to create a rough surface that the gel stain can adhere to. Once the surface is ready, you can apply the gel stain and wipe off the excess.

Can you apply PolyShades over polyurethane?

Yes, you can apply PolyShades over polyurethane. However, you need to ensure that the surface is clean and free from any contaminants. You can use a degreaser or denatured alcohol to clean the surface. After cleaning, sand the surface lightly with sandpaper to create a rough surface that the PolyShades can adhere to. Once the surface is ready, you can apply the PolyShades and wipe off the excess.

What type of stain can go over polyurethane?

You can use any type of stain over polyurethane as long as the surface is clean and free from any contaminants. However, it is recommended to use gel stain as it adheres well to polyurethane and provides a uniform finish.

Can I stain over varnished wood without sanding?

No, you cannot stain over varnished wood without sanding. Sanding is necessary to create a rough surface that the stain can adhere to. If you apply stain over varnished wood without sanding, it will not adhere properly and will result in an uneven finish.