Month: August 2023

Blog

What Adhesive to Use for Bonding Wood to PVC Board?

Are you wondering what adhesive to use when bonding wood to PVC board? It can be challenging to find the right adhesive for this task, especially if you’re not familiar with the materials. However, with the right information, you can easily choose the right adhesive for your project.

When bonding wood to PVC board, it’s essential to consider the strength and durability of the adhesive. You want an adhesive that can withstand the elements and hold up over time. Additionally, you want an adhesive that can bond the two materials together effectively. In this article, we’ll explore some of the best adhesives for bonding wood to PVC board, so you can choose the right one for your project.

Understanding Wood and PVC Board

When it comes to bonding wood to PVC board, it’s important to understand the characteristics of each material. This will help you choose the right adhesive for the job and achieve a strong and lasting bond.

Characteristics of Wood

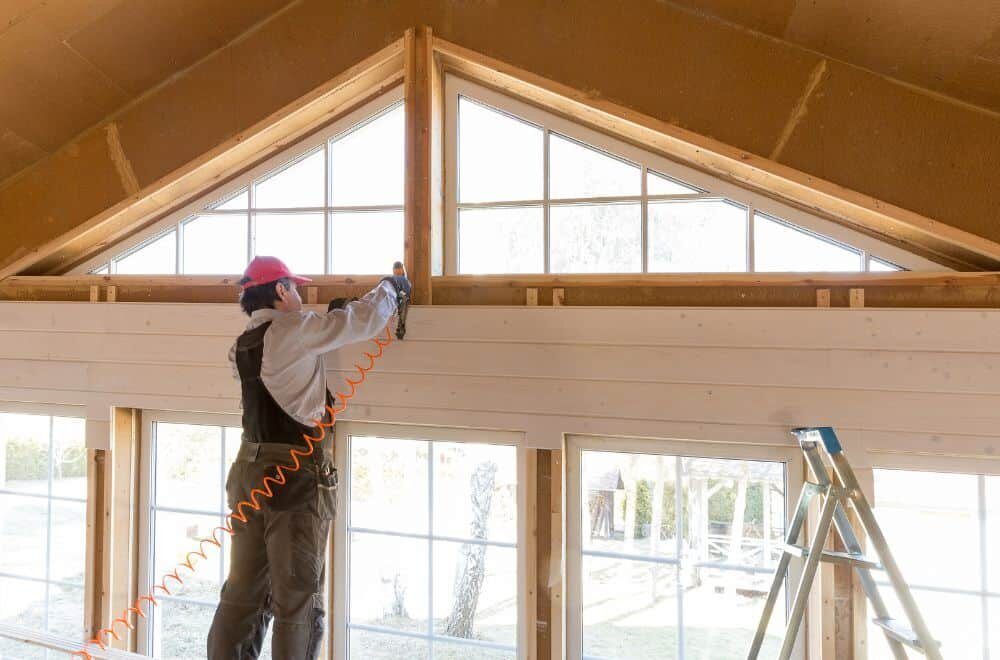
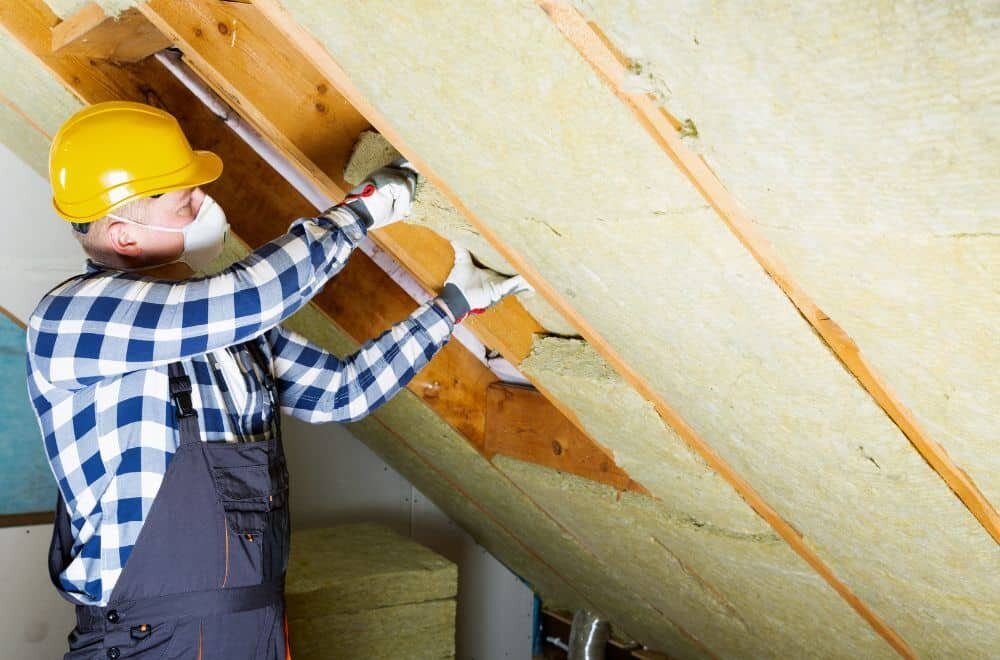
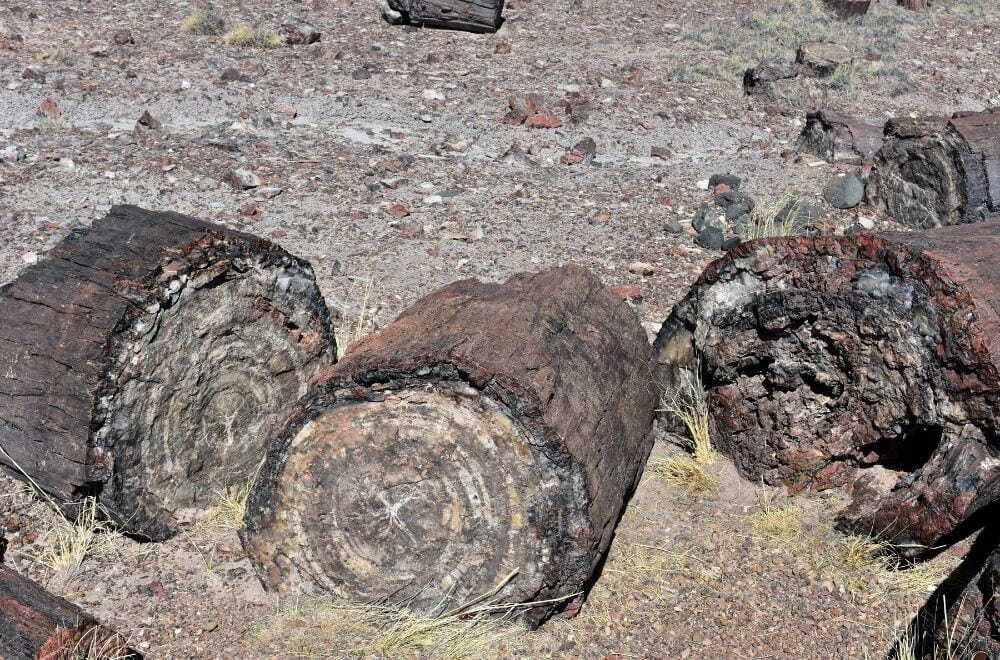
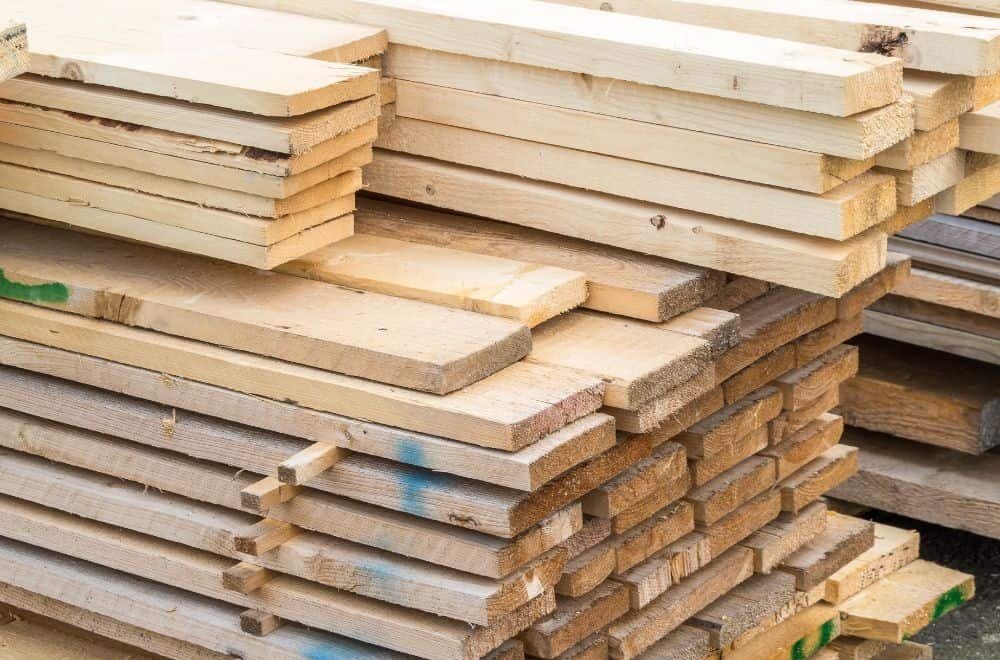
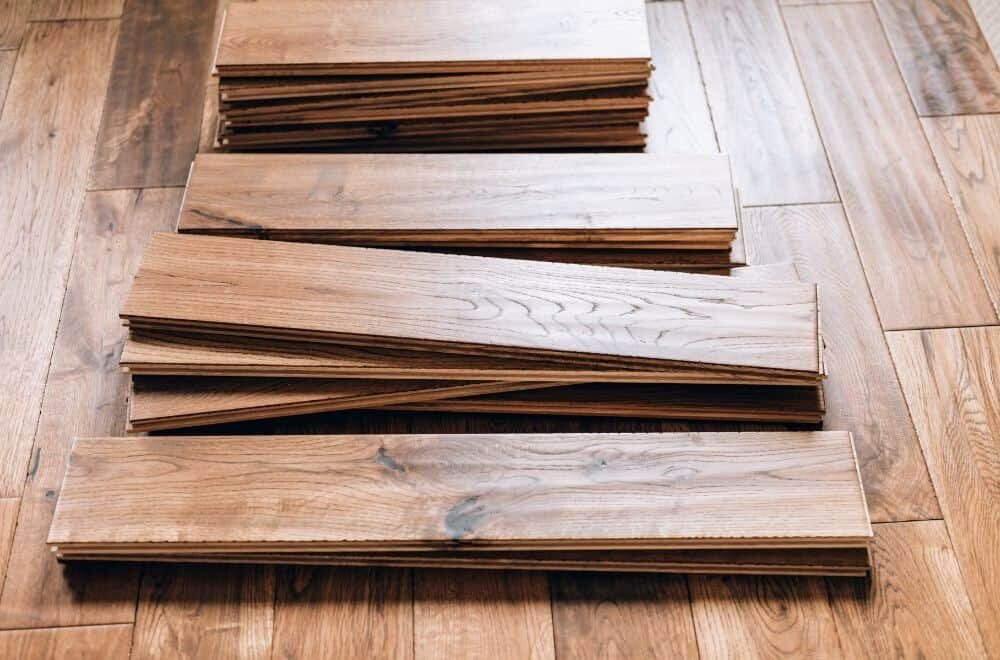
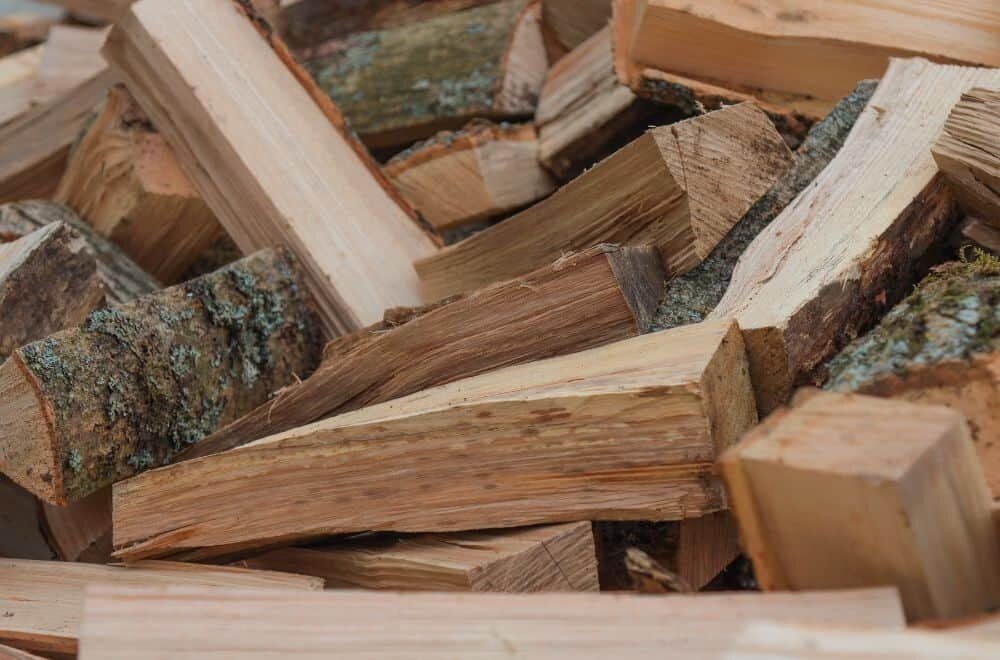
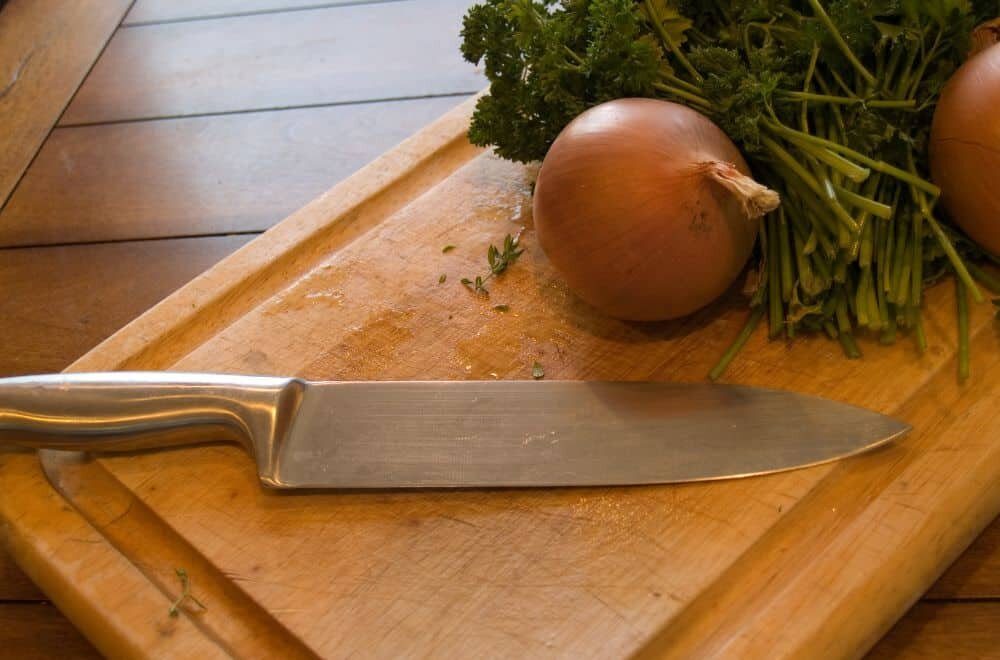
Wood is a natural material that comes in many different types and grades. Some common types of wood used in construction and woodworking include pine, oak, maple, and cherry. Each type of wood has its own unique characteristics, such as color, grain pattern, hardness, and density.

One important thing to keep in mind when working with wood is that it can expand and contract with changes in temperature and humidity. This can cause the wood to warp, crack, or split over time if it’s not properly secured or treated.

Characteristics of PVC Board

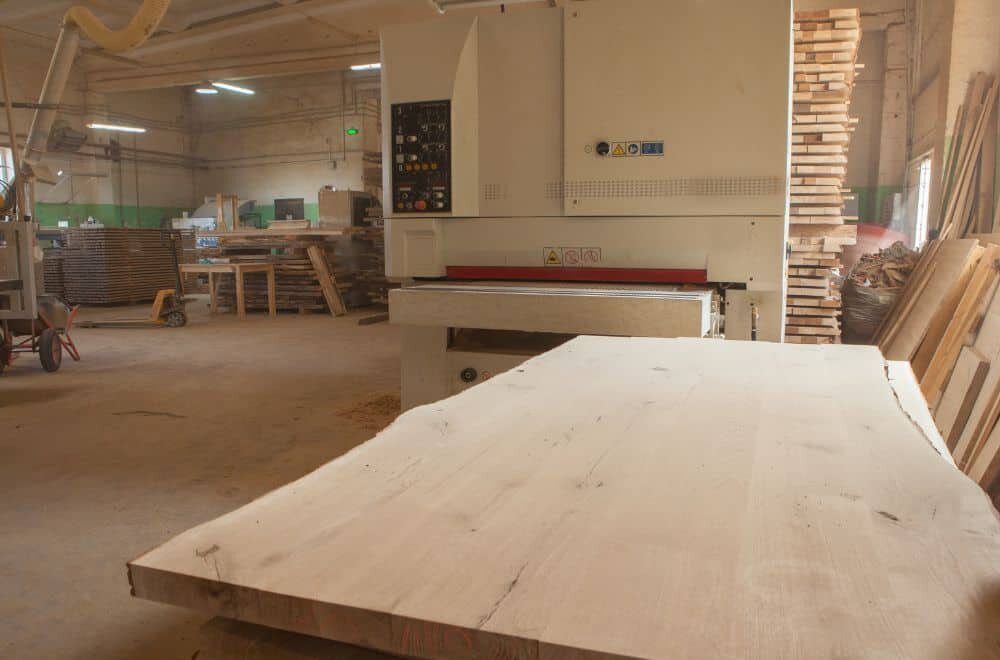
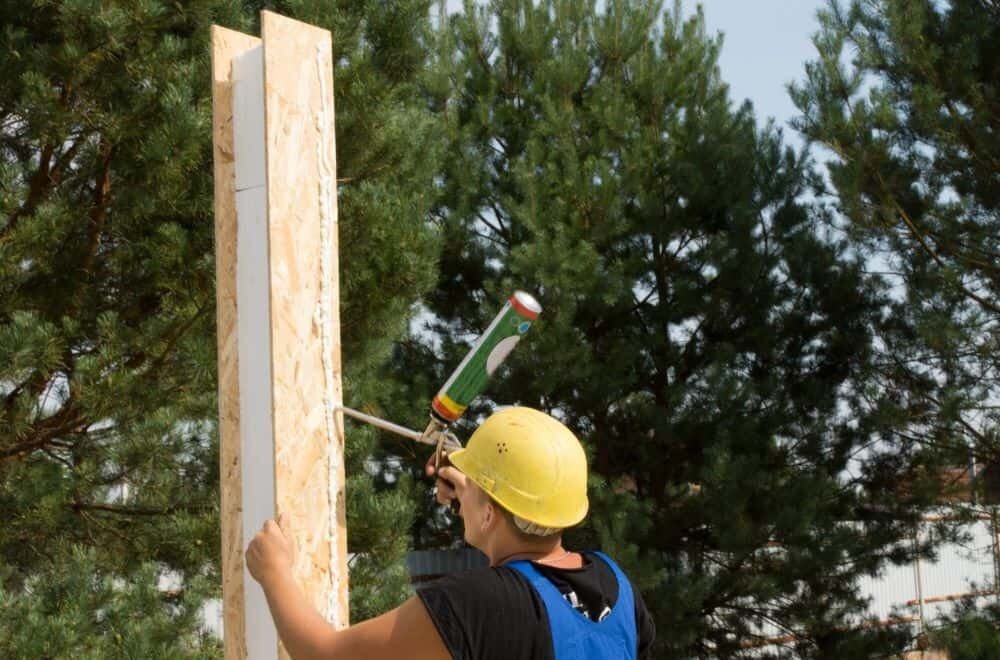
PVC board, also known as PVC foam board or expanded PVC, is a lightweight and durable plastic material. It’s often used in signage, displays, and other applications where a smooth and rigid surface is needed.

PVC board is resistant to moisture, chemicals, and UV radiation, making it a great choice for outdoor use. It’s also easy to cut, shape, and drill, which makes it a versatile material for a variety of projects.

One thing to keep in mind when working with PVC board is that it can be brittle and prone to cracking if it’s not handled carefully. It’s also important to choose an adhesive that’s compatible with PVC and won’t damage or weaken the material over time.

Understanding the characteristics of wood and PVC board is the first step in choosing the right adhesive for your project. By selecting an adhesive that’s compatible with both materials and provides a strong and lasting bond, you can ensure that your finished product will be sturdy and reliable.

Types of Adhesives

types-of-adhesives

When it comes to bonding wood to PVC board, there are several types of adhesives to choose from. Each type of adhesive has its own unique properties and is suitable for different applications. In this section, we’ll take a closer look at three types of adhesives that are commonly used for bonding wood to PVC board: Epoxy Resin, Polyurethane Adhesive, and Cyanoacrylate Adhesive.

Epoxy Resin

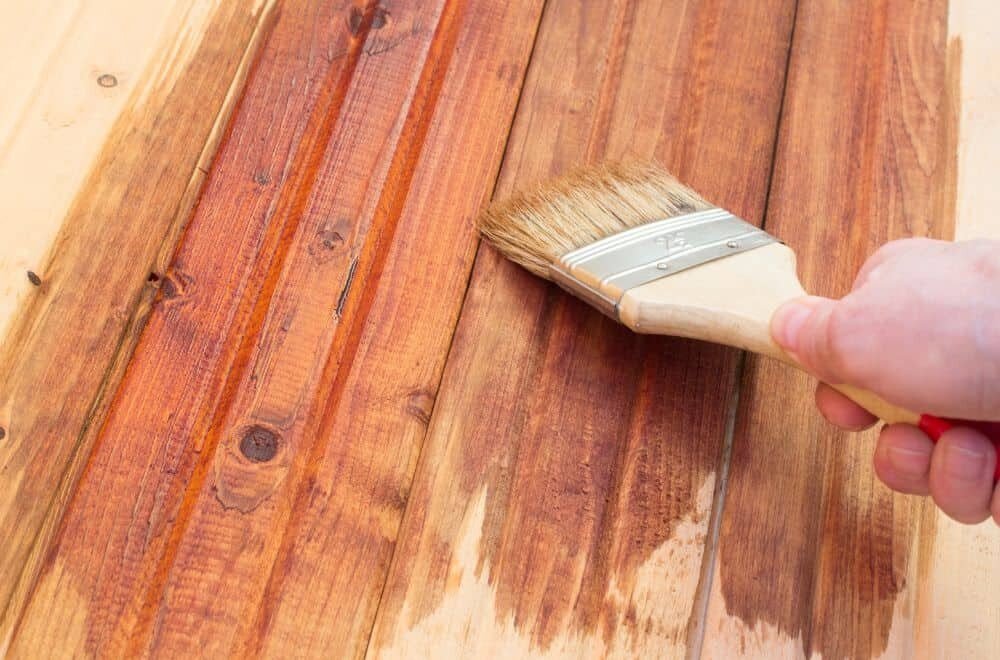
Epoxy resin is a two-part adhesive that consists of a resin and a hardener. When mixed together, the two parts chemically react to form a strong, durable bond. Epoxy resin is an excellent choice for bonding wood to PVC board because it is waterproof, heat-resistant, and can withstand exposure to UV rays. It is also a good choice for bonding dissimilar materials, such as wood and plastic.

To use epoxy resin, you will need to mix the two parts together according to the manufacturer’s instructions. Once mixed, the adhesive will begin to cure, so you will need to work quickly to apply it to the surfaces you want to bond. Epoxy resin has a long curing time, so you will need to allow plenty of time for it to dry completely before using the bonded materials.

Polyurethane Adhesive

Polyurethane adhesive is a one-part adhesive that cures by reacting with moisture in the air. It forms a strong, flexible bond that is resistant to water, heat, and chemicals. Polyurethane adhesive is a good choice for bonding wood to PVC board because it can fill gaps and is suitable for use on porous and non-porous surfaces.

To use polyurethane adhesive, you will need to apply it to one of the surfaces you want to bond. Then, press the two surfaces together and hold them in place until the adhesive dries. Polyurethane adhesive has a relatively short working time, so you will need to work quickly to apply it before it begins to cure.

Cyanoacrylate Adhesive

Cyanoacrylate adhesive, also known as super glue, is a fast-drying adhesive that forms a strong, permanent bond. It is suitable for use on a wide range of materials, including wood and PVC board. Cyanoacrylate adhesive is a good choice for bonding small pieces of wood to PVC board, or for repairing small cracks or chips in PVC board.

To use cyanoacrylate adhesive, you will need to apply a small amount to one of the surfaces you want to bond. Then, press the two surfaces together and hold them in place until the adhesive dries. Cyanoacrylate adhesive dries very quickly, so you will need to work quickly to apply it before it sets.

In summary, there are several types of adhesives that can be used to bond wood to PVC board. Epoxy resin, polyurethane adhesive, and cyanoacrylate adhesive are all good choices, depending on the application.

Choosing the Right Adhesive

choosing-the-right-adhesive

When bonding wood to PVC board, choosing the right adhesive is crucial to ensure a strong and durable bond. With so many adhesive options available, it can be overwhelming to determine which one is the best fit for your project. Here are some factors to consider and common mistakes to avoid when choosing the right adhesive for your needs.

Factors to Consider

  1. Material compatibility: Not all adhesives are compatible with all materials. Make sure the adhesive you choose is designed for bonding wood to PVC board. Check the manufacturer’s specifications to ensure compatibility.
  2. Bond strength: Consider the strength of the bond you need. Some adhesives are stronger than others and may be better suited for heavy-duty applications.
  3. Application method: Consider the application method of the adhesive. Some adhesives require special tools or equipment, while others can be applied with a simple brush or roller.
  4. Drying time: Consider the drying time of the adhesive. Some adhesives require more time to dry than others, which can impact your project timeline.

Common Mistakes

  1. Using the wrong adhesive: Using an adhesive that is not designed for bonding wood to PVC board can result in a weak bond that may not hold up over time.
  2. Improper surface preparation: Proper surface preparation is essential for a strong bond. Make sure both the wood and PVC board surfaces are clean, dry, and free of any debris before applying the adhesive.
  3. Applying too much or too little adhesive: Applying too much adhesive can result in a messy and uneven bond, while applying too little adhesive can result in a weak bond that may not hold up over time. Follow the manufacturer’s instructions for proper application.
  4. Rushing the drying process: Rushing the drying process can result in a weak bond. Allow the adhesive to dry completely before handling or applying any stress to the bond.

By considering these factors and avoiding these common mistakes, you can choose the right adhesive for your project and ensure a strong and durable bond between your wood and PVC board.
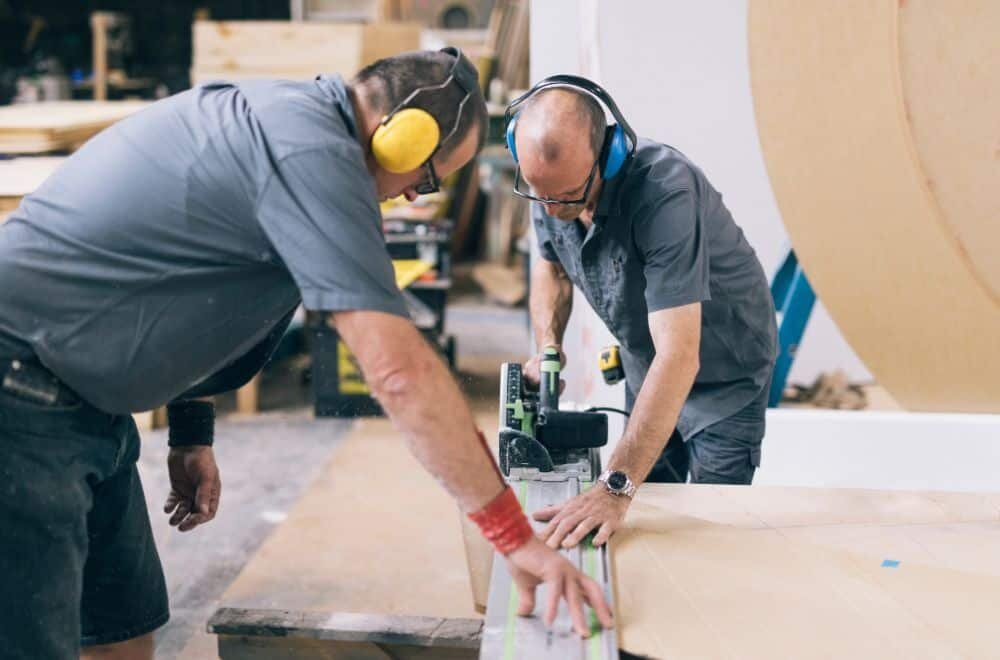
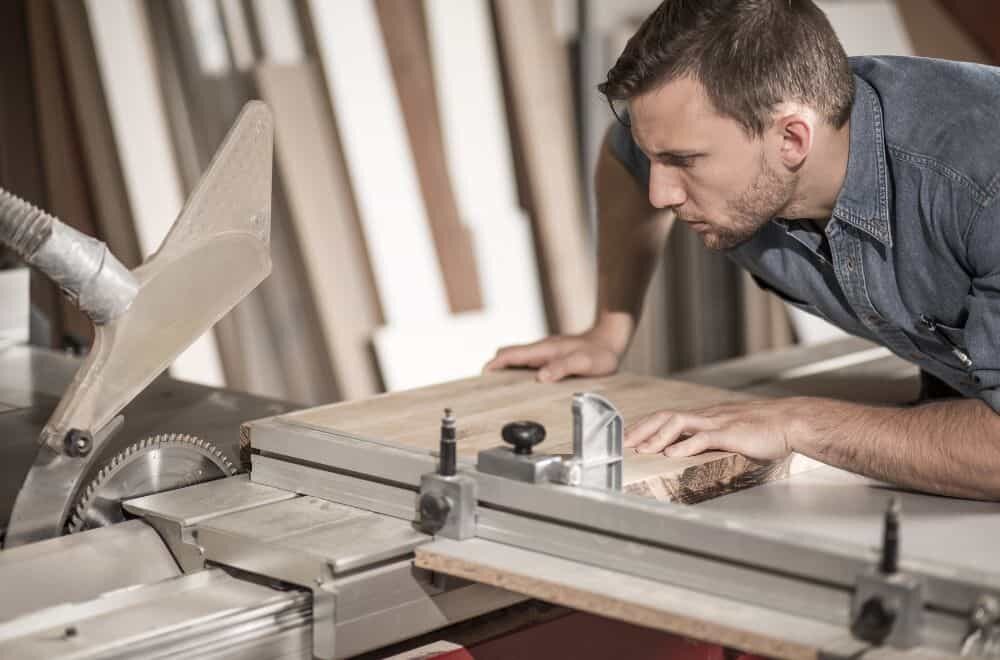
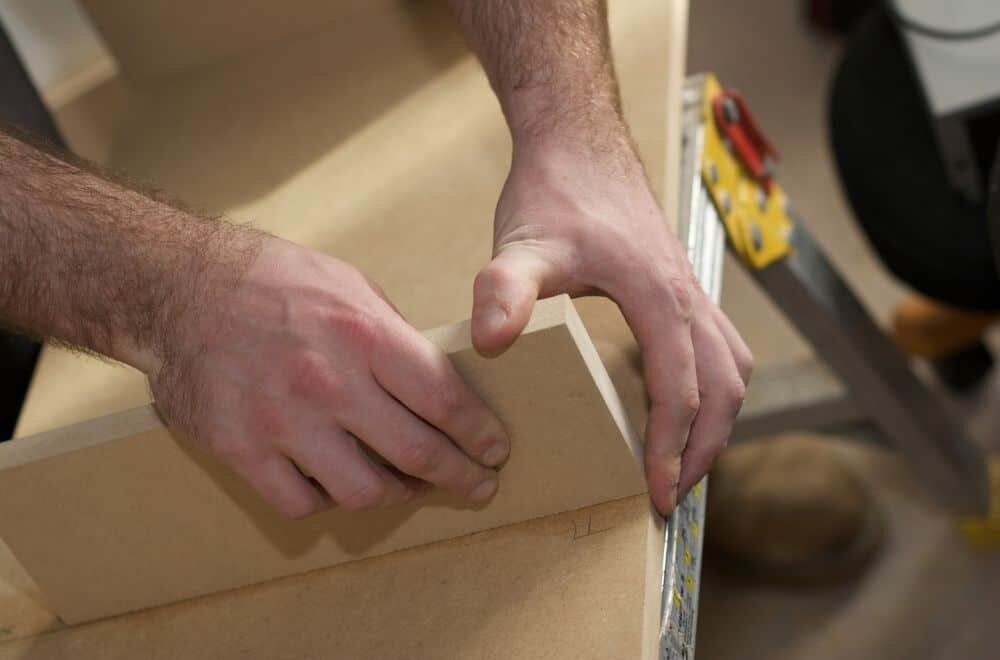
Application Process

application-process-1-1

Preparation

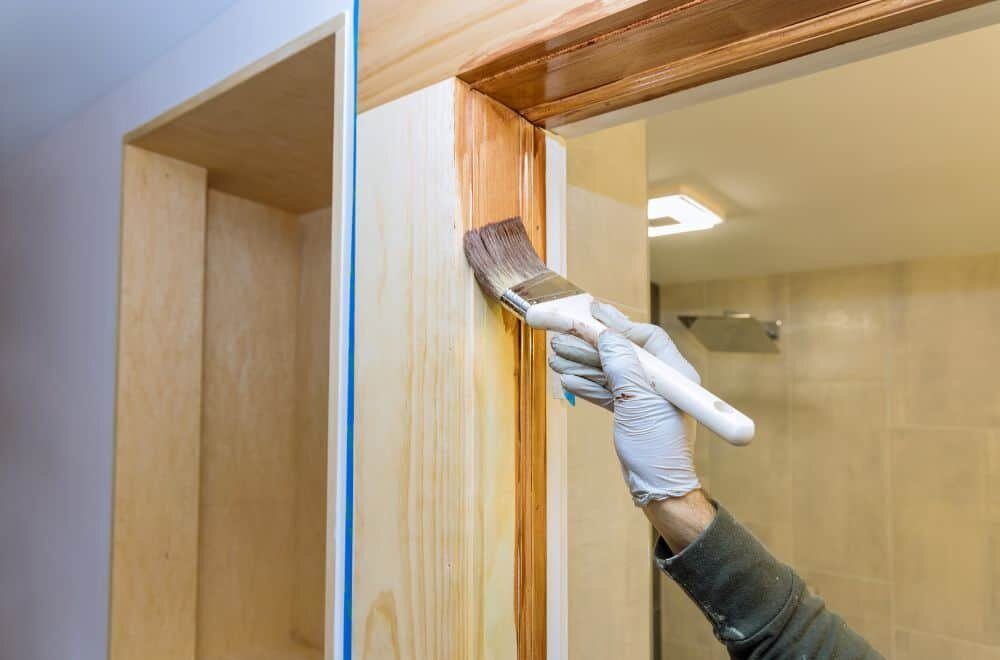
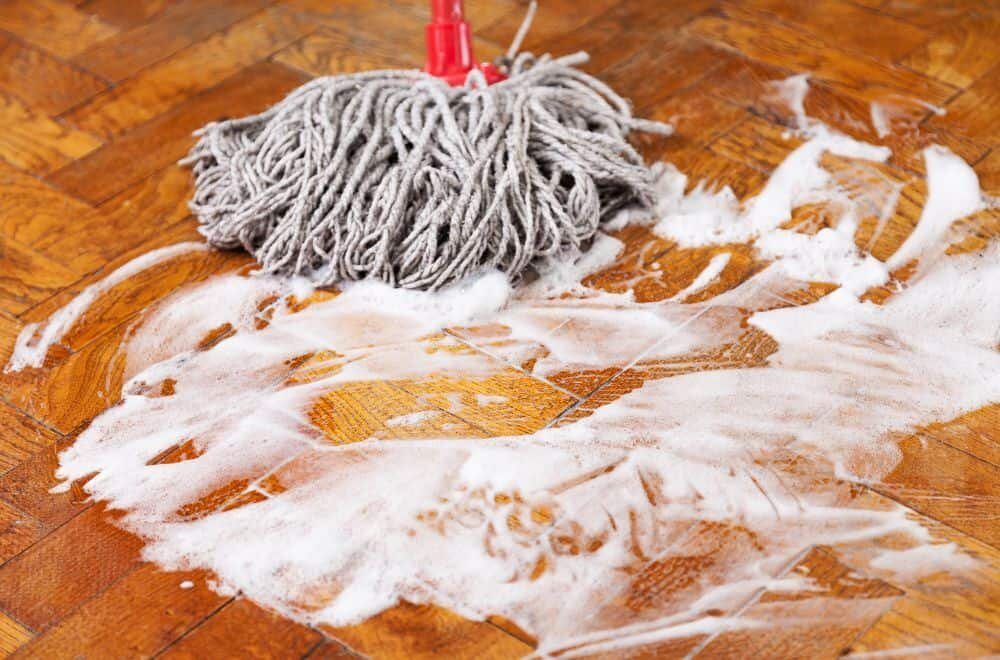
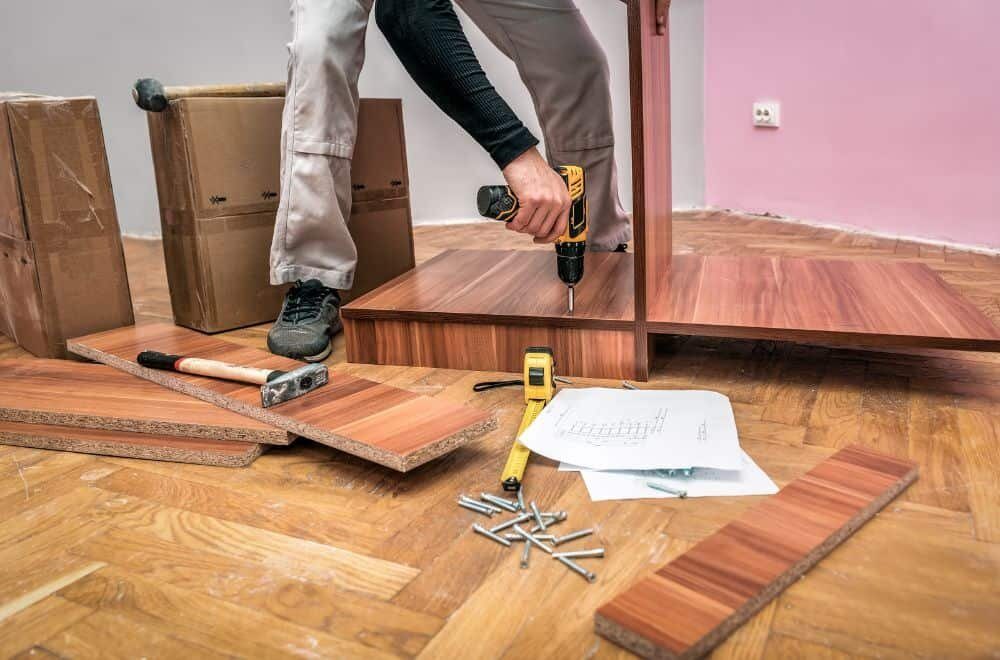
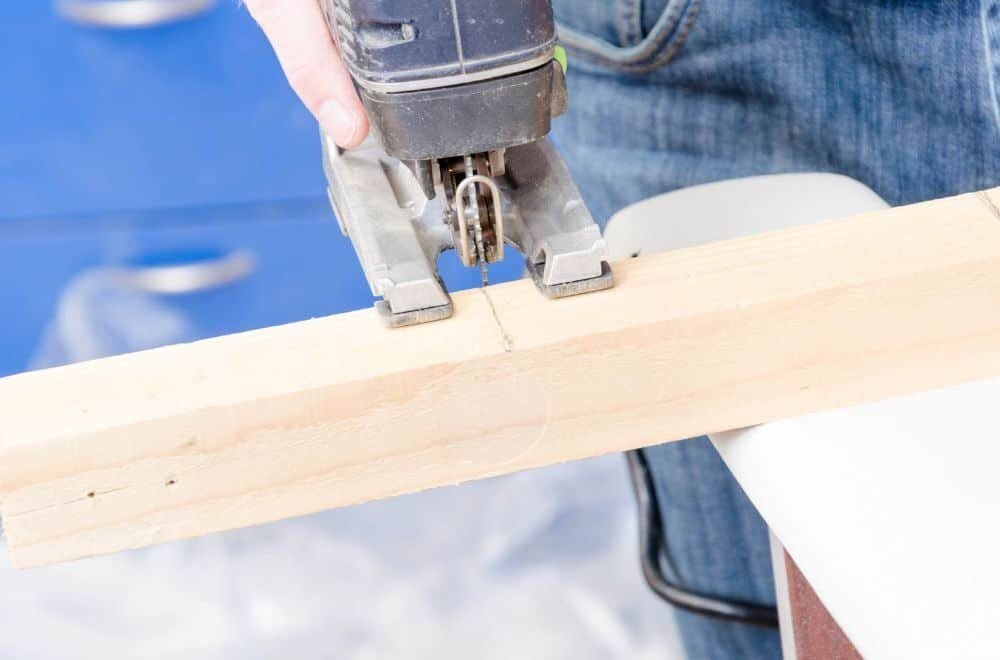
Before applying any adhesive to bond wood to PVC board, it’s important to prepare the surfaces properly. First, make sure that both the wood and PVC board are clean and free of any debris, dust, or oil that may prevent adequate adhesion. You can clean the surfaces with a damp cloth or use a solvent-based cleaner for tougher stains.

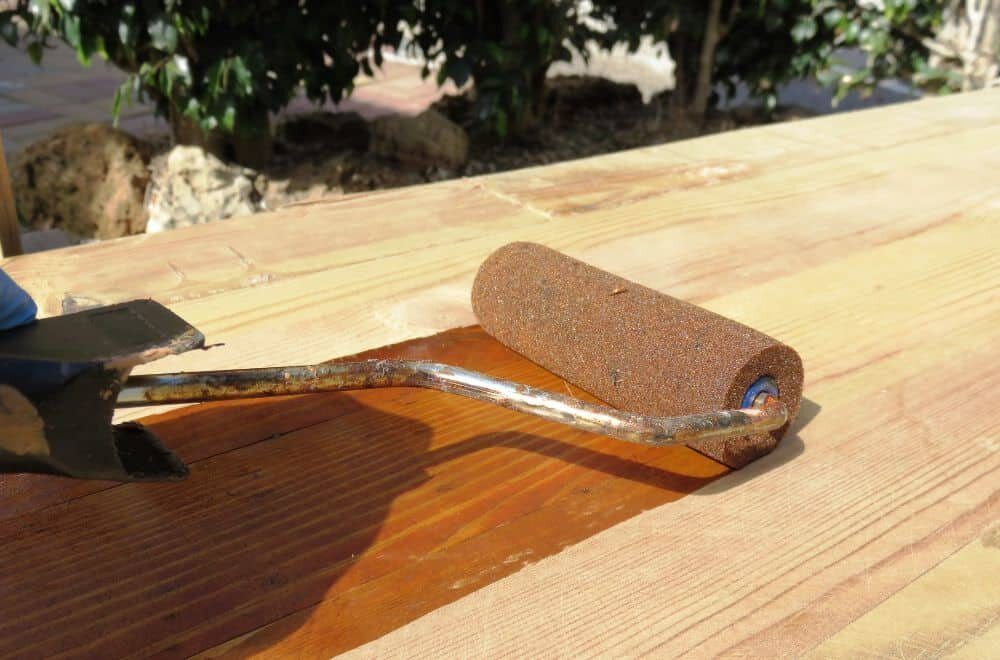
Next, rough up the surfaces to be bonded. Sand the PVC board with a fine-grit sandpaper to create a rough surface that will allow the adhesive to grip better. Sand the wood in the same manner, making sure to remove any splinters or rough spots that may interfere with the bond.
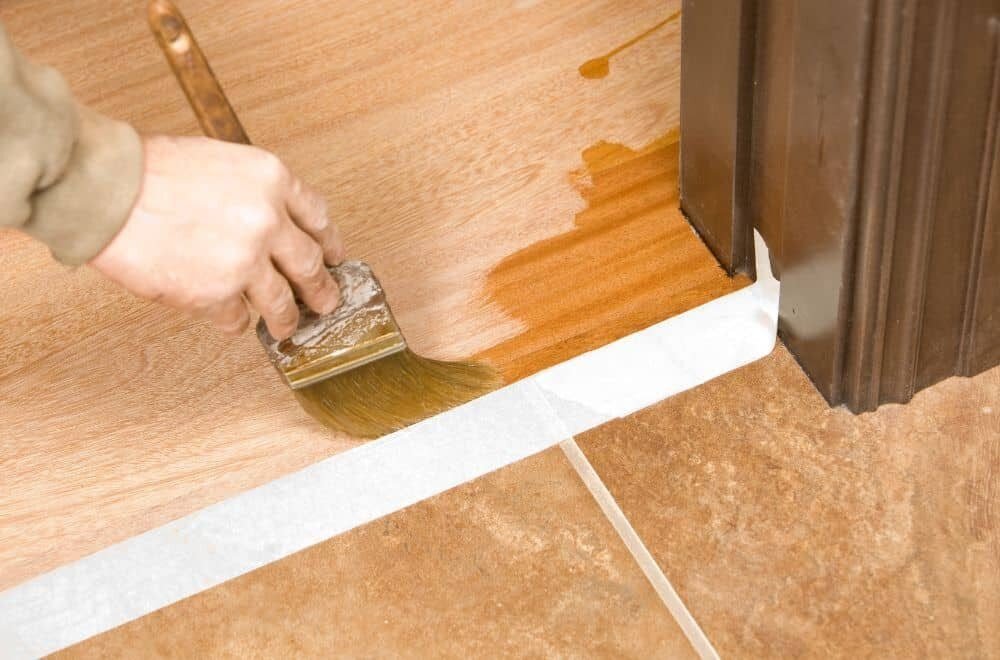
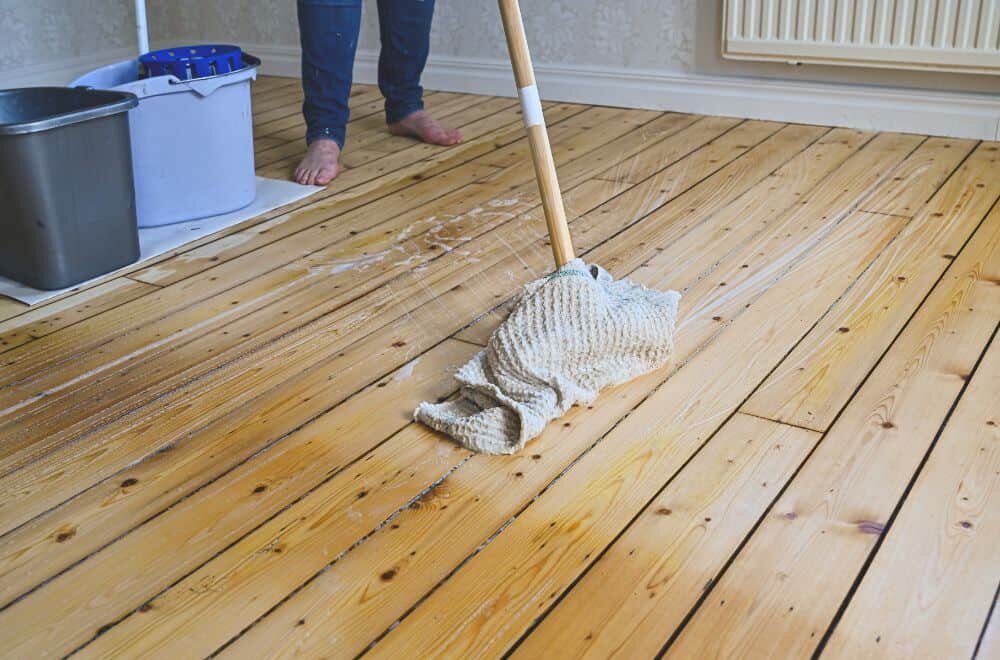
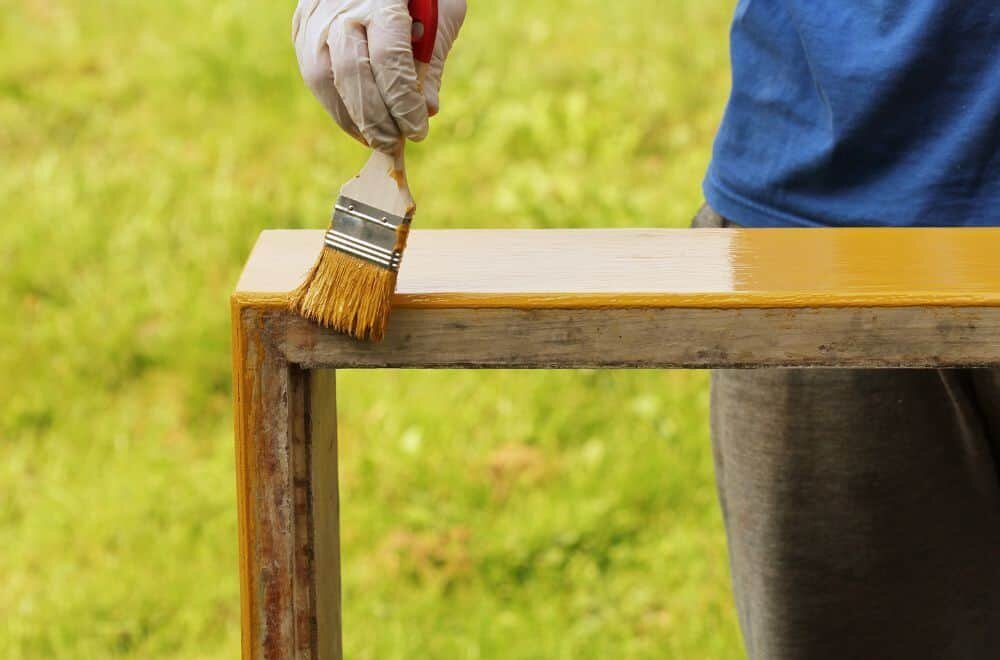
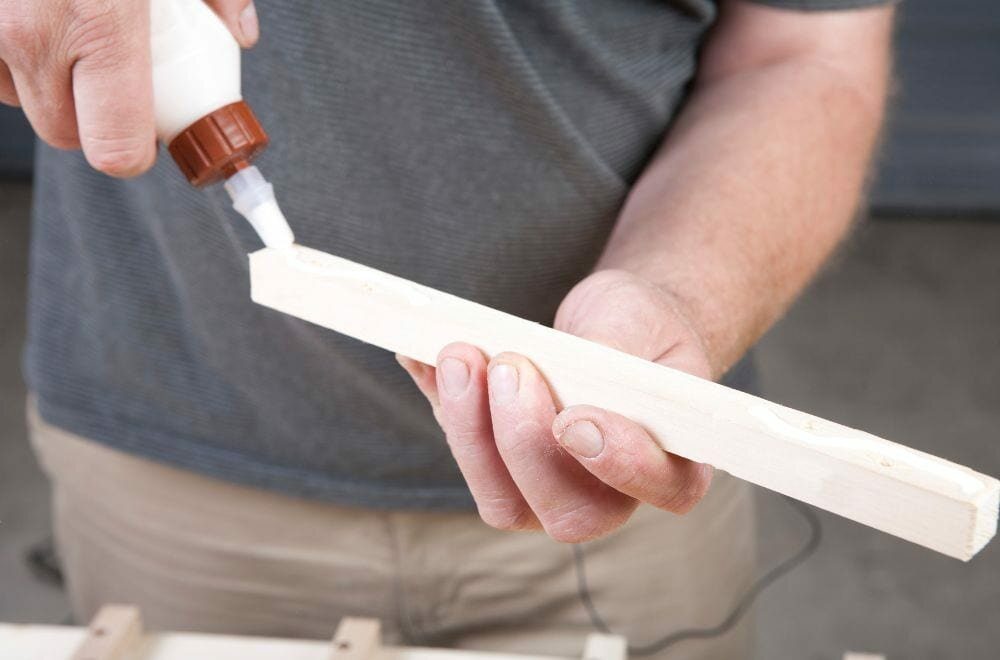
Application

When applying the adhesive, use a continuous or spot bead depending on the size of the surfaces being bonded. Apply the adhesive to the PVC board first, then press the wood onto the adhesive. Make sure that the surfaces are aligned correctly before the adhesive sets.

For bonding wood to PVC board, there are a few adhesive options available. Polyurethane and epoxy glues are popular choices for larger projects, while superglues work well for smaller projects. E6000 adhesive is another option that can provide a strong bond.

Curing Time

After applying the adhesive, it’s important to allow sufficient curing time for the bond to set properly. The curing time will depend on the type of adhesive used, as well as the temperature and humidity of the environment. Check the manufacturer’s instructions for specific curing times.

In general, it’s best to allow the adhesive to cure for at least 24 hours before putting any stress on the bond. Avoid moving or disturbing the bonded surfaces during this time to ensure a strong and durable bond between the wood and PVC board.
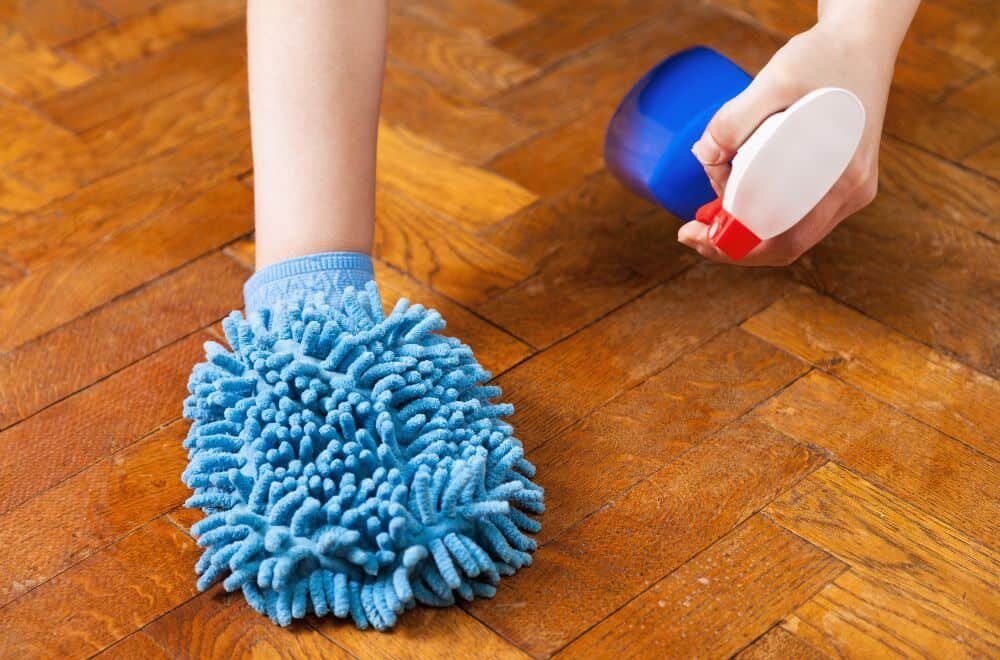
Safety Measures

safety-measures-2

When working with adhesives, it is important to take proper safety measures to avoid any accidents or injuries. Here are some tips to keep in mind:

Wear Protective Gear

Always wear protective gear such as gloves, goggles, and a mask to avoid any contact with the adhesive or fumes. Some adhesives can cause skin irritation or respiratory problems if inhaled.

Work in a Well-Ventilated Area

Make sure to work in a well-ventilated area to avoid inhaling any toxic fumes. Open windows and doors or use a fan to increase airflow in the workspace.

Follow Manufacturer’s Instructions

Read and follow the manufacturer’s instructions carefully before using any adhesive. Some adhesives require specific application techniques or curing times, and failure to follow instructions can result in a weak bond or other issues.

Store Adhesives Properly

Store adhesives in a cool, dry place away from any heat sources or direct sunlight. Keep them out of reach of children and pets.

Dispose of Adhesives Properly

Dispose of any leftover adhesive or empty containers properly according to local regulations. Do not pour adhesives down the drain or throw them in the trash.

By following these safety measures, you can ensure a safe and successful bonding process when working with wood and PVC materials.

Maintenance and Care

Once you have successfully bonded wood to PVC board, it is important to maintain and care for the joint to ensure its longevity. Here are some tips to help you keep your bond strong:

Avoid Excessive Moisture

PVC board is resistant to moisture, but wood is not. Excessive exposure to moisture can cause the wood to swell and weaken the bond. To avoid this, try to keep the joint as dry as possible. If the joint is exposed to moisture, wipe it dry immediately.

Clean Regularly

Dirt, dust, and other debris can accumulate on the joint over time, which can weaken the bond. To prevent this, clean the joint regularly with a damp cloth. Avoid using harsh chemicals or abrasive cleaners, as they can damage the joint.

Check for Damage

Regularly inspect the joint for any signs of damage, such as cracks or separation. If you notice any damage, repair it as soon as possible to prevent it from getting worse.

Avoid Excessive Weight

While a properly bonded joint can be strong, it is important to avoid putting excessive weight or pressure on it. This can cause the joint to weaken or break over time. If you need to support heavy objects, consider using additional support such as brackets or screws.

By following these tips, you can help ensure that your bond between wood and PVC board remains strong and durable for years to come.

Frequently Asked Questions

Can wood glue be used to bond PVC board?

No, wood glue is not recommended for bonding PVC board to wood. This is because PVC and wood have different properties and require different types of adhesives to bond properly.

Where can I buy Titebond PVC Trim Adhesive and Sealant?

Titebond PVC Trim Adhesive and Sealant can be purchased at most home improvement stores, such as Home Depot and Lowe’s. It can also be found online on websites like Amazon.

Is there PVC trim glue available at Lowe’s?

Yes, Lowe’s carries a variety of PVC trim adhesives, including Titebond PVC Trim Adhesive and Sealant, as well as other brands like DAP and Liquid Nails.

What is the best adhesive for bonding PVC boards?

The best adhesive for bonding PVC boards to wood is a polyurethane-based adhesive, such as Gorilla PVC Cement or Titebond PVC Trim Adhesive and Sealant. These adhesives are specifically designed to bond PVC to wood and provide a strong, durable bond.

How do I attach PVC board to wood?

To attach PVC board to wood, first clean and dry the surfaces to be bonded. Apply the adhesive to one of the surfaces and press the two surfaces together firmly. Use clamps or weights to hold the surfaces in place while the adhesive dries.

Will Gorilla Wood Glue work for bonding PVC?

No, Gorilla Wood Glue is not recommended for bonding PVC to wood. It is specifically designed for bonding wood to wood and may not provide a strong, durable bond when used on PVC board. Use a polyurethane-based adhesive, such as Gorilla PVC Cement or Titebond PVC Trim Adhesive and Sealant, for best results.

Blog

Can You Polyurethane Over Painted Wood? A Guide to Coating Painted Wood with Polyurethane

Are you wondering if you can apply polyurethane over painted wood? The answer is yes, you can. However, there are a few things to keep in mind to ensure a successful outcome. In this article, we’ll explore the process of polyurethaning over painted wood and provide some tips to help you achieve the best results.

Before applying polyurethane over painted wood, it’s important to make sure the paint is fully cured and clean. This will help ensure a smooth and even finish. Additionally, it’s important to choose the right type of polyurethane. Both oil-based and water-based polyurethane can be used over painted wood, but oil-based polyurethane may cause discoloration over time, so be cautious when using it. With these considerations in mind, let’s take a closer look at the process of applying polyurethane over painted wood.

Understanding Polyurethane

understanding-polyurethane

Polyurethane is a synthetic product that is commonly used as a protective coating for wood surfaces. It is a durable and flexible material that can help to extend the lifespan of your painted wood surfaces. In this section, we will discuss the benefits of polyurethane and the different types available.

Benefits of Polyurethane

Polyurethane offers several benefits when used as a protective coating for painted wood surfaces. These benefits include:

  • Protection against weathering and UV damage
  • Enhanced and deepened colors
  • Increased resistance to scratching, impact, and general wear
  • Easy cleanup

Types of Polyurethane

There are two main types of polyurethane: oil-based and water-based. Each type has its own advantages and disadvantages.

Oil-Based Polyurethane

Oil-based polyurethane is known for its durability and resistance to water and chemicals. It also tends to give a warm, amber tone to the wood surface. However, it has a longer drying time and can emit strong fumes during application. It is also more difficult to clean up.

Water-Based Polyurethane

Water-based polyurethane dries faster and emits fewer fumes during application. It also has a clear finish that does not alter the color of the wood surface. However, it is less durable than oil-based polyurethane and may require more coats for adequate protection.

In conclusion, polyurethane is a valuable protective coating for painted wood surfaces. Understanding the benefits and types available can help you choose the best product for your specific needs.

Painted Wood and Polyurethane

If you have a painted wood surface that needs additional protection, applying polyurethane over the paint can be a great option. However, there are some important considerations to keep in mind to ensure the best results.

Preparation of Painted Wood

Before applying polyurethane over painted wood, it is crucial to ensure that the paint is fully cured and clean. Any grease stains, dirt, or other filth needs to be washed off before you can apply the first coat of polyurethane. Use a soft sponge or rag and a powerful detergent to clean up the painted surface. You can take a ½ cup of trisodium phosphate and mix it with warm water.

After cleaning, it is important to scuff the surface with 220-grit sandpaper. This helps the polyurethane adhere to the painted surface. Make sure to wipe away any sanding dust with a damp rag or tack cloth.

Compatibility of Polyurethane and Paint

When it comes to applying polyurethane over paint, you can use both oil-based and water-based polyurethane. However, it is important to be cautious of discoloration, especially when using oil-based polyurethane. Some oil-based polyurethane can yellow over time, which can be especially noticeable over light-colored paint.

To avoid discoloration, it is recommended to use a water-based polyurethane over light-colored paint. Additionally, it is important to test the polyurethane on a small, inconspicuous area before applying it to the entire surface.

Overall, applying polyurethane over painted wood can provide additional protection and durability to your surface. Just make sure to properly prepare the surface and choose the right type of polyurethane to avoid any discoloration or other issues.

Application Process

application-process-1

Materials Needed

Before you begin the application process, you will need to gather a few materials. Here is a list of what you will need:

  • Sandpaper (120 grit)
  • Tack cloth
  • Paintbrush or paint sprayer
  • Polyurethane
  • Gloves
  • Safety goggles
  • Face mask

Step-by-Step Guide

  1. Sand the painted surface with 120 grit sandpaper. This will help the polyurethane adhere to the surface. Be sure to sand in the direction of the grain.
  2. Wipe the surface with a tack cloth to remove any dust or debris.
  3. Put on gloves, safety goggles, and a face mask to protect yourself from the fumes.
  4. Apply the polyurethane with a paintbrush or paint sprayer. Be sure to follow the manufacturer’s instructions for application.
  5. Allow the first coat to dry completely before applying a second coat.
  6. Sand the surface lightly with 220 grit sandpaper before applying the second coat. This will help the second coat adhere to the first coat.
  7. Apply the second coat of polyurethane and allow it to dry completely.
  8. Sand the surface lightly with 220 grit sandpaper before applying the third coat.
  9. Apply the third coat of polyurethane and allow it to dry completely.
  10. After the final coat has dried, you can sand the surface lightly with 220 grit sandpaper to remove any imperfections.
  11. Wipe the surface with a tack cloth to remove any dust or debris.

Congratulations! You have successfully applied polyurethane over painted wood.

Maintenance Tips

Keeping your polyurethane finished painted wood looking its best requires some basic maintenance. Here are some tips to help you keep your surfaces looking their best.

Cleaning and Care

To keep your polyurethane finished painted wood looking clean and shiny, you should clean it regularly. Here are some tips to help you with regular cleaning:

  • Use a soft cloth or sponge to wipe down the surface.
  • Use a mild soap and water solution to clean the surface.
  • Avoid using harsh chemicals or abrasive cleaners that can damage the finish.
  • Dry the surface thoroughly after cleaning to prevent water damage.

If your polyurethane finished painted wood becomes dull or scratched, you can restore its shine by applying a new coat of polyurethane. Before applying a new coat, clean the surface thoroughly and lightly sand it to remove any scratches or imperfections.

Touch-Ups and Repairs

Even with regular care, your polyurethane finished painted wood may become damaged over time. Here are some tips to help you with touch-ups and repairs:

  • Use a fine-grit sandpaper to lightly sand the damaged area.
  • Clean the surface thoroughly to remove any dust or debris.
  • Apply a small amount of touch-up paint to the damaged area.
  • Allow the touch-up paint to dry completely.
  • Apply a new coat of polyurethane to the entire surface to blend the touch-up with the rest of the finish.

By following these simple maintenance tips, you can keep your polyurethane finished painted wood looking its best for years to come.

Common Mistakes to Avoid

common-mistakes-to-avoid

When it comes to polyurethane over painted wood, there are a few common mistakes that you should avoid to ensure a successful project. Here are some of the most important things to keep in mind:

Skipping Surface Preparation

One of the biggest mistakes people make when applying polyurethane over painted wood is skipping surface preparation. Before you apply any polyurethane, you need to make sure the surface is clean, dry, and free of any dirt, grease, or other contaminants. If you skip this step, the polyurethane may not adhere properly, and you could end up with a finish that peels or flakes off.

Using the Wrong Type of Polyurethane

Another common mistake is using the wrong type of polyurethane. There are two main types of polyurethane: oil-based and water-based. Oil-based polyurethane is more durable and provides a richer, deeper finish, but it takes longer to dry and can yellow over time. Water-based polyurethane dries faster and is less likely to yellow, but it is not as durable as oil-based polyurethane. Make sure you choose the right type of polyurethane for your project.

Applying Too Thick of a Coat

When applying polyurethane over painted wood, it’s important to apply thin, even coats. If you apply too thick of a coat, the polyurethane may not dry properly, and you could end up with a finish that is uneven or has drips and runs. It’s better to apply multiple thin coats than one thick coat.

Not Allowing Enough Drying Time

Finally, one of the biggest mistakes people make when applying polyurethane over painted wood is not allowing enough drying time between coats. Polyurethane takes time to dry and cure, and if you apply a new coat before the previous coat is fully dry, you could end up with a finish that is tacky or doesn’t adhere properly. Make sure you follow the manufacturer’s instructions for drying time between coats.

Frequently Asked Questions

Can polyurethane be applied over latex paint?

Yes, you can apply polyurethane over latex paint. However, it is important to wait until the paint has fully cured before applying the polyurethane. This usually takes about 30 days. Additionally, it is recommended that you lightly sand the surface of the paint before applying the polyurethane to ensure proper adhesion.

What is the best type of polyurethane to use over paint?

The best type of polyurethane to use over paint is a water-based polyurethane. This type of polyurethane is easy to apply, dries quickly, and is less likely to yellow over time compared to oil-based polyurethane.

Can you put polyurethane over water-based paint?

Yes, you can put polyurethane over water-based paint. However, it is important to wait until the paint has fully cured before applying the polyurethane. This usually takes about 30 days. Additionally, it is recommended that you lightly sand the surface of the paint before applying the polyurethane to ensure proper adhesion.

How do you apply polyurethane to painted wood?

To apply polyurethane to painted wood, first, ensure that the paint has fully cured and the surface is clean and dry. Then, lightly sand the surface of the paint to ensure proper adhesion. Apply the polyurethane using a brush or roller, following the manufacturer’s instructions for application and drying times. Sand lightly between coats, and apply multiple coats as needed for the desired level of protection.

Is polyurethane a good option for protecting painted wood?

Yes, polyurethane is a good option for protecting painted wood. It provides a durable and long-lasting protective finish that can help prevent scratches, scuffs, and other types of damage to the painted surface.

Should I apply polyurethane over painted cabinets for extra protection?

Yes, applying polyurethane over painted cabinets can provide extra protection and help extend the life of the paint job. It is important to ensure that the paint has fully cured before applying the polyurethane and to follow the manufacturer’s instructions for application and drying times.

Blog

Affordable Solutions: How to Remove Fully Dried Paint from Wooden Floors

Are you dealing with a paint spill or splatter on your wooden floor? Removing dried paint from hardwood floors can seem like a daunting task, but it’s not impossible. With a few simple techniques and some inexpensive materials, you can remove fully dried paint from your wooden floor on the cheap.

One of the most effective and affordable ways to remove dried paint from hardwood floors is by using rubbing alcohol. If the paint is water-based, wet a cotton ball with rubbing alcohol and wipe it over the paint. If any residue comes off on the cotton ball, the paint is water-based. If nothing comes off, then it’s oil-based. Once you’ve identified the type of paint, you can get started with one of the methods mentioned in this article.

Another cheap and easy solution is to use dish soap and warm water. Simply apply a few drops of dish soap to a damp rag and then use the rag to rub the dried-up paint stains. This method works best for water-based paints. If the paint is oil-based, you can use paint thinner or mineral spirits to remove it. However, be careful when using these solvents as they can damage the finish of your wooden floor.

Understanding the Type of Paint

understanding-the-type-of-paint

When it comes to removing dried paint from your wooden floor, the first thing you need to consider is the type of paint that was used. Different types of paint require different methods of removal. In general, there are two main types of paint: water-based and oil-based.

Water-Based Paint

Water-based paint, also known as latex paint, is the most common type of paint used for interior surfaces. It is easy to clean up with soap and water, dries quickly, and is less toxic than oil-based paint. However, it can still be difficult to remove once it has dried.

To remove dried water-based paint from your wooden floor, you can try the following methods:

  • Scrape the paint off with a plastic scraper or putty knife.
  • Use a damp cloth to soften the paint and then scrape it off.
  • Apply a paint remover or solvent to the paint and then scrape it off.

Oil-Based Paint

Oil-based paint is a more durable and long-lasting type of paint that is often used for exterior surfaces and high-traffic areas. It is harder to clean up and requires solvents such as mineral spirits or turpentine. Once it has dried, it can be difficult to remove.

To remove dried oil-based paint from your wooden floor, you can try the following methods:

  • Scrape the paint off with a plastic scraper or putty knife.
  • Apply a paint remover or solvent to the paint and then scrape it off.
  • Use a heat gun or hair dryer to soften the paint and then scrape it off.

It is important to note that some paint removers and solvents can be toxic and should be used with caution. Always follow the manufacturer’s instructions and wear protective gear such as gloves and a mask. Additionally, be careful not to damage the wood underneath the paint while removing it.

Materials and Tools Needed

materials-and-tools-needed

Removing fully dried paint from your wooden floor can be a challenging task, but it’s not impossible. With the right tools and cleaning solutions, you can get rid of the paint and restore your floor’s natural beauty. Here are the materials and tools you’ll need:

Safety Gear

Before you start removing the paint, it’s important to protect yourself. Here are some safety gear you should have:

  • Gloves: Use gloves to protect your hands from the cleaning solutions and scraping tools.
  • Eye protection: Wear goggles to prevent the cleaning solutions and paint chips from getting into your eyes.
  • Respirator: Use a respirator to avoid inhaling the fumes from the cleaning solutions.

Cleaning Solutions

There are several cleaning solutions you can use to remove the paint from your wooden floor. Here are some options:

  • Vinegar and water: Mix equal parts of vinegar and water and apply it to the paint. Let it sit for a few minutes before scraping it off.
  • Baking soda and water: Mix baking soda and water to create a paste. Apply it to the paint and let it sit for a few minutes before scraping it off.
  • Rubbing alcohol: Apply rubbing alcohol to the paint and let it sit for a few minutes before scraping it off.

Scraping Tools

To remove the paint, you’ll need some scraping tools. Here are some options:

  • Putty knife: Use a putty knife to scrape off the paint. Be careful not to damage the wooden floor.
  • Scraper: A scraper is a more heavy-duty tool that can remove stubborn paint.
  • Sandpaper: Sandpaper can be used to remove any remaining paint after scraping.

Remember to be patient and take your time when removing the paint. Rushing the process can damage your wooden floor.

Safety Precautions

safety-precautions

Removing dried paint from wooden floors can be a challenging task, but it is essential to take safety precautions to avoid any accidents or health hazards. Here are some safety measures to consider before starting:

1. Wear Protective Gear

It is crucial to wear protective gear such as gloves, safety glasses, and a dust mask to avoid any contact with toxic chemicals or dust particles that may cause respiratory problems or skin irritation.

2. Ventilate the Area

Ensure that the room is well ventilated by opening windows and doors to allow fresh air to circulate. This will help to reduce the risk of inhaling toxic fumes or dust particles.

3. Use Safe Products

When selecting cleaning products, opt for non-toxic and eco-friendly options to avoid harmful chemicals that may damage the wood or pose a health risk. Always read the label and follow the instructions carefully.

4. Avoid Using Heat or Flame

Avoid using heat or flame to remove paint from wooden floors as it can be dangerous and may cause a fire. Instead, use a chemical paint stripper or a scraper to remove the paint.

5. Consult a Professional

If you are unsure about how to remove paint from your wooden floor or if you suspect that the paint may contain lead, it is best to consult a professional. They can provide expert advice and ensure that the job is done safely and effectively.

By taking these safety precautions, you can remove dried paint from your wooden floor safely and without any health or safety risks.

Step-by-Step Guide to Removing Paint

step-by-step-guide-to-removing-paint

If you have fully dried paint on your wooden floor, don’t worry. You can remove it using some simple steps. Here is a step-by-step guide to help you remove paint from your wooden floor on the cheap.

Initial Cleaning

Before you start removing the paint, you need to do some initial cleaning. Sweep the floor to remove any loose dirt or debris. Then, use a vacuum cleaner to remove any remaining dust or debris. This will ensure that the surface is clean and ready for the next step.

Applying the Cleaning Solution

The next step is to apply a cleaning solution to the paint. You can use a mixture of warm water and dish soap or vinegar. Apply the solution to the paint using a sponge or cloth and let it sit for a few minutes. This will help loosen the paint and make it easier to remove.

Scraping the Paint

After the cleaning solution has had time to work, use a scraper or putty knife to gently scrape the paint off the floor. Be careful not to scratch the wood. If the paint is stubborn, you can use a heat gun to soften it before scraping.

Sanding the Surface

Once you have removed as much paint as possible with the scraper, you can use sandpaper to sand the surface. This will help remove any remaining paint and smooth out the surface. Start with a coarse grit sandpaper and gradually work your way up to a finer grit.

Final Cleaning

After sanding, use a vacuum cleaner or damp cloth to remove any dust or debris. Then, wipe the surface with a clean, damp cloth to remove any remaining cleaning solution.

By following these simple steps, you can remove fully dried paint from your wooden floor on the cheap. Remember to be patient and take your time to avoid damaging the wood.

Maintaining Your Wooden Floor

maintaining-your-wooden-floor

Maintaining your wooden floor is crucial to keep it looking new and beautiful for years to come. Here are some tips to help you keep your wooden floor in top condition:

Regular Cleaning

Regular cleaning is essential to keep your wooden floor looking clean and shiny. You can use a soft-bristled broom or a vacuum cleaner to remove dust and dirt from the surface of your floor. Make sure to use a vacuum cleaner with a soft brush attachment to avoid scratching the surface of your floor.

Avoid Water Damage

Water can damage your wooden floor, so it’s essential to avoid spills and leaks. If you spill any liquid on your floor, clean it up immediately to prevent it from seeping into the wood and causing damage. You can also place mats and rugs in high-traffic areas to protect your floor from wear and tear.

Use Protective Pads

Furniture can scratch and damage your wooden floor, so it’s essential to use protective pads on the legs of your furniture. You can buy these pads at any hardware store or online. Make sure to replace them regularly to keep your floor protected.

Refinishing Your Floor

Over time, your wooden floor may become dull and damaged. If this happens, you can refinish your floor to restore its beauty. Refinishing your floor involves sanding down the surface and applying a new coat of finish. You can do this yourself if you have the right tools and experience, or you can hire a professional to do it for you.

By following these tips, you can keep your wooden floor looking beautiful and new for years to come.

Frequently Asked Questions

What is the best way to remove dried paint from hardwood floors without damaging the finish?

If you want to remove dried paint from your hardwood floor without damaging the finish, you can use a plastic scraper or putty knife to gently scrape off the paint. You can also use a mixture of warm water and soap to soften the paint and make it easier to remove. Be sure to avoid using any harsh chemicals or abrasive materials that could damage the finish of your hardwood floor.

How can I remove water-based paint from my wooden floor on a budget?

If you want to remove water-based paint from your wooden floor on a budget, you can use a mixture of warm water and dish soap. Apply the mixture to the paint stain and use a soft-bristled brush to gently scrub the area. You can also use a plastic scraper or putty knife to gently scrape off the paint. Be sure to rinse the area with clean water and dry it thoroughly to avoid any water damage to your wooden floor.

Is Goo Gone effective in removing paint from hardwood floors?

Goo Gone can be effective in removing paint from hardwood floors, but it’s important to use it carefully. Apply a small amount of Goo Gone to a clean cloth and gently rub the paint stain. Be sure to rinse the area with clean water and dry it thoroughly to avoid any damage to your hardwood floor. However, Goo Gone can also be harsh on some types of finishes, so it’s important to test it on a small, inconspicuous area first.

Can I use paint remover on my wooden floor?

You can use paint remover on your wooden floor, but it’s important to use it carefully and follow the manufacturer’s instructions. Be sure to test the paint remover on a small, inconspicuous area first to make sure it won’t damage your hardwood floor. You should also wear gloves and protective eyewear when using paint remover and work in a well-ventilated area.

What is the best way to remove paint splatters from my wooden floor?

If you have paint splatters on your wooden floor, you can use a plastic scraper or putty knife to gently scrape off the paint. You can also use a mixture of warm water and soap to soften the paint and make it easier to remove. Be sure to avoid using any harsh chemicals or abrasive materials that could damage your wooden floor.

How do I remove oil-based paint from my wooden floor?

Removing oil-based paint from your wooden floor can be more challenging than removing water-based paint. You can try using mineral spirits or paint thinner to soften the paint and make it easier to remove. Be sure to wear gloves and protective eyewear when using these chemicals and work in a well-ventilated area. You can also use a plastic scraper or putty knife to gently scrape off the paint, but be careful not to damage the finish of your hardwood floor.

Blog

Insulation Comparison: One Inch of Wood vs. Sheetrock

If you’re considering insulating your home, you’ll want to know how much insulation you need to achieve the desired R-value. R-value is a measure of insulation’s ability to resist heat traveling through it. The higher the R-value, the better the thermal performance of the insulation.

When it comes to insulation, there are many materials to choose from, including wood and sheetrock. One question you may have is how much insulation is one inch of wood compared to sheetrock? The insulation value of wood varies depending on what type of wood it is and how it has been treated. On the other hand, sheetrock is not an insulation material, but rather a type of drywall used for walls and ceilings. Knowing the insulation value of wood compared to sheetrock can help you make an informed decision when it comes to insulating your home.

Understanding Insulation

When it comes to insulating your home, there are a few factors you need to consider. One of the most important factors is the R-value of the insulation material. R-value is a measure of the insulation’s ability to resist heat flow. The higher the R-value, the better the insulation.

Insulation materials come in different forms, including batts, rolls, blown-in, and spray foam. Each type has its own R-value per inch, which is the amount of resistance to heat flow per inch of thickness.

But what about other materials in your walls, like wood or sheetrock? How much insulation do they provide?

Here are some commonly used materials and their R-values per inch:

  • Fiberglass batts: R-3.1 to R-4.3
  • Blown-in fiberglass: R-2.2 to R-4.3
  • Cellulose: R-3.2 to R-3.8
  • Spray foam: R-6.0 to R-7.0
  • Wood: R-1.25
  • Sheetrock: R-0.45 to R-0.90

As you can see, wood provides very little insulation compared to other materials like fiberglass or spray foam. Sheetrock, while slightly better than wood, still has a relatively low R-value per inch.

It’s important to note that the R-value of your walls is affected by more than just the insulation material. Other factors like studs, air leaks, and moisture can all impact the overall R-value.

To ensure that your home is properly insulated, it’s best to consult with a professional. They can assess your home’s insulation needs and recommend the best materials and thicknesses for your walls.

Comparison of Wood and Sheetrock

comparison-of-wood-and-sheetrock

When it comes to insulation, wood and sheetrock have different R-values per inch. R-value is the measure of thermal resistance, which indicates how well a material resists heat transfer.

R-Value of Wood

The R-value of wood varies depending on the type of wood and its density. Generally, one inch of wood has an R-value of about 1.41. However, the R-value can range from 0.71 for softwoods like pine to 1.60 for hardwoods like oak. Wood is not a good insulator compared to other materials like fiberglass or cellulose.

R-Value of Sheetrock

Sheetrock, also known as drywall, is a popular building material used for walls and ceilings. It has an R-value of about 0.45 per inch. This means that one inch of sheetrock provides less insulation than one inch of wood. However, sheetrock is often used in combination with insulation materials like fiberglass or cellulose to improve its insulating properties.

Comparison

In terms of insulation, one inch of wood provides better thermal resistance than one inch of sheetrock. However, wood is not commonly used as an insulating material in construction. Sheetrock, on the other hand, is often used in combination with other insulation materials to improve its insulating properties.

If you are looking for a material with high insulation value, wood may not be the best choice. However, if you are looking for a material that provides structural support and aesthetic appeal, wood may be a good option. Sheetrock, on the other hand, is a cost-effective and commonly used building material that can be combined with other insulation materials to improve its thermal resistance.

Insulation Value of One Inch Wood

insulation-value-of-one-inch-wood

When it comes to insulation, wood is not the best material to use. Although wood is a natural insulator, it is not as effective as other materials such as fiberglass or spray foam insulation. The insulation value of one inch of wood varies depending on the type of wood and its moisture content.

According to a source, yellow poplar has an R-value of 1.1 per inch of thickness at 12% MC. This means that for 5 inches of yellow poplar, the R-value would be 5.5, which is not bad at all. However, it is important to note that the real problem with R-values in general is that air leaks and window/door leaks often result in more heat loss than the wall itself.

In comparison, sheetrock or drywall has an R-value of approximately 0.45 per inch of thickness. This means that one inch of sheetrock provides less insulation than one inch of yellow poplar. Therefore, if you are looking to insulate your home, it is best to use materials that have a higher R-value than wood.

It is also important to note that the insulation value of wood can be affected by its moisture content. Wood that is damp or wet will have a lower R-value than dry wood. Therefore, it is important to ensure that the wood is dry before using it as insulation.

In summary, while wood can provide some insulation, it is not the best material to use. The insulation value of one inch of wood varies depending on the type of wood and its moisture content. If you are looking to insulate your home, it is best to use materials that have a higher R-value than wood.

Insulation Value of Sheetrock

insulation-value-of-sheetrock

When it comes to insulating your home, you may wonder how much insulation you can get from materials like sheetrock. While sheetrock is primarily used as a wall and ceiling covering, it can provide some insulation value as well.

The insulation value of sheetrock is measured in terms of its R-value. R-value is a measure of how well a material resists heat flow. The higher the R-value, the better the insulation.

According to the United States Department of Energy, the R-value of standard sheetrock is around 0.45 per inch. This means that one inch of sheetrock provides an insulation value of 0.45. For comparison, one inch of fiberglass insulation has an R-value of around 3.7.

It’s important to note that the insulation value of sheetrock is relatively low compared to other insulation materials. However, if you’re already using sheetrock as a wall or ceiling covering, it can provide some additional insulation value without requiring any additional materials or installation.

If you’re looking to improve the insulation value of your home, you may want to consider adding additional insulation materials like fiberglass or cellulose insulation. These materials can be installed in walls, attics, and other areas to provide additional insulation and improve energy efficiency.

In summary, sheetrock can provide some insulation value, but it is not a highly effective insulation material on its own. If you’re looking to improve the insulation of your home, consider adding additional insulation materials like fiberglass or cellulose insulation.

Factors Affecting Insulation

When it comes to insulation, there are several factors that can affect its efficiency and effectiveness. Here are some of the most important ones to consider:

Material Type

Different materials have different R-values, which measure their resistance to heat flow. For example, wood has a lower R-value than some other building materials, such as sheetrock. This means that homes constructed with a lot of wood may need more insulation to be warm and energy-efficient during cold weather.

Thickness

The thickness of insulation is also an important factor to consider. The thicker the insulation, the higher its R-value will be. For example, one inch of sheetrock has an R-value of 0.45, while one inch of wood has an R-value of only 0.91.

Climate

The climate in which you live can also affect the amount of insulation you need. If you live in a colder climate, you will need more insulation to keep your home warm. Conversely, if you live in a warmer climate, you may need less insulation to keep your home cool.

Building Design

The design of your home can also affect the amount of insulation you need. For example, if your home has a lot of windows or doors, you may need more insulation to compensate for the heat loss that occurs through these openings.

Heating and Cooling Systems

The type and efficiency of your heating and cooling systems can also affect the amount of insulation you need. If your systems are not very efficient, you may need more insulation to compensate for the heat loss that occurs.

Living Habits

Finally, your own living habits can affect the amount of insulation you need. For example, if you keep your thermostat at a very high temperature during the winter, you may need more insulation to keep your home warm. Conversely, if you keep your thermostat at a very low temperature during the summer, you may need less insulation to keep your home cool.

Improving Insulation

improving-insulation

When it comes to improving insulation, adding an extra layer of sheetrock can help. However, it’s important to note that one inch of wood provides significantly less insulation than one inch of sheetrock.

According to the search results, the R-value of one inch of wood is approximately R-1, whereas one inch of sheetrock has an R-value of approximately R-0.45. This means that adding an extra inch of sheetrock will provide more insulation than an extra inch of wood.

If you’re looking to improve insulation in your home, there are a few other options to consider:

  • Insulated sheathing: Adding insulated sheathing to the exterior of your home can significantly improve insulation. The R-value of insulated sheathing can range from R-3.6 to R-6, depending on the type of insulation used.
  • Blown-in insulation: Blown-in insulation, such as fiberglass or cellulose, can be added to wall cavities to improve insulation. The R-value of blown-in insulation can range from R-3.2 to R-3.8 per inch.
  • Spray foam insulation: Spray foam insulation can be used to fill gaps and cracks in walls, providing a more complete seal. The R-value of spray foam insulation can range from R-3.5 to R-6.5 per inch.

Overall, there are several options to consider when looking to improve insulation in your home. Adding an extra layer of sheetrock can help, but there are other options that may provide more significant improvements.

Practical Implications

When it comes to insulation, it’s important to understand how much insulation you’re getting from different materials. If you’re considering using wood or sheetrock as insulation, you may be wondering how they compare in terms of insulation value.

According to a Wood Insulation Guide, the insulation value of wood varies depending on the type of wood and how it has been treated. The R-value of softwoods ranges from 1.41 per inch for most softwoods to 0.71 for hardwoods. This means that if you have an exterior wall made of 4-inch-thick wood, it might have an R-value somewhere in the range of 3 to 6.

In comparison, the R-value of sheetrock is around 0.45 per inch. This means that one inch of sheetrock provides less insulation than one inch of wood. If you want to achieve the same level of insulation as one inch of wood, you would need to use more than two inches of sheetrock.

It’s also important to consider other factors when choosing insulation materials. For example, sheetrock may be a better choice if you’re looking for a material that provides soundproofing or fire resistance. On the other hand, wood may be a better choice if you’re looking for a material that is more environmentally friendly or has a lower cost.

Ultimately, the choice between wood and sheetrock as insulation materials will depend on your specific needs and priorities. By understanding the insulation value of each material, as well as their other characteristics, you can make an informed decision that meets your needs.

Frequently Asked Questions

How does the R-value of 1/2 inch plywood compare to that of 5/8 inch drywall?

The R-value of 1/2 inch plywood is about 0.63, while the R-value of 5/8 inch drywall is about 0.56. So, 1/2 inch plywood provides slightly better insulation than 5/8 inch drywall.

What is the R-value of wood per inch?

The R-value of wood varies depending on the type of wood and how it has been treated. The R-value of softwoods ranges from 1.41 per inch for most softwoods to 0.71 for hardwoods.

What is the R-value of a 2×6 wall?

The R-value of a 2×6 wall depends on the insulation used. For example, a 2×6 wall with fiberglass batt insulation has an R-value of about 19. If you use spray foam insulation, the R-value can be as high as 38.

How much insulation does drywall add?

Drywall itself does not provide any insulation value. However, the air space between the drywall and the exterior wall can provide some insulation.

How much insulation does plywood provide?

Plywood itself does provide some insulation value, but it is not significant. For example, 1 inch of plywood has an R-value of about 0.63.

What is the R-value of sheetrock compared to wood?

The R-value of sheetrock is about 0.45 per inch, which is lower than the R-value of most types of wood. So, wood provides better insulation than sheetrock.

Blog

How to Determine the Value of Petrified Wood Crystals in US Dollars

Are you curious about the value of a crystalized piece of petrified wood? Perhaps you’ve come across one and are wondering how much it’s worth. While petrified wood is a fascinating and unique natural material, determining its value can be tricky.

The worth of a crystalized piece of petrified wood depends on various factors, including the size, quality, and rarity of the specimen. The petrified wood market is not regulated, so prices can vary greatly depending on the buyer and seller. However, there are some general guidelines you can follow to estimate the value of your petrified wood.

Salah satu poin utama yang menonjol dari situs IDN Poker adalah keberagaman permainan poker yang ditawarkan. Dari Texas Hold’em hingga Omaha, para pemain dapat menikmati berbagai varian poker sesuai dengan preferensi dan keterampilan mereka. Turnamen reguler dan meja taruhan yang beragam memberikan pengalaman bermain yang dinamis dan menantang. Situs IDN Poker memanfaatkan teknologi tinggi untuk memberikan pengalaman bermain yang aman dan lancar. Sistem enkripsi data tingkat tinggi memastikan perlindungan informasi pribadi dan keuangan para pemain. Dengan adanya teknologi ini, pemain dapat merasa yakin bahwa transaksi mereka dan data pribadi tetap dalam lingkungan yang aman.

In this article, we will explore how to determine the value of a crystalized piece of petrified wood in US dollars. We will discuss the factors that affect the price of petrified wood and provide some general pricing guidelines based on the information available from expert sources. Whether you’re a collector, seller, or just curious about petrified wood, this article will provide you with the information you need to understand the value of this unique material.

Understanding Petrified Wood

Petrified wood is a type of fossilized wood that has been transformed into stone through a process called permineralization. This process occurs when minerals, such as silica, replace the organic matter in the wood, resulting in a piece of wood that has been turned into stone. Petrified wood is often found in areas where volcanic activity has occurred, and it can come in a variety of colors, including brown, red, yellow, and green.

One of the most interesting things about petrified wood is that it can preserve the original structure of the wood, including the rings that indicate the age of the tree. This makes petrified wood a valuable resource for scientists who study the history of the earth and the evolution of plant life.

While petrified wood is a fascinating material, it is important to note that not all pieces of petrified wood are created equal. Some pieces may be more valuable than others, depending on a variety of factors. These factors can include the size and shape of the piece, the rarity of the color or pattern, and the quality of the preservation.

If you are interested in purchasing a piece of petrified wood, it is important to do your research and make sure you are getting a fair price. While petrified wood can be valuable, it is not always easy to determine its worth. Factors such as size, color, and quality can all play a role in determining the value of a piece of petrified wood.

Penggunaan Data SGP tidak hanya terbatas pada analisis statistik, tetapi juga mencakup pengembangan strategi permainan. Pemain sering merinci keluaran angka-angka terakhir untuk membuat pilihan angka yang lebih tepat pada taruhan berikutnya. Meskipun tidak ada jaminan kemenangan, pemain meyakini bahwa pemahaman mendalam terhadap data dapat meningkatkan peluang mereka. Bagi mereka yang bermain togel online, situs-situs resmi seperti Arizona88 pastinya menyediakan pembaruan data Togel SGP secara berkala. Pemain dapat dengan mudah mengakses hasil pengundian terbaru, tabel keluaran, dan informasi terkait lainnya di bandar togel ini. Kemudahan ini membuat para penggemar togel tetap terinformasi dan dapat menyesuaikan strategi mereka seiring perkembangan data.

In general, smaller pieces of petrified wood are less valuable than larger pieces, and pieces with more vibrant colors or unique patterns may be more valuable than those with more muted colors. It is also important to consider the quality of the preservation, as pieces that are well-preserved may be more valuable than those that are damaged or degraded.

Ultimately, the value of a piece of petrified wood is determined by a variety of factors, and it is important to do your research and consult with experts to ensure that you are getting a fair price. With a little bit of knowledge and some careful consideration, you can find a beautiful and valuable piece of petrified wood to add to your collection.

Identifying Crystallized Petrified Wood

identifying-crystallized-petrified-wood

Petrified wood is a fossilized wood that has been replaced by minerals, usually silica. When the process of petrification occurs, the wood’s organic material is replaced by minerals, creating a crystalline structure. This process can take millions of years, and the result is a beautiful and unique piece of petrified wood that can be used for decorative purposes or even jewelry.

Identifying crystallized petrified wood can be a bit tricky, but there are a few things you can look for to determine if a piece is crystallized. First, look for a smooth texture with a shiny surface. Crystallized petrified wood often has a glassy appearance, and the surface will reflect light.

Another thing to look for is the color of the wood. Crystallized petrified wood often has a range of colors, including white, gray, brown, and black. The colors can be uniform or have patterns, such as rings or stripes.

You can also look for the presence of crystals. Crystallized petrified wood will often have small crystals visible on the surface or within the wood itself. These crystals can be clear, white, or colored, and they can add to the beauty of the piece.

When it comes to determining the value of crystallized petrified wood, there are several factors to consider. The size, color, and quality of the piece all play a role in determining its worth. Larger pieces are generally more valuable, as are pieces with unique colors or patterns. The presence of crystals can also increase the value of a piece.

In general, smaller pieces of crystallized petrified wood can be purchased for a few dollars, while larger, high-quality pieces can sell for hundreds or even thousands of dollars. It’s important to do your research and compare prices before making a purchase to ensure you’re getting a fair price.

In conclusion, identifying crystallized petrified wood requires a keen eye for texture, color, and the presence of crystals. When it comes to determining the value of a piece, size, color, quality, and the presence of crystals all play a role. With a little bit of knowledge and research, you can find a beautiful piece of crystallized petrified wood to add to your collection.

Factors Influencing Value

When it comes to determining the value of a piece of petrified wood, there are several factors to consider. Here are some of the most important ones:

Quality

The quality of the petrified wood is one of the most significant factors that influence its value. High-quality petrified wood is rare and has a unique pattern, color, and texture. The quality of the petrified wood can affect its value significantly. Petrified wood that has a smooth surface, vibrant colors, and intricate patterns is more valuable than petrified wood that is dull, cracked, or has a rough surface.

Size

The size of the petrified wood also plays a role in determining its value. Larger pieces of petrified wood are generally more valuable than smaller ones. However, the size of the petrified wood should not be the only factor that determines its value. The quality and rarity of the piece are also essential considerations.

Rarity

The rarity of the petrified wood is another critical factor that influences its value. Petrified wood that is rare or difficult to find is more valuable than petrified wood that is abundant. The rarity of the petrified wood can be due to its age, location, or other factors that make it unique.

Condition

The condition of the petrified wood is also an important factor that affects its value. Petrified wood that is well-preserved and in excellent condition is more valuable than petrified wood that is damaged or has cracks. The condition of the petrified wood can also affect its color and texture, which can impact its value.

Market Demand

Finally, the market demand for petrified wood is also a significant factor that influences its value. If there is a high demand for petrified wood, the value of the wood will increase. However, if the demand for petrified wood is low, the value of the wood will decrease.

In summary, the quality, size, rarity, condition, and market demand are the most important factors that influence the value of petrified wood. By considering these factors, you can determine the value of your petrified wood accurately.

Size and Weight

size-and-weight

When it comes to determining the value of a piece of petrified wood, size and weight are important factors to consider. The larger and heavier the piece, the more valuable it tends to be.

Tumbled or rough pieces that are one to three inches long will typically be worth a dollar or two each, if that. Bulk lots of these pieces are often purchased for even less per individual sample. On the other hand, a petrified wood log weighing 50 pounds could sell for $150 or more.

It’s important to keep in mind that not all petrified wood is created equal. The quality of the piece, as well as its rarity, can also impact its value. For example, a piece of petrified wood with well-defined patterns or colors may be more valuable than a plain piece.

If you’re unsure about the value of a piece of petrified wood, it may be helpful to consult with a professional appraiser or to do some research on similar pieces that have sold recently. This can give you a better idea of what to expect in terms of price.

In summary, the size and weight of a piece of petrified wood can play a significant role in determining its value. However, other factors such as quality and rarity should also be taken into consideration.

Condition and Quality

When determining the value of a piece of petrified wood, its condition and quality are important factors to consider. Here are a few things to keep in mind:

Condition

The condition of the petrified wood refers to its overall state of preservation. A piece that is well-preserved and has minimal damage or wear will generally be worth more than one that is heavily damaged or degraded.

Common types of damage that can affect the value of petrified wood include cracks, breaks, and fractures. In addition, pieces that have been exposed to the elements for a long time may have weathered surfaces or erosion.

Quality

The quality of petrified wood refers to its visual appeal and suitability for use in lapidary work. High-quality pieces will have vibrant colors, interesting patterns, and a smooth, polished surface.

When evaluating the quality of petrified wood, it is important to consider factors such as color, grain pattern, and translucency. Pieces that are rare or unique in some way may also be more valuable than more common specimens.

Overall, the condition and quality of a piece of petrified wood can have a significant impact on its value. By carefully evaluating these factors, you can get a better idea of what your petrified wood may be worth.

Rarity and Uniqueness

rarity-and-uniqueness

Petrified wood is a unique and rare natural wonder that has been formed over millions of years. It is created when wood is buried underground and minerals seep into the wood’s cellular structure, replacing the organic material with stone-like minerals. Because of its rarity, petrified wood can be quite valuable, especially if it has unique and intricate patterns or colors.

The rarity and uniqueness of petrified wood is determined by several factors, including the type of wood, the location where it was found, and the quality of the petrification process. Some types of wood, such as oak and maple, are more commonly found petrified than others. The location where the wood was buried can also affect its rarity, as certain areas may have more favorable conditions for petrification. Additionally, the quality of the petrification process can vary, resulting in different levels of preservation and mineralization.

The rarity of petrified wood can also be influenced by its size and shape. Large, intact pieces of petrified wood are more rare and valuable than smaller fragments. The shape of the wood can also affect its rarity, as unique and intricate shapes are more sought after by collectors and enthusiasts.

When determining the value of petrified wood, it is important to consider both its rarity and its uniqueness. A rare piece of petrified wood may not be as valuable if it lacks unique patterns or colors, while a highly unique piece may still be valuable even if it is not particularly rare. Ultimately, the value of petrified wood is determined by a combination of these factors, as well as market demand and other external factors.

Location of Discovery

The location where the petrified wood was discovered can greatly affect its value. Some locations are known to produce higher quality and more valuable specimens than others. Here are some locations known for producing high-quality petrified wood:

  • Arizona: The Petrified Forest National Park in Arizona is a well-known location for petrified wood. The wood found here is known for its vibrant colors and high-quality preservation.
  • Wyoming: The Yellowstone National Park in Wyoming is another location known for producing high-quality petrified wood. The wood found here is known for its unique patterns and colors.
  • Oregon: The John Day Fossil Beds National Monument in Oregon is another location known for producing high-quality petrified wood. The wood found here is known for its unique patterns and colors.
  • Madagascar: Madagascar is known for producing some of the most colorful and unique petrified wood specimens in the world. The wood found here is often used for decorative purposes and can be quite valuable.

It’s important to note that the location where the petrified wood was discovered is not the only factor that determines its value. Other factors such as size, color, and quality of preservation also play a role in determining the value of a specimen. However, knowing the location where the wood was discovered can give you a better idea of its potential value.

Market Trends

market-trends

The value of petrified wood depends on its size, quality, color, and finish. The market trends for petrified wood have been fluctuating in recent years due to various factors such as supply and demand, rarity, and popularity. Here are some market trends that you should be aware of when determining the value of your petrified wood:

  • Increasing demand: There has been a growing interest in petrified wood among collectors and enthusiasts, which has led to an increase in demand. This could potentially drive up the value of petrified wood in the future.
  • Rarity: The rarity of petrified wood can greatly affect its value. For instance, petrified wood from certain regions or with unique patterns may be more valuable due to their scarcity.
  • Popularity: The popularity of petrified wood among buyers can also affect its value. For example, petrified wood that is commonly used for jewelry making may have a higher demand and value.
  • Fluctuating prices: The price of petrified wood can be influenced by market fluctuations and economic conditions. Therefore, it is important to keep an eye on the market trends and adjust your pricing accordingly.

Overall, the market trends for petrified wood are constantly changing, and it is essential to stay informed in order to accurately determine the value of your petrified wood.

Professional Valuation

If you want to determine the exact value of your petrified wood, you may need to consult with a professional appraiser. A professional appraiser will assess the condition, rarity, and quality of your petrified wood and provide you with an accurate valuation. Here are some factors that a professional appraiser may consider when valuing your petrified wood:

  • Rarity: The rarity of the petrified wood can significantly affect its value. Petrified wood that is rare and difficult to find is generally more valuable than common varieties.
  • Quality: The quality of the petrified wood is another crucial factor that affects its value. High-quality petrified wood that is free of cracks, fractures, or other damage is more valuable than lower quality specimens.
  • Size and Weight: The size and weight of the petrified wood also play a significant role in determining its value. Larger and heavier specimens are generally more valuable than smaller ones.
  • Color and Pattern: The color and pattern of the petrified wood can also affect its value. Petrified wood with vibrant colors and unique patterns is generally more valuable than specimens with dull or common colors and patterns.
  • Unusual Features: Petrified wood with unusual features such as branch extensions, worm tracks, knot holes, double hearts, mineral inclusions, or strong cell structure can also increase its value.

It’s essential to note that the value of petrified wood can vary significantly depending on these factors and the current market demand. Therefore, it’s always a good idea to consult with a professional appraiser to get an accurate valuation of your petrified wood.

Selling Your Crystallized Petrified Wood

selling-your-crystallized-petrified-wood

If you have a piece of crystallized petrified wood that you want to sell, there are a few things you should keep in mind to ensure you get a fair price for your specimen.

Firstly, it’s important to know that the value of petrified wood can vary greatly depending on a number of factors, including its size, color, and overall quality. As such, it’s a good idea to do some research to get an idea of what similar pieces have sold for in the past.

One way to do this is to search online auction sites and forums to see what prices other sellers have been able to get for their petrified wood. You can also check with local rock and mineral clubs or dealers to see if they have any insights on the current market value of your specimen.

When it comes to actually selling your petrified wood, there are a few different avenues you can explore. Some options include:

  • Online auction sites like eBay or Etsy
  • Local rock and mineral shows or markets
  • Online marketplaces for rocks, minerals, and fossils

No matter which route you choose, it’s important to accurately describe your petrified wood specimen, including its size, weight, color, and any other notable features. You should also include clear, high-quality photos that show the specimen from multiple angles.

Additionally, be sure to set a fair price for your petrified wood based on its condition and market value. If you’re unsure of what to ask for, consider consulting with a professional appraiser or experienced collector to get an unbiased opinion.

Overall, selling your crystallized petrified wood can be a great way to share your love of rocks and minerals with others while also making some money in the process. Just be sure to do your research and approach the process with a clear understanding of your specimen’s value and market demand.

Frequently Asked Questions

What factors determine the value of petrified wood?

The value of petrified wood is determined by several factors, including the size, color, rarity, and condition of the piece. Large pieces with vibrant colors and unique patterns are generally more valuable than smaller, less colorful pieces. Additionally, pieces that are in excellent condition and have not been heavily weathered or damaged are more valuable.

What are some rare types of petrified wood and how much are they worth?

Some rare types of petrified wood include rainbow wood, blue forest wood, and opalized wood. These types of wood are highly sought after by collectors and can be quite valuable. The value of these rare types of petrified wood can vary greatly depending on factors such as size, color, and condition.

Is petrified wood crystalized and does that affect its value?

Yes, petrified wood is crystalized, which means that minerals have replaced the organic material in the wood over time. This process can create beautiful patterns and colors in the wood, which can increase its value. However, not all petrified wood is equally valuable, as factors such as size, color, and condition also play a role in determining its value.

How can you identify high quality petrified wood?

High quality petrified wood should have vibrant colors and unique patterns. It should also be in excellent condition and free from heavy weathering or damage. You can also look for pieces that have been cut and polished to reveal their full beauty.

Where can you find buyers for petrified wood in Texas?

There are several options for finding buyers for petrified wood in Texas. You can try selling your petrified wood online through websites such as eBay or Etsy. You can also try selling to local rock and mineral clubs or at gem and mineral shows.

What is the average price per kilogram for petrified wood?

The average price per kilogram for petrified wood can vary greatly depending on factors such as size, color, and condition. On average, you can expect to sell petrified wood for between $0.25 and $10.00 per pound. However, rare and high-quality pieces can sell for much more.

Blog

Why Tiger Oak Wood is Also Known as Quarter Sawed Oak

If you’re a woodworker or a furniture enthusiast, you might have heard of tiger oak wood. It’s a type of lumber that’s known for its distinctive grain pattern, which resembles the stripes of a tiger. But did you know that tiger oak wood is also called “quarter sawed oak”? In this article, we’ll explore why this lumber is referred to by two different names.

The answer lies in the way that tiger oak wood is produced. It’s made through a specific method of milling called quarter sawing, which involves cutting the log into quarters and then slicing it perpendicular to the growth rings. This results in lumber with a unique grain pattern that’s highly sought after in high-end applications. Because this milling process is so closely associated with the production of tiger oak wood, the two names have become interchangeable over time.

Definition of Tiger Oak Wood

Tiger oak wood is a type of lumber that is highly prized for its unique and striking appearance. It is also known as quarter sawn oak because of the way it is cut during the milling process. The process of quarter sawing involves cutting a log into quarters and then sawing it perpendicular to the growth rings. This results in lumber with a distinctive grain pattern that is highly sought after for use in high-end applications.

The term “tiger” refers to the dark, irregular stripes that run through the wood, which resemble the markings of a tiger. This pattern is created by the way the wood is cut during the quarter sawing process. The process is not limited to oak, and many other kinds of wood are quarter-sawn.

Tiger oak wood is commonly used in the production of furniture, cabinetry, and flooring. It is known for its durability and resistance to wear and tear. The distinctive grain pattern of tiger oak wood also makes it a popular choice for decorative applications.

Overall, tiger oak wood is a highly desirable type of lumber that is prized for its unique appearance and durability. If you are looking for a high-quality wood that will last for years to come, tiger oak wood is definitely worth considering.

Understanding Quarter Sawn Process

understanding-quarter-sawn-process

If you are curious about the term “quarter sawn oak” and wondering why it is called so, you need to understand the quarter sawn process. Quarter sawing is a technique used to cut a log into lumber. It is a process that results in lumber with a distinctive grain pattern that is often used in high-end applications where the appearance of the wood is an important consideration.

To understand the quarter sawn process, imagine a log cut into four quarters. Each quarter is then cut into pieces at a 45° angle to the growth rings. The resulting lumber has a straight grain pattern that is perpendicular to the face of the board. This creates a unique appearance that is highly sought after for its beauty and durability.

The quarter sawn process is not limited to oak. Many other types of wood can be quarter sawn, including maple, cherry, and walnut. However, oak is the most commonly used wood for this process.

One of the benefits of quarter sawn lumber is its stability. The straight grain pattern makes it less likely to warp or twist, which is important for applications where stability is crucial, such as flooring or furniture. Additionally, quarter sawn lumber tends to have a tighter grain pattern, which makes it more resistant to moisture and decay.

Overall, the quarter sawn process is a time-consuming and labor-intensive technique that produces lumber with a unique appearance and exceptional durability. It is a popular choice for high-end applications where the appearance and performance of the wood are of utmost importance.

Reason for the Alias

Tiger oak wood is also known as “quarter sawed oak” because of the specific milling process used to produce it. When logs are cut into lumber, there are two main ways to do it: plain sawing and quarter sawing.

Plain sawing is the most common method, in which the log is cut into planks by slicing it parallel to the growth rings. This method is quick and efficient, but it results in boards with a less uniform grain pattern and a tendency to warp and twist as they dry.

On the other hand, quarter sawing is a more time-consuming and expensive method that involves cutting the log into quarters and then slicing each quarter perpendicular to the growth rings. This produces boards with a more uniform grain pattern and greater stability, making them less likely to warp or twist.

The distinctive grain pattern produced by quarter sawing is what gives tiger oak wood its characteristic look, with a series of parallel lines or “rays” that resemble the stripes of a tiger. These rays are actually the medullary rays that run perpendicular to the growth rings of the tree, and they are more prominent in oak than in other woods.

In addition to its unique appearance, tiger oak wood is also prized for its strength, durability, and resistance to decay. It is commonly used in high-end applications such as furniture, cabinetry, and flooring, where its distinctive grain pattern adds visual interest and value.

Distinct Characteristics of Tiger Oak

distinct-characteristics-of-tiger-oak

Tiger oak, also known as quarter sawn oak, is a type of wood that has a unique and distinctive appearance. Here are some of the characteristics that set tiger oak apart from other types of wood:

  • Grain Pattern: Tiger oak has a pronounced grain pattern that is often described as “tiger stripes.” This pattern is created by the way the wood is cut during the milling process, which involves cutting the log into quarters and then slicing it into boards. This method of milling creates a more consistent grain pattern and results in a more durable and stable wood.
  • Flecking: In addition to the distinctive grain pattern, tiger oak also has a characteristic flecking that is caused by the medullary rays in the wood. These rays are more visible in quarter sawn wood and create a unique and eye-catching pattern that is highly sought after.
  • Durability: Tiger oak is a very durable wood that is resistant to wear and tear. It is often used in high-end applications such as flooring, cabinetry, and furniture because of its strength and durability.
  • Color: Tiger oak has a warm, golden color that is highly prized by woodworkers and designers. The color can vary depending on the age and species of the tree, but it is generally a rich, warm brown with golden undertones.

Overall, tiger oak is a beautiful and distinctive wood that has a unique appearance and exceptional durability. If you are looking for a high-quality wood for your next project, tiger oak is definitely worth considering.

Historical Context

Tiger oak, also known as quarter sawn oak, has been a popular choice for furniture and flooring for many years. The term “quarter sawn” refers to the way the oak log is cut into lumber. Rather than being cut straight through the center of the log, quarter sawing involves cutting the log into quarters and then cutting each quarter into boards. This method produces boards with a distinctive grain pattern that is highly prized in certain applications.

The technique of quarter sawing oak dates back to the Middle Ages, when it was used to produce planks for shipbuilding. Quarter sawn oak was prized for its strength and durability, which made it an ideal choice for the hulls of ships. As the demand for oak lumber grew, the technique of quarter sawing was adapted for use in furniture and flooring.

During the Arts and Crafts movement of the late 19th and early 20th centuries, quarter sawn oak became particularly popular. This was due in part to the movement’s emphasis on traditional craftsmanship and natural materials. Furniture makers and architects favored quarter sawn oak for its distinctive grain pattern and its ability to take on a rich, warm finish.

Today, quarter sawn oak is still a popular choice for high-end furniture and flooring. Its distinctive grain pattern and durability make it a favorite of designers and homeowners alike. Whether you are looking for a classic, traditional look or a more modern, contemporary style, quarter sawn oak is a versatile and beautiful choice.

Uses of Tiger Oak Wood

uses-of-tiger-oak-wood

Tiger oak, also known as quarter sawn oak, is a popular type of wood used in various applications. Its unique grain pattern and durability make it a preferred choice for high-end furniture, cabinetry, and flooring.

Here are some common uses of tiger oak wood:

Furniture

Tiger oak is a popular choice for furniture makers due to its durability and distinctive grain pattern. It is commonly used to make dining tables, chairs, desks, and cabinets. The wood’s flecked pattern adds a unique touch of elegance to any piece of furniture.

Cabinetry

Tiger oak is also used in cabinetry for its durability and attractive appearance. It is commonly used for kitchen cabinets, bathroom vanities, and built-in bookshelves. The wood’s unique grain pattern adds character and texture to any space.

Flooring

Tiger oak wood is a popular choice for flooring due to its durability and resistance to wear and tear. It is often used in historic homes and buildings, as well as in new construction projects. The wood’s distinctive grain pattern adds visual interest and texture to any room.

Decorative Accents

Tiger oak wood is also used for decorative accents such as trim, molding, and paneling. Its unique grain pattern adds visual interest and texture to walls and ceilings, creating a warm and inviting atmosphere.

In conclusion, tiger oak wood is a versatile and durable material that can be used in a variety of applications. Its distinctive grain pattern and durability make it a popular choice for high-end furniture, cabinetry, flooring, and decorative accents.

Benefits of Tiger Oak Wood

Tiger oak wood, also known as quarter sawed oak, is a highly sought-after type of wood for furniture and flooring due to its unique grain pattern and durability. Here are some benefits of using tiger oak wood:

  • Stability: The grain of quarter-sawn tiger oak wood is straighter than that of flat-sawn lumber, making it significantly more stable. This means that it is less likely to warp or twist over time, making it an ideal choice for high-end furniture and flooring.
  • Durability: Tiger oak wood is known for its durability and resistance to wear and tear. It is a hardwood that can withstand heavy use and last for many years without showing signs of damage.
  • Distinctive Grain Pattern: The distinctive grain pattern of tiger oak wood is what makes it so desirable. The wood features a unique pattern of “tiger stripes” that gives it a one-of-a-kind look that cannot be replicated with other types of wood.
  • Versatility: Tiger oak wood can be used in a variety of applications, from flooring to cabinetry to furniture. It is a versatile wood that can be stained or painted to match any decor style.
  • Increased Property Value: Adding tiger oak wood flooring or furniture to your home can increase its value and appeal to potential buyers. The unique and high-quality nature of tiger oak wood can make your home stand out in a crowded real estate market.

Overall, tiger oak wood is a valuable and versatile material that offers many benefits for those who choose to use it in their projects. Its stability, durability, unique grain pattern, and versatility make it a top choice for high-end furniture and flooring.

Drawbacks of Tiger Oak Wood

drawbacks-of-tiger-oak-wood

While tiger oak wood is a popular choice for high-end applications, it does come with some drawbacks that you should be aware of before using it.

Firstly, tiger oak wood is more expensive than other types of oak wood due to the specific method of milling called quarter sawing that is used to produce it. This can make it a less practical option for those on a tight budget.

Additionally, the unique grain pattern of tiger oak wood can make it difficult to match with other pieces of furniture or woodwork. This can be a problem if you are trying to create a cohesive look in a room or throughout a building.

Another potential issue with tiger oak wood is that it can be more prone to splitting and warping than other types of oak wood. This is because the quarter sawing process can create tension in the wood that can cause it to warp over time.

Finally, tiger oak wood can be more difficult to work with than other types of oak wood due to its hardness and density. This can make it challenging to cut, shape, and finish, especially for those without experience working with hardwoods.

Overall, while tiger oak wood can be a beautiful and distinctive choice for high-end applications, it is important to consider its drawbacks before deciding whether or not to use it in your project.

Comparison with Other Woods

When it comes to wood furniture, oak is a popular choice due to its strength, durability, and prominent wood grain. However, there are different types of oak, and quarter sawn oak, also known as tiger oak, stands out from the rest.

Compared to plain sawn oak, which is the most common type of oak used in furniture, quarter sawn oak has a more uniform grain pattern and is less likely to warp or twist over time. It also has a distinctive “tiger stripe” pattern that gives it a unique and elegant appearance.

Other types of wood commonly used in furniture include:

  • Mahogany: Known for its reddish-brown color and durability, mahogany is often used in high-end furniture.
  • Cherry: With its warm, reddish-brown color and fine grain, cherry is a popular choice for traditional and formal furniture.
  • Maple: With its light color and smooth grain, maple is often used in contemporary and modern furniture.

While each type of wood has its own unique characteristics and advantages, quarter sawn oak remains a popular choice for those looking for a combination of strength, durability, and distinctive appearance in their furniture.

Frequently Asked Questions

Why is quarter sawn oak also known as tiger oak?

Quarter sawn oak is also known as tiger oak because of the distinctive grain pattern that results from the milling process. The process involves cutting the log into quarters and then sawing each quarter at a 90-degree angle to the growth rings. This results in a unique pattern of rays and flecks that resemble the stripes of a tiger.

What are the characteristics of tiger oak wood?

Tiger oak wood is known for its distinctive grain pattern, which is characterized by tight, straight grain lines and prominent rays and flecks. The wood is also known for its durability and strength, making it a popular choice for furniture and flooring.

What is the difference between tiger oak and tiger maple?

Tiger oak and tiger maple are two different types of wood with distinct characteristics. Tiger oak is a type of oak wood that has been quarter sawn, resulting in the distinctive grain pattern. Tiger maple, on the other hand, is a type of maple wood that has a similar grain pattern, but is characterized by a more pronounced curl or wave in the grain.

What is the cost of tiger oak compared to other types of oak?

Tiger oak is generally more expensive than other types of oak due to the time and effort required to produce the distinctive grain pattern. However, the cost can vary depending on the quality of the wood and the specific application.

What are the benefits of quarter sawn oak over plain sawn oak?

Quarter sawn oak is known for its superior stability and resistance to warping and splitting compared to plain sawn oak. It also has a more consistent grain pattern and a distinctive appearance.

How is tiger oak wood used in furniture making?

Tiger oak wood is a popular choice for furniture making due to its durability, strength, and distinctive appearance. It is commonly used for tables, chairs, cabinets, and flooring, among other applications. The unique grain pattern of tiger oak can add a touch of elegance and sophistication to any piece of furniture.

Blog

What are the Different Colors of Oak Wood? A Quick Guide

Oak wood is a popular choice for furniture, flooring, and other home decor. It is known for its durability, strength, and beauty. However, oak wood comes in a variety of colors, which can make it difficult to choose the right one for your home. In this article, we will explore the different colors of oak wood and their characteristics.

The color of oak wood depends on the species, age, and location of the tree. Red oak and white oak are the most common species used for furniture and flooring. Red oak has a pinkish-red hue, while white oak has a more yellow-brown color. However, there are many other species of oak, each with their own unique color and characteristics.

Understanding the different colors of oak wood can help you choose the right one for your home. Whether you prefer a light, natural look or a darker, more rustic feel, there is an oak wood color that will suit your needs. In the following sections, we will explore the different colors of oak wood and their uses.

Understanding Oak Wood

Oak wood is one of the most popular types of wood used in furniture, flooring, and cabinetry. It is a hardwood that is known for its durability, strength, and beauty. Oak wood comes in a variety of colors, depending on the species and the part of the tree from which it is harvested.

Colors of Oak Wood

The two most common types of oak wood are red oak and white oak. Red oak has a reddish-brown color, while white oak has a lighter, yellowish-brown color. However, both red and white oak can vary in color depending on the growing conditions and the part of the tree from which it is harvested.

In addition to red and white oak, there are other species of oak wood that have unique colors. For example, black oak has a dark brown color with black streaks, while chestnut oak has a yellowish-brown color with a distinct grain pattern.

Characteristics of Oak Wood

Oak wood has a number of characteristics that make it a popular choice for furniture and other woodworking projects. Here are a few key characteristics of oak wood:

  • Durability: Oak wood is a very hard and durable wood that can withstand wear and tear over time.
  • Grain pattern: Oak wood has a distinctive grain pattern that gives it a unique look and feel.
  • Stainability: Oak wood takes stain very well, which makes it easy to customize the color and finish of your furniture or other projects.
  • Resistance to rot: White oak is particularly resistant to rot, which makes it a popular choice for outdoor furniture and other projects.

Overall, oak wood is a versatile and beautiful material that can be used in a wide range of woodworking projects. Whether you are building furniture, flooring, or cabinetry, oak wood is a great choice that will provide durability, strength, and beauty for years to come.

Natural Colors of Oak Wood

natural-colors-of-oak-wood

Oak wood is a popular choice for hardwood flooring, furniture, and construction. It is known for its durability, strength, and beauty. Oak wood comes in a variety of natural colors depending on the species. In this section, we will discuss the natural colors of oak wood and the species that produce them.

White Oak

White oak is a popular species of oak wood that has a light to medium brown color. It has a straight grain pattern with a coarse texture. The heartwood of white oak is light to medium brown, while the sapwood is light in color. White oak is a durable wood that is resistant to decay and insects. It is commonly used for flooring, furniture, and construction.

Red Oak

Red oak is another popular species of oak wood that has a reddish-brown color. It has a coarse texture with a prominent grain pattern. The heartwood of red oak is a light to medium brown color, while the sapwood is slightly lighter in color. Red oak is a strong and durable wood that is commonly used for flooring, furniture, and construction.

Black Oak

Black oak is a less common species of oak wood that has a dark brown to black color. It has a coarse texture with a prominent grain pattern. The heartwood of black oak is dark brown to black, while the sapwood is lighter in color. Black oak is a durable wood that is commonly used for flooring, furniture, and construction.

In conclusion, oak wood comes in a variety of natural colors depending on the species. White oak has a light to medium brown color, red oak has a reddish-brown color, and black oak has a dark brown to black color. Each species has its own unique characteristics and is commonly used for flooring, furniture, and construction.

Color Variations Due to Age and Exposure

color-variations-due-to-age-and-exposure

Oak wood is known for its beautiful, natural color variations. However, the color of oak wood can change over time due to exposure to light and air. Here are some of the common color variations you can expect to see in oak wood as it ages:

Lightening of Color

As oak wood ages, it tends to lighten in color. This is especially true for red oak, which can turn from a reddish-brown color to a more golden hue. White oak, on the other hand, tends to change less dramatically, with its golden tones only growing slightly richer over time.

Darkening of Color

While white oak may not darken as dramatically as red oak, it can still develop a darker color over time. This is due to the natural aging process, as well as exposure to light and air. If you have white oak floors or furniture, you may notice that they darken slightly over time, especially in areas that are exposed to sunlight.

Color Variation

One of the unique features of oak wood is its natural color variation. This can be especially pronounced in red oak, which can have a range of colors from pale pink to deep reddish-brown. White oak also has natural color variation, with some boards having a more golden hue while others are more grayish-brown.

Overall, the color variations in oak wood due to age and exposure can add to its natural beauty and character. However, if you want to maintain a specific color, it’s important to take steps to protect your oak wood from excessive exposure to light and air.

Stained Oak Wood Colors

stained-oak-wood-colors

When it comes to oak wood, staining is a popular way to enhance its natural beauty and add a touch of color. Oak wood is known for its durability, strength, and unique grain patterns, making it a popular choice for furniture, flooring, and other decorative items. In this section, we will explore the different stained oak wood colors and their characteristics.

Light Stain

If you prefer a subtle, natural look, then a light stain may be the perfect choice for your oak wood. Light stains are ideal for highlighting the wood’s natural grain and texture, while adding a touch of warmth and depth. Some popular light stain colors for oak wood include:

These light stains are perfect for creating a cozy, inviting atmosphere in your home. They work well with a variety of interior design styles, from rustic to contemporary.

Medium Stain

For a slightly bolder look, a medium stain may be the way to go. Medium stains add more color to the wood, while still allowing the natural grain to show through. Some popular medium stain colors for oak wood include:

  • Provincial
  • Early American
  • Red Oak

These medium stains are perfect for creating a classic, timeless look in your home. They work well with traditional and transitional interior design styles.

Dark Stain

If you want to make a statement with your oak wood, then a dark stain may be the way to go. Dark stains add rich, deep color to the wood, while still allowing the natural grain to show through. Some popular dark stain colors for oak wood include:

  • Espresso
  • Jacobean
  • Dark Walnut

These dark stains are perfect for creating a bold, dramatic look in your home. They work well with modern and contemporary interior design styles.

In conclusion, stained oak wood comes in a variety of colors and shades, each with its own unique characteristics. Whether you prefer a light, medium, or dark stain, there is sure to be a stained oak wood color that will suit your style and taste.

Impact of Grain Patterns on Color

impact-of-grain-patterns-on-color

The grain pattern of oak wood can have a significant impact on its color. Here are a few ways the grain pattern can affect the color of oak wood:

  • Straight Grain: Oak wood with a straight grain pattern tends to have a more uniform color. This is because the grain pattern is consistent, and the wood fibers are evenly distributed. Straight grain oak wood is ideal for projects where you want a consistent color throughout, such as flooring or furniture.
  • Curly Grain: Oak wood with a curly grain pattern has a unique, wavy appearance. This pattern can create a range of colors and shades, depending on the angle of the light. Curly grain oak wood is ideal for projects where you want a more dynamic, eye-catching appearance, such as decorative pieces or accent walls.
  • Flecked Grain: Oak wood with a flecked grain pattern has small, dark spots scattered throughout the wood. This pattern can create a rustic, natural appearance. Flecked grain oak wood is ideal for projects where you want a more natural, organic look, such as cabinetry or outdoor furniture.
  • Wavy Grain: Oak wood with a wavy grain pattern has a more pronounced, undulating appearance. This pattern can create a range of colors and shades, depending on the angle of the light. Wavy grain oak wood is ideal for projects where you want a more dramatic, artistic appearance, such as sculpture or wall art.

In summary, the grain pattern of oak wood can have a significant impact on its color. Straight grain oak wood tends to have a more uniform color, while curly, flecked, and wavy grain oak wood can create a range of colors and shades, depending on the angle of the light. When choosing oak wood for your project, consider the impact of the grain pattern on the final color and choose the pattern that best suits your needs.

Choosing the Right Oak Wood Color

choosing-the-right-oak-wood-color

When it comes to designing your home or office space, choosing the right color of oak wood can make all the difference. Oak wood comes in a variety of colors, each with its unique characteristics and features. Whether you are looking for a light, medium, or dark hue, there is an oak wood color that will suit your needs.

Here are some things to consider when choosing the right oak wood color for your project:

  • Undertones: Each type of oak wood has a distinct background hue that can affect the appearance of the stain color. Some oak woods have warm undertones, such as hints of yellow, orange, or red, while others have cool undertones, such as blue, green, black, or gray. Consider the undertones of the oak wood when selecting a stain color.
  • Grain pattern: Oak wood has a distinctive grain pattern that can vary from straight to wavy. The grain pattern can affect the appearance of the stain color, so consider the grain pattern when selecting a stain color.
  • Durability: Some types of oak wood are more durable than others. For example, white oak is more durable than red oak and is better suited for high-traffic areas.
  • Aesthetics: Consider the overall aesthetics of your space when selecting an oak wood color. Lighter colors can make a space appear larger and brighter, while darker colors can create a more formal and sophisticated look.
  • Cost: The cost of oak wood can vary depending on the type of oak and the color. Some colors may be more expensive than others, so consider your budget when selecting an oak wood color.

By considering these factors, you can choose the right oak wood color for your project that will complement your space and meet your needs.

Frequently Asked Questions

What are the common colors of oak wood?

Oak wood can come in a variety of colors, ranging from light beige to dark brown. The natural color of oak wood can vary depending on the species of oak, the location it was grown in, and the age of the tree.

How do different types of oak wood vary in color?

Red oak tends to have a pinkish hue, while white oak is more of a golden color. There are also other species of oak that have unique colors, such as black oak, which has a darker, almost black color.

What factors affect the color of oak wood?

The color of oak wood can be affected by a variety of factors, such as the age of the tree, the location it was grown in, and the amount of sunlight it received. The type of soil and climate can also play a role in the color of the wood.

Can oak wood be stained to a different color?

Yes, oak wood can be stained to a different color. Stains can be used to enhance the natural color of the wood or to completely change its color. However, it is important to note that the color of the stain may vary depending on the type of oak wood being used.

What is the natural color of red oak wood?

The natural color of red oak wood can range from light pink to reddish-brown. The heartwood of red oak tends to be a darker color than the sapwood.

What are some popular wood color charts for oak furniture?

There are many popular wood color charts available for oak furniture, such as the Minwax Wood Finish color chart and the Varathane Ultimate Wood Stain color chart. These charts can help you choose the perfect color for your oak furniture based on your personal style and preferences.

Blog

Protecting Your Outdoor Wood Furniture: Is Tung Oil Finish Enough?

If you have outdoor wood furniture, you likely want to protect it from the elements. Water and sun damage can cause your furniture to deteriorate quickly, leaving it looking worn and unattractive. While there are many finishes you can use to protect your furniture, tung oil is often touted as one of the best. But is it really the best option for protecting outdoor wood furniture?

Tung oil is a natural drying oil that is derived from the tung tree nut. It is often used as a finish for wood furniture because it is waterproof and can protect against water damage. Additionally, tung oil can enhance the natural color of the wood, giving it a beautiful, rich finish. But while tung oil is a popular choice for indoor furniture, is it really the best option for outdoor use? In this article, we will explore whether a tung oil finish can protect outdoor wood furniture from water and sun damage, or if there is something better.

Understanding Tung Oil Finish

If you’re looking for a natural finish for your outdoor wood furniture, tung oil is a great option. It is a natural drying oil that is extracted from the seeds of the tung tree. Here’s what you need to know about tung oil finish.

Origins of Tung Oil

Tung oil has been used for centuries in China and other parts of Asia for wood finishing. It was introduced to the Western world in the early 1900s and has gained popularity as a natural finish for wood. Tung oil is a renewable resource that is eco-friendly and non-toxic.

Properties of Tung Oil

Tung oil is a slow-drying oil that penetrates deep into the wood, providing a durable and protective finish. It is resistant to water, mildew, and insects, making it an excellent choice for outdoor furniture. Tung oil also enhances the natural beauty of the wood by bringing out its grain and color.

One thing to keep in mind is that tung oil takes longer to dry than other finishes, so you’ll need to be patient when applying it. It can take up to 30 days to fully cure, so avoid exposing your furniture to moisture during this time.

Overall, tung oil is a great natural finish for outdoor wood furniture. It provides protection against water and sun damage and enhances the natural beauty of the wood.

Tung Oil and Outdoor Wood Furniture

tung-oil-and-outdoor-wood-furniture

If you’re looking for a natural and effective way to protect your outdoor wood furniture from water and sun damage, tung oil may be a great option. Here’s what you need to know about using tung oil on your outdoor furniture.

Application Process

Before applying tung oil to your outdoor furniture, it’s important to prepare the surface. Make sure it’s clean, dry, and free of any previous finishes. You can use sandpaper to smooth out any rough spots and create a surface that will better absorb the oil.

To apply tung oil, you can use a brush, cloth, or sprayer. Apply a thin layer of oil to the surface, making sure to cover the entire piece of furniture. Let it dry for at least 24 hours before applying another coat. Most outdoor furniture will require at least three coats of tung oil to provide adequate protection.

Durability Against Water

One of the biggest advantages of tung oil is its ability to resist water damage. Unlike other finishes, tung oil penetrates deep into the wood, creating a protective barrier that can withstand exposure to rain, snow, and other forms of moisture. This can help prevent warping, cracking, and other types of damage that can occur when outdoor furniture is exposed to water.

Resistance to Sun Damage

In addition to protecting against water damage, tung oil can also help prevent sun damage. The oil creates a natural barrier that blocks harmful UV rays, which can cause fading, discoloration, and other types of damage to outdoor furniture. While tung oil won’t completely prevent sun damage, it can help extend the life of your furniture and keep it looking great for years to come.

Overall, tung oil can be a great choice for protecting your outdoor wood furniture from water and sun damage. Just be sure to follow the application process carefully and apply multiple coats for the best results.

Comparing Tung Oil with Other Finishes

comparing-tung-oil-with-other-finishes

When it comes to protecting outdoor wood furniture from water and sun damage, there are a few different finishes to choose from. Here, we’ll compare tung oil with three other popular finishes: teak oil, spar varnish, and linseed oil.

Tung Oil vs. Teak Oil

Teak oil is a popular choice for outdoor furniture because it contains a high amount of natural oils, which helps to make it water-resistant. However, teak oil is not actually extracted from the teak tree. Instead, it is typically a blend of linseed oil, tung oil, and other ingredients.

Compared to tung oil, teak oil tends to be easier to apply and dries more quickly. However, it may not provide quite as much protection against water and sun damage as tung oil. Additionally, teak oil may need to be reapplied more frequently than tung oil to maintain its protective properties.

Tung Oil vs. Spar Varnish

Spar varnish is a popular finish for boats and other outdoor wood surfaces because it is designed to be extremely durable and resistant to water and sun damage. However, it can be quite difficult to apply and requires a lot of preparation to get the best results.

Compared to spar varnish, tung oil is much easier to apply and can provide similar levels of protection against water and sun damage. Additionally, tung oil is a more eco-friendly option than spar varnish, which often contains harsh chemicals.

Tung Oil vs. Linseed Oil

Linseed oil is another natural oil that is sometimes used to protect outdoor wood furniture. Like tung oil, it is a slow-drying oil that can take several days to cure. However, linseed oil is not as water-resistant as tung oil and may not provide as much protection against sun damage.

Compared to linseed oil, tung oil is generally considered to be a superior choice for protecting outdoor wood furniture. Tung oil is more water-resistant and provides better protection against sun damage. Additionally, tung oil is less likely to go rancid than linseed oil, which can become sticky and unpleasant over time.

Overall, tung oil is a great choice for protecting outdoor wood furniture from water and sun damage. While there are other finishes to choose from, tung oil is a natural, eco-friendly option that provides excellent protection and a beautiful, transparent finish.

Choosing the Right Finish for Your Outdoor Furniture

choosing-the-right-finish-for-your-outdoor-furniture

When it comes to protecting your outdoor furniture from water and sun damage, choosing the right finish is essential. There are several options available, but not all of them are suitable for outdoor use. In this section, we will discuss some of the most popular finishes for outdoor furniture and their benefits.

Tung Oil

Tung oil is a natural and environmentally friendly option for outdoor furniture. It provides excellent protection against water damage, UV rays, and other outdoor hazards. Additionally, tung oil gives outdoor furniture a beautiful, natural matte finish that can really enhance its overall appearance. However, it is important to note that tung oil takes a few days to dry and up to 30 days to cure completely.

Teak Oil

Teak oil is another popular option for protecting outdoor furniture. It is said to be the best oil for outdoor furniture as it waterproofs wood and protects against sun damage. Teak oil is easy to apply and dries quickly. However, it may need to be reapplied more frequently than other finishes.

Varnish

Varnish is a synthetic finish that provides excellent protection against water and sun damage. It is available in gloss, satin, and matte finishes, and can be applied with a brush or spray gun. However, varnish can be difficult to apply evenly and may require several coats.

Paint

Paint is a popular finish for outdoor furniture as it provides excellent protection against water and sun damage. It is available in a wide range of colors and can be applied with a brush or spray gun. However, paint can be difficult to apply evenly and may require several coats.

Stain

Stain is a popular finish for outdoor furniture as it enhances the natural beauty of the wood while providing protection against water and sun damage. It is available in a wide range of colors and can be applied with a brush or spray gun. However, stain may need to be reapplied more frequently than other finishes.

In conclusion, there are several options available for protecting your outdoor furniture from water and sun damage. Each finish has its own benefits and drawbacks, so it is important to choose the right one for your specific needs. Consider the level of protection you need, the look you want to achieve, and the maintenance required before making a decision.

Frequently Asked Questions

Will tung oil protect outdoor wood furniture from water and sun damage?

Yes, tung oil is a great option for protecting outdoor wood furniture from water and sun damage. It creates a hard, durable finish that can withstand the elements and is water-resistant. Tung oil also provides natural UV protection, making it a popular choice for outdoor furniture.

What are some alternatives to tung oil for protecting outdoor wood furniture?

Other popular options for protecting outdoor wood furniture include teak oil, Danish oil, and linseed oil. Teak oil is great for waterproofing wood and protecting against sun damage. Danish oil contains resins and either linseed oil or tung oil in the mix, which can protect against the elements really well. Linseed oil is another natural oil that can be used to protect outdoor wood furniture.

How long does tung oil last on outdoor wood furniture?

Tung oil can last up to several years on outdoor wood furniture, depending on the conditions it is exposed to. However, it is recommended to apply a fresh coat of tung oil every year or so to maintain its protective qualities.

Can tung oil be applied over other finishes on outdoor wood furniture?

It is generally not recommended to apply tung oil over other finishes on outdoor wood furniture. Tung oil works best when applied directly to bare wood. If you want to switch to tung oil from another finish, it is recommended to sand the furniture down to bare wood before applying the tung oil.

Is polymerized tung oil better than regular tung oil for outdoor wood furniture?

Polymerized tung oil is a more durable and water-resistant version of regular tung oil. It can provide better protection against water and sun damage than regular tung oil. However, it can also be more expensive and harder to find.

What are some tips for applying tung oil to outdoor wood furniture?

Before applying tung oil, make sure the surface of the furniture is clean and dry. Sand the furniture down to bare wood if necessary. Apply the tung oil with a clean cloth, working in small sections at a time. Let the oil soak in for a few minutes before wiping off any excess with a clean cloth. Repeat the process until the entire surface is covered. Allow the furniture to dry completely before using it.

Blog

What Kitchen Wood Cutting Boards Are Dishwasher Safe? A Quick Guide

Are you tired of constantly hand-washing your wooden cutting boards? Do you find yourself wondering which ones are safe to put in the dishwasher? Look no further, as we have done the research for you. In this article, we will explore which kitchen wood cutting boards are dishwasher safe and provide you with some top picks for your next purchase.

When it comes to wooden cutting boards, not all are created equal. Some are specifically designed to be dishwasher safe, while others may not hold up as well. It is important to read the manufacturer’s instructions before placing your cutting board in the dishwasher. Additionally, certain types of wood may be more prone to warping or cracking when exposed to water, so it is important to choose a high-quality board made from a durable wood.

Our research has led us to some great options for those looking for a dishwasher safe wooden cutting board. From composite materials to treated hardwoods, there are a variety of options to choose from. Keep reading to discover our top picks for the best dishwasher safe wooden cutting boards on the market.

Understanding Dishwasher Safe Wood Cutting Boards

understanding-dishwasher-safe-wood-cutting-boards

When it comes to cleaning your wooden cutting board, you may wonder if it’s safe to put it in the dishwasher. While some wood cutting boards are dishwasher safe, others are not. It’s important to understand the difference so you can properly care for your cutting board and avoid damaging it.

What Makes a Wood Cutting Board Dishwasher Safe?

Dishwasher safe wood cutting boards are typically made from hardwoods such as maple, walnut, or cherry. These woods are dense and have a tight grain, which makes them less prone to warping or cracking when exposed to water and heat.

In addition, dishwasher safe wood cutting boards are often treated with food-safe finishes that help protect the wood from moisture and bacteria. These finishes can include mineral oil, beeswax, or a combination of both.

How to Determine if Your Wood Cutting Board is Dishwasher Safe

To determine if your wood cutting board is dishwasher safe, check the manufacturer’s instructions or look for a label that indicates it’s safe for dishwasher use. If there’s no label or instructions, it’s best to assume that the cutting board is not dishwasher safe.

Another way to test if your wood cutting board is dishwasher safe is to expose a small area of the board to hot water and detergent for a short period of time. If the wood appears to be unaffected, it’s likely safe to put in the dishwasher. However, if the wood becomes discolored, warped, or cracked, it’s best to avoid putting it in the dishwasher.

Tips for Cleaning Dishwasher Safe Wood Cutting Boards

If your wood cutting board is dishwasher safe, there are a few things to keep in mind when cleaning it:

  • Always use the top rack of the dishwasher to avoid exposing the cutting board to direct heat.
  • Avoid using harsh detergents or bleach, as these can damage the wood and strip away the protective finish.
  • After washing, allow the cutting board to air dry completely before storing it away.

By following these tips, you can safely clean your dishwasher safe wood cutting board and ensure it lasts for years to come.

Types of Dishwasher Safe Wood Cutting Boards

types-of-dishwasher-safe-wood-cutting-boards

When it comes to wood cutting boards that are dishwasher safe, there are a few different types to consider. Here are some of the most common options:

Bamboo Cutting Boards

Bamboo cutting boards are a popular choice for those looking for a sustainable and eco-friendly option. Bamboo is a fast-growing plant that is highly renewable, making it a great choice for those who want to reduce their environmental impact. Bamboo cutting boards are also naturally antimicrobial, which means they are less likely to harbor bacteria than other types of cutting boards.

Teak Cutting Boards

Teak cutting boards are known for their durability and resistance to moisture. Teak is a dense hardwood that is naturally resistant to water and other liquids, making it a great choice for cutting boards that will be exposed to moisture on a regular basis. Teak cutting boards also have a beautiful, rich color that can add a touch of elegance to your kitchen.

Maple Cutting Boards

Maple cutting boards are another popular choice for those looking for a durable and long-lasting option. Maple is a hardwood that is known for its strength and resistance to wear and tear. Maple cutting boards are also easy to clean and maintain, making them a great choice for those who want a low-maintenance option.

Cherry Cutting Boards

Cherry cutting boards are a beautiful and elegant option for those who want a cutting board that looks as good as it performs. Cherry is a hardwood that has a rich, reddish-brown color and a beautiful grain pattern. Cherry cutting boards are also naturally resistant to bacteria and other microbes, making them a great choice for those who want a cutting board that is both functional and beautiful.

No matter which type of wood cutting board you choose, it’s important to make sure that it is dishwasher safe before putting it in the dishwasher. Not all wood cutting boards are designed to withstand the heat and moisture of a dishwasher, so be sure to check the manufacturer’s instructions before cleaning your cutting board in the dishwasher.

How to Identify Dishwasher Safe Wood Cutting Boards

When it comes to cleaning kitchen tools, the dishwasher is a convenient option for many people. However, not all wood cutting boards are dishwasher safe. Here are some tips to help you identify which wood cutting boards can be safely washed in the dishwasher.

Look for the Dishwasher Safe Label

Some wood cutting boards come with a dishwasher safe label. This label indicates that the board has been tested and deemed safe to be washed in the dishwasher. If you are looking to purchase a new wood cutting board and want to be able to clean it in the dishwasher, look for this label.

Check the Manufacturer’s Instructions

If your wood cutting board does not have a dishwasher safe label, check the manufacturer’s instructions. The instructions should indicate whether or not the board can be washed in the dishwasher. If the instructions do not mention the dishwasher, it is best to assume that the board is not dishwasher safe.

Consider the Type of Wood

Some types of wood are more resistant to water and heat than others. For example, bamboo is a popular material for cutting boards because it is durable and resistant to water. If you are looking for a wood cutting board that can be washed in the dishwasher, consider choosing one made from bamboo or another type of wood that is known to be dishwasher safe.

Look for Signs of Damage

If you are unsure whether or not your wood cutting board is dishwasher safe, look for signs of damage. If the board has cracks, splits, or other types of damage, it may not be safe to wash in the dishwasher. Additionally, if the board has been treated with oil or other types of finish, it may not be dishwasher safe.

By following these tips, you can identify which wood cutting boards are safe to wash in the dishwasher. Remember, if you are unsure whether or not a board is dishwasher safe, it is always best to err on the side of caution and wash it by hand.

Benefits of Using Dishwasher Safe Wood Cutting Boards

benefits-of-using-dishwasher-safe-wood-cutting-boards

Using a dishwasher safe wood cutting board has several benefits that make it a great addition to your kitchen.

Hygiene

One of the biggest advantages of using a dishwasher safe wood cutting board is that it is more hygienic than other materials. Wood is naturally antibacterial, which means it can kill bacteria that may be present on the surface of the board. Additionally, dishwasher safe wood cutting boards can be easily sanitized in the high-heat cycle of your dishwasher, which is an effective way to kill bacteria and other harmful microorganisms.

Durability

Another benefit of using a dishwasher safe wood cutting board is its durability. Wood is a long-lasting material that can withstand the wear and tear of daily use. It is less likely to develop deep grooves or scratches that can harbor bacteria or other contaminants. Additionally, wood cutting boards are less likely to dull your knives compared to other materials like glass or ceramic.

Convenience

Dishwasher safe wood cutting boards are also convenient to use and maintain. They can be easily cleaned in the dishwasher, which saves you time and effort. Additionally, wood cutting boards are relatively lightweight and easy to move around your kitchen. They also look great and can add a natural, rustic touch to your kitchen decor.

In summary, using a dishwasher safe wood cutting board is a great choice for anyone looking for a hygienic, durable, and convenient cutting surface. With its natural antibacterial properties, long-lasting durability, and easy maintenance, a dishwasher safe wood cutting board is a smart investment for any home cook.

Care and Maintenance for Dishwasher Safe Wood Cutting Boards

If you have a dishwasher safe wood cutting board, you’re in luck! These boards are designed to withstand the high temperature and pressure of a dishwasher, making them easy to clean and maintain. However, it’s still important to take proper care of your board to ensure it lasts as long as possible.

Here are some tips for caring for and maintaining your dishwasher safe wood cutting board:

  1. Clean your board after each use: Whether you wash your board in the dishwasher or by hand, it’s important to clean it thoroughly after each use. Use hot, soapy water and a scrub brush to remove any food particles or stains. Rinse the board well and pat it dry with a clean towel.
  2. Oil your board regularly: To keep your wood cutting board looking and feeling its best, it’s important to oil it regularly. Use food-grade mineral oil or another type of oil specifically designed for cutting boards. Apply the oil to the board with a clean cloth, rubbing it in well. Let the board sit for a few hours or overnight before wiping off any excess oil.
  3. Avoid soaking your board: While dishwasher safe wood cutting boards are designed to be washed in the dishwasher, it’s still important to avoid soaking them for long periods of time. Excessive moisture can cause the wood to warp or crack over time. Instead, wash your board as soon as possible after use and dry it thoroughly.
  4. Remove stains with lemon and salt: If your wood cutting board develops stains over time, you can remove them naturally using lemon and salt. Cut a lemon in half and sprinkle salt on the cut side. Rub the lemon and salt mixture over the stained area, using a bit of pressure. Let the mixture sit for a few minutes before rinsing the board with hot water and drying it thoroughly.

By following these simple care and maintenance tips, you can keep your dishwasher safe wood cutting board looking and performing its best for years to come.

Popular Brands of Dishwasher Safe Wood Cutting Boards

popular-brands-of-dishwasher-safe-wood-cutting-boards

When it comes to finding a dishwasher safe wood cutting board, there are a few popular brands that you might want to consider. Here are some of the top options:

Totally Bamboo

Totally Bamboo is a popular brand that offers a variety of bamboo cutting boards that are dishwasher safe. They are made from eco-friendly, sustainable bamboo and come in a range of sizes and styles.

Ironwood Gourmet

Ironwood Gourmet is another brand that offers dishwasher safe wood cutting boards. Their boards are made from acacia wood and come in a variety of sizes and shapes. They also offer a range of other kitchen accessories made from wood.

Epicurean

Epicurean is a brand that offers cutting boards made from a composite material that is dishwasher safe. Their boards come in a variety of colors and styles, and are designed to be durable and long-lasting.

Teakhaus

Teakhaus is a brand that offers a range of dishwasher safe wood cutting boards made from teak wood. Their boards are designed to be durable and resistant to moisture, making them a great choice for use in the kitchen.

John Boos

John Boos is a brand that offers a range of wood cutting boards that are dishwasher safe. Their boards are made from a variety of woods, including maple and cherry, and come in a range of sizes and styles.

Totally Kitchen

Totally Kitchen is a brand that offers a range of dishwasher safe bamboo cutting boards. Their boards are designed to be lightweight and easy to use, and come in a range of sizes and shapes.

These are just a few of the popular brands that offer dishwasher safe wood cutting boards. When shopping for a cutting board, be sure to look for one that is made from a durable, long-lasting material and is designed to withstand repeated use and cleaning in the dishwasher.

Considerations When Buying Dishwasher Safe Wood Cutting Boards

If you are looking for a wood cutting board that is dishwasher safe, there are a few things to keep in mind before making a purchase. Here are some considerations to help you choose the right cutting board for your needs:

Material

When it comes to wood cutting boards, not all types of wood are created equal. Some woods are more porous and absorbent than others, which can make them more prone to warping, cracking, and harboring bacteria. For dishwasher safe wood cutting boards, look for hardwoods with tight grains, such as maple, birch, and beech. Bamboo is also a safe option, as it is a grass and not a wood.

Finish

The finish on a wood cutting board is important for both aesthetics and durability. A good finish will help protect the wood from moisture, stains, and scratches, and can also make the board easier to clean. Look for cutting boards with a food-safe finish, such as mineral oil or beeswax, that can withstand repeated washings in the dishwasher.

Size and Thickness

The size and thickness of a cutting board can affect its durability and usefulness. A thicker board may be more durable and less prone to warping, but it may also be heavier and harder to maneuver. A larger board can provide more workspace, but it may also be more difficult to clean and store. Consider your cooking needs and kitchen space when choosing the size and thickness of your cutting board.

Maintenance

While dishwasher safe wood cutting boards are convenient, they still require some maintenance to keep them in good condition. Be sure to follow the manufacturer’s instructions for cleaning and care, and avoid using abrasive cleaners or utensils that can scratch the surface of the board. Regular oiling can help keep the wood moisturized and prevent cracking and warping over time.

By considering these factors when buying a dishwasher safe wood cutting board, you can choose a board that is both functional and durable, and that will provide you with years of use in your kitchen.

Environmental Impact of Using Dishwasher Safe Wood Cutting Boards

environmental-impact-of-using-dishwasher-safe-wood-cutting-boards

When it comes to choosing a cutting board, many people opt for wood because of its natural beauty and durability. However, some may be concerned about the environmental impact of using wood cutting boards that are dishwasher safe.

Fortunately, many wood cutting boards that are dishwasher safe are made from sustainably sourced materials. This means that the wood used to make the cutting board comes from forests that are managed in a way that ensures the health and productivity of the ecosystem.

In addition, using a dishwasher to clean your wood cutting board can actually be more environmentally friendly than washing it by hand. This is because dishwashers are designed to use less water and energy than washing dishes by hand.

However, it’s important to note that not all wood cutting boards are dishwasher safe. Some may warp or crack in the high heat and humidity of the dishwasher. Be sure to check the manufacturer’s instructions before putting your wood cutting board in the dishwasher.

Overall, using a dishwasher safe wood cutting board can be a great choice for both your kitchen and the environment. Just be sure to choose a sustainably sourced board and follow the manufacturer’s instructions for cleaning.

Frequently Asked Questions

Are there any types of wood cutting boards that can be safely washed in the dishwasher?

No, wooden cutting boards should not be washed in the dishwasher. The high temperature and moisture in the dishwasher can cause the wood to warp, crack or split.

What are the best materials for cutting boards that can go in the dishwasher?

If you’re looking for a cutting board that can go in the dishwasher, you should choose a non-porous material such as plastic, glass or acrylic. These materials are easy to clean and won’t absorb bacteria or odors.

Can bamboo cutting boards be washed in the dishwasher?

Bamboo cutting boards should not be washed in the dishwasher. Like wooden cutting boards, bamboo is a natural material that can warp, crack or split in the dishwasher.

What is the best way to clean a wood cutting board?

To clean a wooden cutting board, you should wash it with warm, soapy water and dry it immediately. Avoid soaking the board in water, as this can cause it to warp or crack. You can also sanitize the board by wiping it down with a solution of one tablespoon of unscented, liquid chlorine bleach per gallon of water.

What are the benefits of using a plastic cutting board?

Plastic cutting boards are a popular choice because they are affordable, lightweight, and easy to clean. They are also non-porous, which means they won’t absorb bacteria or odors.

How often should you replace your cutting board?

It’s a good idea to replace your cutting board every few years, depending on how often you use it. If your cutting board is showing signs of wear and tear, such as cracks or deep grooves, it’s time to replace it. A worn-out cutting board can harbor bacteria and make your food unsafe to eat.

Blog

How Much Does It Cost to Cut Wood at Lowes? A Comprehensive Guide to Lowes' Wood Cutting Services

Are you wondering how much it costs to cut wood at Lowe’s? If you’re planning a DIY project that involves cutting wood, you may be considering having it cut at Lowe’s. Lowe’s offers wood cutting services at many of their locations, which can save you time and effort. However, you may be wondering how much it will cost you to have your wood cut.

The cost of cutting wood at Lowe’s varies by location and the type of wood you need cut. In general, Lowe’s will cut store-bought wood for you, but there may be store-specific policies to charge a small fee. The fee can vary from store to store, but typically ranges from 25 cents to 50 cents per cut. If you need multiple cuts, the cost can add up quickly. However, there are ways to increase your chances of getting multiple free cuts, such as being friendly and courteous to the staff.

Understanding Wood Cutting Services at Lowes

If you’re looking to cut wood for your next project, Lowes offers wood cutting services to help you get the job done. Here’s what you need to know about their wood cutting services:

Types of Wood Cutting Services

Lowes offers two types of wood cutting services: in-store and online. In-store wood cutting services are available at most Lowes locations, while online wood cutting services are only available for select products.

In-Store Wood Cutting Services

If you need wood cut in-store, simply bring your lumber to the store and a Lowes associate will cut it to your desired size. The first few cuts are typically free, but additional cuts may cost a fee. The cost of in-store wood cutting services varies depending on the size of the material being worked with, but usually ranges between $5 – $13 per cut.

Online Wood Cutting Services

If you need wood cut for an online purchase, Lowes offers online wood cutting services for select products. Simply select the online wood cutting option when purchasing your product and enter your desired measurements. The wood will be cut to your specifications before it is shipped to you.

Limitations

It’s important to note that Lowes wood cutting services have some limitations. For example, Lowes will only cut wood that is purchased from their store. Additionally, they may not be able to cut certain types of wood or materials, such as pressure-treated lumber or metal.

In summary, Lowes offers convenient wood cutting services for your next project. Whether you need in-store or online wood cutting services, Lowes has you covered. Just be aware of the limitations and costs associated with these services before you get started.

Cost Factors of Wood Cutting at Lowes

cost-factors-of-wood-cutting-at-lowes

If you’re planning to have your wood cut at Lowes, you might be wondering how much it will cost. The price of wood cutting at Lowes depends on various factors, including the type of wood, size of wood, and quantity of wood. In this section, we’ll explore each of these factors in detail.

Type of Wood

The type of wood you want to cut is a significant factor in determining the cost of wood cutting at Lowes. Some types of wood are harder and denser than others, making them more challenging to cut. As a result, they may cost more to cut. Here is a breakdown of some common types of wood and their estimated cost for cutting at Lowes:

Type of Wood Estimated Cost per Cut
Pine $0.25 – $0.50
Oak $0.50 – $1.00
Maple $0.75 – $1.25
Cherry $1.00 – $1.50
Mahogany $1.50 – $2.00

Size of Wood

The size of the wood you want to cut is another factor that affects the cost of wood cutting at Lowes. Larger pieces of wood take more time and effort to cut, which can increase the cost. Here is a breakdown of estimated costs for different sizes of wood:

Size of Wood Estimated Cost per Cut
2×4 $0.25 – $0.50
4×4 $0.50 – $1.00
4×6 $0.75 – $1.25
6×6 $1.00 – $1.50
8×8 $1.50 – $2.00

Quantity of Wood

The quantity of wood you want to cut is also a factor that affects the cost of wood cutting at Lowes. If you need a large amount of wood cut, you may be eligible for a discount. However, if you only need a few cuts, the cost per cut may be higher. Here is a breakdown of estimated costs for different quantities of wood:

Quantity of Wood Estimated Cost per Cut
1-10 cuts $0.25 – $1.00
11-20 cuts $0.20 – $0.80
21-30 cuts $0.15 – $0.60
31+ cuts $0.10 – $0.40

Keep in mind that these estimated costs are subject to change and may vary depending on your location and the specific Lowes store you visit. It’s always a good idea to call your local Lowes store and ask about their wood cutting services and pricing before visiting.

Comparing Lowes to Other Wood Cutting Services

comparing-lowes-to-other-wood-cutting-services

If you’re looking for a place to cut your wood, you might be wondering how Lowe’s compares to other wood cutting services. Here’s a quick comparison:

Home Depot

Home Depot is a popular alternative to Lowe’s for wood cutting services. They offer free wood cutting services, but they have a limit of two cuts per board. If you need more than two cuts, they charge $0.25 per cut. Home Depot also offers custom cuts for an additional fee.

Menards

Menards is another option for wood cutting services. They offer free wood cutting services, but they have a limit of four cuts per board. If you need more than four cuts, they charge $0.25 per cut. Menards also offers custom cuts for an additional fee.

Ace Hardware

Ace Hardware is a smaller chain than Lowe’s or Home Depot, but they also offer wood cutting services. They charge $1 per cut, but they do not have a limit on the number of cuts. Ace Hardware also offers custom cuts for an additional fee.

Independent Lumber Yards

Independent lumber yards may also offer wood cutting services. Prices and policies vary, so it’s best to check with your local lumber yard for more information.

Overall, Lowe’s is a great option for wood cutting services if you’re looking for free cuts and standard cuts. If you need custom cuts or more than a few cuts, you may want to consider other options like Home Depot or Menards.

How to Save Money on Wood Cutting at Lowes

how-to-save-money-on-wood-cutting-at-lowes

Cutting wood at Lowes can be a convenient service, but it can also add up quickly if you have a lot of cuts to make. Here are some tips to help you save money on wood cutting at Lowes:

1. Take Advantage of Free Cuts

Lowes offers a certain number of free cuts for each piece of lumber you purchase. Take advantage of this service by planning your cuts ahead of time and getting as many cuts as you can during your visit.

2. Opt for Straight Cuts

Straight cuts are usually cheaper than angled cuts, so try to stick to straight cuts whenever possible. If you need angled cuts, try to make them yourself with a handsaw or miter saw to save money.

3. Bring Your Own Saw Blades

If you have a specific blade you want to use for your cuts, bring it with you to Lowes. This can save you money on blade rental fees and ensure that you get the exact cut you want.

4. Use Coupons and Discounts

Check online or in-store for coupons or discounts on wood cutting services at Lowes. You may be able to save a percentage off your total cost or get a certain number of cuts for free.

5. Rent a Table Saw

For larger projects, consider renting a table saw from Lowes instead of paying for each individual cut. This can be a cost-effective option if you have a lot of cuts to make and can also save you time.

By following these tips, you can save money on wood cutting services at Lowes and get the cuts you need for your project.

Additional Services and Costs at Lowes

additional-services-and-costs-at-lowes

In addition to wood cutting services, Lowes offers a variety of other services to help make your home projects easier. Here are some of the additional services and costs you can expect at Lowes:

Delivery Services

Lowes offers delivery services for a variety of products, including appliances, furniture, and building materials. Delivery fees vary depending on the distance and the size of the item being delivered. For example, delivery fees for appliances start at $59, while delivery fees for building materials start at $79.

Installation Services

Lowes offers installation services for a variety of products, including appliances, flooring, and fencing. Installation fees vary depending on the product being installed and the complexity of the installation. For example, installation fees for appliances start at $99, while installation fees for flooring start at $1.99 per square foot.

Repair Services

Lowes offers repair services for a variety of products, including appliances, plumbing, and electrical. Repair fees vary depending on the product being repaired and the extent of the damage. For example, repair fees for appliances start at $129, while repair fees for plumbing start at $99.

Design Services

Lowes offers design services for a variety of projects, including kitchen and bathroom remodels. Design fees vary depending on the scope of the project and the amount of time required for the design process. For example, design fees for a kitchen remodel start at $199.

Rental Services

Lowes offers rental services for a variety of tools and equipment, including power tools, lawn and garden equipment, and trucks. Rental fees vary depending on the item being rented and the length of the rental period. For example, rental fees for a power drill start at $10 for four hours, while rental fees for a pickup truck start at $19 for the first 75 minutes.

Overall, Lowes offers a variety of additional services to help make your home projects easier. While fees vary depending on the service and the location, Lowes strives to provide affordable and convenient services for all customers.

Frequently Asked Questions

Does Lowes charge for cutting wood?

Yes, Lowes charges for cutting wood. However, the cost varies depending on the type of material you want to cut and the quantity.

How much does Lowes charge per cut?

The cost of cutting wood at Lowes ranges from $0.25 to $1 per cut. If you need special cutting instructions like exact measurements or angles, you may have to pay an additional fee.

Can I get wood cut at Lowes that I didn’t purchase there?

No, you cannot bring lumber from home and expect Lowes to cut it for free. You must purchase your lumber from Lowes in order to score free wood-cutting services before you take it home.

Where can I find wood cutting services near me?

You can find wood cutting services near you by searching online or checking with your local hardware store. Lowes and Home Depot both offer wood cutting services, but you can also check with other hardware or lumber stores in your area.

Is there a Lowes store near me?

To find a Lowes store near you, visit the Lowes website and use their store locator tool. Enter your zip code or city and state to find the nearest Lowes store.

Will Menards cut wood for you?

Yes, Menards also offers wood cutting services. The cost and policies may vary by location, so it’s best to check with your local Menards store for more information.