Month: September 2023

Blog

Have you ever wondered what happens to the leftover wood pieces at hardware stores like Home Depot and Lowe’s? Do they just throw them away? Fortunately, many hardware stores have scrap wood bins where they sell leftover pieces at a discounted price. These bins can be a great resource for DIY projects or for anyone who needs a small amount of wood for a specific task.

The prices of scrap wood pieces can vary depending on the size and type of wood. Some hardware stores may even offer free scraps or off-cuts. In addition to hardware stores, cabinet and commercial wood shops may also keep bins of scraps to sell at a discount. If you’re looking to save money on lumber or just need a small amount of wood for a project, checking out your local hardware store’s scrap wood bin could be a great option.

Understanding Hardware Stores

If you are looking for scrap wood, hardware stores like Home Depot and Lowe’s can be a great place to start. But before you head out, it’s important to understand what a hardware store is and what types of products you can expect to find there.

What is a Hardware Store?

A hardware store is a retail store that specializes in selling tools, hardware, and building materials. These stores typically carry a wide range of products, including lumber, plumbing supplies, electrical supplies, and gardening tools. They may also offer services like key cutting, tool rental, and repair services.

Hardware stores are a great place to find materials for DIY projects, home repairs, and construction projects. They offer a wide range of products at competitive prices, and many stores have knowledgeable staff who can help you find the right products for your needs.

Types of Products in a Hardware Store

Hardware stores carry a wide range of products, but some of the most common items include:

  • Lumber: Hardware stores typically carry a variety of lumber, including dimensional lumber, plywood, and particleboard. They may also have scrap wood bins where you can find small pieces of lumber for your projects.
  • Tools: Hardware stores carry a variety of hand tools, power tools, and specialty tools for different types of projects. They may also offer tool rental services for larger projects.
  • Plumbing and Electrical Supplies: Hardware stores carry a variety of plumbing and electrical supplies, including pipes, fittings, wires, and outlets.
  • Gardening Supplies: Many hardware stores carry gardening supplies, including seeds, plants, and tools.
  • Building Materials: Hardware stores carry a variety of building materials, including roofing materials, insulation, and drywall.

Overall, hardware stores are a great resource for DIY enthusiasts, homeowners, and contractors. They offer a wide range of products and services at competitive prices, and their knowledgeable staff can help you find the right products for your needs.

Scrap Wood in Hardware Stores

If you’re a DIY enthusiast or woodworker, you might be wondering if hardware stores have scrap wood bins. The answer is yes, many do! Scrap wood can be a great resource for small projects or for practicing your skills without breaking the bank. In this section, we’ll explore the definition of scrap wood and common uses for it.

Definition of Scrap Wood

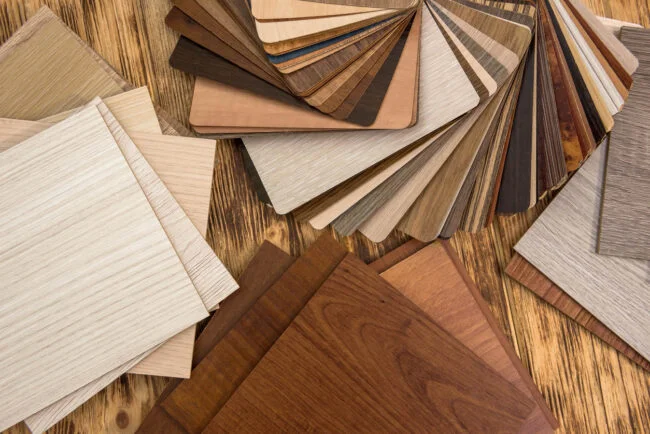
Scrap wood is any leftover or unused wood that is too small to be sold as a regular piece of lumber. This could include off-cuts, end cuts, wood squares, and dowels. Hardware stores may also have bins of larger scraps from broken or damaged pieces of lumber.

Common Uses of Scrap Wood

Scrap wood can be used for a variety of projects, including:

  • Small home decor items like picture frames, shelves, and signs
  • Practice pieces for woodworking techniques
  • Firewood or kindling
  • Garden stakes or trellises
  • Toys or games for children
  • Birdhouses or feeders

When using scrap wood, it’s important to keep in mind that the quality and strength may not be the same as regular lumber. Make sure to inspect each piece for any defects or damage before using it in a project.

In addition to hardware stores, you can also find scrap wood at construction sites, furniture manufacturers, and even online. Some websites offer free or discounted scrap wood for pickup or delivery.

Overall, scrap wood can be a valuable resource for DIY projects and woodworking. Check with your local hardware store to see if they have a scrap wood bin and start creating!

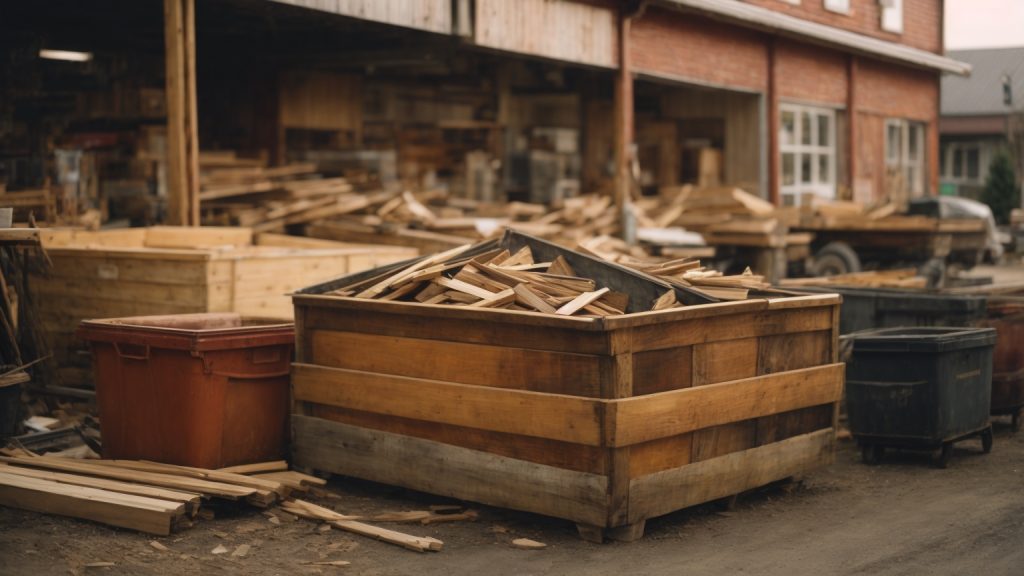
Scrap Wood Bins in Hardware Stores

If you’re a DIY enthusiast or a woodworker, you know how expensive it can be to buy new lumber. Fortunately, many hardware stores have scrap wood bins that can save you a lot of money. In this section, we’ll cover the availability and location of scrap wood bins in hardware stores.

Availability of Scrap Wood Bins

Not all hardware stores have scrap wood bins, but many do. The availability of scrap wood bins depends on the store’s size, location, and customer demand. Larger stores are more likely to have scrap wood bins, but smaller stores may have them as well. If you’re not sure if your local hardware store has a scrap wood bin, give them a call or check their website.

Location of Scrap Wood Bins in the Store

Scrap wood bins can be found in different locations in the store, depending on the store’s layout. Some stores have a designated area for scrap wood bins, while others may have them scattered throughout the store. Here are some tips to help you find scrap wood bins in a hardware store:

  • Check near the lumber section: Many hardware stores keep their scrap wood bins near the lumber section.
  • Ask an employee: If you can’t find the scrap wood bin, don’t hesitate to ask an employee. They will be happy to help you locate it.
  • Look for a sign: Some hardware stores have signs that point to the location of the scrap wood bin.

Once you find the scrap wood bin, take a few minutes to sort through the pieces to find the ones you need. You may find some pieces that are too small or too damaged, but you may also find some hidden gems that can be used for your next project.

In conclusion, if you’re looking for a way to save money on lumber, check out your local hardware store’s scrap wood bin. Not all stores have them, but it’s worth checking out. With a little bit of luck, you may find the perfect piece of wood for your next project.

Benefits of Scrap Wood Bins

If you’re a DIY enthusiast or a professional woodworker, you know that wood scraps can accumulate quickly and take up valuable space in your workshop or garage. That’s where scrap wood bins come in handy. Not only do they help keep your workspace organized, but they also offer several other benefits.

Environmental Impact

One of the main benefits of scrap wood bins is their positive impact on the environment. Instead of throwing away usable wood scraps, you can store them in a bin for future use. This reduces the amount of waste that ends up in landfills, which is great for the environment. Additionally, using scrap wood for small projects instead of buying new wood can help reduce deforestation and preserve natural resources.

Cost Efficiency

Another advantage of scrap wood bins is their cost efficiency. Buying new wood for every project can get expensive, especially if you only need a small amount. By storing your wood scraps in a bin, you can save money by using those scraps for future projects instead of buying new wood. This is especially useful for small projects like picture frames or birdhouses, where you only need a few pieces of wood.

In conclusion, scrap wood bins are a great addition to any workshop or garage. They help keep your workspace organized, reduce waste, and save you money. By using scrap wood for small projects, you can help preserve natural resources and reduce deforestation.

Alternatives to Scrap Wood Bins

find-scrap-wood-at-your-local-hardware-store-do-they-have-scrap-wood-bins

If you’re looking for ways to get your hands on some scrap wood, you might be wondering if hardware stores have scrap wood bins. While some hardware stores do have scrap wood bins, not all of them do. Here are some alternatives to consider:

Buying New Wood

If you can’t find a hardware store with a scrap wood bin, you can always buy new wood. While this may not be as cheap as getting scrap wood, it’s a good option if you need specific sizes or types of wood.

When buying new wood, consider the following:

  • Check for sales or discounts: Many hardware stores have sales or discounts on certain types of wood, so keep an eye out for those.
  • Look for bundles: Some hardware stores sell bundles of wood that may be cheaper than buying individual pieces.
  • Ask for help: If you’re not sure what type of wood you need, don’t be afraid to ask for help from a store employee.

Recycling Old Wood

Another alternative to scrap wood bins is to recycle old wood. This is a great way to get free wood while also helping the environment. Here are some ways to recycle old wood:

  • Check Craigslist or Facebook Marketplace: Many people give away old wood on these sites, so it’s worth checking them out.
  • Ask friends and family: If you know someone who is getting rid of old wood, ask if you can take it off their hands.
  • Visit a recycling center: Some recycling centers accept old wood and may even have a section where you can take what you need.

Remember that when recycling old wood, you may need to do some extra work to prepare it for use. This could include removing nails or screws, sanding it down, or cutting it to the right size. But with a little effort, you can turn old wood into something new and beautiful.

Frequently Asked Questions

Can I find scrap wood bins at hardware stores?

It depends on the store. Some hardware stores have scrap wood bins where you can find small pieces of wood that are leftover from larger cuts. However, not all hardware stores offer this service. You can call your local hardware store to see if they have a scrap wood bin or if they sell cull lumber.

Where can I find scrap wood near me?

Aside from hardware stores, you can also check with local lumberyards, construction sites, or woodworking shops. You can also check online classifieds such as Craigslist or Facebook Marketplace for people giving away scrap wood.

Do Lowe’s or Home Depot sell cull lumber?

Yes, both Lowe’s and Home Depot sell cull lumber. Cull lumber is wood that has cosmetic defects such as knots or warping, but is still structurally sound. It is sold at a discounted price compared to regular lumber. You can ask an associate at the store where to find cull lumber.

Is it possible to get free plywood near me?

It is possible, but it depends on your location and availability. You can check with construction sites or woodworking shops to see if they have any scrap plywood they are willing to give away. You can also check online classifieds such as Craigslist or Facebook Marketplace for people giving away free plywood.

What does the purple spray paint on lumber at Home Depot mean?

The purple spray paint on lumber at Home Depot indicates that the wood has been inspected and graded by an independent third-party organization to ensure quality and safety. It is a mark of assurance that the wood meets certain standards.

What happens to bad wood at Home Depot?

Bad wood, or wood that is not fit for sale, is typically sent back to the manufacturer or supplier for credit. It is not sold to customers. Home Depot has a commitment to quality and safety, so they take measures to ensure that only good quality wood is sold to customers.

Blog

Are you a chess enthusiast looking to make your own wooden chess board? Making a wooden chess board can be a fun and rewarding project for woodworkers of all skill levels. With a few tools and materials, you can create a beautiful and functional chess board that will last for years to come.

To start, you’ll need to gather some materials. You’ll need two different types of wood, one light and one dark, to create the alternating pattern of a chess board. Maple and walnut are a classic combination, but you can use any type of wood you prefer. You’ll also need a saw, a router, wood glue, sandpaper, and a finish such as varnish or wax. Once you have your materials, you’re ready to get started!

Understanding Chess Board Basics

how-to-make-a-wooden-chess-board-a-step-by-step-guide

When it comes to making a wooden chess board, it’s important to understand some basic concepts of the game of chess. Here are some things you should keep in mind:

The Board Size

A standard chess board consists of 64 squares arranged in an 8×8 grid. Each square has a size of 2.25 inches (5.7 cm) and is alternately colored in black and white. The board itself should have a size of around 18-20 inches (45-50 cm) on each side.

The Chess Pieces

A standard chess set consists of 32 pieces, 16 of which are white and 16 of which are black. Each player has one king, one queen, two rooks, two knights, two bishops, and eight pawns. The pieces should be proportionate to the size of the board, with the king being around 3.75 inches (9.5 cm) tall.

The Chess Notation

Chess notation is a system used to record the moves of a game of chess. It’s important to understand this system if you want to follow a game or record your own games. The notation consists of a letter and a number for each move, with the letter indicating the piece moved and the number indicating the square moved to.

The Chess Rules

Finally, it’s important to understand the basic rules of chess if you want to play the game on your new wooden chess board. Each player takes turns moving their pieces according to the rules, with the ultimate goal of putting the opponent’s king in checkmate. There are many resources available online that can help you learn the rules of chess.

By understanding these basic concepts of chess, you’ll be better equipped to create a beautiful and functional wooden chess board that you can enjoy playing on for years to come.

Choosing the Right Wood

When it comes to building a wooden chessboard, the type of wood you choose is crucial. You want to select a type of wood that not only looks good but is also durable and easy to work with. Here are some factors to consider when choosing the right wood for your chessboard:

Color Contrast

One of the most important factors to consider is the color contrast between the two types of wood you choose. The classic chessboard pattern consists of alternating light and dark squares, so you want to select two types of wood that have a good contrast. For example, you could use maple and walnut, or cherry and ebony.

Wood Hardness

Another factor to consider is the hardness of the wood. Harder woods tend to be more durable and resistant to scratches and dents. However, harder woods can also be more difficult to work with, especially if you’re a beginner. So, you need to find a balance between hardness and workability. Some good options for chessboard wood include maple, walnut, cherry, and mahogany.

Wood Grain

The grain of the wood can also affect the appearance of your chessboard. Some woods, like maple and birch, have a very subtle grain that can create a smooth, uniform look. Other woods, like oak and mahogany, have a more prominent grain that can add texture and character to your chessboard. Consider the style you’re going for and choose a wood with a grain that complements it.

Availability and Cost

Finally, you want to consider the availability and cost of the wood. Some types of wood may be harder to find or more expensive than others. Consider your budget and the availability of different types of wood in your area before making a final decision.

By considering these factors, you can choose the right wood for your chessboard that looks great, is durable, and is easy to work with.

Gathering Essential Tools

Making a wooden chess board requires some essential tools to get started. Here are the tools you will need:

Table Saw

A table saw is a must-have tool for this project. It will help you cut the wood pieces to the required size. Ensure that the table saw is in good condition and the blade is sharp before starting the project.

Miter Saw

A miter saw is used to make precise angle cuts on the wood strips. This tool is essential for making the chessboard pattern. You can also use a handsaw, but it will take more time and effort.

Drill

You will need a drill to make pilot holes for the screws and to drill the holes for the dowels. Ensure that you have the appropriate drill bits for the job.

Brad Nailer

A brad nailer is used to attach the wood pieces together. It is faster and more efficient than using screws or nails. Ensure that you have enough brad nails before starting the project.

Clamps

Clamps are used to hold the wood pieces together while the glue dries. They are available in different sizes and shapes. Ensure that you have enough clamps to hold the wood pieces firmly in place.

Sandpaper

Sandpaper is used to smooth out rough edges and surfaces. You will need different grits of sandpaper to achieve a smooth finish.

Wood Glue

Wood glue is used to attach the wood pieces together. Ensure that you have enough wood glue before starting the project.

Safety Gear

Safety gear is essential when working with power tools. Wear safety glasses to protect your eyes from sawdust and debris. Wear earplugs to protect your ears from the noise of the power tools. Wear a dust mask to protect your lungs from sawdust.

Preparing the Wood

Before you can begin building your wooden chess board, you need to prepare the wood. Here are a few steps to follow:

Step 1: Choose the Right Wood

The first step in preparing the wood for your chess board is to choose the right type of wood. You want to select two types of wood that have a strong contrast in color and grain. Common choices include maple and walnut, cherry and oak, or birch and mahogany.

Step 2: Cut the Wood

Once you have selected your wood, you will need to cut it into strips that are the same width and thickness. A table saw is the best tool for this job. Make sure that your strips are straight and free of knots or other imperfections.

Step 3: Glue the Strips Together

Next, you will need to glue the strips together to create the chess board. Apply a thin layer of wood glue to each strip and press them together. Use clamps to hold the strips in place while the glue dries.

Step 4: Sand the Board

After the glue has dried, you will need to sand the chess board to create a smooth surface. Start with a coarse grit sandpaper and work your way up to a finer grit. Use a sanding block or orbital sander to ensure that the surface is even and smooth.

Step 5: Apply a Finish

Finally, you will need to apply a finish to the chess board to protect the wood and enhance its natural beauty. There are many different finishes to choose from, including oil-based finishes, water-based finishes, and wax. Apply the finish according to the manufacturer’s instructions and allow it to dry completely before using the chess board.

By following these steps, you can prepare the wood for your wooden chess board and create a beautiful and functional piece that you can enjoy for years to come.

Creating the Squares

creating-the-squares

When it comes to making a wooden chess board, creating the squares is one of the most important steps. The squares need to be precise and uniform in size to ensure the board looks professional and is easy to play on. Here are the steps to create the squares:

Measuring and Marking

The first step is to measure and mark the squares on the wood. You can use a ruler, square, or other measuring tools to ensure accuracy. Here are some tips to keep in mind:

  • Measure twice, cut once: Double-check your measurements before making any cuts.
  • Use a pencil: Make sure to use a sharp pencil to mark the squares. This will help ensure accuracy and make it easier to see the markings.
  • Mark both sides: When marking the squares, make sure to mark both sides of the wood. This will help ensure that the squares are aligned properly.

Cutting and Sanding

Once you have marked the squares, it’s time to cut them out. Here’s how to do it:

  • Use a saw: A table saw or a circular saw with a guide will work well for cutting the squares.
  • Cut carefully: Take your time when cutting the squares to ensure accuracy. Use a push stick to keep your hands safe.
  • Sand the squares: After cutting the squares, sand them to ensure they are smooth and free of any rough edges.

When creating the squares, it’s important to take your time and be precise. With a little patience and attention to detail, you can create a beautiful wooden chess board that will be enjoyed for years to come.

Assembling the Board

Now that you have all the pieces cut and sanded, it’s time to assemble your wooden chess board. Follow these steps to put it all together:

  1. Lay out the chessboard pattern: Arrange the squares in the desired pattern. You can use the same wood for all the squares or alternate between two different types of wood. Make sure the pattern is aligned correctly.
  2. Glue the squares together: Apply a thin layer of glue to the back of each square and press it firmly onto the backing board. Use clamps to hold the squares in place until the glue dries. Be sure to wipe off any excess glue that seeps out from between the squares.
  3. Sand the board: Once the glue has dried, sand the board to make it smooth. Start with a coarse grit sandpaper and work your way down to a fine grit sandpaper. Be careful not to sand too much, or you may end up with uneven squares.
  4. Apply a finish: Apply a clear finish to protect the board and give it a polished look. You can use a clear lacquer, polyurethane, or varnish. Apply the finish in thin coats, allowing each coat to dry completely before applying the next.
  5. Attach the legs (optional): If you want to add legs to your chess board, you can attach them now. Use wood screws to attach the legs to the bottom of the backing board. Make sure the legs are level and securely attached.

Congratulations! You have now assembled your very own wooden chess board. It’s time to gather some chess pieces and start playing.

Finishing Touches

Once you have completed the construction of your wooden chess board, it’s time to put the finishing touches on it. This will not only enhance the beauty of your chess board but also protect it from wear and tear. In this section, we will discuss two important finishing touches: applying stain and adding a finish.

Applying Stain

Staining your wooden chess board is a great way to add color and depth to the wood. Here are the steps to follow:

  1. Sand the surface of your chess board with fine-grit sandpaper to remove any rough spots or blemishes.
  2. Apply wood conditioner to the surface of the board to help the stain penetrate evenly.
  3. Apply the stain with a brush or cloth, following the manufacturer’s instructions. Be sure to apply it evenly and wipe off any excess.
  4. Allow the stain to dry completely before applying a finish.

Adding a Finish

Adding a finish to your chess board will protect it from scratches, moisture, and other types of damage. Here are the steps to follow:

  1. Sand the surface of your chess board with fine-grit sandpaper to remove any rough spots or blemishes.
  2. Apply a sealer coat to the surface of the board to help the finish adhere better.
  3. Apply the finish with a brush or cloth, following the manufacturer’s instructions. Be sure to apply it evenly and wipe off any excess.
  4. Allow the finish to dry completely before using your chess board.

There are many types of finishes available, including polyurethane, lacquer, and varnish. Choose the one that best suits your needs and preferences.

In conclusion, applying stain and adding a finish are important steps in completing your wooden chess board. These finishing touches will not only enhance its appearance but also protect it from damage. Follow the steps outlined above to achieve a beautiful and durable chess board that will provide years of enjoyment.

Maintenance Tips

Once you’ve completed your wooden chessboard, it’s important to keep it in good condition so that it lasts for years to come. Here are some maintenance tips to keep your chessboard looking great:

Clean Regularly

Dust and debris can accumulate on your chessboard over time, so it’s important to clean it regularly. Use a soft, dry cloth to wipe down the surface of the board. If there are any stubborn spots, you can use a damp cloth with a little bit of soap to gently scrub the area. Make sure to dry the board thoroughly after cleaning.

Avoid Moisture

Wood is sensitive to moisture, so it’s important to keep your chessboard away from damp areas. Avoid placing it near windows or in areas with high humidity. If your chessboard does get wet, make sure to dry it off as soon as possible to prevent any damage.

Store Properly

When you’re not using your chessboard, it’s important to store it properly. Keep it in a dry, cool place away from direct sunlight. You can also cover it with a cloth or a chessboard cover to protect it from dust and debris.

Repair as Needed

If your chessboard gets scratched or damaged, you can repair it with a little bit of sandpaper and wood filler. Sand down the damaged area and apply the wood filler according to the manufacturer’s instructions. Once the filler is dry, sand it down again and apply a coat of finish to match the rest of the board.

By following these maintenance tips, you can keep your wooden chessboard looking great for years to come.

Blog

If you have a wooden bench that has seen better days, don’t throw it away just yet! With a little bit of effort, you can restore it to its former glory and enjoy it for years to come. Restoring a wooden bench involves several steps, including sanding down the surface, repairing or replacing damaged parts, and sealing the wood with protective coatings or finishes.

One of the benefits of restoring a wooden bench is improved appearance. Over time, outdoor wooden furniture can become weathered and faded, losing its natural beauty. By restoring your bench, you can bring it back to life and enhance the look of your outdoor space. Plus, it’s a great way to repurpose an old piece of furniture and give it new life.

Another benefit of restoring a wooden bench is that it can save you money. Rather than buying a brand new bench, you can restore your old one and save yourself some cash. Plus, it’s a fun and rewarding DIY project that you can do yourself with just a few basic tools and supplies. So why not give it a try and see what you can accomplish?

Understanding the Wood

how-to-restore-a-wooden-bench-a-beginners-guide

Before you begin restoring a wooden bench, it is essential to understand the type of wood used in its construction. Different types of wood require different restoration techniques and products.

Identifying the Wood

The first step is to identify the type of wood used in your bench. You can do this by examining the grain pattern, color, and texture of the wood. Here are some common types of wood used in outdoor furniture:

  • Teak: A durable and weather-resistant hardwood with a golden-brown color that ages to a silvery-gray patina.
  • Cedar: A softwood with a reddish-brown color that weathers to a grayish-silver hue.
  • Pine: A softwood with a yellowish-white color that weathers to a grayish-brown shade.

Understanding the Characteristics

Different types of wood have distinct characteristics that affect their durability and how they respond to weather and aging. Here are some essential characteristics to consider:

  • Density: The density of the wood affects its durability and resistance to wear and tear.
  • Porosity: The porosity of the wood determines how easily it absorbs moisture, which affects its resistance to rot and decay.
  • Grain pattern: The grain pattern affects the wood’s appearance and how it responds to sanding and refinishing.
  • Color: The color of the wood changes over time due to exposure to sunlight and weathering.

Choosing the Right Products

Once you have identified the type of wood and its characteristics, you can choose the right products for restoring it. For example, teak requires a different type of sealer than cedar or pine. It is essential to use products that are specifically designed for the type of wood you are working with to achieve the best results.

In conclusion, understanding the type of wood used in your bench is crucial for restoring it properly. By identifying its characteristics and choosing the right products, you can ensure that your wooden bench will look great and last for years to come.

Identifying the Damage

Before you start restoring your wooden bench, it is important to identify the type of damage it has sustained. This will help you determine the best course of action to take. Here are some common types of damage that you may encounter:

Surface Scratches

Surface scratches are the most common type of damage that wooden benches sustain. They are usually caused by everyday wear and tear, such as people sitting on the bench or objects being placed on it. Surface scratches can be easily fixed by sanding down the affected area and applying a new coat of finish. If the scratches are particularly deep, you may need to use wood filler to fill in the gaps before sanding.

Deep Gouges

Deep gouges are more serious than surface scratches and require a different approach to repair. If your bench has deep gouges, you will need to use wood filler to fill in the gaps. Once the wood filler has dried, you can sand down the area and apply a new coat of finish. If the gouges are particularly large, you may need to replace the affected section of the bench entirely.

Weather Damage

Wooden benches that are left outside can be damaged by the elements over time. Weather damage can take many forms, including warping, cracking, and rotting. If your bench has been damaged by the weather, you will need to assess the extent of the damage before deciding on a course of action. In some cases, you may be able to repair the damage by sanding down the affected area and applying a new coat of finish. In other cases, you may need to replace the affected section of the bench entirely.

By identifying the type of damage that your wooden bench has sustained, you can take the appropriate steps to restore it to its former glory. Remember to take your time and be patient during the restoration process, as rushing can lead to mistakes and further damage.

Gathering Restoration Materials

Restoring a wooden bench requires a few essential tools and materials. Here are the items you will need:

Sanding Tools

Sanding is a crucial step in restoring a wooden bench. You will need to remove the old finish and any imperfections on the surface of the wood. Here are some sanding tools you may need:

  • Sandpaper (medium and fine grit)
  • Power sander (optional)
  • Sanding block
  • Sanding sponge

Wood Fillers

Wood fillers are used to repair any cracks, holes, or gaps in the wood. They come in various colors and can be sanded, painted, or stained to match the surrounding wood. Here are some types of wood fillers you can use:

  • Wood putty
  • Epoxy
  • Wood filler sticks

Sealants

Sealants are used to protect the wood from moisture, UV rays, and other environmental factors. They come in various types and finishes, such as clear, matte, or glossy. Here are some sealants you can use:

  • Polyurethane
  • Varnish
  • Oil-based or water-based sealants

Make sure to choose high-quality materials that are appropriate for the type of wood your bench is made of. With the right tools and materials, you can restore your wooden bench to its former glory.

Preparation Process

Before you begin restoring your wooden bench, you need to prepare it. This process involves cleaning the bench and sanding the wood.

Cleaning the Bench

The first step in preparing your wooden bench for restoration is cleaning it. You want to remove any dirt, grime, or debris that may be on the surface of the bench. Here’s how you can do it:

  1. Start by using a stiff-bristled brush to remove any loose dirt or debris from the bench.
  2. Next, mix a solution of warm water and mild soap. Dip a soft cloth in the solution and wring it out so that it’s not dripping wet.
  3. Use the damp cloth to wipe down the bench, making sure to get into all the nooks and crannies.
  4. Rinse the cloth in clean water and use it to wipe down the bench again, removing any soap residue.
  5. Allow the bench to dry completely before moving on to the next step.

Sanding the Wood

The next step in preparing your wooden bench for restoration is sanding the wood. Sanding helps to remove any old finish or paint, smooth out rough spots, and prepare the surface for a new finish. Here’s how you can do it:

  1. Start by using a coarse-grit sandpaper (around 80 grit) to remove any old finish or paint from the surface of the bench. Sand in the direction of the grain, and be sure to wear a dust mask and eye protection.
  2. Once you’ve removed the old finish or paint, switch to a finer-grit sandpaper (around 120 grit) and sand the surface of the bench again. This will help to smooth out any rough spots and prepare the surface for a new finish.
  3. If there are any hard-to-reach areas on the bench, you can use a sanding sponge or sandpaper wrapped around a dowel to sand those areas.
  4. After you’ve finished sanding, use a tack cloth to remove any dust or debris from the surface of the bench.

By following these steps, you’ll be well on your way to restoring your wooden bench to its former glory.

Restoration Process

restoration-process

Restoring a wooden bench can bring it back to life and extend its lifespan. The process involves sanding, repairing, and sealing the wood. Here are the steps to follow:

Filling the Damages

Before sanding the bench, you need to fill any damages such as cracks, holes, or gaps. Here’s how to do it:

  1. Clean the bench thoroughly to remove any dirt or debris.
  2. Use wood filler to fill the damages. Apply it with a putty knife, and make sure to spread it evenly.
  3. Let the wood filler dry completely according to the manufacturer’s instructions.
  4. Sand the filled areas until they are smooth and level with the rest of the bench.

Applying Sealant

After filling the damages, you need to apply a sealant to protect the wood from moisture and other elements. Here’s how to do it:

  1. Choose a sealant that suits the type of wood and the desired finish. You can use a clear coat, stain, or paint.
  2. Apply the sealant with a brush, roller, or sprayer. Make sure to cover the entire bench, including the undersides and corners.
  3. Let the first coat dry completely according to the manufacturer’s instructions.
  4. Sand the bench lightly with fine-grit sandpaper to remove any rough spots or bubbles.
  5. Apply a second coat of sealant and let it dry completely.

Following these steps will help you restore your wooden bench to its former glory. Remember to take your time and be patient, and your bench will look great for years to come.

Maintenance Tips

Proper maintenance is essential to keep your wooden bench looking great and lasting for a long time. Here are some tips to help you maintain your bench:

Regular Cleaning

Dirt, dust, and debris can accumulate on your bench over time, making it look dull and dirty. To keep your bench looking its best, it’s important to clean it regularly. Here’s how:

  • Use a soft-bristled brush or a cloth to remove any loose dirt or debris from the bench.
  • Mix a solution of mild soap and warm water in a bucket.
  • Dip a cloth in the solution and wring it out.
  • Use the cloth to wipe down the bench, making sure to get into all the nooks and crannies.
  • Rinse the bench with clean water and let it dry completely before using it again.

Applying Protective Coating

Wooden benches are exposed to the elements, which can cause the wood to deteriorate over time. To protect your bench from the elements, you should apply a protective coating. Here’s how:

  • Sand the bench with a fine-grit sandpaper to remove any rough spots or splinters.
  • Clean the bench with a mild soap and warm water solution, as described above.
  • Let the bench dry completely.
  • Apply a protective coating, such as a clear varnish or sealant, to the bench.
  • Follow the manufacturer’s instructions for application and drying time.

Covering During Extreme Weather

Extreme weather conditions, such as heavy rain or snow, can damage your bench. To protect it from the elements, consider covering it during extreme weather. Here are some tips:

  • Use a waterproof cover that is designed for outdoor furniture.
  • Make sure the cover fits snugly over the bench.
  • Remove any standing water from the cover to prevent it from pooling and damaging the bench.
  • Remove the cover once the weather has cleared and let the bench dry completely before using it again.

By following these maintenance tips, you can keep your wooden bench looking great for years to come.

Blog

What is the Best Fast Drying Glue for Wood? Our Top Picks!

Looking for the best fast-drying glue for wood? With so many options available, it can be challenging to determine which one is right for your project. Whether you’re a professional woodworker or a DIY enthusiast, having the right adhesive is crucial for ensuring your project’s success. In this article, we’ll explore some of the best fast-drying glues for wood available on the market today.

When it comes to fast-drying wood glue, there are several factors to consider. For starters, you’ll want to choose a glue that sets quickly to save time. Additionally, you’ll want to select an adhesive that is strong and durable enough to withstand the test of time. Finally, you’ll want to choose a glue that is easy to work with and doesn’t leave any unsightly residue behind. In the following paragraphs, we’ll take a closer look at some of the top fast-drying wood glues available and highlight their unique features.

Understanding Fast Drying Glue

When it comes to woodworking, fast drying glue is a must-have. It can save you a lot of time and effort, especially when you are working on a project with tight deadlines. However, not all fast drying glues are created equal, and it’s important to understand the different types of fast drying glue available on the market.

Cyanoacrylate Glue

Cyanoacrylate glue, also known as super glue, is a fast-drying adhesive that can set in as little as 10-30 seconds. It is great for bonding materials such as plastic, metal, and wood. However, it is not suitable for use on fabrics and other porous materials, as it can become brittle and break.

Epoxy Glue

Epoxy glue is a two-part adhesive that requires mixing before use. It can take anywhere from 5 minutes to 24 hours to dry, depending on the type of epoxy and the conditions it is used in. Epoxy glue is great for bonding wood, metal, and plastic, and it is also waterproof and heat-resistant.

Polyurethane Glue

Polyurethane glue is a one-part adhesive that reacts with moisture in the air to cure. It can take anywhere from 30 minutes to 24 hours to dry, depending on the thickness of the glue and the conditions it is used in. Polyurethane glue is great for bonding wood, metal, and plastic, and it is also waterproof and heat-resistant.

PVA Glue

PVA glue is a water-based adhesive that can take anywhere from 30 minutes to 24 hours to dry, depending on the thickness of the glue and the conditions it is used in. PVA glue is great for bonding wood, paper, and fabric, and it is also non-toxic and easy to clean up.

In conclusion, the type of fast drying glue you choose depends on the materials you are working with and the conditions you are working in. Consider the drying time, strength, and other properties of each type of glue before making your decision.

Top Fast Drying Glues for Wood

When working on a woodworking project, you need a glue that can bond quickly and securely. Fast-drying glues are the perfect solution for this. Here are some of the best fast-drying glues for wood:

Epoxy Resin

Epoxy resin is a two-part adhesive that is known for its strong and durable bond. It is ideal for bonding wood because it can fill gaps and is resistant to water and heat. Epoxy resin comes in two parts that must be mixed together before application. Once mixed, the adhesive sets quickly, so you must work fast. Here are some of the best epoxy resins for bonding wood:

Product Features
Gorilla Epoxy Sets in 5 minutes, dries clear, waterproof
J-B Weld WoodWeld Sets in 6 minutes, can be sanded, stained, or painted
Loctite Epoxy Extra Time Sets in 30 minutes, can be sanded or painted, waterproof

Cyanoacrylate

Cyanoacrylate, also known as super glue, is a fast-drying adhesive that is perfect for small woodworking projects. It is ideal for bonding small pieces of wood together and can also be used to fill gaps. Cyanoacrylate dries clear and is waterproof. Here are some of the best cyanoacrylate glues for woodworking:

Product Features
Gorilla Super Glue Sets in 10-30 seconds, bonds in seconds, dries clear
Krazy Glue Maximum Bond Sets in 10-30 seconds, bonds in seconds, dries clear
Loctite Super Glue Sets in 10-30 seconds, bonds in seconds, dries clear

Polyurethane

Polyurethane glue is a one-part adhesive that is perfect for bonding wood. It is waterproof and can be used to fill gaps. Polyurethane glue expands as it dries, so it is important to clamp the wood together while the glue is drying. Here are some of the best polyurethane glues for woodworking:

Product Features
Gorilla Wood Glue Sets in 20-30 minutes, dries natural color, waterproof
Titebond III Ultimate Wood Glue Sets in 10-15 minutes, dries natural color, waterproof
Elmer’s Carpenter’s Wood Glue Max Sets in 20-30 minutes, dries natural color, waterproof

These are some of the best fast-drying glues for wood. Choose the one that best suits your needs and enjoy a strong and durable bond.

Factors to Consider When Choosing Glue

When selecting a fast-drying glue for wood, there are several factors to consider to ensure you choose the right product for your project. Here are some key factors to keep in mind:

Drying Time

One of the primary benefits of fast-drying glue is that it significantly reduces the amount of time you need to wait for the glue to dry. However, it’s important to note that different types of fast-drying glue have varying drying times. Some types of glue may take only a few seconds to dry, while others may take several minutes. Be sure to select a glue that has a drying time that works for your specific project.

Strength

Another important factor to consider is the strength of the glue. You want a glue that will provide a strong, durable bond that can withstand the stresses and strains of use. Different types of glue have different levels of strength, so be sure to choose a glue that is appropriate for your project.

Weather Resistance

If your project will be exposed to the elements, it’s important to choose a glue that is weather-resistant. Some types of glue may break down or lose their adhesive properties when exposed to moisture or extreme temperatures. Be sure to select a glue that is designed to withstand the specific weather conditions your project will encounter.

Ease of Use

Finally, it’s important to choose a glue that is easy to use. Some types of glue may require special equipment or techniques to apply, while others may be more straightforward. Consider your level of experience with glue and choose a product that you feel comfortable using.

By keeping these factors in mind, you can select a fast-drying glue that will provide a strong, durable bond for your wood project.

Safety Precautions for Using Fast Drying Glue

When using fast drying glue, it is important to take certain safety precautions to avoid accidents and injuries. Here are some safety tips to keep in mind:

1. Wear Protective Gear

Fast drying glue can be harmful to your skin, eyes, and lungs. Therefore, it is important to wear protective gear such as gloves, safety glasses, and a respirator mask when using it. This will help prevent any accidental contact with the glue and protect your skin and eyes from irritation.

2. Work in a Well-Ventilated Area

Fast drying glue can release fumes that can be harmful to your health. Therefore, it is important to work in a well-ventilated area to prevent the buildup of fumes. Open windows and doors to allow fresh air to circulate and wear a respirator mask to avoid inhaling any harmful fumes.

3. Follow the Instructions Carefully

Different types of fast drying glue have different instructions for use. It is important to read and follow the instructions carefully to ensure that you are using the glue correctly. Using the glue incorrectly can result in a weak bond or damage to the materials you are working with.

4. Keep the Glue Out of Reach of Children and Pets

Fast drying glue can be harmful if ingested by children or pets. Therefore, it is important to keep it out of reach of children and pets. Store the glue in a secure place where children and pets cannot access it.

By following these safety precautions, you can ensure that you use fast drying glue safely and avoid any accidents or injuries.

How to Apply Fast Drying Glue on Wood

When working on a woodworking project, using the right glue is essential to ensure that the pieces are securely held together. Fast-drying glue is a popular choice for woodworkers who want to speed up the process of bonding pieces of wood. In this section, we will discuss how to apply fast-drying glue on wood.

Preparation

Before applying the glue, it is important to prepare the wood surface. Make sure that the surface is clean and dry. Any dirt or dust on the surface can affect the bonding process. You can use a clean cloth or a brush to remove any debris from the surface.

It is also important to ensure that the pieces of wood fit together properly before applying the glue. This will help to ensure that the bond is strong and secure. You can use clamps or weights to hold the pieces in place while the glue dries.

Application

When applying fast-drying glue, it is important to work quickly. Apply the glue to one surface of the wood and spread it evenly using a brush or a roller. Make sure that you apply enough glue to create a strong bond.

Once the glue has been applied, press the two surfaces together firmly. Use clamps or weights to hold the pieces in place while the glue dries. Be careful not to move the pieces while the glue is drying, as this can weaken the bond.

Finishing

After the glue has dried, you can remove any excess glue using a scraper or sandpaper. Sand the surface of the wood to ensure that it is smooth and even. You can then apply a finish to the wood, such as paint or varnish.

It is important to follow the manufacturer’s instructions when using fast-drying glue. Some types of glue may require a longer drying time or a different application method. Always wear protective gloves and goggles when working with glue to avoid skin and eye irritation.

By following these simple steps, you can ensure that your woodworking project is securely bonded using fast-drying glue.

Maintaining the Bond Over Time

Once you have found the best fast-drying glue for your wood project, it’s important to ensure that the bond remains strong over time. Here are some tips to help you maintain the bond:

Proper Clamping

When using fast-drying glue, it’s important to clamp the pieces together firmly until the glue has fully cured. This will help ensure that the bond is strong and long-lasting. Make sure to use the appropriate clamps for your project and follow the manufacturer’s instructions for clamping time.

Avoid Extreme Temperatures

Extreme temperatures can weaken the bond of your fast-drying glue. Avoid exposing your wood project to temperatures that are too hot or too cold. If you need to use your project in extreme temperatures, consider using a glue that is specifically designed for those conditions.

Regular Maintenance

Regular maintenance can help keep your wood project in top condition and prevent the bond from weakening. Keep your project clean and dry, and avoid exposing it to moisture or humidity. If you notice any signs of damage or weakening in the bond, address them promptly to prevent further damage.

Choose the Right Glue

Choosing the right glue for your project is key to maintaining the bond over time. Make sure to choose a glue that is specifically designed for wood and that is appropriate for the type of project you are working on. Consider factors such as the type of wood, the size and weight of the project, and the conditions the project will be exposed to.

By following these tips, you can help ensure that your fast-drying glue bond remains strong and long-lasting.

Frequently Asked Questions

What is the best glue for fast wood bonding?

When it comes to fast wood bonding, the best glue is one that dries quickly and forms a strong bond. There are many different types of glue that can be used for wood bonding, but the most popular ones are cyanoacrylate (super glue), polyurethane, and PVA (polyvinyl acetate) glue.

Which brand of fast drying wood glue is recommended?

There are many brands of fast drying wood glue available in the market. Some of the most recommended brands include Gorilla Wood Glue, Titebond III Ultimate Wood Glue, and Franklin International Titebond 1414 III Ultimate Wood Glue. These brands are known for their fast drying times and strong bonding capabilities.

What are the benefits of using a clear fast drying wood glue?

Clear fast drying wood glue has the advantage of being invisible when it dries. This makes it ideal for use in woodworking projects where the glue lines need to be hidden. Additionally, clear glue is water-resistant and can withstand exposure to moisture and humidity.

Can PVA wood glue be used for fast wood bonding?

PVA glue is not typically used for fast wood bonding as it takes longer to dry compared to other types of glue. However, there are some fast-drying PVA glues available in the market that can be used for wood bonding. These glues are usually labeled as “fast-drying” or “quick-drying” and can dry in as little as 30 minutes.

What are the advantages of using Titebond fast drying wood glue?

Titebond fast drying wood glue has several advantages over other types of glue. It dries quickly, forms a strong bond, and is water-resistant. Additionally, it is non-toxic and can be easily cleaned up with water.

How does super glue compare to fast drying wood glue for wood crafts?

Super glue, also known as cyanoacrylate glue, is a fast-drying adhesive that can be used for wood crafts. However, it is not recommended for use on larger wood projects as it can become brittle over time. Fast drying wood glue, on the other hand, is designed specifically for wood bonding and can provide a stronger and more durable bond.

Blog

What Kind of Wood is a 2×4 Stud? A Quick Guide to Identifying the Most Commonly Used Lumber for Framing.

If you’re new to woodworking or DIY projects, you might be wondering what type of wood is used for a 2×4 stud. The most common type of wood for 2×4 studs is pine, but they can also be made from other types of lumber, such as spruce or fir. Knowing the different types of wood can be helpful when selecting materials for your project.

Pine is a softwood that is easy to work with and is readily available at most home improvement stores. It’s also one of the most affordable woods, making it a popular choice for beginners. Spruce and fir are also softwoods that are commonly used for 2×4 studs. These woods are often chosen for their strength and durability, and they are also easy to work with.

Understanding 2×4 Studs

Understanding 2×4 Studs

If you are planning a construction project, you may have come across the term “2×4 studs.” A 2×4 stud is a piece of wood that is commonly used to build walls, frames, and other structures. But what type of wood is a 2×4 stud made of?

The most common type of wood used for 2×4 studs is pine. However, they can also be made from other types of lumber, such as spruce or fir. It is important to note that 2×4 studs made from different types of wood may have different properties, such as strength and durability.

When selecting materials for your project, it is important to consider the properties of the wood you are using. Softwoods like pine, spruce, and fir are commonly used for 2×4 studs because they are lightweight, easy to work with, and relatively inexpensive. Hardwoods, on the other hand, are denser and more difficult to work with, making them better suited for applications like flooring, decking, and furniture making.

It is also important to consider the dimensions of 2×4 studs. Despite their name, 2×4 studs are not actually 2 inches by 4 inches. Rather, they measure 1.5 inches by 3.5 inches. This is because the wood is planed and smoothed down to these dimensions for consistency and ease of use.

In summary, 2×4 studs are commonly made from softwoods like pine, spruce, and fir. They are lightweight, easy to work with, and relatively inexpensive. When selecting materials for your project, it is important to consider the properties of the wood you are using and to be aware of the actual dimensions of 2×4 studs.

Types of Wood for 2×4 Studs

When it comes to choosing the right type of wood for your 2×4 studs, there are a few options to consider. The most common types of wood used for 2×4 studs are pine, spruce, and fir. Each type of wood has its own unique characteristics and advantages.

Pine

Pine is the most commonly used wood for 2×4 studs. It is readily available and affordable, making it a popular choice for builders and DIY enthusiasts alike. Pine is a softwood, which means it is easy to work with and can be cut and shaped with basic tools. It is also lightweight, which makes it easy to transport and handle.

Spruce

Spruce is another popular choice for 2×4 studs. It is a softwood, like pine, but it is slightly stronger and more durable. Spruce is also known for its straight grain, which makes it easy to work with and gives it a uniform appearance. It is a good choice for projects that require a strong, stable wood.

Fir

Fir is a dense, strong wood that is often used for structural applications. It is a softwood, but it is harder and more durable than pine or spruce. Fir is also resistant to rot and decay, which makes it a good choice for outdoor projects. It is slightly more expensive than pine or spruce, but it is worth the investment for its strength and durability.

When choosing the right type of wood for your 2×4 studs, it is important to consider your specific needs and budget. Pine is a good choice for basic projects, while spruce and fir are better suited for projects that require a stronger, more durable wood. Whatever type of wood you choose, be sure to consult with a professional if you are unsure about which type is best for your specific needs.

Factors Affecting Wood Choice

When choosing the type of wood for your 2×4 studs, there are several factors to consider. These factors include climate, construction type, and budget.

Climate

The climate of the area where the wood will be used is an important factor to consider when selecting the type of wood for your 2×4 studs. Different types of wood have different levels of resistance to moisture, rot, and insects. If you live in an area with high humidity or frequent rainfall, you may want to consider using a type of wood that is more resistant to moisture, such as treated lumber. On the other hand, if you live in a dry climate, you may be able to use a less expensive type of wood that is not as resistant to moisture.

Construction Type

The type of construction you are working on is another important factor to consider when selecting the type of wood for your 2×4 studs. If you are building a structure that will be exposed to the elements, such as a deck or outdoor shed, you will need to use a type of wood that is more resistant to moisture and rot. If you are building an interior wall or a non-load-bearing structure, you may be able to use a less expensive type of wood.

Budget

Budget is always a consideration when choosing the type of wood for your 2×4 studs. Some types of wood are more expensive than others. If you are working on a tight budget, you may want to consider using a less expensive type of wood, such as pine. However, keep in mind that less expensive types of wood may not be as durable or resistant to moisture and insects as more expensive types of wood.

In conclusion, when selecting the type of wood for your 2×4 studs, it is important to consider the climate, construction type, and budget. By taking these factors into account, you can choose the right type of wood for your specific needs.

Benefits of Different Wood Types

When it comes to choosing the right wood for your 2×4 stud, you have several options to consider. Each type of wood has its own unique benefits, so it’s important to choose the one that best fits your needs. Here are some of the benefits of different wood types for 2×4 studs:

Durability

One of the most important factors to consider when choosing a wood type for your 2×4 stud is durability. You want a wood that is strong enough to support the weight of your structure and withstand the test of time. Here are some of the most durable wood types for 2×4 studs:

  • Douglas Fir: Douglas fir is a popular choice for 2×4 studs because it is strong, durable, and relatively affordable.
  • Hemlock: Hemlock is another strong and durable wood that is commonly used for 2×4 studs. It is also resistant to rot and decay.
  • Southern Yellow Pine: Southern yellow pine is a dense and strong wood that is ideal for 2×4 studs. It is also resistant to rot and decay.

Cost-Effectiveness

Another important factor to consider when choosing a wood type for your 2×4 stud is cost-effectiveness. You want a wood that is affordable without sacrificing quality. Here are some of the most cost-effective wood types for 2×4 studs:

  • Spruce: Spruce is a lightweight and affordable wood that is commonly used for 2×4 studs. It is also easy to work with.
  • Pine: Pine is another affordable wood that is commonly used for 2×4 studs. It is also easy to work with and has a natural resistance to decay.
  • Cedar: Cedar is a slightly more expensive wood than spruce or pine, but it is also more durable and resistant to rot and decay.

Availability

Finally, you want to choose a wood type for your 2×4 stud that is readily available in your area. Here are some of the most widely available wood types for 2×4 studs:

  • Spruce: Spruce is one of the most widely available wood types for 2×4 studs. It is commonly found in North America and Europe.
  • Pine: Pine is another widely available wood type for 2×4 studs. It is commonly found in North America and Europe.
  • Douglas Fir: Douglas fir is also widely available in North America and Europe and is commonly used for 2×4 studs.

In conclusion, when choosing the right wood type for your 2×4 stud, it’s important to consider factors such as durability, cost-effectiveness, and availability. By choosing the right wood type for your needs, you can ensure that your structure is strong, durable, and built to last.

Environmental Impact of Wood Choices

When choosing the type of wood for your construction project, it’s important to consider the environmental impact of your choice. Here are some factors to consider:

Sustainability

One important aspect of environmental impact is sustainability. This refers to whether the wood is being harvested in a way that allows the forest to regenerate and continue to provide wood in the future. Look for wood that has been certified by organizations like the Forest Stewardship Council (FSC) or the Sustainable Forestry Initiative (SFI).

Carbon Footprint

Another aspect to consider is the carbon footprint of the wood. Wood is a renewable resource, but harvesting, transporting, and processing it can still have a significant impact on the environment. Look for wood that has been harvested and processed locally to minimize transportation emissions.

End-of-Life Disposal

Finally, consider what will happen to the wood at the end of its life. Will it be recycled, reused, or sent to a landfill? Look for wood that can be easily recycled or reused, or that will break down naturally if it does end up in a landfill.

By considering these factors, you can choose a wood that has a minimal environmental impact and is sustainable for future generations.

Frequently Asked Questions

What are the dimensions of a 2×4 stud?

A 2×4 stud typically has actual dimensions of 1.5 inches by 3.5 inches. The length can vary depending on the intended use.

What is the longest length of a 2×4?

The longest length of a 2×4 stud is typically 16 feet. However, some lumber yards may carry longer lengths.

What type of wood is typically used for framing with 2x4s?

The most common type of wood used for framing with 2x4s is pine. However, other types of lumber such as spruce or fir can also be used.

What is the price range for a 2×4 at Lowe’s?

The price range for a 2×4 at Lowe’s can vary depending on the type of wood and length. On average, a 2×4 can cost between $2 and $5.

What are the different types of 2×4 wood?

There are several different types of 2×4 wood, including pine, spruce, fir, hemlock, and cedar. Each type of wood has its own unique characteristics and may be better suited for certain projects.

Is pine the most common type of wood used for 2x4s?

Yes, pine is the most common type of wood used for 2x4s. This is because it is readily available, affordable, and easy to work with. However, other types of wood can also be used depending on the project requirements.

Blog

Will Liquid Nails Adhere Wood to Concrete? A Quick Guide

Are you considering using Liquid Nails to adhere wood to concrete? If so, you’re in luck. Liquid Nails is a popular construction adhesive that can be used for a variety of projects, including attaching wood to concrete surfaces. However, there are some important factors to consider before using Liquid Nails for this purpose.

First and foremost, it’s essential that both the wood and concrete surfaces are clean, dry, and free of dust and debris. This will ensure that the adhesive can properly bond to both surfaces. Additionally, the application temperature should be between 40-100° F (5-38° C) for optimal results. It’s also important to select the right type of Liquid Nails for your project, as there are various formulations available for different purposes. By following these guidelines, you can ensure that your wood-to-concrete project will be a success with the help of Liquid Nails.

Understanding Liquid Nails

hammer-1629587_1920

If you are looking for a heavy-duty construction adhesive, Liquid Nails is a popular choice that can provide you with harsh edition and durability in harsh weather conditions. Liquid Nails come in a variety of adhesives based on different purposes, and they are commonly used for bonding different materials, including wood, concrete, metal, and more.

Liquid Nails is a brand name for a line of construction adhesives that are designed to bond a wide range of materials. The adhesives are made from a variety of chemicals, including polyurethane, epoxy, and acrylic. The specific type of adhesive you need will depend on the materials you are bonding and the conditions under which the bond will be used.

When using Liquid Nails, it is important to follow the manufacturer’s instructions carefully. The surfaces you are bonding must be clean, dry, and free of dust and debris. The application temperature must be between 40-100° F (5-38° C). If the temperature is too low, the adhesive may not cure properly, and if it is too high, the adhesive may dry too quickly.

One of the most common applications for Liquid Nails is bonding wood to concrete. To achieve a strong bond, you must follow some crucial steps before applying the adhesive. The surface must be clean and dry beforehand; this means removing any dirt or debris from both the wood and concrete surfaces. Liquid Nails Polyurethane Construction Adhesive can be used to stick wood to concrete given the appropriate conditions.

Liquid Nails is a versatile construction adhesive that can be used for a wide range of applications. Whether you are bonding wood to concrete, repairing cracks in concrete, or bonding metal to metal, Liquid Nails has an adhesive that can meet your needs. Always follow the manufacturer’s instructions carefully and ensure that the surfaces you are bonding are clean, dry, and free of dust and debris.

Wood and Concrete: A Material Overview

Wood and concrete are two of the most commonly used building materials in construction projects. While wood is a natural material that comes from trees, concrete is a man-made material that is composed of cement, water, and aggregates. Both materials have their advantages and disadvantages, and they are often used together in construction projects.

Wood is a popular choice for building structures, such as houses, because it is lightweight, easy to work with, and has good insulation properties. It is also a renewable resource, which makes it an environmentally friendly option. However, wood is vulnerable to moisture, insects, and fire, which can cause it to decay, rot, or burn.

Concrete, on the other hand, is a durable and strong material that can withstand a lot of wear and tear. It is also fire-resistant and has good insulation properties. However, concrete is heavy, difficult to work with, and has a high carbon footprint. It also requires a lot of energy to produce, which makes it less environmentally friendly than wood.

When it comes to joining wood and concrete together, there are several options available. One popular method is to use mechanical fasteners, such as screws, bolts, or nails. However, this method can be time-consuming and may weaken the wood or concrete over time.

Another option is to use adhesives, such as Liquid Nails construction adhesive. This type of adhesive can bond wood to concrete, as long as the surfaces are clean, dry, and dust-free. It is also important to use the appropriate type of adhesive for the job, such as Liquid Nails Polyurethane Construction Adhesive.

Overall, wood and concrete are two versatile and useful materials that can be used together in many construction projects. Whether you choose to use mechanical fasteners or adhesives, it is important to follow the manufacturer’s instructions and take the appropriate safety precautions.

Adhesion Process

When using Liquid Nails to adhere wood to concrete, there are a few important steps you need to follow to ensure a strong bond.

First, make sure both the wood and concrete surfaces are clean and dry. Any dirt, dust, or debris can compromise the adhesion, so it’s important to thoroughly clean both surfaces before applying the adhesive.

Next, apply the Liquid Nails in a zigzag pattern on the back of the wood, making sure to leave enough space around the edges for the adhesive to spread out when the wood is pressed onto the concrete.

Once the adhesive is applied, press the wood firmly onto the concrete surface and hold it in place for at least 24 hours to allow the adhesive to fully cure. You can use clamps or weights to help hold the wood in place while the adhesive sets.

It’s important to note that the ideal temperature for applying Liquid Nails is between 40-100°F (5-38°C). If the temperature is too cold or too hot, the adhesive may not bond properly.

Overall, if you follow these steps and ensure the conditions are right, Liquid Nails can be an effective adhesive for adhering wood to concrete.

Factors Affecting Adhesion

When using Liquid Nails to adhere wood to concrete, there are several factors that can affect the strength and longevity of the bond. By properly preparing the surface, taking into account weather conditions, and using the correct application technique, you can ensure the best possible results.

Surface Preparation

One of the most important factors in achieving a strong bond between wood and concrete is surface preparation. Both surfaces should be clean, dry, and free of dust and debris before applying Liquid Nails. Any loose paint, rust, or other contaminants should be removed with a wire brush or scraper. For best results, use a solvent such as acetone to clean the surfaces before applying the adhesive.

Weather Conditions

The climate and fluctuation of temperature and humidity are major factors in determining the longevity of an adhesive bond between the wood and concrete. Wood tends to swell and contract over time with changing atmospheric conditions. Therefore, it is important to apply Liquid Nails when the temperature is between 40-100°F (5-38°C) and the humidity is low. Avoid applying the adhesive on rainy or damp days, as moisture can interfere with the bond.

Application Technique

The application technique is also important in achieving a strong bond. Liquid Nails should be applied in a continuous bead, with 1/4 inch (6mm) of adhesive per square inch (6.45cm²) of surface area. The adhesive should be applied to both surfaces, and then the surfaces should be pressed firmly together. Use clamps or other means to hold the surfaces in place while the adhesive sets. Allow the adhesive to dry for at least 24 hours before removing the clamps or other means of support.

By following these guidelines for surface preparation, weather conditions, and application technique, you can ensure the best possible results when using Liquid Nails to adhere wood to concrete.

Real-World Examples

If you’re wondering whether Liquid Nails will adhere wood to concrete, you’re not alone. Many people have used this popular construction adhesive for various DIY projects. Here are some real-world examples of how Liquid Nails worked for others:

Example 1: Attaching Wood to Concrete Stairs

One homeowner needed to attach wooden treads to concrete stairs in their basement. They used Liquid Nails Heavy Duty Construction Adhesive, and the result was impressive. The wood treads were securely attached to the concrete stairs, and they were able to walk up and down the stairs without any issues.

Example 2: Installing a Wood Floor on Concrete

Another DIY enthusiast wanted to install a wood floor in their basement, but the concrete subfloor was uneven. They used Liquid Nails Premium Polyurethane Construction Adhesive to attach plywood subflooring to the concrete. The adhesive worked perfectly, and the plywood subflooring was level and secure. They were able to install the wood floor on top of the subflooring without any problems.

Example 3: Building a Retaining Wall

A homeowner wanted to build a retaining wall in their backyard using concrete blocks and wood posts. They used Liquid Nails Landscape Block and Stone Adhesive to attach the concrete blocks to each other and the wood posts to the blocks. The adhesive worked well, and the retaining wall was sturdy and secure.

In conclusion, Liquid Nails can adhere wood to concrete in various DIY projects. However, it’s important to use the right type of Liquid Nails for the job and follow the manufacturer’s instructions carefully. With the appropriate conditions and application temperature, Liquid Nails can provide a strong and reliable bond between wood and concrete.

Safety Measures

When working with Liquid Nails to adhere wood to concrete, it is important to take the necessary safety measures to protect yourself and others in the area. Here are some safety tips to keep in mind:

Wear Protective Gear

Before you start using Liquid Nails, make sure you are wearing the appropriate protective gear. This includes gloves, safety glasses, and a respirator mask. The fumes from the adhesive can be harmful, so it is important to protect your lungs by wearing a mask.

Work in a Well-Ventilated Area

When using Liquid Nails, it is important to work in a well-ventilated area. Open windows and doors to allow fresh air to circulate, and use fans to help move the air around. This will help to reduce the amount of fumes in the air and make it safer for you to work.

Follow the Manufacturer’s Instructions

Always follow the manufacturer’s instructions when using Liquid Nails. This includes applying the adhesive in the correct temperature range, using the right amount of adhesive, and allowing enough time for the adhesive to dry. Failure to follow these instructions can result in a weaker bond and a less secure installation.

Keep Children and Pets Away

When working with Liquid Nails, it is important to keep children and pets away from the area. The adhesive can be harmful if ingested, and it is important to keep it out of reach of curious little hands and paws.

Clean Up Spills Immediately

If you spill Liquid Nails, clean it up immediately. The adhesive can be difficult to remove once it dries, and it can damage surfaces if left in place for too long. Use a solvent like mineral spirits to clean up any spills, and dispose of the rags or paper towels properly to prevent a fire hazard.

By following these safety measures, you can ensure that your project goes smoothly and that everyone stays safe.

Alternatives to Liquid Nails

While Liquid Nails is a popular choice for bonding wood to concrete, there are other alternatives available that may better suit your needs. Here are some options to consider:

Epoxy

Epoxy is a two-part adhesive that is known for its strength and durability. It can bond wood to concrete and other surfaces, and is often used in construction and woodworking projects. Epoxy sets quickly and is resistant to water and chemicals, making it a good choice for outdoor or high-moisture environments.

Construction Adhesive

Similar to Liquid Nails, there are other construction adhesives available that can bond wood to concrete. These adhesives come in a variety of formulas, such as polyurethane or acrylic, and may offer different strengths and drying times. Be sure to choose an adhesive that is appropriate for your specific project and follow the manufacturer’s instructions carefully.

Mechanical Fasteners

If you prefer not to use an adhesive, mechanical fasteners such as screws or nails can also be used to attach wood to concrete. However, this method may require drilling into the concrete, which can be difficult and time-consuming. Additionally, the fasteners may be visible and may not provide as strong of a bond as an adhesive.

Overall, the best option for bonding wood to concrete will depend on your specific project and needs. Consider factors such as strength, durability, and ease of use when choosing an adhesive or fastening method.

Frequently Asked Questions

Can Liquid Nails be used to attach wood to concrete?

Yes, Liquid Nails Polyurethane Construction Adhesive can be used to attach wood to concrete. However, it is important to ensure that the surfaces are clean, dry, and dust-free before applying the adhesive. Additionally, the application temperature should be between 40-100°F (5-38°C) for best results.

Is Liquid Nails a good adhesive for wood to concrete?

Liquid Nails is a popular and trusted adhesive for attaching wood to concrete. However, its effectiveness depends on the specific conditions of the project, such as the type of wood and concrete being used, as well as the temperature and humidity during application.

What is the best glue for attaching wood to concrete?

In addition to Liquid Nails, there are several other adhesives that can be used to attach wood to concrete, including epoxy, construction adhesive, and silicone adhesive. The best glue for your project will depend on the specific materials and conditions involved.

Can you glue wood to concrete without drilling?

Yes, it is possible to glue wood to concrete without drilling by using a strong adhesive such as Liquid Nails or construction adhesive. However, it is important to follow the manufacturer’s instructions carefully and ensure that the surfaces are properly prepared before applying the adhesive.

Will Liquid Nails adhere metal to concrete?

Yes, Liquid Nails can be used to adhere metal to concrete. However, it is important to choose the appropriate type of Liquid Nails for your specific project and ensure that the surfaces are properly prepared before applying the adhesive.

What is the best Liquid Nails for concrete?

The best Liquid Nails for concrete will depend on the specific conditions of your project. However, Liquid Nails Heavy Duty Construction Adhesive is a popular choice for attaching wood and other materials to concrete, as it is designed to withstand extreme temperatures and weather conditions.

Blog

What are some ways to glue fabric to wood? Tips and tricks

If you’re a DIY enthusiast, you know that fabric and wood are two versatile materials that can be used to create a variety of beautiful projects. However, gluing fabric to wood can be a bit tricky, especially if you don’t have the right materials or technique. Fortunately, there are several ways to glue fabric to wood, and we’ll cover some of the most effective methods in this article.

One of the most popular methods for gluing fabric to wood is using Mod Podge. This all-in-one glue, sealer, and finish is perfect for adhering fabric to wood, and it dries clear, leaving a smooth and professional-looking finish. Another popular option is using spray adhesive, which is quick and easy to apply, and provides a strong bond between the fabric and wood. However, it’s important to use spray adhesive in a well-ventilated area and protect surrounding surfaces from overspray.

Another method for gluing fabric to wood is using a hot glue gun. This option is ideal for smaller projects or when you need a quick and strong bond. However, it’s important to be careful when using a hot glue gun, as the glue can be hot enough to cause burns. Additionally, hot glue may not be the best option for projects that will be exposed to high temperatures or moisture. Overall, there are several ways to glue fabric to wood, and the method you choose will depend on the project you’re working on and your personal preferences.

Understanding the Basics of Gluing Fabric to Wood

understanding-the-basics-of-gluing-fabric-to-wood

When it comes to gluing fabric to wood, it is important to understand the basics in order to achieve a successful outcome. Here are some key points to keep in mind:

Choosing the Right Adhesive Medium

Selecting the right adhesive medium is crucial when gluing fabric to wood. Using a typical crafting glue will not work well for this combination. Instead, you should choose an adhesive that is specifically designed for bonding fabric to wood. Some popular options include:

  • Fabric glue
  • Spray adhesive
  • Contact cement

Each of these adhesives has its own unique properties and application methods, so be sure to choose the one that best suits your project needs.

Preparing the Wood Surface

Before gluing fabric to wood, it is important to prepare the wood surface properly. This will help ensure a strong bond between the two materials. Here are some steps to follow:

  1. Sand the wood surface to remove any rough spots or debris.
  2. Wipe the surface clean with a damp cloth to remove any dust or dirt.
  3. Apply a coat of primer or sealer to the wood surface. This will help the adhesive bond more effectively.

Applying the Adhesive

When applying the adhesive, it is important to follow the manufacturer’s instructions carefully. Here are some general tips to keep in mind:

  • Apply the adhesive evenly and thinly to both the fabric and wood surfaces.
  • Allow the adhesive to dry until it becomes tacky before bonding the two surfaces together.
  • Use a brayer or scraper to smooth out any air bubbles or wrinkles in the fabric.

By following these basic guidelines, you can achieve a strong and long-lasting bond between fabric and wood.

Choosing the Right Glue

When it comes to gluing fabric to wood, choosing the right glue is essential to ensure a strong and long-lasting bond. There are several types of glue available, each with its own advantages and disadvantages. Here are some of the most common types of glue for fabric to wood:

Fabric Glue

Fabric glue is specially designed for bonding fabric to various surfaces, including wood. It is easy to use and dries clear, making it ideal for projects where appearance is important. Fabric glue is also washable, making it a great option for items that will be exposed to moisture or need to be cleaned regularly.

Wood Glue

Wood glue is a popular choice for bonding wood to other materials, including fabric. It is strong and durable, making it ideal for projects that require a long-lasting bond. However, wood glue can be messy and difficult to clean up, so it is important to use it carefully.

Hot Glue

Hot glue is a fast-drying adhesive that is ideal for bonding fabric to wood. It is easy to use and can be applied quickly, making it a great option for projects that require a quick turnaround time. However, hot glue can be messy and may not be the best choice for items that will be exposed to high temperatures.

Spray Adhesive

Spray adhesive is a popular choice for bonding fabric to wood because it creates an even layer of glue that is easy to apply. It is also fast-drying and can be used on a variety of surfaces. However, spray adhesive can be messy and may not be the best choice for projects that require precise application.

When choosing the right glue for your project, it is important to consider the materials you are working with, as well as the type of bond you need. Take the time to research your options and choose a glue that will provide a strong and long-lasting bond.

Preparation Process

Preparation Processpreparation-process-1

Before you start gluing fabric to wood, it is essential to prepare both the wood and the fabric. Proper preparation ensures that the fabric adheres well to the wood and the final product looks neat and professional. This section will guide you through the preparation process.

Cleaning the Wood

The first step in preparing the wood is to clean it thoroughly. Any dirt, dust, or grease on the wood surface can interfere with the adhesive’s effectiveness, leading to a weak bond. Here are the steps to follow when cleaning the wood:

  1. Wipe the wood surface with a dry cloth to remove any loose debris.
  2. Use a damp cloth to wipe the wood surface. Ensure the cloth is not too wet to avoid soaking the wood.
  3. Allow the wood to dry completely before proceeding to the next step.

Cutting the Fabric

Cutting the fabric is the next step in preparing it for gluing to the wood. The fabric should be cut to the same size as the wood surface to ensure a clean finish. Follow these steps to cut the fabric:

  1. Measure the wood surface using a measuring tape.
  2. Add an extra inch to the measurement to allow for folding the fabric over the edges of the wood surface.
  3. Cut the fabric to the required size using scissors.

By following these preparation steps, you will have a clean and well-prepared surface for gluing the fabric to the wood.

Step-By-Step Guide to Gluing

If you want to glue fabric to wood, there are a few steps you need to follow to ensure that the fabric stays in place and looks good. Here is a step-by-step guide to gluing fabric to wood.

Applying the Glue

The first step is to apply the glue to the wood. You can use any type of glue that is suitable for fabric and wood, such as Mod Podge or a fabric glue. Apply the glue to the wood using a brush or a roller, making sure to cover the entire surface evenly.

Positioning the Fabric

Once you have applied the glue, it’s time to position the fabric. Lay the fabric over the wood, making sure that it is centered and straight. Smooth out any wrinkles or bubbles in the fabric with your hands, starting from the center and working your way outwards.

Smoothing Out the Fabric

After you have positioned the fabric, use a tool to smooth out any wrinkles or bubbles that remain. You can use a credit card or a plastic scraper to do this. Start from the center of the fabric and work your way outwards, pressing down firmly as you go.

Allowing the Glue to Dry

Once you have smoothed out the fabric, allow the glue to dry completely. This can take anywhere from a few hours to overnight, depending on the type of glue you used and the humidity in the air. Once the glue is dry, your fabric should be firmly attached to the wood.

By following these simple steps, you can easily glue fabric to wood and create beautiful, unique pieces of art or furniture.

Tips for a Perfect Finish

tips-for-a-perfect-finish

When gluing fabric to wood, it’s important to achieve a smooth and flawless finish. Here are some tips to help you achieve the perfect finish for your project.

Dealing with Bubbles

Bubbles can be a common problem when gluing fabric to wood. To avoid them, make sure to apply the glue evenly and smoothly. Use a foam brush or a scraper to spread the glue evenly over the wood surface.

If you do end up with bubbles, don’t worry. You can easily fix them by using a pin or a needle to puncture the bubble. Then, use your finger or a scraper to smooth out the fabric over the punctured area.

Trimming Excess Fabric

After gluing the fabric to the wood, you may have excess fabric that needs to be trimmed. Use a sharp pair of scissors to carefully trim the excess fabric. Make sure to leave a small margin of fabric around the edges to avoid any fraying or unraveling.

If you need to trim the fabric around curves or corners, make small cuts to help the fabric lay flat. Be careful not to cut too much or you may end up with gaps or holes in your fabric.

By following these tips, you can achieve a perfect finish when gluing fabric to wood. Remember to take your time and work carefully to ensure the best results.

Safety Measures

When working with glue and wood, it is important to take the necessary safety measures to avoid accidents and injuries. Here are some safety tips to keep in mind:

Wear Protective Gear

Wear protective gear such as gloves and safety goggles to protect your skin and eyes from the glue and any debris that may fly off during the process. This is especially important if you are using power tools to sand the wood.

Work in a Well-Ventilated Area

Glue can emit fumes that can be harmful if inhaled in large quantities. Make sure you work in a well-ventilated area to avoid inhaling the fumes. If you are working indoors, open windows and doors to allow fresh air to circulate.

Use Glue Responsibly

Make sure you use glue responsibly and follow the manufacturer’s instructions carefully. Avoid using too much glue, as it can cause the fabric to wrinkle or bubble. Also, keep the glue away from children and pets.

Clean Up Properly

After you are done with the project, make sure you clean up properly. Wipe off any excess glue from the surface of the wood and dispose of any used glue containers properly. Store the glue in a safe place away from heat and flames.

By following these safety measures, you can ensure that your project is completed safely and without any accidents or injuries.

Maintaining Your Fabric-Wood Piece

maintaining-your-fabric-wood-piece

Once you’ve successfully glued fabric to wood, you’ll want to make sure it stays looking great for as long as possible. Here are some tips for maintaining your fabric-wood piece:

Avoid Direct Sunlight

Prolonged exposure to direct sunlight can cause the colors in your fabric to fade over time. If possible, avoid placing your fabric-wood piece in direct sunlight. If it must be in a sunny area, consider using curtains or blinds to block some of the light.

Clean Regularly

Dust and dirt can accumulate on your fabric-wood piece over time, making it look dingy and dull. To keep it looking its best, clean it regularly with a soft cloth or brush. If there are any stains, use a gentle cleaner and a damp cloth to remove them.

Use Furniture Wax

If your fabric-wood piece has a glossy finish, you can use furniture wax to help maintain its shine. Apply a thin layer of wax with a soft cloth, then buff it with a clean cloth to give it a nice shine.

Avoid Harsh Chemicals

When cleaning your fabric-wood piece, avoid using harsh chemicals that can damage the fabric or the wood. Stick to gentle cleaners and avoid anything with bleach or ammonia.

Store Carefully

If you need to store your fabric-wood piece for any length of time, make sure it’s stored in a cool, dry place where it won’t be exposed to sunlight or moisture. Cover it with a cloth or sheet to protect it from dust and dirt.

Frequently Asked Questions

How can I attach fabric to wood furniture?

If you want to attach fabric to wood furniture, there are a few ways to do it. One option is to use a staple gun to staple the fabric to the wood. Another option is to use a hot glue gun to glue the fabric to the wood. You can also use fabric glue or spray adhesive to attach the fabric to the wood.

What kind of glue works best for sticking fabric to wood?

The best glue for sticking fabric to wood is a PVA glue or a fabric glue. Both of these glues are designed specifically for use with fabric and wood, and they are strong enough to hold the fabric in place. You can also use a spray adhesive or a hot glue gun to attach the fabric to the wood.

What are some alternatives to fabric glue for attaching fabric to wood?

If you don’t have fabric glue, there are a few alternatives that you can use to attach fabric to wood. One option is to use a spray adhesive, which will create a strong bond between the fabric and the wood. Another option is to use a hot glue gun, which can be used to attach the fabric to the wood quickly and easily.

Can I use spray adhesive to attach fabric to wood?

Yes, you can use spray adhesive to attach fabric to wood. Spray adhesive is a great option if you want to attach the fabric to the wood quickly and easily. Simply spray the adhesive onto the wood and press the fabric onto the wood. The adhesive will create a strong bond between the fabric and the wood.

Will Gorilla Glue work for attaching fabric to wood?

While Gorilla Glue is a strong adhesive, it is not the best option for attaching fabric to wood. Gorilla Glue is designed for use with wood, metal, and plastic, and it may not bond well with fabric. It’s best to use a fabric glue or a spray adhesive when attaching fabric to wood.

Does PVA glue hold fabric to wood effectively?

Yes, PVA glue holds fabric to wood effectively. PVA glue is designed for use with porous materials like wood and fabric, and it creates a strong bond between the two materials. When using PVA glue to attach fabric to wood, be sure to apply a thin layer of glue to both the fabric and the wood for the best results.

Blog

Does Wood Glue Work on Metal? A Comprehensive Guide

Have you ever wondered if wood glue works on metal? Many people believe that wood glue is only suitable for wood-to-wood bonding, but this is not entirely true. It is possible to use wood glue to attach metal to wood, but it depends on the type of glue you use.

While wood and metal have vastly different properties, there are certain types of wood glue that have been specifically designed to bond with metal. Two-part epoxy or acrylate glue are considered to be the strongest options for metal-to-wood bonding. However, polyurethane-based wood glue and contact cement can also work well. It’s important to choose the right type of glue based on the materials you are working with to ensure a strong and lasting bond.

Understanding Wood Glue

When it comes to woodworking, wood glue is an essential tool that can be used to bond pieces of wood together. But what about bonding wood to metal? Can wood glue be used for that purpose?

The answer is yes, but it’s important to understand the properties of wood glue and how they interact with metal surfaces.

Wood glue, also known as PVA glue, is a water-based adhesive that is specifically formulated to bond porous surfaces like wood. When applied to wood, the glue penetrates the pores and creates a strong bond between the wood fibers.

However, metal surfaces are non-porous and do not have the same type of structure as wood. This means that regular wood glue may not be effective for bonding metal surfaces.

To bond wood to metal, you will need to use a specialized type of wood glue that is designed to work with non-porous surfaces. These types of wood glue typically contain additives that help the glue adhere to metal surfaces.

It’s also important to note that the strength of the bond will depend on the type of metal you are working with. Some metals, like aluminum, are more difficult to bond than others.

In summary, wood glue can be used to bond wood to metal, but you need to use a specialized type of glue that is designed for non-porous surfaces. The strength of the bond will depend on the type of metal you are working with, so it’s important to choose the right type of glue for your project.

Understanding Metal Surfaces

understanding-metal-surfacesUnderstanding Metal Surfaces

When it comes to bonding metal to wood using glue, it is essential to understand the characteristics of the metal surface. Here are a few things to keep in mind:

  • Cleanliness: Before applying any glue, make sure the metal surface is clean. Dirt, grease, oil, and rust can all affect the bonding ability of the glue. Use a damp cloth to wipe the surface to get rid of any grease, oil, and dirt. Finish by wiping with a dry cloth so that you are left with bare metal.
  • Texture: The texture of the metal surface can also affect the bonding ability of the glue. Smooth, shiny surfaces may not provide enough surface area for the glue to bond properly. In contrast, rough or porous surfaces may absorb too much glue, weakening the bond. To improve bonding, consider sanding the metal surface lightly to create a slightly rougher texture.
  • Type of metal: Different types of metals have different properties that can affect the bonding ability of the glue. For example, aluminum is a lightweight metal that can be challenging to bond because it is non-porous and has a smooth surface. On the other hand, steel is a more porous metal that can bond well with glue.
  • Expansion and contraction: Metal and wood expand and contract at different rates due to temperature changes and moisture levels. This can cause stress on the bond, leading to failure over time. To minimize this effect, choose a glue that can handle some degree of flexibility and movement, such as 2-part epoxy.

By understanding the characteristics of the metal surface, you can choose the right glue and surface preparation techniques to create a strong bond between metal and wood.

Adhesion Principles

When it comes to bonding materials together, the process of adhesion is essential. Adhesion is the attraction between two different substances that causes them to stick together. The principles of adhesion are important to understand when considering whether wood glue can work on metal.

Adhesion occurs when the adhesive molecules interact with the surface of the material being bonded. The strength of the bond depends on several factors, including the surface energy of the materials, the adhesive’s chemical composition, and the environmental conditions during bonding.

Wood glue, also known as PVA glue, is designed to bond porous materials such as wood, paper, and fabric. It works by penetrating the pores of the material and creating a strong bond within the fibers. However, metal surfaces are non-porous, which means that wood glue may not be able to penetrate the surface and create a strong bond.

Another factor to consider is the chemical composition of the adhesive. Wood glue is typically water-based, which means that it may not be able to bond with metal surfaces that are not water-absorbent. In addition, wood glue may not be able to withstand the stress and strain that metal surfaces can experience.

Overall, while wood glue may be able to bond some types of metal surfaces, it is not recommended for use as a primary adhesive for metal bonding. Instead, it is best to use specialized metal adhesives that are designed specifically for bonding metal surfaces. These adhesives are formulated to provide strong bonds that can withstand the stress and strain of metal bonding, ensuring a long-lasting bond that will not fail over time.

Wood Glue on Metal: The General Consensus

When it comes to bonding metal and wood together, many people wonder if wood glue is a viable option. While some types of wood glue can be used on certain metals, the general consensus is that wood glue is not the best adhesive for metal bonding.

Regular wood glue, also known as polyvinyl acetate (PVA) glue, is formulated as a water-based adhesive. Its functionality is rooted in its ability to permeate the wood’s porous structure and establish a strong bond within the wood fibers. However, this mechanism is not effective on non-porous surfaces like metal, which makes it unsuitable for bonding most metals.

Wood glue can be used on soft metals like aluminum and copper, but the bond will be weaker than with other types of metal. PVA glues are also suitable for bonding steel, but again, the bond will not be as strong as with other adhesives.

If you need to bond metal and wood together, there are other adhesives that are more suitable for the job. Epoxy and polyurethane glue are the best options for attaching metal and wood as they form the strongest bond between the two materials. They are also more resistant to water and heat, making them ideal for outdoor or high-temperature applications.

In summary, while wood glue can be used on certain types of metal, it is not the best adhesive for bonding metal and wood together. If you need a strong and reliable bond, it is best to use epoxy or polyurethane glue instead.

Exploring Alternative Adhesives

When it comes to bonding wood and metal, wood glue may not always be the best option. In some cases, you may need to explore alternative adhesives to achieve a strong and durable bond. Here are a few options to consider:

Epoxy Resins

Epoxy resins are a popular choice for bonding metal and wood. These adhesives consist of two parts – a resin and a hardener – that must be mixed together before use. Once applied, epoxy resins cure to form a strong and durable bond that can withstand high stress and strain. They are also resistant to water, heat, and chemicals, making them ideal for use in harsh environments.

Here are a few things to keep in mind when using epoxy resins:

  • Mix the resin and hardener thoroughly before use
  • Apply the adhesive evenly to both surfaces
  • Clamp the surfaces together until the adhesive cures
  • Allow the adhesive to cure completely before subjecting the bond to stress or strain

Polyurethane Adhesives

Polyurethane adhesives are another option for bonding wood and metal. These adhesives are known for their high strength and flexibility, which makes them ideal for use in applications where the bond may be subjected to movement or vibration. They also have good resistance to water and chemicals.

Here are a few tips for using polyurethane adhesives:

  • Apply the adhesive evenly to both surfaces
  • Clamp the surfaces together until the adhesive cures
  • Allow the adhesive to cure completely before subjecting the bond to stress or strain

Cyanoacrylate Adhesives

Cyanoacrylate adhesives, also known as superglues, are a fast and easy option for bonding wood and metal. These adhesives work by reacting with moisture in the air to form a strong and durable bond. They are ideal for use in small applications where a quick bond is needed.

Here are a few things to keep in mind when using cyanoacrylate adhesives:

  • Apply the adhesive sparingly to one surface
  • Press the surfaces together firmly and hold for a few seconds
  • Allow the adhesive to cure completely before subjecting the bond to stress or strain

Overall, there are several alternative adhesives that can be used to bond wood and metal. The best option will depend on the specific application and the conditions the bond will be subjected to. By considering the properties of each adhesive and following the manufacturer’s instructions, you can achieve a strong and durable bond between wood and metal.

Practical Applications of Wood Glue on Metal

practical-applications-of-wood-glue-on-metal

If you’re wondering whether wood glue can be used on metal, the answer is yes. While wood glue is primarily used for bonding wood, it can also be used on metal surfaces. Here are some practical applications of using wood glue on metal:

1. Wood and Metal Combination Projects

Wood and metal combination projects are becoming increasingly popular in the world of DIY. If you’re working on a project that involves both wood and metal, using wood glue can be a great way to bond the two materials together. This will help you avoid the hassle of maintaining two sets of glue.

2. Repairing Metal Objects

If you have a metal object that needs repairing, wood glue can be a great solution. It can be used to bond broken pieces of metal together, or to fill in gaps and cracks. However, it’s important to keep in mind that not all types of wood glue are suitable for use on metal. Be sure to choose a wood glue that is specifically designed for use on metal surfaces.

3. Creating Metal Art

If you’re a fan of metal art, you can use wood glue to create unique and interesting pieces. For example, you can use wood glue to bond metal pieces together to create a sculpture or other decorative object. You can also use wood glue to attach other materials, such as wood or fabric, to metal surfaces.

4. Building Metal Furniture

If you’re building metal furniture, wood glue can be a great way to bond metal pieces together. It can also be used to attach other materials, such as wood or glass, to metal surfaces. However, it’s important to keep in mind that wood glue may not be strong enough for all types of metal furniture. Be sure to choose a wood glue that is strong enough for the job.

Overall, wood glue can be a great solution for bonding wood and metal surfaces together. However, it’s important to choose the right type of wood glue for the job, and to use it properly. With the right approach, you can create unique and interesting projects that combine the beauty of wood and metal.

Safety Measures When Using Adhesives

When using adhesives, safety should always be your top priority. Here are some safety measures to keep in mind when using wood glue or any other adhesive to attach metal to wood:

Wear Protective Gear

Wear protective gear to avoid any accidents. We recommend wearing safety goggles and nitrile gloves to protect your eyes and hands from any harmful chemicals that may be present in the adhesive.

Work in a Well-Ventilated Area

Make sure to work in a well-ventilated area to avoid inhaling any fumes that may be produced by the adhesive. If possible, work outside or in a room with open windows.

Follow the User Manual

Always follow the user manual that comes with the adhesive. The manual will provide you with important information about the adhesive, including how to use it safely.

Keep the Workspace Clear

Keep your workspace clear of any hazards that may cause accidents. Make sure that the surface you are working on is clean and free of any debris.

Store Adhesives Properly

Store adhesives in a cool, dry place, away from direct sunlight and heat sources. Make sure that the adhesive is stored in its original container with the lid tightly closed.

By following these safety measures, you can ensure that you use wood glue or any other adhesive safely and effectively.

Additional Tips for Adhesive Use

additional-tips-for-adhesive-use

When it comes to bonding wood and metal together using adhesive, there are a few additional tips that can help ensure a strong and long-lasting bond. Here are some tips to keep in mind:

1. Choose the Right Adhesive

While wood glue can work on metal, it is important to choose the right type of adhesive for the job. Some adhesives, such as epoxy and cyanoacrylate (super glue), are specifically designed to bond metal and wood together. Make sure to read the label carefully and choose an adhesive that is suitable for both materials.

2. Prepare the Surfaces

Before applying the adhesive, it is important to prepare the surfaces of the wood and metal. Make sure they are clean, dry, and free of any debris or dust. You can use sandpaper or a wire brush to roughen up the surface of the metal, which will help the adhesive bond better.

3. Apply the Adhesive Correctly

When applying the adhesive, make sure to follow the instructions carefully. Apply a thin, even layer of adhesive to both the wood and metal surfaces, and then press them together firmly. Use clamps or weights to hold the pieces in place while the adhesive dries.

4. Allow Time for Drying

Different adhesives have different drying times, so make sure to follow the instructions on the label. It is important to allow the adhesive to dry completely before using the bonded pieces. This will ensure a strong and long-lasting bond.

5. Consider Using Mechanical Fasteners

While adhesive can be a great way to bond wood and metal together, it is not always the strongest option. For heavy-duty applications, consider using mechanical fasteners such as screws or bolts in addition to adhesive. This will provide extra strength and durability.

By following these tips, you can ensure a strong and long-lasting bond between wood and metal using adhesive.

Frequently Asked Questions

What kind of glue works best for metal to metal bonding?

When it comes to metal to metal bonding, epoxy or cyanoacrylate (super glue) are the best options. These types of glue create a strong and durable bond that can withstand stress and pressure.

Can wood glue be used to attach metal to wood?

Regular wood glue is not recommended for attaching metal to wood as it is not designed to bond with metal. However, there are specialized wood glues available that are formulated to work with metal, such as polyurethane-based adhesives.

What is the strongest glue for metal to wood?

The strongest glue for metal to wood bonding is epoxy. Epoxy provides a strong and durable bond that can withstand stress and pressure. It is also resistant to water and chemicals, making it a great choice for outdoor projects.

How to attach metal to wood without screws or nails?

One option for attaching metal to wood without screws or nails is to use adhesive strips or double-sided tape. Another option is to use specialized metal-to-wood adhesives, such as epoxy or polyurethane-based adhesives.

Will Gorilla Wood Glue stick to metal?

No, Gorilla Wood Glue is not designed to bond with metal. It is specifically formulated for wood-to-wood bonding.

Will Titebond Wood Glue adhere to metal?

No, Titebond Wood Glue is not designed to bond with metal. It is specifically formulated for wood-to-wood bonding.

Blog

What are Some Ways to Glue Fabric to Wood? Tips and Tricks!

Gluing fabric to wood can be a tricky task, especially if you’re not sure which adhesive to use. Fortunately, there are a few tried-and-true methods that can help you achieve a strong, long-lasting bond between your fabric and wood surfaces.

One popular option is to use Mod Podge, a versatile crafting glue that works well for adhering fabric to wood. Another method is to use a spray adhesive, which can create a quick and easy bond between the two materials. However, it’s important to choose the right type of spray adhesive for your project, as some may not be suitable for use with certain types of fabric.

If you prefer a more traditional approach, you can also use a fabric glue or epoxy to attach your fabric to wood. These adhesives can provide a strong, durable bond that will stand up to regular wear and tear. Whatever method you choose, be sure to follow the manufacturer’s instructions carefully and test the adhesive on a small, inconspicuous area before applying it to your entire project.

Understanding Fabric and Wood

understanding-fabric-and-woodUnderstanding Fabric and Wood

When it comes to gluing fabric to wood, it’s important to understand the characteristics of both materials. Fabric and wood have different properties that can impact how well they bond together. Here are some things to keep in mind:

Fabric

  • Choose the right fabric: The type of fabric you use can affect how well it adheres to the wood. Upholstery-weight fabrics or canvas are good choices because they are durable and have a tighter weave. Avoid lightweight or stretchy fabrics as they may not bond well with the wood.
  • Prepare the fabric: Before gluing the fabric to the wood, make sure it is clean and free of any debris or loose fibers. You can use a lint roller or a soft brush to remove any dust or dirt.
  • Test the fabric: It’s a good idea to test the fabric on a small, inconspicuous area of the wood first to make sure it adheres well and doesn’t cause any damage.

Wood

  • Choose the right wood: Any unfinished, sanded wood surface will work for gluing fabric. However, some types of wood may be more porous than others, which can affect how well it absorbs the glue.
  • Sand the wood: Sanding the wood with fine-grit sandpaper (between 100-200 grit) can help the glue adhere better. Make sure to wipe away any dust with a microfiber cloth before applying the glue.
  • Use the right glue: Basic crafting glue may not be strong enough to bond fabric to wood. A better option is to use a glue that is specifically designed for wood and fabric, such as Mod Podge.

By understanding the properties of fabric and wood, you can choose the right materials and prepare them properly for a strong and lasting bond.

Types of Adhesives

When it comes to gluing fabric to wood, choosing the right adhesive is crucial. Here are some of the most common types of adhesives used for this purpose:

Mod Podge

Mod Podge is a popular adhesive medium that works well for a fabric and wood combination. It is a water-based sealer, glue, and finish that dries clear and creates a strong bond. Mod Podge comes in different finishes, such as matte, glossy, and satin, and is easy to apply with a brush. It is also versatile and can be used on a variety of surfaces.

Spray Adhesive

Another option is a spray adhesive designed for fabric. These adhesives go on in an even layer and are ideal for large or irregularly shaped surfaces. However, you want to make sure that the glue won’t pool on the wood and create an uneven bond with the fabric. When using a spray adhesive, it is important to work in a well-ventilated area and follow the manufacturer’s instructions carefully.

Contact Cement

Contact cement is a type of adhesive that creates a strong, permanent bond. It is applied to both the fabric and the wood and allowed to dry before the two surfaces are joined together. Contact cement is ideal for heavy-duty applications, such as upholstery or woodworking projects. However, it can be difficult to work with and requires careful application to avoid mistakes.

Epoxy

Epoxy is a two-part adhesive that creates a strong, durable bond. It is ideal for projects that require a high level of strength and durability, such as outdoor furniture or boat building. However, epoxy can be messy and difficult to work with, and it requires careful mixing and application.

Hot Glue

Hot glue is a quick and easy adhesive option that works well for small projects or temporary bonds. It is applied with a hot glue gun and dries quickly, creating a strong bond. However, hot glue is not ideal for heavy-duty applications, and it may not hold up well over time.

Overall, choosing the right adhesive for your fabric-to-wood project depends on the specific materials and application. Consider the strength, durability, and ease of use of each adhesive before making your choice.

Using Craft Glue

using-craft-glue 
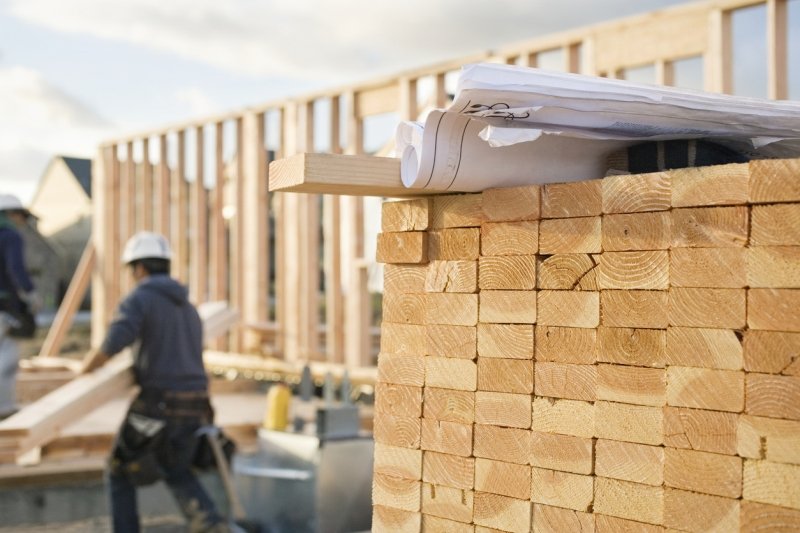
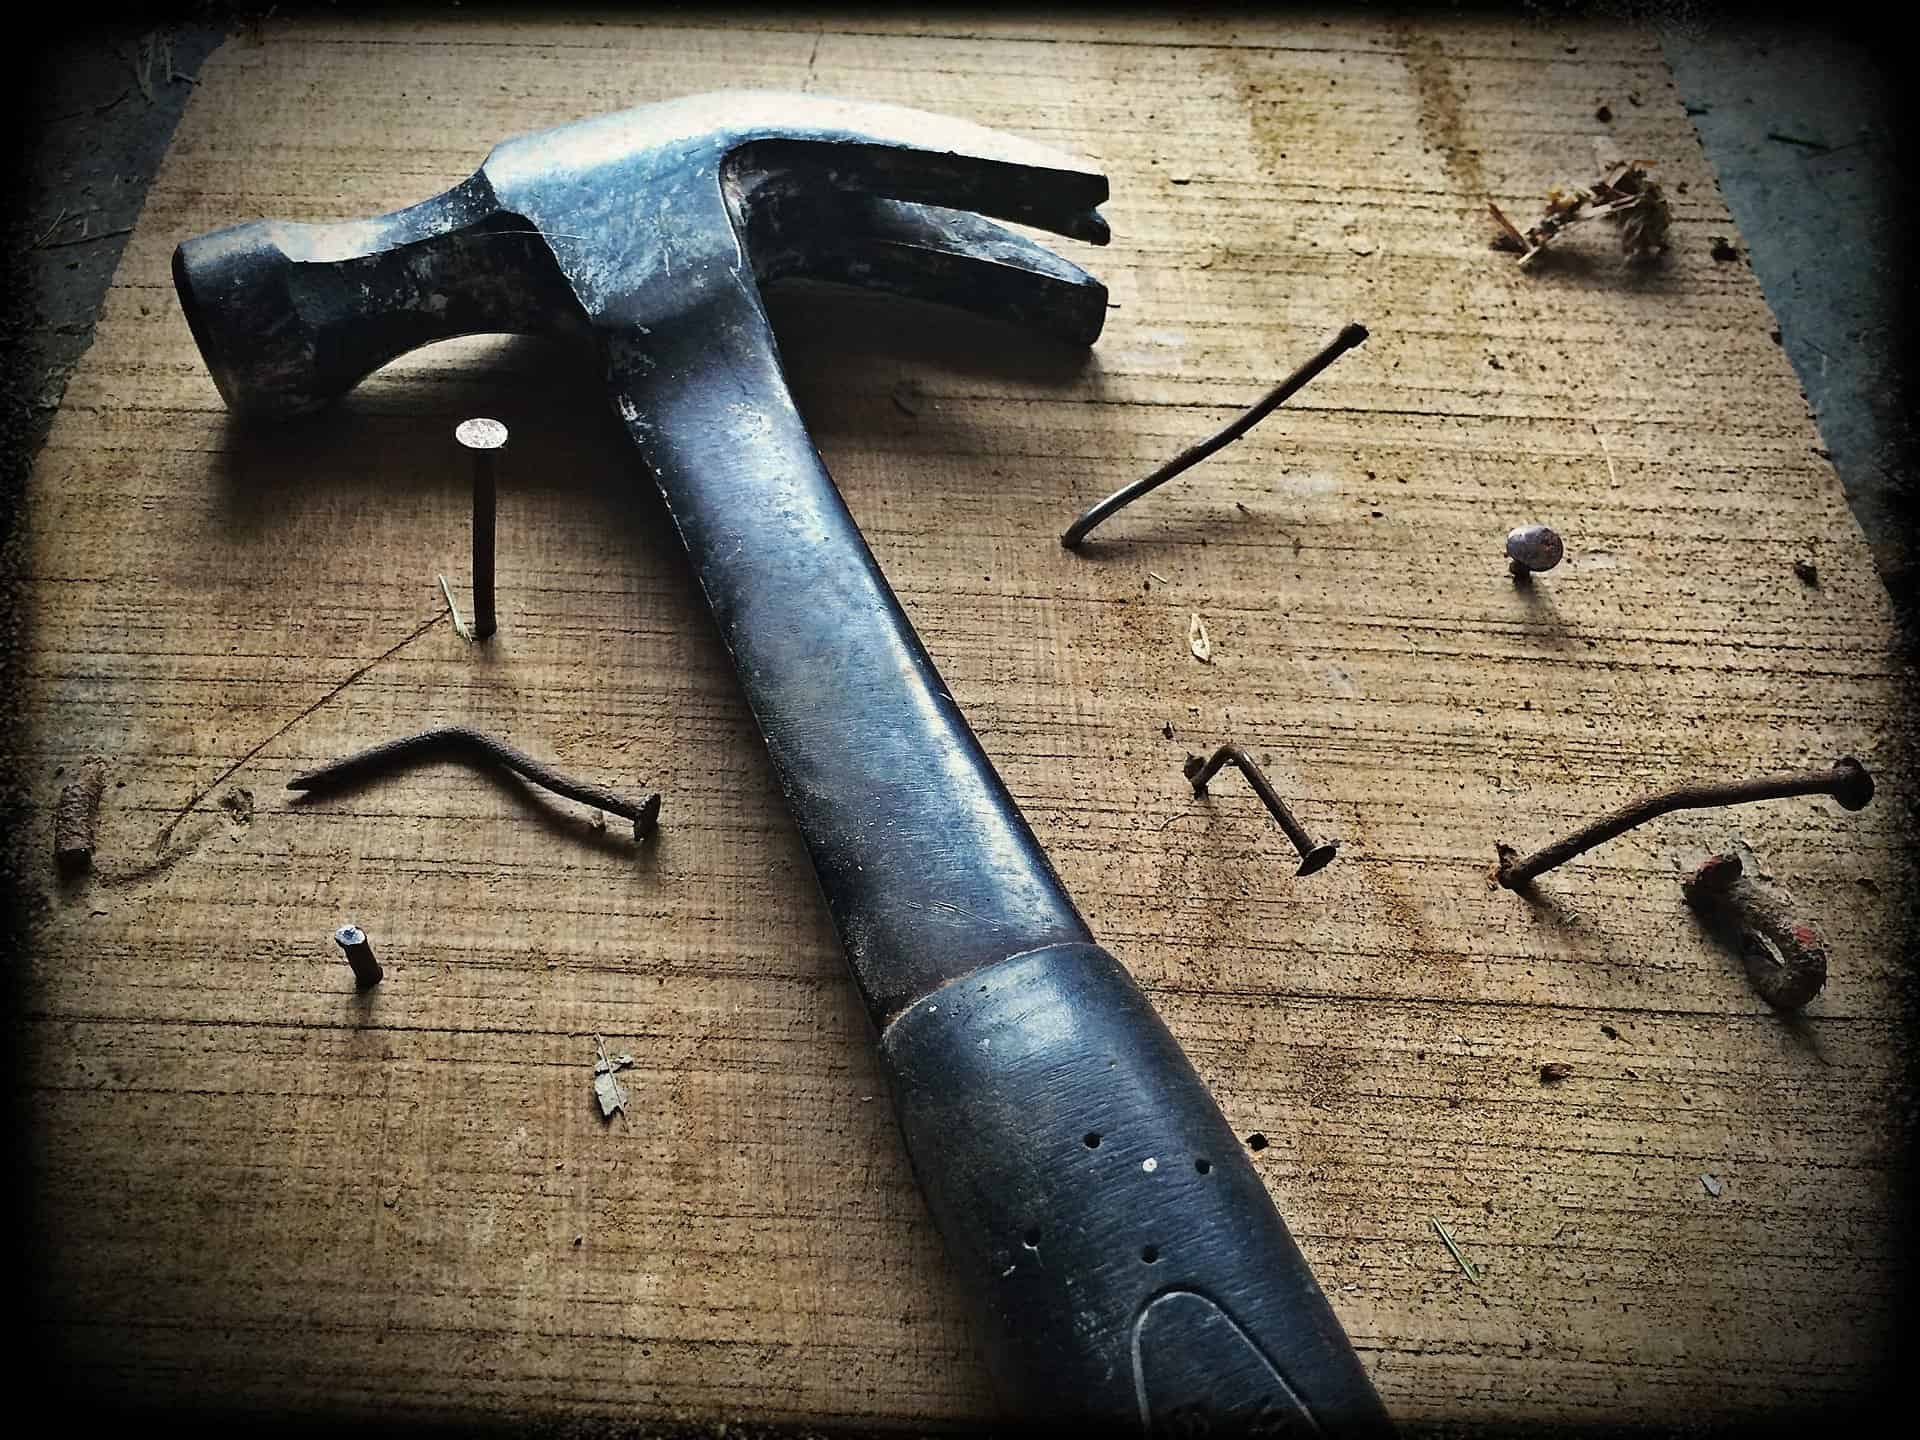
Image Credit: fabricfits

When it comes to gluing fabric to wood, craft glue is a popular choice. It is easy to use, widely available, and affordable. Here are some tips on how to use craft glue effectively.

Choosing the Right Craft Glue

Not all craft glues are created equal. When choosing a craft glue for fabric and wood, look for a glue that is strong, flexible, and dries clear. Some popular options include:

  • Aleene’s Original Tacky Glue
  • Mod Podge Fabric
  • E6000 Craft Adhesive
  • Gorilla Super Glue

Read the label carefully to make sure the glue is suitable for your project and follow the manufacturer’s instructions.

Applying Craft Glue

Here’s how to apply craft glue to fabric and wood:

  1. Lay the fabric flat on a clean, dry surface.
  2. Apply a thin, even layer of glue to the wood surface using a brush or applicator.
  3. Press the fabric onto the wood, smoothing out any wrinkles or bubbles with your fingers or a brayer.
  4. Let the glue dry completely before handling the project.

Note: It is important to use the right amount of glue. Too little glue will not hold the fabric in place, while too much glue will cause the fabric to wrinkle or warp.

Craft glue is a great option for small to medium-sized projects, such as covering a wooden picture frame or creating a decorative wooden box. However, for larger or more heavy-duty projects, you may want to consider using a different type of adhesive, such as wood glue or contact cement.

Using Hot Glue

When it comes to gluing fabric to wood, hot glue is one of the most commonly used adhesives. It’s easy to use, fast-drying, and has a strong hold once dry. In this section, we’ll discuss how to choose the right hot glue and how to apply it properly.

Choosing the Right Hot Glue

Not all hot glue is created equal, and it’s important to choose the right one for your project. Here are a few things to consider when selecting hot glue:

  • Temperature: Hot glue comes in low, high, and dual-temperature options. Low-temperature hot glue is best for delicate fabrics, while high-temperature glue is better for heavier fabrics and wood. Dual-temperature glue can be used for both.
  • Size: Hot glue sticks come in various sizes, so choose one that’s appropriate for the size of your project.
  • Color: Hot glue sticks come in different colors, but clear glue is the most versatile and won’t affect the appearance of your project.

Applying Hot Glue

Here’s how to apply hot glue to fabric and wood:

  1. Preheat your hot glue gun according to the manufacturer’s instructions.
  2. Cut your fabric to the desired size and shape.
  3. Apply a small amount of hot glue to the wood surface where you want to attach the fabric. Be careful not to use too much glue, as this can cause the fabric to wrinkle or warp.
  4. Press the fabric onto the hot glue, starting at one end and working your way to the other. Use a scraper or your fingers to smooth out any wrinkles or bubbles.
  5. Hold the fabric in place until the glue sets, which usually takes a few seconds.

It’s important to work quickly when using hot glue, as it dries fast and can be difficult to remove once it sets. If you make a mistake, use a scraper or your fingers to remove the glue before it dries completely.

In summary, hot glue is a great option for gluing fabric to wood. Just be sure to choose the right type of glue for your project and apply it carefully to avoid any mishaps.

Using Spray Adhesive

using-spray-adhesive Image Credit: waynearthurgallery

When it comes to gluing fabric to wood, spray adhesive is a popular option. It is easy to use and provides a strong bond. However, choosing the right spray adhesive and applying it correctly are important for achieving the best results.

Choosing the Right Spray Adhesive

Not all spray adhesives are created equal. It is important to choose one that is specifically designed for use with fabric and wood. Look for a spray adhesive that is labeled as “multi-purpose” or “multi-surface” to ensure that it will work well with both materials.

Additionally, consider the strength of the adhesive. Some spray adhesives are designed for temporary bonds, while others provide a permanent bond. Choose the strength that is appropriate for your project.

Applying Spray Adhesive

Before applying spray adhesive, make sure that both the fabric and wood surfaces are clean and dry. Any dirt or debris on the surfaces can prevent the adhesive from bonding properly.

Next, apply the spray adhesive to the back of the fabric in a thin, even layer. Be sure to hold the can approximately 6-8 inches away from the fabric to ensure an even application.

Once the adhesive is applied, carefully place the fabric onto the wood surface. Use a brayer or scraper to smooth out any wrinkles or bubbles in the fabric and ensure a strong bond.

Overall, using spray adhesive can be an effective way to glue fabric to wood. Just be sure to choose the right adhesive for your project and apply it correctly for the best results.

Preparation of Fabric and Wood

Before you start gluing fabric to wood, it is important to prepare both surfaces properly. This will ensure that the glue adheres to the surfaces and that the fabric stays in place. Here are some tips to help you prepare the fabric and wood for gluing:

Fabric Preparation

  1. Wash and Dry: If your fabric is new, wash it before using it. This will remove any sizing or chemicals that may interfere with the adhesive. Make sure the fabric is completely dry before gluing it to the wood.
  2. Iron: Iron the fabric to remove any wrinkles or creases. This will help the fabric lay flat and prevent any bubbles from forming under the glue.
  3. Cut: Cut the fabric to the desired size and shape. Make sure the edges are clean and straight.

Wood Preparation

  1. Sand: Sand the wood surface to remove any rough spots or splinters. This will help the glue adhere to the surface better.
  2. Clean: Wipe down the wood surface with a clean, dry cloth to remove any dust or debris.
  3. Prime: Apply a primer to the wood surface. This will help the glue adhere to the wood and prevent any bleeding of the wood’s natural oils.
  4. Cut: Cut the wood to the desired size and shape. Make sure the edges are clean and straight.

By properly preparing both the fabric and wood surfaces, you will ensure a strong and long-lasting bond between the two materials.

Post Gluing Care

post-gluing-care Image Credit: craftcuts

After successfully gluing your fabric to wood, it is important to take care of the finished product to ensure it lasts a long time. Here are some post-gluing care tips:

Allow Proper Drying Time

Before handling your newly glued fabric and wood project, make sure it has completely dried. This can take anywhere from a few hours to a full day depending on the type of glue used. Be patient and avoid touching or moving the project until it is fully dry.

Clean Up Excess Glue

If any excess glue has seeped out from the edges of the fabric and wood, use a scraper or a damp cloth to clean it up. This will prevent the glue from hardening and ruining the appearance of your project.

Avoid Water Exposure

While some glues claim to be water-resistant, it is best to avoid exposing your fabric and wood project to water. Moisture can weaken the bond between the fabric and wood, causing the fabric to peel or warp. If you need to clean your project, use a dry cloth or a gentle brush instead of water.

Store Properly

When not in use, store your fabric and wood project in a cool, dry place. Avoid exposing it to direct sunlight or extreme temperatures, as this can cause the glue to weaken and the fabric to fade or discolor.

By following these post-gluing care tips, you can ensure that your fabric and wood project stays looking great for years to come.

Frequently Asked Questions

How can I attach fabric to wood without using glue?

There are a few ways to attach fabric to wood without using glue. One option is to use staples or a specialty flat-headed fabric nail. Another option is to sew the fabric onto the wood using a needle and thread. If you don’t want to make any permanent changes to the wood, you can also use clips or clamps to hold the fabric in place.

What type of glue is best for attaching fabric to wood?

When it comes to attaching fabric to wood, there are several types of glue that can work well. One popular option is Mod Podge, which is a versatile adhesive that can be used for a variety of crafting projects. Another good choice is a spray adhesive, which can provide a strong bond without leaving any visible residue. For a more heavy-duty option, you can try using a wood glue or epoxy.

Can I use Mod Podge to attach fabric to wood?

Yes, Mod Podge is a great option for attaching fabric to wood. It is easy to use, dries clear, and provides a strong bond between the two materials. To use Mod Podge, simply apply a thin layer to the surface of the wood, then press the fabric onto the glue. Smooth out any wrinkles or bubbles, then allow the glue to dry completely before using the project.

What is the best way to glue fabric to hardboard?

When gluing fabric to hardboard, it is important to use a strong adhesive that can withstand the rigors of everyday use. One good option is a contact cement, which provides a permanent bond between the two materials. Another option is a spray adhesive, which can be easier to apply and less messy than other types of glue. Whichever adhesive you choose, be sure to follow the manufacturer’s instructions carefully for best results.

Is it possible to use hot glue to attach fabric to wood?

Yes, hot glue can be used to attach fabric to wood, but it may not be the best choice for all projects. Hot glue can provide a strong bond, but it can also be messy and difficult to work with. Additionally, it may not hold up as well over time as other types of glue. If you do choose to use hot glue, be sure to use a low-temperature glue gun to avoid damaging the fabric or wood.

Will Gorilla Glue work for attaching fabric to wood?

Gorilla Glue can work for attaching fabric to wood, but it may not be the best choice for all projects. Gorilla Glue is a polyurethane-based adhesive that expands as it dries, which can make it difficult to work with and may cause the fabric to wrinkle or warp. Additionally, Gorilla Glue can be difficult to remove if you make a mistake, so it is important to use it carefully and follow the manufacturer’s instructions closely.

Blog

“How Much Does It Cost to Refinish a 2,000 Square Foot Hardwood Floor?” – A Guide to Budgeting for Your Flooring Project

Refinishing a hardwood floor can give your home a fresh new look and increase its value. However, one of the biggest concerns homeowners have when considering this type of renovation is the cost. If you’re wondering how much it will cost to refinish a 2,000 square foot hardwood floor, you’ve come to the right place.

According to industry experts, the cost to refinish a 2,000 square foot hardwood floor can range from $3,000 to $7,000. The final cost will depend on a variety of factors, such as the condition of the floor, the type of wood, the extent of the damage, and the type of finish you choose. It’s important to note that these prices are just estimates, and the actual cost may be higher or lower depending on your specific situation.

Factors that can affect the cost of refinishing a hardwood floor include the level of sanding required, the type of finish you choose, and the amount of prep work needed. Some homeowners opt for a DIY approach to save money, but it’s important to note that refinishing a hardwood floor can be a time-consuming and labor-intensive process. Hiring a professional can ensure that the job is done properly and efficiently, but it will also add to the overall cost.

Understanding Hardwood Floor Refinishing

cost-to-refinish-hardwood-floors-types-of-hardwood-floors-650x434understanding-hardwood-floor-refinishing

What is Hardwood Floor Refinishing?

Hardwood floor refinishing is the process of sanding, staining, and sealing a hardwood floor to restore its original beauty. Over time, hardwood floors can become dull, scratched, and worn out due to foot traffic, pets, and furniture. Refinishing your hardwood floor can bring it back to life and make it look brand new again.

The process of hardwood floor refinishing involves several steps. First, the floor is sanded down to remove the old finish and any scratches or imperfections on the surface. Then, the floor is stained to achieve the desired color and tone. Finally, a protective sealant is applied to protect the floor from future damage.

Why Refinish Your Hardwood Floor?

Refinishing your hardwood floor has several benefits. First and foremost, it can improve the appearance of your home. A freshly refinished hardwood floor can make a room look brighter, cleaner, and more inviting. It can also increase the value of your home if you plan to sell it in the future.

In addition to aesthetic benefits, refinishing your hardwood floor can also help prolong its lifespan. The protective sealant applied during the refinishing process can help prevent scratches, dents, and other damage from occurring. This can save you money in the long run by reducing the need for costly repairs or replacements.

Overall, hardwood floor refinishing is a great investment for any homeowner looking to improve the appearance and durability of their hardwood floors. With the right tools and techniques, it is possible to refinish a 2,000 square foot hardwood floor at a reasonable cost.

Cost Factors

When it comes to refinishing a hardwood floor, several factors can influence the overall cost of the project. Here are some essential cost factors you should consider before starting the refinishing process.

Type of Hardwood

The type of hardwood you have can significantly affect the cost of refinishing. Some hardwoods are more difficult to work with than others, and therefore, require more time and effort to refinish. For instance, exotic hardwoods like Brazilian Cherry or Teak can be more challenging to sand and finish, which can increase the cost of refinishing.

Condition of the Flooring

The condition of your hardwood flooring is another significant cost factor. If the flooring has deep scratches, dents, or stains, it may require more extensive sanding and repair work, which can increase the overall cost of refinishing. On the other hand, if the flooring is in good condition, it may only require light sanding and a new coat of finish, which can be less expensive.

Geographical Location

Geographical location can also affect the cost of refinishing a hardwood floor. In some areas, the cost of living is higher, which can increase the labor costs associated with the refinishing process. Additionally, some regions have more experienced and skilled hardwood flooring professionals, which can also impact the overall cost.

Level of Finishing Required

The level of finishing required is another critical cost factor. If you want a high-gloss finish, it may require more coats of finish and additional buffing, which can increase the cost. However, if you prefer a more natural look, it may only require a single coat of finish, which can be less expensive.

In summary, the cost of refinishing a 2,000 square foot hardwood floor can vary depending on several factors. By considering the type of hardwood, the condition of the flooring, your geographical location, and the level of finishing required, you can get a better idea of the overall cost of the project.

Average Cost Breakdown

average-cost-breakdown

When it comes to refinishing a 2,000 square foot hardwood floor, the cost can vary depending on several factors. In this section, we’ll break down the average cost of refinishing a 2,000 square foot hardwood floor, including labor costs, material costs, and additional costs.

Labor Costs

The cost of labor is typically the most significant expense when it comes to refinishing a hardwood floor. The labor cost for refinishing a 2,000 square foot hardwood floor can range from $2,500 to $5,000. The cost of labor will vary depending on the experience and expertise of the contractor, the location of the project, and the complexity of the job.

Material Costs

The material cost for refinishing a 2,000 square foot hardwood floor can range from $1,500 to $3,000. The cost of materials will depend on the type of finish you choose, the quality of the materials, and the size of the project. The most common materials used for refinishing hardwood floors include sandpaper, stain, polyurethane, and paint brushes.

Additional Costs

In addition to labor and material costs, there may be additional costs associated with refinishing a 2,000 square foot hardwood floor. These costs may include:

  • Furniture removal and replacement: If you have furniture in the room, you’ll need to remove it before the project begins. This may require hiring a moving company or renting a storage unit.
  • Floor repairs: If your hardwood floor has extensive damage, such as deep scratches or gouges, you may need to repair the floor before refinishing it.
  • Stair refinishing: If you have stairs that need to be refinished, this will add to the overall cost of the project.

It’s important to keep in mind that the cost of refinishing a 2,000 square foot hardwood floor can vary depending on your location, the contractor you hire, and the materials you choose. Be sure to get multiple quotes from different contractors and compare them to find the best deal for your project.

Cost Comparison

When it comes to refinishing a 2,000 square foot hardwood floor, there are a few cost comparison factors to consider. In this section, we’ll compare the cost of DIY vs professional refinishing and new installation vs refinishing.

DIY vs Professional Refinishing

One way to save money on refinishing a hardwood floor is to do it yourself. DIY refinishing costs around $600 to $1,100, according to HomeGuide. However, this option is only recommended for those with experience in woodworking and refinishing.

Professional refinishing, on the other hand, costs between $2 and $8 per square foot, depending on the location, type of finish, and condition of the floor. According to This Old House, a 2,000 square foot floor could cost between $4,800 and $16,000 for professional refinishing.

While DIY refinishing may seem like a cost-effective option, it’s important to consider the time and effort required to complete the project. Professional refinishing may be more expensive, but it ensures a high-quality finish and saves you the hassle of doing the work yourself.

New Installation vs Refinishing

Another cost comparison to consider is new installation vs refinishing. Installing a new hardwood floor can cost between $8 and $14 per square foot, according to HomeAdvisor. This means that a 2,000 square foot floor could cost between $16,000 and $28,000 to install.

Refinishing, on the other hand, costs between $2 and $8 per square foot, as mentioned earlier. Refinishing a 2,000 square foot floor could cost between $4,000 and $16,000.

While new installation may seem like a better option, refinishing can save you money and preserve the character and history of your existing hardwood floor. Refinishing also has a shorter timeline than new installation, as it can be completed in a few days compared to the weeks required for new installation.

In conclusion, both DIY and professional refinishing and new installation and refinishing have their pros and cons. It’s important to consider your budget, timeline, and desired outcome before making a decision.

How to Save on Refinishing Costs

how-to-save-on-refinishing-costs

Refinishing a 2,000 square foot hardwood floor can be a significant investment. However, there are ways to save on refinishing costs without compromising the quality of the work. Here are some tips to help you save money on your hardwood floor refinishing project.

Choosing the Right Contractor

The first step in saving on refinishing costs is to choose the right contractor. Look for a contractor who has experience in hardwood floor refinishing and has good reviews from previous customers. Ask for references and check them to ensure that the contractor is reliable and provides quality work.

Get multiple quotes from different contractors and compare their prices and services. Don’t simply choose the lowest bidder, as the quality of their work may not be up to par. Instead, choose a contractor who offers a fair price and provides a detailed breakdown of the costs involved in the project.

Opt for Simpler Finishes

Hardwood floor finishes come in a variety of options, ranging from simple to complex. While complex finishes may look more attractive, they can also be more expensive. Opting for a simpler finish can save you money without compromising the quality of the work.

Consider using a water-based finish instead of an oil-based finish. Water-based finishes are cheaper and dry faster, which means that the project can be completed more quickly. They are also more environmentally friendly and have fewer fumes than oil-based finishes.

Maintain Your Floors Properly

One of the best ways to save on refinishing costs is to maintain your floors properly. Regular cleaning and maintenance can extend the life of your hardwood floors and reduce the need for refinishing.

Sweep or vacuum your floors regularly to remove dirt and debris. Use a damp mop to clean spills and stains immediately. Avoid using harsh chemicals or abrasive cleaners, as they can damage the finish of your floors.

Place rugs or mats in high-traffic areas to protect your floors from wear and tear. Trim your pet’s nails regularly to prevent scratches on the floor. By maintaining your floors properly, you can save money on refinishing costs and keep your floors looking beautiful for years to come.

In conclusion, refinishing a 2,000 square foot hardwood floor can be expensive, but there are ways to save on costs without compromising the quality of the work. Choose the right contractor, opt for simpler finishes, and maintain your floors properly to save money on your hardwood floor refinishing project.

Frequently Asked Questions

What factors affect the cost of refinishing hardwood floors?

The cost of refinishing hardwood floors depends on several factors, including the size of the area to be refinished, the condition of the floors, the type of finish you want, and the cost of labor in your area. If your floors require extensive repairs, such as replacing damaged boards or fixing squeaks, this will also add to the cost.

Is it worth it to hire a professional to refinish hardwood floors?

While it is possible to refinish hardwood floors yourself, it can be a time-consuming and challenging process. Hiring a professional can ensure that the job is done correctly and efficiently. Additionally, professionals have access to specialized equipment and materials that can produce better results than DIY methods.

How much does it cost to rent a hardwood floor sander?

The cost to rent a hardwood floor sander varies depending on your location and the type of sander you need. On average, you can expect to pay between $50 and $100 per day to rent a sander. Keep in mind that you will also need to purchase sandpaper and other supplies, which can add to the overall cost.

Can you refinish hardwood floors yourself? What are the risks?

Yes, it is possible to refinish hardwood floors yourself. However, there are several risks involved. If you are not experienced with sanding and finishing floors, you may damage the wood or produce uneven results. Additionally, refinishing floors can produce a significant amount of dust, which can be hazardous to your health if you do not take proper precautions.

What is the average cost to refinish 2,000 square feet of hardwood floors?

The cost to refinish 2,000 square feet of hardwood floors can vary widely depending on several factors. On average, you can expect to pay between $3,000 and $6,000 for professional refinishing services. However, this cost can be higher or lower depending on the condition of your floors, the type of finish you choose, and the cost of labor in your area.

Is it cheaper to refinish or replace hardwood floors?

In general, it is cheaper to refinish hardwood floors than to replace them. Refinishing can cost between $3 and $8 per square foot, while replacing can cost between $8 and $15 per square foot. However, if your floors are severely damaged or you want to change the layout of your space, replacement may be a better option.