Blog

Blog

how-to-seal-a-crack-where-concrete-and-wood-meet-tips-and-tricks

Are you struggling to seal a crack where concrete and wood meet? This can be a common problem for homeowners, especially those with older homes. If left untreated, these cracks can allow water to seep in and cause damage to both the concrete and wood. But don’t worry, sealing the crack is a relatively simple process that can be done with the right materials and a little bit of know-how.

The first step in sealing a crack where concrete and wood meet is to determine the size and depth of the crack. If the crack is less than 1/4 inch wide, you can use a caulk gun to apply a flexible sealant such as urethane caulk. For larger cracks, you may need to use a foam backer rod to fill the gap before applying the sealant. It’s important to choose a sealant that is compatible with both the concrete and wood to ensure that it will adhere properly and not cause any damage.

Once you have chosen the right sealant, you can begin the process of sealing the crack. Clean the area around the crack thoroughly, removing any debris or loose material. Apply the sealant to the crack, making sure to fill it completely. Smooth the sealant out with a putty knife or your finger, and allow it to dry according to the manufacturer’s instructions. With a little bit of effort, you can effectively seal a crack where concrete and wood meet, protecting your home from water damage and ensuring that your concrete and wood surfaces remain strong and durable.

Understanding the Issue

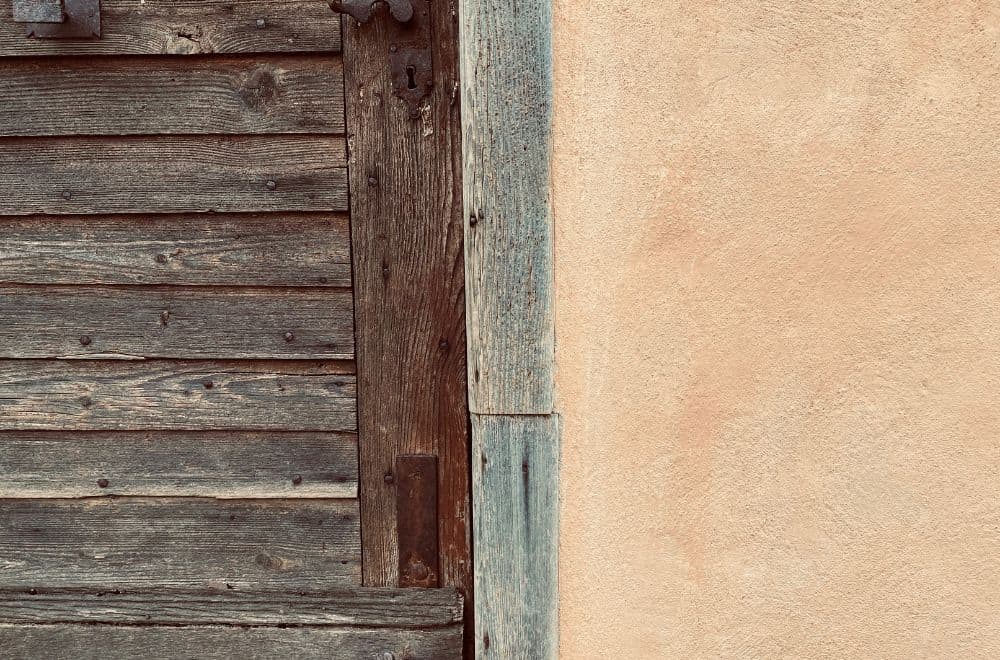
Identifying the Crack

If you have a gap between concrete and wood, it is important to identify if it is a crack or a joint. A crack is a separation in the concrete, while a joint is a planned separation. Joints are typically filled with a flexible material, such as caulk or backer rod, to allow for movement. Cracks, on the other hand, need to be sealed to prevent water from entering and causing further damage.

To determine if the gap is a crack or a joint, look at the size and location. Joints are typically spaced every few feet and are less than 1/2 inch wide. Cracks can be wider and are often irregular in shape.

Why Sealing is Necessary

Sealing the crack where concrete and wood meet is necessary to prevent water from entering and causing damage. Water can seep into the crack and cause the wood to rot or the concrete to deteriorate. In colder climates, water can freeze and expand, causing the crack to widen and further damage the surrounding materials.

Sealing the crack will also improve the appearance of the area. A well-sealed crack will blend in with the surrounding materials and prevent dirt and debris from getting stuck in the gap.

In the next section, we will look at how to seal the crack between concrete and wood.

Materials Needed

materials-needed

To seal a crack where concrete and wood meet, you will need a few materials. Here are the materials you will need:

  • Exterior grade caulking material
  • Foam backer rod
  • Mineral spirits
  • Paintable type of caulk
  • Caulk gun
  • Spoon

It is important to use a good quality exterior grade caulking material to ensure that the seal is strong and durable. The foam backer rod is used to fill any gaps or spaces in the crack before applying the caulking material. This ensures that the seal is tight and prevents any water from seeping through.

Mineral spirits are used to clean the crack before applying the foam backer rod and caulking material. This ensures that the surface is clean and free from any debris or dirt that may affect the adhesion of the caulking material.

Using a paintable type of caulk is important if the surrounding area needs re-priming and painting. This ensures that the caulk can be painted over without affecting the overall appearance of the area.

To apply the foam backer rod and caulking material, you will need a caulking gun and a spoon. The caulking gun helps to apply the caulking material evenly and the spoon can be used to smooth out any bumps or lumps in the material.

Overall, these materials are essential for sealing a crack where concrete and wood meet. With the right materials and proper application, you can ensure that the seal is strong and long-lasting.
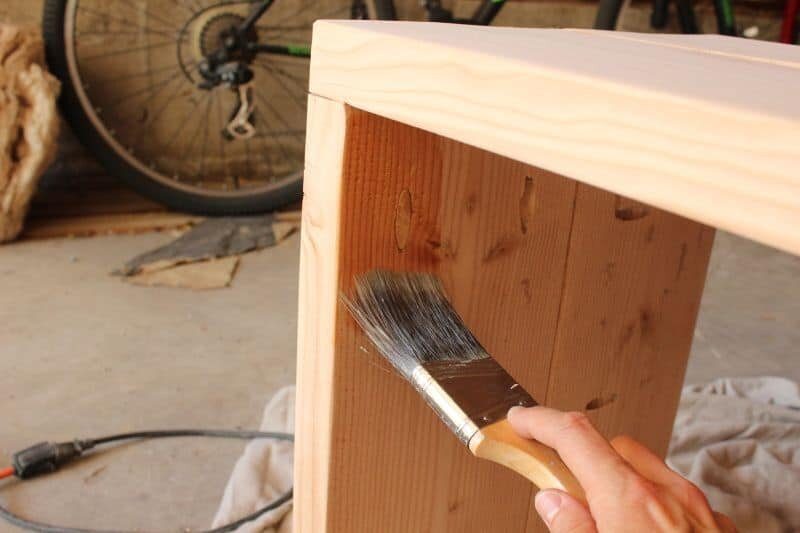
Preparation Steps

Before you start sealing the crack where concrete and wood meet, you need to prepare the area. Preparation is an essential step to ensure that the sealant will adhere properly and last for a long time. Here are the preparation steps you need to follow:

Cleaning the Area

The first step in preparing the area is to clean it thoroughly. You need to remove any dirt, debris, or loose material from the crack. Use a wire brush or a broom to clean the area. You can also use a vacuum cleaner to remove any loose material.

After cleaning the area, wash it with water to remove any remaining dirt or debris. Allow the area to dry completely before proceeding to the next step.

Removing Loose Material

If there is any loose material in the crack, you need to remove it before sealing the crack. Use a chisel or a scraper to remove any loose material from the crack. Be careful not to damage the surrounding concrete or wood while removing the loose material.

After removing the loose material, clean the area again to remove any remaining debris. Make sure the area is completely dry before proceeding to the next step.

By following these preparation steps, you can ensure that the sealant will adhere properly and last for a long time.

Sealing Process

When it comes to sealing a crack between concrete and wood, the process is relatively straightforward. Here are the steps you need to follow:

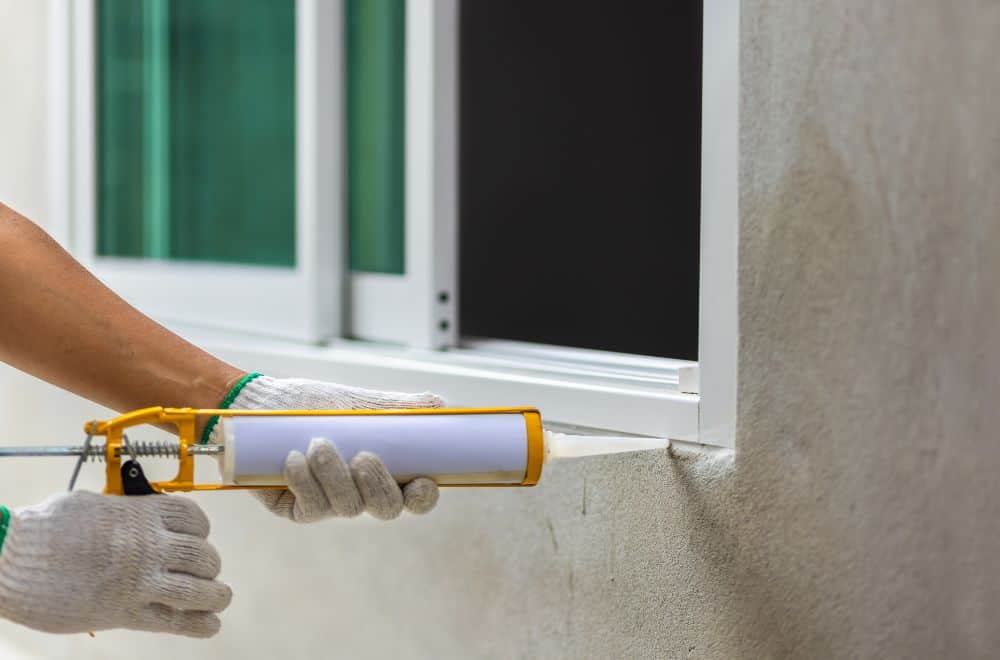
Applying the Sealant

  1. Clean the area around the crack thoroughly, removing any debris or loose material. You can use a wire brush or a vacuum cleaner to do this.
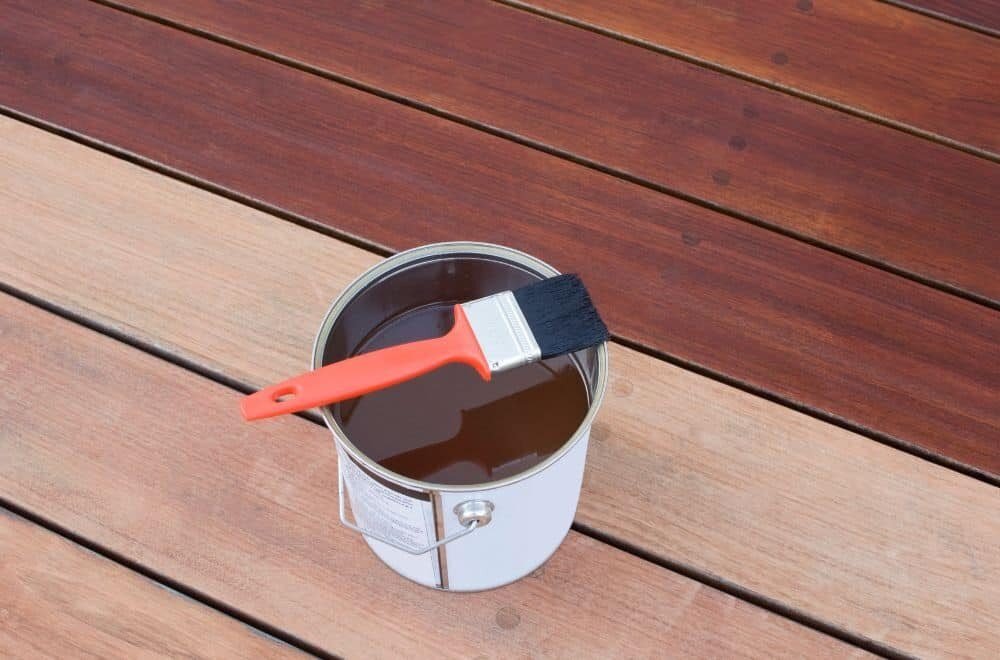
  2. Apply a bead of high-quality exterior-grade caulking material along the crack. Make sure to use a paintable type of caulk if you plan on painting over it.
  3. Use a caulking gun to apply the sealant, making sure to fill the entire crack. You may need to apply more than one layer of sealant to ensure that the crack is completely filled.
  4. Smooth the sealant using a caulk smoothing tool or your finger. This will help to ensure that the sealant is evenly distributed and that there are no air pockets.

Smoothing the Sealant

  1. Once you have applied the sealant, use a caulk smoothing tool or your finger to smooth it out. This will help to ensure that the sealant is evenly distributed and that there are no air pockets.
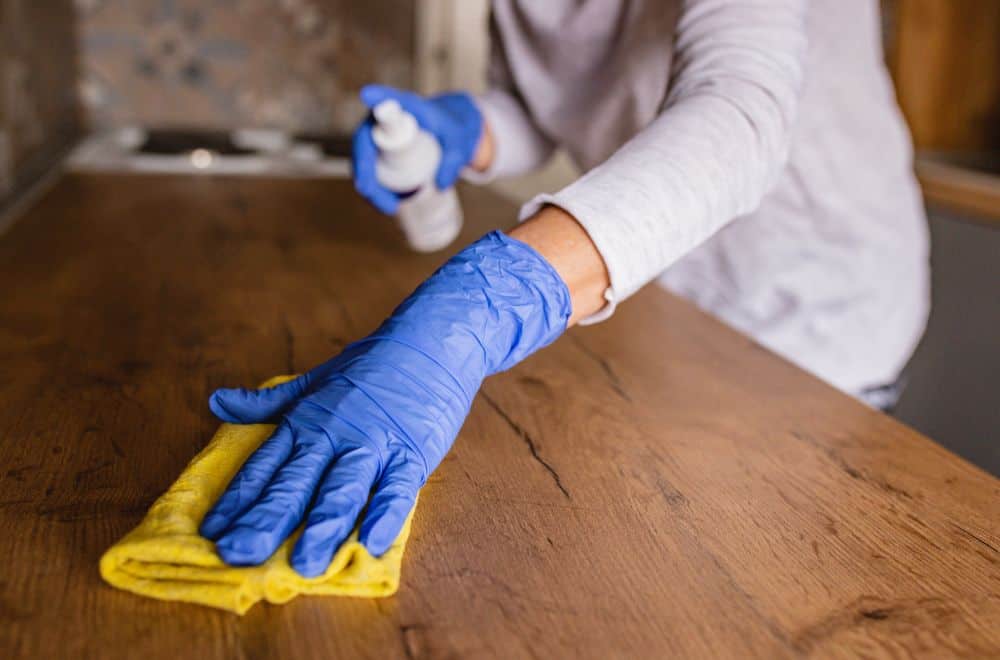
  2. If you are using your finger, make sure to wear gloves to protect your skin from the sealant.
  3. Run your finger along the length of the crack, smoothing out the sealant as you go. You may need to apply a bit of pressure to ensure that the sealant is evenly distributed.
  4. Once you have smoothed out the sealant, let it dry completely. This may take a few hours, depending on the type of sealant you are using.
  5. Once the sealant is dry, you can paint over it if you wish. Make sure to use a paintable type of sealant if you plan on painting over it.

By following these simple steps, you can effectively seal a crack between concrete and wood, helping to prevent moisture and air from getting in and causing further damage.

Post-Sealing Care

After sealing the crack where concrete and wood meet, it is important to take proper care to ensure the longevity of the seal. Here are some post-sealing care tips:

Drying Time

The drying time for the sealant will vary depending on the type of sealant used. Be sure to follow the manufacturer’s instructions for drying time. It is important to avoid any foot traffic or heavy loads on the sealed area until the sealant has fully cured.

Maintenance Tips

Regular maintenance can help extend the life of the sealant. Here are some tips for maintaining the sealed area:

  • Keep the area clean and free of debris. Dirt and debris can cause damage to the sealant over time.
  • Check the sealant periodically for any signs of wear or damage. If you notice any issues, reapply the sealant as needed.
  • Avoid using harsh chemicals or cleaners on the sealed area, as this can cause damage to the sealant.
  • If the sealed area is exposed to extreme temperatures or weather conditions, consider applying a second coat of sealant for added protection.

By following these post-sealing care tips, you can help ensure that the sealed crack where concrete and wood meet remains protected and intact for years to come.

Safety Precautions

When sealing a crack where concrete and wood meet, it is important to take the necessary safety precautions to protect yourself from any potential harm. Here are some safety tips to keep in mind:

  • Wear protective gear: Always wear gloves and eye protection when working with sealants. Some sealants can cause skin irritation or eye damage, so it’s important to protect yourself.
  • Work in a well-ventilated area: Most sealants emit fumes that can be harmful if inhaled. Make sure you work in a well-ventilated area to avoid breathing in any harmful fumes.
  • Read the label: Make sure you read the label of the sealant you’re using before you start working with it. The label will provide important information about the safety precautions you need to take, as well as any specific instructions for using the product.
  • Keep the area clean: Before you start sealing the crack, make sure the area is clean and free of debris. This will help ensure that the sealant adheres properly to the surfaces you’re sealing.
  • Follow the manufacturer’s instructions: Different sealants may have different application instructions, so make sure you follow the manufacturer’s instructions carefully. This will help ensure that you apply the sealant correctly and get the best results.

By following these safety precautions, you can help ensure that you seal the crack safely and effectively.

Alternative Solutions

If you are not comfortable using caulking material to seal the gap between concrete and wood, there are other solutions you can try. Here are a few alternative options:

1. Use a Concrete Filler

If the gap between the concrete and wood is wider than 1/4 inch, you can use a concrete filler to seal it. First, clean the gap thoroughly and let it dry. Then, apply the concrete filler according to the manufacturer’s instructions. Once the filler is dry, sand it down to create a smooth surface.

2. Install a Backer Rod

A backer rod is a foam strip that is used to fill gaps before caulking. If the gap between the concrete and wood is larger than 1/2 inch, you can install a backer rod to fill the gap before applying caulking material. This will help prevent the caulking from cracking or pulling away from the surfaces.

3. Use Epoxy

Epoxy is a two-part adhesive that can be used to fill gaps and cracks in concrete. If the gap between the concrete and wood is small, you can mix up some epoxy and apply it to the gap with a putty knife. Once the epoxy is dry, sand it down to create a smooth surface.

4. Install a Threshold

If the gap between the concrete and wood is too large to fill with caulking or other materials, you may need to install a threshold. A threshold is a strip of wood or metal that is installed between the concrete and wood to bridge the gap. This can be a good solution if the gap is causing a tripping hazard or allowing water to enter the building.

Remember, before trying any of these alternative solutions, make sure to clean the gap thoroughly and let it dry completely. Also, be sure to follow the manufacturer’s instructions for any materials you use.

Frequently Asked Questions

What is the best caulk to use between concrete and wood?

The best caulk to use between concrete and wood is a high-quality exterior grade caulking material. Make sure that the caulk is paintable, as some of the siding may need re-priming and painting. Urethane caulk is also an excellent sealer for concrete expansion joints.

How do you seal a crack between concrete and a house?

To seal a crack between concrete and a house, clean the area of all debris and let it dry completely. Apply a bead of high-quality exterior grade caulking material to the gap. Make sure the caulk is paintable if any of the siding needs re-priming and painting.

What is the barrier between concrete and wood framing?

The barrier between concrete and wood framing is called a sill plate. It is a wooden board that is placed over the foundation wall to provide a surface for attaching the wood framing of the house.

How do you fill a 2 inch gap in concrete?

To fill a 2 inch gap in concrete, you can use a compressible foam backer rod to fill the gap halfway. Then apply a high-quality concrete crack sealer to fill the remaining gap.

What are some outdoor waterproof caulking options for concrete?

Some outdoor waterproof caulking options for concrete include silicone caulk, polyurethane caulk, and butyl rubber caulk. These caulks are designed to withstand outdoor weather conditions and provide a waterproof seal.

What is the best concrete crack sealer for waterproofing?

The best concrete crack sealer for waterproofing is a polyurethane-based sealant. It is flexible, durable, and can withstand extreme weather conditions. Polyurethane sealants are also resistant to chemicals and abrasion, making them ideal for outdoor use.

Blog

rubbing-alcohol-for-cleaning-finished-wood-surfaces-does-it-work

Rubbing alcohol is a popular cleaning agent that many people swear by for tackling tough stains and grime. However, when it comes to cleaning finished wood surfaces, you may be wondering if rubbing alcohol is safe and effective. After all, you don’t want to risk damaging your beautiful wood furniture or floors.

The good news is that rubbing alcohol can be a safe and effective cleaner for finished wood surfaces, as long as it is used properly. Rubbing alcohol, also known as isopropyl alcohol, is a colorless liquid that is made by combining water and propylene or ethylene. It is commonly sold at most big box stores, grocery stores, and hardware stores in concentrations ranging from 60% to 90% isopropyl alcohol and distilled water solution.

Understanding Finished Wood Surfaces

understanding-finished-wood-surfaces

When it comes to cleaning finished wood surfaces, it’s important to understand what type of finish you are dealing with. Different finishes will react differently to cleaning agents, including rubbing alcohol. Here are some common types of finishes and how they may react to rubbing alcohol:

  • Varnish: Varnish is a popular finish for wood surfaces, but it can be sensitive to rubbing alcohol. The alcohol can dissolve the varnish, leaving the wood unprotected and vulnerable to damage.
  • Shellac: Shellac is another popular finish, but it is even more sensitive to rubbing alcohol than varnish. The alcohol can dissolve shellac almost instantly, leaving behind a sticky residue that is difficult to remove.
  • Lacquer: Lacquer is a durable finish, but it can still be sensitive to rubbing alcohol. The alcohol can cause the lacquer to soften and become sticky, which can make it difficult to clean.
  • Polyurethane: Polyurethane is a tough, durable finish that is resistant to most cleaning agents, including rubbing alcohol. However, prolonged exposure to alcohol can cause the finish to soften and become damaged.

If you are unsure what type of finish your wood surface has, it’s best to err on the side of caution and avoid using rubbing alcohol altogether. Instead, try using a mild soap and water solution or a specialized wood cleaner that is designed for your specific type of finish.

Remember, prevention is always better than cure. To avoid damaging your finished wood surfaces, take care to clean up spills and stains as soon as possible, and avoid using harsh cleaning agents or abrasive materials that can scratch or damage the finish.

What is Rubbing Alcohol?

Rubbing alcohol, also known as isopropyl alcohol, is a colorless liquid that is commonly used for cleaning and disinfecting surfaces. It is made by combining water and propylene or ethylene, and it contains approximately 70% alcohol.

Rubbing alcohol is a versatile cleaning agent that can be used for a variety of purposes, including removing stains and grime from surfaces. However, it is important to note that rubbing alcohol can be harmful to certain surfaces, particularly finished wood surfaces.

When using rubbing alcohol on finished wood surfaces, it is important to exercise caution. Rubbing alcohol can dissolve or liquefy finishes and varnishes, causing significant damage to the surface. As such, it is not recommended to use rubbing alcohol on painted, shellac, lacquered, or varnished surfaces.

Despite its potential for damage, rubbing alcohol can be an effective cleaning agent for certain types of finished wood surfaces. For example, it can be used to remove ink stains or other stubborn marks from unfinished wood surfaces.

Overall, rubbing alcohol can be a useful tool for cleaning and disinfecting surfaces, but it is important to use it with caution and to avoid using it on surfaces that may be damaged by the alcohol.

The Cleaning Properties of Rubbing Alcohol

the-cleaning-properties-of-rubbing-alcohol

Rubbing alcohol, also known as isopropyl alcohol, is a versatile cleaning solution that can be used on various surfaces, including finished wood. It is a popular choice for cleaning and disinfecting because it is effective against a wide range of microorganisms, including bacteria, viruses, and fungi.

When it comes to cleaning finished wood surfaces, rubbing alcohol can be an effective solution. It can help remove dirt, grime, and stains without damaging the finish. However, it is important to use it correctly to avoid any potential damage.

Here are some tips on how to use rubbing alcohol for cleaning finished wood surfaces:

  • Dilute the rubbing alcohol: Pure rubbing alcohol can be too strong and can damage the finish of the wood. Dilute it with water to create a solution that is safe for use on finished wood. A ratio of 1:1 (equal parts rubbing alcohol and water) is a good starting point.
  • Test on a small, inconspicuous area: Before using rubbing alcohol on a larger area, test it on a small, hidden spot to make sure it does not damage the finish.
  • Apply the solution with a soft cloth: Dip a soft cloth in the rubbing alcohol solution and wring it out to remove excess liquid. Gently wipe the surface of the wood, being careful not to scrub too hard.
  • Dry the surface: After cleaning, use a clean, dry cloth to wipe the surface of the wood and remove any excess moisture.

Rubbing alcohol can be a useful tool for cleaning finished wood surfaces, but it is important to use it correctly to avoid any potential damage. With the right technique, you can effectively remove dirt and stains without harming the finish of your wood furniture or flooring.

Rubbing Alcohol and Finished Wood Surfaces

When it comes to cleaning finished wood surfaces, rubbing alcohol can be a useful tool. However, it’s important to understand the potential effects it can have on your furniture. In this section, we’ll explore the chemical reaction that occurs when rubbing alcohol comes into contact with finished wood surfaces, as well as the effects it can have on the finish and wood grain.

Chemical Reaction

Rubbing alcohol, also known as isopropyl alcohol, is a solvent that can dissolve certain types of finishes, such as shellac and lacquer. When rubbing alcohol comes into contact with these finishes, it can cause them to liquefy and become sticky. This can make the finish more susceptible to damage from other cleaning products or even from something as simple as water.

Effect on Finish

If you’re cleaning a finished wood surface with rubbing alcohol, it’s important to be careful about how much you use and how you apply it. Using too much rubbing alcohol or rubbing too hard can cause the finish to become damaged or even dissolve completely. To avoid this, it’s best to use a soft cloth or sponge and to apply the rubbing alcohol in a gentle, circular motion.

Effect on Wood Grain

In addition to potentially damaging the finish, rubbing alcohol can also affect the wood grain itself. If you’re cleaning a piece of wood furniture with rubbing alcohol, it’s important to be aware that the alcohol can strip away some of the natural oils in the wood. This can cause the wood to become dry and brittle over time, which can lead to cracking or other damage.

To minimize the risk of damage to your finished wood surfaces, it’s best to use rubbing alcohol sparingly and to avoid using it on surfaces that are particularly delicate or prone to damage. If you’re unsure about whether or not rubbing alcohol is safe to use on a particular surface, it’s always a good idea to test a small, inconspicuous area first to see how it reacts.

Alternatives to Rubbing Alcohol for Cleaning Finished Wood Surfaces

alternatives-to-rubbing-alcohol-for-cleaning-finished-wood-surfaces

If you’re looking for alternatives to rubbing alcohol for cleaning finished wood surfaces, there are a few options available. Here are some of the most effective alternatives:

Commercial Wood Cleaners

There are a variety of commercial wood cleaners available that are specifically designed for cleaning finished wood surfaces. These cleaners come in a variety of forms, including sprays, wipes, and concentrated solutions that you can dilute with water.

When choosing a commercial wood cleaner, it’s important to look for one that is specifically designed for finished wood surfaces. Some wood cleaners are designed for use on unfinished or raw wood, and may not be effective on finished surfaces.

Homemade Natural Cleaners

If you prefer to use natural cleaning solutions, there are several options that are effective for cleaning finished wood surfaces. Here are a few homemade natural cleaners that you can try:

  • White Vinegar: Mix equal parts white vinegar and water in a spray bottle. Spray the solution onto the wood surface and wipe it clean with a soft cloth.
  • Olive Oil and Lemon Juice: Mix 1/4 cup olive oil and 1/4 cup lemon juice in a spray bottle. Spray the solution onto the wood surface and wipe it clean with a soft cloth.
  • Baking Soda and Water: Mix 1/4 cup baking soda and enough water to make a paste. Apply the paste to the wood surface and scrub it gently with a soft brush. Wipe the surface clean with a damp cloth.

When using homemade natural cleaners, it’s important to test the solution on a small, inconspicuous area of the wood surface first to ensure that it doesn’t cause any damage or discoloration.

Overall, there are several effective alternatives to rubbing alcohol for cleaning finished wood surfaces. Whether you choose a commercial wood cleaner or a homemade natural solution, be sure to follow the manufacturer’s instructions or recipe carefully to ensure the best results.

Precautions When Using Rubbing Alcohol on Finished Wood Surfaces

When using rubbing alcohol to clean finished wood surfaces, there are a few precautions you should take to avoid damaging the wood. Here are some important tips to keep in mind:

Test Patch

Before applying rubbing alcohol to a large area, it’s important to test it on a small, inconspicuous spot first. This will help you determine if the alcohol will cause any damage or discoloration to the wood. Apply a small amount of rubbing alcohol to a cotton swab or cloth and rub it gently on the test area. If there is no damage or discoloration, you can proceed with cleaning the rest of the surface.

Proper Application

When applying rubbing alcohol to a finished wood surface, it’s important to use a soft, lint-free cloth. Avoid using abrasive materials like steel wool or rough sponges, as these can scratch the surface of the wood. Apply the rubbing alcohol to the cloth, rather than directly to the wood, and use a gentle, circular motion to clean the surface.

Ventilation

Rubbing alcohol can produce fumes that can be harmful if inhaled in large quantities. To avoid breathing in these fumes, it’s important to work in a well-ventilated area. Open windows and doors to allow fresh air to circulate, and consider wearing a mask or respirator if you will be working with rubbing alcohol for an extended period of time.

By following these precautions, you can safely and effectively use rubbing alcohol to clean finished wood surfaces. Remember to always test a small area first, use a soft cloth, and work in a well-ventilated area to protect both yourself and your wood surfaces.

Regular Maintenance of Finished Wood Surfaces

If you have finished wood surfaces in your home, you know that they require regular maintenance to keep them looking their best. One of the most common questions people have is whether rubbing alcohol is an effective cleaner for finished wood surfaces.

The answer is that it depends on the type of finish you have. Most finishes will degrade or dissolve with alcohol, but some are more resistant than others and can tolerate a little bit of alcohol to clean off dirt or some adhesive. It is best to test a small, inconspicuous area before using rubbing alcohol on a larger area.

Assuming your finish can tolerate rubbing alcohol, here are some tips for regular maintenance of finished wood surfaces:

  • Dust regularly: Use a soft cloth or microfiber duster to remove dust from your finished wood surfaces. Dust can scratch the surface if left to accumulate.
  • Clean up spills immediately: If you spill something on your finished wood surface, clean it up immediately with a soft cloth or paper towel. Liquids can seep into the finish and cause damage if left to sit for too long.
  • Use a mild cleaner: If you need to use a cleaner on your finished wood surface, use a mild cleaner that is specifically formulated for wood surfaces. Avoid using harsh chemicals or abrasive cleaners that can scratch or damage the finish.
  • Avoid excessive moisture: Finished wood surfaces should be kept dry. Avoid using excessive amounts of water or leaving wet items on the surface, as this can cause the finish to warp or discolor.
  • Use rubbing alcohol sparingly: If you choose to use rubbing alcohol to clean your finished wood surface, use it sparingly and only on areas that need extra cleaning. Always test a small area first to make sure the finish can tolerate it.

By following these tips for regular maintenance of your finished wood surfaces, you can keep them looking beautiful for years to come.

Frequently Asked Questions

What is the best way to clean finished wood surfaces?

The best way to clean finished wood surfaces is to use a soft cloth or sponge with a mild soap and water solution. Avoid using abrasive cleaners or harsh chemicals that can damage the wood or the finish. Always test any cleaning solution on a small, inconspicuous area of the wood before applying it to the entire surface.

Can rubbing alcohol be used to clean furniture?

Rubbing alcohol can be used to clean furniture, but it is not recommended for use on finished wood surfaces. Rubbing alcohol can dissolve or damage the finish, leaving the wood looking dull or discolored. It is best to avoid using rubbing alcohol on finished wood surfaces.

How do you disinfect finished wood?

To disinfect finished wood, use a solution of equal parts water and white vinegar. Apply the solution to the wood surface using a soft cloth or sponge, and let it sit for a few minutes. Then, wipe the surface clean with a damp cloth and dry it thoroughly.

Is rubbing alcohol safe for use on finished wood?

Rubbing alcohol is generally not safe for use on finished wood surfaces. It can damage or dissolve the finish, leaving the wood looking dull or discolored. It is best to avoid using rubbing alcohol on finished wood surfaces.

What are the effects of rubbing alcohol on polyurethane finishes?

Rubbing alcohol can damage polyurethane finishes, leaving the wood looking dull or discolored. It is best to avoid using rubbing alcohol on polyurethane finishes.

Can rubbing alcohol remove shellac from wood surfaces?

Rubbing alcohol can remove shellac from wood surfaces, but it is not recommended. Shellac is a delicate finish, and rubbing alcohol can dissolve or damage it, leaving the wood looking dull or discolored. It is best to avoid using rubbing alcohol on shellac finishes.

Blog

Can You Use Water-Based Polyurethane Over Oil-Based Wood Stain? Explained

Can a water-based polyurethane go over an oil-based wood stain? This is a common question that many DIY enthusiasts and professional woodworkers ask themselves. The answer is yes, you can use a water-based polyurethane over an oil-based wood stain, but there are some important considerations to keep in mind.

Firstly, it’s important to ensure that the oil-based wood stain is fully cured before applying the water-based polyurethane. This can take anywhere from a few days to a few weeks depending on the type of stain and the conditions it’s exposed to. Applying the water-based polyurethane too soon can cause it to not adhere properly and ruin the finish. Additionally, it’s important to make sure that the surface is clean and free of any dust or debris before applying the polyurethane.

Understanding Polyurethane Types

understanding-polyurethane-types

When it comes to finishing wood, polyurethane is a popular choice due to its durability and versatility. However, there are two main types of polyurethane: water-based and oil-based. Each has its own unique properties that make it suitable for different applications.

Water-Based Polyurethane

Water-based polyurethane is a popular choice for those who want a clear finish that won’t yellow over time. It has a low odor and dries quickly, making it ideal for use in areas with poor ventilation. Additionally, water-based polyurethane is easy to clean up with soap and water.

One of the main advantages of water-based polyurethane is that it is less likely to crack or peel over time. It also has a lower VOC content than oil-based polyurethane, making it a more environmentally friendly option. However, water-based polyurethane may not be as durable as its oil-based counterpart.

Oil-Based Polyurethane

Oil-based polyurethane is a popular choice for those who want a durable finish that will stand up to heavy use. It has a high VOC content, which means it can be harmful to the environment and your health if not used in a well-ventilated area. Additionally, oil-based polyurethane takes longer to dry than water-based polyurethane.

One of the main advantages of oil-based polyurethane is that it provides a warm, amber glow that can enhance the natural beauty of the wood. It is also more durable than water-based polyurethane, making it ideal for high-traffic areas. However, oil-based polyurethane may yellow over time, which can detract from the natural beauty of the wood.

In summary, both water-based and oil-based polyurethane have their own unique properties that make them suitable for different applications. Water-based polyurethane is a good choice for those who want a clear finish that won’t yellow over time, while oil-based polyurethane is ideal for those who want a durable finish that will stand up to heavy use.

The Science Behind Polyurethane and Wood Stain Interaction

When it comes to finishing your wooden projects, you may have a lot of questions about the compatibility of different products. One common question is whether you can apply a water-based polyurethane over an oil-based wood stain. The answer is yes, but there are some important things to keep in mind.

First, let’s talk about the science behind polyurethane and wood stain interaction. Polyurethane is a protective coating that is applied over wood to protect it from damage and wear. It is made up of urethane resins, which are suspended in a carrier medium. The carrier medium can be either oil-based or water-based.

Wood stain, on the other hand, is a type of finish that is applied to wood to enhance its natural color and grain pattern. Stains are made up of pigments, dyes, and solvents, and they can be either oil-based or water-based.

When you apply a water-based polyurethane over an oil-based wood stain, the polyurethane will bond to the stain, but it may not adhere well to the wood surface underneath. This can lead to peeling and flaking of the finish over time.

To avoid this problem, it is important to make sure that the wood surface is clean and free of any contaminants before applying the polyurethane. You should also allow the stain to dry completely before applying the polyurethane. This will ensure that the polyurethane adheres well to both the stain and the wood surface.

In summary, you can apply a water-based polyurethane over an oil-based wood stain, but you need to take some precautions to ensure that the finish adheres well and lasts for a long time. By following these guidelines, you can achieve a beautiful and durable finish on your wooden projects.

Process of Applying Water-Based Polyurethane Over Oil-Based Stain

process-of-applying-water-based-polyurethane-over-oil-based-stain

If you are looking to apply a water-based polyurethane over an oil-based stain, it is important to follow the correct process. Here are the steps to ensure a successful application:

Surface Preparation

Before applying the water-based polyurethane, the surface must be properly prepared. This includes removing any dust, dirt, or debris from the surface. Wipe the surface with a cloth dipped in a mixture of water and detergent to remove any grease, wax, dust, and dirt that may be on the surface. As this step and the step before will be the primary factors for determining how well your polyurethane finish will hold, we highly recommend being thorough.

After cleaning the surface, it is important to roughen it by sanding it. This will help the polyurethane adhere to the surface better. Use a fine-grit sandpaper to sand the entire surface. Wipe the surface clean with a cloth to remove any dust or debris.

Application Technique

When applying the water-based polyurethane, it is important to use the correct technique. Start by stirring the polyurethane gently but thoroughly before each use. Apply the finish in a clean, well-ventilated area.

Use a high-quality brush or roller to apply the polyurethane. Apply a thin, even coat of polyurethane to the entire surface. Avoid over-brushing or over-rolling, as this can cause bubbles and streaks in the finish.

Drying Time

Allow the first coat of polyurethane to dry completely before applying a second coat. This can take anywhere from 2-4 hours, depending on the humidity and temperature of the room.

After applying the final coat, allow the surface to dry completely before using it. This can take up to 24 hours, depending on the humidity and temperature of the room.

Following these steps will help ensure a successful application of water-based polyurethane over an oil-based stain.

Potential Problems and Solutions

Uneven Finish

One potential problem when applying a water-based polyurethane over an oil-based stain is an uneven finish. This can occur when the polyurethane does not adhere properly to the stain, causing it to bubble or peel. To avoid this issue, it is important to properly prepare the surface before applying the polyurethane.

One solution is to lightly sand the surface with fine-grit sandpaper to create a rough surface for the polyurethane to adhere to. Additionally, you can apply a coat of dewaxed shellac as a barrier between the stain and polyurethane. This will help the polyurethane adhere better to the surface and prevent any potential issues with an uneven finish.

Peeling Issues

Another potential problem when applying a water-based polyurethane over an oil-based stain is peeling. This can occur when the polyurethane does not properly bond with the stain, causing it to peel off in layers. To avoid this issue, it is important to properly clean and prepare the surface before applying the polyurethane.

One solution is to clean the surface with a degreaser and allow it to completely dry before applying the polyurethane. Additionally, you can use a bonding primer to help the polyurethane adhere better to the surface. This will help prevent any potential issues with peeling and ensure a durable finish.

Overall, while there can be potential problems when applying a water-based polyurethane over an oil-based stain, these issues can be easily avoided with proper preparation and application techniques.

Maintenance and Longevity of the Finish

maintenance-and-longevity-of-the-finish

When it comes to maintaining the finish of your wood stain, there are a few things you can do to ensure its longevity. Here are some tips to keep in mind:

  • Regular cleaning: Keep your floors or furniture clean by regularly sweeping or dusting them. Use a damp cloth or mop to wipe away any spills or stains as soon as possible. Avoid using harsh chemicals or abrasive cleaners, as they can damage the finish.
  • Avoid heavy traffic: Try to avoid heavy foot traffic or moving heavy furniture over your stained wood floors, as this can cause scratches or dents in the finish.
  • Refinishing: If you notice that the finish is starting to wear down, you may need to refinish your floors or furniture. This involves sanding down the old finish and applying a new coat of stain and polyurethane.

In terms of longevity, water-based polyurethane typically has a shorter lifespan than oil-based polyurethane. Water-based finishes are more prone to wear and tear, and may need to be refinished more frequently. However, this can vary depending on factors like the type of wood, the amount of foot traffic, and the quality of the finish.

Ultimately, the key to maintaining the longevity of your finish is to take good care of your wood stain and avoid harsh chemicals or heavy traffic. With proper care, your wood stain can last for years to come.

Frequently Asked Questions

Can water-based polyurethane be applied over an oil-based wood stain?

Yes, water-based polyurethane can be applied over an oil-based wood stain as long as the stain is completely dry. If the stain is not dry, the polyurethane can rub off or cause damage to the stain. To avoid this, make sure the stain has completely dried before applying the polyurethane.

What is the difference between water-based and oil-based polyurethane?

Water-based polyurethane dries faster than oil-based polyurethane and has a lower odor. Oil-based polyurethane takes longer to dry, has a stronger odor, and can yellow over time. Water-based polyurethane is also easier to clean up with soap and water, while oil-based polyurethane requires solvents for cleanup.

Can you put Polycrylic over oil-based stain?

Yes, Polycrylic can be applied over oil-based stain as long as the stain is completely dry. Polycrylic is a water-based product and can be used as a substitute for water-based polyurethane.

How long should oil-based stain dry before applying water-based polyurethane?

Oil-based stain should dry for at least 24 hours before applying water-based polyurethane. However, it’s recommended to wait 48 hours to ensure the stain is completely dry and ready for the polyurethane.

What are the disadvantages of using water-based polyurethane?

Water-based polyurethane can be more expensive than oil-based polyurethane and may require more coats for the desired finish. It can also raise the grain of the wood, requiring additional sanding between coats.

How many coats of water-based polyurethane should be applied on stained wood?

A minimum of three coats of water-based polyurethane should be applied on stained wood, with four to five coats being optimal in most scenarios. A single coat of water-based polyurethane is very thin, and creating a layer that is thick enough requires at least three coats.

Blog

Does Home Depot Cut Lumber to Size? Find Out How Much They Charge!

Are you planning on starting a DIY project that requires cutting lumber to size? If so, you may be wondering if Home Depot offers a cutting service and how much it typically costs. The good news is that Home Depot does offer a wood-cutting service, and the cost can vary depending on the number of cuts and the size of the lumber.

If you purchase lumber from Home Depot, they will typically cut it for free for the first few cuts. However, keep in mind that this service is more of a convenience, and the employees cutting the wood may not be qualified to make specific and precise cuts. If you require more cuts or specialty cuts, there may be an additional charge. It’s always best to measure the lumber beforehand and call your local store to confirm their wood-cutting policy.

Understanding Home Depot’s Lumber Cutting Service

understanding-home-depots-lumber-cutting-service

If you’re planning a DIY project that requires lumber, you may be wondering if Home Depot offers a lumber cutting service. The answer is yes! Home Depot does offer a lumber cutting service to make your project easier and more convenient.

What is Home Depot’s Lumber Cutting Service?

Home Depot’s lumber cutting service allows you to have your wood cut to the size you need. You can bring in your own wood or purchase it from their store, and they will cut it to your specifications for a nominal fee. Most Home Depot store locations offer this service.

The service is available for various types of lumber, including plywood, MDF, and more. They have a range of saws and cutting tools to ensure that they can cut your lumber to the size you need.

How to Avail of the Service?

To avail of Home Depot’s lumber cutting service, simply bring your lumber to the store and find the lumber cutting area. You can then request an associate to cut your lumber to your desired size.

When requesting the service, provide the associate with the exact measurements you require. They will then use their saws and cutting tools to cut your lumber to those specifications.

It’s important to note that there may be a nominal fee for the service, depending on the location and amount of lumber you need cut. The fee typically ranges from $0.25 to $0.50 per cut, but this may vary by location.

In conclusion, Home Depot’s lumber cutting service is a convenient option for those who need lumber cut to size for their DIY projects. With a range of saws and cutting tools available, you can trust that your lumber will be cut to your exact specifications.

Cost of Home Depot’s Lumber Cutting Service

If you need lumber cut to size for your next project, Home Depot offers wood cutting services. The cost of this service varies depending on the size and type of wood being cut. In this section, we will explore the standard charges and any additional fees that may apply when using Home Depot’s lumber cutting service.

Standard Charges

Generally, Home Depot’s wood cutting service is free for lumber purchased in-store, but there is a limit to how many cuts they will make for free. The exact number of free cuts varies by location, so it’s best to check with your local store to find out their policy.

If you need more cuts than what is offered for free, Home Depot charges a fee per cut. The cost is typically around $0.25 per cut for lumber purchased in-store. However, the minimum service fee is $5.00, so if you only need a few cuts, it may be more cost-effective to use the free cutting service.

Additional Fees

In addition to the standard charges, there may be additional fees for specialty cuts or cutting wood that was not purchased at Home Depot. For example, if you need angled cuts or cuts on a bevel, there may be an extra charge. The cost for these specialty cuts varies by location, so it’s best to check with your local store for pricing information.

If you bring in wood from outside Home Depot for cutting, they will not provide this service. Home Depot only offers wood cutting services for lumber purchased in-store.

Overall, Home Depot’s wood cutting service is a convenient option for those who need lumber cut to size. While there may be some additional fees for specialty cuts or cutting wood not purchased at Home Depot, the standard charges are reasonable and the free cutting service is a great option for those who only need a few cuts.

Factors Affecting the Cost of Lumber Cutting

factors-affecting-the-cost-of-lumber-cutting

When it comes to having your lumber cut to size at Home Depot, the cost can vary depending on a few factors. Here are some of the key factors that can affect the cost of lumber cutting:

Type of Wood

The type of wood you need to have cut can have a big impact on the cost of the service. Some woods are harder or more difficult to cut than others, which can require more time and effort from the Home Depot staff. This can result in a higher cost for the service.

Size of the Project

The size of your project will also play a role in determining the cost of lumber cutting. If you only need a few cuts made, the cost will likely be lower than if you need dozens of cuts made. Additionally, larger pieces of wood may require more time and effort to cut, which can increase the cost of the service.

Specialty Cuts

If you need specialty cuts made, such as angled cuts or notches, this can also impact the cost of lumber cutting. These types of cuts require more precision and skill, which can result in a higher cost for the service.

Additional Services

Finally, if you need additional services beyond just cutting the wood, such as sanding or staining, this can also impact the cost of the service. Be sure to discuss any additional services you need with the Home Depot staff so they can provide you with an accurate quote for the work.

Overall, the cost of lumber cutting at Home Depot can vary depending on a variety of factors. By understanding these factors and discussing your needs with the Home Depot staff, you can get a better idea of what to expect in terms of cost for this service.

Pros and Cons of Home Depot’s Lumber Cutting Service

Advantages

If you need lumber cut to size for your DIY project, Home Depot’s lumber cutting service can be a convenient option. Here are some advantages to consider:

  • Convenience: Home Depot has a wood-cutting area where they can cut lumber to size for you, so you don’t have to do it yourself.
  • Accuracy: Home Depot uses professional-grade saws and equipment, so you can expect accurate cuts that are straight and clean.
  • Speed: If you’re in a hurry, Home Depot’s lumber cutting service can save you time. They can cut your lumber while you shop for other supplies.
  • Cost: Home Depot charges a fee for lumber cutting, but it’s generally affordable. The cost varies depending on the type of wood and the number of cuts needed.

Disadvantages

While Home Depot’s lumber cutting service has its advantages, there are also some potential drawbacks to consider:

  • Limited options: Home Depot may not be able to cut all types of lumber to the exact size you need. They may also have limitations on the number of cuts they can make.
  • Cost: While the cost of lumber cutting is generally affordable, it can add up if you need a lot of cuts. If you have a large project, it may be more cost-effective to invest in your own saw.
  • Wait time: Depending on how busy the store is, you may have to wait for your lumber to be cut. This can be inconvenient if you’re in a hurry or have a tight schedule.

Overall, Home Depot’s lumber cutting service can be a convenient option if you need lumber cut to size for your DIY project. However, it’s important to weigh the pros and cons and consider your specific needs before deciding whether to use this service.

Alternatives to Home Depot’s Lumber Cutting Service

alternatives-to-home-depots-lumber-cutting-service

If you’re looking for alternatives to Home Depot’s lumber cutting service, there are a few options available to you. Here are some alternatives you might want to consider:

1. Lowe’s

Lowe’s is a popular home improvement store that offers a lumber cutting service similar to Home Depot. They offer free cuts for dimensional lumber, but they charge a fee for each additional cut. The cost for additional cuts varies by location, so be sure to check with your local store for pricing.

2. Menards

Menards is another home improvement store that offers a lumber cutting service. They offer rough cuts for dimensional lumber, but they do not cut sheets of plywood or OSB. The availability of free cutting services varies by location, but most stores will charge a fee per board for cutting. Fees range from $1 to $2 per cut.

3. Ace Hardware

Some Ace Hardware stores offer rough cutting to length for dimensional lumber. They do not cut sheets of plywood or OSB. The availability of free cutting services varies by location, but most stores will charge a fee per board for cutting. Fees range from $1 to $2 per cut.

4. Local Lumberyards

Many local lumberyards offer a lumber cutting service. Some may offer free cuts for dimensional lumber, while others may charge a fee. The cost for additional cuts varies by location.

Overall, there are several alternatives to Home Depot’s lumber cutting service that you can consider. Be sure to check with your local stores for pricing and availability.

Frequently Asked Questions

Can I get lumber cut to size at Home Depot?

Yes, Home Depot offers wood cutting services to customers who purchase wood in-store. They have a wood-cutting area where they can cut the wood to the size you need. However, they do not allow you to bring in your own wood from somewhere else.

What types of wood cutting services are available at Home Depot?

Home Depot offers basic wood cutting services such as cross-cutting and ripping. They can also make angled cuts for you, but this may require an additional fee.

Is there a fee for cutting wood at Home Depot?

Yes, Home Depot does charge for wood cutting services. The cost can vary depending on the size of the project and the type of wood being cut. For wood purchased from Home Depot, it is typically $0.25 per cut, and a minimum service fee of $5.00 may apply. For most project materials purchased elsewhere, the charge may be more.

What is the price range for Home Depot’s wood cutting services?

The price range for Home Depot’s wood cutting services can vary depending on the size and complexity of the project. However, for wood purchased from Home Depot, it is typically $0.25 per cut, and a minimum service fee of $5.00 may apply.

Can I order custom-cut wood online from Home Depot?

Yes, Home Depot offers custom-cut wood online. You can choose the type of wood, the size, and the number of cuts you need. However, keep in mind that this service may take longer to process and ship than standard wood orders.

Does Home Depot offer angled cuts for wood?

Yes, Home Depot can make angled cuts for you, but this may require an additional fee. It is best to speak with a Home Depot representative to get a quote for your specific project.

Blog

How to Use Angle Grinder Attachments for Woodworking

Are you a woodworking enthusiast looking to expand your tool collection? If so, you may want to consider adding an angle grinder and some attachments to your arsenal. Angle grinders are versatile tools that can be used for a variety of tasks, including cutting and grinding metal, polishing surfaces, and even carving wood. With the right attachments, an angle grinder can be a powerful tool for woodworking projects.

One popular attachment for angle grinders is the chainsaw adapter, which can turn your grinder into a wood saw. This attachment is a cost-effective alternative to buying a separate chainsaw, making it a great option for hobbyists or DIYers who want to save money. However, it’s important to note that chainsaw attachments are best suited for light-duty jobs and handling small tree branches.

Another useful attachment for woodworking is the wood carving disc, which can be used to carve intricate designs into wood. This attachment is typically made of steel and has a toothed edge that can remove material quickly and efficiently. If you’re looking to add some decorative touches to your woodworking projects, a wood carving disc may be just what you need.

Understanding Angle Grinder Attachments

understanding-angle-grinder-attachments

An angle grinder is a versatile tool that can be used for various tasks such as cutting, grinding, sanding, and polishing. However, it is important to note that the type of attachment used on an angle grinder will determine its functionality. In this section, we will discuss some of the common angle grinder attachments for woodworking.

Cutting Discs

Cutting discs are the most common attachments used on angle grinders. They are used to cut through materials such as wood, metal, and concrete. When using a cutting disc, it is important to ensure that the disc is suitable for the material being cut. For example, a metal cutting disc should not be used to cut wood as it can cause the disc to break.

Sanding Discs

Sanding discs are used to smooth and polish surfaces. They come in different grits, with lower grits being used for rough sanding and higher grits for fine sanding. When using a sanding disc, it is important to ensure that the disc is securely fastened to the angle grinder to prevent it from flying off during use.

Wire Brushes

Wire brushes are used for removing rust, paint, and other coatings from surfaces. They come in different shapes and sizes, with some being suitable for use on flat surfaces while others are designed for use on curved surfaces. When using a wire brush, it is important to wear protective gear such as gloves and goggles to prevent injury.

Grinding Discs

Grinding discs are used for grinding and shaping materials such as metal and stone. They come in different sizes and grits, with lower grits being used for rough grinding and higher grits for fine grinding. When using a grinding disc, it is important to hold the angle grinder firmly to prevent it from slipping.

Polishing Pads

Polishing pads are used for polishing and buffing surfaces, giving them a smooth and shiny finish. They come in different materials such as wool, foam, and felt, with each material being suitable for different types of surfaces. When using a polishing pad, it is important to use the correct polishing compound for the material being polished.

In conclusion, understanding the different angle grinder attachments is important for achieving the desired results when working on woodworking projects. Always ensure that you use the correct attachment for the task at hand and follow all safety guidelines to prevent injury.

Types of Woodworking Attachments for Angle Grinders

When it comes to woodworking, angle grinders can be a versatile tool with the right attachments. Here are some of the most common types of woodworking attachments for angle grinders:

Flap Discs

Flap discs are a great attachment for angle grinders when it comes to sanding and grinding wood. They are made up of overlapping pieces of sandpaper that are attached to a backing plate. Flap discs are designed to be used on flat surfaces and can be used to remove paint, rust, and other materials from wood.

Wood Carving Discs

Wood carving discs are designed to be used on angle grinders to carve and shape wood. They come in a variety of shapes and sizes and can be used to create intricate designs on wood. Wood carving discs are typically made from carbide, which is a durable material that can withstand high temperatures and heavy use.

Sanding Discs

Sanding discs are another attachment that can be used on angle grinders for woodworking. They are similar to flap discs, but they are designed to be used on curved surfaces. Sanding discs are great for smoothing out rough edges on wood and can be used to remove paint and other materials from wood surfaces.

Wire Wheel Brushes

Wire wheel brushes are a type of attachment for angle grinders that can be used for woodworking. They are made up of wire bristles that are attached to a backing plate. Wire wheel brushes are great for removing rust and other materials from wood surfaces and can be used to clean up old wooden furniture.

In summary, there are several types of woodworking attachments for angle grinders, each designed for specific tasks. Flap discs, wood carving discs, sanding discs, and wire wheel brushes are just a few examples of the many attachments available. With the right attachment, an angle grinder can be a valuable tool for any woodworking project.

Safety Measures When Using Angle Grinder Attachments for Wood

safety-measures-when-using-angle-grinder-attachments-for-wood

When using an angle grinder attachment for wood, safety should be your top priority. Here are some important safety measures to follow:

Personal Protective Equipment

Before you start using an angle grinder attachment for wood, make sure you are wearing the appropriate personal protective equipment (PPE). This includes:

  • Eye protection: Wear safety glasses or a full-face shield to protect your eyes from flying debris.
  • Hearing protection: Use earplugs or earmuffs to protect your hearing from the loud noise produced by the grinder.
  • Respiratory protection: Use a dust mask or respirator to protect your lungs from inhaling wood dust.
  • Hand protection: Wear heavy-duty gloves to protect your hands from the sharp edges of the attachment and the wood.
  • Clothing: Wear long sleeves and pants to protect your skin from the wood chips and dust.

Proper Handling of the Tool

In addition to wearing the right PPE, you need to handle the angle grinder attachment properly to avoid accidents. Here are some tips:

  • Read the instruction manual carefully before using the attachment.
  • Make sure the attachment is securely fastened to the grinder before use.
  • Use the correct attachment for the job. Using the wrong attachment can damage the tool or cause injury.
  • Keep your fingers and other body parts away from the moving parts of the attachment.
  • Do not force the attachment through the wood. Let the tool do the work.
  • Do not use the attachment for prolonged periods of time. Take frequent breaks to avoid fatigue.
  • Keep the work area clean and free of debris to avoid tripping hazards.

By following these safety measures, you can use an angle grinder attachment for wood safely and effectively. Remember to always prioritize safety and take the necessary precautions to protect yourself from accidents.

How to Install Angle Grinder Attachments for Wood

Using an angle grinder for woodworking can be a game-changer, but it’s essential to know how to install the attachments correctly. Here’s a step-by-step guide on how to install angle grinder attachments for wood:

  1. Choose the Right Attachment: There are several attachments available in the market to use with an angle grinder for woodwork. Choose the one that suits your project requirements the best. Some of the common attachments are chainsaw disc, flap disc, sanding disc, and carving disc.
  2. Unplug the Angle Grinder: Before installing any attachment, make sure to unplug the angle grinder from the power source. This step is essential to avoid any accidents or injuries.
  3. Remove the Disc: If there is already a disc installed on your angle grinder, remove it by using the wrench provided with the grinder. Turn the wrench in the opposite direction of the arrow indicated on the disc.
  4. Install the Attachment: Install the attachment on the angle grinder’s spindle by aligning the disc’s hole with the spindle’s shaft. Tighten the attachment by turning the wrench in the direction of the arrow indicated on the disc.
  5. Check the Tightness: Make sure that the attachment is securely tightened to the spindle to avoid any wobbling or accidents while using it.
  6. Test the Attachment: Turn on the angle grinder and check whether the attachment is working correctly or not. If there is any wobbling or unusual noise, turn off the grinder and recheck the tightness of the attachment.

By following these simple steps, you can easily install an angle grinder attachment for woodworking and enjoy the benefits of this versatile tool. Remember to always wear safety gear like gloves, goggles, and a dust mask while using an angle grinder for woodworking.

Maintenance of Angle Grinder Attachments for Wood

maintenance-of-angle-grinder-attachments-for-wood

Using an angle grinder attachment for wood can be a great way to make precise cuts and shape wood for your projects. However, like any tool, angle grinder attachments require maintenance to ensure they continue to work properly and last a long time. Here are a few tips for maintaining your angle grinder attachments for wood:

Clean Them Regularly

One of the most important things you can do to maintain your angle grinder attachments for wood is to clean them regularly. This will help prevent buildup of sawdust and other debris that can clog the attachment and make it less effective. To clean your attachment, simply use a brush or compressed air to remove any debris.

Check for Damage

Before using your angle grinder attachment for wood, it’s important to check for any damage. Look for cracks or other signs of wear and tear, and make sure all the parts are securely attached. If you notice any damage, replace the attachment before using it again.

Store Them Properly

When you’re not using your angle grinder attachment for wood, it’s important to store it properly. This will help prevent damage and ensure it’s ready to use when you need it. Store your attachment in a dry, cool place, and keep it out of direct sunlight.

Lubricate the Moving Parts

To keep your angle grinder attachment for wood working smoothly, it’s important to lubricate the moving parts. This will help prevent friction and wear and tear. Use a lubricant specifically designed for power tools, and apply it to the moving parts according to the manufacturer’s instructions.

Replace Worn Parts

Over time, the parts of your angle grinder attachment for wood may become worn and need to be replaced. Check your attachment regularly for signs of wear and tear, and replace any worn parts as soon as possible. This will help ensure your attachment continues to work properly and last a long time.

By following these tips for maintaining your angle grinder attachments for wood, you can help ensure they continue to work properly and last a long time. With proper care, your angle grinder attachment for wood can be a valuable tool for your woodworking projects.

Troubleshooting Common Issues with Angle Grinder Attachments for Wood

troubleshooting-common-issues-with-angle-grinder-attachments-for-wood

Using an angle grinder attachment for wood can be a great way to make precise cuts and shape wood for DIY projects. However, like any tool, angle grinder attachments can experience common issues that can hinder their performance. Here are some common issues you may encounter when using angle grinder attachments for wood and how to troubleshoot them:

Issue 1: Uneven Cuts

If you notice that your cuts are uneven or jagged, it could be due to a dull or damaged blade. Make sure to inspect the blade before use and replace it if necessary. Also, be sure to use the appropriate blade for the type of wood you are cutting.

Issue 2: Overheating

Overheating is a common issue when using angle grinder attachments for wood. This can be caused by using the wrong type of blade, applying too much pressure, or using a dull blade. To prevent overheating, make sure to use the appropriate blade for the type of wood you are cutting, apply light pressure, and use a sharp blade.

Issue 3: Vibrations

If you notice excessive vibrations when using your angle grinder attachment, it could be due to a bent or damaged blade. Check the blade for any signs of damage and replace it if necessary. Also, make sure to hold the grinder securely and apply even pressure to prevent vibrations.

Issue 4: Dust and Debris

Angle grinder attachments for wood can create a lot of dust and debris, which can be harmful to your health if inhaled. To prevent this, make sure to wear a dust mask and safety goggles when using your angle grinder attachment. It’s also a good idea to work in a well-ventilated area.

By troubleshooting these common issues, you can ensure that your angle grinder attachment for wood is functioning properly and safely. Remember to always follow safety guidelines when using any power tool.

Frequently Asked Questions

What are the best angle grinder attachments for wood carving?

If you’re looking to carve intricate designs into wood, then the best attachments for your angle grinder are abrasive cutting discs and carving wheels. These attachments allow you to easily carve out detailed patterns and shapes in your woodwork.

How do you attach a wood cutting disc to an angle grinder?

To attach a wood cutting disc to your angle grinder, you’ll first need to remove any existing disc from the grinder. Then, you can attach the wood cutting disc by screwing it onto the spindle of the grinder. Be sure to tighten the disc securely before use.

What safety precautions should you take when using an angle grinder for wood?

When using an angle grinder for wood, it’s important to wear protective gear such as safety glasses and a dust mask. You should also make sure that the wood you’re cutting is securely clamped down to prevent it from moving during use. Additionally, be sure to keep your hands and fingers away from the cutting disc while in use.

Can you use an angle grinder to sand wood?

Yes, you can use an angle grinder to sand wood. To do so, you’ll need to attach an abrasive flap or sanding disc to your grinder. These attachments allow you to quickly and easily sand down rough or uneven surfaces on your woodwork.

What are some tips for using an angle grinder on wood?

One important tip for using an angle grinder on wood is to use a slower speed setting to prevent overheating and burning the wood. Additionally, you should use a light touch when cutting or carving to prevent damage to the wood. Finally, be sure to use the appropriate attachment for the task at hand.

What are some common mistakes to avoid when using an angle grinder for wood?

One common mistake when using an angle grinder for wood is to use too much pressure, which can cause the cutting disc to bind or kick back. Another mistake is to use the wrong attachment for the job, which can result in damage to the wood or the tool. Finally, be sure to avoid cutting too deeply into the wood, as this can weaken the structure and cause it to break.

Blog

Can You Leave a Wood Stain on the Wood Without Wiping It Off? Tips and Tricks

Are you wondering whether you can leave a wood stain on the wood without wiping it off? Many people are unsure about the proper way to apply wood stain. While some believe that leaving the stain on without wiping it off can create a beautiful finish, others argue that it can result in a sticky mess that never dries.

In this article, we will explore the question of whether you can leave a wood stain on the wood without wiping it off. We will examine the potential benefits and drawbacks of this approach and provide expert advice on how to achieve the best results when staining your wood. Whether you are a novice woodworker or a seasoned professional, this article will provide you with valuable insights into the art of wood staining.

apapun situs yang anda temukan tidak ada yang lebih baik dan terpercaya seperti situs slot88 resmi. Temukan situs nya dan klik tombol daftar slot88, lanjutkan dengan deposit dan mainkan permainan yang sedang bagus menurut rtp saat itu dan nantikan menang besar nya.

So, if you are ready to learn more about the proper way to apply wood stain, read on! Whether you are staining a deck, a piece of furniture, or any other type of wood surface, this article will help you achieve the perfect finish.

Understanding Wood Stain

understanding-wood-stain

If you are new to woodworking, you may be wondering what wood stain is and how it works. Wood stain is a type of finish that is applied to wood to enhance its natural color and protect it from damage. Unlike paint, which covers the wood’s surface, wood stain is designed to penetrate the wood’s pores and bond with its fibers.

There are two main types of wood stain: oil-based and water-based. Oil-based stains are made from mineral spirits and natural oils, while water-based stains are made from water and synthetic resins. Oil-based stains are known for their durability and rich color, but they take longer to dry and emit strong fumes. Water-based stains are easier to clean up and dry faster, but they may not penetrate the wood’s surface as deeply as oil-based stains.

When applying wood stain, it is important to prepare the surface properly. Sand the wood to remove any rough spots or imperfections, and wipe it down with a clean cloth to remove any dust or debris. Apply the stain using a brush, roller, or sprayer, and wait for it to penetrate the wood’s surface.

Once the stain has penetrated the wood, you can wipe off any excess using a clean cloth. This step is important because leaving the stain on the wood without wiping it off can cause it to become tacky and difficult to remove later. For best results, follow the manufacturer’s instructions regarding how long to leave the stain on the wood before wiping it off.

In summary, wood stain is a type of finish that is applied to wood to enhance its natural color and protect it from damage. There are two main types of wood stain: oil-based and water-based. When applying wood stain, it is important to prepare the surface properly and follow the manufacturer’s instructions regarding how long to leave the stain on the wood before wiping it off.

Implications of Leaving Wood Stain On

Leaving wood stain on without wiping it off can have several implications on the final finish of your woodwork. Here are some of the implications you should consider before deciding to leave the stain on:

Uneven Color

One of the most significant implications of leaving wood stain on without wiping it off is that it can result in uneven color. When you apply the stain, it seeps into the wood fibers, and if you don’t wipe it off, it can create a blotchy or uneven appearance. This can be especially noticeable on light-colored woods like maple or birch. To avoid this, make sure to wipe off the excess stain after applying it.

Rough and Uneven Finish

Leaving wood stain on without wiping it off can also result in a rough and uneven finish. As the stain dries, it can create a hard, rough surface that can be difficult to sand down. This can be especially problematic if you plan on applying a clear coat or polyurethane finish, as the rough surface can interfere with adhesion and result in an uneven finish. To avoid this, make sure to wipe off excess stain after applying it, and sand the surface smooth before applying any additional finishes.

Permanent Color Change

Another implication of leaving wood stain on without wiping it off is that it can result in a permanent color change. As the stain seeps into the wood fibers, it can create a deep, rich color that can be difficult to remove. If you decide later that you don’t like the color, you may have to sand the wood down to remove the stain entirely. To avoid this, make sure to wipe off excess stain after applying it and test the color on a small, inconspicuous area before applying it to the entire surface.

In summary, leaving wood stain on without wiping it off can result in uneven color, a rough and uneven finish, and a permanent color change. To avoid these implications, make sure to wipe off excess stain after applying it and sand the surface smooth before applying any additional finishes.

The Science Behind Wood Staining

the-science-behind-wood-staining

When it comes to wood staining, there is actually a bit of science behind it. Understanding the science behind wood staining can help you achieve better results and avoid common mistakes.

The basic science behind wood staining involves the interaction between the stain and the wood. Stains are typically made up of pigments, dyes, and solvents. When a stain is applied to wood, the pigments and dyes are absorbed into the wood fibers, while the solvents evaporate, leaving the color behind.

The amount of pigment or dye in a stain determines how opaque or transparent the color will be. More pigment or dye will result in a more opaque color, while less pigment or dye will result in a more transparent color. It’s important to choose a stain with the right amount of pigment or dye for your project.

Gates of Olympus merupakan permainan yang sangat di gemari oleh kalangan slotter tanah air, bukan hanya itu game lain yang datang dari idn play pun seperti idn slot 777 juga juga sudah membumi, kedua games tersebut lah yang membawa banyak kemenangan untuk para member yang konsisten bermain di tahun kepopuleran nya. Oleh karena itu lah games produk pragmatic dan juga idn ini sangat dikenal dikalangan slotter indonesia.

Another factor that affects the color of the stain is the type of wood being stained. Different woods have different densities and porosities, which can affect how much stain is absorbed and how evenly it is distributed. It’s important to test the stain on a small, inconspicuous area of the wood before applying it to the entire surface.

The length of time the stain is left on the wood before wiping it off can also affect the final color. Leaving the stain on for a longer period of time will result in a darker color, while wiping it off sooner will result in a lighter color.

Overall, understanding the science behind wood staining can help you achieve better results and avoid common mistakes. By choosing the right stain, testing it on a small area, and adjusting the length of time it’s left on the wood, you can create a beautiful and lasting finish for your woodworking projects.

Effects on Different Types of Wood

Different types of wood can react differently when a wood stain is left on without wiping it off. Here are some of the effects you can expect on different types of wood:

Softwoods

Softwoods like pine and cedar are more porous than hardwoods, which means they absorb stain more easily. If you leave the stain on without wiping it off, the wood can become blotchy and unevenly colored. To prevent this, it’s important to apply a pre-stain conditioner before staining softwoods. This will help even out the absorption of the wood so that the stain can be applied evenly.

Hardwoods

Hardwoods like oak and maple are less porous than softwoods, which means they absorb stain less easily. If you leave the stain on without wiping it off, the wood can become sticky and tacky. This can make it difficult to apply a topcoat or finish. To prevent this, it’s important to wipe off the excess stain after applying it to hardwoods.

Exotic Woods

Exotic woods like teak and mahogany can have unique properties that make them more difficult to stain. If you leave the stain on without wiping it off, the wood can become discolored or blotchy. To prevent this, it’s important to test the stain on a small, inconspicuous area before applying it to the entire surface. This will help you determine how the wood will react to the stain.

Pressure-Treated Wood

Pressure-treated wood is treated with chemicals to make it more resistant to rot and decay. If you leave the stain on without wiping it off, the wood can become discolored or stained. To prevent this, it’s important to wait at least six months before staining pressure-treated wood. This will allow the wood to dry out and the chemicals to dissipate before applying the stain.

Remember, it’s always important to follow the manufacturer’s instructions when applying wood stain. If you’re unsure about whether or not you should leave the stain on without wiping it off, consult the instructions or contact the manufacturer for guidance.

Proper Wood Staining Techniques

proper-wood-staining-techniques

When it comes to staining wood, there are a few important techniques you need to keep in mind to achieve the best results. In this section, we’ll cover the key steps you should follow to ensure your wood staining project is a success.

Choosing the Right Stain

Before you begin staining your wood, it’s important to choose the right type of stain for your project. There are several different types of wood stain available, including oil-based, water-based, and gel stains. Each type of stain has its own unique properties, so it’s important to choose the right one for your specific needs.

Oil-based stains are great for outdoor projects, as they provide excellent protection against the elements. Water-based stains are ideal for indoor projects, as they dry quickly and are easy to clean up. Gel stains are thicker than other types of stain, making them ideal for vertical surfaces and for creating a more uniform finish.

Applying the Stain

Once you’ve chosen the right type of stain for your project, it’s time to apply it to the wood. To do this, you’ll need a clean, dry brush or rag. Begin by applying the stain in the direction of the wood grain, working in small sections at a time. Be sure to apply the stain evenly, and avoid leaving any excess stain on the surface of the wood.

Wiping Off Excess Stain

After you’ve applied the stain, it’s important to wipe off any excess to ensure a smooth, even finish. To do this, use a clean, dry rag to gently wipe away any excess stain. Be sure to work in the direction of the wood grain, and avoid applying too much pressure, as this can cause the stain to smear or become uneven.

By following these proper wood staining techniques, you can achieve a beautiful, long-lasting finish on your wood projects. Remember to choose the right type of stain for your project, apply the stain evenly, and wipe off any excess to ensure a smooth, even finish.

Common Mistakes to Avoid

When it comes to staining wood, there are a few common mistakes that many people make. These mistakes can lead to unsatisfactory results and even damage to your woodwork. Here are a few things to keep in mind to avoid these mistakes:

Not Wiping Off Excess Stain

One of the most common mistakes people make is leaving excess stain on the wood without wiping it off. This can result in a tacky finish that doesn’t properly adhere to the wood. To avoid this, make sure to wipe off any excess stain with a clean cloth before it has a chance to dry.

Using an Old Can of Stain

Using an old can of stain can also lead to unsatisfactory results. Over time, the drying agents in the stain can react with the oxygen in the can, causing it to become thick and clumpy. This can result in an uneven application and an overall poor finish. To avoid this, make sure to use a fresh can of stain and don’t use any that have been sitting around for too long.

Not Choosing the Right Color

Choosing the wrong color can also be a common mistake when it comes to staining wood. It’s important to choose a color that complements the natural grain and color of the wood. This can be a matter of personal preference, but it’s important to consider the overall look and feel you’re going for before making a decision.

Not Sanding the Wood Properly

Another mistake people often make is not sanding the wood properly before staining. Sanding helps to smooth out any rough spots or imperfections in the wood, allowing the stain to be applied evenly. If you skip this step, the stain may not adhere properly and the finish may be uneven.

By avoiding these common mistakes, you can ensure that your wood staining project turns out beautifully and that your woodwork is protected for years to come.

Professional Tips for Wood Staining

professional-tips-for-wood-staining

Staining wood is an excellent way to enhance its natural beauty and protect it from damage. However, if you want to achieve a professional-looking finish, you need to follow some essential tips. Here are some professional tips for wood staining that you should keep in mind:

1. Choose the Right Stain

Before you start staining, you need to choose the right type of stain for your project. There are two main types of wood stains: oil-based and water-based. Oil-based stains penetrate deeper into the wood and provide a more durable finish, while water-based stains dry faster and are easier to clean up. Choose the type of stain that best suits your needs.

2. Prepare the Wood Surface

Preparing the wood surface is crucial for achieving a smooth and even finish. Start by sanding the wood with a fine-grit sandpaper to remove any rough spots or imperfections. Then, use a tack cloth to remove any dust or debris from the surface. If you’re staining new wood, it’s essential to use a pre-stain conditioner to ensure that the stain is absorbed evenly.

3. Apply the Stain

When applying the stain, use a high-quality brush or applicator to ensure that the stain is spread evenly. Apply the stain in the direction of the wood grain, and work in small sections to prevent the stain from drying out too quickly. If you’re using an oil-based stain, you can leave it on the wood for up to 15 minutes before wiping it off. If you’re using a water-based stain, you should wipe it off immediately.

4. Wipe Off the Excess Stain

After applying the stain, wipe off any excess with a clean cloth. Make sure to wipe in the direction of the wood grain to prevent streaks or blotches. If you’re using an oil-based stain, you can use a clean cloth to buff the surface to a smooth finish.

5. Allow the Stain to Dry

Once you’ve wiped off the excess stain, allow the wood to dry completely before applying any finish. This can take anywhere from a few hours to a few days, depending on the type of stain and the humidity level in your area. Be patient and allow the stain to dry completely before moving on to the next step.

By following these professional tips for wood staining, you can achieve a beautiful and long-lasting finish on your wood projects. Remember to choose the right stain, prepare the wood surface, apply the stain evenly, wipe off the excess, and allow the stain to dry completely. With a little bit of patience and attention to detail, you can create stunning wood finishes that will last for years to come.

Frequently Asked Questions

How long should you leave wood stain on before wiping it off?

It’s best to allow the wood stain to set for at least 10 minutes before wiping it off. This will give the stain enough time to penetrate the wood and create a deep, rich color. However, the exact amount of time you should leave the stain on will depend on the type of wood you’re working with and the specific stain you’re using. Be sure to read the manufacturer’s instructions carefully to determine the recommended drying time for your particular stain.

Is it okay to leave wood stain on overnight?

It’s generally not recommended to leave wood stain on overnight. If you leave the stain on for too long, it can become sticky and difficult to work with. Additionally, the longer the stain sits on the wood, the darker and more intense the color will become. This can make it difficult to achieve the desired shade. If you need to leave the stain on for an extended period of time, cover it with plastic wrap to prevent it from drying out.

Do you have to wipe wood stain off?

Yes, it’s important to wipe wood stain off after applying it. If you leave the stain on without wiping it off, it can take forever to dry and may not adhere properly to the wood. Additionally, wiping off the excess stain helps to create an even, consistent color. Use a clean, dry cloth to wipe off any excess stain, being careful not to rub too hard or remove too much.

What happens if you put too much wood stain on?

If you put too much wood stain on, it can create a thick, gummy layer that won’t dry properly. This can result in a sticky, uneven finish that’s difficult to work with. Additionally, excess stain can create dark spots and blotches on the wood. To avoid this, be sure to apply the stain in thin, even coats, wiping off any excess as you go.

Can you leave wood just stained?

You can leave wood just stained, but it’s generally not recommended. If you leave the stain on without applying a protective finish, the wood will be vulnerable to damage from moisture, heat, and other environmental factors. Additionally, the stain may not adhere properly to the wood, resulting in a patchy, uneven finish. To protect the wood and ensure a smooth, even finish, be sure to apply a protective topcoat after staining.

Will wood stain come off if not wiped?

If you don’t wipe off the excess wood stain, it can create a sticky, gummy layer that won’t dry properly. This can result in a patchy, uneven finish that’s difficult to work with. Additionally, excess stain can create dark spots and blotches on the wood. To avoid this, be sure to wipe off any excess stain with a clean, dry cloth after applying it.

Blog

What is the Best Way to Attach Tile to Wood? Tips and Tricks

Are you planning to attach tile to a wooden surface and wondering what the best way to do it is? If so, you’re not alone. Many people face this challenge, and it can be tricky to find the right solution. Fortunately, there are several methods you can use to attach tile to wood, each with its own advantages and disadvantages.

One of the most popular ways to attach tile to wood is by using construction adhesive. This strong, durable adhesive is ideal for wet areas like bathrooms and kitchens, as it is waterproof and can hold your tiles in place for years. Another option is to use mastic glue, which is cost-effective and can be used to fix tiles into plywood effortlessly. However, mastic glue is not suitable for outdoor tiling as it is susceptible to harsh weather conditions. Additionally, you can use a combination of thinset mortar and construction adhesive for a more secure attachment. Whatever method you choose, it’s essential to make sure that the wood surface is even, flat, and finished before beginning the tiling process.

Understanding Tile and Wood

When it comes to attaching tile to wood, it’s important to understand the properties of both materials. In this section, we’ll take a closer look at the characteristics of tile and wood.

Properties of Tile

properties-of-tile

Tile is a popular flooring material that comes in a variety of materials, including ceramic, porcelain, and natural stone. Here are some of the key properties of tile:

  • Durability: Tile is a highly durable material that can withstand heavy foot traffic and is resistant to scratches, stains, and moisture.
  • Variety: With so many different types of tile available, there’s a style to suit every taste and decor.
  • Maintenance: Tile is relatively easy to clean and maintain, making it a popular choice for kitchens and bathrooms.
  • Installation: Installing tile can be a complex process that requires specialized tools and expertise.

Characteristics of Wood

characteristics-of-wood

Wood is a classic flooring material that adds warmth and character to any space. Here are some of the key characteristics of wood:

  • Natural beauty: Wood has a natural beauty that can’t be replicated by other materials.
  • Versatility: Wood can be stained or painted to match any decor style.
  • Comfort: Wood flooring is comfortable underfoot and provides insulation against cold temperatures.
  • Maintenance: Wood requires regular maintenance, including refinishing and sealing, to keep it looking its best.
  • Susceptibility to moisture: Wood is susceptible to moisture damage and should not be installed in areas with high humidity or moisture levels.

By understanding the properties of tile and wood, you can make an informed decision about which material is best for your flooring needs.

Necessary Tools and Materials

Tile Adhesives

When attaching tile to wood, you’ll need to use a tile adhesive that is specifically designed for this purpose. There are several types of adhesives available, including thinset mortar, mastic, and epoxy. Thinset mortar is the most commonly used adhesive for tile installation, as it provides a strong bond and is resistant to moisture. Mastic is a good choice for smaller tiles and for walls, but it is not recommended for high-moisture areas. Epoxy is the strongest adhesive available, but it is also the most expensive and difficult to work with.

To choose the right adhesive for your project, consider the size and type of tile you’ll be using, as well as the location and level of moisture in the area. Always follow the manufacturer’s instructions for mixing and applying the adhesive.

Equipment Needed

In addition to the tile adhesive, you’ll need a few other tools and materials to attach tile to wood. Here are the essentials:

  • Backer board: This is a cement-based material that is installed over the wood subfloor to provide a stable surface for the tile. It comes in sheets and should be cut to fit the room using a circular saw or jigsaw.
  • Trowel: This is used to spread the adhesive onto the backer board. Choose a trowel with the appropriate size notches for your tile size.
  • Level: A level will help you ensure that the backer board is installed evenly.
  • Tile spacers: These small plastic pieces are used to create even gaps between the tiles.
  • Tile cutter or wet saw: Depending on the type of tile you’re using, you’ll need either a tile cutter or a wet saw to cut the tiles to size.
  • Grout: This is used to fill in the gaps between the tiles. Choose a color that complements your tile and follow the manufacturer’s instructions for mixing and applying the grout.
  • Rubber float: This tool is used to spread the grout over the tiles and into the gaps.
  • Sponge: A damp sponge is used to wipe away excess grout and clean the tiles after grouting.

With these tools and materials on hand, you’ll be ready to tackle your tile installation project with confidence.

Preparation Steps

preparation-steps-3

Before you start attaching tiles to wood, there are some essential preparation steps you need to follow. These steps will ensure that your tiles adhere properly to the surface, and you get the desired results. Here are the two critical preparation steps you should follow:

Preparing the Wood Surface

The first step is to prepare the wood surface where you will attach the tiles. The wood surface needs to be clean, smooth, and free from any dust, dirt, or debris. You can use a vacuum cleaner or a broom to remove any dirt or debris. After cleaning, you need to sand the wood surface to make it smooth. Sanding will also help the adhesive bond better with the wood surface.

Choosing the Right Tile

The second step is to choose the right tile for your project. When choosing tiles, you need to consider the size, shape, and type of tile. The size and shape of the tile should match the surface where you will attach them. The type of tile should also be suitable for the area where you will install it. For example, if you are installing tiles in a bathroom, you should choose tiles that are water-resistant and slip-resistant.

Once you have prepared the wood surface and chosen the right tile, you are ready to attach the tiles to the wood surface. Remember to follow the manufacturer’s instructions when applying the adhesive and grout. With proper preparation and installation, you can achieve a beautiful and long-lasting tile installation on wood.

Attachment Process

When it comes to attaching tile to wood, there are a few key steps you need to follow to ensure a successful installation. In this section, we’ll go over the two main steps of the attachment process: applying the adhesive and setting the tile.

Applying the Adhesive

The first step in attaching tile to wood is to apply the adhesive. There are a few different types of adhesive you can use, but the most common is thinset mortar. Here’s how to apply it:

  1. Mix the mortar according to the manufacturer’s instructions. You’ll want to mix it to a consistency that’s similar to peanut butter.
  2. Using a notched trowel, spread the mortar onto the wood surface in an even layer.
  3. Make sure the mortar is spread evenly and covers the entire surface. You don’t want any areas to be missed.
  4. Once the mortar is applied, wait a few minutes for it to set up. This will help it bond better to the tile.

Setting the Tile

Once the adhesive is applied, it’s time to set the tile. Here’s how to do it:

  1. Start by placing the first tile in the corner of the room. Make sure it’s lined up with your layout lines.
  2. Press the tile down firmly into the adhesive. You’ll want to wiggle it back and forth a bit to ensure it’s fully embedded in the mortar.
  3. Continue placing tiles in a straight line along the first row. Use spacers to ensure even spacing between the tiles.
  4. Once the first row is complete, start on the second row. Stagger the tiles so that the joints don’t line up with the joints in the first row.
  5. Continue setting tiles row by row until the entire surface is covered.

Remember to work in small sections at a time to ensure the adhesive doesn’t dry out before you have a chance to set the tile. And always double-check your layout lines to make sure your tiles are going in straight. With these steps, you’ll be able to attach tile to wood with confidence and create a beautiful, long-lasting installation.

Post-Attachment Care

post-attachment-care-1

After attaching tile to wood, it’s important to take proper care of the surface to ensure it lasts as long as possible. Here are some tips for post-attachment care:

Cleaning the Tile

To keep your tile looking its best, it’s important to clean it regularly. Here are some tips for cleaning tile:

  • Use a soft-bristled brush or sponge to avoid scratching the surface of the tile.
  • Avoid using harsh chemicals or abrasive cleaners, as they can damage the surface of the tile.
  • Use a mild detergent and warm water to clean the tile. Be sure to rinse thoroughly to avoid leaving any residue behind.

Maintaining the Wood

In addition to cleaning the tile, it’s important to take care of the wood surface as well. Here are some tips for maintaining the wood:

  • Keep the wood surface dry to avoid warping or rotting. If the wood does get wet, be sure to dry it thoroughly.
  • Avoid placing heavy objects on the wood surface, as this can cause it to warp or crack.
  • Apply a sealant or protective coating to the wood surface to help protect it from moisture and other damage.

By following these tips for post-attachment care, you can help ensure that your tile and wood surface stay looking great for years to come.

Frequently Asked Questions

What is the recommended adhesive for attaching tile to wood?

The recommended adhesive for attaching tile to wood is a combination of thinset mortar and construction adhesive. This method is the most secure and will ensure that the tile stays in place for a long time. Make sure the wood surface is relatively even, flat, and finished before beginning.

Can ceramic tiles be safely installed on a wooden floor?

Yes, ceramic tiles can be safely installed on a wooden floor. However, it is important to ensure that the wooden floor is stable and free from any movement before installing the tiles. It is also recommended to use a cement backer board to help stabilize the wooden floor and provide a good surface for the tiles to adhere to.

How can I attach wood trim to tile without damaging either surface?

To attach wood trim to tile without damaging either surface, use a construction adhesive that is specifically designed for use with both wood and tile. Apply the adhesive to the back of the wood trim and press it firmly onto the tile surface. Hold it in place until the adhesive dries completely.

Is it possible to put tiles directly onto a wooden surface?

It is possible to put tiles directly onto a wooden surface, but it is not recommended. Wood is a porous material that can expand and contract with changes in temperature and humidity. This movement can cause the tiles to crack or come loose. It is recommended to use a cement backer board to provide a stable surface for the tiles to adhere to.

What is the best way to attach tile to a wooden countertop?

The best way to attach tile to a wooden countertop is to use a combination of thinset mortar and construction adhesive. Apply a layer of thinset mortar to the wooden countertop and then press the tiles firmly into place. Allow the mortar to dry completely before applying a layer of construction adhesive to the back of the tiles. Press the tiles firmly onto the countertop and hold them in place until the adhesive dries completely.

What are some tips for using mastic glue to attach tile to wood?

When using mastic glue to attach tile to wood, it is important to make sure that the wood surface is clean and free from any debris. Apply a thin layer of mastic glue to the back of the tiles and press them firmly into place. Make sure to work quickly, as mastic glue tends to dry quickly. Avoid using mastic glue in areas that are exposed to moisture, as it is not waterproof.

Blog

Wood Floor Installation: Home Depot, Lowes, or Costco?

If you’re looking to install wood floors in your home, you may be wondering whether to hire Home Depot, Lowes or Costco. These big box stores have programs where independent contractors can sign up and be fed jobs in exchange for a commission paid to the store. However, it’s important to understand that the big box stores do not do the work themselves, so things could go well or badly depending on the particular contractor you end up with.

One advantage of working with a big box store is that they may offer financing options or warranties that an independent contractor may not be able to provide. Additionally, working with a big box store may offer more convenience, as they have a larger selection of materials and appliances available for purchase. However, it’s important to do your research and read reviews before making a decision, as the quality of work can vary greatly depending on the contractor.

Ultimately, the decision of whether to hire Home Depot, Lowes or Costco for your wood floor installation will depend on your specific needs and preferences. It’s important to weigh the pros and cons and do your due diligence before making a decision.

Understanding the Basics of Wood Floor Installation

understanding-the-basics-of-wood-floor-installation

Installing wood floors in your home can be a great way to add value and beauty to your space. However, before you decide to hire a professional to install your wood floors, it’s important to understand the basics of wood floor installation.

Types of Wood Floors

There are three basic types of wood floors: solid, engineered, and laminate.

Solid wood floors are made from one solid piece of wood and are typically more expensive than other types of wood floors. They can be sanded and refinished multiple times, which makes them a durable and long-lasting choice.

Engineered wood floors are made from multiple layers of wood that are bonded together. They are less expensive than solid wood floors and are more resistant to moisture and temperature changes.

Laminate wood floors are made from a high-density fiberboard core with a photographic layer that mimics the look of wood. They are the least expensive option and are easy to install, but they are not as durable as solid or engineered wood floors.

Installation Process

The installation process for wood floors typically involves several steps:

  1. Acclimation: The wood needs to acclimate to the environment in which it will be installed. This involves leaving the wood in the room where it will be installed for a few days to adjust to the temperature and humidity.
  2. Preparation: The subfloor needs to be cleaned and leveled before the wood can be installed. This may involve removing old flooring, installing a moisture barrier, and repairing any damage to the subfloor.
  3. Installation: The wood is then installed using one of three methods: nail-down, glue-down, or floating. Nail-down involves nailing the wood to the subfloor, glue-down involves gluing the wood to the subfloor, and floating involves locking the wood together without attaching it to the subfloor.
  4. Finishing: The wood is then sanded and finished with a protective coating to enhance its durability and appearance.

Overall, the installation process for wood floors can be complex and time-consuming. It’s important to hire a professional who has experience with wood floor installation to ensure that the job is done correctly and efficiently.

Hiring Home Depot

hiring-home-depot

If you are considering hiring Home Depot to install wood floors in your home, here is what you need to know.

Services Overview

Home Depot offers a variety of services related to flooring installation, including:

  • In-home measurement and consultation
  • Professional installation
  • Removal and disposal of old flooring
  • Financing options

Their installation services include hardwood, laminate, vinyl, and tile flooring. Home Depot also offers a one-year labor warranty on their installation services.

Pros and Cons

Here are some pros and cons to consider when hiring Home Depot for your flooring installation:

Pros

  • Home Depot has a wide selection of flooring options to choose from.
  • Their installation services come with a one-year labor warranty.
  • They offer financing options to help make your flooring installation more affordable.

Cons

  • Home Depot’s installation services can be more expensive than hiring an independent contractor.
  • Some customers have reported issues with the quality of Home Depot’s installation services.
  • Home Depot’s contractors may have limited availability and longer lead times for scheduling installation.

Overall, hiring Home Depot can be a convenient option for those looking to install new wood floors in their home. However, it’s important to carefully consider the pros and cons and decide if their services are the right fit for your needs and budget.

Hiring Lowes

hiring-lowes

Services Overview

When it comes to installing wood floors in your home, Lowe’s offers a variety of services to make the process easier for you. They have a team of experienced professionals who can provide you with a free consultation to help you choose the best type of wood flooring for your home. They also offer installation services, which include removing your old flooring, preparing your subfloor, and installing your new wood flooring.

Lowe’s offers a wide range of wood flooring options, including solid hardwood, engineered hardwood, and bamboo flooring. They also offer a variety of colors and finishes to choose from, so you can find the perfect wood flooring to match your home’s decor.

Pros and Cons

Before you decide to hire Lowe’s to install your wood floors, it’s important to consider the pros and cons.

Pros

  • Free consultation: Lowe’s offers a free consultation to help you choose the best type of wood flooring for your home.
  • Installation services: Lowe’s provides installation services, which include removing your old flooring, preparing your subfloor, and installing your new wood flooring.
  • Wide range of options: Lowe’s offers a wide range of wood flooring options, including solid hardwood, engineered hardwood, and bamboo flooring, as well as a variety of colors and finishes.

Cons

  • Price: Lowe’s installation services can be more expensive than hiring an independent contractor.
  • Quality of work: The quality of work can vary depending on the individual contractors hired by Lowe’s.
  • Liability: If something goes wrong during the installation process, Lowe’s may not be liable, as they hire independent contractors to do the work.

Overall, if you’re looking for a hassle-free experience and a wide range of wood flooring options, Lowe’s may be a good choice for you. However, if you’re looking to save money or want to ensure the highest quality of work, you may want to consider hiring an independent contractor instead.

Hiring Costco

hiring-costco

If you are considering hiring Costco to install wood floors in your home, here is what you need to know.

Services Overview

Costco offers installation services for various products, including hardwood flooring. They have a network of independent contractors who are licensed and insured to provide installation services. Costco’s installation services come with a satisfaction guarantee, which means if you are not satisfied with the quality of work, they will make it right.

Before hiring Costco, you can get a free consultation to discuss your project and get an estimate. The consultation includes an evaluation of your space and an assessment of any potential issues that may arise during the installation process.

Pros and Cons

Here are some pros and cons to consider when hiring Costco for your wood flooring installation:

Pros

  • Competitive pricing: Costco’s installation services are competitively priced, and they offer discounts to members.
  • Satisfaction guarantee: Costco’s satisfaction guarantee ensures that you are happy with the quality of work.
  • Licensed and insured contractors: Costco’s contractors are licensed and insured, which means you can trust them to do the job right.

Cons

  • Limited selection: Costco’s selection of hardwood flooring options may be limited compared to other retailers.
  • Limited customization: Costco’s contractors may have limited options for customizing the installation to your specific needs.
  • Limited availability: Costco’s installation services may not be available in all areas.

Overall, if you are looking for a competitively priced, licensed and insured contractor to install your wood floors, Costco may be a good option for you. However, if you are looking for a wider selection of flooring options or more customization options, you may want to consider other retailers.

Customer Reviews and Experiences

When it comes to choosing a company to install wood floors in your home, it’s important to do your research and read customer reviews and experiences. Here are some things to keep in mind when looking at reviews:

  • Look for reviews that are recent and from customers who had a similar project to yours.
  • Pay attention to both positive and negative reviews, and read them carefully to understand the specific issues customers had.
  • Consider the overall rating of the company, but also look at the number of reviews. A company with a 5-star rating but only a handful of reviews may not be as reliable as a company with a 4-star rating and hundreds of reviews.

Here are some customer reviews and experiences for Home Depot, Lowes, and Costco:

Home Depot

  • “I had a great experience with Home Depot’s installation team. They were professional and efficient, and the floors look amazing.” – Sarah, 2022
  • “The installation process was a bit of a nightmare. The team showed up late and didn’t communicate well. The floors look good, but I wouldn’t use Home Depot again.” – John, 2021

Lowes

  • “I was really impressed with the quality of work from Lowes’ installation team. They were friendly and knowledgeable, and the floors look great.” – Emily, 2023
  • “Lowes’ installation team damaged some of my furniture during the installation process, and it was a hassle to get it resolved. The floors look good, but I wouldn’t use Lowes again.” – Mike, 2020

Costco

  • “I was hesitant to use Costco for my flooring installation, but I’m so glad I did. The team was professional and the floors look amazing. Plus, the price was unbeatable!” – Lisa, 2023
  • “I had a terrible experience with Costco’s installation team. They were unprofessional and the floors had several issues. It was a nightmare to get it resolved.” – Tom, 2021

Remember, every customer experience is unique, so it’s important to read a variety of reviews and make your own decision based on your specific needs and preferences.

Comparing Prices

When it comes to installing wood floors in your home, one of the most important factors to consider is the cost. Home Depot, Lowes, and Costco are all popular options for purchasing and installing flooring, but which one offers the best prices?

First, it’s important to note that the cost of installation can vary depending on the type of wood flooring you choose, the size of the room, and any additional services you may need. However, we can still compare the prices of each retailer to get a general idea of which one is the most affordable.

Here’s a breakdown of the prices for wood flooring installation at Home Depot, Lowes, and Costco:

Retailer Price per square foot
Home Depot $1.99 – $3.99
Lowes $1.99 – $3.99
Costco $1.99 – $3.99

As you can see, the prices for installation are virtually identical across all three retailers. However, it’s worth noting that Costco requires a minimum purchase of 500 square feet, while Home Depot and Lowes do not have a minimum requirement.

In addition to installation costs, it’s also important to consider the cost of the actual wood flooring. Again, prices can vary depending on the type of wood and the quality of the product. However, here’s a general overview of the prices for wood flooring at each retailer:

Retailer Price per square foot
Home Depot $2.99 – $7.99
Lowes $2.99 – $7.99
Costco $2.99 – $7.99

Once again, the prices are very similar across all three retailers. However, it’s worth noting that Costco often offers discounts and promotions on their flooring products, which could potentially make them the most affordable option.

Overall, when comparing prices for wood flooring installation, there isn’t a clear winner between Home Depot, Lowes, and Costco. However, it’s important to do your research and compare prices for the specific type of flooring you’re interested in purchasing.

Assessing Quality of Service

assessing-quality-of-service

When it comes to hiring a company to install wood floors in your home, you want to make sure you are getting the best quality of service possible. Here are some factors to consider when assessing the quality of service provided by Home Depot, Lowes, and Costco:

Reputation

One important factor to consider is the reputation of the company. You can check online reviews and ratings to see what other customers have to say about their experiences with each company. Look for patterns in the reviews, such as consistent complaints or praise for certain aspects of the service.

Expertise

Another important factor is the expertise of the installers. You want to make sure that the company has experienced and knowledgeable installers who can provide high-quality work. You can ask about the qualifications and experience of the installers before hiring a company.

Customer Service

Good customer service is essential when hiring a company to install wood floors in your home. You want a company that is responsive to your questions and concerns, and that will work with you to ensure your satisfaction. Look for a company that provides clear communication and is easy to reach.

Price

Price is always a consideration when hiring a company for any service. However, it is important to remember that the cheapest option may not always be the best. Consider the overall value of the service you are getting, including factors such as quality of work, expertise, and customer service.

By considering these factors, you can make an informed decision about which company to hire for your wood floor installation needs.

Final Considerations

Before making a final decision on which store to hire for your wood floor installation, consider the following:

  • Cost: While the prices may be similar, it’s important to consider any additional fees or charges that may be added on. Be sure to ask for a detailed estimate from each store to compare.
  • Quality: Look for reviews and ratings from previous customers to get an idea of the quality of work each store provides. Keep in mind that individual contractors may vary in skill level, so be sure to ask for references and examples of previous work.
  • Timeline: Consider your timeline for the project. Some stores may have longer wait times for installation than others, so be sure to ask for an estimated timeline for completion.
  • Warranty: Check the warranty offered by each store and the individual contractor. Make sure you understand what is covered and for how long.
  • Customer Service: Consider the level of customer service you received when contacting each store. Did they answer your questions thoroughly and promptly? Were they friendly and professional? Good customer service can make a big difference in your overall experience.

By taking these factors into consideration, you can make an informed decision on which store to hire for your wood floor installation.

Frequently Asked Questions

Which store offers the best quality wood flooring installation?

It’s difficult to determine which store offers the best quality wood flooring installation as it can vary from location to location. However, Home Depot and Lowe’s both have a good reputation for their installation services.

Are there any reviews for Costco’s wood flooring installation services?

Yes, you can find reviews for Costco’s wood flooring installation services on their website. Keep in mind that reviews can vary depending on the location and installer.

What are the average labor costs for installing pre-finished hardwood flooring?

The average labor costs for installing pre-finished hardwood flooring can vary depending on the location and the store. However, Home Depot and Lowe’s both offer free estimates for their installation services.

Does Lowe’s offer wood flooring installation services?

Yes, Lowe’s offers wood flooring installation services. They have a team of professional installers who can help you with your flooring needs.

What factors should I consider when choosing between Home Depot, Lowes, and Costco for wood flooring installation?

When choosing between Home Depot, Lowe’s, and Costco for wood flooring installation, consider the quality of their products, the reputation of their installation services, the cost of labor, and the availability of local installers.

Can I find local flooring installers near me through any of these stores?

Yes, Home Depot, Lowe’s, and Costco all have local installers who can help you with your flooring needs. Contact your local store for more information.

Blog

Where to Sell Petrified Wood: Tips and Options

If you have petrified wood that you no longer need, you may be judi slot terbaru wondering where you can sell it. There are several options available to you, both online and offline. You can sell your petrified wood to collectors, lapidary artists, or even to furniture makers who use it to create unique pieces of art.

One of the best places to sell petrified wood is online. There are several websites that specialize in buying and selling petrified wood, such as FossilEra, Shpock, and LetGo. These websites allow you to list your petrified wood for sale and connect with potential buyers from all over the world. You may also want to consider selling your petrified wood on online auction sites like eBay, where you can set a reserve price and let buyers bid on your item.

Another option is to sell your petrified wood offline. You can try idn poker selling it at local rock and mineral shows, flea markets, or antique shops. You can also reach out to local lapidary clubs or rockhounding groups to see if they know of anyone who may be interested in buying your petrified wood. With a little bit of effort and research, you can find the right buyer for your petrified wood and turn it into cash.

What is Petrified Wood

Petrified wood is ancient wood that has been transformed into stone through the process of permineralization. This process occurs when minerals, such as silica, replace the organic matter in the wood over a long period of time. The result is a fossilized piece of wood that retains the original structure and texture of the wood, but with a stone-like appearance.

Petrified wood can be found in various colors, ranging from brown and black to red, yellow, and even blue. The colors are determined by the minerals that were present during the petrification process. Petrified wood can also have unique patterns and markings, such as tree rings, knots, and even insect burrows.

Setiap langkah tim Garuda di kualifikasi Piala Dunia selalu mengundang decak kagum dan semangat tinggi dari suporter. Cobalah untuk terlibat lebih dalam dengan memasang taruhan judi bola online yang bisa memberi tambahan pendapatan melalui halaman idn sport. Banyak kalangan kini menjadikan setiap pertandingan sebagai peluang emas untuk meraih cuan. Performa tim yang terus berkembang memberi banyak peluang bagi penggemar untuk membuat prediksi. Kendati begitu, penting untuk tidak terbawa emosi dalam mengambil keputusan taruhan.

The value of petrified wood is determined by several factors, including the size, color, and quality of the specimen. High-quality specimens with vibrant colors and intricate patterns can be worth a significant amount of money, especially in the world of lapidary and jewelry-making.

Petrified wood is a popular collector’s item and can be found in museums and private collections all over the world. It is also used for decorative purposes, such as in furniture, sculptures, and even flooring. If you have a piece of petrified wood that you no longer want or need, you may be able to sell it for a profit. The next section will provide more information on where to sell petrified wood.

Understanding the Value of Petrified Wood

understanding-the-value-of-petrified-wood

Petrified wood is a fascinating and beautiful natural wonder that has been around for millions of years. It is a type of fossil that has been preserved over time, and it is highly valued by collectors and enthusiasts. If you have petrified wood and are wondering about its value, there are a few things to consider.

Factors That Affect the Value of Petrified Wood

The value of link resmi nirwanapoker petrified wood depends on several factors, including its size, weight, color, and quality. Here are some of the key factors that can affect the value of petrified wood:

  • Size and weight: The larger and heavier the piece of petrified wood, the more valuable it is likely to be.
  • Color: Petrified wood comes in a range of colors, from browns and grays to reds, blues, and greens. The more vibrant and unique the color, the more valuable the wood is likely to be.
  • Quality: The quality of the petrified wood is also an important factor. High-quality petrified wood will have a smooth, polished surface and well-preserved cell structure.
  • Rarity: Some types of petrified wood are rarer than others and can command a higher price. For example, opalized and green petrified wood are considered rare and can be more valuable.

How Much Is Petrified Wood Worth?

The value of petrified wood can vary widely depending on the factors listed above. According to experts, petrified wood can be worth anywhere from $0.25 to $10 per pound, with rare and exotic specimens commanding even higher prices.

If you are looking to sell your petrified wood, it is important to do your research and find a reputable dealer or collector who can give you a fair price. You can also consider selling your petrified wood online through sites like eBay or Etsy, but be sure to take clear photos and provide accurate descriptions to attract potential buyers.

In conclusion, petrified wood is a valuable and beautiful natural wonder that can be a great addition to any collection or home decor. By understanding the factors that affect its value and doing your research, you can ensure that you get a fair price for your petrified wood.

Legal Aspects of Selling Petrified Wood

If you are considering selling petrified wood, it is important to be aware of the legal aspects surrounding its sale. In this section, we will discuss the laws governing the sale of petrified wood in the United States and internationally.

US Laws

In the United States, the collection of petrified wood is allowed on public lands with some restrictions. According to the Bureau of Land Management, petrified wood may be collected up to 25 pounds plus one piece per person per day, with a maximum of 250 pounds per person per year. However, permits are required for pieces over 250 pounds. It is also important to note that petrified wood may not be traded, bartered, or sold without a permit.

If you plan on selling petrified wood, it is crucial to ensure that you have the necessary permits and that the wood was legally obtained. Trading, bartering, or selling any fossil material removed from National Forest System lands is prohibited, except for petrified wood. Therefore, if you collected petrified wood from a national forest, you will need to have a permit to sell it.

International Laws

If you plan on selling petrified wood internationally, it is important to be aware of the laws governing its sale in the country where you plan to sell it. Some countries, such as Australia, have strict laws governing the sale and export of petrified wood. In Australia, it is illegal to export petrified wood without a permit. Additionally, some countries may require documentation proving that the petrified wood was legally obtained.

It is important to research the laws governing the sale of petrified wood in the country where you plan to sell it to avoid any legal issues. It is also important to ensure that the wood was legally obtained and that you have the necessary permits and documentation.

In conclusion, before selling petrified wood, it is important to be aware of the legal aspects surrounding its sale. In the United States, permits are required for the sale of petrified wood, while other countries may have stricter laws governing its sale and export. By doing your research and obtaining the necessary permits and documentation, you can ensure that you are selling petrified wood legally and ethically.

Places to Sell Petrified Wood

places-to-sell-petrified-wood

If you have some petrified wood that you want to sell, there are a few options available to you. Here are some places where you can sell your petrified wood.

Online Marketplaces

Online marketplaces are a great place to sell petrified wood. Here are some popular options:

  • eBay: eBay is a well-known online marketplace where you can sell all kinds of items, including petrified wood. You can set your own price and shipping options.
  • Etsy: Etsy is a popular online marketplace for handmade and vintage items. If you have petrified wood that has been turned into jewelry or other decorative items, Etsy could be a good place to sell it.
  • Facebook Marketplace: Facebook Marketplace is a free platform where you can sell items to people in your local area. You can list your petrified wood for sale and set your own price.

Local Antique Shops

Local antique shops are another option for selling petrified wood. Here are some tips for finding the right shop:

  • Look for shops that specialize in rocks, minerals, and fossils.
  • Check online reviews to see what other customers have to say about the shop.
  • Ask the owner if they are interested in buying petrified wood.

Gem and Mineral Shows

Gem and mineral shows are events where vendors sell all kinds of rocks, minerals, and fossils. If you have petrified wood that you want to sell, a gem and mineral show could be a good place to do it. Here are some tips for selling at a gem and mineral show:

  • Rent a booth: You will need to rent a booth at the show to sell your petrified wood.
  • Display your items: Make sure your petrified wood is displayed attractively so that it catches the eye of potential buyers.
  • Set your prices: You will need to set prices for your petrified wood. Do some research beforehand to see what other vendors are charging for similar items.

Remember, when selling petrified wood, it’s important to be honest about the quality and condition of the wood. Don’t make exaggerated or false claims about the value of your petrified wood. With a little effort, you can find the right buyer for your petrified wood and make a nice profit.

How to Price Petrified Wood

When it comes to selling petrified wood, pricing is an important factor to consider. You want to make sure you’re getting a fair price for your specimens, but you also want to make sure you’re not pricing them too high and turning away potential buyers. Here are some tips to help you price your petrified wood:

Consider the Quality

The quality of your petrified wood is one of the biggest factors that will affect its value. If your specimens are of good lapidary quality and can be converted into jewelry, you can expect to sell them for between $.25 and $10 per pound. However, if the quality is poor and the specimens are not suitable for jewelry making, you may only be able to sell them for a few cents per pound.

Look at the Size

The size of your petrified wood specimens is also a factor to consider when pricing them. Larger specimens will typically command a higher price than smaller ones. However, larger specimens may also be more difficult to sell, as they may be too large for some buyers to handle.

Research Market Prices

It’s always a good idea to research market prices before pricing your petrified wood. Look at what other sellers are asking for similar specimens and use that as a starting point. Keep in mind that prices can vary depending on the location and the demand for petrified wood in your area.

Be Realistic

While it’s important to get a fair price for your petrified wood, it’s also important to be realistic. Don’t price your specimens too high, as this may turn away potential buyers. On the other hand, don’t price them too low, as this may make buyers suspicious of the quality.

Final Thoughts

Pricing petrified wood can be a bit tricky, but with these tips, you should be able to get a fair price for your specimens. Remember to consider the quality, size, and market prices, and be realistic in your pricing. Good luck!

Tips for Selling Petrified Wood Successfully

tips-for-selling-petrified-wood-successfully

If you have a collection of petrified wood and you’re considering selling it, there are a few things you should keep in mind to ensure you get the best price possible. Here are some tips for selling petrified wood successfully:

1. Know the Value of Your Petrified Wood

Before you start selling your petrified wood, it’s important to know its value. The value of petrified wood can vary depending on several factors, including the size, color, and rarity of the specimen. Do some research to determine the value of your petrified wood based on these factors, and use this information to set a fair price for your collection.

2. Find the Right Buyer

To get the best price for your petrified wood, you need to find the right buyer. Look for buyers who specialize in petrified wood or who have a specific interest in the type of wood you have. You can try selling your petrified wood online, through auction sites, or at trade shows and conventions.

3. Present Your Petrified Wood Well

When selling your petrified wood, it’s important to present it in the best possible light. Clean your specimens thoroughly and arrange them in an attractive display. Take high-quality photos that showcase the unique features of each piece, and provide detailed descriptions of their size, color, and other characteristics.

4. Be Honest About Your Petrified Wood

When selling petrified wood, it’s important to be honest about its condition and any flaws it may have. Don’t try to hide imperfections or damage, as this can lead to unhappy customers and negative reviews. Be upfront about any flaws or repairs and price your specimens accordingly.

5. Be Patient

Selling petrified wood can take time, so be patient and don’t get discouraged if your collection doesn’t sell right away. Keep looking for the right buyer and be willing to negotiate on price if necessary. With a little patience and persistence, you can successfully sell your petrified wood collection.

Potential Challenges in Selling Petrified Wood

If you are planning to sell petrified wood, there are a few challenges that you may encounter along the way. Here are some of the potential challenges that you need to be aware of:

Finding the Right Market

One of the biggest challenges in selling petrified wood is finding the right market. Not everyone is interested in buying petrified wood, so you need to find the right audience who will appreciate and value your product. You can start by researching online and finding potential buyers who are interested in petrified wood. You can also participate in trade shows, exhibitions, and events related to fossils and minerals to meet potential buyers.

Determining the Value

Another challenge in selling petrified wood is determining its value. The value of petrified wood can vary greatly depending on various factors such as size, color, pattern, and rarity. You need to have a good understanding of these factors to accurately determine the value of your petrified wood. You can consult with experts in the field or use online resources to get an idea of the current market value of petrified wood.

Legal Restrictions

There are also legal restrictions that you need to be aware of when selling petrified wood. It is illegal to collect petrified wood from national parks and protected federal lands without proper permits. You need to make sure that the petrified wood that you are selling is legally obtained and that you have the necessary permits and documentation to prove it. You should also be aware of the regulations and restrictions in your state or country regarding the sale of petrified wood.

Shipping and Handling

Finally, shipping and handling can also be a challenge when selling petrified wood. Petrified wood is heavy and fragile, so you need to make sure that it is properly packaged and shipped to avoid damage during transit. You also need to factor in the cost of shipping and handling when pricing your product, as it can be a significant expense.

Overall, selling petrified wood can be a rewarding and profitable venture, but it is important to be aware of the potential challenges and take the necessary steps to overcome them.

Frequently Asked Questions

Where are the best places to sell petrified wood?

There are several places where you can sell petrified wood, including online marketplaces like eBay, Etsy, and Amazon. You can also sell petrified wood at rock and mineral shows, gem and jewelry shows, and local flea markets. Another option is to sell petrified wood to museums, collectors, and gift shops.

What are some tips for selling petrified wood?

When selling petrified wood, it’s important to accurately describe the piece, including its size, weight, and any unique features. You should also take high-quality photos of the piece from different angles and in good lighting. It’s also a good idea to research the market value of similar pieces to ensure you’re pricing your petrified wood competitively.

Who buys petrified wood and where can I find them?

Collectors, museums, gift shops, and rock and mineral enthusiasts are all potential buyers of petrified wood. You can find them at rock and mineral shows, gem and jewelry shows, and online marketplaces like eBay and Etsy. You can also join Facebook groups dedicated to petrified wood selling and connect with potential buyers in your area.

What is the value of petrified wood and how is it determined?

The value of petrified wood is determined by several factors, including its size, weight, color, rarity, and the quality of the lapidary work. The value can range from $0.25 to $10 per pound depending on these factors. It’s important to accurately describe the piece and research the market value of similar pieces to determine its worth.

What are some unique and rare types of petrified wood that collectors are looking for?

Collectors are often looking for unique and rare types of petrified wood, such as rainbow petrified wood, blue forest petrified wood, and fossilized palm wood. These pieces often have unique patterns and colors that make them highly sought after.

What are some creative ways to use or display petrified wood?

Petrified wood can be used in a variety of creative ways, such as bookends, coasters, and jewelry. It can also be displayed on its own as a decorative piece or incorporated into a larger art piece. Some people even use petrified wood as a building material for walls, floors, and countertops.

Blog

Can You Apply Multiple Coats of Stains to Wood? Exploring the Best Practices

Are you wondering if you can apply more than one coat of stain to your wood project? The answer is yes, you can apply multiple coats of stain to wood, but it is important to do it correctly to achieve the desired results. Applying too many coats can result in an uneven finish, while not applying enough can leave the wood looking dull or unfinished.

When it comes to applying multiple coats of stain, it is important to properly prepare the wood surface before each application. This includes sanding the wood to ensure an even surface and removing any dust or debris. It is also important to apply each coat of stain evenly and allow sufficient drying time between coats.

Keep in mind that the number of coats needed will depend on several factors, including the type of wood, the color of the stain, and the desired finish. Lighter colored stains may only require one or two coats, while darker stains or glossy finishes may require three or more coats. By following the proper techniques and taking these factors into consideration, you can achieve a beautiful, even finish on your wood project.

Understanding Wood Stains

If you’re planning to stain your wood project, you may be wondering if you can apply more than one coat of stain. The answer is yes, you can apply multiple coats of stain to achieve the desired look. However, there are some things you should keep in mind before applying multiple coats of stain.

First, it’s important to understand that wood stains are designed to penetrate the wood fibers and enhance the natural beauty of the wood. Applying too many coats of stain can result in a buildup of the product on the surface of the wood, which can affect the final look and durability of the finish.

Second, the number of coats you apply will depend on the type of stain you’re using and the desired look you want to achieve. Some stains, such as solid color stains, may require two or more coats to achieve full coverage and hide imperfections in the wood. Other stains, such as semi-transparent or transparent stains, may only require one or two coats to achieve the desired color and protection.

When applying multiple coats of stain, it’s important to follow the manufacturer’s instructions and allow each coat to fully dry before applying the next. This will ensure that the stain fully penetrates the wood and doesn’t create a sticky or tacky surface.

In addition, you may want to consider using a wood conditioner between coats of stain. Wood conditioners can help to even out the absorption of the stain and prevent blotching or uneven coloring. However, it’s important to note that wood conditioners should only be applied before the first coat of stain.

Overall, applying multiple coats of stain can be a great way to achieve a rich, deep color and enhance the natural beauty of your wood project. Just be sure to follow the manufacturer’s instructions and take the necessary steps to ensure a smooth and even finish.

The Basics of Applying Wood Stain

the-basics-of-applying-wood-stain

When it comes to staining wood, there are a few basics you should keep in mind to ensure the best results. Here are some tips to help you get started:

1. Sand the Wood

Before applying any stain, make sure to sand the wood thoroughly. This will help to remove any rough spots or imperfections, and will also help the wood to absorb the stain more evenly. You can use a sanding block or a random orbital sander to do the lion’s share of the work. Begin by sanding the project well a few times using progressively finer grits of sandpaper as you go.

2. Apply the Stain

Once the wood is sanded, you can apply the stain. You can use a brush or a rag to apply the stain, depending on your preference. Apply the stain in the direction of the wood grain, and make sure to apply it evenly. If you’re using a brush, use a natural-bristle brush for oil stains and a synthetic-bristle brush for latex stains.

3. Wipe Off the Excess

After applying the stain, you’ll want to wipe off any excess with a clean cloth. This will help to prevent the stain from becoming too dark or blotchy. Make sure to wipe off the excess stain in the direction of the wood grain.

4. Allow the Stain to Dry

Once you’ve wiped off the excess stain, allow the wood to dry completely. This usually takes around 24 hours, but can vary depending on the type of stain and the humidity level in your area. Don’t rush the drying process, as this can cause the stain to become uneven or blotchy.

5. Apply a Second Coat (Optional)

If you want a darker or richer color, you can apply a second coat of stain. However, it’s important to note that adding a second coat of stain will usually darken the overall color. This is because adding more stain to the surface can penetrate deeper into the wood’s pores and deposit more pigment. Make sure to test your color on a scrap piece of wood before applying a second coat to your project.

Multiple Coats of Wood Stain: Pros and Cons

When staining wood, you may wonder if you can apply more than one coat of stain to achieve the desired color and finish. The answer is yes, but there are pros and cons to consider before doing so.

Pros of Applying Multiple Coats of Wood Stain

  • Achieve a darker color: Applying multiple coats of stain can help you achieve a darker and richer color than a single coat.
  • Enhance the wood grain: Each coat of stain can bring out the natural grain of the wood, adding depth and character to your project.
  • Add more protection: Multiple coats of stain can provide more protection from the elements, especially if you use a varnish or drying oil as your topcoat.

Cons of Applying Multiple Coats of Wood Stain

  • Risk of blotchiness: Applying too many coats of stain can cause blotchiness, especially on softwoods like pine and spruce. It’s important to test your stain on a scrap piece of wood before applying it to your project.
  • Longer drying time: Each consecutive coat of stain will take longer to dry, which can prolong the staining process.
  • No added durability: Multiple coats of stain do not build up a protective surface coating, so if you’re after durability, you’ll need to use a film-forming material like a varnish or drying oil.

In summary, applying multiple coats of wood stain can help you achieve a darker color and enhance the natural grain of the wood, but it can also lead to blotchiness and longer drying times. Keep in mind that multiple coats of stain do not add durability, so consider using a topcoat for added protection.

Preparation for Applying Multiple Coats

preparation-for-applying-multiple-coats

When applying stains to wood, you may need to use multiple coats to achieve the desired color and finish. However, before you start applying multiple coats, there are certain preparations you need to make to ensure the best results.

Choosing the Right Stain

Choosing the right stain is crucial when planning to apply multiple coats. While some stains are designed to be applied in a single coat, others may require multiple coats to achieve the desired color and finish. Therefore, it’s important to read the manufacturer’s instructions carefully to determine the recommended number of coats for the stain you’ve chosen.

Wood Condition Considerations

Before applying multiple coats of stain, it’s important to consider the condition of the wood you’re working with. If the wood is rough or porous, you may need to use multiple coats to get even coverage. On the other hand, if the wood has an existing finish, you may need to use multiple coats to fully obscure the old color.

To prepare the wood for staining, you may need to sand it lightly to remove any rough spots or imperfections. You should also clean the wood thoroughly to remove any dirt or debris that may interfere with the staining process.

Safety Measures

When applying multiple coats of stain, it’s important to take appropriate safety measures. This includes wearing protective gloves and eyewear to prevent direct contact with the stain. You should also work in a well-ventilated area to avoid inhaling fumes from the stain.

In addition to these safety measures, you should also follow the manufacturer’s instructions carefully when applying multiple coats of stain. This may include waiting a certain amount of time between coats to allow the stain to dry properly.

By taking these preparation steps, you can ensure that your multiple coats of stain are applied evenly and provide the desired color and finish for your wood project.

Step-by-Step Guide to Applying Multiple Coats

step-by-step-guide-to-applying-multiple-coats

If you want to achieve a darker or richer color for your wood project, applying multiple coats of stain is a great option. However, it’s important to apply each coat correctly to avoid issues like blotching or uneven coloring. Follow these steps to apply multiple coats of stain to your wood:

First Coat Application

Before applying the first coat, make sure your wood is clean and dry. If necessary, sand the surface to remove any roughness or imperfections. Then, apply the first coat of stain using a brush, cloth, or sprayer. Make sure to apply the stain evenly, following the wood grain. Let the stain dry completely before moving on to the next step.

Interim Sanding

After the first coat has dried, lightly sand the surface with fine-grit sandpaper. This will help smooth out any raised grain or rough spots and prepare the surface for the next coat. Make sure to remove any sanding dust before applying the second coat.

Second Coat Application

Apply the second coat of stain in the same manner as the first, making sure to follow the wood grain and apply the stain evenly. Let the second coat dry completely before deciding if you need to apply additional coats.

Additional Coats

Depending on the desired color and the type of wood you’re working with, you may need to apply additional coats of stain. If so, repeat the process of interim sanding and applying the stain until you achieve the desired color. However, be careful not to over-apply the stain, as this can result in a blotchy or uneven finish.

By following these steps, you can achieve a rich, even color for your wood project. Just remember to take your time and apply each coat carefully and evenly.

Maintenance Tips for Stained Wood

After staining your wood, it is important to maintain it properly to ensure it lasts for a long time. Here are some tips to help you maintain your stained wood:

  • Clean Regularly: Dirt and dust can accumulate on your stained wood, making it look dull. To prevent this, clean your wood regularly with a soft cloth or a vacuum cleaner. Avoid using harsh chemicals that can damage the wood or the stain.
  • Avoid Water Damage: Stained wood can be damaged by water, so it is important to keep it dry. Wipe up any spills immediately and avoid placing wet items on the wood surface. If you need to clean the wood with water, use a damp cloth and dry it thoroughly afterward.
  • Protect from Sunlight: Sunlight can cause the stain to fade and the wood to dry out, so it is important to protect your stained wood from direct sunlight. Use curtains or blinds to block out the sun, or move the wood to a shaded area.
  • Reapply Stain: Over time, the stain on your wood may start to fade or wear off. To keep your wood looking its best, you can reapply the stain. Follow the manufacturer’s instructions for applying the stain and make sure to clean the wood thoroughly before applying the new coat.
  • Use Protective Coating: A protective coating can help to protect your stained wood from scratches, dings, and other damage. You can use a clear coat or a tinted coat to enhance the color of the stain. Follow the manufacturer’s instructions for applying the protective coating and allow it to dry completely before using the wood.

By following these maintenance tips, you can keep your stained wood looking beautiful for years to come.

Common Mistakes to Avoid

When it comes to staining wood, there are some common mistakes that many people make. Here are a few things to keep in mind to avoid these mistakes:

Applying Too Many Coats

One of the biggest mistakes people make when staining wood is applying too many coats. While it may seem like adding more coats will make the color richer and deeper, it can actually have the opposite effect. Too many coats can lead to a buildup of stain that can obscure the wood grain and create a splotchy, uneven finish.

Not Sanding Between Coats

Another mistake people make is not sanding between coats. Sanding between coats helps to smooth out any rough spots or raised grain, which can make the final finish look much better. If you skip this step, you may end up with a rough, uneven finish that is difficult to fix.

Using the Wrong Brush

Using the wrong brush can also be a mistake. For example, if you use a natural bristle brush with a water-based stain, the bristles can swell and become misshapen, making it difficult to apply the stain evenly. Make sure you use the right brush for the type of stain you are using.

Not Testing the Stain

Finally, not testing the stain can be a big mistake. Before you apply the stain to your entire project, it’s a good idea to test it on a small, inconspicuous area first. This will help you see how the stain will look on your particular type of wood and whether you like the color. If you don’t test the stain first, you may end up with a finish that you don’t like and have to redo the entire project.

Frequently Asked Questions

How many coats of stain should be applied to wood?

The number of coats of stain that should be applied to wood depends on the type of stain and the desired outcome. In general, one to two coats of stain are sufficient for most projects. However, some stains may require more coats to achieve the desired color or level of protection.

Is one coat of stain enough for wood?

One coat of stain may be enough for some projects, but it depends on the type of stain and the desired outcome. If you want a deeper color or more protection, you may need to apply more than one coat of stain.

Can you apply multiple coats of oil-based stain?

Yes, you can apply multiple coats of oil-based stain. However, you should wait for the first coat to dry completely before applying the second coat. This will ensure that the second coat adheres properly and doesn’t create a blotchy appearance.

How soon can a second coat of stain be applied to wood?

The drying time for stain varies depending on the type of stain and environmental conditions. In general, you should wait at least 24 hours before applying a second coat of stain. However, some stains may dry faster and allow for a second coat to be applied sooner.

Will applying two coats of stain make the color darker?

Applying two coats of stain may make the color darker, but it depends on the type of stain and the desired outcome. Some stains may not darken significantly with a second coat, while others may become much darker.

Can different types of stains be layered on wood?

Different types of stains can be layered on wood, but it may not always produce the desired outcome. For example, layering a water-based stain over an oil-based stain may not work well, as the water-based stain may not adhere properly. It’s best to stick with the same type of stain or consult with a professional if you want to layer different types of stains.