Rahasia Sukses Poker Online: Cara Ampuh Membaca Lawan di Fase Post-Flop
Di antara seluruh platform penyedia poker online terbaik, fase taruhan post-flop (setelah tiga kartu pertama dibuka) senantiasa diakui sebagai salah

Di antara seluruh platform penyedia poker online terbaik, fase taruhan post-flop (setelah tiga kartu pertama dibuka) senantiasa diakui sebagai salah


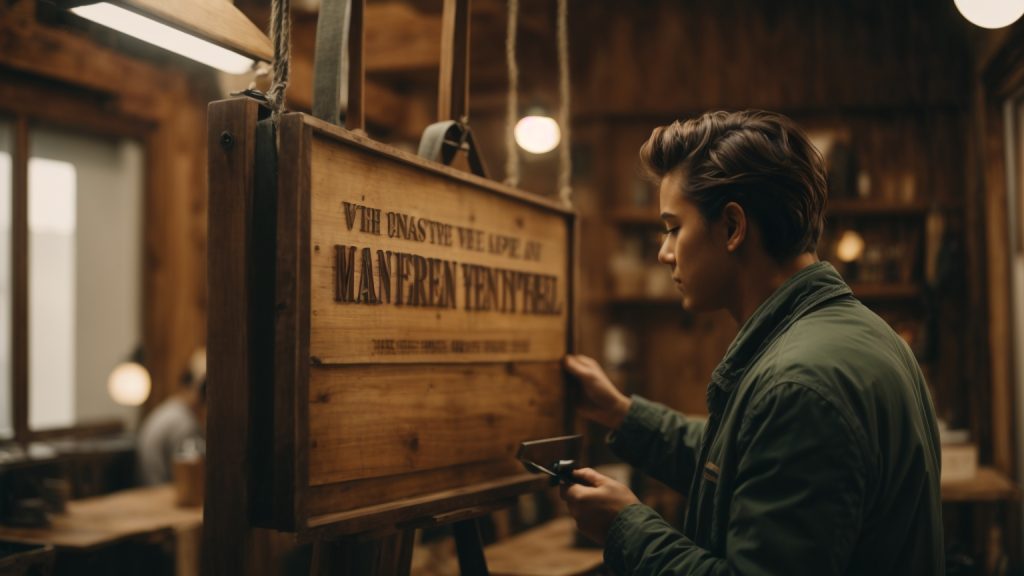
Hanging a wooden sign can add a touch of rustic charm to your home or business. However, it can be tricky to know where to start. Whether you’re hanging a sign indoors or outdoors, on drywall or concrete, there are a few key things to keep in mind. In this article, we’ll guide you through the process of hanging a wooden sign, step by step.
First, you’ll need to choose the right hardware for your sign and the surface you’re hanging it on. For lightweight signs, picture-hanging hardware or a simple nail or screw may be sufficient. For heavier signs, you’ll need to use more heavy-duty hardware such as a French cleat or a Sawtooth hanger. If you’re hanging your sign on drywall, it’s important to locate a stud to ensure that it will be securely anchored. For concrete surfaces, you’ll need to use concrete screws or anchors.
Once you’ve chosen your hardware, it’s time to measure and mark the location where you want to hang your sign. Use a level to ensure that your sign will hang straight. If you’re hanging multiple signs, make sure to measure and mark the location of each one individually. With the right hardware and a little bit of careful planning, you’ll be able to hang your wooden sign in no time.

When it comes to hanging a wooden sign, choosing the right spot is crucial to ensure that your sign is visible and adds to the aesthetics of the room or space. Here are some things to consider when choosing the right spot to hang your wooden sign.
The first thing you need to consider is the material of the wall where you plan to hang your wooden sign. Some walls, such as drywall, plaster, or brick, may require specific hardware to ensure that your sign stays securely in place. Here are some things to keep in mind:
Once you have determined the type of wall where you plan to hang your wooden sign, the next step is to measure your space. Here are some things to keep in mind:
In conclusion, choosing the right spot to hang your wooden sign is crucial to ensure that it is visible and adds to the aesthetics of the room or space. Be sure to consider the type of wall where you plan to hang your sign, as well as the height, spacing, and location of the sign.
When it comes to choosing the perfect wooden sign to hang, there are a few things you should consider. In this section, we’ll go over the different wood types you can choose from and how to select the right size for your space.
The type of wood you choose for your sign can affect its durability, appearance, and overall style. Here are some common wood types used for signs:
| Wood Type | Characteristics |
|---|---|
| Pine | Affordable, lightweight, and easy to work with. |
| Cedar | Durable, weather-resistant, and has a natural aroma. |
| Oak | Strong, heavy, and has a distinctive grain pattern. |
| Maple | Hard and dense, with a light color and uniform texture. |
Consider the style and purpose of your sign when choosing a wood type. For example, if you want a rustic or vintage look, pine or cedar may be a good choice. If you want a more polished or refined look, oak or maple may be a better option.
The size of your wooden sign should be proportional to the space where you plan to hang it. Here are some tips to help you choose the right size:
Remember, it’s always better to go slightly larger than too small when it comes to choosing the size of your wooden sign. A well-sized sign can make a big impact in your space and add a touch of personality and charm.
Before you start hanging your wooden sign, it’s important to gather all the necessary tools to ensure a smooth and safe installation process. In this section, we’ll cover the hardware essentials and safety equipment you’ll need to complete the job.
To hang your wooden sign, you’ll need the following hardware essentials:
| Hardware | Description |
|---|---|
| Structural Screws | Sized to support the weight of your sign |
| Drill Bit | 1/16 of an inch smaller than the diameter of your structural screw |
| Stud Finder | To locate a stud behind your drywall |
| Pencil | To mark where you want to hang your sign |
| Ruler | To measure the distance between your hanger and the top of the sign |
| Level | To ensure your sign is straight |
Safety should always be a top priority when hanging a wooden sign. Here are some safety equipment you should have on hand:
By gathering all the necessary tools and safety equipment, you’ll be able to hang your wooden sign with ease and confidence.
Before hanging your wooden sign, you need to make sure you have all the necessary tools and materials. Here are the preparation steps to follow:
The first step is to determine where you want to hang your wooden sign. Use a stud finder to locate the studs behind the drywall. Once you locate the studs, mark their location on the wall using a pencil. This will ensure that your sign is securely anchored to the wall.
Before hanging your wooden sign, you need to prepare it. Here are the steps to follow:
By following these preparation steps, you will ensure that your wooden sign is securely anchored to the wall and will not fall down.
When it comes to hanging a wooden sign, there are a few things to keep in mind to ensure it is secure and stable. In this section, we will go over how to secure the sign and how to check for stability.
Before you begin hanging the sign, make sure you have the necessary tools and hardware. You will need a stud finder, a pencil, a ruler, a power drill, a 3 1/2 inch structural screw, and a drill bit that is 1/16 of an inch smaller than the diameter of your structural screw. You may also need a spirit or digital level to ensure the sign is straight.
To secure the sign, follow these steps:
After hanging the sign, it is important to check for stability to ensure it will not fall or become loose over time. Here are some tips for checking the stability of your wooden sign:
By following these steps, you can ensure that your wooden sign is securely and stably hung on your wall.
To keep your wooden sign looking great, it’s important to clean it regularly. Here are some tips to help you keep your sign clean:
In addition to regular cleaning, it’s also important to periodically check your wooden sign for any signs of damage or wear. Here are some things to look for:
By following these simple tips, you can help ensure that your wooden sign stays in great condition for years to come.

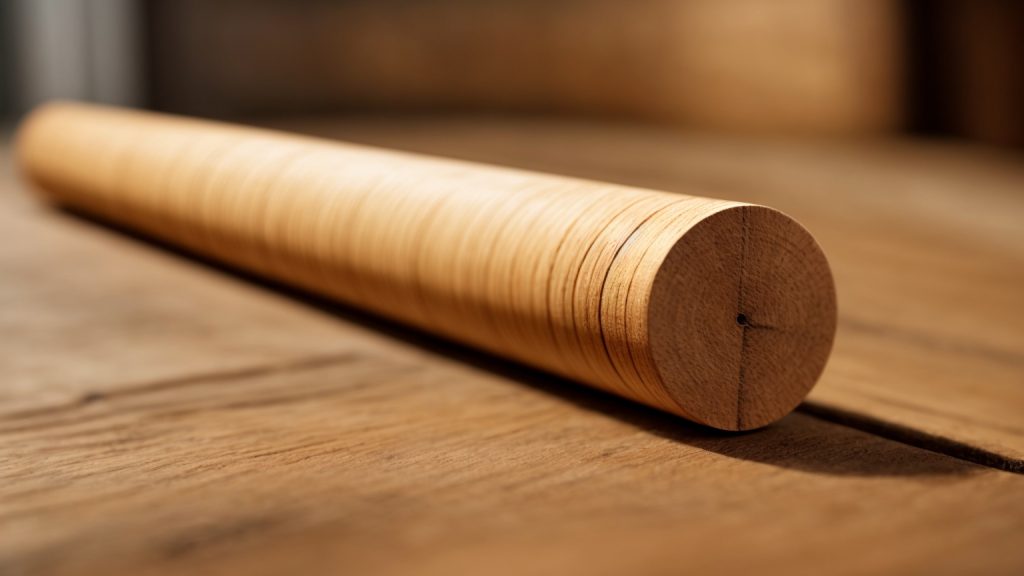
Wooden dowels are cylindrical rods made of wood that are used as fasteners in furniture and woodworking. They come in various diameters and lengths and are commonly used to assemble furniture, such as tables, cabinets, and beds. Dowels are also used as structural reinforcements in cabinet making and in numerous other applications.
Wooden dowels are versatile and easy to use. They are often used to join two pieces of wood together without the need for screws, nails, or other fasteners. Dowels can be glued into pre-drilled holes or simply hammered in, depending on the application. They are also useful for creating strong joints in furniture and other woodworking projects. Whether you are a professional woodworker or a DIY enthusiast, wooden dowels are a useful tool to have in your arsenal.
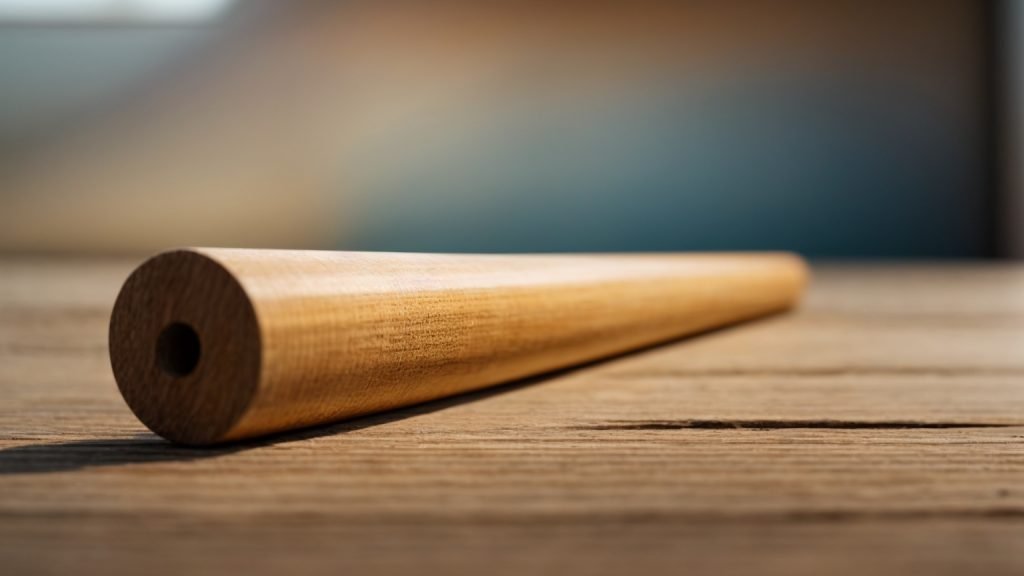
If you’re into woodworking, you’ve probably heard of wooden dowels. Wooden dowels are cylindrical rods made of wood that are used to join two pieces of wood together. They are a popular alternative to screws, nails, and other types of fasteners because they provide a strong and reliable connection that is also aesthetically pleasing.
Wooden dowels come in various diameters and lengths, making them versatile and suitable for a wide range of woodworking projects. The most common diameters range from 1/8 inch to 1 inch, while lengths can vary from a few inches to several feet.
Wooden dowels are typically made from hardwoods such as oak, maple, and birch, although softer woods like pine can also be used. They can also be made from bamboo, which is a sustainable and eco-friendly option.
One of the benefits of using wooden dowels is that they provide a flush and seamless connection between two pieces of wood. This is because the dowel is inserted into a hole that is drilled into each piece of wood, and then glued in place. The glue creates a strong bond between the two pieces of wood, while the dowel provides additional support and stability.
Overall, wooden dowels are a simple yet effective way to join two pieces of wood together. Whether you’re building a piece of furniture or a small woodworking project, wooden dowels are a reliable and aesthetically pleasing option that can help you achieve a professional-looking result.
When it comes to wooden dowels, there are several types available. Each type has its own unique properties and uses. In this section, we will go over some of the most common types of wooden dowels.
Standard dowels are the most common type of wooden dowel. They are cylindrical in shape and are available in various diameters and lengths. Standard dowels are used in a wide range of applications, including furniture making, carpentry, and DIY projects.
Fluted dowels are similar in shape to standard dowels, but they have flutes or grooves running along their length. These grooves provide better adhesion and help to prevent the dowel from slipping or rotating within the joint. Fluted dowels are commonly used in furniture making and carpentry.
Spiral dowels are similar to fluted dowels, but they have a spiral groove running along their length. This spiral groove provides even better adhesion than fluted dowels and can help to prevent the joint from loosening over time. Spiral dowels are commonly used in high-stress applications, such as chair legs and table legs.
Dowel pins are shorter and thicker than standard dowels. They are designed to be used as structural reinforcements in cabinetry and furniture making. Dowel pins are commonly used to join two pieces of wood together at a right angle.
Pre-glued dowels are standard dowels that have been coated with glue. They are designed to be used in applications where a quick and easy joint is required. Pre-glued dowels are commonly used in DIY projects and furniture making.
Hardwood dowels are made from hardwoods such as maple, oak, and cherry. They are stronger and more durable than softwood dowels and are commonly used in high-stress applications.
Softwood dowels are made from softwoods such as pine and spruce. They are less expensive than hardwood dowels but are not as strong or durable. Softwood dowels are commonly used in low-stress applications.
In conclusion, when choosing a wooden dowel, it is important to consider the type of wood, the diameter and length of the dowel, and the type of joint you are trying to create. By selecting the right type of dowel for your project, you can ensure a strong and reliable joint that will last for years to come.
Wooden dowels are versatile and widely used in various woodworking projects. Here are some common uses for wooden dowels:
Wooden dowels are commonly used in furniture construction as a way to join pieces of wood together. They are often used in place of metal fasteners because they are less visible and provide a more natural look. Dowels are especially useful for creating strong joints in chairs, tables, and cabinets. They can be used to fasten legs to tabletops, attach arms to chairs, and connect shelves to bookcases.
Wooden dowels are also popular in craft projects. They can be used to create a variety of items such as picture frames, jewelry holders, and plant stands. Dowels can be cut to different lengths and painted or stained to match the project. They can also be used as handles for small boxes or as the base for a homemade wind chime.
Wooden dowels are useful in a variety of home improvement projects. They can be used to repair broken furniture legs or to reinforce joints in a wobbly table. Dowels can also be used to hang curtains or to create a simple towel rack. They are also useful for creating a dowel joint when joining two pieces of wood together.
In conclusion, wooden dowels are a versatile and useful tool in woodworking, crafting, and home improvement projects. They provide a natural look and can be used to create strong joints in a variety of applications.
Choosing the right wooden dowel for your project can be a bit tricky, but it’s an important step to ensure that your project turns out just the way you want it. Here are some tips to help you choose the right wooden dowel:
One of the most important things to consider when choosing a wooden dowel is the size. Dowels come in different lengths and diameters, so you’ll need to choose the right size for your project.
The length of the dowel you choose will depend on the thickness of the wood you’re working with. If you’re working with thin wood, you’ll want a shorter dowel, whereas if you’re working with thicker wood, you’ll need a longer dowel.
The diameter of the dowel you choose will depend on the size of the hole you’ve drilled. You’ll want to choose a dowel that fits snugly in the hole, but not so tight that it splits the wood.
Another important factor to consider when choosing a wooden dowel is the type of wood you’re working with. Different types of wood have different characteristics, so you’ll need to choose a dowel that’s compatible with the wood you’re using.
For example, if you’re working with hardwood, you’ll want to choose a hardwood dowel. Hardwood dowels are stronger and more durable than softwood dowels, so they’re better suited for hardwood projects.
The finish of the wooden dowel is also an important consideration. Some dowels come unfinished, while others come pre-finished with a clear coat or stain.
If you’re planning on staining or painting your project, you’ll want to choose an unfinished dowel. This will allow you to match the color of the dowel to the color of the wood.
If you’re not planning on staining or painting your project, you may want to choose a pre-finished dowel. This will give your project a finished look without the need for additional work.
By considering the size, type of wood, and finish of the wooden dowel, you can choose the right dowel for your project and ensure that it turns out just the way you want it.
Using wooden dowels is a simple and effective way to join pieces of wood together. Here are some steps to follow when using wooden dowels:
Using wooden dowels can be a great way to create strong and durable joints in your woodworking projects. Just make sure to follow these steps carefully to ensure that your joints are properly aligned and secure.
Wooden dowels are durable and long-lasting, but they still require proper maintenance and care to ensure their longevity. Here are some tips on how to take care of your wooden dowels:
Wooden dowels should be kept dry at all times. Moisture can cause the wood to swell and weaken, which can affect the strength of your joints. If your wooden dowels get wet, dry them off immediately with a clean cloth.
Dirt and debris can accumulate on your wooden dowels over time, which can affect their performance. To keep them clean, wipe them down with a dry cloth or use a soft-bristled brush to remove any dirt or debris.
When not in use, store your wooden dowels in a dry, cool place. Avoid storing them in areas with high humidity or extreme temperatures, as this can cause the wood to warp or crack.
To keep your wooden dowels looking their best, apply a coat of wood oil or wax every few months. This will help protect the wood from moisture and prevent it from drying out.
Regularly inspect your wooden dowels for any signs of damage or wear. If you notice any cracks, splits, or other damage, replace the dowel immediately to prevent it from weakening your joints.
By following these simple tips, you can ensure that your wooden dowels remain strong and durable for years to come.

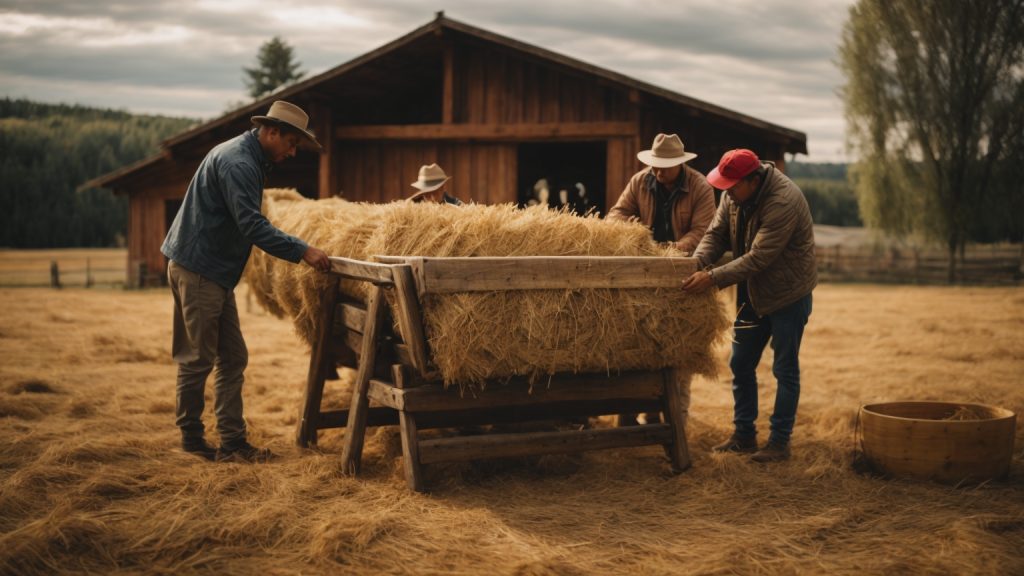
If you’re a horse owner, you know how important it is to ensure that your horses are getting the right nutrition. One way to do this is by using a hay feeder. A hay feeder can help reduce the amount of hay wasted, promote better digestion, and even help prevent digestive issues like colic. However, buying a hay feeder can be expensive. Fortunately, making your own wooden hay feeder for horses is a relatively simple and cost-effective solution.
To make a wooden hay feeder for horses, you’ll need some basic woodworking skills and tools. The good news is that you don’t need to be an expert woodworker to build a hay feeder. With a little bit of patience and some guidance, you can create a sturdy and functional hay feeder for your horses. In this article, we’ll walk you through the steps of making your own wooden hay feeder for horses. We’ll cover everything from selecting the right materials to assembling the feeder. So whether you’re a seasoned woodworker or a beginner, you’ll be able to follow along and create a hay feeder that your horses will love.
When it comes to feeding horses, it’s important to understand their natural feeding habits. Horses are grazers and are designed to eat small amounts of food throughout the day. In the wild, horses will spend up to 16 hours a day grazing on grasses and other vegetation.
When feeding horses, it’s important to mimic their natural feeding habits as much as possible. This means providing them with access to hay or grass throughout the day. However, it’s also important to control their intake to prevent overfeeding and potential health issues such as colic.
One way to control a horse’s hay intake is by using a wooden hay feeder. A hay feeder allows the horse to eat hay in a controlled manner, preventing them from consuming too much at once and reducing waste.
When building a wooden hay feeder for your horse, it’s important to consider the size of the feeder and the amount of hay your horse will consume. A feeder that is too small will not provide enough hay, while a feeder that is too large may encourage overeating.
Overall, understanding your horse’s natural feeding habits and providing them with a controlled feeding environment can help promote their health and well-being.
If you’re considering building a wooden hay feeder for your horses, you’ll need to gather some materials first. Here are the things you’ll need to get started:
Pressure-treated lumber is a popular choice for building a wooden hay feeder because it’s resistant to rot, decay, and insect damage. When selecting pressure-treated lumber, make sure it’s marked as “ground contact” or “exterior use” to ensure it’s suitable for outdoor use.
You’ll need screws to hold the wooden pieces together. Make sure to use screws that are long enough to securely fasten the lumber together.
A saw is necessary to cut the pressure-treated lumber to the desired dimensions of your hay feeder. A circular saw or a miter saw are both good options for this task.
Measuring tape is an essential tool for accurately measuring the lumber pieces. Make sure to measure twice to avoid any mistakes.
A drill is necessary for drilling pilot holes for the screws. This will prevent the wood from splitting when the screws are inserted.
Hardware cloth is a mesh material that can be used to cover the hay feeder to prevent the horses from wasting hay or injuring themselves on sharp edges. Make sure to use a heavy-duty hardware cloth to ensure it’s durable enough for outdoor use.
Paint or stain can be used to protect the wooden hay feeder from the elements and to improve its appearance. Make sure to use a paint or stain that’s suitable for outdoor use and safe for horses.
By gathering these materials, you’ll be well on your way to building a sturdy and functional wooden hay feeder for your horses.
When it comes to building a wooden hay feeder for your horses, choosing the right wood is crucial. You want to make sure that the wood you use is durable, safe, and resistant to weathering. Here are a few options to consider:
Pressure-treated lumber is a popular choice for building horse hay feeders. The wood is treated with chemicals that protect it from rot, insects, and decay, making it a long-lasting option. However, it’s important to note that some horses may have allergies or sensitivities to the chemicals used in pressure-treated lumber. If you decide to use this type of wood, make sure to let it dry and air out for a few weeks before putting it in the pasture.
Cedar is a naturally rot-resistant wood that is also resistant to insects. It has a pleasant aroma and is less likely to splinter than other types of wood. However, cedar can be more expensive than other options.
Oak is a strong and durable wood that is resistant to rot and insects. It’s a good option if you’re looking for a wood that will last a long time. However, oak can be more expensive and harder to work with than other types of wood.
Pine is a commonly used wood for horse hay feeders because it’s affordable and readily available. However, it’s important to choose a high-quality pine that is free from knots and defects. Pine is also more likely to rot and decay over time than other types of wood.
In conclusion, choosing the right wood for your horse hay feeder is important for the safety and longevity of the structure. Consider the pros and cons of each type of wood and choose the one that best fits your needs and budget.
When it comes to designing your wooden hay feeder for horses, there are a few important considerations to keep in mind. This section will cover the key factors to consider when designing your hay feeder.
The size and dimensions of your hay feeder will depend on a few factors, including the number of horses you have, their size, and their feeding habits. Here are some general guidelines to follow:
Here is a table summarizing some recommended dimensions for your hay feeder:
| Number of Horses | Linear Feeder Space | Height | Depth |
|---|---|---|---|
| 1 | 2 feet | 4 feet | 2 feet |
| 2 | 4 feet | 4 feet | 3 feet |
| 3 | 6 feet | 4 feet | 4 feet |
The placement of your hay feeder is also an important consideration. Here are some guidelines to follow:
Here are a few additional tips to keep in mind:
By following these guidelines, you can design a hay feeder that meets the needs of your horses and helps ensure their health and safety.
When building a wooden hay feeder for your horses, the frame is an essential component that provides stability and support. In this section, we will cover the steps involved in building the frame for your hay feeder.
The first step in building the frame is to cut the wood to the appropriate size. You will need four pieces of wood for the frame, two long pieces, and two short pieces. The length of the long pieces will depend on the size of your hay feeder, while the short pieces should be the same width as the long pieces.
To ensure accuracy, it is essential to measure and mark the wood before cutting it. You can use a table saw or a circular saw to cut the wood to the correct size.
Once you have cut the wood to the right size, the next step is to assemble the frame. Start by laying the two long pieces on a flat surface, parallel to each other, and then place the two short pieces between them, perpendicular to the long pieces.
To secure the frame, you can use wood screws or nails. Make sure to pre-drill the holes to avoid splitting the wood. You can use a clamp to hold the pieces together while you attach them.
After attaching the pieces, check to make sure the frame is square and level. You can use a carpenter’s square and a level to ensure accuracy.
With the frame assembled, you can now move on to the next step in building your wooden hay feeder for your horses.
Once you have assembled the wooden structure of your hay feeder, it’s time to add the feeding area. This is where your horses will access the hay, so it’s important to ensure that it is secure and easy to use.
The first step is to create the hay slots. These are the openings where your horses will access the hay. To create the hay slots, you will need to measure and mark the location of the slots on the feeding area. Once you have marked the location, use a jigsaw or circular saw to cut out the slots.
It’s important to make sure that the slots are large enough for your horses to access the hay, but not so large that they can easily pull out large amounts of hay at once. A good size for the slots is around 4-6 inches wide and 12-16 inches long.
Once you have created the hay slots, it’s time to attach the feeding area to the frame of the hay feeder. To do this, you will need to use screws or bolts to secure the feeding area to the frame.
Make sure that the feeding area is level and securely attached to the frame. You don’t want it to wobble or come loose, as this could be dangerous for your horses.
Once you have attached the feeding area, you can add hay to the feeder and watch your horses enjoy their new feeding station. Remember to regularly check the hay feeder for any damage or wear and tear, and make any necessary repairs to ensure that it remains safe and functional for your horses.
When building a wooden hay feeder for your horses, it is important to take safety measures to ensure that the feeder is secure and safe for your horses to use. Here are some safety measures to consider:
Before assembling the wooden structure of your hay feeder, it is important to sand the wood to remove any rough edges or splinters that could harm your horses. Use sandpaper with a fine grit to sand down the edges of the wood pieces. Make sure to wear gloves and a dust mask to protect yourself from the dust and debris created by sanding.
Once you have assembled the wooden structure of your hay feeder, it is important to secure it in place to prevent it from tipping over or collapsing. You can secure the feeder to the ground using stakes or anchors. Alternatively, you can attach the feeder to a wall or fence using brackets or screws.
It is also important to ensure that the feeder is stable and balanced. Make sure that the feeder is level and that the legs are evenly spaced. If the feeder wobbles or tips over, it could injure your horses or damage the feeder.
By taking these safety measures, you can ensure that your wooden hay feeder is safe and secure for your horses to use.
To ensure that your wooden hay feeder lasts a long time and remains safe for your horses, it is important to perform routine maintenance checks and make any necessary repairs or replacements. Here are some tips to help you maintain your wooden hay feeder:
Performing routine checks on your wooden hay feeder can help you identify any potential problems early on and prevent them from becoming bigger issues. Here are some things to check:
If you notice any damage or wear and tear on your wooden hay feeder, it is important to make any necessary repairs or replacements as soon as possible. Here are some tips to help you repair or replace your feeder:
By performing routine maintenance checks and making any necessary repairs or replacements, you can help ensure that your wooden hay feeder remains safe and functional for your horses.

Staining a wooden fence is an excellent way to protect it from the elements while enhancing its natural beauty. If you’re looking for a cost-effective and easy way to spruce up your fence, staining is a great option. In this article, we’ll provide you with step-by-step instructions on how to stain your wooden fence like a pro.
Before we get into the nitty-gritty of staining, it’s important to choose the right day for your project. You’ll want to select a day with temperatures between 50-80 degrees Fahrenheit, low humidity, and no rain in the forecast. It’s also important to check the weather forecast for the next few days to ensure that your fence has enough time to dry completely before any rain or moisture hits.
Once you’ve chosen the right day, it’s time to prep your fence for staining. This involves cleaning the fence thoroughly to remove any dirt, debris, or mildew that may have accumulated over time. You’ll also need to sand the fence to remove any rough spots or splinters and ensure that the surface is smooth and even. By following these steps, you’ll be well on your way to achieving a beautifully stained wooden fence.
When it comes to staining your wooden fence, there are a few things you need to know about wood stains. In this section, we will cover the different types of wood stains available and the benefits of staining your wooden fence.
There are three main types of wood stains: solid, semi-transparent, and transparent.
Solid stains provide the most coverage and hide the natural grain of the wood. They are best used on older fences that have a lot of wear and tear or on fences made from lower quality wood.
Semi-transparent stains allow some of the natural grain of the wood to show through while still providing good coverage. They are a good choice for newer fences that are in good condition and made from higher quality wood.
Transparent stains provide the least coverage and allow the natural grain of the wood to show through. They are best used on fences that are in excellent condition and made from high-quality wood.
Staining your wooden fence has several benefits, including:
Overall, staining your wooden fence is a great way to protect and enhance its appearance while also extending its lifespan. When choosing a wood stain, be sure to consider the type of wood your fence is made from and the condition it is in to ensure you choose the right type of stain for your needs.
Staining your wooden fence is an excellent way to protect it from the elements while also giving it a fresh new look. Before you begin, it’s important to have all the necessary materials and tools on hand. Here’s what you’ll need:
By gathering all of these materials and tools before you begin staining your fence, you’ll be able to work efficiently and effectively. With a little bit of effort, you can transform your weathered wooden fence into a beautiful and functional outdoor feature.
Before staining your wooden fence, there are a few preparation steps that you should follow to ensure a smooth and successful staining process. In this section, we will discuss the three important preparation steps that you need to take before staining your fence: choosing the right weather, cleaning the fence, and sanding the fence.
Choosing the right weather is crucial when it comes to staining your wooden fence. You should avoid staining your fence on a rainy or humid day, as the moisture can prevent the stain from adhering properly. It is recommended to choose a day with temperatures between 50 and 80 degrees Fahrenheit, low to moderate humidity, and no rain in the forecast for at least 24 hours after staining.
Before staining your fence, it is important to clean it thoroughly to remove any dirt, debris, or mildew that may have accumulated on the surface. You can use a pressure washer or a garden hose with a high-pressure nozzle to clean the fence. If there are any stubborn stains or mildew, you can use a mixture of water and bleach to clean the fence. Be sure to wear gloves and protective eyewear when working with bleach.
After cleaning the fence, you need to sand it to remove any rough spots or splinters that may be present on the surface. Sanding will also help the stain adhere better to the wood. You can use a power sander or sandpaper to sand the fence. Start with a coarse-grit sandpaper and work your way up to a finer-grit sandpaper for a smooth finish. Be sure to wear a dust mask and protective eyewear when sanding the fence.
By following these preparation steps, you can ensure that your wooden fence is ready for staining and that the stain will adhere properly to the wood.
Staining a wooden fence is a great way to enhance its natural beauty and protect it from the elements. Here’s a guide to help you through the staining process.
Before applying the stain, make sure the fence is clean and dry. Use a power washer or a scrub brush to remove any dirt, debris, or mildew from the surface. Once the fence is clean, allow it to dry completely before applying the stain.
When applying the stain, use a brush or a sprayer to evenly distribute the stain on the surface of the fence. Make sure to apply the stain in the direction of the wood grain to avoid streaking. You can also use a roller to apply the stain on larger surfaces.
It’s important to apply the stain evenly and not let it pool or drip. If the stain is too thick, it may not penetrate the wood properly, and if it’s too thin, it may not provide adequate protection.
After applying the stain, allow it to dry completely before touching or walking on the fence. The drying time will depend on the type of stain you use and the weather conditions. Generally, it takes about 24 hours for the stain to dry completely.
During the drying process, keep the fence protected from rain, direct sunlight, and foot traffic. If the weather is too hot or too cold, it may affect the drying time and the overall performance of the stain.
Once the stain is dry, inspect the fence for any missed spots or areas that need touch-up. If necessary, apply a second coat of stain to ensure complete coverage and protection.
By following these simple steps, you can achieve a beautiful and long-lasting finish on your wooden fence.
Proper maintenance is crucial to ensure the longevity and appearance of your wooden fence. Regular cleaning and periodic re-staining are essential to keep your fence looking its best.
Cleaning your wooden fence regularly is one of the easiest and most effective ways to maintain its appearance and prevent damage. Here are some tips for cleaning your fence:
Regular cleaning will help prevent dirt and mildew buildup, which can cause discoloration and damage to your fence.
Periodic re-staining is necessary to protect your wooden fence from weathering, fading, and other damage. Here are some tips for re-staining your fence:
Re-staining your fence every 2-3 years will help maintain its appearance and protect it from damage caused by weathering and UV rays.
By following these maintenance tips, you can ensure that your wooden fence remains beautiful and functional for years to come.

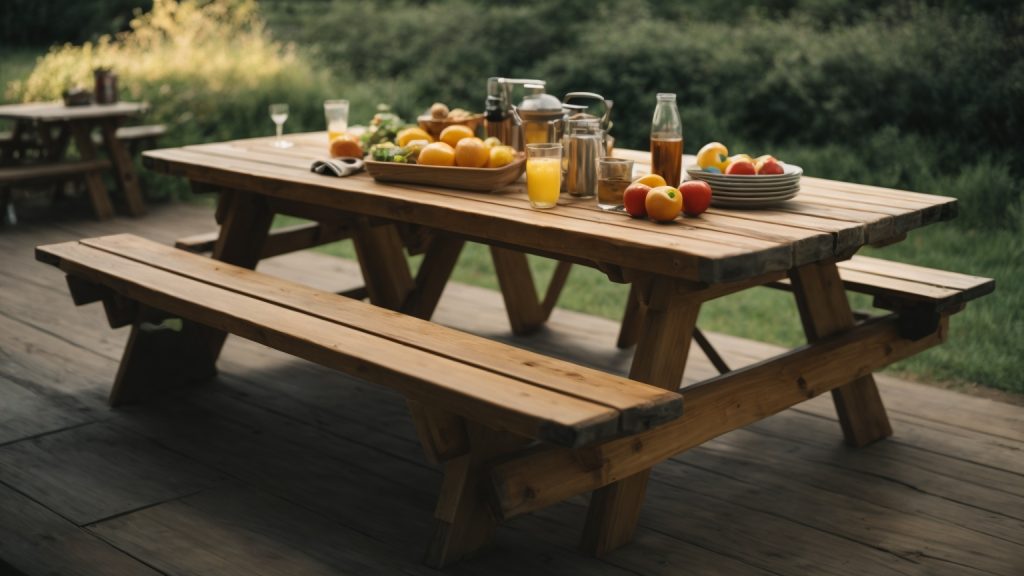
Building a wooden picnic table is a great way to add functionality and charm to your outdoor space. Whether you’re planning a family gathering or simply looking for a spot to enjoy your morning coffee, a sturdy picnic table can provide the perfect setting. With a few basic tools and some quality lumber, you can easily create a beautiful and functional picnic table that will last for years to come.
Before you get started, it’s important to choose the right type of wood for your project. Hardwood or pressure-treated lumber are popular choices, as they can withstand the outdoor elements in your area. Southern yellow pine is another strong and relatively inexpensive option. Additionally, you will need some basic tools such as a saw, drill, and measuring tape. Once you have your materials and tools ready, you can begin building your picnic table.
When it comes to building a wooden picnic table, there are a few basics you need to understand before you get started. In this section, we’ll cover the types of wood you should use and the tools you’ll need to build a sturdy and reliable table.
Choosing the right type of wood is crucial to building a picnic table that will last for years to come. Here are some of the most popular types of wood used for picnic tables:
When choosing your wood, make sure to select boards that are straight and free of knots or cracks. You’ll also want to choose boards that are at least 1 inch thick to ensure your table is sturdy enough to hold up to regular use.
To build a wooden picnic table, you’ll need a few basic tools. Here’s a list of the tools you’ll need:
Make sure to have all of your tools ready before you start building your picnic table. With the right tools and materials, you’ll be able to build a beautiful and functional picnic table that will be the centerpiece of your outdoor gatherings for years to come.
When it comes to building a wooden picnic table, the design is an important aspect to consider. In this section, we will discuss the size and dimensions of the table as well as choosing a suitable design.
The size of your picnic table will depend on how many people you plan on seating. A standard picnic table can seat six to eight people comfortably. The dimensions of a typical picnic table are as follows:
However, you can adjust the dimensions to fit your specific needs. Keep in mind that the tabletop should be at least 28 inches off the ground, and the benches should be about 18 inches off the ground.
There are many different designs to choose from when it comes to building a wooden picnic table. Some popular options include:
The traditional A-frame design is a classic look that is easy to build. The cross-legged design is a more modern look that provides more legroom. The detached benches design allows for more flexibility and can be moved around to accommodate different seating arrangements.
When choosing a design, consider your skill level and the tools you have available. Some designs may be more complicated than others and require more advanced woodworking skills. Additionally, some designs may require specialized tools that you may not have access to.
Overall, the design of your picnic table should be functional and comfortable for your guests. With the right design and dimensions, you can build a picnic table that will provide years of outdoor enjoyment.
Before you begin building your wooden picnic table, you need to prepare all the necessary materials. Here are the steps you need to follow:
The first step in preparing your materials is to cut the wood to the right size. You will need to cut the following pieces:
Make sure to measure and mark the wood accurately before cutting it. Use a saw to make the cuts, and be sure to wear safety goggles and gloves to protect yourself.
After cutting the wood, you need to sand and smooth the edges to ensure that they are safe and comfortable to use. Here’s how to do it:
Be sure to sand all the edges and corners of the wood, as well as the surfaces that will be in contact with your skin. This will help prevent splinters and make the picnic table more comfortable to use.
By following these steps, you can ensure that your wooden picnic table is safe, sturdy, and comfortable to use.

Now that you have all the pieces cut and sanded, it’s time to put them together. In this section, we’ll go over how to assemble your wooden picnic table. This process can be completed in a few hours with the help of a friend or family member.
The first step in assembling your picnic table is to build the table top. Lay out the five 2×6 boards on a flat surface, making sure they are flush with each other. Use clamps to hold them together and drill pilot holes through the boards where they will be attached to the braces.
Next, attach the two braces to the underside of the table top. Make sure they are centered and flush with the edges of the boards. Use wood screws to secure them in place.
Once the table top is assembled, it’s time to build the seats. Lay out the four 2×6 boards for each seat on a flat surface. Use clamps to hold them together and drill pilot holes through the boards where they will be attached to the braces.
Attach the two braces to the underside of each seat board, making sure they are centered and flush with the edges of the boards. Use wood screws to secure them in place.
Now it’s time to attach the legs to the table top and seats. Stand the table top upright and attach the legs to the braces using wood screws. Make sure the legs are flush with the edges of the table top and perpendicular to the ground.
Next, attach the legs to the braces on the seats using wood screws. Make sure the legs are flush with the edges of the seats and perpendicular to the ground.
Finally, flip the table over and check that all the legs are level and secure. If necessary, adjust the legs until the table sits level on the ground.
Congratulations, you have successfully assembled your wooden picnic table!
Once you have built your wooden picnic table, it’s time to add the finishing touches. This will not only give your table a polished look but also protect it from the elements. In this section, we will discuss two important finishing touches: applying wood stain and adding a protective coating.
Wood stain is a great way to enhance the natural beauty of your wooden picnic table while providing it with additional protection. Follow these steps to apply wood stain:
Note: Always follow the manufacturer’s instructions when applying wood stain.
Adding a protective coating to your picnic table will help it withstand the elements and last longer. Here are some options for protective coatings:
Here are the steps to add a protective coating to your picnic table:
Note: Always follow the manufacturer’s instructions when applying a protective coating.
Taking care of your wooden picnic table is crucial to ensure that it lasts for many years of outdoor enjoyment. Here are some maintenance tips to keep your picnic table looking great and in good condition.
Cleaning your picnic table regularly is essential to prevent dirt and grime buildup. Use a mild detergent and warm water to clean the surface of the table. Avoid using harsh chemicals or abrasive cleaners that can damage the wood. Scrub the surface gently with a soft-bristled brush, and rinse thoroughly with water.
After cleaning, let the picnic table dry completely before using it again. You can also apply a wood sealer or protector to help prevent water damage and maintain the natural color of the wood.
Inspect your picnic table at least once a year to check for any signs of damage or wear. Look for cracks, splits, or splinters in the wood, and check the stability of the table legs and supports. Tighten any loose screws or bolts, and replace any damaged or broken parts.
If you notice any signs of rot or decay, it’s essential to address the issue promptly. Remove any damaged wood and replace it with new boards. Applying a wood preservative can also help prevent further decay and extend the life of your picnic table.
By following these maintenance tips, you can keep your wooden picnic table in excellent condition for many years of outdoor fun and relaxation.

Wooden door hangers are a great way to add a touch of personality to your home decor. They can be customized to fit any style or theme, and can be made using a variety of materials. In this article, we will show you how to make a wooden door hanger using simple materials and techniques.
To start, you will need a wooden base for your door hanger. You can purchase pre-cut wooden rounds or squares from a craft store, or cut your own using a saw. Next, you will need to choose a design for your door hanger. This can be a simple shape or a more intricate design, depending on your skill level and preferences.
Once you have your design, you can begin painting or staining your wooden base. You can use acrylic paint or wood stain to achieve the desired look. After your base is dry, you can add any additional details such as lettering or embellishments. Finally, attach a hanger to the back of your door hanger and it’s ready to be displayed on your front door or in your home.
If you’re looking for a fun and easy way to add some personality to your front door, a wooden door hanger is a great option. But before you start crafting, it’s important to understand the basics of door hangers.
The first thing you’ll need is a wooden round or plaque. You can find these at most craft stores or online. You’ll also need some paint, brushes, and any other decorations you want to add, such as ribbon, flowers, or vinyl lettering.
When it comes to designing your door hanger, the possibilities are endless. You can choose a theme, such as seasonal or holiday, or simply create a design that matches your home’s decor. Don’t be afraid to get creative and add your own personal touch.
To construct your door hanger, start by painting your wooden round or plaque. Once it’s dry, you can add any decorations or vinyl lettering. If you’re adding a bow or ribbon, attach it with hot glue or wire. Finally, attach a hanger to the back of your door hanger so you can hang it on your front door.
To keep your door hanger looking its best, be sure to protect it from the elements. If you’re using it outside, consider adding a coat of sealant to protect it from rain and sun damage. And if it does get dirty, simply wipe it down with a damp cloth.
Now that you understand the basics of door hangers, it’s time to get crafting! With a little creativity and some basic supplies, you can create a beautiful and unique wooden door hanger that will add some personality to your front door.
Making a wooden door hanger is a fun and easy project that requires only a few materials. Here are the things you’ll need to get started:
The first thing you’ll need is a piece of wood to use as the base for your door hanger. You can use any type of wood you like, but MDF (medium-density fiberboard) is a popular choice because it’s easy to work with and doesn’t splinter. You can purchase pre-cut wooden bases from craft stores or cut your own from a larger piece of wood.
Once you have your wooden base, you’ll need to choose a paint color and gather some brushes. Acrylic paint is a good choice because it dries quickly and is easy to clean up. You’ll also want to have a few different sizes of brushes on hand so you can paint both large and small areas.
To make your door hanger stand out, you’ll want to add some decorative elements. This can include things like ribbon, greenery, or pre-made bows. You can also use stencils or stickers to add designs or words to your door hanger.
Finally, you’ll need a few tools to help you put everything together. A staple gun can be useful for attaching ribbon or other decorative elements, while a drill can be used to make holes for hanging your door hanger. You’ll also want to have some sandpaper on hand to smooth out any rough edges on your wooden base.
With these materials in hand, you’re ready to start creating your own beautiful wooden door hanger.
When making a wooden door hanger, selecting the right type of wood is crucial. You want to choose a wood that is both lightweight and smooth, so it won’t be too heavy on the door and will be easy to paint or decorate.
Here are some popular types of wood to consider:
MDF is a popular choice for wooden door hangers because it is easy to work with and has a smooth surface. It’s made by breaking down hardwood and softwood and contains tiny wood fibers, so it won’t have any wood grain. MDF is also affordable and readily available at most hardware stores.
Birch plywood is a strong and durable option for door hangers. It has a beautiful wood grain that can add a rustic touch to your project. However, it can be more expensive than other types of wood.
Pine is another affordable option for door hangers. It’s lightweight and easy to work with, but it may have knots or other imperfections that can affect the final look of your project.
Cedar is a great choice if you want a natural wood look for your door hanger. It’s lightweight, durable, and has a pleasant aroma. However, it can be more expensive than other types of wood.
When choosing the right wood for your door hanger, consider the look you want to achieve, your budget, and the tools you have available to work with. With the right wood and a little creativity, you can create a unique and beautiful door hanger that will add charm to any door.
When it comes to designing your wooden door hanger, there are a few things to consider. From sketching your design to choosing the right size, each step is important to ensure that you end up with a door hanger that you love.
Before you start cutting your wood, it’s important to sketch out your design. This will give you a better idea of what your door hanger will look like and help you make any necessary adjustments before you start cutting.
When sketching your design, consider the following:
Once you have a rough sketch of your design, you can start refining it and making any necessary changes.
The size of your door hanger will depend on a few factors, including the size of your door and the design you have in mind. Here are a few things to keep in mind when choosing the right size:
Once you have a general idea of the size you want, you can start cutting your wood and bringing your design to life.
Cutting the wood is one of the most important steps in making a wooden door hanger. It requires precision and attention to detail. In this section, we will discuss the safety precautions you should take before cutting the wood and the cutting techniques you can use.
Before cutting the wood, it is important to take some safety precautions to avoid accidents. Here are some tips to keep in mind:
There are several cutting techniques you can use to cut the wood for your door hanger. Here are some of the most common techniques:
Remember to take your time and be patient when cutting the wood. It is better to make slow, steady cuts than to rush and make mistakes.
Once you have painted your wooden door hanger, it’s time to finish it off with a protective coat. This will not only make your door hanger look more professional, but it will also help to protect it from the elements.
Before applying any finish, it’s essential to sand your wooden door hanger. Sanding will remove any rough spots or imperfections, leaving you with a smooth surface to work with.
Start by using a coarse-grit sandpaper to remove any large bumps or ridges. Then, switch to a fine-grit sandpaper to smooth out the surface. Be sure to sand all sides of the door hanger, including the edges.
Once you have finished sanding, wipe the door hanger down with a damp cloth to remove any dust or debris.
There are many different finishes you can use on your wooden door hanger, including varnish, polyurethane, and wax. Each has its own advantages and disadvantages, so it’s essential to choose the right one for your project.
Varnish is a popular choice for wooden door hangers as it provides a durable and long-lasting finish. It’s also available in a range of sheens, from matte to high gloss.
Polyurethane is another popular choice, as it’s easy to apply and dries quickly. It’s also very durable and resistant to scratches and stains.
Wax is a more traditional finish that provides a soft, natural look. It’s easy to apply and can be buffed to a high shine.
When applying your chosen finish, be sure to follow the manufacturer’s instructions carefully. Apply the finish in thin, even coats, and allow each coat to dry completely before applying the next.
With a little bit of sanding and the right finish, your wooden door hanger will look beautiful for years to come.
Now that you have your wooden door hanger base, it’s time to add some personality to it! Here are some tips on how to add details to your door hanger:
Painting is a great way to add color and design to your door hanger. Here are some steps to follow when painting your door hanger:
Accessories can add a unique touch to your door hanger and make it stand out. Here are some ideas for accessories to add to your door hanger:
Remember, the key to adding details to your door hanger is to be creative and have fun! Experiment with different colors, designs, and accessories until you find the perfect combination that reflects your style.
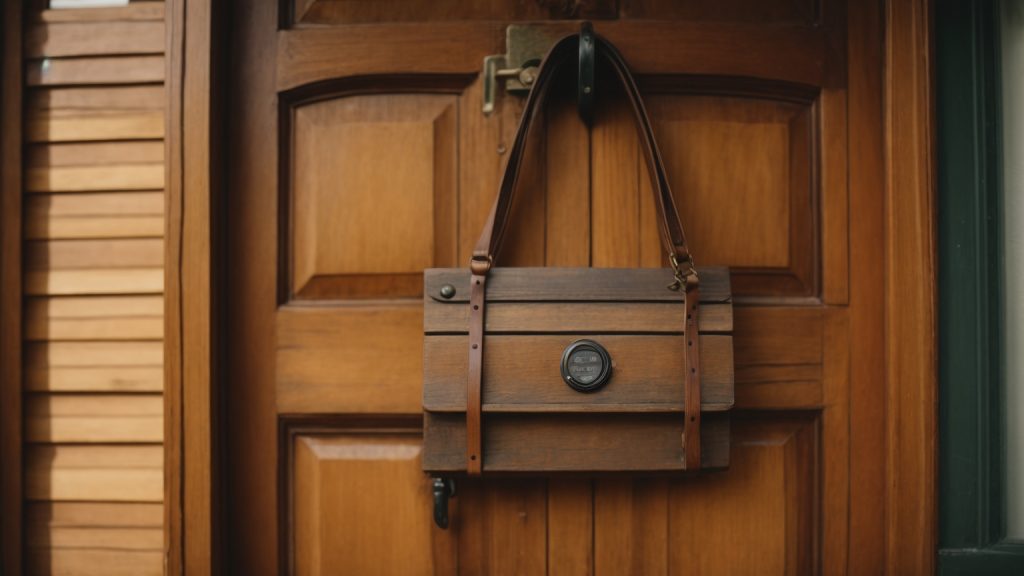
Once you’ve finished creating your wooden door hanger, it’s time to hang it up! Here are a few tips to ensure your door hanger looks great and stays securely in place.
Before you hang your door hanger, take a moment to consider where it will look best. You’ll want to choose a spot that is visible from the street and complements your home’s overall aesthetic. Consider hanging your door hanger on the front door, a side door, or even a fence or gate.
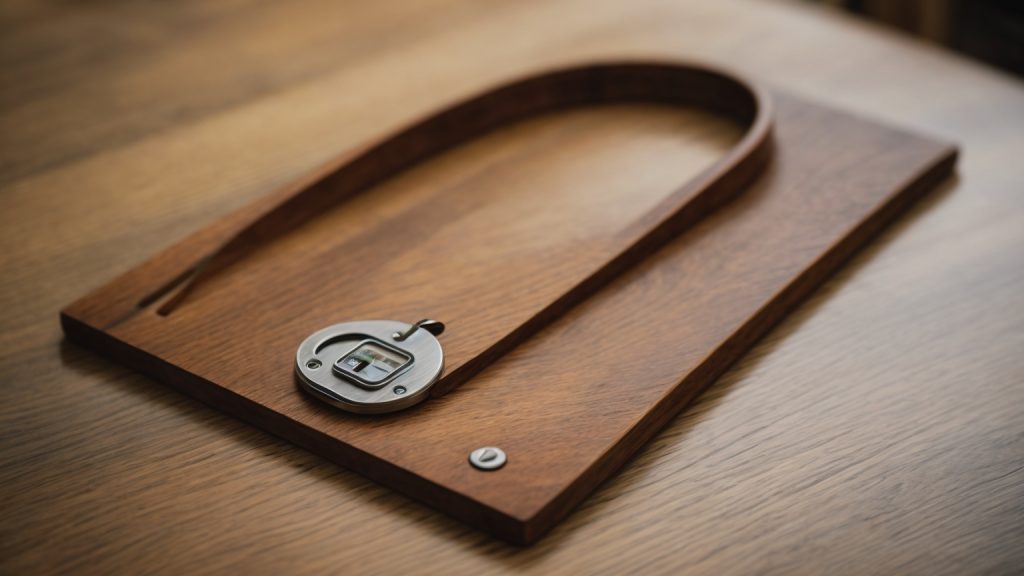
To hang your door hanger, you’ll need to attach some hanging hardware to the back. You can use a simple picture hanger or a sawtooth hanger, depending on the weight of your door hanger. Make sure the hardware is securely attached to the back of the hanger and centered so that it hangs straight.
Once your hardware is attached, it’s time to hang your door hanger. Hold the hanger up to the desired spot and mark where the hardware will go. Then, use a drill or screwdriver to attach the hardware to the surface. Make sure the hardware is securely attached and can support the weight of the door hanger.
To keep your wooden door hanger looking great, you may need to perform some maintenance from time to time. If the hanger becomes dirty or dusty, simply wipe it down with a damp cloth. If the finish begins to fade or wear away, you can apply a fresh coat of paint or stain to restore its appearance.
By following these simple tips, you can ensure that your wooden door hanger looks great and stays securely in place for years to come.

If you have wooden toys at home, it’s important to keep them clean and sanitized to protect your child’s health. Wooden toys are great because they are durable and can last for years, but they can also harbor germs and bacteria if not properly cleaned. In this article, we’ll give you some tips on how to sanitize wooden toys safely and effectively.
To start, it’s important to note that not all wooden toys are created equal. Some may have a protective finish, while others may be raw wood. The type of finish and the age of the toy can affect how you clean and sanitize it. Additionally, some cleaning products may be too harsh for wooden toys, so it’s important to choose the right products to avoid damaging them. In the next section, we’ll go over some general guidelines for cleaning and sanitizing wooden toys.
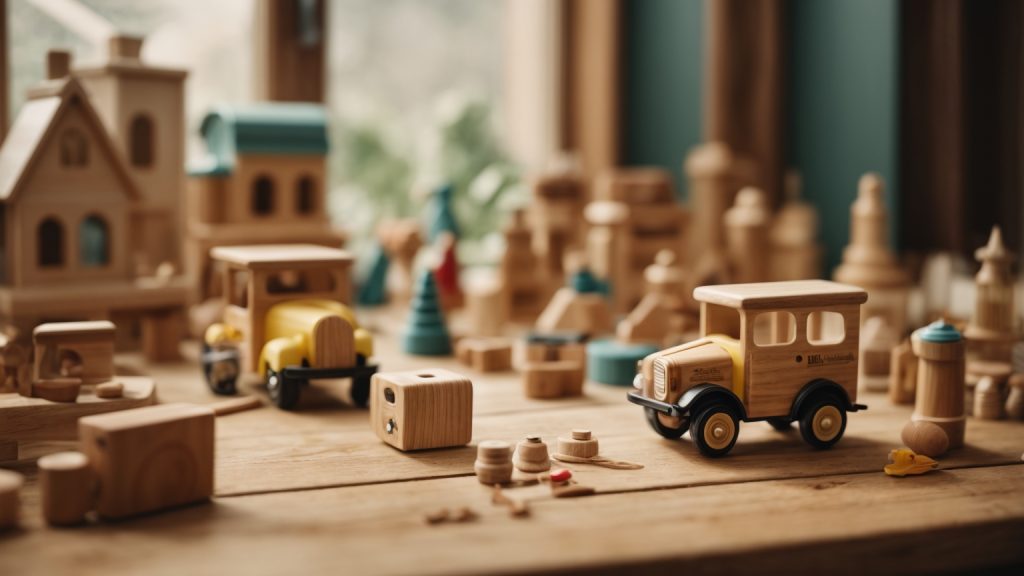
As a parent or caregiver, you want to ensure that your child’s toys are clean and safe to play with. Wooden toys are a popular choice for many families due to their durability and natural materials. However, like any other toy, wooden toys can harbor germs and bacteria that can pose a health risk to your child. This is why it is important to sanitize wooden toys regularly.
Wooden toys can come into contact with various germs and bacteria, especially when they are shared among children or played with outside. These germs can cause illnesses such as colds, flu, and stomach bugs. Sanitizing wooden toys can help prevent the spread of these germs and keep your child healthy.
It is also important to note that wooden toys can accumulate dirt and grime over time, which can make them look unappealing and even affect their functionality. Sanitizing wooden toys not only helps keep them clean and safe, but also helps prolong their lifespan.
When it comes to sanitizing wooden toys, there are various methods that you can use, as outlined in the search results. It is important to choose a method that is safe for the type of wooden toy you have and to follow the instructions carefully to ensure effective sanitization.
Overall, understanding the need to sanitize wooden toys is crucial for maintaining a safe and healthy play environment for your child. By regularly sanitizing wooden toys, you can help prevent the spread of germs and bacteria, keep the toys clean and functional, and provide your child with a safe and enjoyable play experience.
When it comes to cleaning wooden toys, it’s important to consider the type of toy you’re dealing with. Different types of wooden toys may have different cleaning requirements to keep them in good condition. Here are some common types of wooden toys and how to clean them:
Wooden blocks are a classic toy that can provide hours of imaginative play. To clean them, simply wipe them down with a damp cloth and mild soap if necessary. Avoid soaking them in water, as this can cause the wood to warp or crack.
Wooden puzzles are a great way to help children develop their problem-solving skills. To clean them, wipe them down with a damp cloth and mild soap if necessary. Avoid using harsh chemicals or soaking them in water, as this can damage the puzzle pieces.
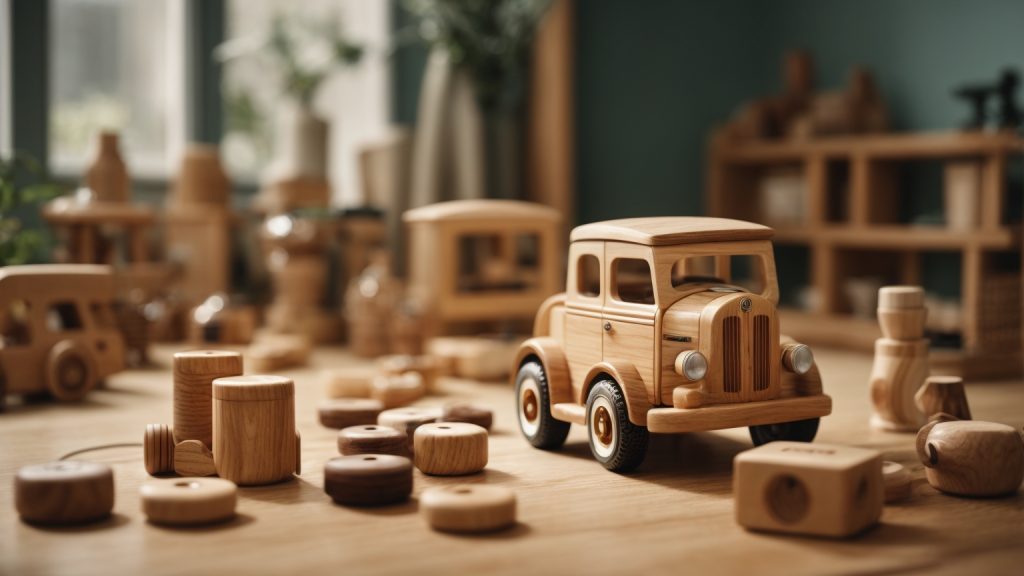
Wooden vehicles, such as cars, trucks, and trains, can be a fun addition to any child’s toy collection. To clean them, wipe them down with a damp cloth and mild soap if necessary. Pay special attention to any small crevices or moving parts to ensure they are thoroughly cleaned.
Wooden dolls can be a great alternative to plastic dolls, as they are more eco-friendly and durable. To clean them, wipe them down with a damp cloth and mild soap if necessary. Avoid soaking them in water, as this can cause the wood to warp or crack.
Wooden musical instruments, such as xylophones and drums, can be a fun way for children to explore music. To clean them, wipe them down with a damp cloth and mild soap if necessary. Avoid using harsh chemicals or soaking them in water, as this can damage the instrument.
In general, it’s important to avoid using harsh chemicals or soaking wooden toys in water. Instead, use a damp cloth and mild soap if necessary to clean them. By following these simple cleaning tips, you can help ensure that your child’s wooden toys stay in good condition and provide years of fun and imaginative play.
When it comes to sanitizing wooden toys, you want to make sure you have the right cleaning supplies on hand. Here are some essential items you’ll need to get started:
When selecting a cleaning product, it’s important to choose one that is safe for both your child and the environment. Look for products that are labeled as non-toxic and biodegradable. Here are some options to consider:
In addition to cleaning products, you’ll need some tools to help you clean your wooden toys effectively. Here are some essential items to have on hand:
By gathering these necessary cleaning supplies, you’ll be ready to sanitize your wooden toys and keep them clean and safe for your child to play with.
If you have wooden toys that need sanitizing, it’s important to do it properly to ensure that they are clean and safe for your child to play with. Here is a step-by-step guide to help you sanitize your wooden toys effectively.
Before you begin, gather all the materials you’ll need. You will need a bucket of warm water, mild dish soap or baby-safe detergent, a clean cloth, and a soft-bristled brush. You may also want to use a natural cleaning solution like vinegar or baking soda.
Start by cleaning the wooden toys thoroughly. Use a damp cloth and mild soap or detergent to wipe down the surfaces of each toy. If the toys have any stubborn dirt or grime, use a soft-bristled brush to gently scrub the surface. Be sure to clean all the nooks and crannies of the toys.
Once you’ve cleaned the toys, rinse them thoroughly with warm water to remove any soap residue. If you’re using a natural cleaning solution, mix it with warm water and wipe down the toys with a damp cloth.
After cleaning, it’s important to dry the wooden toys thoroughly. Use a clean, dry cloth to wipe down the toys and remove any excess water. If possible, place the toys in a well-ventilated area and let them air dry completely.
Once the toys are dry, you can apply a natural finish to protect the wood and keep it looking its best. You can use olive oil or mineral oil to condition the wood and give it a nice shine. Apply a small amount of oil to a clean cloth and rub it into the surface of the toy. Be sure to wipe off any excess oil with a clean cloth.
By following these simple steps, you can sanitize your wooden toys and keep them safe for your child to play with. Remember to clean and sanitize your toys regularly to keep them in good condition and avoid the spread of germs.
Wooden toys are a great choice for children’s playthings. But, like any other toy, they can get dirty and need to be cleaned regularly. Here are some tips for maintaining the cleanliness of wooden toys.
Routine cleaning of wooden toys is important to keep them free of dirt and germs. Here are some easy steps to follow:
Sometimes, wooden toys can get tough stains that are hard to remove. Here are some tips for dealing with tough stains:
Remember, wooden toys should never be soaked in water as it can cause the wood to swell and crack. Always dry the toys thoroughly after cleaning to prevent any moisture from getting trapped inside the wood.
By following these simple steps, you can keep your child’s wooden toys clean and safe for playtime.
When it comes to sanitizing wooden toys, safety should always be your top priority. Here are some precautions you should take to ensure that the process is safe and effective:
By following these simple safety precautions, you can ensure that your wooden toys are properly sanitized without putting yourself or your child at risk.

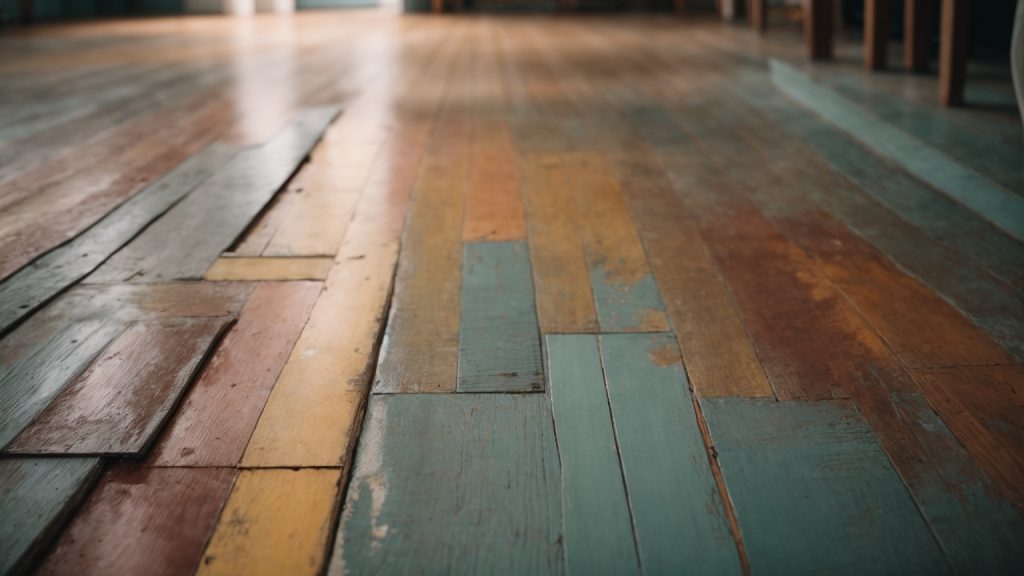
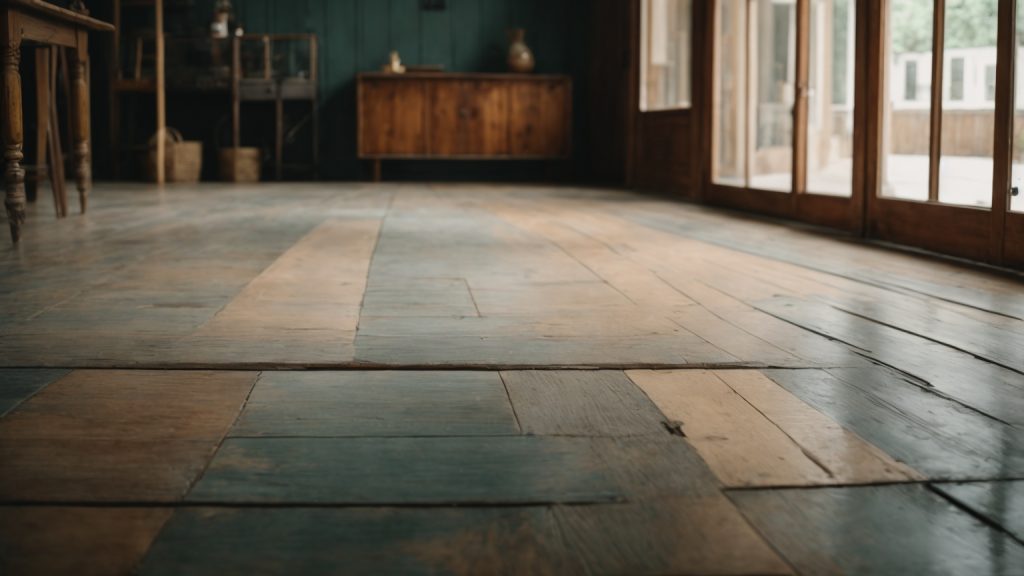
Are you tired of your old, worn-out wooden floors? Painting them can be a great way to give them a fresh new look without the expense of replacing them. Painting wooden floors is a relatively easy DIY project that can be done in a weekend. In this article, we will provide you with some tips on how to paint your wooden floors and achieve a professional-looking finish.
Before you start painting, it is important to prepare your floors properly. This involves cleaning, sanding, and priming the surface to ensure that the paint adheres properly and lasts for a long time. We will walk you through the steps of preparing your floors and choosing the right paint color and finish. We will also provide you with some ideas on how to create interesting patterns and designs on your floors using stencils or painter’s tape. With the right tools and techniques, you can transform your wooden floors into a beautiful and stylish feature of your home.
If you’re thinking of painting your wooden floors, it’s important to understand the basics before you start. Painting your floors can give your home a fresh new look, but it’s not a project to take lightly. Here are some things to keep in mind:
Not all paints are created equal, and this is especially true when it comes to painting floors. You’ll want to choose a paint that’s specifically designed for floors, as these paints are formulated to be more durable and resistant to wear and tear. Look for paints labeled as “porch and floor” or “deck and floor” paints. These paints are usually oil-based or water-based enamels and are available in a range of colors.
Proper surface preparation is key to a successful floor painting project. Start by thoroughly cleaning the floors to remove any dirt, dust, or debris. Sand the floors lightly to create a rough surface that will help the paint adhere. Fill any cracks or holes with wood filler, and sand again once the filler is dry. Finally, vacuum and wipe down the floors to remove any remaining dust.
To get the best results, it’s important to use the right tools. You’ll need a high-quality brush or roller designed for use with floor paints. A brush will give you a smoother finish, but a roller is faster. You may also want to use a paint sprayer if you have a large area to cover. Be sure to choose the right size brush or roller for your project, and use a high-quality paint tray to hold your paint.
When you’re ready to paint, start by cutting in around the edges of the room with a brush. Then, use a roller or sprayer to apply the paint in even, thin coats. Be sure to follow the manufacturer’s instructions for drying time and recoat time. It’s better to apply several thin coats of paint than one thick coat, as this will help prevent drips and ensure a smooth finish.
Once you’ve finished painting, it’s important to allow plenty of time for the paint to dry before you start using the floors again. This can take anywhere from a few hours to a few days, depending on the type of paint you used and the humidity in your area. Be sure to follow the manufacturer’s instructions for drying time, and avoid walking on the floors or placing furniture on them until the paint is fully cured.
By following these basic tips, you can achieve beautiful, long-lasting results when painting your wooden floors.
When it comes to painting wooden floors, choosing the right paint and tools is crucial to achieving a beautiful and long-lasting finish. In this section, we will go over the key factors to consider when selecting your paint and tools.
When it comes to selecting the paint for your wooden floors, there are a few things to keep in mind. First, you’ll want to choose a paint that is specifically designed for floors. These paints are formulated to be durable and resistant to wear and tear, which is essential for high-traffic areas like floors.
Second, consider the color and finish of the paint. While white is a popular choice for painted wooden floors, you can choose any color you like. Just be sure to test a small area first to make sure you like the color and that it complements the rest of your decor. As for the finish, a glossy or semi-glossy finish is recommended for floors as it is easier to clean and more durable than a matte finish.
Lastly, make sure the paint is compatible with the type of wood you are painting. Some paints may not adhere well to certain types of wood, so be sure to check the label or consult with a professional if you are unsure.
The tools you use to apply the paint are just as important as the paint itself. When it comes to brushes and rollers, there are a few things to consider.
For brushes, choose a high-quality brush with synthetic bristles. These brushes will provide a smooth and even finish and are easier to clean than natural bristle brushes. Look for a brush with a comfortable grip and a size that is appropriate for the size of your floor.
For rollers, choose a high-quality roller with a medium nap. This will allow the paint to be applied evenly and will prevent drips and streaks. Look for a roller with a sturdy frame and a comfortable grip.
In addition to brushes and rollers, you may also need other tools such as sandpaper, painter’s tape, and a paint tray. Be sure to have all the necessary tools on hand before you begin painting.
By selecting the right paint and tools, you can ensure a successful and long-lasting paint job on your wooden floors.
Before you start painting your wooden floors, you need to prepare them properly. This step is crucial to ensure that the paint adheres well and lasts for a long time. Follow these sub-sections to prepare your floors:
The first step is to clean your wooden floors thoroughly. You should remove any dirt, dust, or debris that may be present on the surface. Here are some tips to clean your floors:
Make sure the floor is completely dry before you move on to the next step.
The next step is to sand the surface of your wooden floors. Sanding helps to remove any rough spots, scratches, or stains on the surface. It also helps to create a smooth surface for the paint to adhere to. Here are some tips to sand your floors:
By following these steps, you can prepare your wooden floors for painting. Remember to take your time and be patient during this process. Proper preparation will ensure that your paint job looks great and lasts for a long time.
Before you start painting your wooden floors, you need to prepare the surface by applying a primer. Priming the floor will help the paint adhere better and last longer. Here are the steps to follow when applying primer to your wooden floors:
By following these steps, you will ensure that your wooden floors are properly primed and ready for painting.
If you’re looking to give your wooden floors a fresh new look, painting them can be a great option. Here are some tips on how to paint your wooden floors.
Before you begin painting, make sure your floors are clean and free of any debris. You can sweep or vacuum them to remove any dust or dirt. Once they’re clean, you can apply the first coat of paint.
When it comes to choosing paint, make sure you choose a paint that is specifically designed for floors. This type of paint is more durable and will hold up better over time. You can choose any color you like, but be sure to test a small area first to make sure you like the color and finish.
When applying the first coat of paint, use a roller or brush and work in small sections. Start at one end of the room and work your way across, making sure to overlap each section slightly to avoid leaving any gaps. Allow the first coat to dry completely before adding additional coats.
Once the first coat is dry, you can add additional coats of paint. Depending on the color and finish you’ve chosen, you may need to apply two or three coats to achieve the desired look.
When applying additional coats, be sure to use a light touch and work in small sections. You don’t want to apply too much paint at once, as this can lead to drips and uneven coverage. Allow each coat to dry completely before adding the next one.
When you’re finished painting, allow the floors to dry completely before walking on them or placing any furniture back in the room. This will ensure that the paint has had time to fully cure and will help prevent any damage or scuffs.
Once you’ve painted your wooden floors, it’s important to maintain them properly to ensure they look great for years to come. Here are some tips to help you keep your painted floors in top condition.
Regular cleaning is essential to maintain the appearance of your painted floors. Here are some tips for cleaning your painted floors:
Even with regular cleaning, your painted floors may still get scratched or scuffed over time. Here are some tips for dealing with scratches and scuffs:
By following these tips, you can keep your painted floors looking great for years to come.

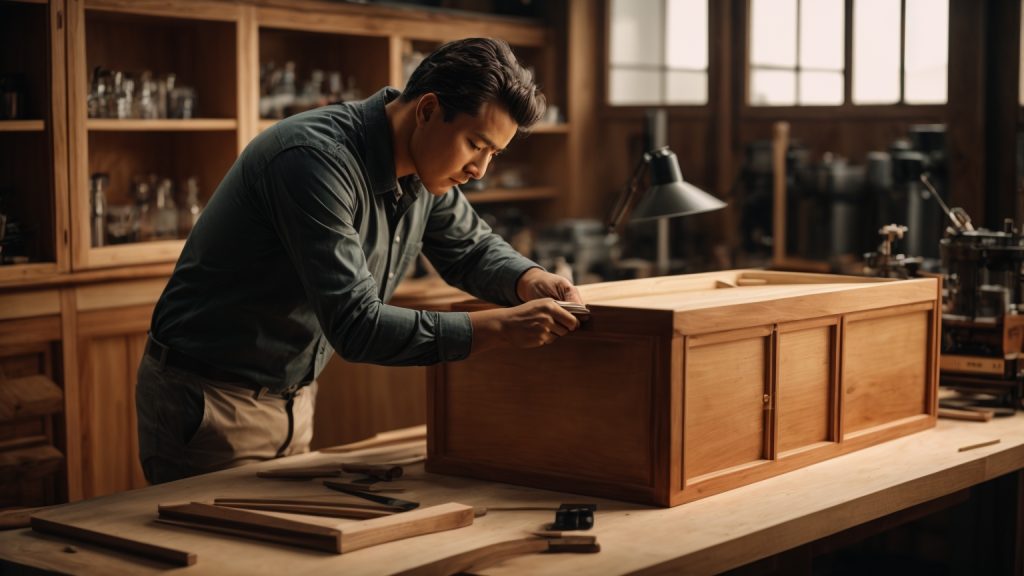
Are you looking to build a wooden cabinet but don’t know where to start? Building a cabinet can seem like a daunting task, but with the right tools and guidance, it can be a rewarding and satisfying project. In this article, we will guide you through the process of building a wooden cabinet, step by step.
Before you begin building your cabinet, you will need to gather the necessary materials and tools. This will include wood boards, screws, nails, wood glue, a saw, a drill, and sandpaper. You will also need to measure the space where you plan to install the cabinet to ensure that it fits properly. Once you have everything you need, you can begin building your cabinet.
The first step in building a wooden cabinet is to create a plan or blueprint. This will help you visualize the design of your cabinet and ensure that you have all the necessary materials. Next, you will need to cut the wood boards to the appropriate size and shape. You can then assemble the cabinet using screws, nails, and wood glue. Once the cabinet is assembled, you can sand and finish it to give it a polished look.
If you’re new to woodworking, building a cabinet can seem like a daunting task. However, with the right tools and materials, it can be a rewarding project that adds both functionality and aesthetic appeal to your living space. In this section, we’ll cover the basics of building a wooden cabinet.
When it comes to choosing the right wood for your cabinet, there are several options available. Here are some of the most common types of wood used in cabinet-making:
Before you start building your cabinet, you’ll need to gather the necessary tools. Here are some of the most important tools you’ll need:
By understanding the basics of wood selection and required tools, you’ll be well on your way to building a wooden cabinet that you can be proud of.
Before you start building your wooden cabinet, it’s essential to plan it out properly. This will ensure that you have all the necessary materials and tools, and that your cabinet will fit perfectly in the space you have designated for it. Here are some steps to follow when planning your cabinet.
The first step in planning your cabinet is to determine its size. Measure the space where you want to install the cabinet, and write down the height, width, and depth of the area. Consider what you will be storing in the cabinet and how much space you will need. Keep in mind that it’s better to have a cabinet that’s slightly too big than one that’s too small.
Once you have the measurements, you can decide on the size of your cabinet. You can use a table saw to cut the wood to the exact size you need. Alternatively, you can purchase pre-cut wood pieces from a hardware store.
The next step is to choose the design of your cabinet. There are many different styles and designs to choose from, so take some time to research and find one that suits your needs and preferences. Some popular options include:
Consider the style of your room and the overall aesthetic you want to achieve. You can also choose to add decorative elements such as trim or molding to your cabinet to give it a more finished look.
Once you have determined the size and design of your cabinet, you can start gathering the necessary materials and tools. With proper planning, you can build a beautiful and functional wooden cabinet that will last for years to come.
Before you start building your wooden cabinet, it’s important to prepare all of the necessary materials. This includes measuring and cutting the wood, as well as sanding it down to a smooth finish.
The first step in preparing your materials is to measure and cut the wood. This will ensure that all of your pieces fit together properly and that your cabinet is the correct size. You will need a tape measure, a saw, and the wood that you will be using for your cabinet.
To begin, measure the height, width, and depth of the space where you will be placing your cabinet. Then, use these measurements to determine the size of each piece of wood that you will need. Mark the measurements on the wood and use the saw to cut each piece to the correct size.
Make sure to double-check your measurements before cutting to avoid any mistakes. It’s also a good idea to label each piece of wood as you cut it to keep track of which piece goes where.
Once you have cut all of your pieces of wood, it’s time to sand them down to a smooth finish. Sanding will help to remove any rough edges or splinters and will ensure that your cabinet looks clean and professional.
You will need sandpaper and a sanding block or an electric sander. Start with a coarse grit sandpaper and work your way up to a finer grit for a smoother finish.
Hold the sandpaper or sander firmly and move it in a back-and-forth motion along the surface of the wood. Be sure to sand evenly and not to apply too much pressure, as this can damage the wood.
Once you have sanded all of your pieces, wipe them down with a damp cloth to remove any dust or debris. Your wood is now ready to be assembled into your cabinet.
By taking the time to properly prepare your materials, you will ensure that your cabinet is sturdy, well-fitted, and looks great.

Now that you have all the necessary components ready, it’s time to assemble your wooden cabinet. This section will guide you through the process of building the frame, adding shelves, and attaching the doors.
Start by laying out the cabinet’s sides, top, bottom, and back on a flat surface. Use clamps to hold the pieces together while you drill pilot holes and then use screws to attach them. Make sure the corners are square by using a carpenter’s square.
Next, attach the face frame to the cabinet’s front. The face frame is the part of the cabinet that the doors will attach to. Use glue and clamps to hold the face frame in place while you drill pilot holes and then use screws to attach it to the cabinet.
Measure and cut the shelves to fit inside the cabinet. Use a table saw or circular saw to make straight cuts. Drill pilot holes into the sides of the cabinet and then attach the shelves using screws. Make sure the shelves are level by using a level.
Measure and cut the doors to fit the face frame. Use a router to create a groove on the inside of the door where the hinges will be attached. Install the hinges on the door and then attach the door to the face frame. Adjust the hinges so that the door hangs straight and opens and closes smoothly.
Finally, install any knobs or pulls on the doors. Make sure they are level and centered.
Congratulations! You have successfully assembled your wooden cabinet.
Once you have built your wooden cabinet, it’s time to add the finishing touches to make it look great. Here are some tips on how to finish your cabinet:
Painting or staining your cabinet is an important step in the finishing process. You can choose to paint or stain your cabinet depending on the look you want to achieve. If you want a more natural look, staining is the way to go. If you want a more colorful look, painting is the way to go.
Before you start painting or staining, you need to prepare the wood. Sand the wood with a fine-grit sandpaper to remove any rough spots. Then, wipe the wood with a damp cloth to remove any dust. Apply a wood conditioner to the wood to help the stain or paint adhere better.
When painting, apply a primer first to help the paint adhere better. Then, apply the paint in thin, even coats. Let each coat dry before applying the next coat. When staining, apply the stain with a brush or cloth, following the grain of the wood. Let the stain dry for at least 24 hours before applying a clear coat.
Adding hardware to your cabinet is another important step in the finishing process. Hardware includes knobs, handles, hinges, and locks. Choose hardware that complements the style of your cabinet.
When installing hardware, mark the location of the hardware on the cabinet with a pencil. Then, drill pilot holes for the screws. Install the hardware with screws, making sure they are tight.
Adding hardware can be a simple way to update the look of your cabinet. You can choose from a variety of styles and finishes to find the perfect hardware for your cabinet.
By following these tips, you can give your wooden cabinet a professional-looking finish that will make it stand out in your home.
When building a wooden cabinet, safety should be your top priority. Woodworking can be dangerous, and it is important to take the necessary precautions to prevent accidents. Here are some safety tips to keep in mind:
Always wear protective gear when working with power tools or sharp objects. This includes safety glasses, earplugs, gloves, and a dust mask. Safety glasses will protect your eyes from flying debris, earplugs will protect your hearing from loud noises, gloves will protect your hands from cuts and scrapes, and a dust mask will protect your lungs from sawdust and other airborne particles.
A cluttered workspace can lead to accidents. Keep your workspace clean and organized to prevent tripping hazards and to ensure that you have enough space to work safely. Make sure that all tools are stored in their proper place when not in use.
Always use tools according to their intended purpose and manufacturer’s instructions. Make sure that blades are sharp and in good condition, and that all guards and safety features are in place and working properly. Never remove guards or safety features from tools.
Working for long periods of time without a break can lead to fatigue and increased risk of accidents. Take frequent breaks to rest and stretch your muscles. This will help you stay alert and focused while working.
Accidents can happen even when you take all the necessary precautions. Keep a first aid kit on hand in case of minor injuries. The kit should include items such as bandages, antiseptic, and tweezers.
By following these safety precautions, you can help ensure that your woodworking project is completed safely and without incident.
Now that you have built your wooden cabinet, it is important to maintain it properly to ensure its longevity and keep it looking its best. Here are some tips to help you maintain your wooden cabinet:
Regular cleaning is essential to keep your wooden cabinet looking its best. Use a soft, damp cloth to wipe down the cabinet and remove any dust or dirt. Avoid using harsh chemicals or abrasive cleaners, as these can damage the wood.
Excessive moisture can cause the wood to warp or crack, so it is important to avoid getting your wooden cabinet too wet. If you need to clean a spill or stain, use a damp cloth and dry the area immediately afterward.
Polishing your wooden cabinet can help protect the wood and keep it looking shiny and new. Choose a high-quality polish that does not contain silicone or wax, and follow the manufacturer’s directions for application.
Regularly inspect your wooden cabinet for any signs of damage, such as cracks or scratches. If you notice any damage, address it promptly to prevent it from getting worse.
Direct sunlight can cause the wood to fade or discolor, so it is important to avoid placing your wooden cabinet in direct sunlight. If you cannot avoid placing it in a sunny location, consider using curtains or blinds to block the sunlight.
By following these tips, you can keep your wooden cabinet looking beautiful for years to come.

If you have a wooden fence that’s seen better days, don’t worry. There are ways to repair it and bring it back to life. With a little bit of effort and some basic tools, you can fix most issues that commonly occur with wooden fences. In this article, we’ll walk you through the steps to repair a wooden fence and provide some helpful tips along the way.
One of the most common issues with wooden fences is rotting. This can happen to the fence posts, rails, or pickets. If you notice any signs of rot, such as soft or spongy wood, it’s important to address the issue as soon as possible. Another common problem is sagging or leaning fence sections. This can be caused by a number of factors, including loose or damaged hardware, soil erosion, or improper installation. Whatever the issue, we’ll show you how to fix it and get your fence looking great again.
Before you begin any repairs, it’s important to assess the damage and determine the best course of action. Depending on the severity of the issue, you may need to replace a section of the fence or simply make some minor repairs. With the right tools and techniques, you can tackle most fence repairs on your own and save money in the process. So, let’s get started and learn how to repair a wooden fence.
When it comes to repairing a wooden fence, the first step is to understand the damage. This will help you determine whether you need to repair or replace the fence, as well as what materials and tools you’ll need. In this section, we’ll go over how to identify the types of damage and assess the severity of the damage.
There are several types of damage that can occur to a wooden fence, including:
By identifying the type of damage, you’ll be better equipped to determine the best course of action.
Once you’ve identified the type of damage, the next step is to assess the severity of the damage. This will help you determine whether you can repair the fence or if you need to replace it. Here are some things to look for when assessing the severity of the damage:
By assessing the severity of the damage, you’ll be able to make an informed decision about how to proceed with the repair or replacement of your wooden fence.
Before you begin repairing your wooden fence, it’s important to gather all the necessary tools and materials. This will save you time and frustration later on. Here are some things you’ll need:
Having the right tools can make all the difference when it comes to repairing your fence. Here are some tools you should consider having on hand:
When it comes to repairing your fence, it’s important to use quality materials that will last. Here are some materials you should consider using:
By gathering the right tools and materials, you’ll be well on your way to repairing your wooden fence.
Before you start repairing your wooden fence, there are some preparation steps you need to take to ensure a successful repair. These steps include clearing the area and taking safety precautions.
The first step in repairing your wooden fence is to clear the area around it. This means removing any debris, such as leaves, branches, or rocks, that may be in the way. You should also clear any plants or grass that are growing too close to the fence, as they may interfere with the repair process.
If your fence is located near any structures, such as a house or garage, make sure to move any items away from the fence to avoid damaging them during the repair process.
When repairing a wooden fence, it is important to take safety precautions to avoid injury. Here are some safety tips to keep in mind:
By taking these preparation steps, you can ensure a safe and successful repair of your wooden fence.
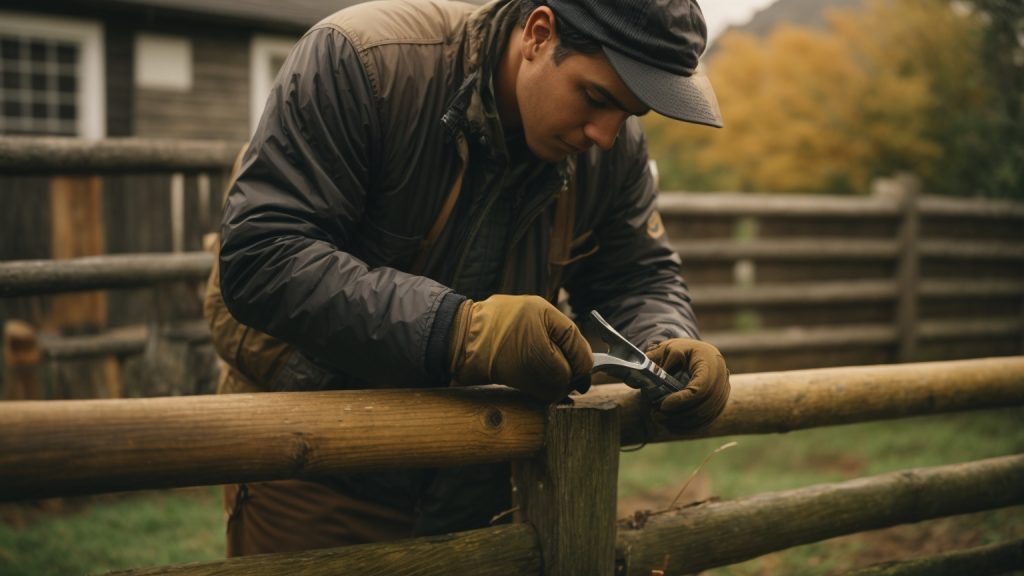
If your wooden fence has minor damages, you can easily fix them yourself. Here are some simple steps to help you repair your fence.
If you have loose boards on your fence, you can fix them by following these steps:
Small cracks in your wooden fence can be repaired using wood filler. Here’s how:
Remember, if the damage to your fence is more severe, it’s best to call a professional to repair it.
If your wooden fence has suffered major damages, such as broken boards or rot, it’s important to take care of them as soon as possible to prevent further damage. Here are some tips on how to repair major damages to your wooden fence.
If you have a broken board on your fence, it’s important to replace it as soon as possible to prevent further damage. Here’s how to do it:
If you have rot on your fence, it’s important to remove it before it spreads. Here’s how to do it:
Remember, prevention is key when it comes to wooden fence maintenance. Regularly inspect your fence for damages and take care of them as soon as possible to prevent further damage.
Regular maintenance is essential to keep your wooden fence looking good and functioning properly. With proper care, you can extend the life of your fence and prevent costly repairs. Here are some tips on how to maintain your wooden fence.
Regular inspections are key to identifying problems early and preventing them from getting worse. Inspect your fence at least once a year, and after any major weather events. Look for signs of damage, such as rotting, cracking, or warping. Check the fence posts for stability and make sure they are not leaning or wobbling. If you notice any damage, address it immediately to prevent it from spreading.
Preventive measures can help protect your fence from damage and extend its life. Here are some tips on how to prevent damage to your wooden fence:
By following these tips, you can keep your wooden fence looking great and functioning properly for years to come. Regular inspections and preventive measures can help you avoid costly repairs and keep your fence in top condition.


