Rahasia Sukses Poker Online: Cara Ampuh Membaca Lawan di Fase Post-Flop
Di antara seluruh platform penyedia poker online terbaik, fase taruhan post-flop (setelah tiga kartu pertama dibuka) senantiasa diakui sebagai salah

Di antara seluruh platform penyedia poker online terbaik, fase taruhan post-flop (setelah tiga kartu pertama dibuka) senantiasa diakui sebagai salah


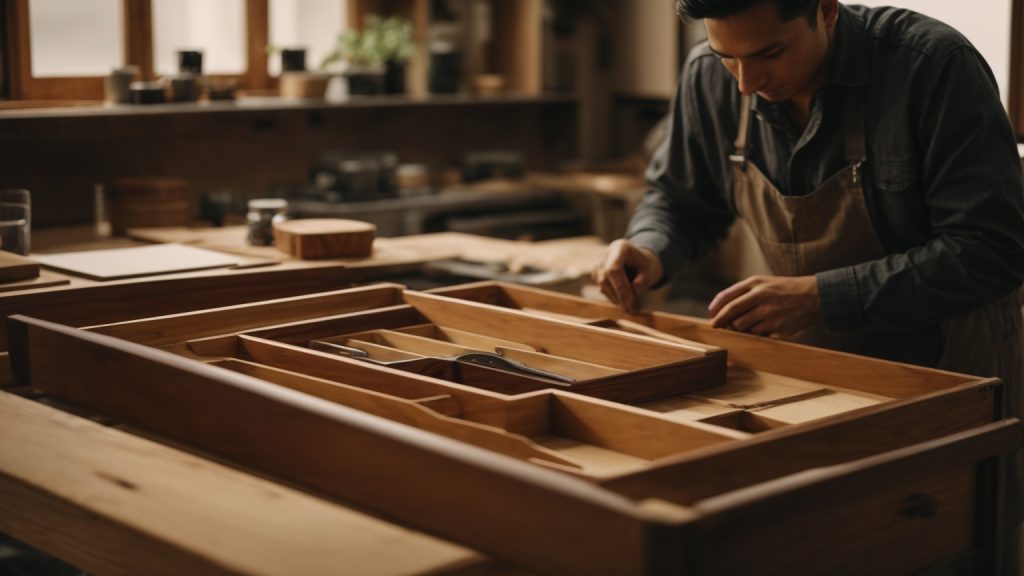
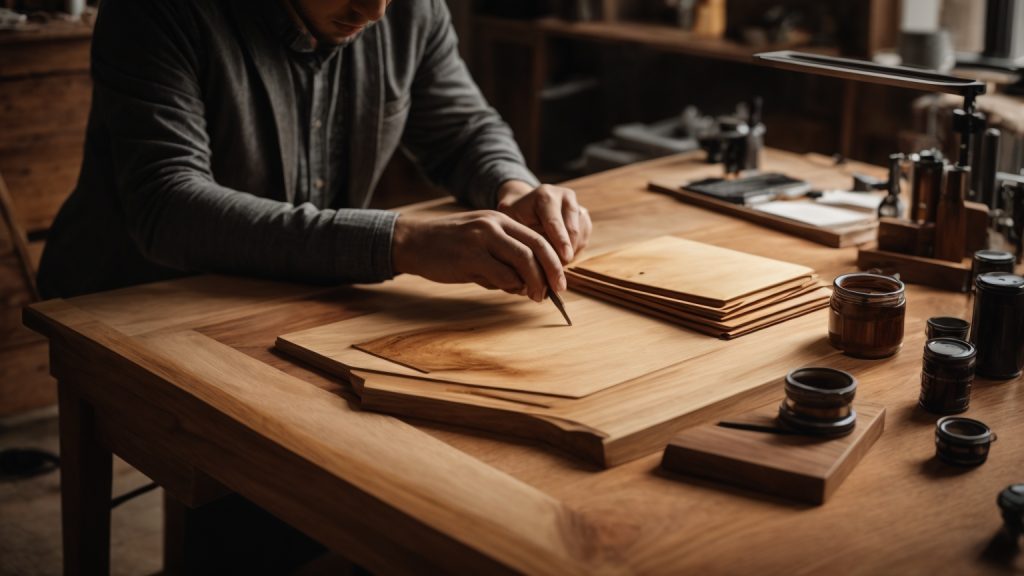
If you’re looking to add some storage space to your home, building wooden drawers can be a great option. Not only do they provide a functional solution for organizing your belongings, but they can also add a touch of warmth and beauty to your decor. Whether you’re a seasoned woodworker or a beginner, making wooden drawers can be a fun and rewarding project.
To get started, you’ll need to determine the size and type of drawers you want to make. There are many different styles and sizes to choose from, so it’s important to consider your specific needs and preferences. You’ll also need to select the right type of wood and hardware for your project. Once you have your materials, you can begin building your drawers by following a few simple steps. With a little patience and attention to detail, you’ll have beautiful, functional drawers in no time.
When it comes to making wooden drawers, choosing the right type of wood is crucial to ensure durability and longevity. Here are some common types of wood used for making drawers:
Hardwood is a popular choice for making drawers due to its strength and durability. Some common types of hardwood used for making drawers include oak, maple, cherry, and walnut. Hardwood is also resistant to wear and tear, making it an ideal choice for drawers that will be used frequently.
Plywood is a type of engineered wood made by bonding several layers of wood veneers together. It is a cost-effective alternative to solid wood and is commonly used for making drawer bottoms and backs. Plywood is also strong and durable, making it a good choice for drawers that will be subjected to heavy use.
Medium-density fiberboard (MDF) is another type of engineered wood made by bonding wood fibers together with resin. It is a popular choice for making drawer fronts and sides due to its smooth surface and ability to hold paint well. MDF is also more affordable than solid wood and is less prone to warping and cracking.
When choosing the type of wood for your drawers, consider the intended use of the drawer and the overall aesthetic of your project. Each type of wood has its own unique characteristics and advantages, so it’s important to choose the one that best suits your needs.
When it comes to making wooden drawers, having the right tools is essential. Here are the basic tools you’ll need to get started:
The measuring tape is an essential tool for any woodworking project. You’ll need to measure the length, width, and height of the drawer, as well as the thickness of the wood you’ll be using. Make sure to get an accurate measurement to ensure that the drawer fits perfectly.
A saw is necessary for cutting the wood to the correct size. A table saw or a miter saw is ideal for making straight cuts, while a jigsaw is best for curved cuts. Choose the saw that is appropriate for the type of cut you need to make.
After cutting the wood, you’ll need to sand it to make it smooth and even. A belt sander or an orbital sander is ideal for this task. Make sure to sand the wood in the direction of the grain to avoid damaging it.
A screwdriver is necessary for attaching the drawer slides and the drawer front. Make sure to choose the right size and type of screwdriver for the screws you’ll be using.
With these tools in hand, you’ll be ready to start building your wooden drawers. Make sure to use them safely and follow all the necessary precautions.
When working with wood, safety should always be your top priority. Here are some safety measures you should take when making wooden drawers.
Wearing protective eyewear is a must when working with wood. It will protect your eyes from flying wood chips, sawdust, and other debris. Make sure your eyewear is rated for impact resistance and fits snugly on your face. Safety glasses with side shields or goggles are recommended.
Gloves can protect your hands from splinters and other injuries. However, you should avoid wearing gloves when operating power tools as they can get caught in the machinery and cause serious harm. When applying finishes, wear latex gloves to protect your skin from chemicals.
When working with wood, you should ensure proper ventilation in your workspace. Sawdust and other particles can be harmful to your respiratory system if inhaled. Use a dust collection system or wear a respirator to protect your lungs. Make sure your workspace is well-ventilated with fresh air to avoid inhaling toxic fumes from finishes or adhesives.
Remember to always prioritize safety when working with wood. By following these safety measures, you can prevent accidents and injuries and enjoy woodworking safely.
Before you start making wooden drawers, you need to prepare the wood. This involves measuring, cutting, and sanding the wood to ensure that it is of the right size, shape, and smoothness. Here are the steps you need to follow:
The first step in preparing the wood for your wooden drawers is measuring. You need to measure the length, width, and depth of the drawers you want to make. Make sure to measure twice to avoid any mistakes. You can use a measuring tape or a ruler to take accurate measurements. Write down your measurements so that you can refer to them later.
Once you have measured your wood, it’s time to cut it to size. You can use a saw or a miter saw to cut the wood. Make sure to cut the wood precisely according to your measurements. You can use a table saw or a circular saw to make straight cuts. If you need to make angled cuts, use a miter saw or a compound miter saw. Be careful while cutting the wood and wear safety goggles to protect your eyes.
After cutting the wood, you need to sand it to make it smooth and remove any rough edges. You can use sandpaper or a power sander to sand the wood. Start with a coarse grit sandpaper and gradually move to a finer grit sandpaper to get a smooth finish. Make sure to sand the edges and corners of the wood as well. If you are using a power sander, be careful not to sand too much or too fast as it can damage the wood.
By following these steps, you can prepare the wood for your wooden drawers and ensure that they are of the right size, shape, and smoothness.
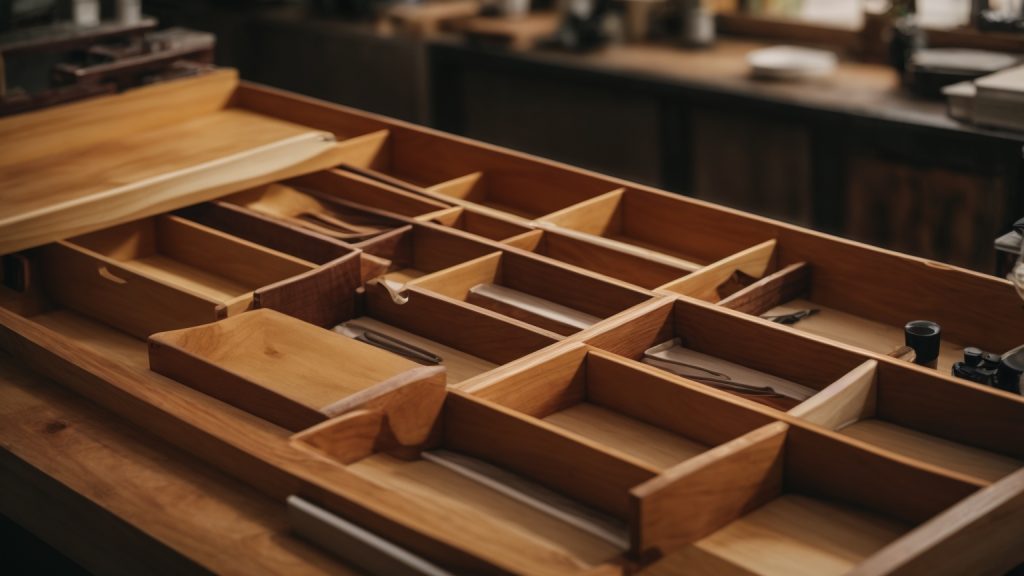
Assembling the drawers is the final step in making wooden drawers. It involves connecting the pieces, installing the bottom, and securing the joints. In this section, we’ll go over each step in detail to help you assemble your wooden drawers with ease.
To connect the pieces of your drawer, you can use wood glue, nails, or screws. Wood glue is a great option because it creates a strong bond and doesn’t leave any visible fasteners.
To use wood glue, apply a generous amount to the joints and then clamp the pieces together. Make sure the joints are flush and square before clamping. Leave the clamps on for at least an hour to allow the glue to dry.
If you prefer to use nails or screws, pre-drill the holes to prevent splitting and then attach the pieces together. Make sure the joints are flush and square before nailing or screwing.
The bottom of the drawer is what holds everything inside, so it’s important to install it properly. You can use plywood or hardboard for the bottom.
To install the bottom, slide it into the groove on the bottom of the drawer. If your drawer doesn’t have a groove, you can attach the bottom using glue, nails, or screws. Make sure the bottom is flush with the bottom of the drawer.
To ensure that your drawer is sturdy and won’t fall apart, you need to secure the joints. You can use wood glue, nails, or screws to do this.
If you’re using wood glue, apply a generous amount to the joints and then clamp the pieces together. Make sure the joints are flush and square before clamping. Leave the clamps on for at least an hour to allow the glue to dry.
If you prefer to use nails or screws, pre-drill the holes to prevent splitting and then attach the pieces together. Make sure the joints are flush and square before nailing or screwing.
By following these steps, you can assemble your wooden drawers with ease. With a little patience and attention to detail, you’ll have a beautiful and functional set of drawers in no time.
Once you have built your wooden drawers, it’s time to add the finishing touches. This section will cover two important aspects of finishing touches: painting or staining and installing the handle.
Painting or staining your wooden drawers is an important step in protecting them from wear and tear. It also adds a decorative touch to your furniture. Here are some tips for painting or staining your wooden drawers:
Installing a handle on your wooden drawer is a simple process that can be done in a few steps. Here’s how to do it:
With these finishing touches, your wooden drawers are now complete and ready to be used.
Once you have built your wooden drawers, it’s time to install them. This can be a bit tricky, but with the right tools and techniques, you can get it done easily. Here are the steps to follow:
Drawer slides are essential for smooth and easy drawer operation. There are many types of drawer slides available in the market, but the most common ones are side-mount and under-mount slides. Here’s how to install them:
Once the slides are installed, it’s time to secure the drawer in place. Here’s how to do it:
By following these simple steps, you can easily install wooden drawers in your cabinet. Just remember to take your time and be patient, and you’ll have a functional and beautiful piece of furniture in no time.

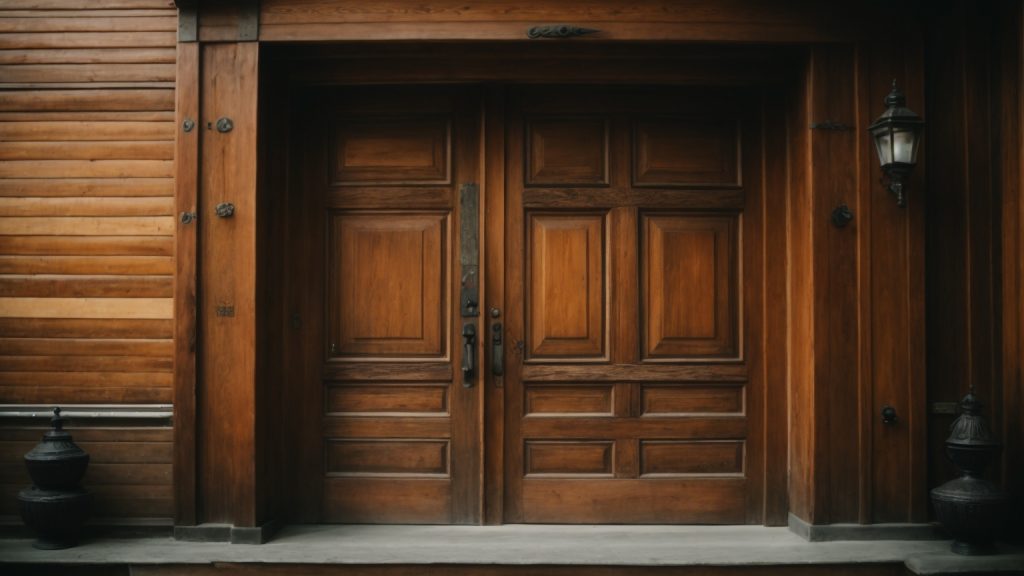
If you’re looking to upgrade your front door, you might be wondering how much a wooden door costs. The answer varies depending on several factors, including the type of wood, the size of the door, and whether it’s pre-hung or not. In this article, we’ll explore the different factors that affect the cost of a wooden door and give you a general idea of what you can expect to pay.
One of the most significant factors that affect the cost of a wooden door is the type of wood used. Different woods have different properties and characteristics that affect their durability, appearance, and price. For example, a solid oak door will generally cost more than a pine door because oak is a denser and more durable wood. Other popular wood options for front doors include mahogany, cherry, and walnut, each with its unique look and price point. Additionally, the grade of the wood can also affect the cost. Higher-grade wood will generally be more expensive than lower-grade wood.
Another factor that affects the cost of a wooden door is whether it’s pre-hung or not. A pre-hung door comes already attached to its frame, making installation easier and quicker. However, pre-hung doors are generally more expensive than slabs, which are just the door itself without a frame. If you’re handy and have some DIY skills, you might be able to save some money by purchasing a slab and installing it yourself. However, keep in mind that installing a door can be a challenging and time-consuming task, so it might be worth it to pay extra for a pre-hung door.
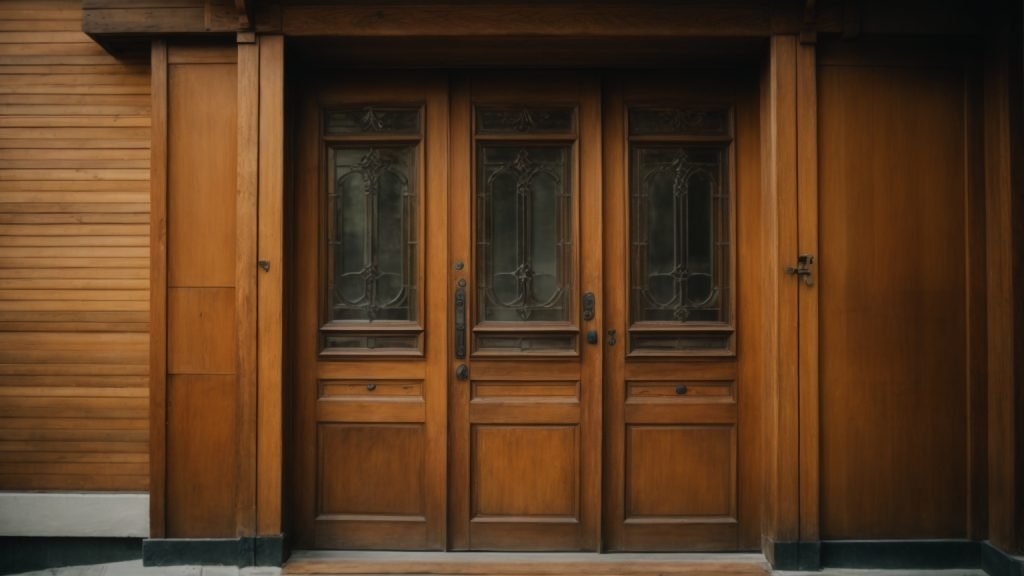
When it comes to choosing a new door for your home, wooden doors are a popular option due to their classic and timeless look. However, before making a purchase, it’s important to understand the different types of wooden doors available and the benefits they offer.
There are several types of wooden doors to choose from, each with their own unique characteristics and price points. Some common types include:
Wooden doors offer several benefits that make them a popular choice for homeowners. Some of these benefits include:
When considering a wooden door for your home, it’s important to weigh the cost and benefits of each type and choose one that fits your budget and needs. With proper care and maintenance, a wooden door can add beauty and value to your home for years to come.
When it comes to buying a wooden door, there are several factors that can affect the price. Here are some of the main cost factors to consider:
The type of wood used to make the door can have a big impact on the price. For example, a solid oak door will generally be more expensive than a pine door. Other factors that can affect the price include the thickness of the wood and whether it is a solid piece or made up of several pieces glued together.
The size of the door is another important factor to consider. Larger doors will generally be more expensive than smaller ones, as they require more materials and labor to manufacture. Standard wooden doors usually measure 6’8″ in height by 3’0″ in width, but custom sizes are also available.
The design of the door can also affect the price. Simple, plain doors will generally be less expensive than doors with intricate designs or carvings. Glass panels and other decorative features can also add to the cost.
The finish of the door can also impact the price. A basic, unfinished door will be less expensive than a door that has been stained or painted. However, finishing the door can also help to protect it from the elements and extend its lifespan.
Overall, the cost of a wooden door can vary widely depending on these and other factors. It’s important to consider your budget and needs when choosing a door, and to shop around to find the best deal.
Wooden doors are a classic and timeless addition to any home. They are available in a variety of styles, sizes, and finishes, making them a versatile option for any budget. The price of a wooden door can vary based on several factors, including the type of wood, the size of the door, and the level of customization.
Basic wooden doors are the most affordable option and are typically made from softwoods such as pine or fir. These doors are simple in design and may not have any added features such as glass panels or decorative carvings. Basic wooden doors typically range in price from $150 to $500.
Mid-range wooden doors are a step up from basic doors and are often made from hardwoods such as oak or maple. These doors may have added features such as glass panels or decorative carvings. Mid-range wooden doors typically range in price from $500 to $1,500.
High-end wooden doors are the most expensive option and are often made from exotic hardwoods such as mahogany or teak. These doors may have intricate designs, custom carvings, or beveled glass panels. High-end wooden doors typically range in price from $1,500 to $5,000 or more.
It is important to note that the price of a wooden door does not always reflect its quality. A well-made basic wooden door can be just as durable and long-lasting as a high-end door. When choosing a wooden door, consider your budget and the style of your home to find the best option for you.
When budgeting for a wooden door, it’s important to consider additional costs beyond just the cost of the door itself. Here are some factors that can impact the overall cost of your wooden door installation:
Unless you’re a skilled carpenter, you’ll likely need to hire a professional to install your wooden door. The cost of installation can vary depending on the complexity of the installation, the location of your home, and the experience level of the installer. On average, you can expect to pay between $100 and $800 for installation.
In addition to the door itself, you’ll also need to purchase hardware such as hinges, doorknobs, and locks. The cost of hardware can vary widely depending on the quality and style you choose. Basic hardware can cost as little as $20, while high-end hardware can cost several hundred dollars.
Most wooden doors require some form of finishing to protect them from the elements and to enhance their appearance. This can include staining, painting, or sealing the door. The cost of finishing can vary depending on the size of the door, the type of finish you choose, and whether you hire a professional to do the work. On average, you can expect to pay between $100 and $300 for finishing.
Depending on your needs and preferences, you may want to add additional features to your wooden door such as a window, a peephole, or a pet door. These features can add to the overall cost of your door, so it’s important to factor them into your budget.
By considering these additional costs, you can get a better idea of the total cost of your wooden door installation and ensure that you’re prepared to budget accordingly.
If you are looking to buy a wooden door, there are several options available. Here are some places where you can find wooden doors:
Home improvement stores like Home Depot and Lowe’s offer a variety of wooden doors. They have a range of styles and sizes to choose from, and you can find doors made from different types of wood. You can also find pre-hung doors, which come with the frame and hinges already attached, making installation easier.
There are several online retailers that specialize in wooden doors. They offer a wider selection of doors than most physical stores, and you can browse their collections from the comfort of your own home. Some popular online retailers for wooden doors include Doors4Home, ETO Doors, and Uber Doors.
If you are looking for a specific size or style of wooden door, you may want to consider a custom door manufacturer. They can create a door to your exact specifications, and you can choose the type of wood, finish, and hardware you want. Custom doors are more expensive than pre-made doors, but they offer a unique look and can be a great investment.
When buying a wooden door, it is important to consider the quality of the wood, the finish, and the hardware. Look for doors made from solid wood, as they are more durable than doors made from composite materials. Check the finish to make sure it is smooth and even, and look for hardware that is sturdy and secure. With these factors in mind, you can find a wooden door that fits your style and budget.
When it comes to buying a wooden door, there are a few things you should keep in mind to ensure you get the best value for your money. Here are some tips to help you make an informed decision:
Different types of wood have different characteristics, such as durability, grain pattern, and color. Some popular types of wood for doors include oak, mahogany, cherry, and maple. Consider the look you want to achieve and the level of maintenance you’re willing to undertake before choosing a type of wood.
Before you start shopping for a wooden door, measure the height, width, and thickness of your door frame. This will help you choose a door that fits properly and looks great. Keep in mind that a custom-sized door may be more expensive than a standard-sized door.
A well-constructed wooden door should be solid and sturdy, with no visible defects or cracks. Check the joints and corners for signs of weakness or separation. The door should also have a smooth finish with no rough spots or splinters.
Wooden doors come in a variety of styles, from traditional to contemporary. Consider the style of your home and choose a door that complements it. You may also want to consider adding decorative glass or hardware to enhance the look of your door.
Wooden doors can vary in price depending on the type of wood, size, and style. Compare prices from different retailers to ensure you get the best deal. Keep in mind that a higher price doesn’t always mean better quality, so be sure to check the construction and materials before making a purchase.
By following these tips, you can find a wooden door that fits your budget and meets your needs.

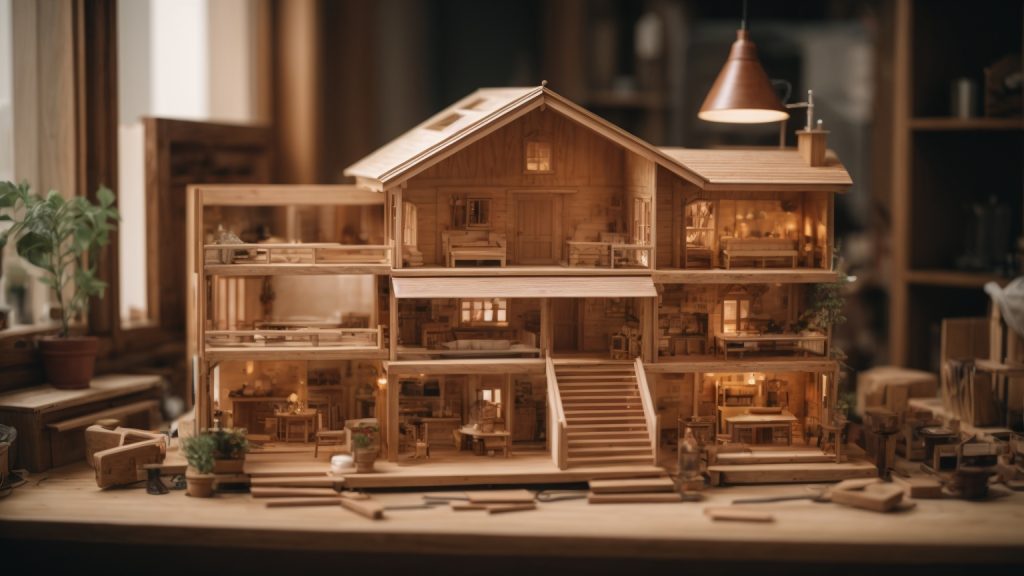
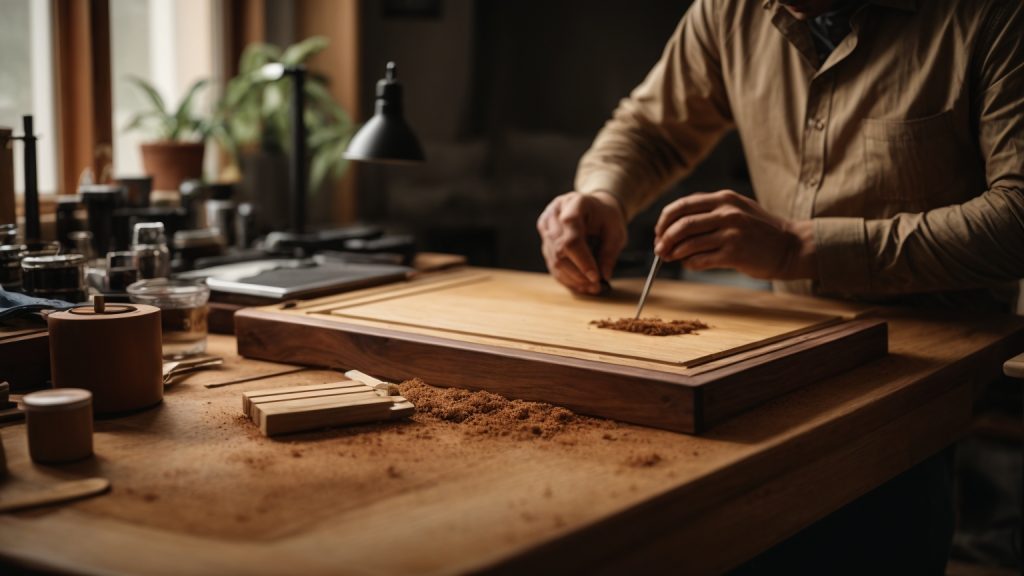
Are you looking for a fun and creative project to do with your kids or just for yourself? Making a wooden dollhouse from scratch is a great way to spend time together and create something beautiful that you can cherish for years to come. With a little bit of planning, patience, and some basic woodworking skills, you can build a dollhouse that is customized to your liking and fits perfectly in your home.
Before you start building your wooden dollhouse, there are a few things you need to consider. First, decide on the size and style of the dollhouse you want to build. You can choose from a variety of designs, such as a Victorian-style mansion or a modern minimalist house. You also need to determine what materials you will need and what tools you will use. Once you have all the necessary supplies, you can get started on your project. In the next section, we will go over some basic steps to help you build your very own wooden dollhouse.
When building a wooden dollhouse, choosing the right type of wood is crucial. You want to select a wood that is sturdy, easy to work with, and will hold up over time. In this section, we will discuss how to identify different types of wood and how to select the best wood for dollhouses.
Wood can be classified into two main categories: hardwood and softwood. Hardwood comes from deciduous trees such as oak, maple, and cherry, while softwood comes from coniferous trees such as pine, cedar, and spruce.
Hardwood is generally more expensive than softwood, but it is also stronger and more durable. Softwood is easier to work with and is often used in construction due to its affordability.
When selecting wood for your dollhouse, it’s important to consider the grain pattern. The grain pattern refers to the direction in which the wood fibers run. Some woods, such as oak, have a prominent grain pattern, while others, such as maple, have a more subtle grain pattern.
When selecting wood for your dollhouse, there are a few factors to consider. First, you want to choose a wood that is easy to work with. Softwoods such as pine and cedar are great options for beginners because they are easy to cut and shape.
Second, you want to choose a wood that is sturdy and will hold up over time. Hardwoods such as oak and maple are great options for dollhouses because they are strong and durable.
Finally, you want to choose a wood that will look great once it is finished. Woods such as cherry and mahogany have a beautiful finish and are perfect for dollhouses that will be on display.
In summary, when choosing wood for your dollhouse, consider the type of wood, the grain pattern, and the ease of use. Softwoods such as pine and cedar are great for beginners, while hardwoods such as oak and maple are strong and durable. Choose a wood that will look great once finished, and your dollhouse will be a beautiful addition to your collection.
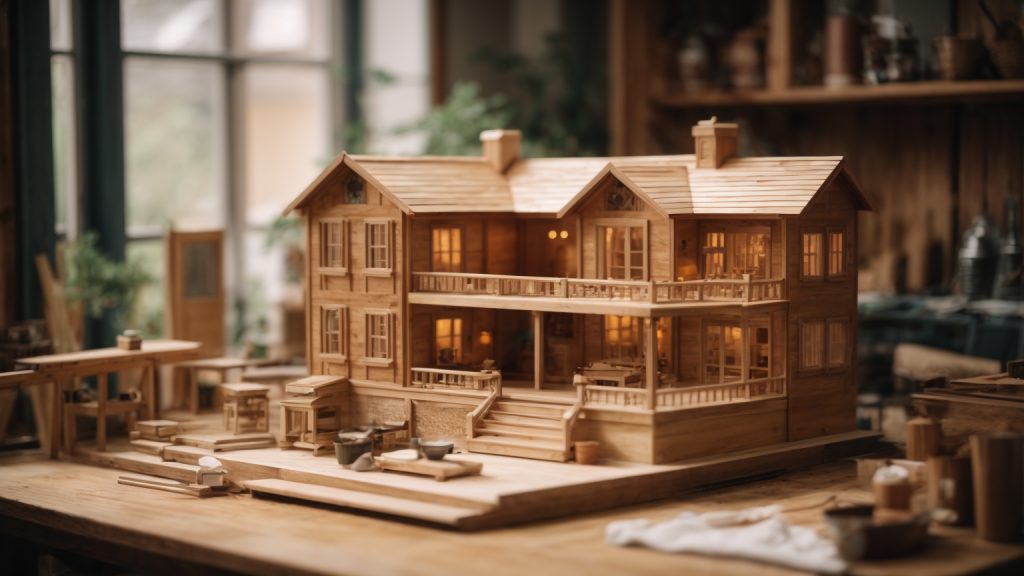
When it comes to designing your wooden doll house, there are a few things to consider to make sure your final product is everything you want it to be. Here are some tips to get you started:
Before you start building, it’s a good idea to sketch out your design. This will help you visualize the final product and make any necessary adjustments before you start cutting wood. You can use graph paper to create a scale drawing of your design, or simply sketch it out on a piece of paper.
Consider the number of rooms you want, the size of each room, and any special features you want to include, such as a balcony or porch. Think about the style of the house you want to create, whether it’s a cozy cottage or a grand mansion.
When designing your doll house, it’s important to consider the size and scale of your dolls. Make sure the rooms are large enough to accommodate your dolls and any furniture you plan to include. You should also consider the overall size of the doll house, as this will affect the amount of materials you will need and the time it will take to build.
Another important consideration is the scale of your doll house. Most doll houses are built to a scale of 1:12, which means that one inch of doll house equals one foot of real life. However, you can choose a different scale if you prefer. Just make sure all the elements of your doll house are in proportion to each other.
By taking the time to carefully design your wooden doll house, you’ll end up with a beautiful and functional toy that your child will love to play with for years to come.
Cutting the wood is an essential part of building a wooden dollhouse. In this section, we will discuss safety measures and how to use a saw when cutting the wood.
Before you start cutting the wood, it is important to take some safety measures to avoid any accidents. Here are some tips to keep in mind:
There are different types of saws you can use to cut the wood for your dollhouse, such as a jigsaw, miter saw, or circular saw. Here are some tips on how to use a saw:
By following these safety measures and tips on how to use a saw, you can cut the wood for your dollhouse accurately and safely.
Before you begin assembling your wooden doll house, make sure you have all the necessary materials and tools. You will need wood glue, nails, a hammer, a saw, and sandpaper. Once you have everything you need, you can begin the assembly process.
The first step in assembling your doll house is to join the pieces together. To do this, you will need to use wood glue and nails. Apply a small amount of glue to the edges of the pieces you are joining together, and then use nails to secure them in place. Make sure the pieces are aligned properly before nailing them together.
It’s important to work slowly and carefully when joining the pieces together. Take your time to ensure that each piece is properly aligned and secured before moving on to the next one.
Once you have joined all the pieces together, you can use wood glue to reinforce the joints. Apply a small amount of glue to each joint, and then use a brush or your finger to spread it evenly. Make sure you apply enough glue to fully cover the joint, but not so much that it drips or runs.
After applying the glue, use clamps or weights to hold the pieces in place while the glue dries. This will help ensure that the joints are strong and secure.
Once the glue has dried, use sandpaper to smooth out any rough edges or surfaces. This will give your doll house a polished and professional look.
In conclusion, assembling a wooden doll house requires patience and attention to detail. By following these steps and taking your time, you can create a beautiful and sturdy doll house that will provide hours of enjoyment.
Once you have completed building your wooden dollhouse, it’s time to add the finishing touches that will make it look complete and beautiful. This section will cover two important sub-sections: Sanding the Edges and Painting and Decorating.
Before painting and decorating your dollhouse, it’s essential to sand the edges to ensure that they are smooth and free of splinters. You can use a sanding block or sandpaper to sand the edges. Be sure to sand in the direction of the grain to avoid creating scratches on the surface of the wood.
Once you have sanded the edges, you can use a damp cloth to wipe away any dust or debris. Then, let the dollhouse dry completely before moving on to the next step.
Painting and decorating your dollhouse is where you can get creative and add your personal touch. You can use a variety of materials such as paint, wallpaper, fabric, and stickers to decorate your dollhouse.
Before painting, it’s important to prime the surface with a primer to ensure that the paint adheres properly. You can use acrylic or latex paint to paint the dollhouse. Be sure to use a paintbrush that is appropriate for the size of the surface you are painting.
When decorating the dollhouse, you can use wallpaper to add patterns and texture to the walls. You can also use fabric to create curtains and bedding for the dollhouse. Stickers can be used to add small details such as flowers or animals.
It’s important to let each layer of paint or glue dry completely before adding another layer. This will ensure that the final result looks neat and professional.
In conclusion, sanding the edges and painting and decorating the dollhouse are essential steps in completing your wooden dollhouse. With a little bit of creativity and patience, you can create a beautiful and unique dollhouse that you will be proud to display.
Taking care of your wooden dollhouse is essential to ensure it lasts for years to come. Here are some maintenance tips to keep your dollhouse in top condition:
Cleaning your wooden dollhouse is a crucial part of maintenance. Here are some tips to help you keep your dollhouse clean:
Over time, your wooden dollhouse may require minor repairs. Here are some tips to help you fix any minor issues:
By following these maintenance tips, you can ensure that your wooden dollhouse stays in great condition for years to come.

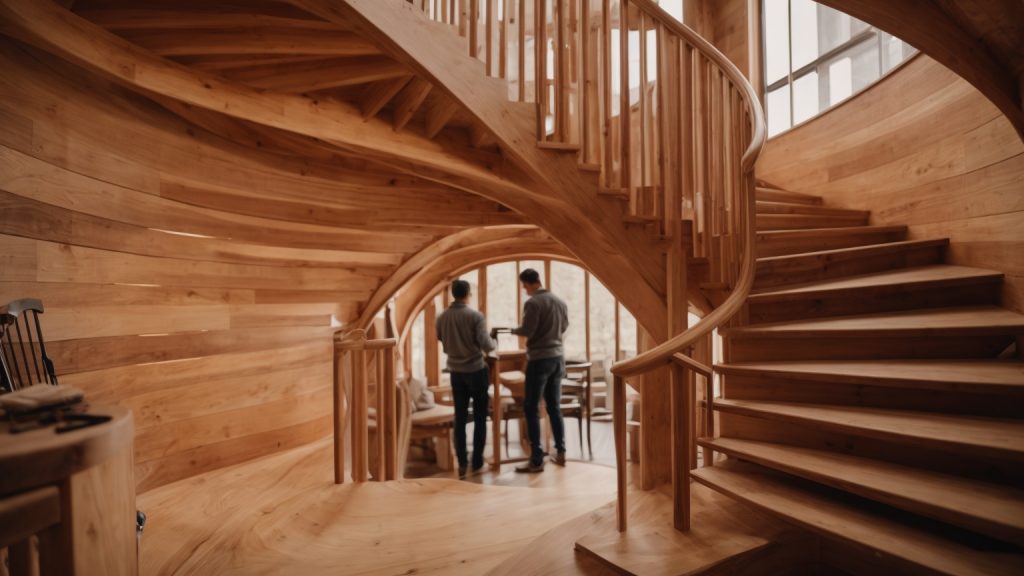
If you’re looking to add a unique touch to your home or building, building a wooden spiral staircase might be just the project you’re looking for. Spiral staircases are not only functional, but also add an attractive element to any space. With a little planning and some basic woodworking skills, you can build your own wooden spiral staircase.
The first step in building a wooden spiral staircase is to decide on the location. Spiral staircases tend to work best in tight spaces and parts of the room that don’t receive heavy foot traffic. Once you’ve chosen the location, you’ll need to design the staircase. This involves deciding on the thickness and width of the treads, as well as the steepness of the spiral. Keep in mind that the International Residential Code (IRC) limits the distance from the bottom of one tread to the bottom of the next (the rise) to 9 1/2 inches.
Once you have a design in place, it’s time to start building. Building a wooden spiral staircase can be a challenging project, but with the right tools and materials, it’s definitely doable. In the next few paragraphs, we’ll walk you through the steps involved in building a wooden spiral staircase, from laying out the spiral to installing the treads and handrail. So grab your tools and let’s get started!
If you’re looking for a stylish and space-saving solution for your home or building, a spiral staircase may be the perfect choice. Spiral staircases are not only visually appealing but also functional, allowing you to save valuable floor space. In this section, we’ll cover the basics of spiral staircases to help you understand what you need to know before you start building.
Before you start building your spiral staircase, it’s important to consider a few design factors. Here are some things to keep in mind:
Spiral staircases offer several advantages over traditional staircases. Here are a few reasons why you might want to consider a spiral staircase:
While spiral staircases offer many benefits, they also have a few drawbacks. Here are some things to keep in mind:
When it comes to building a wooden spiral staircase, you’ll need to gather a variety of materials to ensure its stability and longevity. Here are the main materials you’ll need to get started:
Choosing the right type of wood is crucial for building a sturdy and beautiful spiral staircase. Some of the best options include:
Other types of wood that can be used for spiral staircase construction include cherry, mahogany, and walnut. Be sure to choose a wood that will complement the overall design of your home or building.
In addition to the wood itself, you’ll need a variety of fasteners and hardware to ensure that your spiral staircase is secure and stable. Some of the most important items include:
Be sure to choose high-quality fasteners and hardware to ensure that your spiral staircase is safe and secure for years to come.
Before starting to build your wooden spiral staircase, you need to design it properly to ensure it fits your space and meets your needs. Here are some tips to help you design your staircase.
The first step in designing your spiral staircase is determining the dimensions. Measure the height from the floor to the ceiling where you want to install your staircase. This measurement will determine the number of steps you need. The standard height for each step is between 7 and 8 inches.
Next, measure the diameter of the space where you want to install your staircase. The diameter will determine the size of the center pole and the treads. The minimum diameter for a spiral staircase is 5 feet.
Once you have determined the height and diameter, you can use a spiral staircase calculator to determine the number of steps, the size of the center pole, and the size of the treads.
After determining the dimensions, create a blueprint of your staircase. The blueprint should include the height, diameter, number of steps, size of the center pole, and size of the treads. You can use software such as SketchUp or AutoCAD to create a 3D model of your staircase.
When creating your blueprint, consider the placement of your staircase. Spiral staircases work best in tight spaces and parts of the room that don’t receive heavy foot traffic, such as corners. You should also consider the aesthetic of your staircase and choose a design that complements your home’s style.
In conclusion, designing your wooden spiral staircase is an important step in the building process. By determining the dimensions and creating a blueprint, you can ensure that your staircase fits your space and meets your needs.
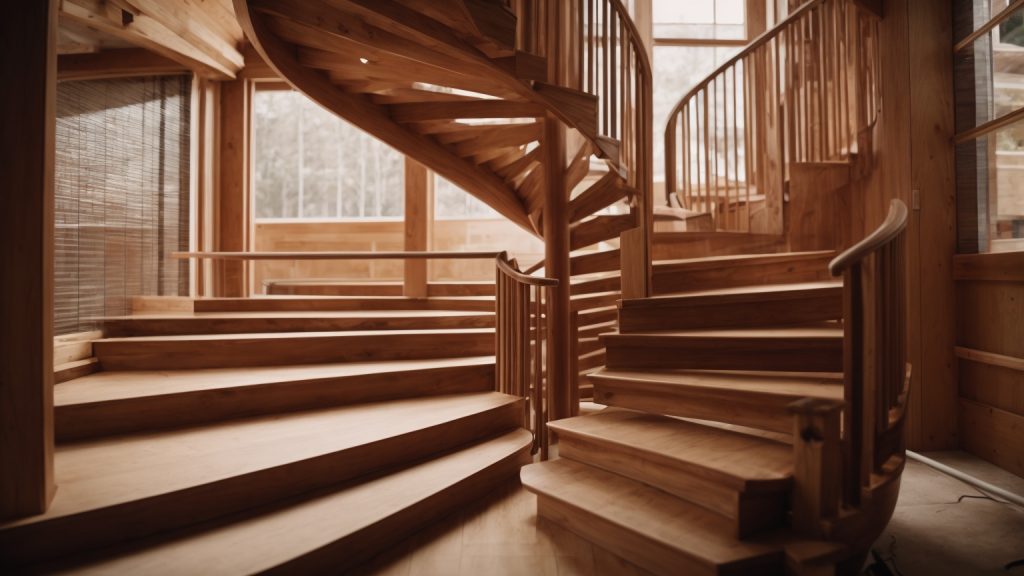
Building a wooden spiral staircase can seem like a daunting task, but with the right tools and materials, you can create a beautiful and functional staircase that will last for years to come. In this section, we will walk you through the steps of building a wooden spiral staircase, including cutting the wood, assembling the stairs, and installing the handrail.
The first step in building your wooden spiral staircase is to cut the wood to the correct size and shape. You will need to cut the center post, the risers, and the treads to the appropriate length and angle. It is important to measure carefully and double-check your measurements before making any cuts.
To cut the wood, you will need a saw, such as a circular saw or a jigsaw, and a straight edge or a template to guide your cuts. You may also want to use a miter saw or a table saw for more precise cuts.
Once you have cut all of your wood to the correct size and shape, you can begin assembling the stairs. Start by attaching the risers to the center post, using screws or bolts to secure them in place. Then, attach the treads to the risers, making sure they are level and evenly spaced.
As you assemble the stairs, it is important to check for any gaps or unevenness and make adjustments as needed. You may also want to sand or finish the wood to give it a smooth and polished look.
The final step in building your wooden spiral staircase is to install the handrail. The handrail provides safety and support as you climb the stairs and can also add a decorative touch to your staircase.
To install the handrail, you will need to drill holes in the center post and attach the handrail brackets. Then, slide the handrail onto the brackets and secure it in place with screws or bolts.
Overall, building a wooden spiral staircase requires patience, precision, and attention to detail. By following these steps and taking the time to do it right, you can create a beautiful and functional staircase that will enhance the look and feel of your home.
Once you have completed the installation of your wooden spiral staircase, it is important to sand and finish it properly. Sanding the stairs will help to smooth out any rough spots or splinters, and finishing will protect the wood from moisture and other damage.
Start by sanding the stairs with a fine-grit sandpaper, working your way up to a higher grit for a smoother finish. Be sure to sand the treads, risers, and balusters, as well as any other exposed wood surfaces.
Next, apply a finish to the stairs to protect the wood. There are many different types of finishes available, including varnish, stain, and polyurethane. Choose the finish that best suits your needs and apply it according to the manufacturer’s instructions.
Before using your new spiral staircase, it is important to perform a safety check to ensure that it is secure and stable. Here are a few things to check:
Performing these safety checks will help to ensure that your new wooden spiral staircase is safe and secure for you and your family to use.

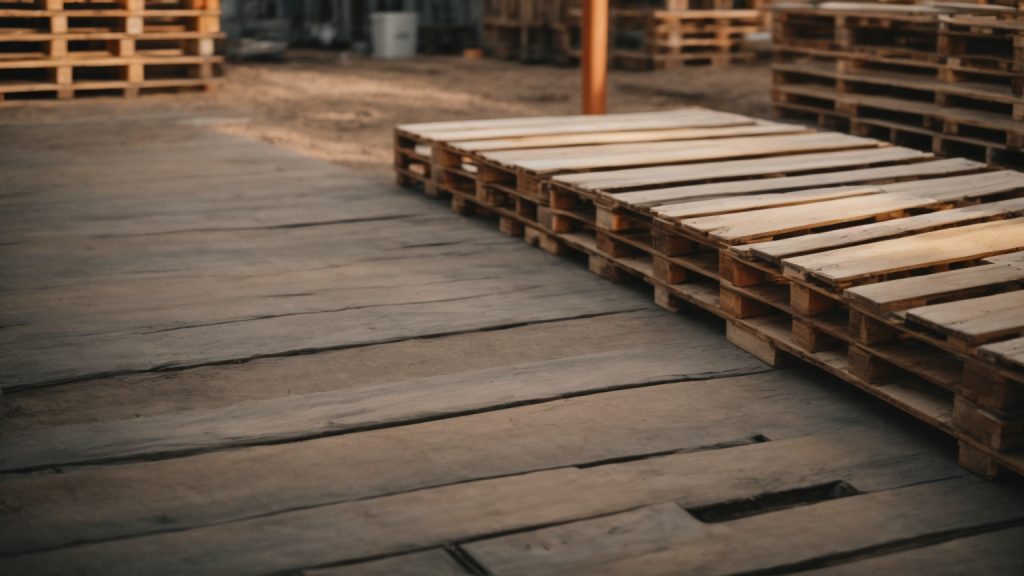
Do you have a pile of wooden pallets taking up space in your yard or warehouse? Getting rid of them can seem like a daunting task, but it doesn’t have to be. With a little effort and creativity, you can dispose of your pallets in an eco-friendly and cost-effective way.
One option is to recycle them. Many local recycling centers accept wood pallets, so you can drop them off and give them a second life. This not only keeps them out of the landfill but also reduces the demand for new trees to be cut down for pallet production.
Another option is to sell them. Even if your pallets are in less-than-perfect condition, they can still fetch a competitive price. Some companies even offer pick-up services, making it easy to clear out your space quickly. Before pricing your pallets, consider factors such as their condition and the current market demand.
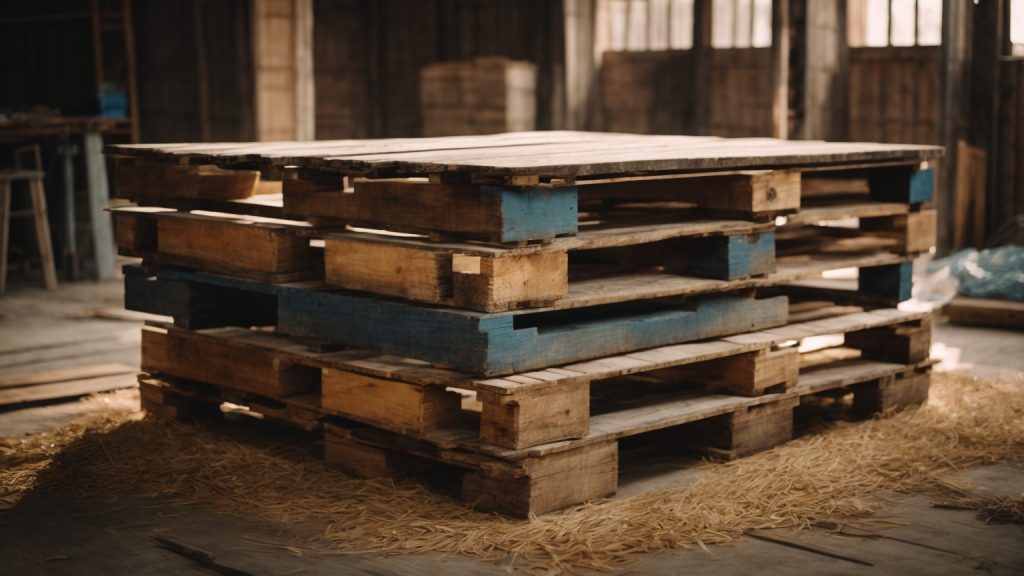
If you work in a warehouse, construction site, or any industry that involves shipping and receiving goods, you are likely familiar with wooden pallets. Wooden pallets are a popular choice for transporting goods due to their durability and affordability. In this section, we will discuss the basics of wooden pallets, including their construction, size, and weight capacity.
Wooden pallets are typically made from hardwood or softwood and consist of a top deck, bottom deck, and stringers. The top and bottom decks are the flat surfaces of the pallet, and the stringers are the long, narrow boards that run perpendicular to the deck boards. The stringers are what support the weight of the goods on the pallet and allow forklifts and pallet jacks to lift and move the pallet.
The most common size for wooden pallets in the United States is 48 inches by 40 inches. However, there are many other sizes available, ranging from small pallets used for retail displays to large pallets used for industrial machinery. When disposing of wooden pallets, it is important to know the size of the pallets you have to ensure that you choose the appropriate disposal method.
The weight capacity of a wooden pallet depends on several factors, including the type of wood used, the construction of the pallet, and the size of the pallet. As a general rule, a standard 48-inch by 40-inch wooden pallet can hold up to 4,600 pounds. However, it is important to note that this weight capacity can vary depending on the specific pallet and the goods being transported.
In summary, wooden pallets are a common and essential part of many industries. Understanding the construction, size, and weight capacity of wooden pallets can help you choose the appropriate disposal method and ensure that your goods are transported safely and efficiently.
If you have old wooden pallets lying around, you may wonder why you should bother getting rid of them. After all, they’re just pieces of wood, right? Well, there are actually several good reasons why you should dispose of your wooden pallets properly.
One of the most important reasons to get rid of wooden pallets is safety. Pallets that are damaged or in disrepair can be a hazard to anyone who comes into contact with them. Workers who pass unserviceable pallets stacked on their feet can trip and bump into them, causing injury. Untidy spaces can also be dangerous! If you leave pallets around, they can quickly turn into a danger.
Another reason to get rid of wooden pallets is to reduce clutter. Pallets can take up a lot of space, and if you have too many of them, they can make your home or business look messy and disorganized. By getting rid of your old pallets, you can free up space and create a more organized and efficient environment.
Wooden pallets can also have a negative impact on the environment if they are not disposed of properly. If you throw your pallets in the trash, they will end up in a landfill where they will take up space and contribute to pollution. However, there are many ways you can choose to get rid of unwanted pallets. You can recycle them by yourself into several different products, including mulch (a layer of material applied to the surface of the soil), animal bedding, and biofuel.
Overall, there are several good reasons why you should get rid of your wooden pallets. By doing so, you can create a safer, more organized environment while also doing your part to protect the planet.
Before disposing of your wooden pallets, it’s important to take some time to prepare them properly. This will not only make the disposal process easier, but it can also help you identify any pallets that may be reusable or recyclable. Here are some steps you can take to prepare your wooden pallets for disposal.
The first step in preparing your wooden pallets for disposal is to inspect them for damage or signs of wear and tear. Look for broken or missing boards, loose nails or screws, and any other damage that may make the pallets unsafe to use. If you find any damaged pallets, set them aside for disposal.
Next, check the condition of the wood itself. If the wood is rotting or infested with insects, it may not be suitable for reuse or recycling. In this case, it’s best to dispose of the pallets.
Once you’ve inspected your pallets, sort them into three categories: reusable, recyclable, and disposable. Reusable pallets are those that are in good condition and can be used again. Recyclable pallets are those that can be broken down and the wood reused. Disposable pallets are those that are damaged or otherwise unsuitable for reuse or recycling.
If you have reusable pallets, consider donating them to a local school or nonprofit organization. These organizations often use pallets for various projects and can put them to good use without having to purchase new lumber.
Recyclable pallets can be taken to a local recycling center or sold to wood recyclers. Some companies may even offer pick-up services for pallets, which can help clear jobsites, warehouses, and driveways quickly.
Finally, dispose of any damaged or unsuitable pallets according to your local regulations. This may involve taking them to a landfill or arranging for a special pickup service. Be sure to follow all safety guidelines when handling and disposing of wooden pallets.
When it comes to getting rid of wooden pallets, there are several methods of disposal you can choose from. Here are a few options to consider:
Recycling is one of the most popular methods of disposing of wooden pallets. If you have a local recycling center that accepts wood, you can take your wood pallets there. This is a great way to give them a second life and keep them out of the landfill. You can also check with local businesses and see if they have a recycling program in place.
Regardless of condition, pallets can be sold for competitive prices. The average price for wood pallets in like-new or good condition is $0.50 – $4 per pallet. Some companies may offer pick-up services — which can help clear jobsites, warehouses, and driveways quickly. Consider these factors when pricing your pallets:
If you have wooden pallets that are still in good condition, consider donating them to a local charity or non-profit organization. Many organizations use pallets to build structures or create furniture, so your donation could be put to good use.
Another option for getting rid of wooden pallets is to repurpose them. Pallets can be used to create a wide variety of items, including:
In conclusion, there are several methods of disposing of wooden pallets, including recycling, selling, donating, and repurposing. Choose the method that works best for you and helps keep these useful items out of the landfill.
When it comes to disposing of wooden pallets, it’s important to take some safety precautions to avoid any accidents or injuries. Here are some tips to keep in mind:
Before you start breaking down or moving wooden pallets, make sure to wear the appropriate protective gear. This includes gloves, safety glasses, and sturdy shoes to protect your hands, eyes, and feet from any potential hazards.
Using the right tools can make the process of breaking down wooden pallets much easier and safer. A pallet buster or pry bar can help you remove the boards without causing damage to the wood. Avoid using tools that are dull, rusty, or damaged, as they can be dangerous to use.
When working with wooden pallets, it’s important to be aware of your surroundings. Make sure you have enough space to move around and avoid working in areas with high foot traffic. Keep an eye out for any potential hazards, such as uneven surfaces or sharp objects.
Moving wooden pallets can be heavy and awkward, so it’s important to use proper lifting technique to avoid strain or injury. Bend your knees and lift with your legs, rather than your back. If possible, use a dolly or hand truck to help you move the pallets.
Finally, make sure to dispose of wooden pallets properly. Avoid leaving them lying around where they can cause a tripping hazard, and don’t burn them, as this can release harmful chemicals into the air. Instead, consider recycling or repurposing the pallets, or contact a waste management company to properly dispose of them.
By following these safety precautions, you can safely and effectively dispose of wooden pallets without putting yourself or others at risk.
When it comes to getting rid of wooden pallets, it’s important to be aware of local laws and regulations. Depending on where you live, there may be specific rules and guidelines that dictate how you can dispose of your pallets. Failing to follow these regulations can result in fines or other penalties, so it’s important to do your research before getting rid of your pallets.
One common regulation that you may encounter is a ban on burning wooden pallets. Burning pallets can release harmful chemicals into the air, which can be harmful to both the environment and human health. If burning is not allowed in your area, you will need to find an alternative method for disposing of your pallets.
Another regulation to be aware of is the requirement to properly label and package pallets for disposal. This may involve using specific types of containers or marking pallets with identifying information. Failure to properly label and package your pallets can result in fines or other penalties.
In addition to these regulations, you may also need to obtain permits or licenses to dispose of your pallets. This is especially true if you are disposing of large quantities of pallets or if you are using a commercial disposal service. Be sure to check with your local government or waste management authority to determine what permits or licenses you may need.
Overall, it’s important to be aware of local laws and regulations when getting rid of wooden pallets. By doing your research and following the rules, you can ensure that you dispose of your pallets safely and responsibly.

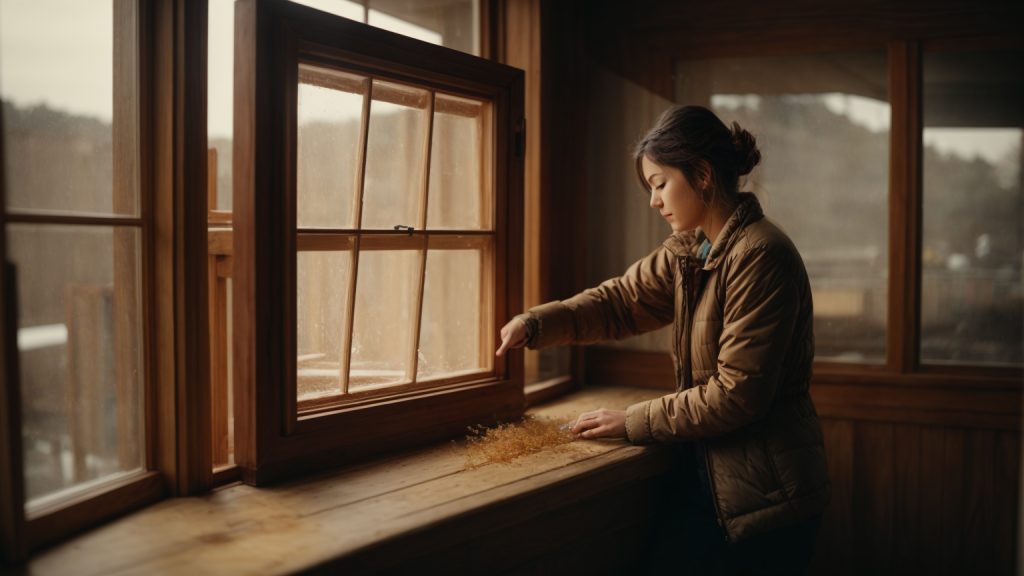
Are you struggling to open a stuck wooden window? It can be frustrating when you want some fresh air or need to close the window but it just won’t budge. Fortunately, there are several methods you can try to open a stuck wooden window without damaging it.
Before attempting any of these methods, it’s important to assess the window and determine why it might be stuck. Is it due to paint buildup, humidity, or a broken mechanism? Once you have identified the cause, you can choose the best method to address it. Some common techniques include using a putty knife to loosen the window, applying lubricant to the tracks, or gently tapping the frame with a rubber mallet.
Remember to be patient and gentle when attempting to open a stuck wooden window. Rushing or using excessive force can cause damage to the window or surrounding structure. With a little bit of effort and the right approach, you can successfully open your window and enjoy the benefits of fresh air and natural light.
If you have a wooden window that won’t budge, it can be frustrating. However, before you start trying to force it open, it’s important to understand the problem. Here are some things to consider:
The first step is to identify the type of window you have. There are several types of wooden windows, including double-hung, single-hung, casement, and awning. Each type of window has its own specific opening mechanism, so it’s important to know what you’re dealing with.
Once you know what type of window you have, you can start to identify common issues that might be preventing it from opening. Here are a few things to look out for:
By understanding the problem with your wooden window, you can take the necessary steps to fix it and get it working properly again.
When opening a stuck wooden window, it’s important to take some safety precautions to avoid injury. Here are a few things to keep in mind:
By following these safety precautions, you can minimize the risk of injury while opening a stuck wooden window.
Before attempting to open a stuck wooden window, you’ll need to gather some necessary tools. Here are some items you’ll want to have on hand:
A putty knife is a thin, flat tool that is perfect for prying open a stuck window. Look for a putty knife with a stiff blade that is at least 4 inches wide. This will give you enough leverage to pry open the window without damaging the wood.
You may need a hammer to gently tap the putty knife into the gap between the window and the frame. Look for a hammer with a small head that is easy to maneuver in tight spaces.
If your window has screws holding it in place, you’ll need a screwdriver to remove them. Look for a screwdriver with a comfortable grip and a magnetic tip to make it easier to handle small screws.
A lubricant can help loosen up any dirt or debris that may be causing your window to stick. Look for a silicone-based lubricant that won’t damage the wood or leave behind a residue.
Finally, be sure to wear safety gear when attempting to open a stuck window. Gloves will protect your hands from splinters and cuts, while safety goggles will protect your eyes from flying debris.
By having these tools on hand, you’ll be well-equipped to tackle a stuck wooden window and get it open in no time.
If you have a stuck wooden window, don’t worry. There are several ways to open it. In this guide, we will take you through the process step-by-step.
The first step is to examine the window and see if it can be opened. Look for any visible obstructions, like dirt or debris, that may be preventing the window from opening. If there are no obstructions, try loosening the window by tapping it gently with a hammer. This can help to break up any paint or dirt that may be holding it in place.
If tapping the window doesn’t work, the next step is to use a pry bar. Place the pry bar between the window frame and the sill and gently pry the window open. Be careful not to damage the window or the frame. If the window still won’t budge, try prying it from the top or bottom.
If the window is still stuck, the final step is to apply a lubricant. There are several types of lubricants that can be used, including silicone spray and WD-40. Spray the lubricant around the edges of the window and let it sit for a few minutes. Then try to open the window again.
By following these steps, you should be able to open your stuck wooden window. If the window still won’t open, it may be time to call a professional for help.
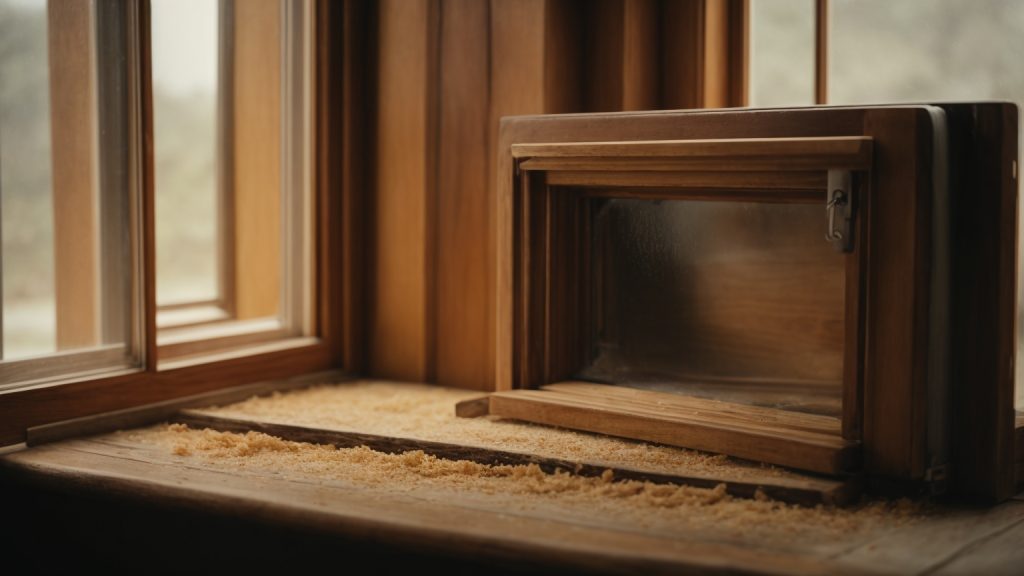
If you have an old wooden window that won’t open, it’s likely that it has been painted shut. Over time, layers of paint can build up and seal the window closed. But don’t worry, with a little bit of effort, you can free up your window and get some fresh air flowing into your home.
Here are some steps you can take to deal with paint-sealed windows:
Remember to take your time and be patient when dealing with a stuck window. Rushing the process can cause damage to the window or frame. With a little bit of effort, you can successfully free up your paint-sealed window and enjoy the fresh air.
To prevent your wooden windows from sticking in the future, regular maintenance is key. This can include:
Another key factor in preventing your wooden windows from sticking is proper weatherstripping. Weatherstripping helps to seal your windows against drafts and moisture, but it can also cause them to stick if it is not installed properly.
By following these simple maintenance and weatherstripping tips, you can help prevent your wooden windows from sticking in the future and keep them operating smoothly for years to come.
In most cases, opening a stuck wooden window can be done with a little bit of effort and the right tools. However, there are times when it may be best to seek professional help. Here are some situations where you may want to consider calling in a pro:
If the window is damaged, it may be best to call a professional. Attempting to force a damaged window open can cause further damage, which may end up costing you more in the long run. A professional can assess the damage and determine the best course of action.
If the window is painted shut, it can be difficult to open without damaging the frame or the sash. While there are DIY methods for removing paint from windows, it can be a time-consuming and messy process. A professional can safely remove the paint and restore the window to its proper function.
If you’re not comfortable using tools or don’t have the right equipment, it may be best to leave the job to a professional. Attempting to open a stuck window without the proper tools or experience can be dangerous and may result in injury or damage to the window.
In general, if you’re not confident in your ability to open a stuck wooden window, it’s best to call a professional. They have the knowledge, experience, and tools to safely and effectively restore your window to its proper function.

Looking to build your own wooden desk? Whether you’re a seasoned woodworker or a beginner, building your own desk can be a fun and rewarding project. Not only will you end up with a custom piece of furniture that perfectly fits your needs and style, but you’ll also have the satisfaction of knowing that you built it yourself.
Before you get started, you’ll need to decide on the type of desk you want to build. Do you want a simple, minimalist desk that can be built in a weekend, or are you looking for a more elaborate design that will require more time and skill? You’ll also need to consider the size and shape of your desk, as well as the type of wood you want to use. Once you’ve made these decisions, you’ll be ready to start gathering your materials and tools and getting to work on your new desk.
Woodworking is a rewarding and fulfilling hobby that allows you to create beautiful and functional pieces of furniture. However, before you start building your own wooden desk, there are a few basics you need to understand.
There are many different types of wood available, each with its own unique characteristics. Some popular types of wood used in woodworking include:
When choosing wood for your desk, consider factors such as strength, durability, and appearance.
Woodworking can be dangerous if proper safety measures are not taken. Always wear protective gear, such as safety glasses and earplugs, when working with power tools. Additionally, make sure to follow all safety instructions for each tool you use. Never rush or take shortcuts when working with wood.
To build a wooden desk, you will need a few essential tools, including:
Other useful tools include a measuring tape, square, and clamps.
By understanding the basics of woodworking, you will be well on your way to building your own beautiful and functional wooden desk. Remember to always prioritize safety and take your time to ensure a high-quality finished product.
When it comes to designing your own wooden desk, there are a few key things to consider. By taking the time to think through these factors, you can create a desk that is both functional and visually appealing. Here are some sub-sections to help guide you through the design process:
The first step in designing your wooden desk is to decide on the size. Consider the space where the desk will be placed and how much room you need to work. You’ll want to make sure that your desk is large enough to accommodate all of your tools and equipment, but not so large that it takes up too much space in the room.
To help you determine the right size for your desk, take measurements of the area where it will be placed. Consider the height of the desk as well, and make sure that it is comfortable for you to work at for extended periods of time.
The style of your wooden desk is another important factor to consider. Do you want a modern, minimalist desk, or something more traditional? Think about the overall aesthetic of the room where the desk will be placed, and try to choose a style that complements it.
You’ll also want to consider the type of wood you’ll use for your desk. Different woods have different grains and colors, so choose one that matches your personal style and the look you’re going for.
Once you have an idea of the size and style of your desk, it’s time to create a blueprint. This will help you visualize the final product and ensure that everything fits together properly.
You can create a blueprint using software like SketchUp, or you can draw it by hand. Make sure to include all of the necessary measurements and details, including the size of the desk, the placement of drawers and shelves, and any other features you want to include.
By taking the time to design your wooden desk properly, you can create a beautiful and functional piece of furniture that will last for years to come.
Before you start building your wooden desk, you need to prepare the wood. This involves selecting the right type of wood, cutting it to size, and sanding it to create a smooth surface.
When selecting wood for your desk, you want to choose a type of wood that is sturdy and durable. Some popular options include oak, maple, and pine. You should also consider the color and grain pattern of the wood to ensure it matches your desired aesthetic.
Once you have selected the wood, you need to measure and cut it to the appropriate size.
To cut the wood, you will need a saw. A miter saw or handsaw will work for this task. Make sure to measure the wood carefully before cutting to ensure accuracy.
If you are not comfortable using a saw, you can have the wood cut to size at a hardware store or lumber yard.
Once the wood is cut to size, you need to sand it to create a smooth surface. Start with a coarse-grit sandpaper, such as 120-grit, and work your way up to a finer grit, such as 180-grit.
Make sure to sand with the grain of the wood to avoid creating scratches or marks. You can use a sanding block or an orbital sander to make the process easier.
After sanding, wipe the wood with a clean cloth to remove any dust or debris. Your wood is now ready to be assembled into a desk.
Once you have all the pieces of your wooden desk cut and sanded, it’s time to put them together. This section will guide you through the process of assembling your desk. We will cover two sub-sections: Joining the Pieces and Securing the Structure.
The first step in assembling your desk is to join the pieces together. You will need to use wood glue and clamps to ensure a strong bond between the pieces. Follow these steps to join the pieces:
Once the pieces are joined together, you will need to secure the structure of the desk. This will ensure that your desk is sturdy and can hold the weight of your computer, books, and other items. Follow these steps to secure the structure:
Congratulations! You have successfully assembled your wooden desk.
Now that you have assembled your wooden desk, it’s time to apply the finish. This will not only protect the wood but also enhance its beauty. There are various finishes you can choose from, such as stains, oils, and varnishes. Here are some tips to help you apply the finish:
To make your wooden desk more functional and comfortable, you can add some accessories. Here are some ideas:
With these finishing touches, your wooden desk will be ready for you to use and enjoy.

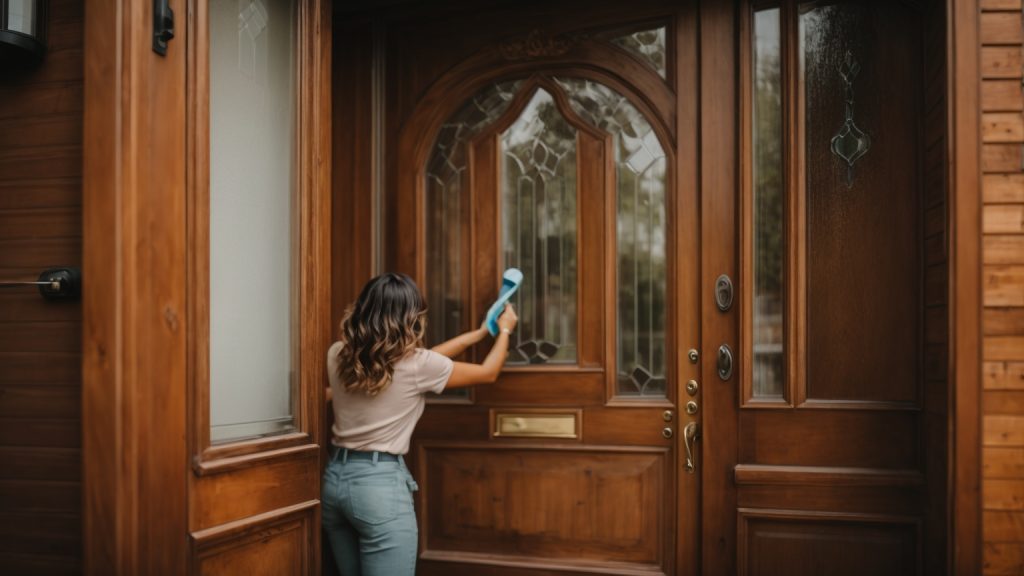
If you have a wooden front door, you know how beautiful they can look. However, over time, they can become dirty and stained, and it can be challenging to know how to clean them without damaging the wood. In this article, we will provide you with some tips on how to clean your wooden front door effectively.
One of the most important things to keep in mind when cleaning a wooden front door is to avoid using harsh chemicals or abrasive materials. Instead, opt for a mild dish soap mixed with hot water and a non-abrasive sponge or brush. Be sure to rinse the door thoroughly with hot water and dry it with a clean, dry cloth to avoid water damage. If there are stubborn stains, you can try using a soft-bristle scrub brush, but be careful not to damage the surface of the wood.
Another essential aspect to consider when cleaning a wooden front door is to work from the top downwards. This will help prevent dirt and debris from getting trapped in crevices or ledges. Don’t forget to clean around the edges of the door and the door frame, as these areas can also accumulate dirt and grime. By following these tips, you can keep your wooden front door looking beautiful for years to come.
Your front door is the first thing that guests see when they visit your home. It’s also one of the first things that you see when you come home after a long day. A clean and well-maintained front door can make a big difference in the overall appearance of your home. That’s why it’s important to take the time to clean your wooden front door regularly.
Wooden front doors are a popular choice for homeowners because they are durable and add a touch of elegance to any home. However, if not properly maintained, wooden doors can become damaged over time. Dirt, dust, and debris can accumulate on the door’s surface, causing it to look dull and worn. Additionally, exposure to sunlight and moisture can cause the wood to warp, crack, or fade.
Regular cleaning and maintenance can help prevent these issues and extend the life of your wooden front door. Here are some reasons why cleaning your wooden front door is important:
A clean and well-maintained front door can instantly improve the curb appeal of your home. It creates a welcoming atmosphere for guests and adds value to your property. A dirty and worn-out door, on the other hand, can make your home look neglected and uninviting.
Wooden front doors are exposed to the elements, which can cause damage over time. Dirt, dust, and debris can scratch the surface of the wood, while moisture can cause it to warp or rot. Regular cleaning and maintenance can help protect the wood from these elements and keep it looking its best.
Replacing a wooden front door can be expensive. Regular cleaning and maintenance can help prevent damage and extend the life of your door, saving you money in the long run. It’s a small investment that can pay off big in the future.
In conclusion, cleaning your wooden front door is an important part of home maintenance. It improves curb appeal, protects the wood, and saves you money in the long run. With a little bit of effort, you can keep your wooden front door looking beautiful for years to come.
Cleaning your wooden front door is a simple task that requires a few basic materials and tools. Here are the things you need to get started:
When it comes to cleaning your wooden front door, it’s important to choose the right cleaning solutions. Avoid using harsh chemicals or abrasive cleaners that can damage the wood. Instead, opt for mild, non-abrasive solutions that are safe for use on wood surfaces. Here are some options to consider:
Before using any cleaning solution, test it on a small, inconspicuous area of your door to make sure it doesn’t cause any damage.
In addition to the right cleaning solutions, you’ll also need a few essential cleaning tools to get the job done right. Here are the tools you’ll need:
Using a soft-bristled brush or sponge will help prevent scratches or damage to the wood surface. A microfiber or lint-free cloth is ideal for wiping down the door after cleaning. A bucket of warm water is necessary for diluting your cleaning solution and rinsing the door after cleaning.
Before cleaning your wooden front door, use a vacuum cleaner with a brush attachment to remove any loose dirt, dust, or cobwebs. A duster or feather duster can also be used to remove any debris from hard-to-reach areas.
With the right materials and tools, cleaning your wooden front door is a breeze.
Before you start cleaning your wooden front door, it is essential to prepare the door properly. This will ensure that you don’t damage the wood or any other features on the door during the cleaning process. Here are a few steps you should take before you start cleaning:
The first step is to remove any dust and debris from the surface of the door. You can use a soft-bristled brush or a vacuum cleaner with a soft brush attachment to remove the dust and cobwebs from the door. Be sure to pay attention to the corners and crevices of the door, where dust and cobwebs tend to accumulate.
If there are any areas on the door that you don’t want to get wet or that are particularly sensitive, you should tape them off before you start cleaning. You can use painter’s tape or masking tape to cover any areas that you want to protect. This might include glass panels, hardware, or decorative features on the door.
Once you have removed the dust and debris and taped off any areas that need protection, you are ready to start cleaning your wooden front door. By taking these steps, you can ensure that you don’t accidentally damage your door while trying to clean it.
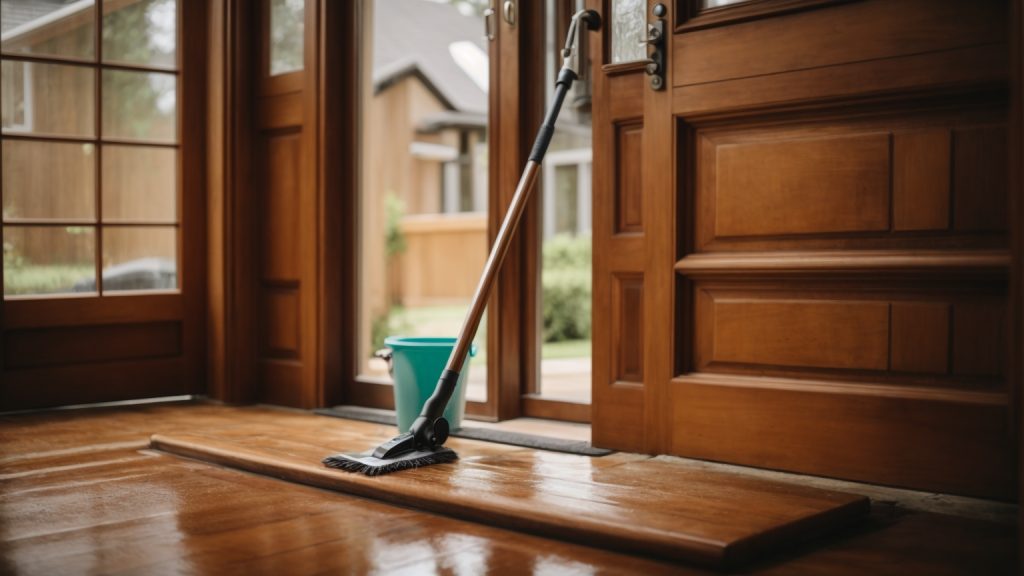
Cleaning your wooden front door is an essential task to keep it looking great and maintaining its longevity. Here is a step-by-step guide to help you clean your wooden door effectively.
First, prepare a cleaning solution by mixing warm water and a mild dish soap in a bucket. You can also add a quarter cup of baking soda for extra cleaning power. Dip a soft sponge or cloth into the solution and wring it out until it’s damp but not dripping.
Start scrubbing the door in the direction of the wood grain using the damp sponge or cloth. Use less pressure on painted wood doors but put some muscle into it for stained or varnished front doors. Pay extra attention to areas with built-up dirt or stains. For tough stains, you can use mineral spirits, but be sure to test it on a small, inconspicuous area first.
After scrubbing the door, rinse it with clean water using a bucket or a hose. Be careful not to get water on any hardware or glass. Once you’ve rinsed the door thoroughly, dry it with a clean, dry cloth or towel. Make sure to dry any water that may have collected in the corners or edges of the door.
By following these simple steps, you can keep your wooden front door looking clean and beautiful for years to come.
Keeping your wooden front door clean and well-maintained is essential to ensure its longevity and beauty. Regular cleaning and applying protective sealant are two key maintenance tips that can help you achieve this goal.
Dust and dirt can accumulate on your wooden front door over time, making it look dull and unappealing. To prevent this, it is important to clean your door regularly. Here are some steps you can follow:
In addition to regular cleaning, applying a protective sealant can help protect your wooden front door from the elements and keep it looking great for years to come. Here are some steps you can follow:
By following these maintenance tips, you can keep your wooden front door looking beautiful and ensure its longevity. Remember to clean your door regularly and apply a protective sealant to keep it in top condition.
If you encounter some tough stains or scratches on your wooden front door, don’t worry. Here are some troubleshooting tips to help you deal with common issues.
If you have tough stains on your wooden front door, such as ink or grease, you can try one of the following methods:
If you have scratches on your wooden front door, you can try one of the following methods:
Remember, prevention is the best way to avoid tough stains and scratches on your wooden front door. Regular cleaning and maintenance can help keep your door looking great for years to come.
Cleaning your wooden front door is a simple task, but it is important to take some safety precautions to avoid any accidents or damages. Here are some tips to keep in mind before you start cleaning your wooden front door:
By following these safety precautions, you can ensure that your cleaning process goes smoothly and safely.

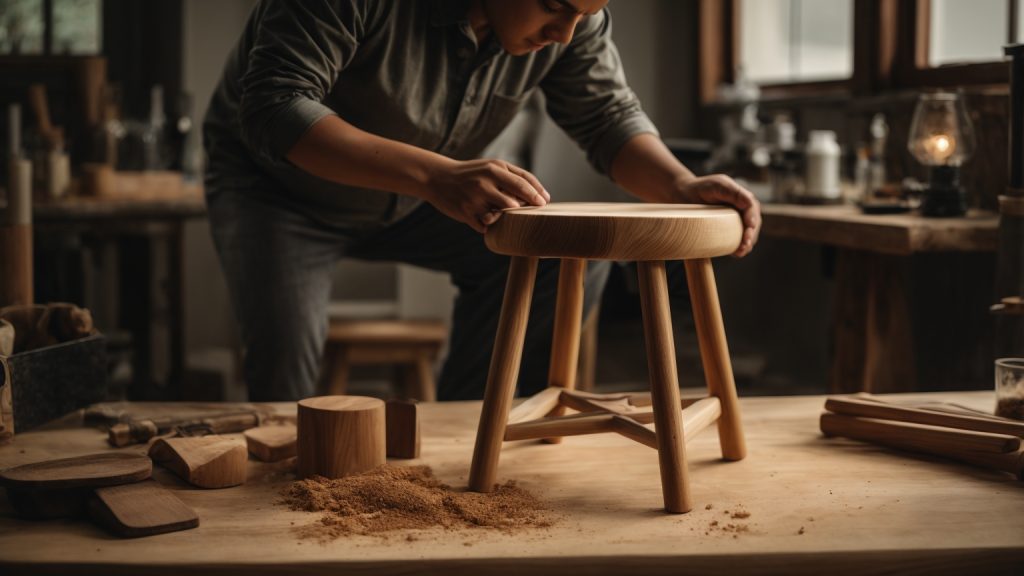
Are you looking to add a touch of rustic charm to your home decor? One easy way to achieve this is by making your own wooden stool. Not only is it an affordable option, but it also allows you to customize the design to fit your personal style.
To get started, you’ll need to gather the necessary materials and tools, including wood, a saw, drill, screws, and sandpaper. Once you have everything you need, the first step is to plan out your project and create a design that suits your needs. From there, it’s a matter of cutting the wood to size, assembling the pieces, and sanding down any rough edges.
Whether you’re a seasoned woodworker or a beginner looking for a fun DIY project, making a wooden stool is a great way to flex your creative muscles and add a functional piece of furniture to your home. So why not give it a try and see what beautiful and unique stool you can create?
When it comes to building a wooden stool, choosing the right wood type is crucial to ensure the durability and longevity of your project. Here are the two main categories of wood types:
Hardwood is known for its strength, durability, and resistance to wear and tear. It comes from deciduous trees, which are trees that lose their leaves annually. Hardwood is generally more expensive than softwood due to its slower growth rate. Some common types of hardwood used in woodworking include:
Hardwood is an excellent choice for building a stool that will last for years to come. It is also perfect for projects that require intricate designs or carvings.
Softwood comes from coniferous trees, which are evergreen trees that have needles instead of leaves. Softwood is generally less expensive than hardwood, making it a popular choice for budget-friendly projects. Some common types of softwood used in woodworking include:
Softwood is often used for outdoor projects such as decks, fences, and garden furniture. However, it is not as durable as hardwood and may require more maintenance over time.
When choosing a wood type for your stool, consider the look, feel, and durability of the wood. Hardwood is a great choice for a long-lasting stool, while softwood is perfect for a more affordable option.
When it comes to making a wooden stool, having the right tools is crucial to achieving a polished and professional finish. Here are the essential tools you’ll need for this project.
A saw is an essential tool for any woodworking project, and making a wooden stool is no exception. A handsaw or circular saw can be used to cut the wood to the correct size and shape. A miter saw is also useful for making angled cuts. Make sure to choose a saw with sharp teeth and a comfortable handle to make the job easier.
A hammer is used to drive nails into the wood to secure the stool’s various parts together. A claw hammer is the most common type of hammer used for woodworking projects. It has a flat surface on one end for driving nails and a claw on the other end for removing them. Choose a hammer with a comfortable grip that is easy to handle.
Screws are an alternative to nails for attaching the stool’s various parts together. A drill is needed to create pilot holes for the screws. A cordless drill is a convenient option as it allows for greater mobility while working. Choose screws that are the appropriate length and thickness for the wood you’re using.
Overall, investing in high-quality tools is important for any woodworking project, including making a wooden stool. Having the right tools will make the job easier and result in a more polished finished product.
Before you start building your wooden stool, you need to create a design that fits your needs and preferences. Here are a few tips to help you with the process:
The first step in designing your stool is to consider its purpose. Will it be used as a seat, a footrest, or a decorative item? The purpose of your stool will determine its height, size, and shape. For example, if you plan to use it as a seat, you’ll want to make sure it’s comfortable to sit on and the right height for the intended use.
The next step is to choose the material for your stool. Wood is a popular choice for its durability, natural beauty, and versatility. There are many types of wood to choose from, each with its own unique characteristics. Some popular options include oak, maple, cherry, and walnut. You can also choose to use reclaimed wood for a more rustic look.
Once you have an idea of the purpose and materials, it’s time to sketch your design. You don’t need to be an artist to create a simple sketch of your stool. Start by drawing a rough outline of the stool’s shape and size. Then, add details such as the legs, seat, and any decorative elements. You can also use a computer program or app to create a more detailed design.
Finally, when designing your stool, consider ergonomics. Ergonomics is the study of how people interact with their environment and the tools they use. When designing your stool, think about how it will be used and make sure it’s comfortable and safe. For example, if you plan to use it as a seat, make sure the seat is wide enough and the legs are sturdy enough to support the weight of the user.
By following these tips, you can create a design for your wooden stool that is both functional and beautiful.
To make a wooden stool, the first step is to cut the wood to the appropriate dimensions. Here are the steps to follow:
Remember to always work in a well-ventilated area and follow proper safety precautions when cutting and sanding wood. If you are unsure about any of the steps, don’t hesitate to ask for help or consult a woodworking guide. With a little practice and patience, you can create a beautiful and functional wooden stool that will last for years to come.
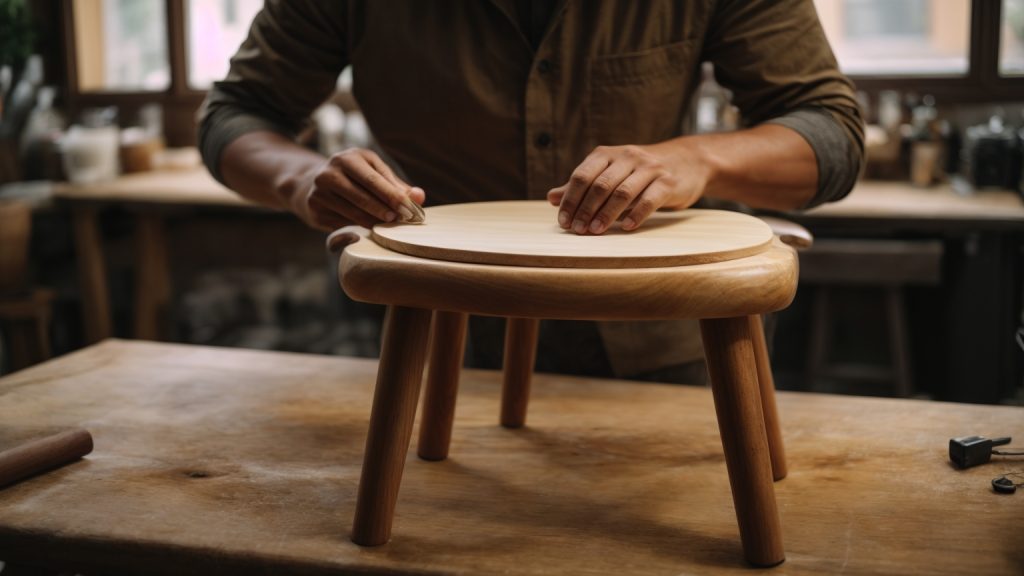
Once you have completed all the necessary steps to create the legs, seat, and stretchers, it’s time to put everything together and assemble your wooden stool. This section will guide you through the process of connecting the legs and attaching the seat, so you can have a sturdy and functional stool.
To connect the legs, you will need to insert the stretchers into the holes you previously drilled in the legs. It’s important to make sure that the stretchers are level and flush with the legs before proceeding. You can use a level or a square to check for alignment.
Once the stretchers are in place, you can secure them to the legs using wood glue and screws. Make sure to pre-drill the holes for the screws to avoid splitting the wood. You can use clamps to hold the pieces in place while the glue dries.
Attaching the seat is the final step in assembling your wooden stool. To do this, you will need to place the seat on top of the legs and stretchers. Make sure it is centered and level before proceeding.
Next, drill holes through the seat and into the stretchers to prepare for attaching the seat. You can use wood screws to secure the seat to the stretchers. Again, make sure to pre-drill the holes to avoid splitting the wood.
Once the seat is attached, you can add any finishing touches, such as sanding or staining, to complete your wooden stool.
Congratulations! You have successfully assembled your own wooden stool. Now you can enjoy the satisfaction of having created a functional piece of furniture with your own hands.
Adding the finishing touches to your wooden stool can make all the difference in its appearance and durability. Here are some tips to help you get the best results.
Before applying any finish, make sure to sand your stool thoroughly. This will help to smooth out any rough spots and ensure that the finish adheres properly. Start with a coarse grit sandpaper, such as 80 or 100, and work your way up to a finer grit, such as 220. Be sure to sand with the grain of the wood to avoid scratches.
Once you have finished sanding, use a tack cloth to remove any dust or debris from the surface of the stool. This will help to ensure a smooth finish.
When it comes to finishing your wooden stool, you have a few options. You can choose to paint it, stain it, or leave it natural. Each option has its own benefits and drawbacks.
If you decide to paint your stool, be sure to use a high-quality paint that is suitable for wood. You may need to apply several coats to achieve the desired coverage. Once the paint is dry, you can add a clear coat of polyurethane to protect the surface.
If you prefer the look of natural wood, you can choose to stain your stool. This will enhance the natural beauty of the wood while also providing some protection. Be sure to choose a stain that is suitable for the type of wood you are using. Apply the stain with a brush or rag, following the grain of the wood. Once the stain is dry, you can add a clear coat of polyurethane to protect the surface.
No matter which finish you choose, be sure to follow the manufacturer’s instructions carefully. This will help to ensure a beautiful and long-lasting finish for your wooden stool.
When working with wood, safety should always be your top priority. Here are some tips to help you stay safe while making your wooden stool.
It is important to handle your tools properly to avoid injuries. Always keep your tools sharp and in good condition, and use them only for their intended purpose. When using power tools, make sure to follow the manufacturer’s instructions and wear appropriate safety gear, such as safety goggles, ear protection, and a dust mask.
When handling sharp tools such as chisels, be sure to keep your hands and fingers away from the cutting edge. Use a clamp or vise to secure your workpiece, and never hold it in your hand while cutting or drilling.
Wearing protective gear can help prevent injuries while working with wood. Here are some items you should consider wearing:
Remember to always use your tools and protective gear as instructed, and never take shortcuts when it comes to safety. With these tips in mind, you can create a beautiful and functional wooden stool while staying safe in the workshop.

Are you looking for a fun and challenging puzzle game to play? Look no further than wooden block puzzles! These puzzles consist of a square or rectangular board with empty spaces to place blocks of various shapes, such as triangles, squares, and rectangles. The goal of the game is to fit the blocks onto the board to complete rows or columns.
Playing a wooden block puzzle is a great way to exercise your brain and improve your problem-solving skills. The game requires you to think ahead and plan your moves carefully in order to fit all of the blocks onto the board. It’s also a great way to relax and unwind after a long day, as the simple yet satisfying gameplay can be very calming. Whether you’re a seasoned puzzle pro or a beginner looking for a new challenge, wooden block puzzles are sure to provide hours of entertainment.

Wooden block puzzle is a classic game that has been around for decades. It is a simple yet addictive game that requires you to fit different-shaped wooden blocks into a square board. Here are some basics to help you get started with this game:
The objective of wooden block puzzle is to fit all the wooden blocks into the square board without leaving any empty spaces. You will lose the game if you cannot fit all the blocks into the board.
The board is a square grid that is divided into smaller squares. The grid can be of different sizes, but the most common is a 10×10 grid. The board can be rotated to help you fit the blocks into the available space.
The blocks are made of different shapes and sizes. They can be rotated to help you fit them into the board. You can only fit the blocks into the board if they do not overlap with each other. Some of the common shapes of the blocks include squares, rectangles, and L-shaped blocks.
In conclusion, wooden block puzzle is a fun and challenging game that can help improve your problem-solving skills. With these basics, you can start playing and enjoying this classic game.
Wooden block puzzle is a fun and challenging game that can be played by anyone. If you are new to the game, this section will guide you through the process of setting up the game and getting started.
The first thing you need to do is choose your game board. Wooden block puzzles typically come with a square or rectangular board with empty spaces to place the blocks. The size of the board may vary depending on the brand and model of the game.
Once you have your game board, you need to choose your blocks. The game comes with blocks of different shapes, such as triangles, squares, and rectangles. These blocks need to be placed on the board to complete rows or columns.
To start the game, place the blocks on the board. You can rotate the blocks to fit them into the empty spaces. The goal of the game is to complete rows or columns of blocks to score points.
Once you have placed the blocks on the board, you can start playing. The game is played by moving the blocks around the board to complete rows or columns. You can also use boosters to destroy blocks and score more points.
With these simple steps, you can set up the game and start playing wooden block puzzle. Have fun and good luck!
Wooden block puzzle is a simple and addictive game that is easy to learn but challenging to master. The objective of the game is to place different shaped wooden blocks on a board to create a complete row or column. Once a row or column is complete, it disappears and makes room for more blocks. The game ends when there is no more space on the board to place the blocks.
Here are the rules of the game:
Remember, practice makes perfect, so keep playing to improve your skills and beat your high score.
When it comes to playing wooden block puzzle games, there are a few strategies you can use to increase your chances of winning and achieving a high score. Here are some tips to help you succeed:
One of the best strategies to use when playing wooden block puzzle games is to start from the corners. By placing blocks in the corners first, you can create a solid foundation for the rest of the blocks to fit into. This also gives you more time to strategize your moves and plan ahead.
Another important strategy is to focus on clearing lines both vertically and horizontally. This is the ultimate goal of the game, and you earn points each time you clear a line. So, aim to create complete lines whenever possible, and try to avoid leaving gaps that can’t be filled.
Each block in a wooden block puzzle game has a different shape, and it’s important to use them wisely. Try to fit the larger blocks in first, as they can take up more space and create more opportunities for clearing lines. Use the smaller blocks to fill in gaps and create complete lines.
One of the most important strategies for winning at wooden block puzzle games is to plan your moves ahead of time. Take a few seconds to consider your options before placing a block, and try to anticipate where you’ll need to place the next one. This can help you avoid getting stuck with a block that doesn’t fit anywhere.
By using these strategies, you can increase your chances of winning at wooden block puzzle games and achieve a higher score. So, start practicing and see how far you can go!
Playing wooden block puzzle can be a fun and challenging experience, but there are some common mistakes that can make it frustrating. Here are some things to avoid:
One of the most common mistakes in wooden block puzzle is not rotating the blocks. Sometimes, it may seem like the blocks don’t fit, but a simple rotation can make all the difference. Make sure to try all possible rotations before giving up on a block.
Another mistake is trying to force a block into a space where it doesn’t fit. This can damage the block or the puzzle itself. If a block doesn’t fit, try a different one or rotate it to see if it fits in another way.
It’s important to start with the edges when playing wooden block puzzle. The edges provide a frame for the puzzle and can help you visualize the rest of the pieces. If you ignore the edges, you may find it difficult to complete the puzzle.
Rushing through the puzzle can lead to mistakes and frustration. Take your time and think about each move before making it. This will help you avoid mistakes and make the puzzle more enjoyable.
Sorting the pieces by color or pattern can make it easier to find the right pieces for each section of the puzzle. This can save time and make the puzzle more manageable.
By avoiding these common mistakes, you can enjoy playing wooden block puzzle and improve your puzzle-solving skills.
Playing wooden block puzzle can be both fun and challenging at the same time. If you’re struggling to get the hang of it, here are some tips and tricks to help you improve:
When you first start playing, it’s best to focus on creating the edges of the puzzle. This will help you create a frame for the rest of the pieces to fit into. Once you have the edges in place, you can start filling in the center.
As you start to fill in the puzzle, look for patterns in the shapes of the pieces. Some pieces may have similar shapes or colors that can help you figure out where they go. Keep an eye out for these patterns and use them to your advantage.
Don’t be afraid to rotate the pieces to see if they fit in a different way. Sometimes a piece may look like it doesn’t fit, but a simple rotation can make all the difference. Experiment with different angles and orientations to find the right fit.
If you’re feeling frustrated or stuck, take a break and come back to the puzzle later. Sometimes taking a step back can help you see the puzzle in a new light and find a solution that you may have missed before.
Like anything else, the more you practice, the better you’ll get. Keep playing and challenging yourself with different puzzles to improve your skills and become a master at wooden block puzzles.
Remember, playing wooden block puzzle should be a fun and relaxing activity. Don’t get too caught up in trying to solve the puzzle quickly or perfectly. Take your time, enjoy the process, and use these tips and tricks to help you along the way.
Once you’ve mastered the basics of wooden block puzzle, it’s time to take your skills to the next level. Here are some advanced techniques to help you improve your puzzle-solving abilities:
Often, wooden block puzzles have repeating patterns that can be used to your advantage. By identifying these patterns, you can quickly figure out where certain pieces should go and how they fit together. Look for things like symmetrical shapes, repeated colors, or patterns that repeat in a certain direction.
Another useful technique is to start by placing pieces around the edges of the puzzle and working your way inward. This can give you a better sense of the overall shape of the puzzle and make it easier to see where other pieces should fit.
Don’t be afraid to rotate the puzzle as you work on it. This can help you see things from a different perspective and make it easier to find the right spot for a particular piece. Just be sure to keep track of which way is up so you don’t get confused!
Sometimes, the best way to solve a wooden block puzzle is through trial and error. If you’re stuck on a particular piece, try fitting it into different spots until you find the right one. This can be time-consuming, but it can also be a great way to learn more about how the pieces fit together.
Finally, remember that wooden block puzzles can be challenging, but they’re also a lot of fun. If you’re feeling frustrated or stuck, take a break and come back to it later. With a little patience and persistence, you’ll be able to solve even the most difficult puzzles!

Wooden block puzzles are a great way to pass the time and challenge your mind. However, like any other game, they need to be maintained to ensure they last a long time. Here are a few tips to help you maintain your wooden block puzzle:
One of the easiest ways to maintain your wooden block puzzle is to keep it clean. Dust and dirt can accumulate on the puzzle pieces and board, making it difficult to play. Use a soft cloth to wipe down the puzzle pieces and board regularly to keep them clean.
When you’re not playing with your wooden block puzzle, it’s important to store it properly. Keep it in a dry place away from direct sunlight and moisture. If the puzzle comes with a box, store it in the box to prevent the pieces from getting lost.
Over time, the puzzle pieces may become loose or start to fall apart. If this happens, don’t panic. Simply use wood glue to fix the loose pieces. Apply a small amount of glue to the piece and press it firmly back into place. Allow the glue to dry completely before using the puzzle again.
If your wooden block puzzle gets stained, don’t worry. You can easily clean it using vinegar. Mix water and vinegar in a 2:1 ratio and spray the solution directly onto the puzzle surface. Use a soft cloth to wipe away the stain.
By following these simple tips, you can ensure that your wooden block puzzle lasts for many years to come.
Wooden block puzzle is a simple yet addictive game that can be played online. Here are the steps to get started:
Playing wooden block puzzle online can be a fun and challenging way to pass the time. With a little practice, you can become a master at this addictive puzzle game.
Playing with wooden block puzzles is a fun and engaging activity that offers numerous benefits for both children and adults. Here are some of the benefits of playing wooden block puzzles:
Playing with wooden block puzzles provides endless opportunities for creativity and imagination. You can use them to build towers, castles, bridges, and more. You can also use them to create your own designs and structures, allowing you to express your creativity in a unique way.
Wooden block puzzles require you to think critically and solve problems. As you try to fit the pieces together, you are developing your spatial awareness and problem-solving skills. This can help you in other areas of your life, such as school or work.
Playing with wooden block puzzles can help develop your fine motor skills. As you pick up and manipulate the pieces, you are improving your hand-eye coordination and dexterity. This can be especially beneficial for young children who are still developing their motor skills.
Playing with wooden block puzzles can be a great way to encourage social interaction. You can work on puzzles with friends or family members, which can help develop teamwork and communication skills. It can also be a fun way to bond with others and create lasting memories.
Playing with wooden block puzzles can be a great way to reduce stress and anxiety. Focusing on the puzzle can help take your mind off of other things and provide a sense of relaxation. It can also be a great way to unwind after a long day.
Overall, playing with wooden block puzzles is a fun and beneficial activity for people of all ages. Whether you’re looking to improve your problem-solving skills, develop your creativity, or simply unwind, wooden block puzzles are a great way to do so.
If you’re new to playing wooden block puzzles, you may have some questions about the game. Here are some frequently asked questions and their answers to help you get started:
To start playing a wooden block puzzle, you need to first choose a board with empty spaces to place the blocks. Then, you need to choose blocks of various shapes and place them on the board to complete rows or columns. The goal is to fill the board with blocks without leaving any empty spaces.
The wooden block puzzle comes with blocks of different shapes, such as triangles, squares, and rectangles. You need to place the blocks in a way that they fit together without leaving any empty spaces. Sometimes, it can be helpful to start with the larger blocks and then fill in the smaller ones around them.
If you get stuck while playing a wooden block puzzle, you can try to rotate the blocks to see if they fit in a different way. You can also try removing some of the blocks you’ve already placed and starting over. Additionally, some wooden block puzzles come with hints or solutions that you can refer to if you get stuck.
Yes, there are many websites that offer free wooden block puzzle games that you can play online. Some websites even have different levels of difficulty and different types of blocks to make the game more challenging.
No, there is no time limit for playing wooden block puzzles. You can take as much time as you need to complete the puzzle. However, some wooden block puzzles come with a scoring system that rewards you for completing the puzzle in a certain amount of time or with a certain number of moves.
Congratulations on successfully completing your first wooden block puzzle! If you’re looking to further improve your skills or learn more about wooden block puzzles, there are plenty of resources available to you. Here are a few to get you started:
There are numerous online tutorials that can teach you different techniques for solving wooden block puzzles. YouTube is a great place to start, with channels like A5L Family and _annisa.aziza offering helpful tips and tricks. You can also find step-by-step guides on websites like Instructables.
If you prefer to learn from books, there are several great options available. “Wooden Puzzles: 31 Favorite Projects & Patterns” by Scroll Saw Woodworking & Crafts Magazine is a comprehensive guide to creating your own wooden puzzles, while “The Wooden Puzzle Book” by Brian Menold offers a variety of challenging puzzles to solve.
If you’re an educator or parent looking to incorporate wooden block puzzles into your curriculum, there are many educational resources available. “Extending Block Play for Early Learning” by The Empowered Educator offers ideas for extending block play in different ways, while “HOW TO ENCOURAGE BLOCK PLAY” by the Workspace for Children provides tips for organizing and storing your blocks.
Whether you’re looking to improve your skills or incorporate wooden block puzzles into your teaching, these resources are a great place to start. Happy puzzling!


