Rahasia Sukses Poker Online: Cara Ampuh Membaca Lawan di Fase Post-Flop
Di antara seluruh platform penyedia poker online terbaik, fase taruhan post-flop (setelah tiga kartu pertama dibuka) senantiasa diakui sebagai salah

Di antara seluruh platform penyedia poker online terbaik, fase taruhan post-flop (setelah tiga kartu pertama dibuka) senantiasa diakui sebagai salah


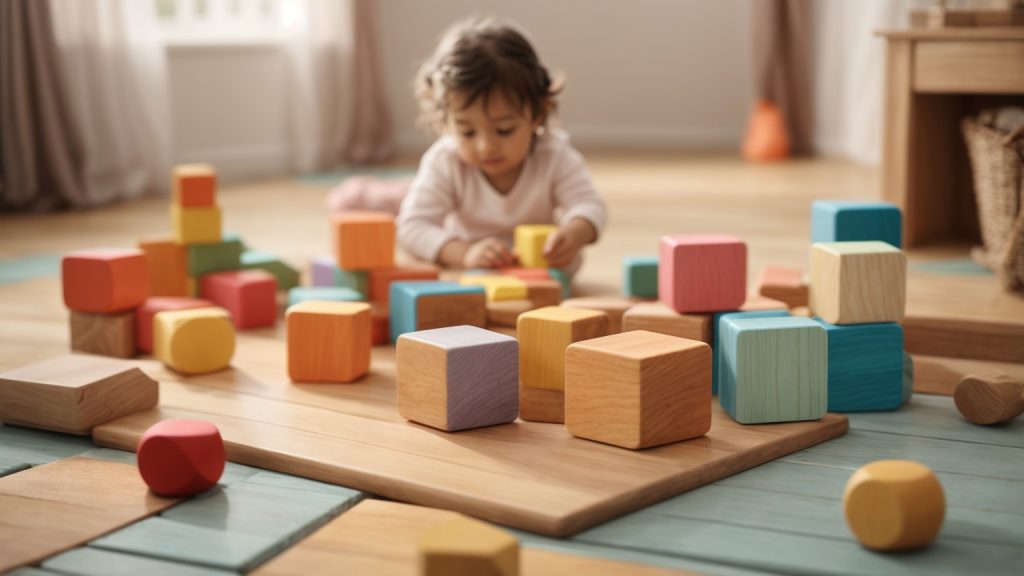
Cleaning wooden blocks may seem like a daunting task, but it’s actually quite simple. Whether you’re a parent wanting to clean your child’s toys or a collector looking to restore old blocks, there are a few easy steps to follow. By properly cleaning your wooden blocks, you can ensure that they last for years to come.
First, it’s important to gather the necessary supplies. You will need a soft cloth, mild soap, and water. For tougher stains, vinegar and baking soda can be used. It’s important to note that only unpainted blocks should be sanded, as painted blocks can be damaged. Once you have your supplies, you’re ready to start cleaning your wooden blocks.
To clean your wooden blocks, simply dampen the cloth with water and mild soap and wipe down each block. For tougher stains, mix equal parts vinegar and water and use the solution to scrub the blocks with a sponge. If the stain still won’t come out, try lightly sanding the block with fine sandpaper. Once you’re done cleaning, be sure to let the blocks air dry completely before storing them away.

Cleaning your child’s wooden blocks is essential for their health and safety. Wooden blocks are a classic toy that has been around for centuries. They are durable and can last for years, but they can also harbor harmful bacteria if not cleaned regularly. Here are some reasons why cleaning wooden blocks is important:
Children are notorious for putting things in their mouths, and wooden blocks are no exception. If the blocks are not cleaned regularly, they can harbor harmful bacteria that can make your child sick. By cleaning the blocks regularly, you can prevent the spread of germs and keep your child healthy.
Wooden blocks can become dirty and stained over time, which can affect their quality. By cleaning the blocks regularly, you can maintain their quality and ensure that they last for years to come. Regular cleaning can also prevent the wood from drying out and cracking.
Cleaning your child’s toys is an important part of creating a safe play environment. By keeping the blocks clean, you can reduce the risk of accidents and injuries. Dirty blocks can become slippery and difficult to handle, which can increase the risk of falls and other accidents.
In summary, cleaning your child’s wooden blocks is essential for their health and safety. By preventing the spread of germs, maintaining the quality of the blocks, and promoting a safe play environment, you can ensure that your child’s wooden blocks are a fun and safe toy to play with.
Cleaning wooden blocks is a simple process that requires only a few materials. Here is a list of the materials you will need:
Warm water mixed with eco-friendly dish soap is an effective and safe cleaning solution for wooden blocks. You can mix one part soap with four parts water and place it in a spray bottle for easy application. Alternatively, you can use a natural disinfectant solution made from white vinegar and water in a ratio of one part vinegar to two parts water.
A soft-bristled brush is useful for removing dirt and grime from the blocks’ crevices and corners. A microfiber cloth can be used to wipe the blocks clean after washing. It is essential to avoid using abrasive materials like steel wool or harsh chemicals that can damage the wood’s surface.
In addition to the above materials, you will need a designated cleaning area covered with a drop cloth or old towel to catch any drips or spills. It is also essential to have a drying rack or a clean towel to dry the blocks after washing them.
By using these simple materials, you can effectively clean your wooden blocks and keep them looking their best for years to come.
Before you start cleaning your wooden blocks, there are a few pre-cleaning steps you should take to ensure the best results.
The first step is to inspect your wooden blocks. Check for any visible signs of damage or wear and tear. Look for cracks, splits, or splinters in the wood. If you find any damaged blocks, set them aside for repair or replacement.
Once you’ve inspected your blocks, the next step is to sort them. Group the blocks by size, shape, and color. This will make it easier to clean them efficiently and thoroughly.
Here are some tips for sorting your blocks:
By sorting your blocks, you’ll be able to clean them more effectively and efficiently. It will also make it easier to put them back together once they’re clean.
Taking these pre-cleaning steps will ensure that your wooden blocks are ready for cleaning. By inspecting and sorting your blocks, you’ll be able to clean them more effectively and efficiently.
Cleaning your wooden blocks is an important step to keep them in good condition and ensure they last for years to come. Here is a step-by-step guide on how to clean your wooden blocks:
First, you need to prepare the cleaning solution. Mix one part white vinegar with one part water in a bowl. If the blocks are heavily soiled, add a small amount of mild dish soap to the solution.
Dip a sponge or soft cloth into the cleaning solution and wring it out. Then, gently wipe down each block with the damp sponge or cloth. Make sure to cover all sides of the block, including any crevices or corners.
For stubborn stains or marks on the blocks, use a soft-bristled brush to scrub the affected area. You can also lightly sand the blocks with fine sandpaper to remove any stains or discoloration, but only do this for unpainted blocks.
Once you have finished cleaning the blocks, rinse them thoroughly with clean water to remove any remaining cleaning solution. Then, dry the blocks with a clean towel, and let them air dry completely before storing them away.
By following these simple steps, you can keep your wooden blocks clean and in good shape for years to come.
After cleaning your wooden blocks, it’s important to take proper care of them to ensure they last a long time. Here are some tips for post-cleaning care:
Storing your wooden blocks properly is crucial to maintaining their quality. Here are some things to keep in mind:
Regular maintenance can help keep your wooden blocks looking and feeling great. Here are some things you can do:
By following these tips, you can help ensure that your wooden blocks stay in great condition for years to come.
Cleaning wooden blocks can be a simple and enjoyable task, but it’s important to do it right to ensure the longevity and safety of your toys. Here are some tips and tricks for effective cleaning:
By following these tips and tricks, you can keep your wooden blocks clean, safe, and beautiful for years to come.
Cleaning wooden blocks is a great way to keep them looking their best, but it’s important to take some safety measures to ensure that you don’t damage the blocks or injure yourself in the process. Here are some tips to help you clean your wooden blocks safely:
By following these safety measures, you can ensure that your wooden blocks stay in great condition for years to come, while also protecting yourself from injury and damage.

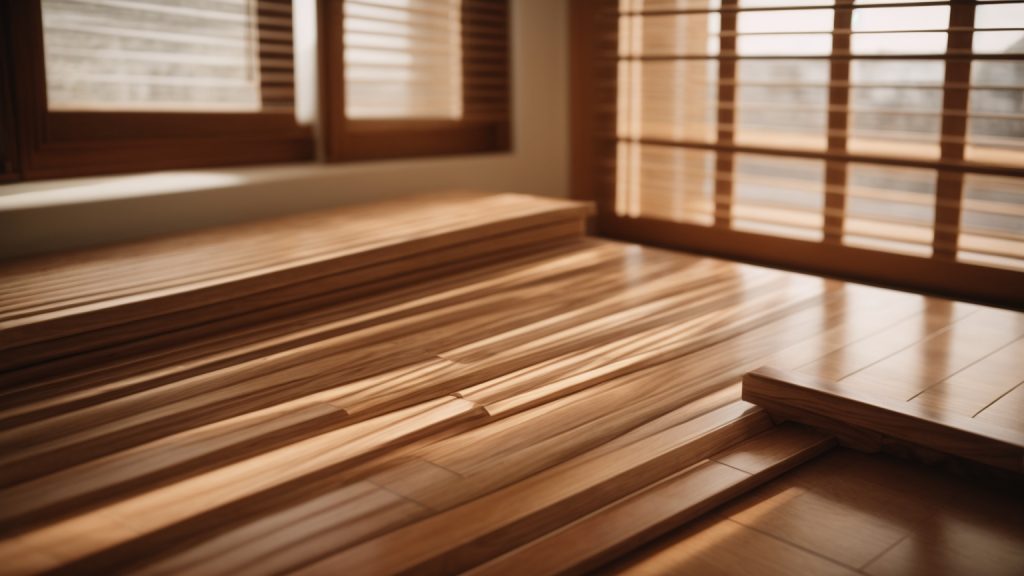
Do you have wooden blinds that are too long for your window? Shortening them is a simple process that you can do yourself with just a few tools and some basic knowledge. In this article, we will provide step-by-step instructions on how to shorten your wooden blinds to fit your window perfectly.
Before you begin, it’s important to know that there are two types of wooden blinds: those with a cord and those with a wand. The process for shortening each type is slightly different, so make sure you know which type you have before you start. Once you have determined the type of blinds you have, you can follow the appropriate steps to shorten them. With a little patience and attention to detail, you can have your wooden blinds fitting perfectly in no time.

Wooden blinds are a popular window treatment that can add warmth and style to any room. They are made of horizontal slats that can be adjusted to control the amount of light that enters the room. Wooden blinds are available in a variety of colors and finishes to match any decor.
When it comes to sizing, wooden blinds are typically made to fit standard window sizes. However, if your window is an odd size or shape, you may need to have your blinds custom made. It’s important to measure your window carefully to ensure that your blinds fit properly.
Wooden blinds are also available in different slat widths, ranging from 1 inch to 2 1/2 inches. The wider the slats, the more light they will let in when they are open. However, wider slats may also make the blinds heavier and harder to lift.
One thing to keep in mind when choosing wooden blinds is that they can be prone to warping in humid environments. If you live in a humid climate or plan to use your blinds in a bathroom or kitchen, you may want to consider faux wood blinds instead.
Overall, wooden blinds are a classic and versatile window treatment that can add beauty and functionality to any room in your home. With proper care and maintenance, they can last for many years to come.
When it comes to shortening wooden blinds, you will need a few tools to get the job done. Here are the essential tools you will need:
Before you start shortening your wooden blinds, you need to measure the length of the blinds and determine how much you need to shorten them. A measuring tape is an essential tool that will help you get accurate measurements.
You will need a pencil to mark the spot where you need to cut the wooden blinds. Make sure the pencil is sharp so that you can make precise marks on the blinds.
You will need a pair of scissors to cut the ladder strings of the wooden blinds. Make sure the scissors are sharp enough to cut through the strings easily.
You will need a screwdriver to remove the end caps of the wooden blinds. This will allow you to remove the ladder strings and cut the blinds to the desired length.
With these tools in hand, you will be able to shorten your wooden blinds with ease. Just make sure to follow the instructions carefully and take your time to ensure that you get the job done right.
If you have wooden blinds that are too long for your window, you can easily shorten them to fit. Before you begin, you’ll need to measure your blinds to determine how much to shorten them. Here’s how to do it:
By following these simple steps, you can easily measure your wooden blinds for shortening. Once you’ve determined how much to shorten your blinds, you can move on to the next step of actually shortening them.
Shortening wooden blinds can be a simple and cost-effective way to update the look of your windows without having to replace the entire set of blinds. To begin, you’ll need to determine the desired length of your blinds.
By following these steps, you can easily mark the desired length of your wooden blinds and prepare them for the next step in the shortening process.
Shortening wooden blinds is a simple process that can be done at home with a few basic tools. One of the first steps to shortening your wooden blinds is to remove the excess slats. This is an important step because it will help you achieve the correct length for your blinds.
To remove the excess slats, you will need to follow these steps:
By following these steps, you can easily remove the excess slats from your wooden blinds and achieve the correct length for your windows. Remember to measure twice and cut once to ensure that you shorten your blinds to the correct length.
Now that you have shortened your wooden blinds, it’s time to reassemble them. Here are some steps to follow:
Congratulations, you have successfully shortened and reassembled your wooden blinds! Now you can enjoy your new custom-fit window coverings.
Once you have shortened your wooden blinds to the desired length, you will need to make some final adjustments to ensure they are working properly. Here are some steps you can take to make sure your newly shortened blinds are functioning correctly:
By following these steps, you can ensure that your newly shortened wooden blinds are functioning properly and will provide you with years of use.
Before you start shortening your wooden blinds, it is essential to take some safety precautions to prevent any injuries or damage to your property. Here are some safety tips to keep in mind:
When shortening wooden blinds, you may need to use sharp tools such as scissors or pliers. To avoid injury, it is crucial to wear protective gear such as gloves and eye protection. Gloves will protect your hands from cuts, while eye protection will prevent any debris from getting into your eyes.
Shortening wooden blinds can be a hazardous task, and it is not recommended to let children or pets near the area. The tools used to shorten the blinds can be dangerous, and children or pets could accidentally hurt themselves.
It is essential to work in a well-lit area when shortening wooden blinds. This will help you see what you are doing and prevent any accidents. If you are working in a dimly lit area, use a flashlight or work lamp to illuminate the workspace.
Before shortening your wooden blinds, it is essential to read the manufacturer’s instructions carefully. This will help you understand the process and avoid any mistakes that could damage the blinds. If you are unsure about any step, contact the manufacturer for clarification.
By following these safety precautions, you can ensure that your wooden blinds are shortened correctly without any accidents. Remember, safety should always come first, and it is better to be safe than sorry.

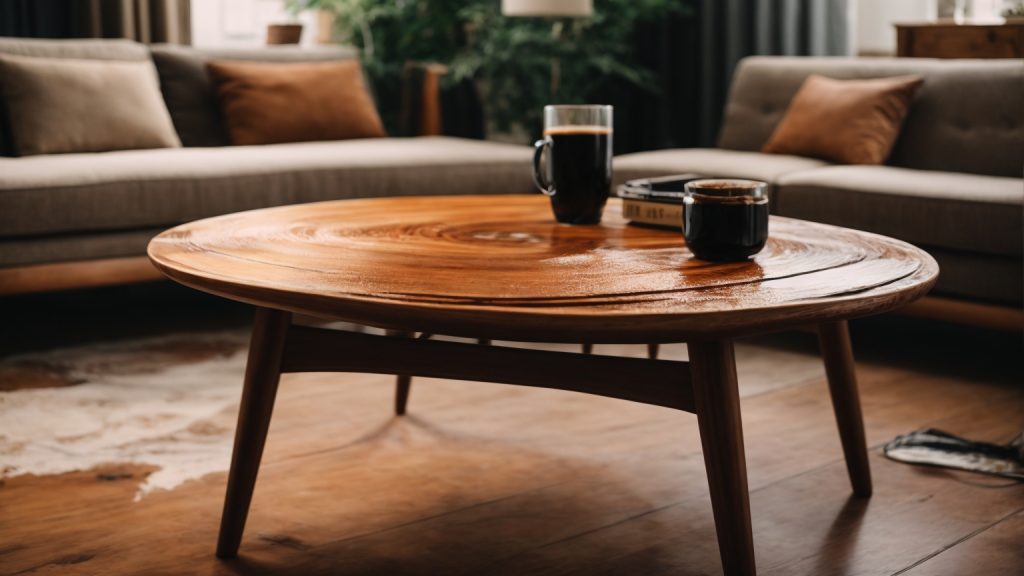
Are you tired of your old and worn-out wooden coffee table? Painting it can be a great way to give it a fresh new look without having to spend a lot of money on a new one. However, painting a wooden coffee table can seem like a daunting task, especially if you’ve never done it before. But don’t worry, with a little bit of knowledge and some patience, you can transform your coffee table into a beautiful piece of furniture that will enhance the look of your living room.
The first step in painting your wooden coffee table is to choose the right paint and supplies. You’ll need a primer, paint, paintbrushes, sandpaper, and a clean cloth. Once you have all your supplies, the next step is to clean your coffee table thoroughly. This will ensure that the primer and paint adhere properly to the surface. After cleaning, you’ll need to sand the table to remove any bumps or rough spots. Once you’ve sanded the table, you’ll need to clean it again to remove any dust or debris.
Before you start painting your wooden coffee table, it’s important to understand the type of wood you’re dealing with. Different types of wood require different preparation and painting techniques to ensure the best results.
The first step in understanding your wood is to identify whether it is hardwood or softwood. Hardwood comes from deciduous trees, such as oak, maple, and cherry, while softwood comes from coniferous trees, such as pine, spruce, and cedar. Hardwood is generally denser and more durable than softwood, but it can also be more difficult to work with.
To identify your wood, look at the grain pattern and color. Hardwood tends to have a more complex grain pattern, while softwood has a simpler, more uniform pattern. Hardwood also tends to be darker in color than softwood.
It’s also important to check whether your wood has been treated with any chemicals or finishes. If your wood has been previously painted or stained, it may have a layer of varnish or polyurethane that needs to be removed before you can paint it.
To check for wood treatments, look for any discoloration or staining on the surface of the wood. You can also try sanding a small area to see if the wood is absorbing the sandpaper or if the surface is too hard and glossy.
If you suspect that your wood has been treated, it’s best to consult a professional or do some research to determine the best way to prepare it for painting. Using the wrong technique could result in a poor finish or damage to the wood.
When it comes to painting a wooden coffee table, choosing the right paint is crucial for a successful outcome. You want to choose a paint that will not only look great but also last for a long time. Here are some things to consider when choosing the right paint for your coffee table.
One of the first things you need to decide is whether to use oil-based or water-based paint. Both types of paint have their pros and cons.
Oil-based paint is known for its durability and ability to provide a smooth, even finish. It is also resistant to stains and scratches. However, it can take a long time to dry and requires the use of solvents for cleanup.
Water-based paint, on the other hand, dries faster and is easier to clean up. It is also less likely to yellow over time. However, it may not be as durable as oil-based paint and may require multiple coats for a smooth finish.
Choosing the right color is also important when painting a coffee table. You want to choose a color that will complement the rest of your decor and add visual interest to the room.
Consider the color of your walls, curtains, and other furniture when choosing a color for your coffee table. If you have neutral-colored walls and furniture, you can add a pop of color with your coffee table. If you have bold-colored walls or furniture, you may want to choose a more neutral color for your coffee table.
In addition to color, consider the finish of the paint. A high-gloss finish will provide a shiny, reflective surface, while a matte finish will provide a more subdued look.
Overall, choosing the right paint for your coffee table requires careful consideration of factors such as durability, drying time, and color. By taking the time to choose the right paint, you can ensure that your coffee table looks great and lasts for years to come.
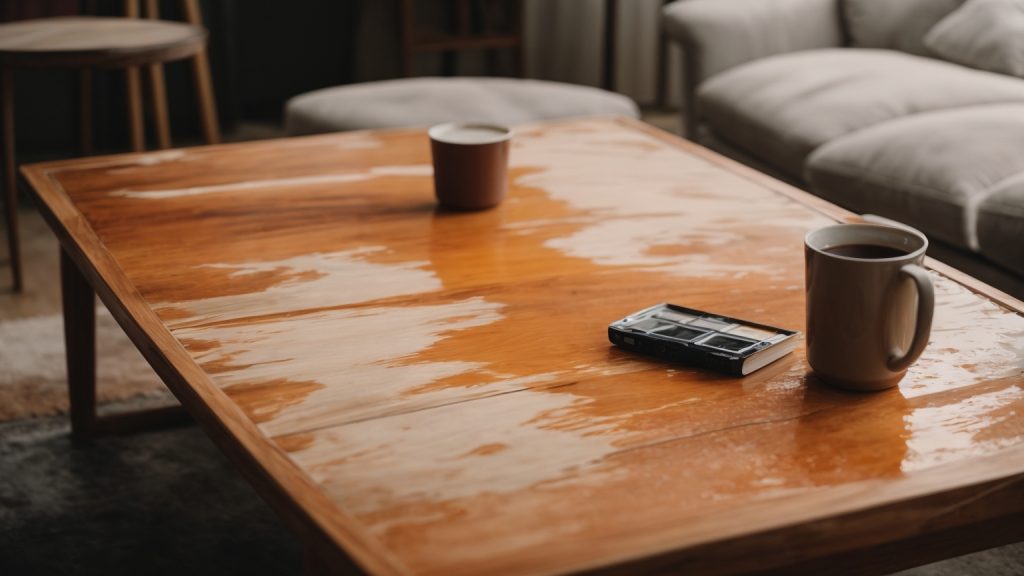
Before you start painting your wooden coffee table, it is important to properly prepare the surface. This will help ensure that the paint adheres well and lasts longer. Here are two key steps you should take to prepare your coffee table for painting:
The first step in preparing your coffee table for painting is to clean it thoroughly. Use a bucket of soapy water and a sponge to remove dirt, dust, and oils that may be on the surface. Make sure to clean all surfaces of the table, including the legs and underside.
After cleaning, rinse the table with clean water and let it dry completely. You can use a clean cloth to wipe away any excess water. It is important to make sure the table is completely dry before moving on to the next step.
The next step in preparing your coffee table for painting is to sand the surface. Sanding helps to create a smooth surface for the paint to adhere to. It also helps to remove any existing finish or paint that may be on the table.
Start by using a medium-grit sandpaper (around 120 grit) to sand the entire surface of the table. Make sure to sand in the direction of the wood grain. After sanding, use a damp cloth to wipe away any dust or debris.
Next, use a fine-grit sandpaper (around 220 grit) to sand the surface again. This will help create an even smoother surface for the paint to adhere to. After sanding, use a clean cloth to wipe away any dust or debris.
By properly cleaning and sanding your coffee table, you will be able to create a surface that is ready for painting. This will help ensure that your paint job looks great and lasts for a long time.
Before you start painting your wooden coffee table, it is essential to prime it. Priming helps the paint adhere better to the surface and provides a smooth and even finish. Here are the steps to prime your coffee table:
When selecting a primer, choose one that is specifically designed for wood surfaces. This will ensure that the primer bonds well with the wood and provides a good base for the paint. If your coffee table has any stains or discolorations, consider using a stain-blocking primer to prevent them from bleeding through the paint.
Remember, the key to a successful paint job is proper preparation. Taking the time to prime your coffee table will ensure that your paint job looks professional and lasts for years to come.
When it comes to painting a wooden coffee table, there are several techniques you can use to achieve a professional-looking finish. In this section, we’ll discuss three popular methods: using a brush, using a roller, and spray painting.
Using a brush is a classic method for painting wooden furniture. It allows for precise application and can be useful for getting into tight corners and edges. Here’s how to do it:
Using a roller can be a faster method for painting larger surfaces. It can also create a smoother finish than using a brush. Here’s how to do it:
Spray painting can be a quick and easy method for painting a coffee table. It can also create a smooth, even finish. However, it requires more preparation and can be more difficult to control than using a brush or roller. Here’s how to do it:
After painting your wooden coffee table, it’s important to add some finishing touches that will protect the paint and enhance the overall look of your furniture. Here are some tips to help you achieve a professional finish.
A sealant is a protective coating that will help prevent scratches, stains, and other types of damage to your coffee table. It also makes the surface easier to clean and maintain. To apply a sealant, follow these steps:
Polishing your coffee table will give it a smooth, shiny finish that will enhance the beauty of the wood and the paint. Here’s how to do it:
Remember to reapply the sealant and polish as needed to keep your coffee table looking its best. With these finishing touches, your painted wooden coffee table will be a beautiful and functional addition to your home decor.
Once you have painted your wooden coffee table, you’ll want to keep it looking fresh and new for as long as possible. Here are some tips to help you maintain your painted coffee table:
To keep your painted coffee table looking its best, you should clean it regularly. Here are some tips for cleaning your coffee table:
Over time, your painted coffee table may start to show signs of wear and tear. To keep it looking its best, you may need to touch up the paint from time to time. Here are some tips for touching up the paint on your coffee table:
By following these tips, you can keep your painted coffee table looking great for years to come.

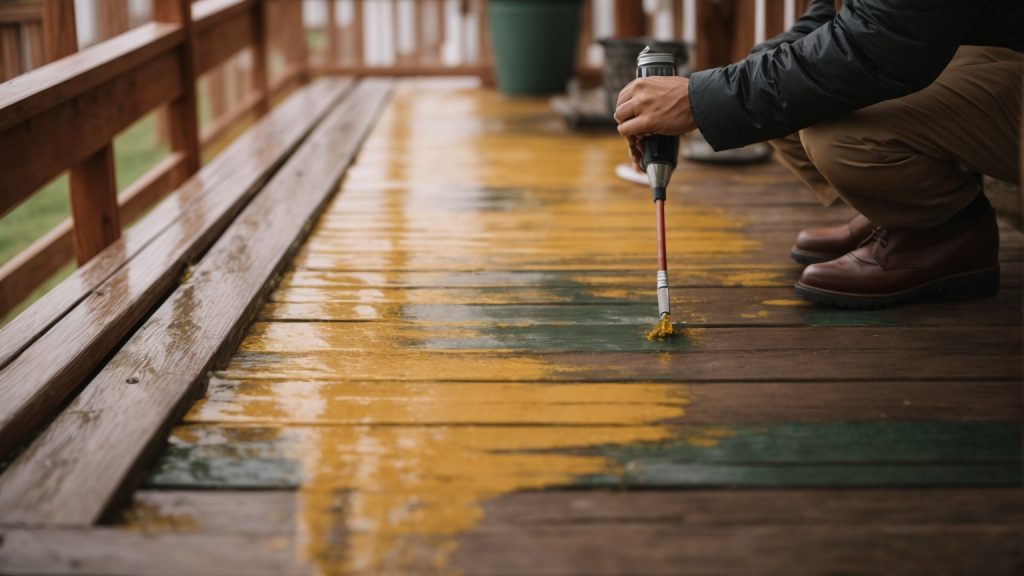
Painting a wooden porch is a great way to give your home a fresh and updated look. Whether you’re looking to enhance your curb appeal or just want to protect your porch from the elements, painting is a simple and effective solution. In this article, we’ll guide you through the process of painting your wooden porch step-by-step, so you can achieve a professional-looking finish.
Before you begin painting, it’s important to properly prepare your porch. This includes removing any furniture or decor, sweeping away debris, and cleaning the surface thoroughly. Once your porch is clean and dry, you can begin the painting process. We’ll cover everything from choosing the right paint and tools, to applying the paint and finishing touches. With our help, you’ll be able to paint your wooden porch with ease and confidence.
When it comes to painting your wooden porch, choosing the right paint is crucial to ensure a long-lasting finish. Here are some things to consider when selecting the right paint for your porch.
There are two main types of paint to consider when painting your wooden porch: oil-based and latex-based.
Oil-based paint is known for its durability and ability to withstand harsh weather conditions. It also has a glossy finish that can enhance the natural beauty of wood. However, it takes longer to dry and requires mineral spirits for cleanup.
Latex-based paint, on the other hand, dries faster and is easier to clean up with soap and water. It also has a low odor and is more environmentally friendly. However, it may not be as durable as oil-based paint and may not adhere as well to bare wood.
The weather in your area is an important factor to consider when choosing the right paint for your porch. If you live in an area with harsh weather conditions, such as extreme heat or cold, rain, or snow, you’ll want to choose a paint that can withstand these conditions.
Look for a paint that is labeled as “exterior” and “weather-resistant.” These types of paints are formulated to withstand exposure to the elements and will provide long-lasting protection for your porch.
In addition to choosing the right paint, it’s also important to properly prepare your porch before painting. This includes cleaning the surface, repairing any damage, and priming the wood to ensure proper adhesion of the paint.
By taking the time to choose the right paint for your porch and properly preparing the surface, you can ensure a beautiful and long-lasting finish that will enhance the look of your outdoor space.
Before you start painting your wooden porch, it’s important to prepare the surface properly. This will ensure that the paint adheres well and lasts longer. Here are some steps to follow:
The first step in preparing your wooden porch is to clean the surface thoroughly. This will remove any dirt, grime, or mildew that may have accumulated on the surface. Here’s how you can clean the surface:
After cleaning the surface, you need to sand the wood to create a smooth surface for the paint to adhere to. Here’s how you can sand the wood:
After sanding the surface, be sure to remove any dust or debris with a damp cloth or a vacuum cleaner. This will ensure that the paint adheres well to the surface.
By following these steps, you can prepare your wooden porch for painting and ensure that the paint lasts longer.
Before you start painting your wooden porch, you need to prime it. Priming is an essential step that ensures the paint adheres well to the surface, and it also helps to protect the wood from moisture and other elements. In this section, you will learn how to choose and apply the right primer for your porch.
When it comes to choosing a primer, there are a few things to consider. First, make sure you choose a primer that is specifically designed for exterior use. Exterior primers are formulated to withstand the elements and provide a strong base for the paint. Second, consider the type of paint you will be using. If you are using an oil-based paint, you will need to use an oil-based primer. If you are using a latex-based paint, you can use either a latex-based or an oil-based primer.
Another thing to consider is the condition of your porch. If your porch is new or in good condition, you can use a regular primer. However, if your porch is old or has a lot of cracks and imperfections, you may want to use a filler primer. Filler primers are thicker and can fill in small cracks and imperfections, giving you a smoother surface to paint.
Before you apply the primer, make sure your porch is clean and dry. Use a stiff-bristled brush to remove any loose or peeling paint, and then sweep the porch to remove any dust or debris.
To apply the primer, use a paintbrush or roller. If you are using a roller, use a brush to cut in around the edges and corners. Work in small sections to ensure thorough coverage. Apply the primer in thin, even coats, and make sure to follow the manufacturer’s instructions for drying time.
Once the primer is dry, you can start painting your porch. Remember to choose a paint that is specifically designed for exterior use, and follow the manufacturer’s instructions for application and drying time.
By following these steps, you can ensure that your porch is properly primed and ready for painting. A little extra effort in the priming stage can go a long way in ensuring a smooth and long-lasting paint job.
When it comes to painting your wooden porch, there are a few different techniques you can use. Each technique has its own advantages and disadvantages, so it’s important to choose the one that’s right for you.
Using a brush is a great way to get a precise, detailed finish. It’s also a good option if you’re working in a small area or need to touch up certain spots. To use a brush, simply dip it into the paint and apply it to the wood in smooth, even strokes. Be sure to work in the direction of the wood grain to get the best results.
One downside to using a brush is that it can be time-consuming, especially if you’re painting a large area. It can also be difficult to avoid brush marks, so you may need to do some sanding and touch-ups after the paint has dried.
Using a roller is a faster way to paint your porch, especially if you’re working in a large area. It’s also a good option if you want a smooth, even finish. To use a roller, simply dip it into the paint and roll it onto the wood in long, even strokes. Be sure to work in sections to avoid overlapping.
One downside to using a roller is that it can be difficult to get into tight corners and edges. You may need to use a brush to touch up these areas after the paint has dried.
Using a sprayer is the fastest way to paint your porch, especially if you’re working in a large area. It’s also a good option if you want a smooth, even finish without any brush marks. To use a sprayer, simply fill it with paint and spray it onto the wood in long, even strokes. Be sure to work in sections to avoid overlapping.
One downside to using a sprayer is that it can be messy and difficult to control. You may also need to use a brush to touch up certain areas after the paint has dried. Additionally, you’ll need to take extra precautions to protect nearby surfaces from overspray.
Taking care of your newly painted wooden porch will help it look great for years to come. Here are some tips for routine cleaning and touch-ups and repairs.
Regular cleaning is important to prevent dirt and grime buildup that can damage your porch’s finish. Here are some tips for keeping your porch clean:
Even with proper care, your porch may need touch-ups and repairs from time to time. Here are some tips for keeping your porch looking its best:
By following these tips, you can keep your wooden porch looking great for years to come.
When painting your wooden porch, it’s important to take certain safety precautions to protect yourself and those around you. Here are some safety tips to keep in mind:
Before you start painting, make sure to wear the appropriate protective gear. This includes gloves, protective eyewear, and a mask to prevent inhaling any paint fumes. In addition, make sure to wear clothing that you don’t mind getting dirty or potentially ruined by paint.
It’s important to ensure that you have proper ventilation when painting your porch. This means opening windows, doors, and using fans to circulate air. If you’re using a paint sprayer, make sure to wear a respirator to prevent inhaling any paint particles.
In addition, keep in mind that some paints and solvents can be flammable, so avoid smoking or using any open flames near the paint. Store all paint and solvents in a cool, dry place away from any heat sources.
By taking these safety precautions, you can ensure that you and your loved ones stay safe while painting your porch.

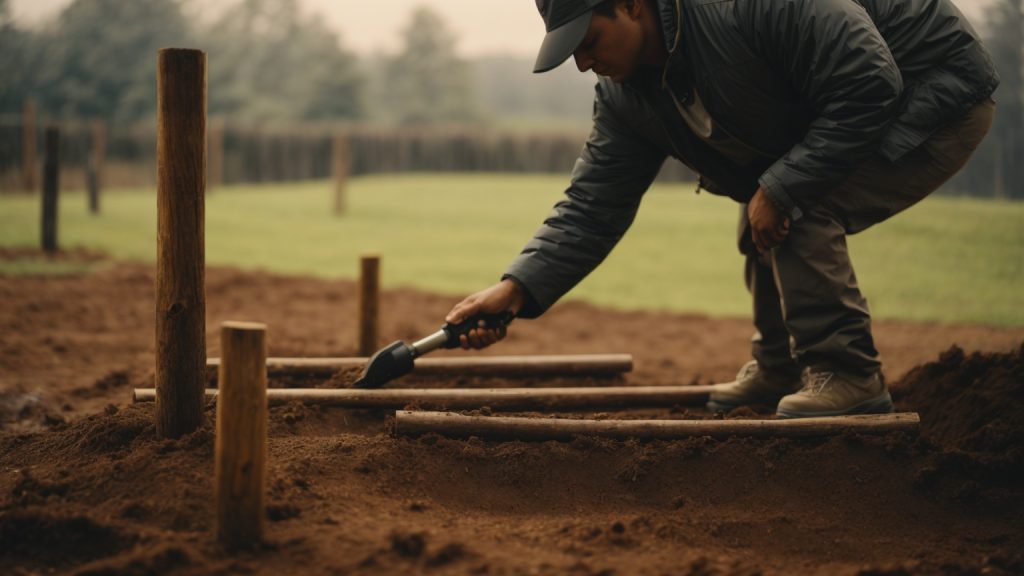
Putting wooden posts in the ground is an essential part of many outdoor DIY projects, such as building a fence, a deck, or a garden structure. However, getting it right can be tricky, especially if you’re dealing with soft or wet ground, or if you want to ensure that your posts will last for years without rotting or leaning. In this article, we’ll guide you through the steps you need to follow to put wooden posts in the ground, from choosing the right materials to digging the hole, setting the post, and securing it in place.
Before you start digging, it’s important to choose the right type of wood for your posts. Pressure-treated lumber is a popular choice for outdoor projects, as it is resistant to rot, insects, and moisture. However, if you prefer the natural look of untreated wood, you can use cedar or redwood, which are naturally resistant to decay. Keep in mind that the size and spacing of your posts will depend on the type of project you’re working on and the local building codes, so make sure to check the requirements before you start.
Once you’ve selected your wood, the next step is to dig the hole. The size and depth of the hole will depend on the size of your post and the type of soil you’re working with. As a general rule, the hole should be at least one-third as deep as the length of the post, and wider than the post by a few inches. If you’re dealing with soft or wet ground, you may need to add gravel or concrete to the bottom of the hole to provide a stable base for the post. In the next section, we’ll look at how to set the post and secure it in place.

Wooden posts are an essential component in many outdoor projects, including landscaping and construction. They are sturdy, durable, and easy to work with, making them a popular choice for many DIY enthusiasts. In this section, we’ll discuss the role of wooden posts in landscaping and construction and why they are essential for your projects.
Wooden posts play a vital role in landscaping, providing support for a wide range of structures. They are commonly used to build garden fences, trellises, and pergolas. Posts also help to define the boundaries of your property and add a decorative touch to your outdoor space.
When selecting wooden posts for your landscaping project, it’s essential to consider the type of wood you use. Some woods, like cedar or redwood, are naturally resistant to rot and decay, making them ideal for outdoor use. Others, like pine, require treatment to protect them from moisture and insects.
Wooden posts are also commonly used in construction, providing support for decks, porches, and other outdoor structures. They are an affordable and versatile option, allowing you to create a range of designs to suit your needs.
When installing wooden posts for construction, it’s crucial to ensure they are securely anchored in the ground. This can be achieved by using a variety of methods, including concrete footings, post anchors, or deadman supports. By properly anchoring your posts, you can ensure the stability and longevity of your structure.
In conclusion, wooden posts are a versatile and essential component in many outdoor projects. Whether you’re building a fence, a deck, or a pergola, wooden posts provide the support and stability you need to create a durable and long-lasting structure. By selecting the right type of wood and properly anchoring your posts, you can ensure the success of your project for years to come.
When it comes to installing a fence or any other wooden structure, the type of wooden post you select is critical. Choosing the right wooden post can ensure that your fence or structure is strong, long-lasting, and withstands the test of time. Here are a few things to consider when selecting the right wooden post.
Different types of wood have different characteristics that make them suitable for different applications. Some of the most common types of wood used for fence posts include:
The size and shape of your wooden post can also affect its durability and strength. Here are a few things to consider:
To ensure that your wooden post is protected from rot and decay, it is essential to treat it with a preservative. Here are a few treatment options to consider:
By considering the type of wood, size and shape considerations, and treatment options, you can select the right wooden post for your fence or structure. Remember that selecting the right wooden post is critical to ensuring the longevity and durability of your fence or structure.
Before you start installing wooden posts in the ground, you need to prepare yourself and your tools. This section will cover the basic preparation steps that you need to take before beginning the installation process.
Before you start digging, you need to make sure you have all the necessary tools. Here are some of the tools you will need:
Make sure you have all the tools before you start the installation process. This will save you time and ensure that you can complete the job without any interruptions.
Once you have all the tools, you need to mark the spot where you want to install the wooden post. Here are the steps to follow:
Marking the spot is important because it will help you dig the hole in the right place.
Before you start digging, you need to ensure that you are safe. Here are some safety tips to follow:
Ensuring safety is important because it will prevent accidents and injuries.
By following these preparation steps, you will be ready to start installing wooden posts in the ground. Remember to take your time and follow the instructions carefully to ensure that the job is done correctly.
Digging the hole is the first step in installing a wooden post in the ground. It is important to dig the hole to the correct depth and width to ensure that the post is stable and secure. Here are some tips to help you dig the perfect hole.
The depth of the hole will depend on the height of the post and the type of soil you are working with. As a general rule, the hole should be at least one-third the length of the post. For example, if you are installing a 6-foot post, the hole should be at least 2 feet deep.
If you are working with sandy soil, you may need to dig the hole deeper to ensure that the post is stable. On the other hand, if you are working with clay soil, you may need to add gravel to the bottom of the hole to improve drainage.
The width of the hole is also important. The hole should be wide enough to allow for concrete or gravel to be added around the post. As a general rule, the width of the hole should be at least three times the width of the post.
For example, if you are installing a 4-inch post, the hole should be at least 12 inches wide. This will allow for enough space to add concrete or gravel around the post to ensure that it is stable.
When digging the hole, it is important to keep the sides as straight as possible. This will help to ensure that the post is straight and level once it is installed. You can use a level to check the depth and alignment of the hole as you dig.
By following these tips, you can ensure that you dig a hole that is the correct depth and width for your wooden post. This will help to ensure that your post is stable and secure, and will last for years to come.
When it comes to setting a wooden post in the ground, there are a few key steps you need to follow to ensure that your fence or deck is stable and secure. Here are the three main sub-sections to keep in mind: Positioning the Post, Using Concrete Mix, and Checking Alignment.
Before you start digging, it’s important to make sure that you’re positioning your post in the right place. Check your local building codes and permits to ensure that you’re following all the necessary guidelines. Then, use a measuring tape to mark the spot where you want your post to go.
Next, use a post hole digger or auger to create a hole that’s deep enough to accommodate your post. The hole should be at least one-third the length of your post, and wider than the post itself to allow for some wiggle room.
Once you’ve dug your hole, it’s time to mix your concrete. Follow the instructions on the bag carefully, and make sure you’re mixing enough to fill the entire hole.
To set your post, pour some of the concrete mix into the hole, then place your post in the center. Use a level to make sure that the post is straight, and adjust as needed.
Next, pour more concrete mix into the hole, making sure to fill it up to ground level. Use a trowel or shovel to smooth out the surface of the concrete and create a slight slope away from the post to help with drainage.
After you’ve filled the hole with concrete, it’s important to double-check that your post is still straight and aligned properly. Use a level to ensure that the post is vertical on all sides, and adjust as needed.
If you notice any issues with alignment or stability, you may need to add more concrete or adjust the position of the post. It’s better to take the time to get it right now, rather than having to deal with a wobbly or unstable fence or deck later on.
By following these steps for setting a wooden post in the ground, you can ensure that your fence or deck will be strong and secure for years to come.
Once you have installed your wooden posts, it is important to take proper care of them to ensure they last as long as possible. Here are some tips for post-installation care:
One of the most important things you can do to protect your wooden posts from rotting is to waterproof them. There are several ways to do this, including:
Whatever method you choose, make sure to apply the waterproofing material to the entire post, paying special attention to the bottom where it is in contact with the ground.
Regularly inspecting your wooden posts can help you catch any problems early on, before they become major issues. Here are some things to look for during your inspections:
If you notice any of these issues, take steps to address them as soon as possible to prevent further damage.
In addition to waterproofing and regular inspections, there are a few other things you can do to keep your wooden posts in good condition:
By following these tips, you can help ensure that your wooden posts stay strong and sturdy for years to come.

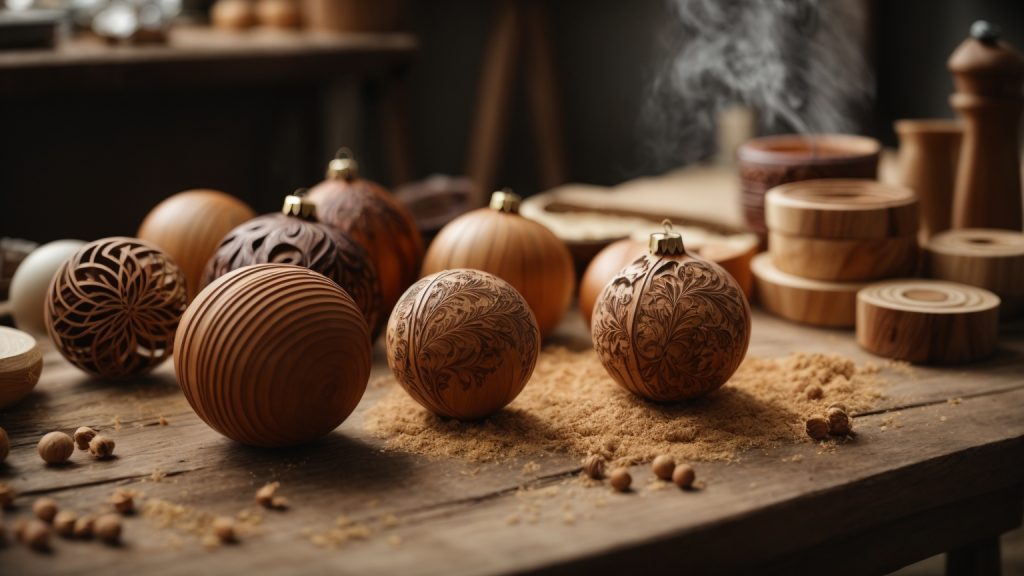
Are you looking for a fun and creative way to decorate your Christmas tree this year? Why not try making your own wooden ornaments? Not only are they a unique addition to your holiday decor, but they also make great gifts for friends and family.
There are many different ways to make wooden ornaments, from using scrap wood to more high-quality materials. One popular method is using a lathe to shape the wood into various designs, such as snowflakes or stars. Another option is to paint or etch designs onto wood slices. Whatever method you choose, making your own wooden ornaments allows for endless possibilities and personalization.

When it comes to creating wooden ornaments, it’s important to understand the different types of wood available. Each type has its own unique characteristics that can affect the final outcome of your project.
Hardwoods come from deciduous trees, which means they lose their leaves annually. They are generally denser and heavier than softwoods, making them more durable and resistant to wear and tear. Some popular types of hardwoods include oak, maple, cherry, and walnut.
Softwoods come from evergreen trees, which means they keep their leaves year-round. They are generally lighter and less dense than hardwoods, making them easier to work with. Some popular types of softwoods include pine, cedar, and spruce.
Plywood is a type of engineered wood made by gluing together thin layers of wood veneer. It is strong, stable, and resistant to warping and cracking. Plywood is often used as a more affordable alternative to solid wood, and it can be found in a variety of thicknesses and grades.
When choosing a wood type for your ornament project, consider the look you want to achieve, as well as the durability and workability of the wood. Hardwoods are great for intricate designs and detailed carving, while softwoods are better for simpler shapes and designs. Plywood is a versatile option that can be used for a variety of projects.
Keep in mind that different types of wood can also vary in price, so consider your budget when making your selection. With a little research and planning, you can choose the perfect wood type for your wooden ornament project.
When it comes to making wooden ornaments, you’ll need a few tools to get started. Here are the essential tools you’ll need, broken down into three categories: Wood Carving Tools, Sanding Tools, and Painting Tools.
To carve your wooden ornaments, you’ll need some basic carving tools. Here are the essential wood carving tools you’ll need:
| Tool | Description |
|---|---|
| Carving Knife | A sharp knife with a pointed tip used for carving fine details. |
| Chisels | A set of chisels with different blade shapes and sizes used for carving and shaping the wood. |
| Gouges | Curved chisels used for carving rounded shapes and contours. |
After carving your wooden ornaments, you’ll need to sand them to smooth out any rough edges and prepare them for painting. Here are the essential sanding tools you’ll need:
| Tool | Description |
|---|---|
| Sandpaper | A variety of sandpapers in different grits, ranging from coarse to fine, used for smoothing and shaping the wood. |
| Sanding Block | A block of wood or foam with sandpaper attached used for sanding flat surfaces. |
| Dremel Tool | A rotary tool with sanding attachments used for sanding hard-to-reach areas and fine details. |
Once your wooden ornaments are sanded, it’s time to paint them. Here are the essential painting tools you’ll need:
| Tool | Description |
|---|---|
| Paintbrushes | A variety of paintbrushes in different sizes and shapes used for painting details and filling in larger areas. |
| Paint | Acrylic paint in a variety of colors used for painting the wooden ornaments. |
| Palette | A flat surface used for mixing and blending paint colors. |
With these essential tools, you’ll be well on your way to making beautiful wooden ornaments.
Before you start making your wooden ornaments, it’s important to sketch out your design. This will help you visualize what the finished product will look like and ensure that you have all the necessary materials.
To sketch out your design, you can use a pencil and paper or a digital drawing program. If you’re not confident in your drawing skills, there are plenty of free templates and designs available online that you can use as a starting point.
Once you have your design sketched out, it’s time to transfer it onto the wood. You can do this by using transfer paper or by free-hand drawing directly onto the wood with a pencil.
If you’re using transfer paper, simply place the transfer paper onto the wood with the design facing down. Then, place your sketch on top of the transfer paper and trace over the design with a pencil. The pressure from the pencil will transfer the design onto the wood.
If you’re free-hand drawing, use a pencil to lightly sketch out your design onto the wood. Don’t worry if your lines aren’t perfect – you can always sand away any mistakes later.
Once your design is sketched onto the wood, you’re ready to start cutting, carving, or burning your ornament. Remember to take your time and be patient – making wooden ornaments can be a time-consuming process, but the end result is worth it.
To carve a wooden ornament, you will need some basic tools and materials. Here are the steps to follow:
Remember to take your time and work carefully when carving your ornament. With practice and patience, you can create a beautiful and unique decoration for your home or as a gift for someone special.
After turning your wooden ornament, it’s important to sand it down to create a smooth surface for painting or staining. Sanding also helps to remove any rough spots or tool marks left behind from the turning process.
To start sanding, you’ll need a variety of sandpaper grits, ranging from coarse to fine. Begin with a coarse grit, such as 80 or 100, and work your way up to finer grits, such as 220 or 320.
To sand your ornament, hold it firmly in place with one hand while using the other hand to move the sandpaper back and forth over the surface. Be sure to sand evenly and in the direction of the grain to prevent scratches or gouges.
As you progress through the grits, be sure to remove any scratches or marks left behind by the previous grit before moving on to the next one. This will help ensure a smooth, even finish.
Once you’ve finished sanding, wipe the ornament down with a clean, dry cloth to remove any dust or debris. Your ornament is now ready for painting or staining.
Remember, sanding is an important step in creating a beautiful, polished wooden ornament. Take your time and be patient, and you’ll be rewarded with a stunning finished product.
When it comes to making wooden ornaments, painting and decorating is where you can really let your creativity shine. Here are some tips to help you get started.
When choosing paints for your wooden ornaments, it’s important to consider the type of paint you’ll be using. Acrylic paints are a popular choice, as they dry quickly and come in a wide variety of colors. You can also use spray paint, but be sure to do so in a well-ventilated area and follow the manufacturer’s instructions.
If you want to add some sparkle to your ornaments, consider using metallic paints or glitter. Just be sure to use a clear sealant to keep the glitter from flaking off.
Before you start painting, be sure to sand your wooden ornaments to create a smooth surface. You can use a fine-grit sandpaper to do this.
When applying paint, use a small brush to get into all the nooks and crannies of your ornament. You may need to apply multiple coats to get the desired color and coverage.
If you want to create a more textured look, consider using a sponge or stencils to apply your paint. This can create a fun, unique look for your ornaments.
Once your paint has dried, you can add decorations to your wooden ornaments. Ribbons, bows, and small ornaments can all be used to add some extra flair.
If you want to add some sparkle, consider using rhinestones or glitter glue. Just be sure to use a strong adhesive to keep your decorations in place.
Overall, painting and decorating wooden ornaments is a fun and creative way to add some holiday cheer to your home. With a little bit of imagination and some basic supplies, you can create beautiful, unique ornaments that will be treasured for years to come.
When working with wood, it’s important to take safety precautions to protect yourself and those around you. Here are some key safety measures to keep in mind when making wooden ornaments.
Handling tools correctly is essential to avoid injuries. Make sure you know how to use each tool properly before starting your project. Here are some tips to keep in mind:
When working with paints and chemicals, it’s important to take proper precautions to avoid exposure to harmful substances. Here are some tips to keep in mind:
By following these safety precautions, you can ensure that your woodworking project is a success without any accidents or injuries.
Taking good care of your wooden ornaments is important to ensure that they last for years to come. Here are some tips on how to clean and store your wooden ornaments properly.
Cleaning your wooden ornaments is a simple process that can help keep them looking like new. Here’s how to do it:
Avoid using water or harsh cleaning chemicals on your wooden ornaments, as this can damage the wood and the finish.
Proper storage is key to keeping your wooden ornaments in good condition. Here are some tips on how to store your ornaments:
If you have a large collection of wooden ornaments, consider investing in a storage container specifically designed for ornaments. These containers often have individual compartments to keep each ornament safe and secure.
By following these simple tips, you can keep your wooden ornaments looking beautiful for years to come.

Are you curious about who wears wooden shoes? Wooden shoes, also known as clogs, have been worn for centuries in various cultures for work and everyday wear. They are made of durable materials that can last for years, are moisture-wicking to keep feet dry and cool, and have a thick wooden sole that provides arch support and stability.
In the Netherlands, wooden shoes have become a symbol of their national identity. Farmers, fishermen, and laborers have traditionally worn wooden shoes for their practicality and durability. However, wooden shoes are not just limited to the Netherlands. They are also worn in other parts of Europe, Asia, and even North America. In some cultures, wooden shoes are considered a fashion statement or a traditional form of footwear.
So, who wears wooden shoes? The answer is simple: anyone who wants to! Whether you are looking for a practical and durable shoe for work or a unique fashion statement, wooden shoes may be the perfect fit for you. In this article, we will explore the history and cultural significance of wooden shoes, as well as the practical and fashion-forward reasons why people choose to wear them.
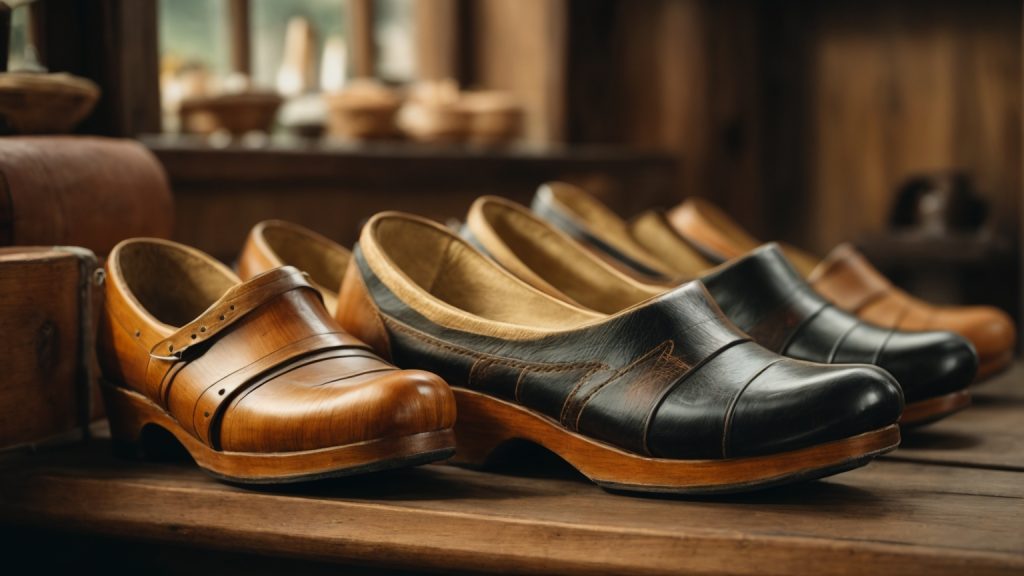
Wooden shoes, also known as clogs, have been worn by people for centuries across different cultures around the world. The oldest known footwear clogs were found in Amsterdam and Rotterdam in the Netherlands, dating back to the 13th century. The original idea for wooden shoes comes from the “calceus shoes” that the Romans wore about 2000 years ago. These Roman calceus shoes resemble sandals with a wooden sole and leather straps on top.
In the Netherlands, wooden shoes were initially worn by farmers and peasants as they provided protection and were easy to make and repair. The wooden shoes were made from different types of wood, such as willow, poplar, and alder. The shoes were carved from a single piece of wood and shaped to fit the foot. They were worn with socks, which helped to keep the feet warm and dry.
Over time, wooden shoes evolved, and their designs changed to suit different needs. For example, in France and Belgium, clogs were worn by factory workers, while in the Netherlands, they were worn by farmers and fishermen. In England, clogs were worn by miners and factory workers.
As technology advanced, new materials, such as rubber, became available, and wooden shoes slowly lost their popularity. However, in some parts of the world, wooden shoes are still worn today, either for practical reasons or as a cultural tradition.
Today, wooden shoes are often seen as a symbol of the Netherlands, and they are popular among tourists. They are often decorated with intricate designs and patterns, and they come in different colors and sizes.
In conclusion, wooden shoes have a rich history that spans centuries and different cultures. While they may not be as popular as they once were, they continue to be an important part of the cultural heritage of many countries.
Wooden shoes, also known as clogs, have been a traditional footwear choice in many countries around the world. In the Netherlands, they have been a staple for centuries, and are still worn by some people today. But who exactly wears wooden shoes? Let’s take a closer look.
In the past, wooden shoes were worn by farmers, fishermen, and other people who worked in the outdoors. The shoes were practical and durable, and protected the feet from the cold, wet ground. They were also easy to clean, which was important for people who worked with animals or in muddy fields.
Today, some people still wear wooden shoes for traditional purposes. For example, during Dutch festivals and celebrations, you may see people wearing wooden shoes as part of their traditional dress. Some farmers and gardeners also wear wooden shoes for practical reasons, as they are still durable and easy to clean.
While wooden shoes may have a traditional connotation, they are still used by many people today for practical reasons. For example, some people wear them as work shoes, as they provide good support and protection for the feet. They are also popular among chefs and other people who work in the food industry, as they are slip-resistant and easy to clean.
In addition, wooden shoes have become a fashion statement in recent years. Many designers have created modern versions of the traditional shoe, with different colors, patterns, and materials. Some people wear them as a quirky accessory, while others incorporate them into their everyday wardrobe.
Overall, wooden shoes have a wide range of users, from traditional wearers to modern fashion enthusiasts. Whether you wear them for practical reasons or as a style statement, they are a unique and interesting footwear choice.
If you’re interested in wooden shoes, you may be surprised to learn that there are actually many different types of wooden shoes worn around the world. Here are a few of the most common types:
Clogs are perhaps the most well-known type of wooden shoe. They are typically made from a single piece of wood, with a leather or fabric upper. Clogs are worn in many different cultures around the world, including the Netherlands, Sweden, and Japan. They are often associated with traditional dress, and are sometimes worn as work shoes.
Geta are a type of wooden sandal worn in Japan. They have a distinctive shape, with two “teeth” on the bottom of the sole that keep the foot elevated above the ground. Geta are typically made from lightweight wood, and are often worn with traditional Japanese clothing such as kimono.
Klompen are a type of clog worn in the Netherlands. They are typically made from willow or poplar wood, and are often painted with bright colors or decorated with intricate designs. Klompen are associated with Dutch culture, and are sometimes worn as part of traditional dress. They are also used as work shoes in some industries, such as farming and gardening.
Overall, wooden shoes are a fascinating and unique type of footwear with a rich history and cultural significance. Whether you’re interested in clogs, geta, or klompen, there’s sure to be a type of wooden shoe that catches your eye.
Wooden shoes, also known as clogs, have been worn by various cultures for centuries. The manufacturing process of wooden shoes involves several steps, which are outlined below.
The first step in making wooden shoes is selecting the type of wood to use. Traditionally, willow, alder, and poplar were the most commonly used woods for making wooden shoes. These woods were chosen for their durability and flexibility. However, nowadays, other types of wood are also used, including birch, beech, and maple.
Once the wood has been selected, it is cut into the rough shape of the shoe. This is done using a saw or a lathe. The rough shape is then smoothed out using a variety of tools, including chisels, planes, and sandpaper.
After the wood has been cut and smoothed, it is hollowed out to create the space for the foot. This is done using a specialized tool called a “hollowing knife.” The knife is used to carve out the interior of the shoe, leaving a space for the foot to fit comfortably.
Once the shoe has been hollowed out, it is shaped to fit the foot. This is done using a variety of tools, including a rasp and a file. The shoe is shaped to fit the contours of the foot, ensuring a comfortable fit.
Finally, the shoe is finished with a coat of varnish or paint. The varnish or paint not only gives the shoe a polished look but also helps to protect it from wear and tear.
In conclusion, the manufacturing process of wooden shoes is a time-consuming and intricate process that requires skill and precision. However, the end result is a durable and comfortable shoe that has been worn by various cultures for centuries.

Wooden shoes, also known as clogs, have a rich cultural significance in many parts of the world. They have been worn for centuries and continue to be a popular footwear choice in some countries. Let’s explore the cultural significance of wooden shoes in the Netherlands and Japan.
In the Netherlands, wooden shoes have been an integral part of the country’s culture for centuries. They were worn by farmers, fishermen, and other working-class people as a practical and durable footwear choice. Today, wooden shoes are still worn by some people in the Netherlands, especially in rural areas.
Wooden shoes are also a symbol of Dutch culture and heritage. They are often featured in traditional Dutch costumes and used in folk dances and other cultural events. In addition, wooden shoes have a significant place in Dutch folklore, with stories about clogs being passed down through generations.
In Japan, wooden shoes are known as geta or zori. They have been worn for centuries and are still a popular footwear choice for some people. Geta are worn with traditional Japanese clothing, such as kimono and yukata, and are often seen at festivals and other cultural events.
In addition to being a practical footwear choice, geta have a cultural significance in Japan. They are associated with the country’s traditional way of life and are seen as a symbol of Japanese culture and heritage. Geta also have a spiritual significance, with some people believing that they help to keep the wearer grounded and connected to the earth.
In conclusion, wooden shoes have a rich cultural significance in many parts of the world. In the Netherlands and Japan, they are not just a practical footwear choice, but also a symbol of culture, heritage, and tradition.
When it comes to footwear, the environmental impact is a major concern. According to a study by Quantis, the footwear industry is responsible for 1.4% of global greenhouse gas emissions. This is due to the production chain and materials used, which often include synthetic materials that take years to biodegrade.
In addition to greenhouse gas emissions, the production of footwear also contributes to other environmental issues such as air pollution, acidification, eutrophication, depletion of abiotic resources, and ozone depletion. The severity of these problems increases day by day.
Furthermore, the disposal of shoes also has a significant impact on the environment. Many shoes end up in landfills where they can take hundreds or even thousands of years to biodegrade. This means that the shoes we wear today could still be sitting in a landfill long after we are gone.
Fortunately, there are ways to reduce the environmental impact of footwear. One option is to choose shoes made from sustainable materials such as bamboo, organic cotton, or recycled materials. Another option is to buy shoes from companies that prioritize sustainability and have implemented eco-friendly production practices.
By making conscious choices about the shoes we wear, we can help reduce the environmental impact of the footwear industry and create a more sustainable future.
Wooden shoes, also known as clogs, have a long history of being worn by people all over the world. From their origins as practical footwear for farmers and factory workers to their current status as a fashion statement, wooden shoes have come a long way.
In the 1960s and 70s, clogs became a widespread fashion statement. This particular iteration derived from the Swedish clog or träskor, a backless shoe with a wooden sole that has been worn for centuries. The clunky sandals got a high-fashion make-over in the ’70s and hit the streets of the United States with all the power of a full-fledged fad. Everyone wore clogs – women, men, schoolgirls, top fashion models, and celebrities.
Today, designer clogs have gained popularity among wooden shoe consumers because they are versatile. They can be dressed up or down, making them suitable for different occasions. The overall look of designer clogs is trendy, chic, and sophisticated.
In addition to their stylish appearance, wooden shoes have practical benefits. They are durable, comfortable, and provide excellent support for your feet. They are also environmentally friendly because they are made from natural materials like wood.
Many fashion designers have embraced the trend of wooden shoes in recent years. They have incorporated them into their collections, creating unique and fashionable designs that appeal to a wide range of consumers.
In conclusion, wooden shoes have come a long way from their humble origins as practical footwear. Today, they are a fashionable and versatile option for people who want to make a statement with their footwear. Whether you’re dressing up for a night out or running errands around town, wooden shoes are a comfortable and stylish choice that you won’t regret.

Refinishing a wooden desk can be a daunting task, but with the right tools and techniques, it can be a rewarding DIY project. Whether you’re looking to give your old desk a new lease of life or simply want to update its look, refinishing can be a cost-effective solution. In this article, we’ll guide you through the steps to refinish a wooden desk and give it a brand new look.
Before you begin, it’s important to determine the original finish of your desk. This will help you choose the right refinishing method and ensure that the wood is suitable for refinishing. Some finishes and types of wood may not be able to be refinished, so it’s important to verify this before taking any action. Once you’ve determined that your desk can be refinished, you can begin the process of stripping the old finish.
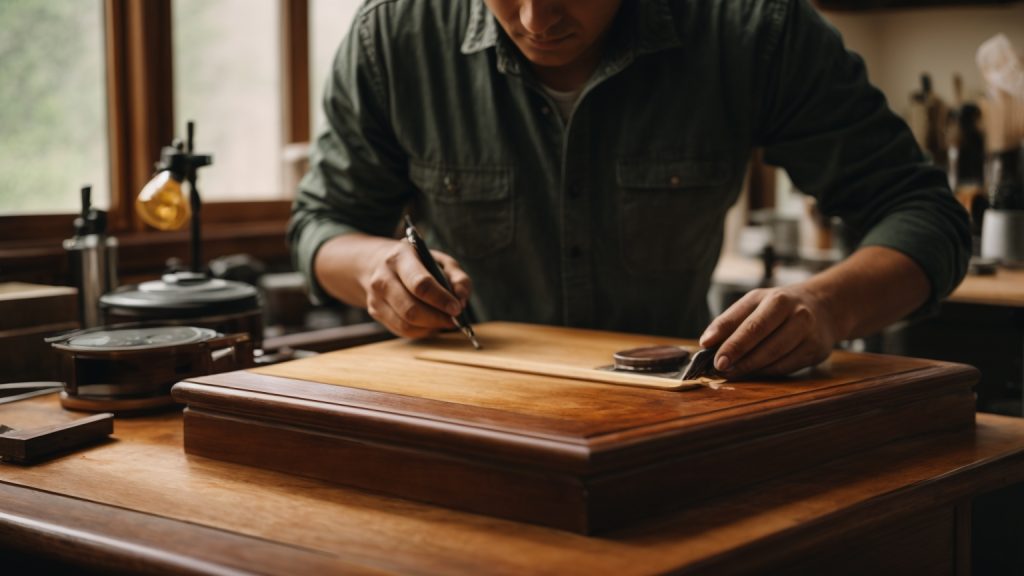
If you have a wooden desk that has seen better days, refinishing it may be just what it needs to restore its beauty and functionality. Refinishing a wooden desk involves removing the old finish, repairing any damage, and applying a new finish to protect the wood and give it a fresh look.
Refinishing your wooden desk is important for several reasons. First, it helps to protect the wood from damage caused by moisture, heat, and other environmental factors. Over time, wooden desks can become discolored, warped, or cracked if they are not properly maintained. Refinishing your desk can help to prevent these issues and keep it looking great for years to come.
Second, refinishing your wooden desk can help to restore its beauty and value. A well-maintained wooden desk can be a valuable piece of furniture that adds character and style to any room. By refinishing your desk, you can bring out its natural beauty and give it a fresh, updated look that will enhance its appeal and value.
Finally, refinishing your wooden desk can be a fun and rewarding DIY project that you can tackle on your own. With the right tools and materials, you can strip and refinish your desk in a weekend or two, depending on the size and complexity of the project. Plus, by doing it yourself, you can save money and have the satisfaction of knowing that you restored your desk to its former glory with your own hands.
In summary, refinishing your wooden desk is an important step in maintaining its beauty, functionality, and value. By taking the time to strip, repair, and refinish your desk, you can protect it from damage, restore its natural beauty, and enjoy the satisfaction of a job well done.
When it comes to refinishing a wooden desk, one of the first things you need to do is identify the type of wood you are working with. Knowing the type of wood will help you choose the right refinishing technique and products to use. Here are some tips for identifying the type of wood:
The first thing you need to determine is whether the wood is a hardwood or a softwood. Hardwoods come from deciduous trees, such as oak, maple, and cherry, while softwoods come from coniferous trees, such as pine and cedar. Hardwoods are generally more durable and harder to work with, while softwoods are easier to work with but less durable.
To determine whether your wood is a hardwood or a softwood, look at the grain pattern. Hardwoods have a tighter and more complex grain pattern, while softwoods have a simpler and more open grain pattern. You can also try to dent the wood with your fingernail. If it dents easily, it is likely a softwood.
If you are working with an exotic wood, such as teak or mahogany, you may need to do some additional research to identify the type of wood. Exotic woods can come from all over the world and can have unique characteristics and properties.
One way to identify exotic woods is to look at the color and grain pattern. For example, teak is a golden brown color with a straight grain, while mahogany is a reddish-brown color with a ribbon-like grain. You can also try to identify the wood by its smell. Some exotic woods have a distinct smell, such as cedar and rosewood.
Overall, identifying the type of wood is an important step in refinishing a wooden desk. By knowing the type of wood, you can choose the right refinishing technique and products to use, and ensure that your finished product looks beautiful and lasts for years to come.
Refinishing a wooden desk can be a rewarding DIY project that can transform an old, worn-out piece of furniture into a beautiful and functional addition to your home or office. To get started, you’ll need a few basic materials and tools. Here are the essentials:
Before you begin refinishing your desk, it’s important to ensure that you have the necessary safety equipment to protect yourself from harmful chemicals and dust. Here are some items you should have on hand:
Sanding is a crucial step in the refinishing process, as it helps to remove the old finish and prepare the surface for a new one. Here are some tools you’ll need for sanding your desk:
The finishing products you choose will depend on the look you want to achieve and the level of protection you need. Here are some options to consider:
With these materials and tools, you’ll be well on your way to refinishing your wooden desk. Remember to take your time and follow the instructions carefully to achieve the best results.
Before you begin refinishing your wooden desk, it is important to prepare your workspace properly. This will ensure that the process is smoother and safer. Here are some steps to follow:
First, clear the area where you will be working. Remove any items that could get in the way or get damaged during the refinishing process. This includes any other furniture, decorations, or accessories.
Next, cover the floor with a drop cloth or plastic sheeting to protect it from any spills or drips. You can also use old newspapers or cardboard boxes if you don’t have a drop cloth. Make sure the covering extends beyond the area where you will be working to catch any stray drips or spills.
Refinishing a wooden desk can produce fumes that can be harmful if inhaled. It is important to work in a well-ventilated area to avoid any health issues. Open windows and doors, or use a fan to help circulate the air. If you have a respirator mask, wear it to protect yourself from the fumes.
Make sure your workspace is well-lit. This will help you see any imperfections or missed spots during the refinishing process. Natural light is best, but if that’s not possible, use bright artificial light.
Gather all the tools and materials you will need before starting the refinishing process. This includes sandpaper, paint stripper, wood filler, stain, and a sealer. Make sure you have enough of each item to complete the job. Keep them within easy reach so you don’t have to stop and search for them during the process.
By following these steps, you can prepare your workspace for refinishing your wooden desk efficiently and safely.
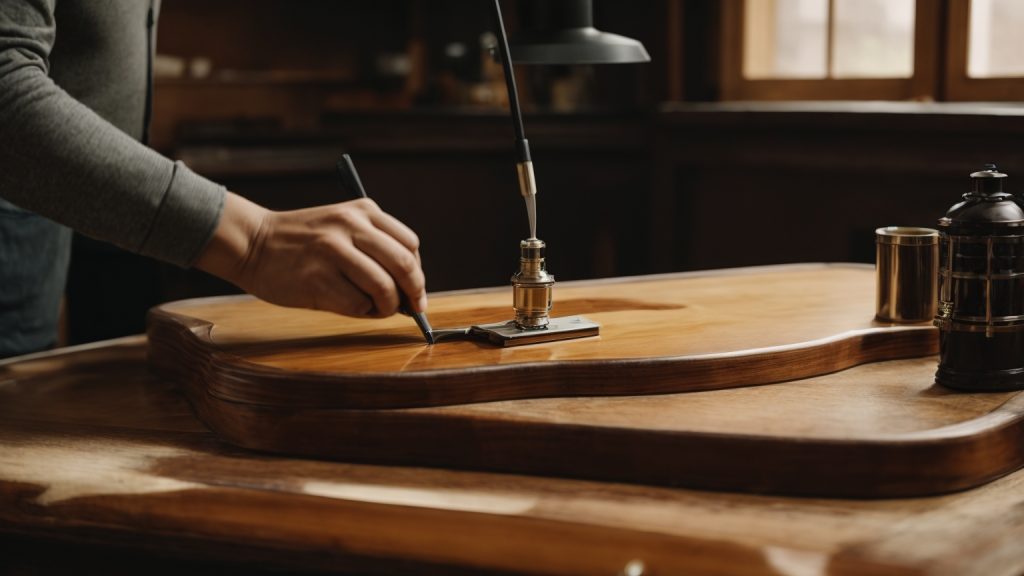
Before you can refinish your wooden desk, you need to remove the old finish first. The process of stripping the old finish can be messy and time-consuming, but it’s essential to achieve a smooth and even surface for the new finish.
There are two main methods for stripping the old finish off your wooden desk: sanding and chemical stripping. Sanding involves using sandpaper to remove the old finish manually, while chemical stripping uses a chemical solvent to dissolve the old finish.
Sanding is a good option for flat surfaces, but it can be challenging to remove the finish from curved or detailed areas. Chemical stripping is a better option for those areas, but it requires more caution and care.
To strip the old finish off your wooden desk, you’ll need the following supplies:
If you choose to use a chemical stripper, follow the manufacturer’s instructions carefully. Apply the stripper to the desk surface with a paintbrush or scraper, and let it sit for the recommended time. Then, use steel wool or sandpaper to remove the old finish.
Be sure to work in a well-ventilated area and wear protective gear, as the fumes from the chemical stripper can be harmful.
If you choose to sand the old finish off your wooden desk, start with a coarse-grit sandpaper and work your way up to a finer grit. Sand in the direction of the wood grain to avoid scratches and uneven spots.
Once you’ve removed the old finish, wipe down the surface with a clean rag to remove any dust or debris.
By following these steps, you can strip the old finish off your wooden desk and prepare it for a new finish.
Sanding the desk is a crucial step in the process of refinishing a wooden desk. It helps to remove the old finish and create a smooth surface for the new finish to adhere to. Here are some tips to help you sand your desk effectively:
By following these tips, you can effectively sand your desk and prepare it for the next step in the refinishing process.
After removing the old finish, it’s time to apply the new finish to your wooden desk. This is the step that will give your desk a fresh new look and protect it from damage. There are many different types of finishes to choose from, so it’s important to choose the right one for your desk.
When choosing a new finish for your desk, consider the following factors:
Here are some common types of finishes and their characteristics:
| Finish | Characteristics |
|---|---|
| Polyurethane | Durable, water-resistant, glossy finish |
| Varnish | Durable, glossy finish |
| Lacquer | Durable, glossy finish, dries quickly |
| Oil-based stain | Penetrates the wood, enhances natural grain, requires a topcoat |
| Water-based stain | Low odor, dries quickly, requires a topcoat |
Once you’ve chosen your finish, it’s time to apply it to your desk. Here are some tips for a successful application:
Remember, applying a new finish can be a time-consuming process, but the end result is worth it. With the right finish and application techniques, your wooden desk will look beautiful and be protected for years to come.
After you have stripped, sanded, stained, and sealed your wooden desk, it’s time to add the final touches to bring out the best in your hard work. This section will cover two essential final touches: buffing and polishing and adding a protective coating.
Buffing and polishing are the final steps to give your desk a smooth and shiny finish. To do this, you will need:
First, apply a small amount of polishing compound to the soft cloth. Then, rub the cloth onto the surface of the desk in circular motions. If you have an electric buffer, you can use it to buff the desk more quickly and efficiently.
Be careful not to overdo it, as too much buffing can remove the protective coating you applied earlier. Once you are satisfied with the shine, wipe off any excess polishing compound with a clean cloth.
Adding a protective coating is crucial to ensure that your desk stays in good condition for years to come. There are several options for protective coatings, including:
Polyurethane is a popular choice for its durability and resistance to scratches and stains. Lacquer is also durable but requires more maintenance and can yellow over time. Wax is a natural option that provides a soft, matte finish but needs to be reapplied regularly.
To apply the protective coating, follow the instructions on the product label carefully. Generally, you will need to apply several thin coats, allowing each coat to dry completely before applying the next.
Congratulations, you have successfully refinished your wooden desk! With proper care, your desk will continue to look beautiful and serve you well for years to come.
Taking care of your refinished wooden desk is important to ensure it stays looking great for years to come. Here are some maintenance tips to keep your desk in top condition.
Regular cleaning is essential to maintaining the beauty of your refinished wooden desk. Dust and dirt can accumulate quickly and cause scratches and damage to the surface. Use a soft, lint-free cloth to wipe down your desk regularly. Avoid using abrasive cleaners or harsh chemicals that can damage the finish. Instead, use a mild soap and water solution to clean your desk. Be sure to dry the surface thoroughly to prevent water damage.
Preventing scratches and stains is key to keeping your refinished wooden desk looking its best. Here are some tips to help prevent damage:
By following these maintenance tips, you can keep your refinished wooden desk looking beautiful and in top condition for years to come.

If you’re a homeowner with a wooden deck, you may be wondering how long it will last before needing to be replaced. The answer to this question can vary depending on a number of factors, including the type of wood used, how well the deck is maintained, and the climate in which you live.
According to industry experts, a traditional wooden deck can last anywhere from 10 to 15 years with proper care and maintenance. However, if you opt for a composite deck made from materials like plastic and wood fibers, you can expect it to last up to 30 years or more. Capped polymer decks, which are made from a superior material composition, can potentially last for 50 years or more.
It’s important to note that the lifespan of your wooden deck will also depend on how well you take care of it. Regular cleaning, staining, and sealing can help to extend the life of your deck and prevent damage from moisture, insects, and UV rays. With proper maintenance, your wooden deck can provide years of enjoyment and add value to your home.
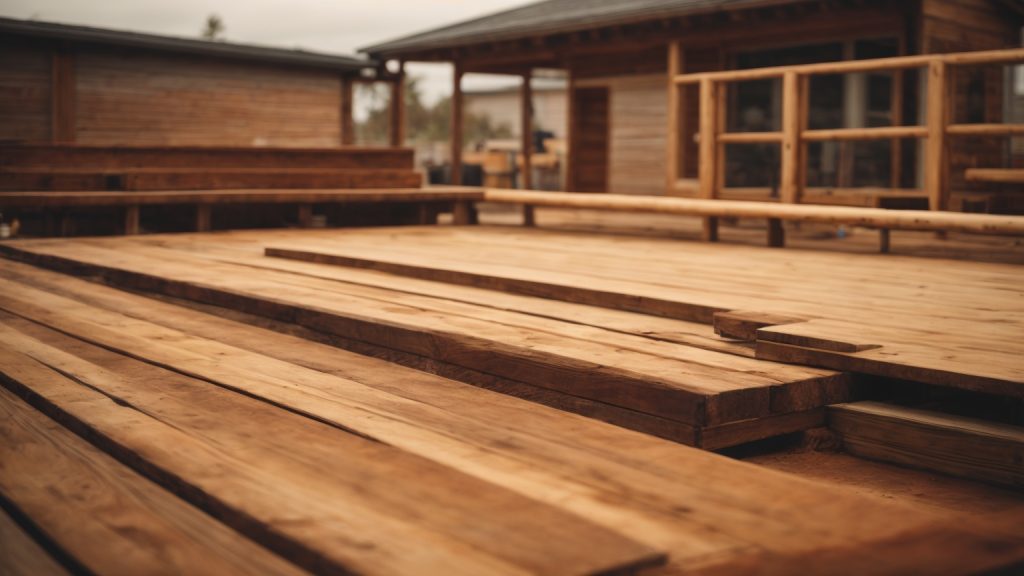
When it comes to building a deck in your backyard, you want to make sure it lasts as long as possible. The life span of a wooden deck will depend on several factors, including the type of wood, the quality of the installation, and how well you maintain it over time.
According to The International Association of Certified Home Inspectors, a traditional wood deck can last for 10-15 years, while a composite deck can last around 15 to 30 years. However, with proper maintenance, a wood deck can last anywhere from 10 to 30 years.
One of the biggest factors that can affect the life span of your wooden deck is the type of wood you choose. Different woods have different levels of durability and resistance to weather and insects. For example, cedar and redwood are known for their natural resistance to decay and insects, making them a popular choice for decks. Pressure-treated lumber is also a popular choice, as it is treated with chemicals to resist decay and insects.
Another factor to consider is the quality of the installation. A well-built deck that is properly supported and secured will last longer than a poorly built deck. It’s important to hire a professional contractor who has experience building decks and will use quality materials and construction techniques.
Finally, proper maintenance is crucial to extending the life span of your wooden deck. This includes regular cleaning, staining, and sealing to protect the wood from moisture, UV rays, and other environmental factors. You should also inspect your deck regularly for any signs of damage, such as rotting or splitting boards, and make repairs as needed.
Overall, the life span of a wooden deck will depend on several factors, but with proper care and maintenance, you can enjoy your deck for many years to come.
When it comes to the lifespan of your wooden deck, several factors come into play. Here are some of the most important factors that can influence the durability of your deck:
The quality of the wood used to build your deck is one of the most critical factors that can affect its lifespan. Some wood species are naturally more resistant to rot and decay than others. For instance, cedar and redwood are known for their natural resistance to rot and insects, while pine and spruce are less durable and require more maintenance.
Another crucial factor that can influence the quality of your deck is the grade of the wood used. Higher-grade wood has fewer knots and defects, making it more durable and long-lasting than lower-grade wood.
The climate and weather conditions in your area can also have a significant impact on the lifespan of your deck. If you live in an area with high humidity or frequent rainfall, your deck is more likely to experience moisture damage, which can lead to rot, decay, and warping.
Similarly, if you live in an area with extreme temperatures, such as hot summers and cold winters, your deck may be more prone to cracking, splitting, and fading.
Proper maintenance and care are crucial for extending the lifespan of your deck. Regular cleaning, sealing, and staining can help protect your deck from weathering and moisture damage. It’s also essential to inspect your deck regularly for signs of wear and tear, such as splintering, cracking, or loose boards.
In addition to regular maintenance, you should also take steps to prevent damage to your deck. For instance, avoid placing heavy objects on your deck, such as grills or furniture, as this can cause dents and scratches. You should also avoid using harsh chemicals or pressure washers to clean your deck, as this can damage the wood.
Overall, the lifespan of your wooden deck depends on several factors, including the quality of wood, climate and weather conditions, and maintenance and care. By choosing high-quality wood, maintaining your deck regularly, and taking steps to prevent damage, you can extend the lifespan of your deck and enjoy it for years to come.
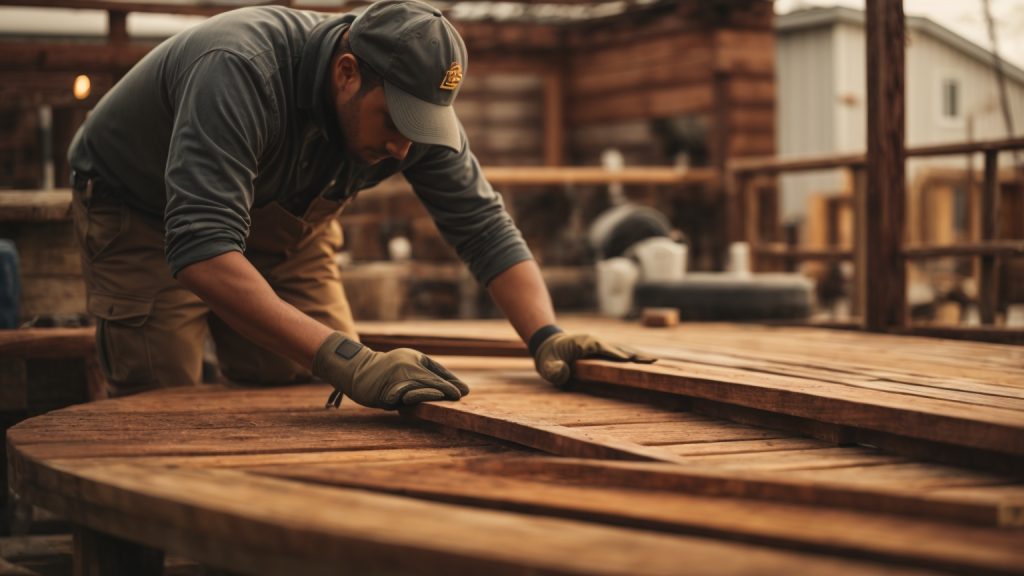
When it comes to building a wooden deck, the type of wood you choose can have a big impact on its longevity. Here are some of the most common types of wood used for decks and how long you can expect them to last with proper maintenance:
Pressure-treated wood is a popular choice for deck building because it is affordable and resistant to rot and insects. However, it does require regular maintenance to prevent warping and cracking. With proper care, a pressure-treated wood deck can last up to 20 years.
Cedar wood is a beautiful and durable option for deck building. It is naturally resistant to rot and insects, and it has a warm, reddish-brown color that many people find appealing. With regular maintenance, a cedar wood deck can last up to 25 years.
Redwood is another popular option for deck building because it is naturally resistant to rot and insects. It has a rich, reddish color that can add warmth and character to any outdoor space. With proper care, a redwood deck can last up to 30 years.
It’s important to note that these are just general guidelines, and the lifespan of your deck will depend on many factors, including the quality of the wood, the climate in your area, and how well you maintain it. Regular cleaning, sealing, and staining can help extend the life of your deck and keep it looking beautiful for years to come.
If you have a wooden deck, it’s essential to keep an eye on its condition. Even with proper maintenance, decks will show signs of aging over time. Here are some warning signs to look out for:
One of the most common problems with wooden decks is wood rot. This occurs when moisture gets trapped in the wood, causing it to decay. Signs of wood rot include soft and spongy areas, discoloration, and a musty odor. If you notice any of these signs, it’s crucial to address the issue as soon as possible. Rot can spread quickly and compromise the structural integrity of your deck.
Another warning sign of an aging deck is loose boards. Over time, the fasteners that hold the boards in place can become loose, causing the boards to shift and move. If left unchecked, this can lead to tripping hazards and even collapse. Check your deck regularly for loose boards and tighten any loose fasteners.
Wooden decks are exposed to the elements year-round, which can cause fading and discoloration. UV rays from the sun can cause the wood to fade, while moisture can cause it to turn gray or black. While this is a cosmetic issue, it can also be a sign of deeper problems. Fading and discoloration can be an indication that your deck is not properly sealed, which can lead to rot and decay.
In conclusion, keeping an eye on your wooden deck’s condition is crucial to ensure its longevity and safety. If you notice any of these warning signs, it’s essential to address them promptly to prevent further damage.
If you want to get the most out of your wooden deck, it’s important to take care of it properly. With proper maintenance, your deck can last for many years. Here are some tips to help you extend the life of your deck.
Regular cleaning is essential for keeping your deck in good condition. Dirt, leaves, and other debris can accumulate on your deck over time, which can lead to mold and mildew growth. To prevent this, you should sweep your deck regularly and remove any debris that you find.
In addition to sweeping, you should also give your deck a thorough cleaning at least once a year. You can use a pressure washer or a deck cleaner to remove dirt and stains. Be sure to follow the manufacturer’s instructions when using a deck cleaner, and rinse your deck thoroughly after cleaning.
Sealing and staining your deck can help to protect it from the elements. Sealing your deck will help to prevent moisture from penetrating the wood, which can lead to rot and decay. Staining your deck will help to protect it from UV rays and other environmental factors.
You should plan to seal or stain your deck every two to three years. Before you do this, you should clean your deck thoroughly and allow it to dry completely. Then, you can apply the sealer or stain according to the manufacturer’s instructions.
It’s important to inspect your deck regularly to make sure that it’s in good condition. You should inspect your deck at least once a year, and look for signs of damage such as loose boards, cracks, and rot.
If you find any damage, you should repair it as soon as possible. This will help to prevent the damage from getting worse and potentially compromising the structural integrity of your deck.
By following these tips, you can extend the life of your wooden deck and keep it looking great for many years to come.

If you’re looking to add a touch of elegance to your garden or backyard, building a wooden arch is a great way to do it. Not only does it add a beautiful focal point to your outdoor space, but it can also serve as a support for climbing plants like roses, ivy, and wisteria. In this article, we’ll go over the steps involved in building a wooden arch so that you can create a stunning addition to your garden.
The first step in building a wooden arch is to gather the necessary tools and materials. You’ll need plywood sheets, a circular saw, a cordless drill, a posthole digger, safety glasses, and other tools depending on the design you choose. Once you have everything you need, you can start building the arch.
The process of building a wooden arch involves cutting and shaping the plywood sheets into the desired shape, assembling the arch, and securing it in place. Depending on the design you choose, you may also need to add additional support structures like posts or braces. With a little patience and some basic woodworking skills, you can create a beautiful wooden arch that will enhance the look of your garden or backyard.
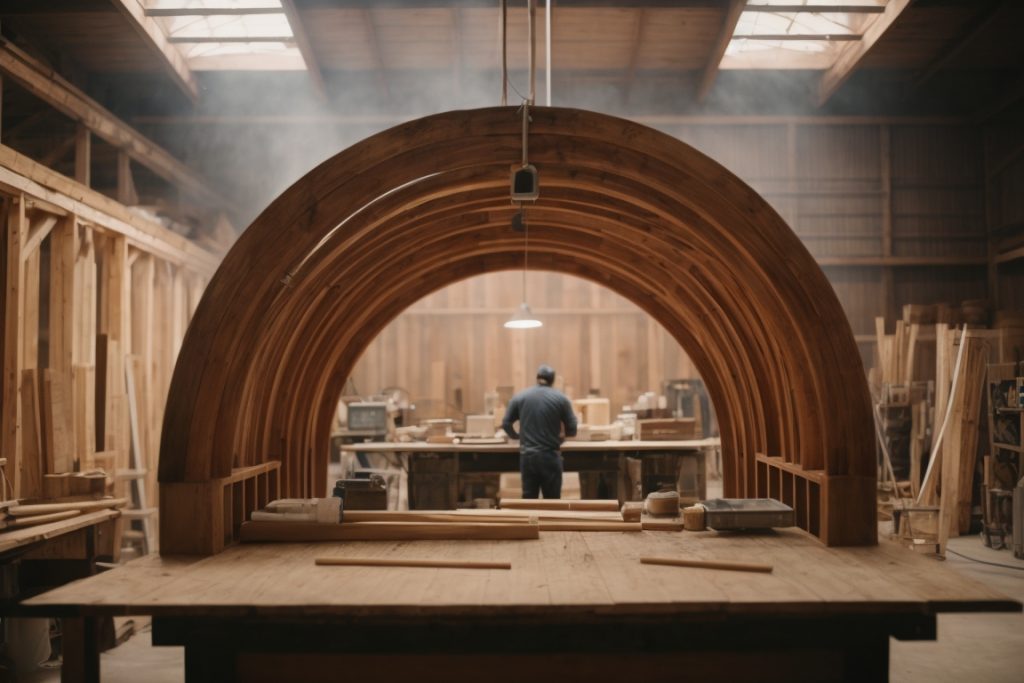
If you’re looking to add a touch of elegance to your garden or outdoor space, a wooden arch is a great way to do it. Wooden arches are easy to build and can be customized to fit any style or design. In this section, we’ll cover the basics of building a wooden arch, including the importance of wood type and arch design principles.
When it comes to building a wooden arch, the type of wood you use is crucial. You want to choose a wood that is strong and durable enough to withstand the elements and support the weight of the arch. Some of the best types of wood for building a wooden arch include:
When it comes to designing your wooden arch, there are a few key principles to keep in mind:
By keeping these design principles in mind and choosing the right type of wood, you can build a beautiful and functional wooden arch that will add a touch of elegance to your outdoor space.
When it comes to building a wooden arch, having the right materials and tools is essential. Here are the things you’ll need to get started:
The first step in building a wooden arch is to choose the right type of wood. You’ll want to select wood that is strong, durable, and able to withstand the elements. Some good options include:
Before you start building, make sure to inspect your wood for any defects or damage. You’ll want to avoid using any wood that is warped, cracked, or has knots that could weaken the structure.
To build a wooden arch, you’ll need a few essential tools:
Having the right materials and tools is crucial to building a wooden arch that is strong and durable. With the right materials and a little bit of know-how, you’ll be able to create a beautiful arch that will last for years to come.
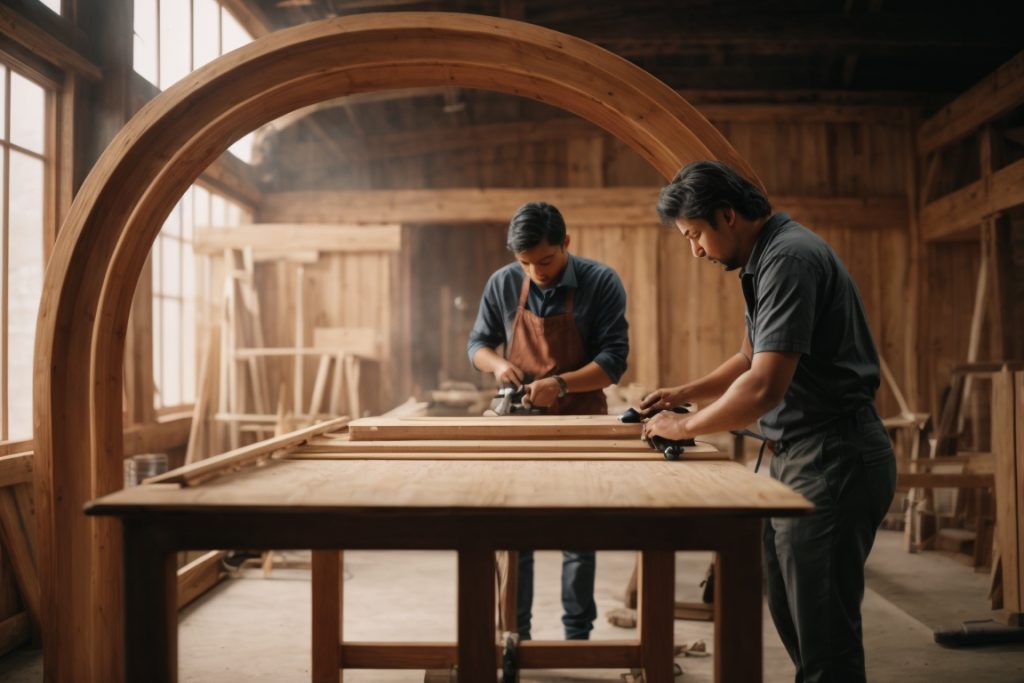
Designing your wooden arch is an important step that will determine the final look and functionality of your arch. In this section, we will go over the steps to create your arch design.
Before you start building your arch, you need to create a blueprint. This will help you visualize the final product and make any necessary adjustments before you start building.
To create your blueprint, you can use a pencil and paper or a computer-aided design (CAD) program. Draw the arch shape you want and make sure to include the height, width, and depth of the arch. You can also add any decorative elements you want to include, such as carvings or cutouts.
Once you have your blueprint, you need to determine the dimensions of your arch. This will depend on the size of the space where you want to install the arch and the purpose of the arch.
To determine the dimensions, measure the height and width of the space where you want to install the arch. Make sure to add a few extra inches to the measurements to ensure a proper fit. You also need to consider the purpose of the arch. If it is for decoration, you may want to make it smaller. If it is for a garden or walkway, you may want to make it larger to accommodate people walking underneath.
After you have determined the dimensions, you can start selecting the materials you will need to build your arch. Make sure to choose high-quality wood that is sturdy and durable. You can also choose to add a finish to your arch, such as paint or stain, to protect it from the elements and enhance its appearance.
By following these steps, you can create a beautiful and functional wooden arch that will enhance the look of your garden or walkway.
Before building a wooden arch, it is important to properly prepare the wood to ensure a sturdy and long-lasting structure. This section will cover two key steps in preparing the wood: cutting and sanding.
To begin, you will need to cut the wood to the appropriate length and shape. This will depend on the specific design of your arch. It is important to use a circular saw or jigsaw to make precise cuts. A framing square or combination square can be used to ensure that the cuts are straight and accurate.
To make curved cuts, a router can be used to create a smooth and consistent shape. Alternatively, a template can be used to guide the saw or jigsaw along the desired curve.
Once the wood is cut to the appropriate size and shape, it is important to sand it to remove any rough edges or splinters. This will also help to create a smooth and even surface for painting or staining.
Start with a coarse sandpaper, such as 80-grit, and gradually work your way up to a finer grit, such as 220-grit. Sand in the direction of the grain to avoid damaging the wood.
After sanding, wipe the wood down with a damp cloth to remove any dust or debris. This will ensure that the surface is clean and ready for finishing.
By properly preparing the wood through cutting and sanding, you can ensure that your wooden arch will be strong, durable, and visually appealing.
After cutting the arch pieces, it’s time to assemble them. This section will guide you through the process of joining and securing the arch structure.
To join the arch pieces, you will need wood glue and clamps. Here are the steps to follow:
Once the glue has dried, it’s time to secure the arch structure. You will need screws and a drill. Here are the steps to follow:
It’s important to note that you should not over-tighten the screws as it can cause the wood to split. Also, make sure the screws are evenly spaced and aligned to ensure a strong and stable arch structure.
Congratulations! You have successfully assembled your wooden arch. In the next section, we will cover how to finish and decorate your arch.
Now that you have built your wooden arch, it’s time to add the finishing touches to make it truly stand out. Here are a few suggestions on how to add some personality and style to your arch.
One way to enhance the natural beauty of your wooden arch is by applying wood stain. Not only does it add color, but it also helps protect the wood from weather damage. Before applying the stain, make sure the wood is clean and dry. You can use a brush, roller, or spray gun to apply the stain. Follow the manufacturer’s instructions for the best results. Once the stain is dry, you can add a clear coat of polyurethane to protect the wood further.
Another way to make your wooden arch unique is by adding decorative elements. Here are a few ideas:
Remember to choose elements that complement the overall style and purpose of your arch. With a little creativity, you can turn your wooden arch into a stunning focal point in your garden or outdoor space.
That’s it! Your wooden arch is now complete, and it’s ready to be enjoyed for years to come.
Maintaining your wooden arch is essential to ensure it lasts for years to come. Here are some tips to help you keep your wooden arch in top condition:
Regular cleaning is important to prevent dirt and debris from accumulating on the arch. Use a soft-bristled brush or a cloth to wipe away any dirt or dust. If there are any stubborn stains, use a mild soap solution and a soft brush to clean the arch. Rinse the arch with water and let it dry completely before applying any finish.
Applying a protective finish to your wooden arch can help prevent moisture damage and protect it from the elements. You can use a clear coat or a stain that matches the color of your arch. Apply the finish according to the manufacturer’s instructions and allow it to dry completely before using the arch.
Inspect your wooden arch regularly for any signs of damage such as cracks, splits, or warping. If you notice any damage, address it immediately to prevent further damage. Replace any damaged parts or contact a professional for repairs.
If you need to store your wooden arch for an extended period, make sure to store it in a dry and cool place. Cover the arch with a tarp or a sheet to protect it from dust and debris. Avoid storing the arch in direct sunlight or near sources of heat.
Taking care of your wooden arch can help prolong its life and keep it looking beautiful for years to come. By following these maintenance tips, you can ensure that your wooden arch remains a stunning addition to your garden or yard.


