Rahasia Sukses Poker Online: Cara Ampuh Membaca Lawan di Fase Post-Flop
Di antara seluruh platform penyedia poker online terbaik, fase taruhan post-flop (setelah tiga kartu pertama dibuka) senantiasa diakui sebagai salah

Di antara seluruh platform penyedia poker online terbaik, fase taruhan post-flop (setelah tiga kartu pertama dibuka) senantiasa diakui sebagai salah


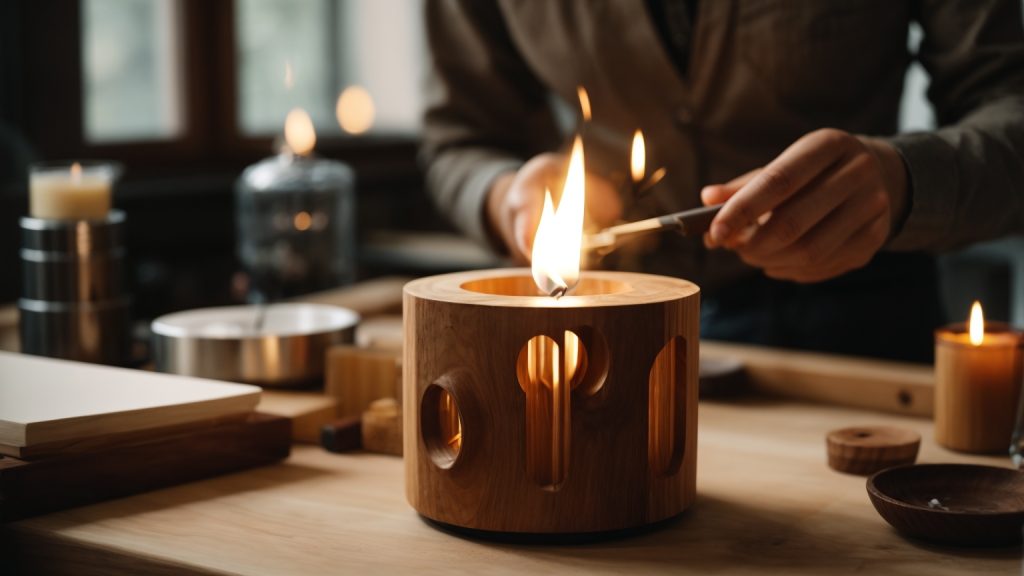
Are you looking for a fun and easy DIY project to spruce up your home decor? Why not try making your own wooden candle holder? With just a few simple materials and some basic tools, you can create a beautiful and functional piece that will add a touch of warmth and charm to any room.
One of the great things about making your own wooden candle holder is that you can customize it to suit your personal style and taste. Whether you prefer a sleek and modern look or something more rustic and natural, there are endless possibilities when it comes to design. Plus, you can choose from a variety of different woods, stains, and finishes to create a truly unique and personalized piece.
So what are you waiting for? Grab some wood, a saw, and some sandpaper, and let’s get started on creating a beautiful and functional wooden candle holder that you can enjoy for years to come.
When it comes to making a wooden candle holder, choosing the right type of wood is crucial. Different types of wood have different properties, which can affect the final product’s appearance, durability, and overall quality. In this section, we’ll discuss the two main categories of wood: hardwood and softwood.
Hardwood comes from deciduous trees, which are trees that lose their leaves annually. Hardwood is known for its density, strength, and durability. It’s also more expensive than softwood because it takes longer to grow. Some common types of hardwood include oak, maple, mahogany, and cherry.
Hardwood is an excellent choice for making candle holders because it’s sturdy and can withstand the heat of a burning candle. It also has a beautiful grain pattern that can add an elegant touch to your candle holder. However, hardwood can be challenging to work with because it’s dense and can be tough to cut and shape.
Softwood comes from coniferous trees, which are trees that have needles instead of leaves. Softwood is less dense than hardwood and is typically less expensive. Some common types of softwood include pine, cedar, and spruce.
Softwood is a popular choice for making candle holders because it’s easy to work with and has a natural, rustic look. However, softwood is not as durable as hardwood and may not last as long. It’s also more prone to dents and scratches, which can detract from the overall appearance of your candle holder.
When choosing between hardwood and softwood, consider your budget, the final product’s intended use, and your woodworking skills. Both types of wood can make beautiful candle holders, but they have different properties that can affect the final product’s appearance and durability.
If you want to make a wooden candle holder, you will need some essential tools. Here are some of the tools you will need to make a wooden candle holder:
A hand saw is an essential tool for any woodworker. It is used to cut the wood to the desired length and shape. You can use a crosscut saw or a rip saw depending on the type of cut you want to make. A crosscut saw is used to make cuts across the grain of the wood, while a rip saw is used to make cuts along the grain.
A chisel is a tool that is used to remove wood from a piece of lumber. It is an essential tool for making precise cuts and shaping the wood. You can use a bench chisel or a mortise chisel depending on the type of cut you want to make. A bench chisel is used for general woodworking, while a mortise chisel is used to make mortises.
Sandpaper is used to smooth the surface of the wood and remove any rough spots. You can use sandpaper of different grits depending on the level of smoothness you want to achieve. Start with a coarse grit sandpaper and work your way up to a finer grit to achieve a smooth finish.
A drill is used to make holes in the wood. You will need a drill to make the holes for the candles in your wooden candle holder. You can use a hand-held drill or a drill press depending on the size of the holes you want to make.
In conclusion, these are the essential tools you will need to make a wooden candle holder. Make sure you have these tools before you start your project.
When it comes to making a wooden candle holder, the type of wood you choose is important. You want to select a wood that is strong enough to hold the weight of the candle and that will not easily crack or split. Here are some factors to consider when selecting your wood:
There are many types of wood to choose from, each with its own unique characteristics. Some popular options for candle holders include pine, oak, and birch. Pine is a softwood that is easy to work with and has a natural grain pattern. Oak is a hardwood that is strong and durable, making it a good choice for larger candle holders. Birch is a light-colored hardwood that has a smooth, even grain.
The grain pattern of the wood can also affect the look of your candle holder. Some woods, like oak, have a prominent grain pattern that adds character to the piece. Other woods, like birch, have a more subtle grain pattern that creates a smoother look.
Consider the size and shape of your candle holder when selecting your wood. If you are making a large candle holder, you will need a thicker and stronger piece of wood. If you are making a smaller candle holder, you can use a thinner piece of wood. The shape of your candle holder will also affect the type of wood you choose. If you are making a curved or rounded candle holder, you will need a wood that is easy to bend and shape.
Lastly, consider the sustainability of the wood you choose. Using sustainable wood sources helps to protect our environment and ensures that future generations will have access to natural resources. Look for wood that is certified by organizations like the Forest Stewardship Council (FSC) or that is harvested locally from sustainable forests.
By considering these factors, you can select the perfect wood for your candle holder project.
When it comes to designing your wooden candle holder, there are a few things to consider. In this section, we will explore the different aspects of designing a candle holder that is both functional and aesthetically pleasing.
The first thing to consider when designing your candle holder is the size. You will want to determine the size of the candle holder based on the size of the candles you plan to use. A good rule of thumb is to make the candle holder at least 1 inch larger than the diameter of the candle. This will ensure that the candle fits snugly in the holder and is stable.
The shape of your candle holder is another important consideration. You can choose from a variety of shapes, including round, square, or even a more unique shape. Keep in mind that the shape of your candle holder should complement the shape of the candles you plan to use.
In addition to the size and shape of your candle holder, you will also need to plan for the size of the candles you plan to use. This includes the height and diameter of the candles. You will want to make sure that the candle holder is tall enough to accommodate the height of the candle, and wide enough to accommodate the diameter of the candle.
One way to plan for the size of your candles is to create a template of the candle holder. This can be done by drawing the shape of the candle holder on a piece of paper and then cutting it out. You can then place the template over the candle to ensure that it fits properly.
By considering these factors when designing your candle holder, you can create a beautiful and functional piece that will enhance the ambiance of any room.
When making a wooden candle holder, the first step is to cut the wood to the desired size. Here are the steps to follow:
The type of wood you choose will depend on your personal preference and the tools you have available. Some good options include pine, cedar, and oak. Make sure the wood is dry and free of knots.
Measure and mark the wood to the desired length. Use a straight edge to ensure a clean cut.
Use a saw to cut the wood to the desired length. A handsaw or circular saw will work well. Make sure to wear safety goggles and gloves to protect yourself from flying debris.
Use sandpaper to smooth the edges of the wood. This will help prevent splinters and give the candle holder a polished look.
If desired, you can add decorative touches to the candle holder. This could include carving designs into the wood or painting it a different color.
By following these steps, you can create a beautiful wooden candle holder that will add warmth and charm to any room in your home.
Now that you have gathered all the necessary materials, it’s time to start carving your wooden candle holder. Here are the steps to follow:
Remember to take your time and be patient when carving your wooden candle holder. It may take some practice to get the shape and depth just right, but with some practice, you’ll be able to create a beautiful and functional candle holder that you can be proud of.
Once you have cut your wooden pieces to size, it’s time to sand and smooth out any rough edges or splinters. This step is important to ensure that your candle holder looks clean and professional.
To sand the edges of your wood, you can use sandpaper or a rotary tool with a sanding attachment. Be sure to sand gently to avoid removing too much wood and altering the shape of your candle holder.
If you are using a rotary tool, set it to a low speed and gently run it along the edges of the wood. This will smooth out any rough spots and splinters. You can also use the rotary tool to sand the inside of any holes you drilled for your candles.
After sanding, wipe down your wooden pieces with a damp cloth to remove any sawdust or debris. This will ensure that your candle holder is clean and ready for finishing.
If you want to add a bit of texture to your candle holder, you can use a wire brush or sandpaper to create a distressed look. Simply run the brush or sandpaper along the surface of the wood in the direction of the grain.
Remember, sanding and smoothing is an important step in creating a beautiful wooden candle holder. Take your time and be gentle to avoid damaging your wood. With a little patience and effort, you’ll have a stunning candle holder that you can be proud of.
To create the candle hole in your wooden candle holder, you will need a drill and a suitable drill bit. The size of the drill bit will depend on the size of the candle you plan to use. Here are the steps to create the candle hole:
Remember to take your time when drilling the candle holes. Rushing the process can result in an uneven or crooked hole. Also, be sure to wear appropriate safety gear, such as eye protection, when using power tools.
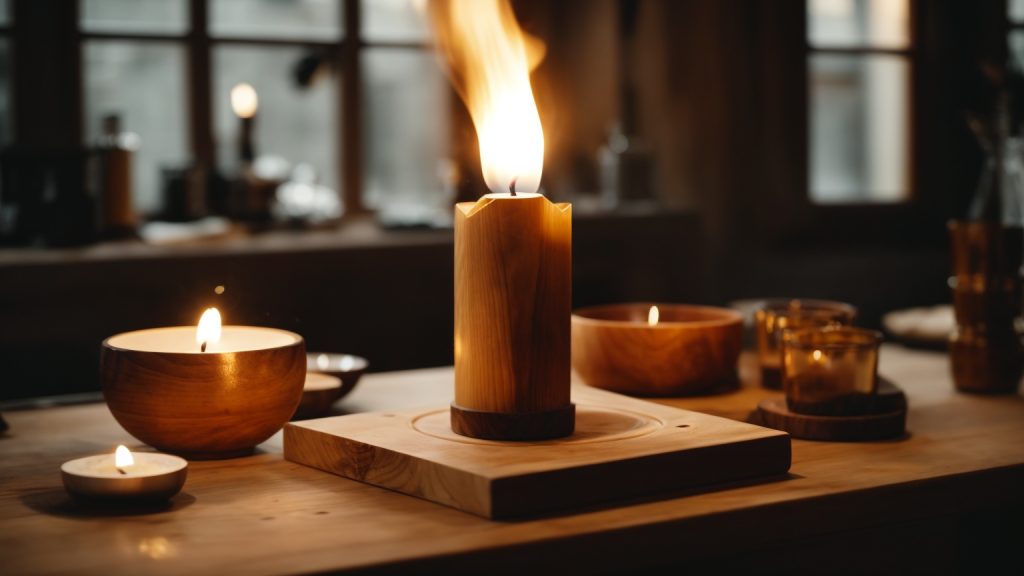
Once you have completed making your wooden candle holder, it’s time to give it the perfect finishing touches. Here are some tips on how to make your wooden candle holder look stunning.
Staining is an excellent way to enhance the natural beauty of the wood. It also helps to protect the wood from moisture and other environmental factors. Before staining, sand the wooden candle holder with fine-grit sandpaper to ensure a smooth surface. Then, apply the stain using a brush or cloth, following the manufacturer’s instructions. Allow the stain to dry completely before moving on to the next step.
Sealing the wooden candle holder is essential to protect it from damage caused by heat and moisture. Use a clear, waterproof sealer to protect the wood. Apply the sealer with a brush or cloth, following the manufacturer’s instructions. Allow the sealer to dry completely before moving on to the next step.
Polishing the wooden candle holder adds a beautiful shine to it. Use a soft cloth to apply a small amount of wood polish to the surface of the candle holder. Rub the polish into the wood in a circular motion. Allow the polish to dry completely before using the candle holder.
Remember, the finishing touches are what make your wooden candle holder stand out. Take your time and follow these tips to ensure that your candle holder looks beautiful and lasts for a long time.

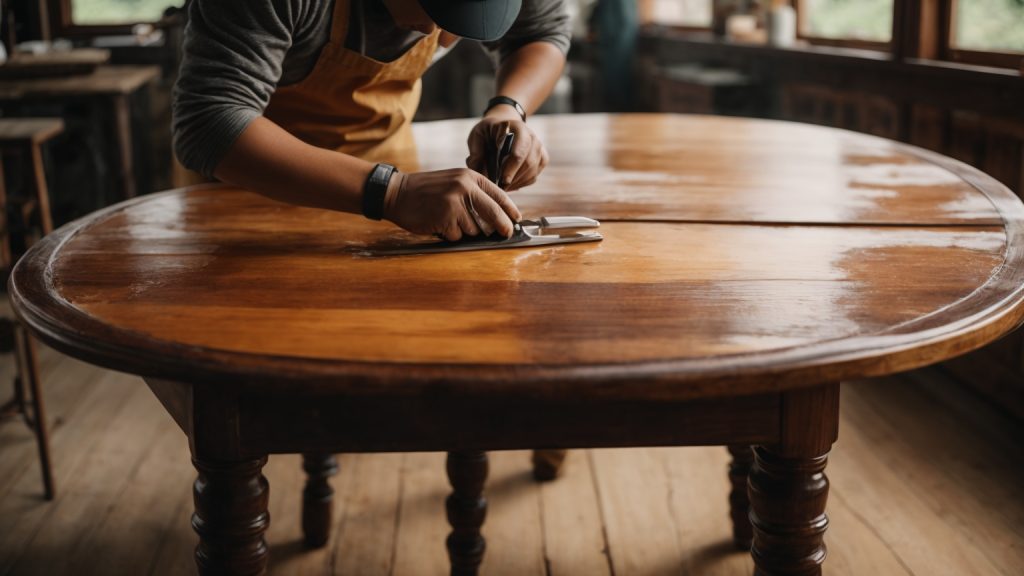
Refinishing a wooden table can breathe new life into an old piece of furniture. Whether you have a family heirloom or a thrift store find, refinishing a table can be a fun and rewarding DIY project. With a little bit of elbow grease and some basic supplies, you can transform a dull or damaged table into a beautiful centerpiece for your home.
Before you get started, it’s important to understand the level of detail and effort required for your specific table. Super ornamental furniture may require more attention to detail, while a simple table may be easier to refinish. The first step in refinishing a table is to clean it thoroughly to remove any dirt or grime that may inhibit the refinishing process. Depending on the condition of your table, you may also need to strip the old finish or sand down any imperfections. With a little bit of patience and some helpful tips, you can successfully refinish a wooden table and enjoy it for years to come.
When it comes to refinishing a wooden table, the first step is to understand the type of wood you’re working with. Different types of wood require different approaches to refinishing, so it’s important to identify the type of wood before you begin.
The first step in identifying the type of wood is to determine whether it is hardwood or softwood. Hardwood comes from deciduous trees, while softwood comes from coniferous trees. Hardwood is denser and more durable than softwood, making it a popular choice for furniture.
To determine whether your table is made of hardwood or softwood, you can look at the grain of the wood. Hardwood has a more complex grain pattern than softwood, which tends to have a straight grain. You can also try scratching the surface of the wood with your fingernail. Hardwood is harder than softwood, so it will be more difficult to scratch.
Once you’ve determined whether your table is made of hardwood or softwood, the next step is to identify the specific wood species. Different wood species have different characteristics, such as color, grain pattern, and hardness.
One way to identify the wood species is to look for identifying marks, such as knots or distinctive grain patterns. You can also try comparing the wood to a wood identification guide or consulting with a professional.
Some common wood species used for furniture include oak, maple, cherry, and mahogany. Each of these species has its own unique characteristics and requires a different approach to refinishing. For example, oak has a distinctive grain pattern and can be difficult to stain evenly, while cherry has a reddish-brown color that can darken over time.
By understanding the type of wood and wood species of your table, you can choose the right approach to refinishing and ensure that your table looks beautiful for years to come.
When refinishing a wooden table, it is important to take certain safety precautions to protect yourself from harmful chemicals and dust. Here are some safety tips to follow:
When working with chemicals, it is important to have proper ventilation to avoid inhaling harmful fumes. Work in a well-ventilated area, such as a covered porch or garage, or use a fan to circulate air. Make sure all windows and doors are open to allow fresh air to flow through the room.
It is important to wear the appropriate safety equipment when refinishing a wooden table. Here are some items you should have on hand:
In addition to these items, it is also important to wear appropriate clothing, such as long sleeves and pants, to protect your skin from chemicals and stains.
By following these safety precautions, you can ensure that your refinishing project is completed safely and without any harm to yourself.
To refinish a wooden table, you will need to gather some necessary tools. Here are the three main categories of tools you will need:
To remove the old finish from your table, you will need some stripping tools. Here are some common options:
After you have removed the old finish, you will need to sand the table to prepare it for the new finish. Here are some tools you will need:
After you have sanded the table, you will need to apply the new finish. Here are some tools you will need:
By gathering these necessary tools, you will be well on your way to refinishing your wooden table.
Before you can refinish your wooden table, you need to remove the old finish. This can be a messy and time-consuming process, but with the right tools and techniques, you can do it yourself.
The first step in removing the old finish is to apply a chemical stripper. This will dissolve the old finish so that it can be easily removed. Here’s how to do it:
Once the old finish has been dissolved by the stripper, it’s time to remove it. Here’s how to do it:
Removing the old finish is an important step in refinishing your wooden table. Take your time and be patient, and you’ll be rewarded with a beautiful new finish that will make your table look like new again.
Once you have stripped the old finish and repaired any damages, it’s time to sand the table to prepare it for the new finish. Sanding is a crucial step in the refinishing process that helps to remove any remaining finish, smooth out the surface, and open up the wood’s pores to accept the new stain or finish. In this section, we will discuss how to sand a wooden table, including choosing the right grit and sanding techniques.
Choosing the right sandpaper grit is essential to achieving a smooth and even finish. The grit number refers to the size of the abrasive particles on the sandpaper. The lower the number, the coarser the sandpaper, and the higher the number, the finer the sandpaper. Here are some guidelines for choosing the right grit:
Here are some tips for sanding a wooden table:
By following these tips, you can achieve a smooth and even surface that is ready for staining or finishing. Sanding is a crucial step in the refinishing process that requires patience and attention to detail, but the results are worth the effort.
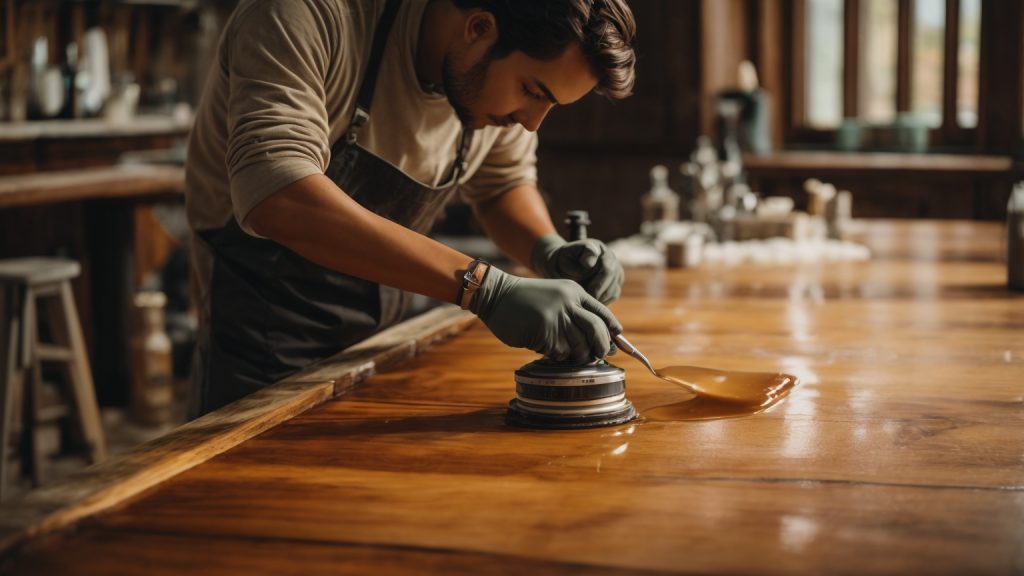
Refinishing a wooden table can give it a new lease on life. Once you have sanded and removed the old finish, it’s time to apply a new one. Here are some tips to help you choose and apply the new finish.
There are many different types of finishes available, each with its own advantages and disadvantages. Some popular options include:
Consider the look you want to achieve and the level of durability you need when choosing a finish.
Before applying the finish, make sure the surface is clean and free of dust. Use a tack cloth or a damp cloth to remove any debris.
When applying the finish, follow these steps:
Be sure to work in a well-ventilated area and follow all safety instructions on the product label. With a little patience and care, you can apply a new finish that will protect and enhance the beauty of your wooden table.
Congratulations! You’ve successfully refinished your wooden table and it looks amazing. Now, it’s important to maintain your hard work to keep your table looking beautiful for years to come. Here are some tips to help you maintain your newly refinished table.
To keep your table looking great, it’s important to clean it regularly. Here are some tips to help you keep your table clean:
To prevent damage to your table, it’s important to take some precautions. Here are some tips to help you prevent damage:
By following these simple tips, you can keep your newly refinished table looking beautiful for years to come.

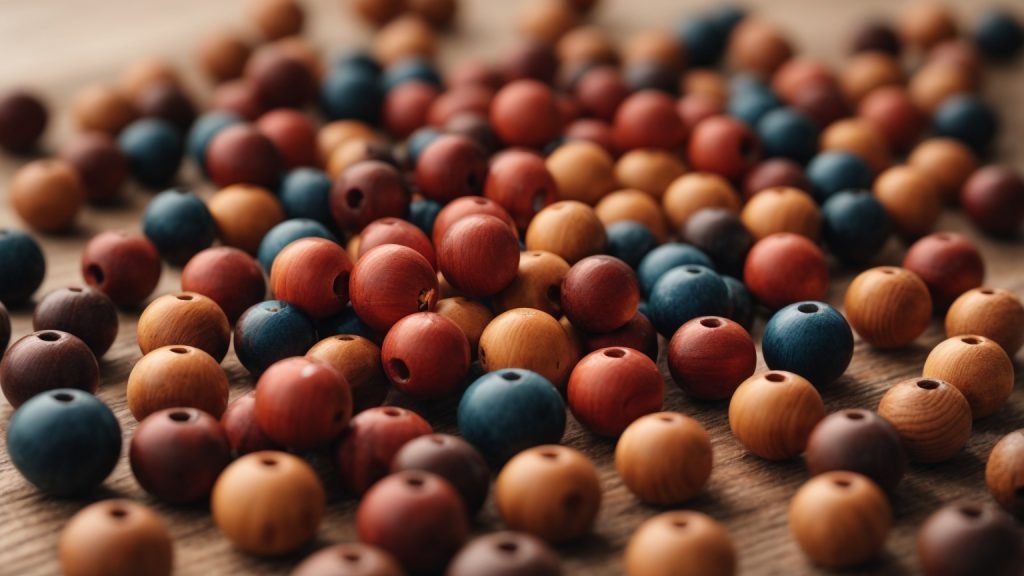
Are you looking for a fun and easy way to add some color to your wooden beads? Dyeing wooden beads is a simple and cost-effective way to customize your jewelry-making projects. With a few basic materials and some creativity, you can create beautiful, unique beads in a variety of colors and shades.
One of the best things about dyeing wooden beads is the versatility of the process. You can use a variety of dyes, including liquid dye, food coloring, and acrylic paint, to achieve different effects and colors. Additionally, you can experiment with different types of wood to see how they absorb the dye and create different shades and patterns. Whether you’re a beginner or an experienced crafter, dyeing wooden beads is a fun and rewarding project that you can enjoy with family and friends.
When it comes to dyeing wooden beads, it’s important to understand the materials you’re working with. Here are a few things to keep in mind:
Not all types of wood are created equal when it comes to dyeing. Light-colored woods like maple, cherry, and pine are best for dyeing because they contain fewer natural oils that can interfere with the dye absorption process. If you’re unsure about the type of wood you’re working with, do a test dye on a small piece of wood before dyeing your beads.
There are many different types of wooden beads available, each with its own unique characteristics. Here are a few common types:
Before dyeing your wooden beads, it’s important to prepare them properly. Here are a few steps to follow:
By understanding the types of wood and beads you’re working with and properly preparing your beads, you can achieve beautiful, vibrant colors when dyeing your wooden beads.
When it comes to dyeing wooden beads, it is important to choose the right type of wood. Not all woods are created equal, and some will take dye better than others. Here are some things to consider when selecting wood for your wooden beads:
Light-colored woods such as maple, cherry, or pine are the best choices for dyeing wooden beads. These woods have fewer natural oils, which can decrease the amount of dye absorbed by the wood. Lighter woods also allow for a wider range of color options, as darker woods can alter the final color of the dye.
Woods with large pores, such as oak or ash, can be difficult to dye evenly. The large pores can absorb more dye in some areas, resulting in a blotchy or uneven appearance. If you do choose to use a wood with large pores, consider using a darker dye to help even out the color.
The grain pattern of the wood can also affect the final appearance of the dyed beads. Woods with a tight, even grain pattern will produce a more uniform color, while woods with a more varied grain pattern may result in a more unique and interesting look.
In addition to the type of wood, there are other factors to consider when selecting wooden beads for dyeing. Make sure the beads are smooth and free of any rough spots or blemishes that could affect the dyeing process. It is also important to choose beads that are the right size and shape for your project.
By taking the time to choose the right type of wood for your wooden beads, you can ensure that your final product will be beautiful and long-lasting.
Dyeing wooden beads is a fun and easy DIY project that can add a pop of color to any craft or jewelry design. Here are the materials you will need to get started:
The first and most obvious material you will need is wooden beads. When choosing wooden beads, it is important to select light-colored woods such as maple, cherry, or pine. These woods will produce the best results when dyed as they contain fewer natural oils which can decrease the amount of dye absorbed by the wood.
Liquid dye is the most popular and easiest type of dye to use for dyeing wooden beads. You can find liquid dye at most craft stores and online. It comes in a variety of colors, and you can mix colors to create your own custom results.
A mason jar or any other glass jar will work well for dyeing wooden beads. Make sure it is large enough to fit the amount of beads you want to dye.
You will need hot water to mix with the liquid dye. The hotter the water, the more intense the color will be.
Adding a tablespoon or two of vinegar to the dye mixture can help the dye adhere better to the wood.
Wearing gloves will protect your hands from getting stained by the dye.
A plastic spoon or any other non-reactive utensil will work well for stirring the dye mixture.
Paper towels will come in handy for wiping up any spills or drips.
With these materials on hand, you are ready to start dyeing your wooden beads.
Before you start dyeing your wooden beads, it is important to prepare them properly. Here are some tips to ensure that your beads are ready to be dyed:
When selecting wood for your wooden beads, it is important to choose light-colored woods such as maple, cherry, or pine. These woods will produce the best results when dyed as they contain fewer natural oils which can decrease the amount of dye absorbed by the wood.
Before dyeing your wooden beads, make sure to sand them with fine-grit sandpaper. This will help to remove any rough spots or imperfections on the surface of the wood, allowing the dye to penetrate more evenly.
To help the dye penetrate the wood more effectively, it is a good idea to soak your wooden beads in water for at least 30 minutes before dyeing them. This will help to open up the pores in the wood, allowing the dye to be absorbed more easily.
Dyeing wooden beads can be messy, so it is important to protect your work area before you start. Use a plastic tablecloth or newspaper to cover your work surface, and wear gloves and an apron to protect your clothing.
By following these simple steps, you can ensure that your wooden beads are properly prepared for dyeing, and that you will achieve the best possible results.
When it comes to dyeing wooden beads, selecting the right dye is crucial to achieving the desired color and finish. Here are some factors to consider when selecting a dye:
There are two main types of dyes to choose from: liquid dye and powder dye. Liquid dye is easier to use and provides more consistent results, but it may not be as vibrant as powder dye. Powder dye, on the other hand, is more concentrated and can produce brighter colors, but it requires more skill to use.
Colorfastness refers to the ability of a dye to resist fading or bleeding when exposed to light, water, or other elements. When selecting a dye, it is important to choose one that is colorfast to ensure that the color stays vibrant and does not fade or bleed over time.
Not all dyes are compatible with all types of wood. Some dyes may work better with lighter woods, while others may work better with darker woods. It is important to choose a dye that is compatible with the type of wood you are using to ensure that the dye is absorbed evenly and produces the desired color.
When selecting a dye, it is important to consider safety. Some dyes may contain harmful chemicals that can be hazardous to your health if not used properly. It is important to choose a dye that is safe to use and follow all safety precautions when working with it.
Overall, selecting the right dye is an important step in the process of dyeing wooden beads. By considering factors such as type of dye, colorfastness, compatibility with wood type, and safety, you can ensure that you achieve the desired color and finish while also staying safe.
Dyeing wooden beads is a fun and creative way to add color to your jewelry and craft projects. Here is a step-by-step guide to help you dye your wooden beads:
Before dyeing your wooden beads, it is important to soak them in water for at least 30 minutes. This will help the beads absorb the dye evenly. You can also add a tablespoon of vinegar to the water to help the dye adhere better.
There are several types of dyes that you can use to color your wooden beads, such as liquid dye, food coloring, acrylic paint, and watercolor paint. Choose the type of dye that you prefer and mix it according to the manufacturer’s instructions.
You can also mix different colors to create your own custom shades. For example, mixing red and blue will give you purple, while mixing yellow and blue will give you green.
Once your beads have soaked and your dye is prepared, it’s time to start dyeing your wooden beads. Here’s how:
After rinsing and drying your beads, it’s important to let them dry completely before using them in your craft projects. You can lay them out on a clean towel or paper towel to air dry, or you can use a hair dryer on low heat to speed up the drying process.
Once your beads are completely dry, you can use them to make colorful jewelry, keychains, or other craft projects. Have fun experimenting with different colors and dyeing techniques to create unique and beautiful wooden beads!
When dyeing wooden beads, it is important to take safety measures to prevent any accidents or injuries. Here are some safety tips to keep in mind:
Wear protective gear such as gloves, goggles, and an apron to protect your skin and eyes from the dye. Some dyes can be harmful if they come into contact with your skin or eyes, so it is important to take precautions.
Dyeing wooden beads can produce fumes that can be harmful to your health if inhaled. Make sure to work in a well-ventilated area, such as near an open window or outside.
Make sure to use a dye that is safe for wooden beads and that is appropriate for the type of wood you are using. Some dyes may not work well with certain types of wood or may cause the wood to warp or crack.
Always read and follow the instructions on the dye package carefully. Improper use of the dye can lead to accidents or injuries.
Dispose of any unused dye or dye containers properly. Some dyes may be harmful to the environment if not disposed of correctly, so make sure to follow the instructions on the package for proper disposal.
By following these safety measures, you can ensure a safe and successful dyeing process for your wooden beads.
Once you have successfully dyed your wooden beads, it is important to maintain and care for them properly. This will help to ensure that the color remains vibrant and the beads last for a long time.
Here are some tips for maintaining and caring for your dyed wooden beads:
By following these tips, you can help to ensure that your dyed wooden beads remain vibrant and beautiful for a long time.
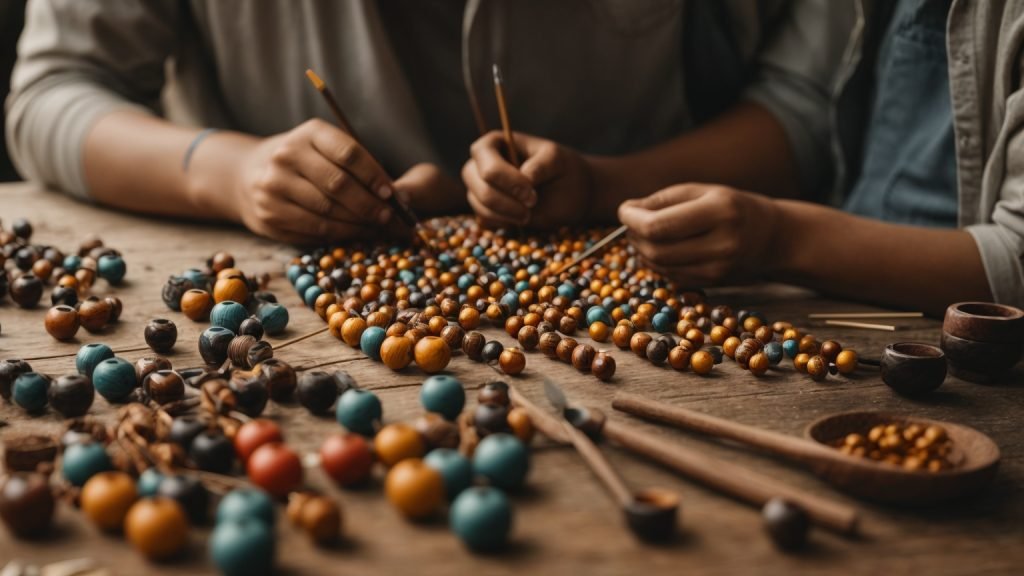
Dyed wooden beads can add a pop of color and a touch of personality to any DIY project. Whether you are making jewelry, home decor, or a fun craft with the kids, there are many creative ways to use dyed wooden beads. Here are a few ideas to get you started:
Dyed wooden beads can be used to make unique and colorful jewelry pieces. Mix and match different colors and sizes to create a one-of-a-kind necklace, bracelet, or pair of earrings. You can also use dyed wooden beads as accents for metal or glass beads to add a natural touch to your designs.
Dyed wooden beads can be used to add a pop of color to your home decor. String them together to make a colorful garland to hang on your wall or drape over a mantle. You can also use them as accents for picture frames, lampshades, or even as drawer pulls for a unique and colorful touch.
Dyed wooden beads are a great addition to any kids’ craft project. Use them to make colorful keychains, bracelets, or even as beads for a homemade dreamcatcher. Kids can also use them to make colorful necklaces or bracelets for themselves or as gifts for friends and family.
Dyed wooden beads can also be used to add a unique touch to your gift wrapping. String them together to make a colorful gift tag or use them as accents for a ribbon or bow. You can also use them to make a colorful tassel to attach to a gift bag or box.
With these creative ideas, you can explore the endless possibilities of using dyed wooden beads in your DIY projects. Let your imagination run wild and see what colorful creations you can come up with!

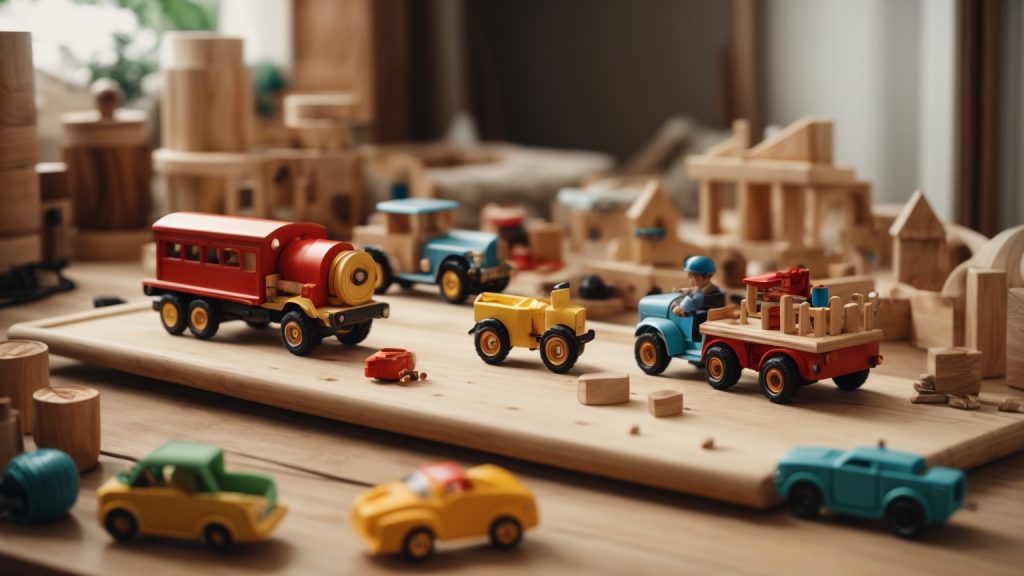
Have you ever wondered why Montessori toys are almost always made of wood? There are several reasons why wooden toys are preferred over plastic or other materials in Montessori education. One of the main reasons is that wood is a natural material that is safe for children to play with, while plastic toys may contain harmful chemicals.
In addition to being safe, wooden toys are also more visually appealing than plastic toys. They have a natural warmth and beauty that can’t be replicated by synthetic materials. This aesthetic quality is important in Montessori education, as it helps to create a calm and inviting learning environment for children. Wooden toys are also more durable than plastic toys, which means they can be enjoyed for years to come. This makes them a great investment for families who want to provide their children with high-quality toys that will last.

If you’re new to the world of Montessori toys, you may be wondering why they are typically made out of wood. Montessori toys are designed to promote a child’s independence, creativity, and cognitive development. Wooden toys, in particular, offer several benefits that make them a great choice for Montessori play.
One of the primary benefits of wooden toys is their durability. Unlike plastic toys, which can easily break or become damaged, wooden toys are built to last. They can withstand the wear and tear of everyday play and can be passed down from child to child.
Another benefit of wooden toys is their safety. Unlike plastic toys, which can contain harmful chemicals and toxins, wooden toys are made from natural materials that are safe for children to handle. They are also less likely to break into small pieces that could be a choking hazard.
In addition to being safe and durable, wooden toys are also aesthetically pleasing. They have a natural beauty and warmth that plastic toys simply cannot match. They can also be used as decorative elements in a child’s playroom, adding to the overall ambiance of the space.
Overall, Montessori toys are designed to provide children with a hands-on, interactive learning experience. Wooden toys are an excellent choice for this type of play, as they are safe, durable, and aesthetically pleasing. By choosing wooden Montessori toys, you can help your child develop their creativity, independence, and cognitive skills in a fun and engaging way.
Montessori education is based on the idea of hands-on learning, and this philosophy is reflected in the toys used in Montessori classrooms. One of the most notable features of Montessori toys is that they are typically made of wood. But why is this the case?
Wooden toys have a long history that dates back to ancient times. Some of the earliest toys ever discovered were made of wood, including dolls, animals, and carts. In fact, wooden toys were the primary type of toy for many centuries, until the rise of mass-produced plastic toys in the 20th century.
In the Montessori philosophy, wooden toys are preferred because they are natural and inspire a connection to the natural world. Wood is a renewable resource that is biodegradable and non-toxic, which makes it an eco-friendly choice for toy making. Additionally, wooden toys are often more durable than plastic toys and can last for many years, making them a more sustainable choice overall.
Another reason why wooden toys are favored in Montessori education is that they are simple and allow for open-ended play. Unlike many modern toys that come with a set of instructions or require batteries to operate, wooden toys are often very basic in design and can be used in a variety of ways. This allows children to use their imaginations and creativity to come up with their own games and activities, which is an important part of the Montessori approach to learning.
Overall, the historical context of wooden toys is an important factor in why they are so valued in Montessori education today. The simplicity, durability, and natural qualities of wooden toys make them an ideal choice for hands-on learning and exploration.
When it comes to choosing toys for your child, you want to make sure that they are not only fun, but also beneficial for their development. Montessori toys made out of wood have been a popular choice for parents for decades. Here are some of the benefits of choosing wooden Montessori toys for your child.
Montessori toys made out of wood are great for sensory development. The natural texture of wood provides a tactile experience that is different from the smoothness of plastic toys. The warmth of the wood also makes it a more inviting material for children to touch and hold. Wooden toys can help children develop their sense of touch, as well as their hand-eye coordination and fine motor skills.
One of the biggest advantages of wooden Montessori toys is their durability. Unlike plastic toys, wooden toys can withstand years of play without breaking or wearing down. They are also less likely to harbor bacteria and other germs, making them a safer and healthier choice for your child. Wooden toys can be passed down from generation to generation, making them a great investment for your family.
Another benefit of wooden Montessori toys is their environmental impact. Wood is a renewable resource that can be sustainably harvested, making it a more eco-friendly choice than plastic. Wooden toys are also biodegradable, which means they won’t end up in landfills and contribute to pollution. By choosing wooden toys, you are making a conscious choice to support sustainable practices and reduce your carbon footprint.
In summary, wooden Montessori toys offer a range of benefits for children, including promoting sensory development, durability, and eco-friendliness. By choosing wooden toys, you can provide your child with a safe, fun, and educational play experience that will last for years to come.
When it comes to choosing toys for your child, you may be wondering whether wooden or plastic toys are better. Montessori toys are typically made of wood, but what makes them better than plastic toys? Let’s compare the two.
Wooden toys are generally more durable than plastic toys. They can withstand more wear and tear, and they are less likely to break or crack. Plastic toys, on the other hand, can easily break or crack, especially if they are dropped or thrown.
Wooden toys are generally safer than plastic toys. They are free from harmful chemicals that may be found in plastic toys. Wooden toys are also less likely to have small parts that can be a choking hazard.
Wooden toys provide a more natural sensory experience than plastic toys. They have a unique texture and smell that can stimulate a child’s senses. Plastic toys, on the other hand, can have a strong chemical smell that may be unpleasant.
Wooden toys are more eco-friendly than plastic toys. They are made from a renewable resource and can be recycled or biodegraded. Plastic toys, on the other hand, are made from non-renewable resources and can take hundreds of years to decompose.
Wooden toys are generally more aesthetically pleasing than plastic toys. They have a natural beauty that can enhance the look of a child’s play area. Plastic toys, on the other hand, can look cheap and tacky.
Overall, wooden toys have many advantages over plastic toys. They are more durable, safer, provide a better sensory experience, are more eco-friendly, and are more aesthetically pleasing. When it comes to choosing toys for your child, wooden toys are definitely worth considering.
When it comes to choosing Montessori toys, it’s important to keep in mind that these toys are designed to promote a child’s development and learning. Therefore, it’s important to choose toys that are age-appropriate and safe for your child to play with.
Montessori toys are designed to be suitable for different age groups. It’s important to choose toys that are appropriate for your child’s age and developmental stage. Here are some general guidelines to follow:
Safety should always be a top priority when choosing Montessori toys for your child. Here are some safety considerations to keep in mind:
By keeping these factors in mind, you can choose Montessori toys that are not only fun and engaging for your child but also safe and beneficial for their development.

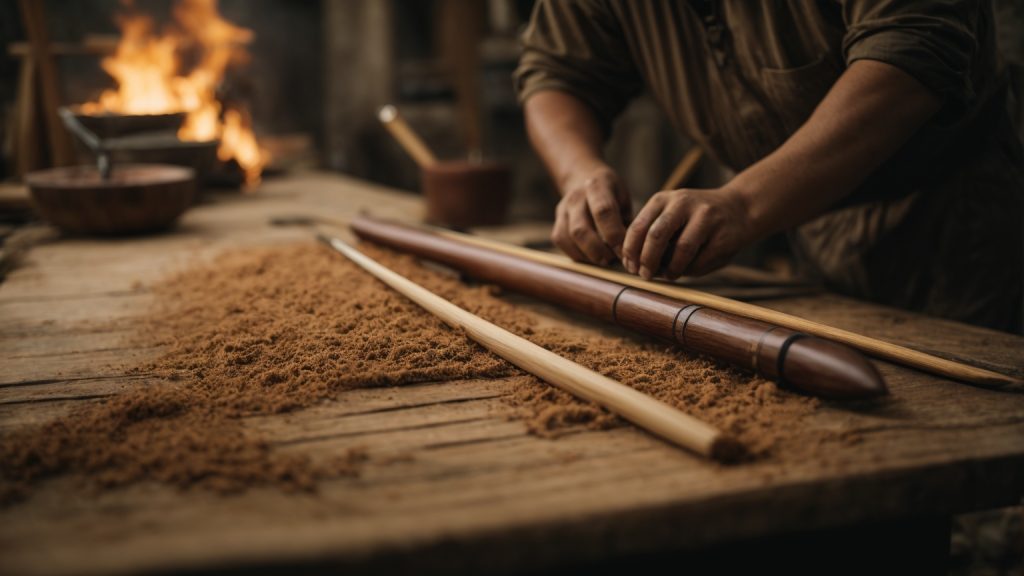
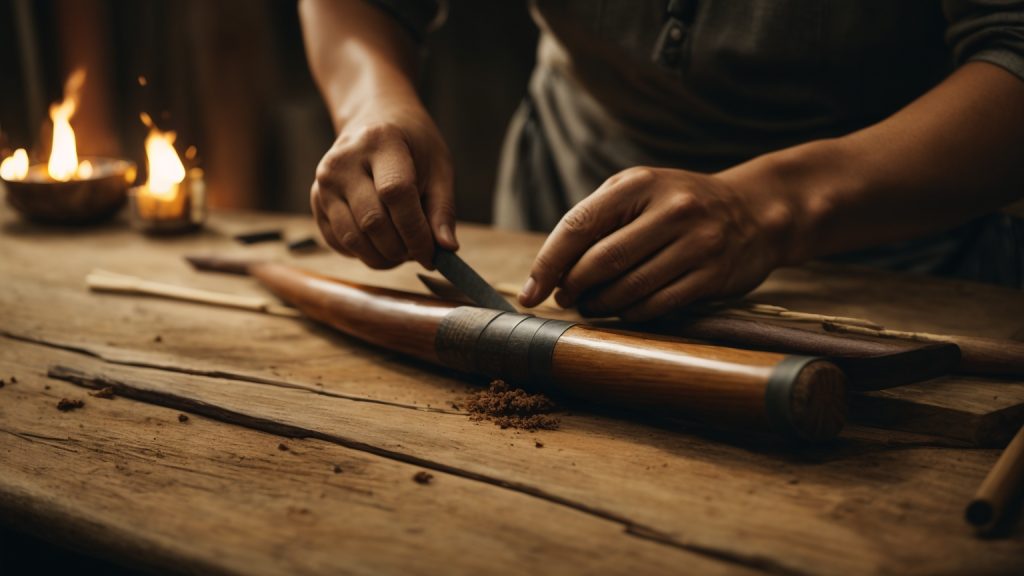
Are you interested in learning how to make a wooden spear? Spears have been used for hunting and fishing for thousands of years, and making your own can be a rewarding and useful skill to have. With just a few basic tools and materials, you can create a simple spear that will be effective for catching fish or small game.
To start, you will need to gather some materials. You can use a straight branch or pole as the shaft of your spear, and a sharp piece of flint or obsidian as the spearhead. If you don’t have access to these materials, you can also use a knife or other sharp tool to carve the spearhead from a piece of wood. Once you have your materials, you can begin the process of crafting your spear.
While making a wooden spear may seem daunting at first, it is actually a relatively simple process. With a little patience and practice, you can create a functional and effective tool that will serve you well in the wilderness. So why not give it a try and see what you can create?
If you’re looking to make a wooden spear, it’s important to understand the basics of the tool before you start. A wooden spear consists of a long shaft with a pointed tip, and it has been used for hunting and fishing for thousands of years. Here are some key points to keep in mind:
The most important part of making a wooden spear is choosing the right materials. You’ll need a strong and straight piece of wood for the shaft, and a hard and durable material for the tip. Some common materials for the tip include bone, flint, or metal.
The design of your spear will depend on what you plan to use it for. If you’re using it for hunting, you’ll want a longer and heavier spear with a sharp tip. If you’re using it for fishing, you’ll want a shorter and lighter spear with a barbed tip. Make sure to plan out your design before you start cutting and shaping the wood.
To make a wooden spear, you’ll need some basic tools such as a saw, a knife, and sandpaper. You may also need some specialized tools such as a drill or chisel, depending on the design of your spear.
It’s important to be safe when making a wooden spear. Make sure to wear protective gear such as gloves and eye goggles, and be careful when using sharp tools. Always cut away from your body and keep your fingers clear of the blade.
When it comes to making a wooden spear, choosing the right wood is crucial. You want a wood that is strong, durable, and flexible enough to withstand the force of throwing or thrusting. Here are some of the most popular woods used for making wooden spears:
Ash wood is one of the best woods for making a wooden spear. It is strong, flexible, and lightweight, making it easy to handle and maneuver. It is also readily available, making it a popular choice for many people.
Hickory wood is another great option for making a wooden spear. It is strong and durable, making it ideal for thrusting and throwing. It is also resistant to bending, which is important when using a spear.
Oak wood is a popular choice for making a wooden spear because it is strong and durable. It is also readily available in many parts of the world, making it a convenient choice for many people.
While ash, hickory, and oak are the most popular woods for making a wooden spear, there are other woods that can be used as well. Some examples include maple, birch, and cherry wood.
When choosing a wood for your spear, it is important to consider the length and thickness of the wood, as well as its flexibility and strength. You want a wood that is straight, sturdy, and free of knots or other defects. With the right wood and some basic tools, you can craft a sharp and effective wooden spear that will serve you well in a variety of situations.
Once you have selected the appropriate wood for your spear, it’s time to shape it. Shaping the spear involves trimming the wood to the desired length and carving the point.
The first step in shaping your wooden spear is to trim it to the desired length. Use a hand saw to cut the wood to the desired length. Make sure to measure the length of the spear before cutting it to avoid any mistakes.
After trimming the wood, it’s time to carve the point. This is the most crucial part of making a wooden spear, as the point determines the effectiveness of the weapon. Use a carving knife to shape the point of the spear. Start by making a small notch at the tip of the spear. Then, carve the wood around the notch to create the point.
Make sure to carve the point evenly on all sides to ensure that it is symmetrical. The point should be sharp enough to penetrate the target, but not too sharp that it becomes brittle and breaks easily.
Here are some tips to keep in mind when shaping your wooden spear:
By following these tips, you can create a well-crafted wooden spear that is both functional and aesthetically pleasing.
Once you have crafted your wooden spear, you need to harden it to make it more durable and effective. There are two main methods for hardening a wooden spear: using fire and using oil.
Fire-hardening your spear involves exposing it to heat to make it stronger and more resistant to breaking. Here’s how to do it:
Fire-hardening your spear will make it stronger and more resistant to breaking, but it may also make it more brittle. Be careful not to overheat the spear, as this can cause it to crack or break.
Oil-hardening your spear involves soaking it in oil to make it more resistant to moisture and decay. Here’s how to do it:
Oil-hardening your spear will make it more resistant to moisture and decay, but it may also make it heavier and less balanced. Use a light touch when applying the oil to avoid oversaturating the wood.
By hardening your wooden spear using either fire or oil, you can make it stronger, more durable, and more effective for hunting or survival situations.
If you want to make your wooden spear even more deadly, you can attach a stone tip to the end. This will make it much sharper and more effective for hunting or self-defense. Here are the steps to attach a stone tip to your spear:
Adding a grip to your spear can make it more comfortable to hold and easier to use. It can also provide additional traction and help prevent your hand from slipping during use. Here are some ways to add a grip to your spear:
Adding features to your wooden spear can make it more effective and easier to use. Whether you attach a stone tip or add a grip, these modifications can help you get the most out of your spear and improve your chances of success in the wild.
When making a wooden spear, it’s important to take safety precautions to avoid any accidents or injuries. Here are a few safety tips to keep in mind:
Wear protective gear such as gloves and eye protection to prevent any injuries while handling sharp tools. Splinters and wood chips can also fly off during the process, so it’s important to protect your eyes.
Using dull tools can increase the risk of accidents. Make sure your tools are sharp and in good condition before using them.
Work in a safe and well-ventilated area. Avoid working near flammable materials or in an area with poor lighting.
Keep a first aid kit nearby in case of any accidents or injuries. Make sure you know how to use it properly.
Follow tool safety guidelines and manufacturer instructions when using power tools. Make sure to use them properly and safely.
By following these safety precautions, you can ensure a safe and enjoyable experience while making a wooden spear.
Once you have crafted your wooden spear, you will want to ensure that it remains in good condition for future use. Here are some tips to help you maintain your wooden spear:
Water can damage your wooden spear, so it is important to keep it dry. After use, wipe it down with a dry cloth or towel. If your spear gets wet, allow it to dry completely before storing it.
When not in use, store your wooden spear in a dry place, away from direct sunlight. You can hang it on a wall or store it horizontally on a shelf. Avoid storing it in a damp or humid area, as this can cause the wood to warp or rot.
To keep the wood from drying out and cracking, you can apply a coat of oil to your wooden spear. Use a natural oil, such as linseed or tung oil, and apply it with a cloth. Allow the oil to soak in for a few minutes, then wipe away any excess.
Over time, the point of your wooden spear may become dull. To sharpen it, use a sharpening stone or a file. Hold the spear firmly and run the stone or file along the edge of the point, using a circular motion. Be careful not to remove too much wood, as this can weaken the spear.
Before each use, inspect your wooden spear for any signs of damage. Look for cracks, splits, or other damage that could weaken the spear. If you notice any damage, do not use the spear until it has been repaired or replaced.
By following these simple tips, you can help ensure that your wooden spear remains in good condition for years to come.

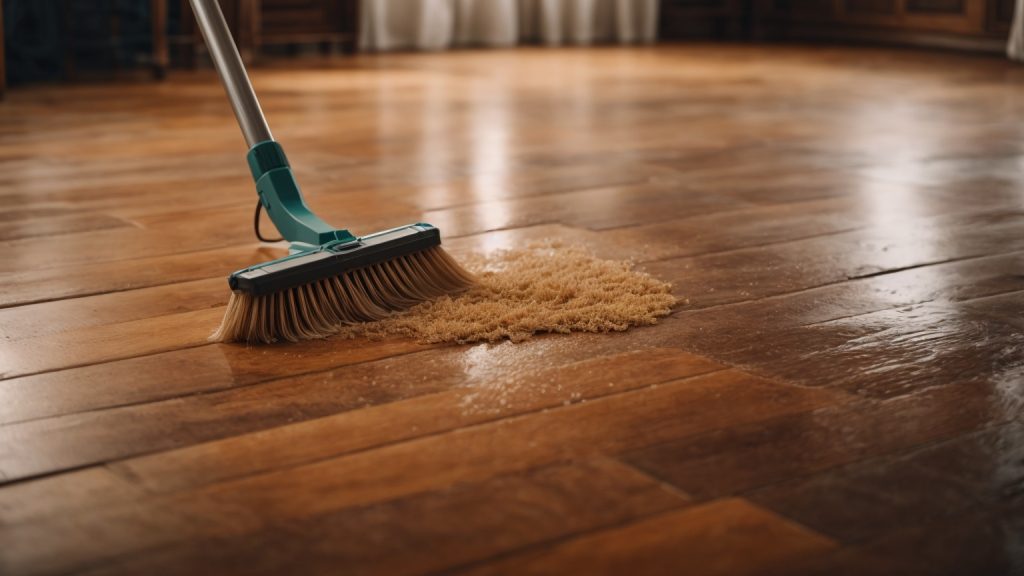
Are you tired of seeing your wooden floors looking dull and dirty? Do you want to know what you can use to clean them effectively and efficiently? Look no further! In this article, we will provide you with some tips and tricks on how to clean your wooden floors and keep them looking their best.
Cleaning wooden floors may seem like a daunting task, but it doesn’t have to be. The key is to use the right products and techniques that won’t damage the wood. There are several options available, from commercial wood-cleaning products to DIY solutions. We will explore the pros and cons of each so that you can make an informed decision on what to use for your specific needs.
It’s important to note that not all wooden floors are the same, and what works for one may not work for another. Factors such as the type of wood, finish, and age of the floor can all play a role in determining the best cleaning method. So, let’s dive in and discover what you can use to clean your wooden floors and achieve that beautiful, shiny finish you desire.
Wooden floors are a beautiful addition to any home, but they also require proper maintenance to keep them looking their best. Before you start cleaning your wooden floors, it’s important to understand the type of wood and finish used. Here are some things to keep in mind:
Different types of wood have different properties that affect their durability and how they should be cleaned. Here are some common types of wood used for flooring:
The finish on your wooden floors affects how you should clean them. Here are some common types of finishes:
Once you understand the type of wood and finish on your floors, you can start cleaning them properly. Here are some tips to keep in mind:
By understanding your wooden floors and taking proper care of them, you can enjoy their beauty for years to come.
When it comes to cleaning wooden floors, it’s important to choose the right products to avoid damaging the wood. There are two main categories of cleaning products: natural products and commercial cleaners.
If you prefer to use natural products to clean your wooden floors, there are several options available:
If you prefer to use commercial cleaners to clean your wooden floors, there are several options available:
When choosing a commercial cleaner, make sure to read the label carefully to ensure that it is safe for use on hardwood floors. Avoid using cleaners that contain harsh chemicals or abrasives, as these can damage the wood.
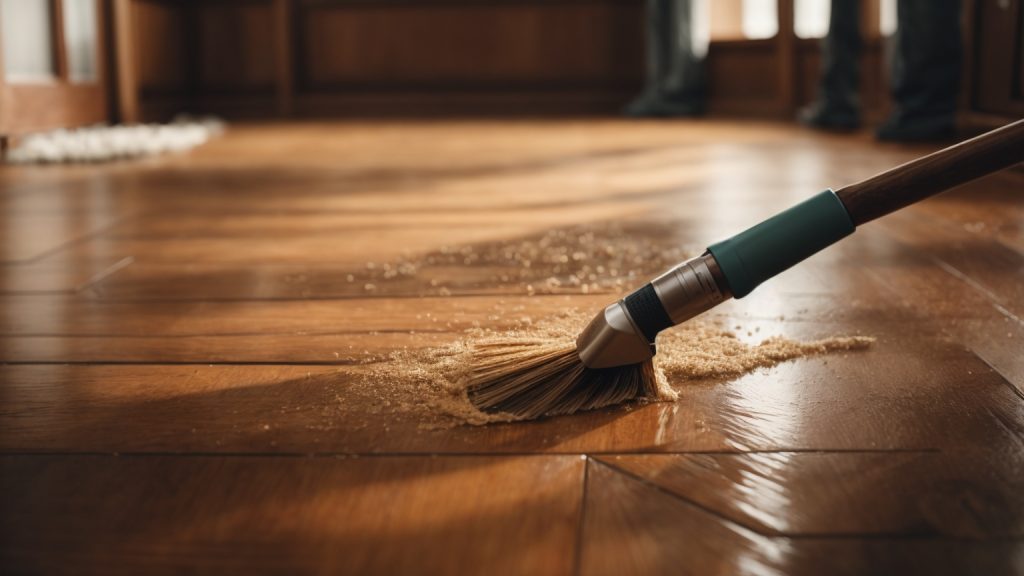
When it comes to cleaning your wooden floors, there are two main techniques you can use: dry cleaning and wet cleaning. Each method has its advantages and disadvantages, so it’s important to choose the right one for your specific needs.
Dry cleaning is a great technique for removing loose dirt, dust, and debris from your wooden floors. Here are a few methods you can use:
Wet cleaning is a great technique for removing stains and spills from your wooden floors. Here are a few methods you can use:
Remember to always test any cleaning solution on a small, inconspicuous area of your floor before using it on the entire surface. This will help prevent any damage or discoloration to your floors.
Taking preventive measures is the best way to ensure that your wooden floors remain clean and shiny. Here are some tips for maintaining your floors:
Dust and dirt can easily scratch and dull the surface of your wooden floors, so it’s important to dust them regularly. You can use a soft-bristled broom or a microfiber dust mop to remove dirt and debris. Make sure to avoid using a vacuum with a beater bar, as it can cause scratches. If you prefer to use a vacuum, make sure to use a bare-floor setting.
Water can cause serious damage to wooden floors, so it’s important to avoid any spills or excess moisture. Make sure to wipe up spills immediately using a dry cloth. Avoid using wet mops or steam cleaners, as they can cause warping and damage to the wood. If you need to clean your floors with water, make sure to use a damp mop and dry the floors thoroughly afterwards.
Floor mats can help prevent dirt and debris from being tracked onto your wooden floors. Place mats at all entryways and high-traffic areas to help trap dirt and moisture. Make sure to clean the mats regularly to prevent any buildup of dirt and debris.
By following these preventive measures, you can help keep your wooden floors looking clean and shiny for years to come.
If your wooden floors have lost their shine, don’t worry! There are several ways to restore and maintain their shine.
Polishing is a quick and easy way to restore the shine of your wooden floors. You can use a floor polish or wax to bring back the shine. Here are the steps to polish your wooden floors:
Note that you should avoid using too much polish or wax as it can leave a residue on the floor.
Recoating is another way to restore the shine of your wooden floors. It involves applying a new coat of finish to the floor. Here are the steps to recoat your wooden floors:
Note that you should choose a finish that is compatible with the existing finish on your floor. Also, make sure to follow the manufacturer’s instructions when applying the finish.
By following these tips, you can restore and maintain the shine of your wooden floors.

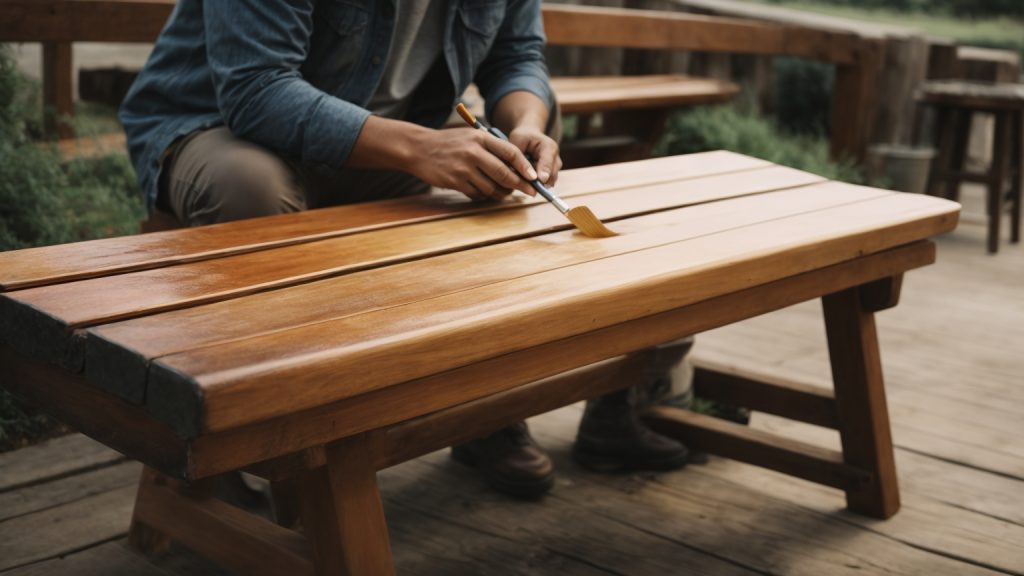
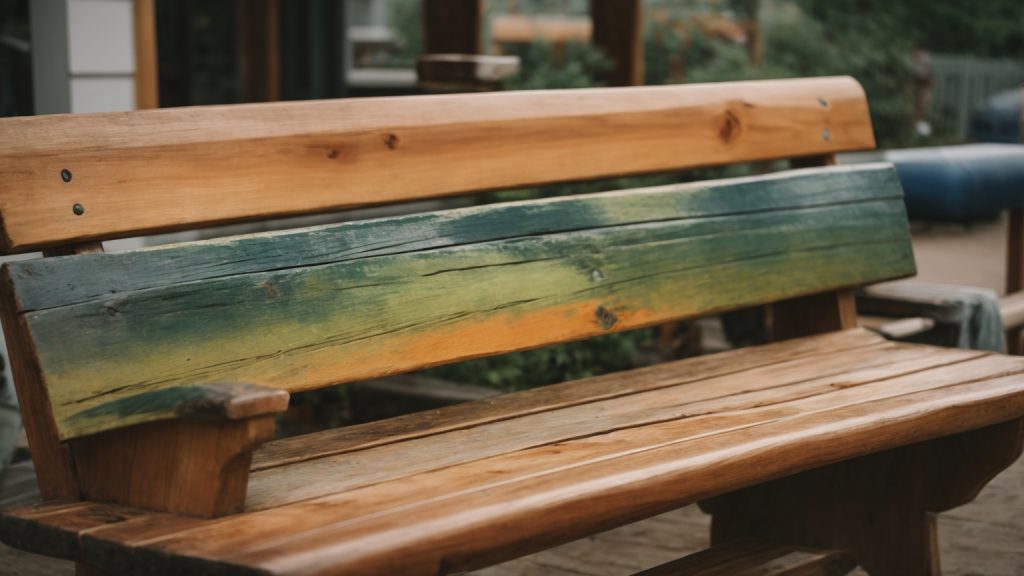
Are you looking to spruce up your outdoor wooden bench with a fresh coat of paint? Choosing the right type of paint for your project is crucial to ensure it lasts through various weather conditions. With so many options available, it can be overwhelming to determine the best paint to use on your outdoor wooden bench.
One of the most efficient and visually appealing ways to paint your outdoor wooden bench is by using spray paint. This type of paint provides even coverage and a glossy finish, making your bench look brand new. Additionally, spray paint is less time-consuming compared to brush painting, making it a great option for those who want to complete their project quickly. Oil-based spray paints are also a great choice as they provide a stronger finish than latex paint, making it more durable for outdoor use.
When it comes to painting an outdoor wooden bench, it is crucial to choose the right type of paint that will provide protection against the elements. There are several types of outdoor paints available in the market, each with its unique features and benefits. In this section, we’ll take a closer look at some of the most commonly used outdoor paints and what makes them suitable for use on wooden benches.
Latex paint is a popular choice for outdoor wooden benches because it is easy to apply, dries quickly, and is resistant to cracking and peeling. This type of paint is water-based, making it easy to clean up with soap and water. Latex paint also comes in a variety of finishes, from flat to high gloss, allowing you to choose the perfect look for your bench.
Oil-based paint is another popular choice for outdoor wooden benches because it offers excellent durability and protection against the elements. This type of paint is resistant to moisture, UV rays, and mildew, making it an excellent choice for areas with high humidity or frequent rain. However, oil-based paint takes longer to dry than latex paint and requires mineral spirits or paint thinner for cleanup.
Acrylic paint is a versatile type of paint that can be used on a variety of surfaces, including wood, metal, and plastic. This type of paint is water-based, making it easy to clean up, and dries quickly. Acrylic paint is also resistant to fading, cracking, and peeling, making it an excellent choice for outdoor wooden benches.
Stain is another option for protecting your outdoor wooden bench. Stain allows the natural beauty of the wood to show through while providing protection against the elements. Stain comes in a variety of colors, from natural to deep brown, allowing you to choose the perfect look for your bench. However, stain does not provide as much protection as paint and may need to be reapplied more frequently.
In summary, when choosing a paint for your outdoor wooden bench, it is essential to consider the durability, protection, and ease of use of the paint. Each type of paint has its unique features and benefits, so it’s important to choose the one that best suits your needs and preferences.
When it comes to painting your outdoor wooden bench, there are a few types of paint to choose from. Each type has its own advantages and disadvantages, so it’s important to choose the right one for your specific needs. Here are some of the most common types of paint for outdoor wooden benches:
Latex paint is a popular choice for outdoor wooden benches because it is easy to use and dries quickly. It is also water-resistant and can withstand harsh weather conditions. Latex paint is available in a variety of colors and finishes, so you can choose the one that best suits your style.
One of the best latex paints for outdoor wooden benches is Behr Premium Plus Exterior Paint & Primer. It offers excellent adhesion, coverage, and durability, and is available in a variety of finishes. It is also low VOC, which means it has fewer harmful chemicals than other types of paint.
Oil-based paint is another option for outdoor wooden benches. It is more durable than latex paint and can withstand harsh weather conditions. It also provides a smooth, glossy finish that looks great on wooden benches. However, oil-based paint takes longer to dry and requires more cleanup than latex paint.
One of the best oil-based paints for outdoor wooden benches is Rust-Oleum Marine Coatings Topside Paint. It is specifically designed for use on boats, so it can withstand even the harshest weather conditions. It provides a high-gloss finish and is available in a variety of colors.
Chalk paint is a popular choice for those who want a more rustic or shabby-chic look for their outdoor wooden bench. It is easy to use and dries quickly, and it provides a matte finish that looks great on wooden benches. However, chalk paint is not as durable as other types of paint, so it may need to be reapplied more frequently.
One of the best chalk paints for outdoor wooden benches is Annie Sloan Chalk Paint. It is water-based and non-toxic, so it is safe to use around children and pets. It is also available in a variety of colors and can be used on a variety of surfaces, including wood, metal, and concrete.
In conclusion, when choosing the right type of paint for your outdoor wooden bench, it’s important to consider your specific needs and preferences. Latex paint is a great all-around option, oil-based paint is more durable, and chalk paint is perfect for those who want a more rustic look. Whatever type of paint you choose, be sure to follow the manufacturer’s instructions for best results.
When it comes to painting an outdoor wooden bench, there are several factors you should consider to ensure that the paint you choose is durable and long-lasting. Here are some of the most important factors to keep in mind.
One of the most important factors to consider when choosing paint for your outdoor wooden bench is the weather conditions it will be exposed to. If your bench will be exposed to harsh sunlight, rain, or other weather elements, you will need to choose a paint that is specifically designed to withstand these conditions. Look for paint that is labeled as “weather-resistant” or “outdoor use.”
Another important factor to consider is the durability of the paint. You want a paint that will last for years without chipping, cracking, or fading. Look for paint that is labeled as “durable” or “long-lasting.” You may also want to consider using a paint that is specifically designed for outdoor use, as these paints tend to be more durable than indoor paints.
While durability and weather resistance are important factors, you also want to choose a paint that looks good and complements the overall aesthetic of your outdoor space. Consider the color of your bench and the surrounding environment when choosing a paint color. You may also want to consider using a paint that has a matte or satin finish, as these finishes tend to look more natural and blend in better with the outdoor environment.
In summary, when choosing paint for your outdoor wooden bench, it is important to consider factors such as weather conditions, durability, and color and aesthetic appeal. By taking these factors into account, you can choose a paint that will protect your bench and look great for years to come.
Before you start painting your outdoor wooden bench, it is important to prepare the surface properly to ensure the paint adheres well and lasts longer. Here are the steps you should follow to prepare your wooden bench for painting.
The first step in preparing your wooden bench for painting is to clean it thoroughly. Use a stiff-bristled brush to remove any dirt, debris, or loose paint from the surface of the bench. You can also use a pressure washer to clean the bench, but be careful not to damage the wood.
Once you have removed all the dirt and debris, wash the bench with a mixture of warm water and mild soap. Rinse the bench with clean water and let it dry completely before moving on to the next step.
After the bench is dry, sand the surface with medium-grit sandpaper to remove any remaining loose paint or rough spots. Sand in the direction of the wood grain to avoid damaging the surface. Once you have finished sanding, wipe the bench with a clean cloth to remove any dust or debris.
For a smoother finish, you can also sand the bench with fine-grit sandpaper. This will help to create a smooth surface and ensure the paint adheres well.
Before you start painting, it is important to prime the surface of the bench. Priming will help the paint adhere better and last longer. Apply a coat of primer to the bench using a brush or roller, making sure to cover the entire surface evenly.
Allow the primer to dry completely before applying the paint. The drying time will depend on the type of primer you use, so be sure to read the manufacturer’s instructions carefully.
By following these simple steps, you can prepare your wooden bench for painting and ensure a smooth, long-lasting finish.
When it comes to painting an outdoor wooden bench, there are several techniques to choose from. The most common methods are brushing, spraying, and rolling. Each technique has its own advantages and disadvantages, so it’s important to choose the one that works best for you.
Brushing is the most traditional method of painting and is great for small projects. It’s a good option if you want to achieve a more textured finish. However, it can be time-consuming and may require multiple coats to achieve the desired coverage. If you choose to use a brush, make sure to choose one that is appropriate for the type of paint you are using.
Spraying is a popular technique for painting outdoor wooden benches because it is quick and easy. It is also great for achieving a smooth finish. However, it can be messy and requires more preparation than other methods. You will need to cover the surrounding area to prevent overspray. Additionally, you will need to use a respirator mask to protect yourself from inhaling the fumes.
Rolling is a good option if you want to achieve a smooth finish without the mess of spraying. It is also less time-consuming than brushing. However, it can be difficult to get into tight spaces with a roller. Additionally, you will need to choose the right type of roller for the type of paint you are using.
No matter which technique you choose, make sure to properly prepare the surface before painting. This includes cleaning and sanding the bench to ensure that the paint adheres properly. Additionally, make sure to choose a high-quality outdoor paint that is specifically designed for wooden surfaces. This will ensure that your bench looks great and lasts for years to come.
If you want your painted outdoor wooden bench to last longer and look good, you need to take good care of it. Here are some maintenance tips to help you keep your bench in good condition.
Cleaning your painted outdoor wooden bench regularly is essential to keep it looking good. You can use a soft-bristled brush or a sponge to remove dirt, dust, and debris from the surface of your bench. You can also use a mild detergent and warm water to clean your bench.
Avoid using harsh chemicals or abrasive cleaners as they can damage the paint or the wood. After cleaning, rinse your bench thoroughly with clean water and let it dry completely before using it.
Over time, the paint on your outdoor wooden bench may start to fade or chip. To keep your bench looking good, you may need to do some touch-ups. You can use a small brush and some touch-up paint to fix any chips or scratches on your bench.
Before you start touching up your bench, make sure it is clean and dry. Apply the touch-up paint carefully and let it dry completely before using your bench.
If the paint on your outdoor wooden bench is severely faded or damaged, you may need to repaint it. Repainting your bench can give it a fresh new look and protect it from the elements.
Before you start repainting your bench, you need to remove the old paint. You can use a paint stripper or sandpaper to remove the old paint. Once you have removed the old paint, clean your bench thoroughly and let it dry completely.
Apply a primer to your bench before painting it. The primer will help the paint adhere better and last longer. Once the primer is dry, you can paint your bench with a high-quality outdoor paint.
In conclusion, taking good care of your painted outdoor wooden bench is essential to keep it looking good and lasting longer. Regular cleaning, touch-ups, and repainting can help you maintain your bench and protect it from the elements.

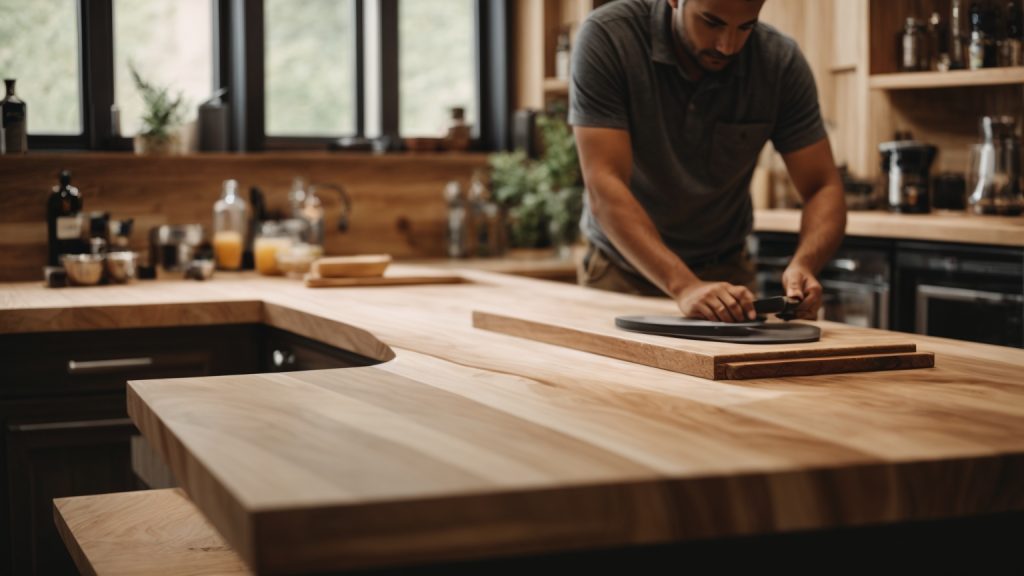
Looking to upgrade your kitchen countertops? Wooden countertops can add warmth and character to your kitchen while also being a practical choice. In this article, we will guide you through the steps of installing a wooden countertop in your kitchen.
First, it’s important to choose the right type of wood for your countertop. Hardwoods such as maple, oak, and cherry are popular choices for their durability and natural beauty. Once you have selected your wood, you will need to measure the dimensions of your countertop space and order a custom-sized countertop. Alternatively, you can purchase pre-made wooden countertops and cut them to size yourself.
Next, you will need to prepare your kitchen for the installation process. This may include removing your old countertops, making any necessary repairs to the underlying cabinets, and ensuring that the cabinets are level and secure. With the proper tools and techniques, installing a wooden countertop can be a DIY project that can greatly enhance the look and functionality of your kitchen.
Wooden countertops are a popular choice for both their aesthetic appeal and durability. They can add warmth and character to a kitchen, and with proper care, can last for many years. However, before you decide to install a wooden countertop, there are a few things to consider.
There are many types of wood that can be used for countertops, each with its own unique characteristics. Some popular choices include:
Wooden countertops have both advantages and disadvantages. Some pros include:
However, there are also some cons to consider:
If you decide to install a wooden countertop, it is important to follow proper installation procedures. This includes:
By understanding the types of wood available, the pros and cons of wooden countertops, and proper installation procedures, you can make an informed decision about whether a wooden countertop is right for your kitchen.
When it comes to choosing the right wood for your countertop, there are several factors to consider. Here are some things to keep in mind:
One of the most important factors to consider is durability. You want a wood that is strong enough to withstand daily use and won’t easily scratch or dent. Some popular options for durability include:
Of course, you also want your countertop to look good! Consider the style and color of your kitchen when choosing a wood. Some popular options for appearance include:
Finally, consider the maintenance required for each type of wood. Some woods require more upkeep than others, so choose one that fits your lifestyle and maintenance preferences. For example:
By considering these factors, you can choose the right wood for your countertop that will look great and last for years to come.
Before you start installing your wooden countertop, there are a few preparation steps you need to take to ensure a smooth installation process. This section will cover two important sub-sections: Measuring Your Space and Gathering Necessary Tools.
Measuring your space accurately is crucial to ensure that your wooden countertop fits perfectly. Here are the steps you need to follow:
By following these steps, you will have accurate measurements for your wooden countertop, which will make the installation process much easier.
Before you start the installation process, make sure you have all the necessary tools. Here’s a list of tools you will need:
| Tools | Description |
|---|---|
| Tape Measure | For measuring your space |
| Circular Saw | For cutting your wooden countertop |
| Jigsaw | For making cutouts for sinks and other appliances |
| Clamps | For holding your wooden countertop in place |
| Drill | For making pilot holes for screws |
| Screws | For securing your wooden countertop to the cabinets |
Make sure you have all of these tools before you start the installation process. If you don’t have any of these tools, you can rent them from a hardware store or consider hiring a professional to install your wooden countertop.
By following these preparation steps, you will be ready to start the installation process for your wooden countertop.
Installing a wooden countertop can be a fun and rewarding DIY project. Here are the steps to follow for a successful installation.
The first step is to measure and cut the wood to fit your countertop area. Use a circular saw or jigsaw to cut the wood to the desired size and shape. Be sure to wear safety goggles and a dust mask when cutting the wood.
Once the wood is cut, it’s time to sand and finish it. Sand the wood with a fine-grit sandpaper to smooth out any rough spots. Then, apply a food-safe finish to protect the wood from moisture and stains. Be sure to follow the manufacturer’s instructions for the finish you choose.
Now that the wood is cut and finished, it’s time to secure it to the cabinets. Apply a bead of construction adhesive along the top of the cabinets, then carefully place the countertop on top. Use clamps to hold the countertop in place while the adhesive dries. Finally, use screws to secure the countertop to the cabinets from underneath.
By following these simple steps, you can install a beautiful wooden countertop in your kitchen or bathroom. With a little bit of patience and some basic tools, you can create a unique and functional addition to your home.

To keep your wooden countertop looking its best, it’s important to clean it regularly. Start by wiping the surface with a damp cloth or sponge to remove any crumbs or spills. Avoid using harsh chemicals or abrasive scrubbers, as these can damage the wood. Instead, use a gentle, non-toxic cleaner such as vinegar and water or dish soap and water. Be sure to rinse the surface thoroughly with clean water and dry it with a soft cloth to prevent water damage.
If your countertop has stains or discoloration, try using a baking soda and water paste to gently scrub the affected area. For tougher stains, you may need to sand the surface lightly with fine-grit sandpaper and reapply a protective finish.
In addition to regular cleaning, there are a few other steps you can take to maintain your wooden countertop. First, make sure to keep the surface dry and avoid leaving standing water on it for extended periods of time. This can cause the wood to warp or crack.
Second, periodically apply a protective finish such as mineral oil or beeswax to the surface. This will help to prevent stains and water damage, as well as keep the wood looking shiny and new. Be sure to follow the manufacturer’s instructions for application and reapplication.
Finally, be mindful of the types of items you place on your wooden countertop. Avoid placing hot pots or pans directly on the surface, as this can cause burns or discoloration. Use cutting boards when preparing food, and avoid cutting directly on the countertop. With proper care and maintenance, your wooden countertop can last for years to come.
Installing a wooden countertop can be a great way to add warmth and character to your kitchen. However, it’s important to be aware of some common mistakes that can occur during the installation process. Here are a few things to keep in mind to help ensure a successful installation:
One of the most common mistakes is rushing into the countertop installation process without proper preparation. Skipping accurate measurements, failing to create a detailed plan, or not gathering the necessary tools and materials can lead to costly errors. Take the time to prepare adequately before starting the installation.
Choosing the wrong type of wood can also lead to problems down the line. For example, if you choose a softwood like pine, it may be more prone to dents and scratches than a hardwood like maple. Make sure to choose a wood that is appropriate for your needs and budget.
Wooden countertops need to be sealed properly to prevent damage from moisture and other elements. Failing to seal the countertop correctly can lead to warping, cracking, and other issues. Make sure to follow the manufacturer’s instructions carefully when sealing your countertop.
Wooden countertops can expand and contract with changes in temperature and humidity. Failing to allow for this movement can lead to warping and other problems. Make sure to leave enough space around the countertop to allow for movement, and avoid attaching the countertop too tightly to the cabinets.
Finally, poor installation can also lead to problems with your wooden countertop. Make sure to follow the manufacturer’s instructions carefully, and consider hiring a professional if you’re not confident in your own abilities. A poorly installed countertop can be a safety hazard as well as a waste of time and money.
By avoiding these common mistakes, you can help ensure a successful installation and enjoy the beauty and functionality of your new wooden countertop for years to come.
Wooden countertops are a popular choice for homeowners due to their natural beauty and unique character. Here are some benefits to consider when choosing a wooden countertop for your kitchen or bathroom:
Overall, wooden countertops offer a unique and natural look that can add warmth and character to any space. With proper installation and maintenance, they can be a durable and eco-friendly option for your home.

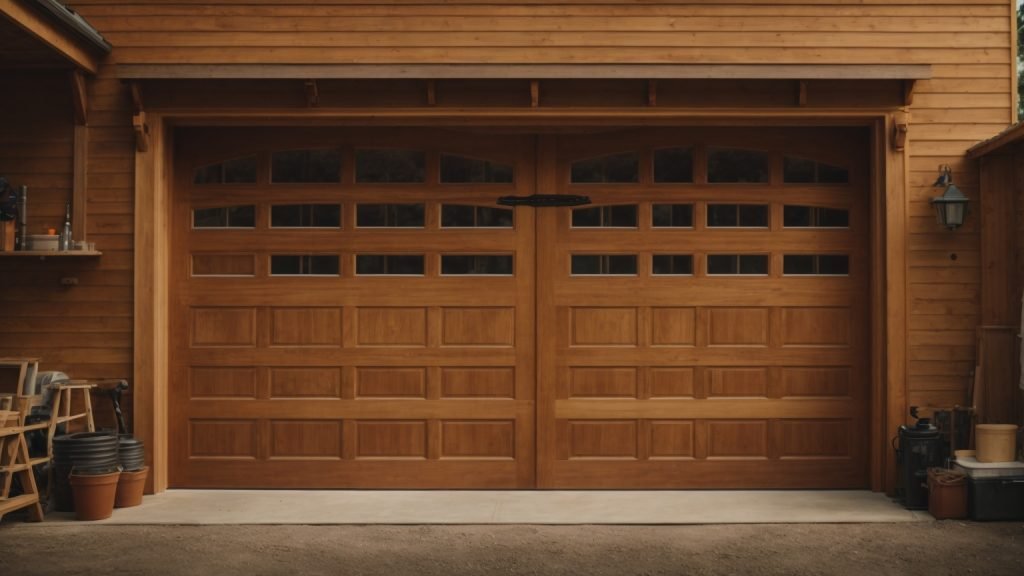
Are you tired of your old, worn-out garage door? Building a wooden garage door can be a great DIY project that not only adds curb appeal to your home but also increases its value. With the right tools and materials, building a wooden garage door can be a fun and rewarding experience.
Before you begin, it’s important to consider the style and design of your garage door. Do you want a traditional or modern look? What type of wood do you want to use? Once you have a plan in place, you can start gathering materials and tools. Keep in mind that safety should always be a top priority when working with power tools and heavy materials.

If you’re looking to build a wooden garage door, it’s important to understand the basics before diving into the project. Here are some key things to consider:
When it comes to selecting the right type of wood for your garage door, there are a few options to choose from. The most common types of wood used for garage doors include:
Consider the climate in your area, as well as your personal preferences and budget, when selecting the right type of wood for your garage door.
Before you start building your garage door, you’ll need to measure the size of your garage opening to determine the correct dimensions for your door. Standard garage door sizes typically range from 8 feet to 18 feet wide and 7 feet to 8 feet tall, but you may need to customize the size of your door based on the dimensions of your garage.
Building a wooden garage door requires a variety of tools, including:
Make sure you have all the necessary tools before starting your project, and take the time to familiarize yourself with each tool and its proper use.
When it comes to designing your wooden garage door, there are a few things to consider. This section will cover two main sub-sections: Choosing a Design and Creating a Blueprint.
The design of your garage door can greatly impact the overall look of your home. There are several different styles to choose from, including:
Consider the style of your home and choose a design that complements it. Raised panel doors are a popular choice for traditional homes, while carriage house doors are a great option for a more rustic look.
In addition to the style of the door, you’ll also need to choose the type of wood and any additional features, such as windows or decorative hardware. Popular wood choices include cedar, redwood, and mahogany.
Before you start building your garage door, it’s important to create a detailed blueprint. This will ensure that you have all the necessary materials and that the door will fit properly.
Start by measuring the opening of your garage door. This will give you the dimensions for the door itself. Next, create a rough sketch of the design you’ve chosen, including any windows or decorative hardware.
Once you have a rough sketch, create a more detailed blueprint. This should include exact measurements and a list of all the materials you’ll need. Consider creating a table to organize your materials and keep track of your progress.
By taking the time to carefully choose a design and create a detailed blueprint, you’ll be well on your way to building a beautiful wooden garage door that will enhance the look of your home.
When building a wooden garage door, selecting quality wood and cutting it properly are essential steps in ensuring a successful project. In this section, we’ll cover the basics of preparing the wood for your garage door.
Choosing the right type of wood is crucial for a durable and long-lasting garage door. Here are some tips for selecting quality wood:
Once you have selected the right type of wood, it’s important to purchase enough to complete your project. Make sure to account for any extra wood needed for mistakes or unexpected changes.
Properly cutting your wood is essential for creating a garage door that fits your space and functions properly. Here are some tips for cutting your wood:
By taking the time to select quality wood and cut it properly, you’ll be on your way to building a beautiful and functional wooden garage door.
Once you have all the pieces cut and sanded, it’s time to assemble your wooden garage door. This section will walk you through the process of joining the pieces and installing the necessary hardware.
Before you start joining the pieces together, make sure you have all the necessary tools and supplies, including wood glue, clamps, and screws. Follow these steps to join the pieces:
Make sure to take your time during this process to ensure that the joints are strong and secure.
Once your garage door is assembled, it’s time to install the necessary hardware. Here are the steps you need to follow:
Make sure to follow the manufacturer’s instructions for installing the hardware and take your time to ensure that everything is installed correctly.
By following these steps, you’ll be able to assemble and install your wooden garage door with ease.
Once you have constructed your wooden garage door, it’s time to add the finishing touches to make it look polished and professional. This section will cover two important steps in the finishing process: sanding and polishing, and painting or staining.
Before painting or staining your wooden garage door, you’ll need to sand it down to ensure a smooth surface. Start by sanding the entire door with a coarse grit sandpaper, such as 80 grit. This will remove any rough spots or imperfections in the wood. Then, switch to a finer grit sandpaper, such as 120 grit, and sand the door again to create a smooth surface.
Once you’ve finished sanding, it’s time to polish the wood. Apply a wood polish or wax to the surface of the door using a soft cloth, and buff it in using circular motions. This will give your door a beautiful shine and protect the wood from moisture and other elements.
Now that your wooden garage door is sanded and polished, it’s time to choose a finish. You can either paint or stain the door, depending on your preference.
If you choose to paint the door, start by applying a coat of primer to the surface. This will help the paint adhere better and prevent it from chipping or peeling. Once the primer is dry, apply one or two coats of paint, depending on the desired coverage. Use a high-quality paintbrush or roller to ensure a smooth finish.
If you prefer to stain the door, choose a stain color that complements the wood’s natural grain. Apply the stain using a brush or rag, and wipe away any excess with a clean cloth. Allow the stain to dry completely before applying a coat of sealer or varnish to protect the wood.
By following these simple steps, you can give your wooden garage door a professional finish that will last for years to come.
Building a wooden garage door is a great way to add value to your home. Once you have built your garage door, the next step is to install it. In this section, we will go over the installation process for your wooden garage door. There are two main steps in the installation process: mounting the door and attaching the opener.
Before you begin mounting the door, make sure you have all the necessary tools and hardware. You will need a drill, screws, a level, and a helper. Here are the steps to mount your wooden garage door:
Attaching the opener is the final step in the installation process. Here are the steps to attach your opener:
With these steps, you should be able to successfully install your wooden garage door. Remember to take your time and follow the instructions carefully.
To keep your wooden garage door functioning and looking great for years to come, regular maintenance is key. Here are some tips to help you maintain your wooden garage door.
Cleaning your wooden garage door regularly is essential to keep it looking good. Dirt, grime, and other debris can accumulate on the surface of the door, making it look dull and unattractive. Here are some tips for cleaning your wooden garage door:
In addition to regular cleaning, it’s important to perform an annual check-up on your wooden garage door to ensure that it’s functioning properly. Here are some things to check during your annual check-up:
By following these maintenance tips, you can keep your wooden garage door looking and functioning great for years to come.

If you’re looking to add a personal touch to your home decor, building your own wooden picture frames can be a great place to start. Not only do they add a rustic feel to your space, but they also allow you to showcase your favorite photos in a unique way. With a few basic tools and some simple steps, you can create custom frames that perfectly match your style.
Before you begin, it’s important to choose the right type of wood for your project. Softwoods like pine and cedar are easy to work with and can be found at most home improvement stores. Hardwoods like oak and cherry are more durable and offer a more polished look, but they can be more expensive. Once you’ve selected your wood, you’ll need to measure and cut it to the desired size. From there, you’ll use basic tools like a saw and sander to shape the wood and create the frame. Whether you’re a seasoned woodworker or a beginner, building a wooden picture frame is a fun and rewarding project that anyone can tackle.
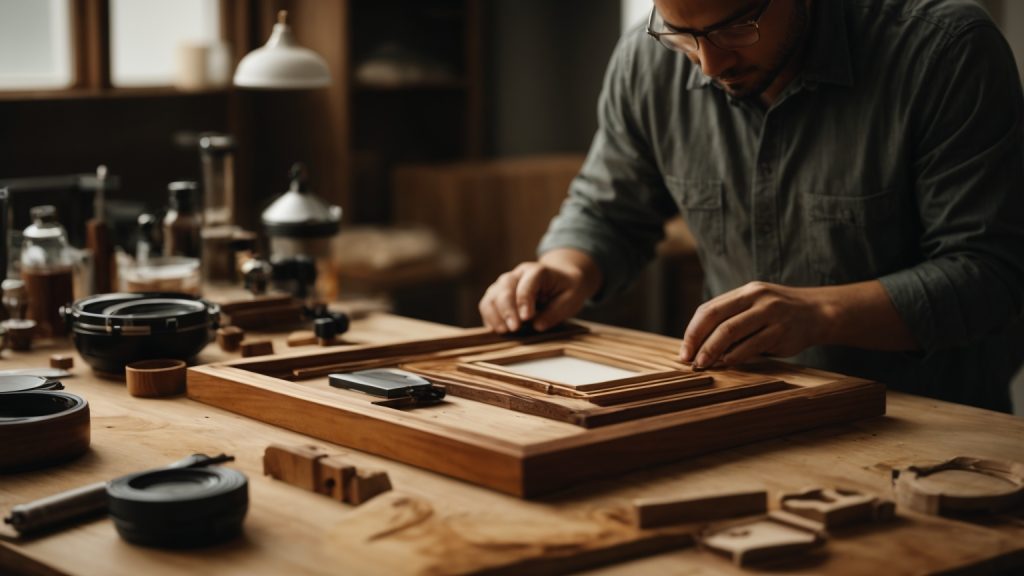
Building a wooden picture frame is a great way to showcase your favorite photos or artwork. With a few basic tools and some lumber, you can create a custom frame that perfectly fits your style and décor. In this section, we’ll cover the basics of building a wooden picture frame, including the types of wood to use and the tools you’ll need.
When it comes to building a picture frame, you’ll want to choose a wood that is both attractive and durable. Some popular options include:
When selecting your wood, be sure to choose boards that are straight and free of knots or other defects. You’ll also want to consider the grain pattern of the wood, as this can affect the overall look of your frame.
To build a wooden picture frame, you’ll need a few basic tools, including:
You may also want to invest in a few additional tools, such as a nail gun or a biscuit joiner, depending on the complexity of your frame design.
With these basics in mind, you’re ready to start building your own wooden picture frame.
When it comes to building a wooden picture frame, the design is just as important as the construction. A well-designed frame can enhance the beauty of your artwork and add a personal touch to your space. Here are some tips on how to design your picture frame.
The first step in designing your picture frame is to determine the size of your artwork. Measure the width and height of your artwork and add an inch to each measurement to allow for the frame to overlap the artwork. This will be the size of your frame. Keep in mind that larger frames will require thicker and sturdier wood to support the weight of the artwork.
Once you have determined the size of your frame, you can choose the style that best suits your artwork and personal taste. Here are some popular styles to consider:
Consider the style of your artwork and the decor of your space when choosing the style of your frame. A traditional frame may be best suited for a classic painting, while a rustic frame may complement a landscape photograph. A modern frame may work well with a contemporary abstract piece.
In summary, designing your picture frame involves determining the size of your artwork and choosing a style that complements both your artwork and your space. Keep these tips in mind when designing your frame to create a beautiful and personalized finished product.
Before you start building your wooden picture frame, it is essential to prepare the wood properly. This process involves cutting and sanding the wood to achieve a smooth and even surface.
The first step in preparing the wood is to cut it to the required size. You can use a table saw or a miter saw to cut the wood. It is essential to measure the wood accurately before cutting it to avoid any mistakes.
When cutting the wood, it is crucial to use the right blade for the job. A crosscut blade is ideal for cutting across the grain, while a rip blade is suitable for cutting along the grain. Using the wrong blade can result in a rough and uneven cut.
After cutting the wood, the next step is to sand it to achieve a smooth and even surface. Sanding helps to remove any rough edges and splinters, making the wood easier to work with.
Start by using a coarse-grit sandpaper to remove any rough spots or imperfections on the wood. Then, switch to a finer-grit sandpaper to achieve a smooth surface. It is essential to sand the wood evenly to avoid any unevenness in the final product.
When sanding the wood, it is crucial to wear protective gear such as gloves, goggles, and a dust mask. Sanding produces a lot of dust, which can be harmful to your health if inhaled.
In conclusion, preparing the wood is an essential step in building a wooden picture frame. By cutting and sanding the wood properly, you can achieve a smooth and even surface, making it easier to work with.
Once you have all the pieces cut to size, it’s time to assemble your wooden picture frame. This section will cover the two main steps of joining the pieces and securing the corners.
To join the pieces of your wooden picture frame, you will need wood glue and plastic pegs. Follow these steps:
To secure the corners of your wooden picture frame, you have a few options:
If you choose to use a brad nailer, be sure to countersink the nails and fill the holes with wood filler before sanding and finishing your frame.
Once your frame is assembled and the glue is dry, you can sand it smooth and apply your finish of choice. Congratulations, you’ve built your own wooden picture frame!
Once you’ve assembled your wooden picture frame, it’s time to add the finishing touches that will make it look polished and professional. This section will cover two important steps: applying the finish and adding the glass and picture.
The finish you choose for your picture frame will depend on your personal preference and the look you’re going for. Some common options include stain, paint, or a clear coat to showcase the natural beauty of the wood.
Before applying any finish, make sure the frame is clean and free of dust and debris. Sand the frame lightly to smooth out any rough spots or imperfections. Then, apply the finish according to the manufacturer’s instructions. You may need to apply multiple coats, allowing each coat to dry completely before applying the next.
Once the finish has dried, it’s time to add the glass and picture to your frame. Start by cleaning the glass to remove any fingerprints or smudges. Then, carefully place the glass into the frame, making sure it fits snugly.
Next, add the picture. If you’re using a mat, make sure the picture is centered and straight within the mat. Then, carefully place the mat and picture into the frame, making sure everything is lined up correctly.
Finally, add any hardware you need to hang the frame. This may include picture hangers, wire, or hooks. Make sure the hardware is securely attached to the frame, and test the frame to make sure it hangs straight.
With these finishing touches, your wooden picture frame is complete and ready to display your favorite photo or artwork.


