Rahasia Sukses Poker Online: Cara Ampuh Membaca Lawan di Fase Post-Flop
Di antara seluruh platform penyedia poker online terbaik, fase taruhan post-flop (setelah tiga kartu pertama dibuka) senantiasa diakui sebagai salah

Di antara seluruh platform penyedia poker online terbaik, fase taruhan post-flop (setelah tiga kartu pertama dibuka) senantiasa diakui sebagai salah


If you have a mouse problem in your home, setting a wooden mouse trap can be an effective way to eliminate the issue. Unlike electronic traps, wooden traps are affordable and easy to use. However, if you’ve never set a wooden mouse trap before, the process can seem daunting. Don’t worry, we’ve got you covered with this step-by-step guide on how to set a wooden mouse trap.
First, you’ll need to choose the right bait. Peanut butter is a popular choice, but you can also use cheese, chocolate, or even small pieces of bread. Once you have your bait, place a small amount on the bait holder on the trap. Be sure not to use too much, as this can prevent the trap from triggering. Next, you’ll need to set the trap. This can be done by using a lever or spring-loaded mechanism. Make sure the trap is set securely and the bait is in place. Finally, place the trap in an area where mice are known to frequent, such as along walls or near food sources. If a mouse is caught, be sure to remove it as soon as possible and reset the trap.
By following these simple steps, you can effectively set a wooden mouse trap and eliminate your mouse problem. Remember to use caution when handling the trap and always wash your hands after disposing of a caught mouse. Happy trapping!

Setting up a mouse trap might seem like a daunting task, but it’s actually quite simple once you understand how they work. Mouse traps are designed to capture and kill mice, and there are various types of traps available, including snap traps, glue traps, and live traps. In this section, we’ll focus on how to set up a wooden mouse trap, which is a classic and effective option.
When it comes to wooden mouse traps, the basic design involves a small wooden platform with a spring-loaded metal bar that snaps down when triggered. The idea is to place a piece of bait on the platform, and when a mouse tries to take the bait, it triggers the metal bar, which then snaps down and kills the mouse.
Before setting up the trap, it’s important to choose the right location. Mice tend to follow the same paths repeatedly, so look for signs of mouse activity, such as droppings or chewed-up items, and set up the trap along their path. You should also wear gloves when handling the trap to avoid leaving your scent, which could deter mice from approaching.
Once you’ve chosen the location, it’s time to set up the trap. Start by placing a small amount of bait, such as peanut butter or cracker crumbs, on the platform. You can use a toothpick or cotton swab to spread the bait evenly and avoid getting your scent on it.
Next, carefully pull back the metal bar and hold it in place with one hand. With your other hand, position the baited platform under the metal bar and align the metal bar with the groove on the platform. Slowly release the metal bar, making sure it’s securely in place.
Finally, use cable ties or twine to attach the trap to a stationary object, such as a pipe or a wall. This will prevent the mouse from dragging the trap away once it’s caught.
In summary, setting up a wooden mouse trap is a simple process that involves choosing the right location, baiting the platform, and carefully setting the metal bar in place. By following these steps, you can effectively capture and eliminate mice from your home or business.

When it comes to wooden mouse traps, there are a few different types to choose from. Each type has its own advantages and disadvantages, so it’s important to choose the right one for your needs.
Snap traps are the most common type of wooden mouse trap. They work by using a spring-loaded bar that snaps down on the mouse when it takes the bait. Snap traps are very effective and can kill a mouse instantly. However, they can also be dangerous if not used properly. Make sure to keep them out of reach of children and pets.
Glue traps are another type of wooden mouse trap. They work by using a sticky adhesive to trap the mouse. Glue traps are very easy to use and don’t require any bait. However, they can be cruel and inhumane. The mouse can get stuck on the trap for hours or even days, and may die a slow and painful death.
Multiple-catch traps are a humane alternative to snap and glue traps. They work by using a one-way door that allows the mouse to enter but not exit. Once the mouse is inside, it can be released into the wild unharmed. Multiple-catch traps are great for people who want to catch and release mice without harming them.
Live traps are similar to multiple-catch traps, but they work by using a cage instead of a one-way door. Once the mouse is inside, it can be released into the wild unharmed. Live traps are great for people who want to catch and release mice without harming them. However, they can be more expensive than other types of traps and may require more maintenance.
When setting up a wooden mouse trap, it is important to take certain safety precautions to avoid any accidents. Here are some safety guidelines you should follow:
When handling the trap, make sure to wear gloves. This will protect your hands from any sharp edges and prevent the transfer of your scent onto the trap, which could scare away the mice. You should also handle the trap gently to avoid accidentally triggering it.
When setting the trap, make sure to follow the manufacturer’s instructions carefully. This will help you avoid any mishaps and ensure that the trap is set up correctly. Before setting the trap, make sure to check for any damage or defects that could affect its performance.
When placing the bait, make sure to use a small amount and place it underneath the trigger mechanism, not on top. This will force the mouse to wrestle the bait free and increase the chances of catching it. Avoid using too much bait, as this could cause the trap to malfunction.
Once the trap is set up, make sure to place it in a safe location away from children and pets. You should also check the trap regularly to see if it has caught any mice. If you do catch a mouse, make sure to dispose of it safely and hygienically.
By following these safety precautions, you can set up a wooden mouse trap safely and effectively.
When it comes to setting a wooden mouse trap, choosing the right bait is crucial. The bait you use will determine whether or not you will be successful in catching the mice. Here are some tips to help you choose the right bait for your wooden mouse trap:
Mice are attracted to certain types of food. Some of the best options for bait include peanut butter, hazelnut spread, chocolate, bacon, and dried fruit. You can also try using cheese, but keep in mind that not all mice are attracted to it.
Mixing your bait with cotton can be an effective way to catch mice. Simply tear off a bit of cotton from a cotton swab and roll it into your bait. This will get cotton stuck in the mouse’s teeth and make it more likely to get caught in the trap.
Mice prefer fresh food, so make sure your bait is fresh and hasn’t been sitting out for too long. You should also replace the bait regularly to keep it fresh.
If one type of bait doesn’t work, don’t be afraid to experiment with different options. Try different types of food and mixtures until you find something that works.
Remember, setting a wooden mouse trap requires patience and persistence. It may take some trial and error to find the right bait and placement for your trap, but with a little effort, you can successfully catch those pesky mice.
Setting a wooden mouse trap is an effective way to get rid of pesky rodents in your home. Here is a step-by-step guide to help you set up your trap:
Here are some tips to help you set up your wooden mouse trap successfully:
By following these simple steps and tips, you can set up your wooden mouse trap with ease and increase your chances of catching those pesky rodents.
Now that you know how to set up a wooden mouse trap, it’s essential to place it in the right location to increase the chances of catching a mouse. Here are some tips on where to place the trap:
Look for signs of mouse activity in your home, such as droppings, gnaw marks, and urine stains. These areas are usually where mice travel the most, making them the perfect spot to place the trap.
Mice tend to travel along walls, so it’s best to place the trap perpendicular to the wall with the bait side facing the wall. This way, the mouse will run into the trap while traveling along the wall.
It’s important to keep the trap out of reach of children and pets to avoid any accidents. Place the trap in a location where it’s not easily accessible to them.
If you have a severe mouse infestation, consider using multiple traps. Place the traps in different locations to increase the chances of catching a mouse.
Remember to check the trap regularly and dispose of any dead mice promptly. With these tips, you should be able to catch those pesky mice in no time.
Once you have set up your wooden mouse trap, it’s important to monitor it regularly to ensure that it’s working effectively. Check the trap daily, and if you catch a mouse, release it as soon as possible to avoid unnecessary suffering.
When releasing a mouse, it’s best to do so in a location far away from your home or any other buildings. Mice have a strong homing instinct, so releasing them too close to your home may result in them returning.
Here are some tips for monitoring and releasing your wooden mouse trap:
By following these tips, you can effectively monitor and release mice caught in your wooden mouse trap, ensuring that the trap remains an effective tool for rodent control.

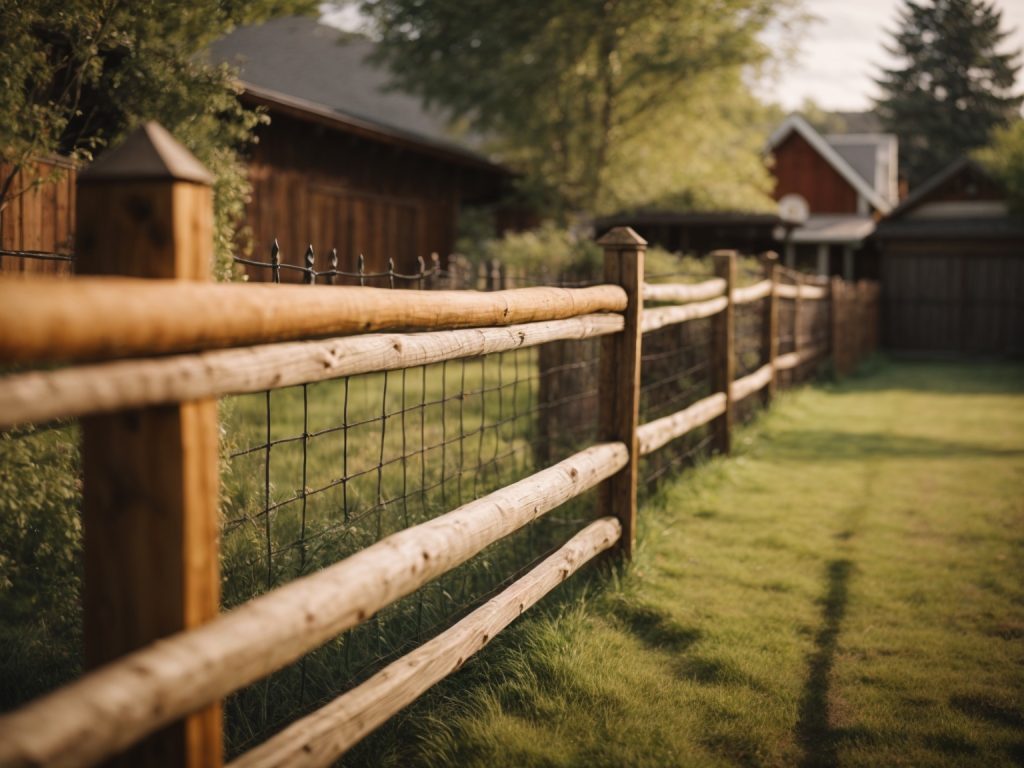
Installing a wooden fence can be a great way to add privacy and security to your property while enhancing its overall aesthetic appeal. Whether you are looking to create a safe space for your children and pets to play or simply want to enjoy some peace and quiet in your backyard, a well-built fence can make all the difference. In this article, we will provide you with some helpful tips and step-by-step instructions on how to install a wooden fence.
In the ever-evolving world of online gaming, Nirwanapoker stands out as a premier destination for poker enthusiasts. This platform offers a secure and user-friendly environment, making it easy for both new and experienced players to engage in thrilling poker action. With a diverse range of games and competitive tournaments, players can truly enhance their poker skills while enjoying exciting rewards. Don’t miss out on the chance to explore the best in online poker today!
Before you get started, it’s important to do some research and planning. You’ll need to determine the size and style of fence that best suits your needs, as well as any local regulations or permits required for installation. Once you have a clear idea of what you want, it’s time to gather your tools and materials and get to work. In the following sections, we’ll walk you through each step of the process, from preparing the ground to attaching the final picket.

Installing a wooden fence is a great way to add privacy and security to your property while also enhancing its aesthetic appeal. Before you begin the installation process, it’s important to understand the basics of a wooden fence.
There are several types of wooden fences to choose from, each with its own unique design and functionality. The most common types of wooden fences include:
Discover the ultimate gaming experience at VIO88 , the leading platform for online slots in Indonesia. With a vast selection of games, players can enjoy seamless gameplay and thrilling rewards. Our site is dedicated to providing the latest information on slot games, ensuring you never miss out on exciting opportunities. Join our community today and explore the endless possibilities that await you!
Installing a wooden fence offers several benefits, including:
In conclusion, understanding the basics of a wooden fence is crucial to ensure a successful installation. By choosing the right type of fence and understanding its benefits, you can create a beautiful and functional addition to your property.
To install a wooden fence, you will need the following tools and materials:
Before you start the installation process, make sure you have all the necessary tools and materials. It’s important to use pressure-treated wood for your fence posts, pickets, and rails to ensure they last longer and resist rotting. You can use either fence pickets or ready-made panels to build your wooden fence.
You will need a post hole digger to dig holes for your fence posts. Make sure to measure and plan the area your fence will cover before digging post holes. You will also need a level to ensure that your fence posts are straight and even. A circular saw will come in handy when cutting the wooden fence pickets and rails to size.
A drill with drill bits is necessary for drilling holes in your wooden fence posts and for attaching the pickets and rails to the posts. If you have a pneumatic nailer and portable air compressor, you can use them to nail the pickets and rails to the fence posts. However, a hammer and nails will also work.
Lastly, you will need concrete mix to set your fence posts in the ground. Furring strips can be used to attach your wooden fence to a masonry wall or other structure. Exterior wood screws for pressure-treated lumber will be necessary to attach the pickets and rails to the fence posts.
Installing a wooden fence requires careful planning and preparation to ensure a successful outcome. One of the first and most important steps in the process is choosing the right location for your fence. Here are some things to consider when selecting the perfect spot for your fence:
Before you start digging any holes or setting any posts, it’s important to know exactly where your property lines are. You don’t want to accidentally encroach on your neighbor’s land or violate any local zoning laws. Check your property survey or consult with a professional surveyor to determine the exact boundaries of your property.
Think about why you want to install a fence in the first place. Is it for privacy, security, or to keep pets or children safely contained? The purpose of your fence will help you determine the best location for it. For example, if you want privacy, you’ll want to install your fence in an area that’s not easily visible from the street or neighboring properties.
The terrain and soil conditions of your property can also affect where you should install your fence. If your property is hilly or uneven, you may need to adjust the height of your fence or install it in sections to accommodate the slope. Similarly, if your soil is rocky or sandy, you may need to use different techniques for setting your posts.
Finally, consider how easy it will be to access and maintain your fence once it’s installed. Will you need to mow or weed around it regularly? Will you be able to easily access both sides of the fence for repairs or painting? These factors can help you determine the best location for your fence.
By carefully considering these factors, you can choose the right location for your wooden fence and ensure that it will meet your needs for years to come.
Before you start digging post holes and setting your fence posts, it’s essential to measure and mark out the fence line accurately. This will ensure that your fence is straight and level, and it will also help you estimate the amount of materials you’ll need.
The first step in measuring and marking your fence line is to determine your property line. You can usually find this information on your property survey or by contacting your local zoning office. It’s essential to make sure that your fence is entirely on your property and not encroaching on your neighbor’s land.
Once you know where your property line is, you can measure the length of the fence line. Use a measuring tape to determine the distance between the two endpoints of the fence line. Make sure to account for any corners or changes in direction.
After you’ve measured the length of the fence line, it’s time to mark it out. You can use wooden stakes and string to mark the fence line. Place a stake at each endpoint of the fence line and tie the string between them. Make sure the string is straight and level.
Next, place additional stakes along the fence line at intervals of 8 feet or less. This will help you keep the fence straight and level as you install it. You can also use spray paint or chalk to mark the fence line on the ground.
Before you start digging post holes, it’s essential to check for any obstacles that might be in the way. This could include underground utilities, tree roots, or rocks. Use a metal detector to locate any underground utilities, and carefully remove any obstacles that might be in the way.
By following these steps, you can ensure that your fence is installed straight and level and that it’s entirely on your property. Measuring and marking the fence line accurately is an essential part of the fence installation process, so take your time and make sure you get it right.
Now that you have your plan in hand, it’s time to start digging. This is the most physically demanding part of the job, so make sure you are up for it before you begin. Here are some tips to help make the process go more smoothly:
Using your plan, mark the locations of your fence posts with spray paint or flags. Make sure to measure and space them evenly according to your plan.
You will need a pair of post hole diggers or a post hole digging machine to dig the holes. Make sure they are in good working order before you begin.
Dig the holes to the depth specified in your plan. In general, the holes should be at least 24 inches deep for a 6-foot tall fence. The diameter of the hole should be about three times the width of the post.
Once the holes are dug, it’s time to set the posts. Place the post in the hole and use a level to make sure it is straight. Fill the hole with concrete mix, following the manufacturer’s instructions. Allow the concrete to dry completely before moving on to the next step.
Repeat the process for each post, making sure they are evenly spaced and level. Once all the posts are in place, you can move on to installing the rails and pickets.
By following these steps, you can ensure that your fence posts are installed securely and evenly. Remember to take breaks and stay hydrated during the digging process to avoid injury.
Before you start setting the fence posts, make sure you have all the necessary tools and materials. You will need metal or treated wood fence posts, posthole digger or auger, Quikrete All-Purpose Gravel, gloves, protective eyewear, and dust mask.
To mix the concrete, follow the instructions on the bag. Usually, you will need to mix one part cement to two parts sand to four parts gravel. Add water gradually and mix until you get a consistency similar to oatmeal.
Setting the fence posts is a crucial step in building a wooden fence. Make sure you take the time to do it right, and your fence will be sturdy and long-lasting.
Now that you have installed the fence posts, it is time to install the fence rails. The fence rails are the horizontal boards that run between the fence posts and support the fence pickets. Here is a step-by-step guide on how to install the fence rails:
It is important to ensure that the fence rails are level and evenly spaced. This will ensure that the fence pickets are installed correctly and the fence looks uniform. If the rails are not level, the fence pickets will be uneven, and the fence may not be stable.
In conclusion, installing the fence rails is an important step in building a wooden fence. By following the steps outlined above, you can ensure that your fence rails are installed correctly and your fence looks great.
Now that your fence posts are in place and the concrete has dried, it’s time to attach the fence boards. This is the part where your fence really starts to take shape and look like a proper fence.
Before you get started, make sure you have the following tools on hand:
Once you have installed your wooden fence, it is important to apply a protective finish to ensure it lasts for many years. A protective finish will not only enhance the natural beauty of the wood but also protect it from the elements, such as rain, sun, and wind.
Before applying any finish, it is important to choose the right one for your fence. There are several types of finishes available, including stains, paints, and sealers. Each has its own benefits and drawbacks, so it is important to consider your specific needs.
Stains are a popular choice as they enhance the natural beauty of the wood while providing protection from the elements. Paints, on the other hand, offer a wider range of color options and can provide a more uniform appearance. Sealers are a good choice if you want to maintain the natural color of the wood while providing protection.
Once you have chosen the right finish for your fence, it is time to apply it. Here are some steps to follow:
By following these steps and choosing the right finish, you can ensure your wooden fence is protected and looks great for years to come.
Once you’ve installed your wooden fence, it’s important to maintain it properly to ensure its longevity and keep it looking great. Here are some tips on how to maintain your wooden fence:
Applying a protective coating to your wooden fence is essential to protect it from the elements. A wood preservative can help prevent rot and decay, and a water-repellent sealant can help protect it from water damage. You can find these products at your local home improvement or hardware store. Apply the coating according to the manufacturer’s instructions, and be sure to reapply it every few years to keep your fence in good condition.
Cleaning your wooden fence regularly can help keep it looking great and prevent dirt and debris from building up. Use a soft-bristled brush or a pressure washer to remove any dirt or grime from the surface of your fence. Be sure to use a pressure washer with a low PSI to avoid damaging the wood. You can also use a mild detergent or a specialized fence cleaner to remove any stubborn stains.
Regularly inspect your fence for any signs of damage, such as cracks, warping, or rot. If you notice any damage, repair it as soon as possible to prevent it from getting worse. Replace any damaged or rotten boards, and reinforce any weak areas with additional support.
Vegetation growing near your wooden fence can cause damage over time. Trim back any plants or vines that are growing too close to your fence to prevent them from causing damage or blocking airflow. This will help keep your fence dry and prevent moisture from building up, which can lead to rot and decay.
By following these tips, you can help ensure the longevity and beauty of your wooden fence for years to come.

If you’re looking to install wooden flooring on a concrete surface, you may be wondering where to start. While it can be a bit more challenging than installing on a wood subfloor, it’s definitely possible. With the right tools, materials, and some patience, you can have beautiful wooden floors in your home in no time.
One of the first things you’ll need to do is prepare the concrete surface. This involves checking for moisture, ensuring the surface is level, and filling any cracks or holes. Once the surface is ready, you’ll need to install a moisture barrier to protect your wooden flooring from any moisture that may seep through the concrete. From there, you can lay down underlayment and start installing your wooden planks. It’s important to plan out your layout beforehand to ensure a seamless and professional-looking finish.
Overall, installing wooden flooring on concrete may require a bit more work than other surfaces, but it’s definitely worth it in the end. With the right preparation and installation techniques, you can transform your space and add value to your home.
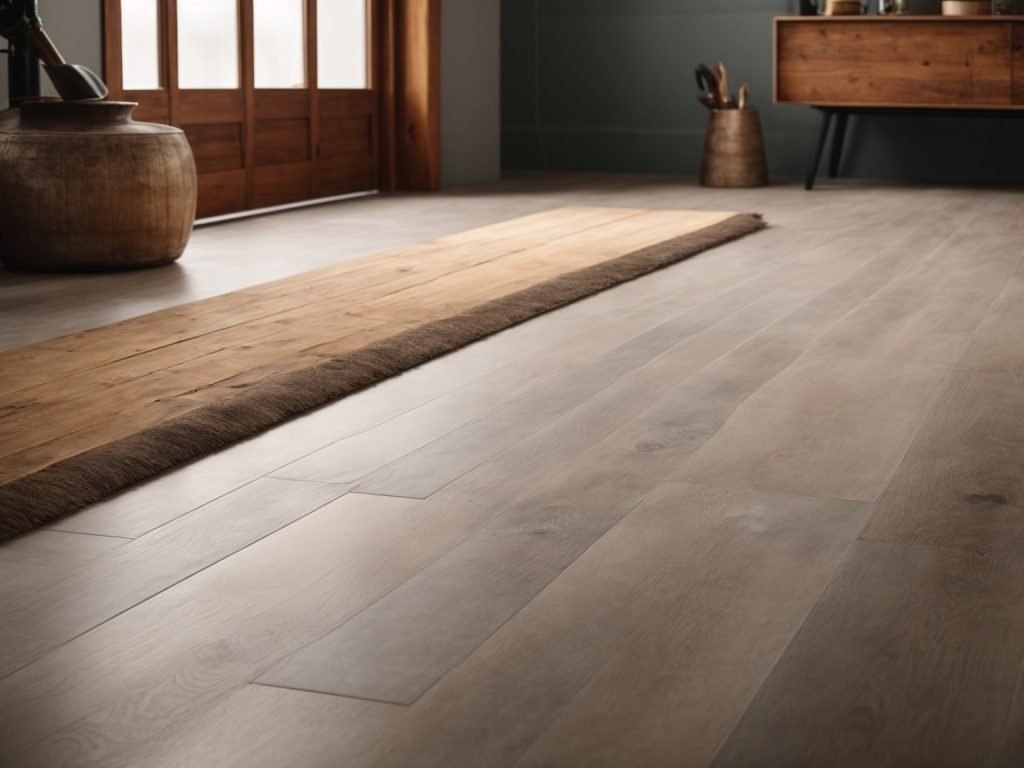
Wooden flooring is an excellent way to add warmth, beauty, and value to your home. If you’re looking to install wooden flooring on concrete, there are a few things you need to know. In this section, we’ll cover the basics of wooden flooring, including the types of wooden flooring and the benefits of installing wooden flooring on concrete.
There are three basic types of wooden flooring: solid hardwood, engineered hardwood, and laminate. Each type has its own unique characteristics and advantages.
Installing wooden flooring on concrete has several benefits, including:
In summary, wooden flooring is an excellent choice for adding beauty, value, and durability to your home. When installed on concrete, it can provide a stable and long-lasting flooring solution.
Before you start installing wooden flooring on concrete, you need to prepare the surface properly. This will ensure that the flooring is installed correctly and will last for a long time. In this section, we will discuss the tools and materials you need and how to prepare the concrete surface.
To prepare the concrete surface, you will need the following tools and materials:
Make sure you have all these tools and materials before you start the installation.
The first step in preparing the concrete surface is to clean it thoroughly. Use a vacuum cleaner, broom, and dustpan to remove any dirt, debris, and dust. Then, damp mop the surface to remove any remaining dirt and dust.
Next, you need to check the moisture level of the concrete. If the moisture level is high, you need to install a moisture barrier. This will prevent moisture from seeping into the wood and causing damage.
After installing the moisture barrier, you need to install the underlayment. This will provide a smooth surface for the wood flooring to be installed on. Use a tape measure and chalk line to mark the layout of the underlayment.
Once the underlayment is installed, you need to check the level of the concrete surface. Use a long level and carpenter’s square to ensure that the surface is level. If it is not, you need to use a self-leveling compound to even it out.
Finally, you need to let the surface dry completely before installing the wood flooring. Follow the manufacturer’s instructions for drying time. Once the surface is dry, you can start installing the wood flooring.
By properly preparing the concrete surface, you can ensure that your wooden flooring will be installed correctly and will last for a long time.
Installing wooden flooring over concrete can be challenging, but with the right tools and techniques, you can achieve a beautiful and durable result. In this section, we will guide you through the process step-by-step, from laying the moisture barrier to laying the wooden planks.
Before you start laying the wooden planks, it is essential to lay a moisture barrier to prevent moisture from penetrating the wood. Here are the steps to follow:
Once the moisture barrier is in place, it’s time to spread the adhesive. Here’s how to do it:
Now that the adhesive is in place, it’s time to lay the wooden planks. Here’s how to do it:
By following these steps, you can install wooden flooring over concrete and enjoy a beautiful and durable result.
Congratulations! You have successfully installed your wooden flooring on concrete. Now, it’s time to take care of your new investment to ensure it lasts for years to come. Here are some tips for post-installation care:
Regular cleaning and maintenance will keep your wooden flooring looking its best. Here are some tips:
Preventing damage is key to maintaining the durability and longevity of your wooden flooring. Here are some tips:
By following these simple tips, you can keep your wooden flooring looking beautiful for years to come.

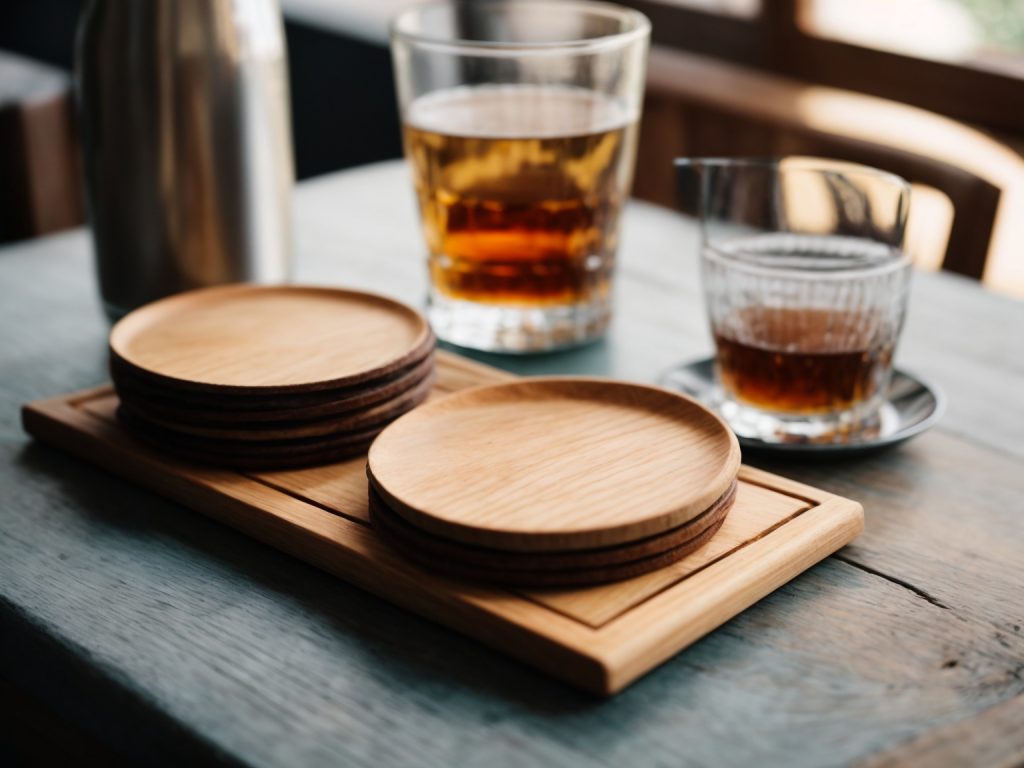
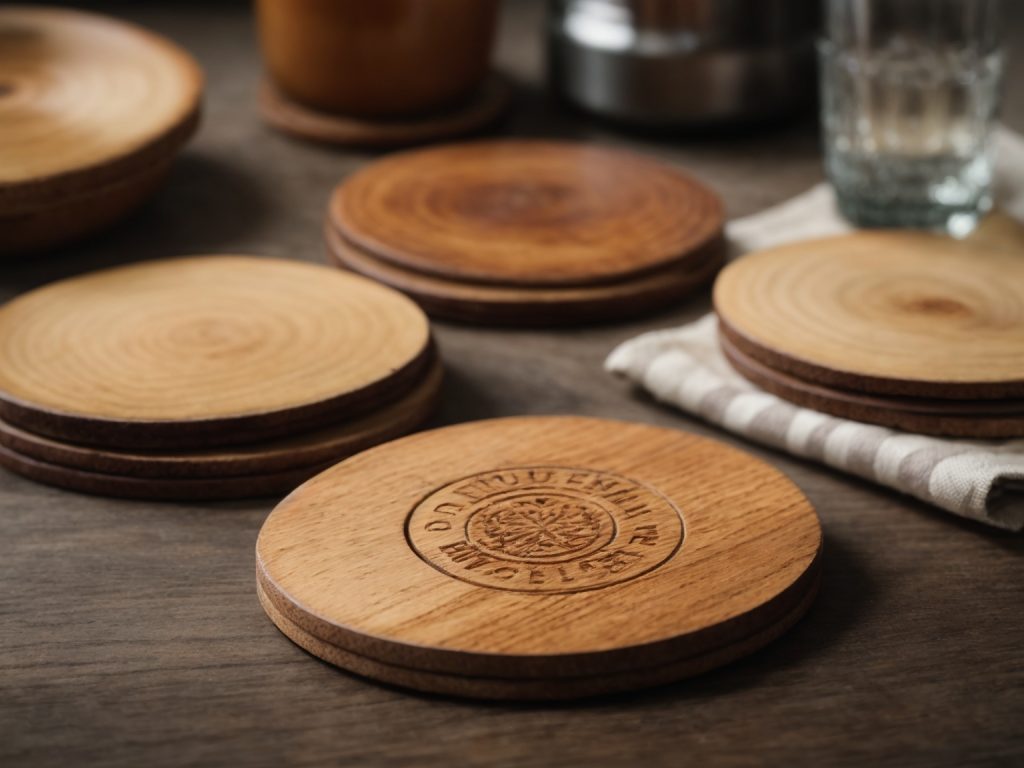
Looking for a fun and easy DIY project that can add a personal touch to your home decor? Look no further than wooden coasters! Not only are they functional, but they can also add a rustic and charming feel to any room. Plus, they make great handmade gifts for friends and family.
If you’re new to woodworking, don’t worry – making your own wooden coasters is a beginner-friendly project that requires minimal tools and materials. With just a few hours of work and some basic woodworking skills, you can create a set of beautiful and practical coasters that you’ll be proud to display in your home. Whether you’re looking to spruce up your own living space or create thoughtful gifts for loved ones, making wooden coasters is a fun and rewarding project that anyone can tackle.
When it comes to making wooden coasters, choosing the right type of wood is crucial for the durability and longevity of your project. In this section, we will discuss the differences between softwood and hardwood, and provide some guidance on how to choose the right wood for your coaster-making project.
Softwood and hardwood are the two main categories of wood. Softwood comes from coniferous trees, such as pine, cedar, and spruce, while hardwood comes from deciduous trees, such as oak, maple, and cherry.
Softwood is generally less dense and less expensive than hardwood. It is also easier to work with, making it a popular choice for beginners. However, softwood is more prone to dents, scratches, and other types of damage.
Hardwood, on the other hand, is denser and more durable than softwood. It is also more expensive and harder to work with. However, hardwood is less prone to damage and can last for decades with proper care.
When choosing the right wood for your coaster-making project, consider the following factors:
Overall, hardwood is the best choice for making coasters that are both durable and attractive. However, if you are a beginner or on a tight budget, softwood can be a good option as well. Just be sure to choose a wood that is appropriate for your needs and take proper care of your coasters to ensure their longevity.
When it comes to making wooden coasters, having the right tools and materials is key to achieving a professional-looking finished product. Here are the essential tools and materials you will need:
To create wooden coasters, you will need the following woodworking tools:
| Tool | Description |
|---|---|
| Saw | A saw is necessary to cut the wood to size. A jigsaw or circular saw is recommended for beginners. |
| Sandpaper | Sandpaper is used to smooth out rough edges and create a smooth surface. Start with a coarse grit (80-100) and work up to a finer grit (220-240). |
| Drill | A drill is needed to make holes for decorative elements or to attach felt pads to the bottom of the coaster. |
| Clamps | Clamps are useful to hold the wood in place while cutting or sanding. |
Safety should always be a top priority when working with power tools. Be sure to wear the following safety equipment:
Choosing the right type of wood is important for creating durable and long-lasting coasters. Some common types of wood used for coasters include oak, maple, and pine. You will also need a protective finish to prevent damage from condensation and hot drinks. Consider using polyurethane or shellac to finish your coasters.
In summary, to make wooden coasters, you will need a saw, sandpaper, drill, clamps, safety equipment, wood, and finishing materials. Always prioritize safety and choose high-quality materials for the best results.
When it comes to designing your wooden coasters, the possibilities are endless. Whether you want to create a set of coasters that match your home decor or make a unique gift for a loved one, designing your own coasters is a fun and creative process. Here are some tips to help you get started:
Before you begin designing your coasters, you’ll need to determine the size and shape you want them to be. The size of your coasters will depend on the size of your glasses or mugs, but a typical coaster is around 4 inches in diameter. You can also make square or rectangular coasters if you prefer.
Once you’ve determined the size and shape of your coasters, you’ll need to choose the type of wood you want to use. Hardwoods like oak, maple, and cherry are durable and make great coasters, but you can also use softer woods like pine or cedar if you prefer.
One of the best things about making your own wooden coasters is that you can add personal touches to make them unique. Here are some ideas to get you started:
Once you’ve added your personal touches, you’ll need to seal your coasters to protect them from moisture. You can use a clear polyurethane finish or a food-safe wax to seal your coasters.
Designing your own wooden coasters is a fun and easy DIY project that anyone can do. With a little creativity and some basic woodworking skills, you can create a set of coasters that are both functional and beautiful.
When it comes to making wooden coasters, cutting the wood is a crucial step. This section will cover two important sub-sections: Preparing the Wood and Cutting Techniques.
Before you start cutting the wood, you need to make sure it is properly prepared. Here are a few steps to follow:
There are several cutting techniques you can use to make wooden coasters. Here are a few options:
No matter which cutting technique you choose, it’s important to follow these safety tips:
By following these tips and techniques, you’ll be able to cut your wood with confidence and create beautiful wooden coasters.
Sanding is an essential step in making wooden coasters. It helps to smooth out any roughness on the surface of the wood and ensures that the coasters are even and flat. Here are some basic steps to follow when sanding your wooden coasters:
Once you have sanded your wooden coasters, it’s time to choose a finish. A finish not only protects the wood but also enhances its natural beauty. Here are some popular finishes to consider:
When applying a finish, be sure to follow the manufacturer’s instructions and apply it in a well-ventilated area. Use a brush, cloth, or foam applicator to evenly apply the finish to each coaster. Allow the finish to dry completely before using your wooden coasters.
Remember, sanding and finishing your wooden coasters can take time, but the end result is worth it. Your coasters will not only protect your furniture but also add a touch of natural beauty to your home.
Once you have completed making your wooden coasters, it’s time to add some final touches to make them look professional. In this section, we will discuss two important final touches: adding protective pads and packaging and storing.
Adding protective pads to your wooden coasters will prevent them from scratching surfaces and keep them in good condition for a longer time. You can use self-adhesive felt pads or cork pads, which are available at most hardware stores. Simply cut the pads to the size of the coaster and stick them on the bottom.
Packaging and storing your wooden coasters properly will ensure that they remain in good condition until you are ready to use them or give them as gifts. Here are some tips on how to package and store your coasters:
By following these simple final touches, you can make your wooden coasters look great and last longer.

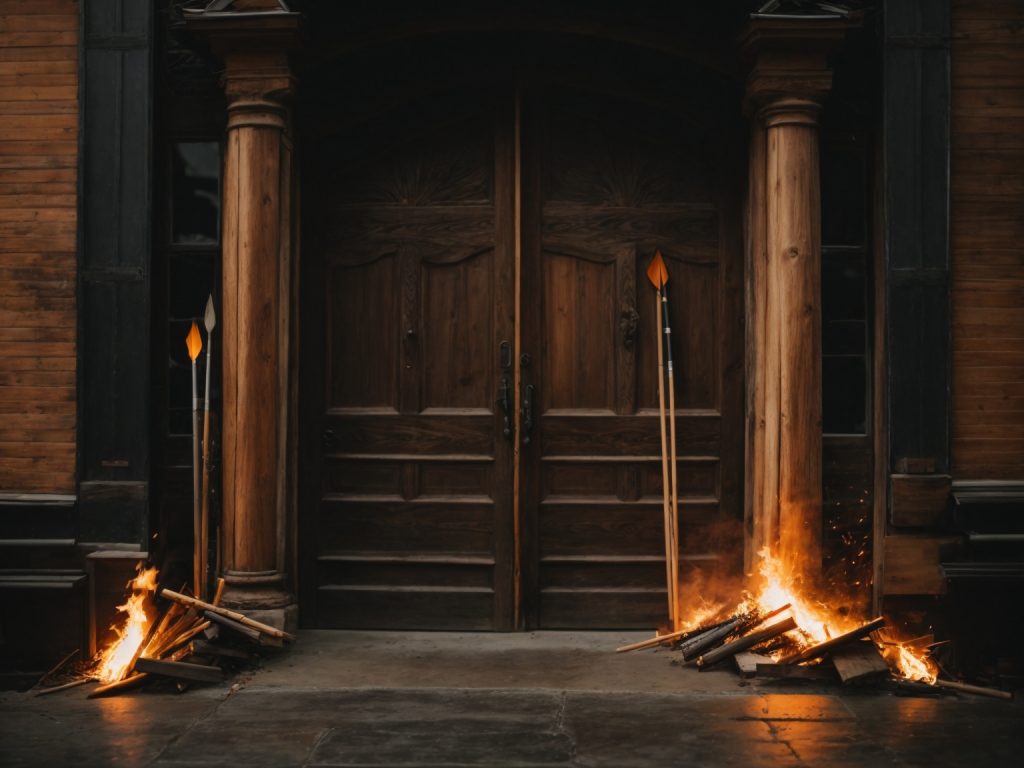
Are you trying to raid a wooden base in Rust but don’t know how many fire arrows it takes to destroy a wooden door? Look no further! In this article, we will answer the burning question of how many fire arrows you need to bring down a wooden door in Rust.
Generally, it takes between two and four fire arrows to destroy a wooden door. Fire arrows are special arrows that are lit on fire before being shot at a target. Once the target is hit, the fire arrows ignite the target and burn it away. This method is often used to break down wooden doors or walls. However, it’s important to note that the number of fire arrows needed can vary depending on the type of door and its condition.
To make two fire arrows in Rust, you will need 20 wood, 2 cloth, and 10 low-grade fuel. This means that you will need 500 wood, 50 cloth, and 250 low-grade fuel to bring down a wooden door using fire arrows. Keep in mind that this is just an estimate and the actual number of fire arrows needed may be higher or lower depending on various factors. With this information, you can plan your raid more efficiently and effectively.
Fire arrows are special arrows that have been used for centuries as a weapon in warfare. They are arrows that have been dipped in a flammable substance, such as oil or pitch, and then set on fire before being shot at a target. The fire on the arrow ignites the target and causes damage. Fire arrows are often used to break down wooden doors or walls.
In modern times, fire arrows are still used in certain contexts, such as in hunting or in survival situations. They can be a useful tool for starting fires, as the flaming arrow can be used to ignite dry kindling or other combustible materials.
The use of fire arrows dates back to ancient China, where they were used as a weapon during battles. The Chinese would attach a small container of gunpowder to the end of the arrow, which would explode upon impact and cause damage to the target.
Fire arrows were also used in Europe during the Middle Ages, where they were used to attack enemy fortifications. The arrows would be launched from a longbow or crossbow, and the flaming tips would ignite the wooden structures.
Today, fire arrows are still used in some cultures for ceremonial purposes, such as in traditional archery competitions in Japan. They are also used in movies and TV shows as a dramatic and visually striking weapon.
Overall, fire arrows are a fascinating historical weapon that have been used for centuries. While they may not be as commonly used today, they still hold a place in history and continue to be a useful tool in certain contexts.

Wooden doors are one of the most common types of doors in Rust. They are easy to make and can be used to secure your base. However, they are not very strong and can be easily destroyed with the right tools. Wooden doors have 200 hitpoints and can be destroyed with explosives, melee weapons, or ranged weapons.
Fire arrows can be used to burn wooden doors. The number of fire arrows needed to destroy a wooden door depends on the size of the door and how dry the wood is. According to Rust Labs, it takes 50 fire arrows (250 low grade fuel) to destroy a wooden door. However, this number may vary depending on the size of the door and how dry the wood is.
The general rule of thumb is that you’ll need about one fire arrow for every two pieces of wood. So, if you’re looking at burning through a door made of four pieces of wood, then you’ll need at least eight fire arrows. However, this is just an estimate, and the actual number of fire arrows needed may vary.
Therefore, anywhere between three and six fire arrows could be necessary in order to set light on such an object as a wooden door. This means that it should still be attainable within two volleys without missing too many shots depending on how skilled the archer is.
In conclusion, wooden doors can be easily destroyed with the right tools, including fire arrows. The number of fire arrows needed to destroy a wooden door depends on the size of the door and how dry the wood is. It’s important to keep this in mind when raiding other bases or defending your own.
Fire arrows are a popular choice for raiding wooden bases because they are cheap and easy to craft. However, they are not always effective against wooden doors. Fire arrows deal damage over time, so they are not the best option if you want to breach a base quickly. They are also less effective against doors that have been treated with fire retardant.
The number of fire arrows needed to burn through a wooden door depends on several factors, including the type of door and its condition. According to Rust Labs, a standard wooden door has 200 hitpoints and can withstand up to 50 fire arrows. However, this number can vary depending on the door’s condition and the type of fire arrows used.
If you are raiding a base with a wooden door, you should expect to use at least 10 to 15 fire arrows to burn through it. The more arrows you use, the faster the door will burn through. However, keep in mind that fire arrows can be difficult to aim, so you may need to use more arrows if you miss your shots.
It is also worth noting that fire arrows are not the only option for breaching wooden doors. Explosives, such as timed explosive charges, can also be effective against wooden doors. However, they are more expensive and can be more difficult to obtain than fire arrows.
In summary, fire arrows can be an effective tool for raiding wooden bases, but they are not always the best option for breaching wooden doors. The number of arrows needed to burn through a door can vary, so it is important to be prepared and bring enough arrows to ensure success.
When using fire arrows to raid a wooden door, it is important to take certain safety precautions to prevent any accidents or injuries. Here are some tips to keep in mind:
First and foremost, always handle fire arrows with care. These arrows are designed to ignite upon impact, so be sure to keep them away from any flammable materials or surfaces. When loading your bow with fire arrows, make sure to keep the arrowhead pointed away from your body and any nearby objects. Additionally, be sure to wear protective gloves when handling fire arrows, as the arrowhead can become very hot after being lit.
When raiding a wooden door with fire arrows, it is important to take steps to protect the door from catching fire too quickly. One way to do this is to use water buckets or other fire extinguishing tools to put out any flames that may start to spread. Another option is to use explosive charges or other raiding methods to weaken the door before using fire arrows. This can help to ensure that the door will catch fire more easily and quickly, without risking the spread of flames to other parts of your base.
Remember, safety should always be your top priority when using fire arrows to raid wooden doors. By taking the necessary precautions and using common sense, you can help to ensure a successful raid without any accidents or injuries.
To determine how many fire arrows are needed to burn through a wooden door, you will need to set up an experiment. First, you will need to gather the necessary materials, including a wooden door, fire arrows, and a bow.
Once you have your materials, place the wooden door in a safe and open area where you can shoot at it without causing damage to surrounding structures. Then, shoot the wooden door with one fire arrow and observe the damage. Repeat this step with two, three, and four fire arrows, taking note of the damage each time.
After conducting the experiment, you should have a good understanding of how many fire arrows are needed to burn through a wooden door. Based on our research and the information provided by the search results, it seems that anywhere between three and ten fire arrows could be necessary to burn through a wooden door, depending on the door’s size and the archer’s skill level.
It’s important to note that using fire arrows to raid a base can be expensive and time-consuming, especially if you miss your shots. Additionally, wooden doors are the weakest type of door, so it’s recommended to upgrade to metal doors as soon as possible for better protection against raiders.
In conclusion, experimenting with fire arrows can give you a good idea of how many you need to burn through a wooden door. However, it’s important to consider the cost and time involved in using fire arrows, as well as the vulnerability of wooden doors compared to other door types.

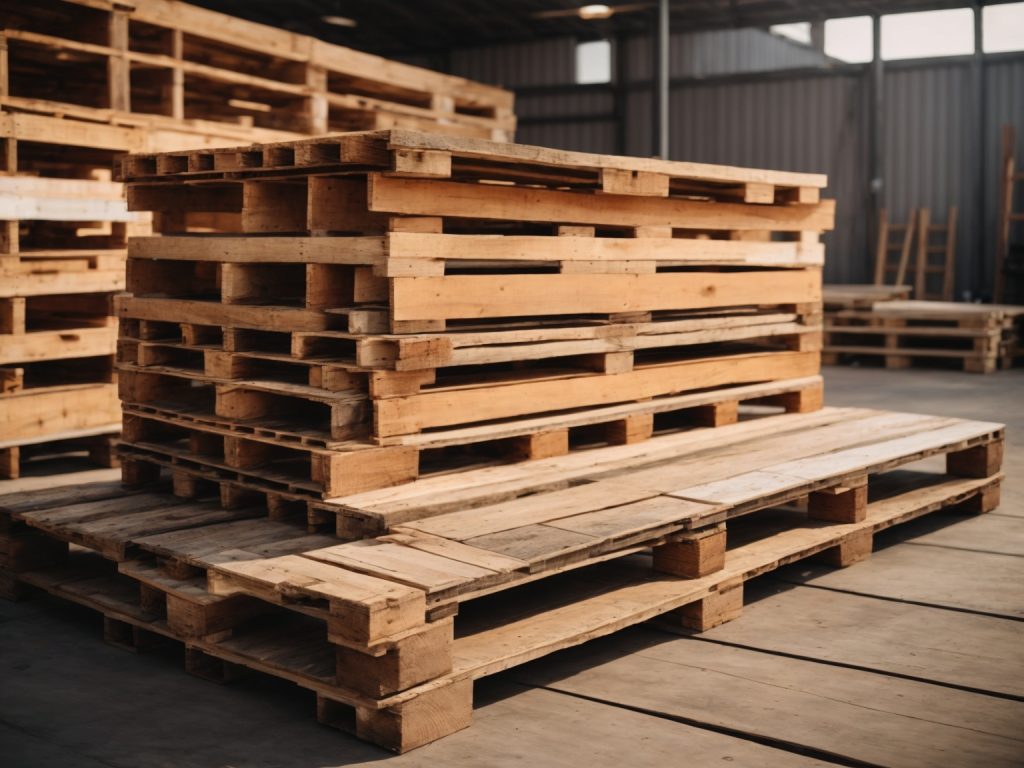
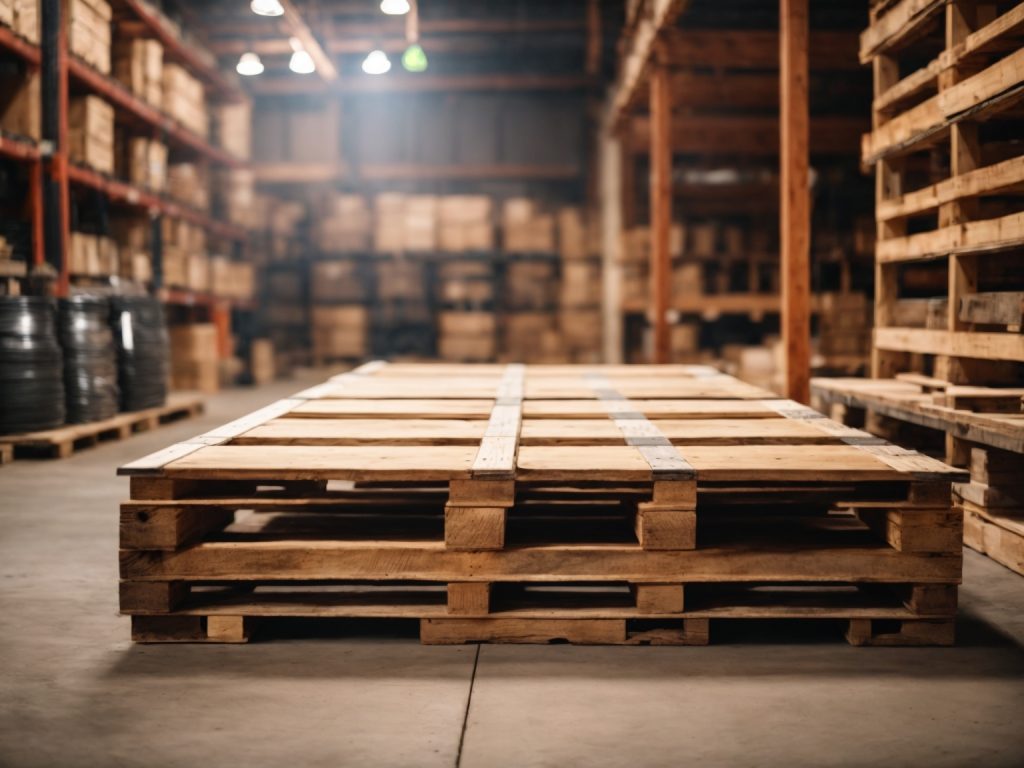
Are you wondering how much a wooden pallet costs? Wooden pallets are essential for shipping and storing goods, but the cost can vary depending on several factors. In this article, we will explore the different types of wooden pallets and their costs, so you can make an informed decision for your business needs.
The cost of a wooden pallet can depend on various factors such as the size, quality, and quantity. For example, a standard 48 x 40-inch wooden pallet can cost anywhere from $8 to $25, depending on its quality and condition. However, larger or custom-sized pallets can cost more. Additionally, the type of wood used to make the pallet can affect the cost. Hardwoods like oak and maple are more expensive than softwoods like pine and spruce.
Whether you are a small business owner or a large corporation, understanding the cost of wooden pallets is essential for managing your budget. By knowing the factors that affect the cost of wooden pallets, you can make an informed decision on which type of pallet is best for your needs and budget. In the following sections, we will explore the different types of wooden pallets and their costs in more detail.
Wooden pallets are an essential part of the logistics industry. They are used to transport goods, store products, and make handling of goods easier. Wooden pallets are made of wood and come in various sizes and shapes.
There are two types of wooden pallets: new and recycled. New pallets are made from fresh wood, while recycled pallets are made from used wood. Recycled pallets are an eco-friendly and cost-saving option.
Wooden pallets come in various sizes, but the most common sizes are 48 x 40 inches, 42 x 42 inches, 48 x 48 inches, and 36 x 36 inches. The size of the pallet depends on the type of product being transported or stored. Choosing the right size is crucial, as it can affect the cost of the pallet.
The cost of wooden pallets can vary depending on various factors, such as:
The price of lumber can also affect the cost of wooden pallets. The industry is currently experiencing lumber shortages that are driving the price of lumber to record levels.
The cost of wooden pallets can range from $11 to $25 for a standard-sized pallet. However, the cost can vary depending on the factors mentioned above. Recycled wooden pallets can cost between $4.25 and $7.40, making them a cost-saving option.
In conclusion, understanding wooden pallets is crucial in determining the cost of pallets. Choosing the right size, type of wood, and customization options can affect the cost of the pallet. Recycled wooden pallets are an eco-friendly and cost-saving option.
When it comes to purchasing wooden pallets, the cost can vary depending on a number of factors. In this section, we’ll take a closer look at the key factors that can influence the cost of wooden pallets.
The type of wood used to manufacture new pallets can have a significant impact on the price. For example, hardwood pallets tend to be more expensive than softwood pallets due to their durability. However, hardwood shortages can also drive up the cost of those pallets. Softwood pricing can also fluctuate due to market conditions, such as wildfires, beetle infestations, and mill production lapses.
The size of the pallet can also impact the cost. Larger pallets will require more wood and labor, which can drive up the price. Additionally, if you require custom-sized pallets, this can also increase the cost as it may require additional labor and materials.
The quality of the wood used to manufacture the pallets can also impact the cost. Higher quality wood will generally cost more than lower quality wood, but it can also increase the lifespan of the pallets and reduce the need for replacements.
The region in which you purchase your wooden pallets can also impact the cost. For example, if you purchase pallets from a region with a high cost of living, this could drive up the price due to higher labor and overhead costs. Additionally, if you purchase pallets from a region that is experiencing a shortage of recycled pallets, this could also drive up the cost due to increased demand.
Overall, when it comes to purchasing wooden pallets, it’s important to consider these key factors in order to make an informed decision and ensure that you’re getting the best value for your money.
If you are looking to purchase new wooden pallets, the cost can vary depending on the size and type of pallet you need. Generally, the average cost of new wooden pallets ranges from $11 to $25. However, there may be additional costs for specialized pallets.
The most common sizes for wooden pallets are 48 x 40 inches, 42 x 42 inches, 48 x 48 inches, and 36 x 36 inches. The cost of wooden pallets may also vary based on the type of wood used, with hardwood pallets typically being more expensive than softwood pallets.
When purchasing new wooden pallets, it is important to consider the intended use and weight capacity. Some pallets may be designed for heavier loads, while others may be more lightweight and cost-effective.
Here are some factors that can affect the cost of new wooden pallets:
Overall, the cost of new wooden pallets can vary depending on several factors. It is important to consider your specific needs when choosing a pallet and to compare prices from different suppliers to find the best deal.
If you’re looking for a cost-effective solution for your shipping needs, used wooden pallets are a great option. They are more affordable than new pallets and can be just as sturdy. Here are some factors that can affect the cost of used wooden pallets:
The condition of the pallet is a significant factor in determining its cost. Pallets that are in good condition and have no visible damage will cost more than those that are damaged or have missing boards.
The size of the pallet also affects its cost. Standard sizes such as 48 x 40 inches are more common and therefore more affordable. However, if you need a custom size, it may cost more.
The more pallets you need, the lower the cost per pallet will be. If you need a large quantity of pallets, consider buying in bulk to save money.
The location of the supplier can also affect the cost of used wooden pallets. Shipping costs can add up quickly, so it’s best to find a supplier that is close to your location.
According to Sawinery, the average cost of a standard wooden pallet ranges from $11 to $25. However, prices for used wooden pallets can vary depending on the factors mentioned above. You can find used wooden pallets for sale online or at local pallet companies. Verde Trader offers used pallets for as low as $8 in some areas.
In conclusion, used wooden pallets are a cost-effective solution for your shipping needs. The cost of used wooden pallets varies depending on the condition, size, quantity, and location. Consider these factors when purchasing used wooden pallets to find the best deal for your needs.
When purchasing wooden pallets, there may be additional costs to consider beyond the initial price of the pallet itself. These costs can vary depending on factors such as the quantity of pallets ordered, the location of the supplier, and any customization options desired.
One additional cost to consider when purchasing wooden pallets is delivery fees. Depending on the location of the supplier and the quantity of pallets ordered, delivery fees can range from a few dollars to several hundred dollars. Some suppliers may offer free delivery for larger orders or for customers located within a certain distance from their warehouse. It is important to factor in delivery fees when calculating the total cost of your pallet order.
If you require customized wooden pallets, there may be additional costs to consider. Customization options can include things like size, shape, and color. Some suppliers may charge extra for these options, while others may include them in the base price of the pallet. It is important to discuss any customization options with your supplier and get a clear understanding of the associated costs before placing your order.
In addition to size, shape, and color, there are other customization options to consider. For example, if you require pallets with a higher weight capacity, there may be additional costs for reinforced boards or extra support beams. Similarly, if you require pallets that are resistant to moisture or chemicals, there may be additional costs for special coatings or treatments.
By taking into account these additional costs, you can ensure that you are getting a complete picture of the total cost of your wooden pallet order. This will help you make an informed decision and choose the supplier and pallets that best meet your needs and budget.
When it comes to choosing the right material for your pallets, cost is often a significant factor to consider. Wooden pallets are a popular choice due to their affordability, but how do they compare to other materials in terms of cost? Let’s take a closer look.
As we’ve seen from the search results, the cost of a wooden pallet can vary depending on various factors such as the size of the pallet, the type of wood used, and the region where it is purchased. Typically, a standard wooden pallet may range in price from $11 to $25, but there could be an additional cost for certain specialized pallets.
Plastic pallets are another commonly used pallet type. They are durable, easy to clean, and can be reused multiple times. However, they are generally more expensive than wooden pallets. According to the search results, you can expect to pay between $50 and $150 for a plastic pallet.
Metal pallets are the most durable and long-lasting option. They are resistant to moisture, pests, and fire, making them a popular choice in certain industries such as food and pharmaceuticals. However, they are also the most expensive option. According to the search results, you can expect to pay between $100 and $300 for a metal pallet.
Recycled pallets are a cost-effective and eco-friendly option. They are made from reclaimed wood and can be just as durable as new pallets. According to the search results, you can expect to pay between $4.25 and $7.40 for a recycled wooden pallet.
In conclusion, wooden pallets are generally the most affordable option, but it’s important to consider the specific needs of your business when choosing a pallet material. Plastic and metal pallets may be more expensive, but they offer additional benefits such as durability and resistance to moisture and pests. Recycled pallets are a great option for those looking to save money and reduce their environmental impact.
If you frequently use wooden pallets for your business, you know that they can be a significant expense. However, there are ways to save on wooden pallet costs without sacrificing quality or safety. Here are some tips:
One of the easiest ways to save on wooden pallet costs is to buy in bulk. Many suppliers offer discounts for large orders. By ordering in bulk, you can save money on each pallet and reduce your overall costs. Additionally, buying in bulk ensures that you always have a sufficient supply of pallets on hand, which can help you avoid rush orders and expedited shipping fees.
Another way to save on wooden pallet costs is to purchase used pallets. Used pallets can be significantly cheaper than new ones, and they are just as strong and sturdy as newly produced pallets. Additionally, purchasing used pallets is an environmentally friendly option, as it reduces the amount of waste that ends up in landfills.
When purchasing used pallets, make sure to inspect them carefully for damage or wear and tear. Look for pallets that are still in good condition and have no broken boards or nails sticking out. Also, make sure that the pallets are the right size and weight capacity for your needs.
Choosing a local supplier can also help you save on wooden pallet costs. Local suppliers often have lower overhead costs than larger, national suppliers, which can result in lower prices for their products. Additionally, working with a local supplier can help you build a relationship with them, which can lead to better pricing and more personalized service.
When choosing a local supplier, make sure to compare prices and quality with other suppliers to ensure that you are getting the best deal. Additionally, ask about delivery options and fees, as these can impact your overall costs.
By following these tips, you can save money on wooden pallet costs without sacrificing quality or safety. Whether you choose to buy in bulk, purchase used pallets, or work with a local supplier, there are many options available to help you reduce your expenses and improve your bottom line.

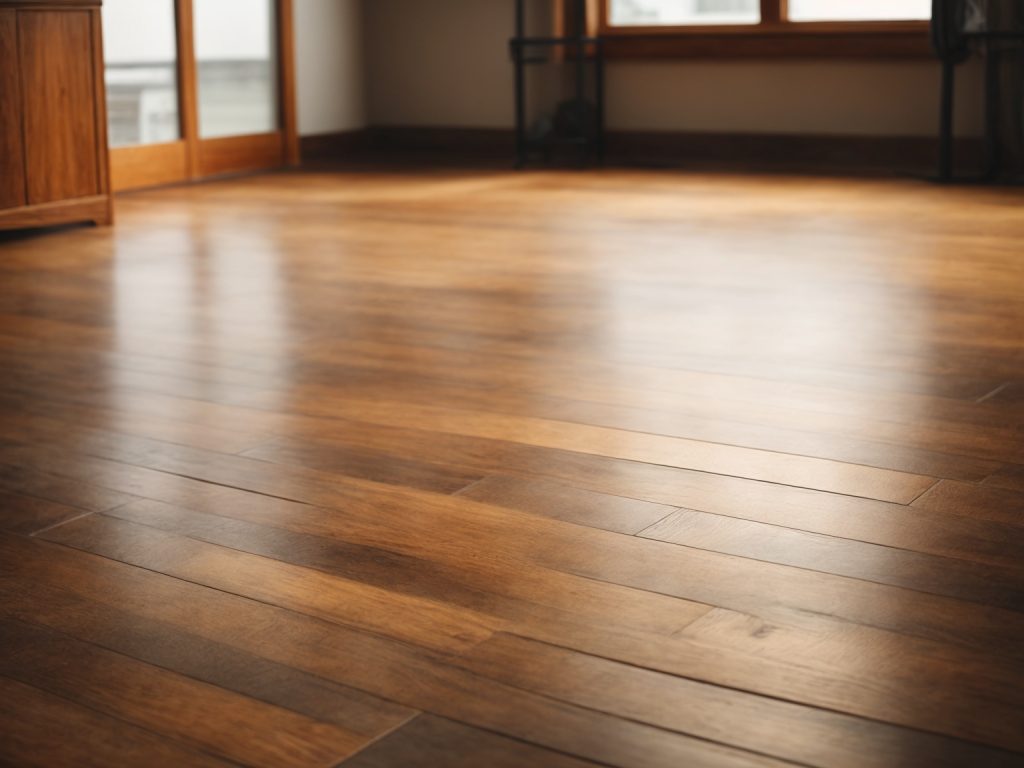
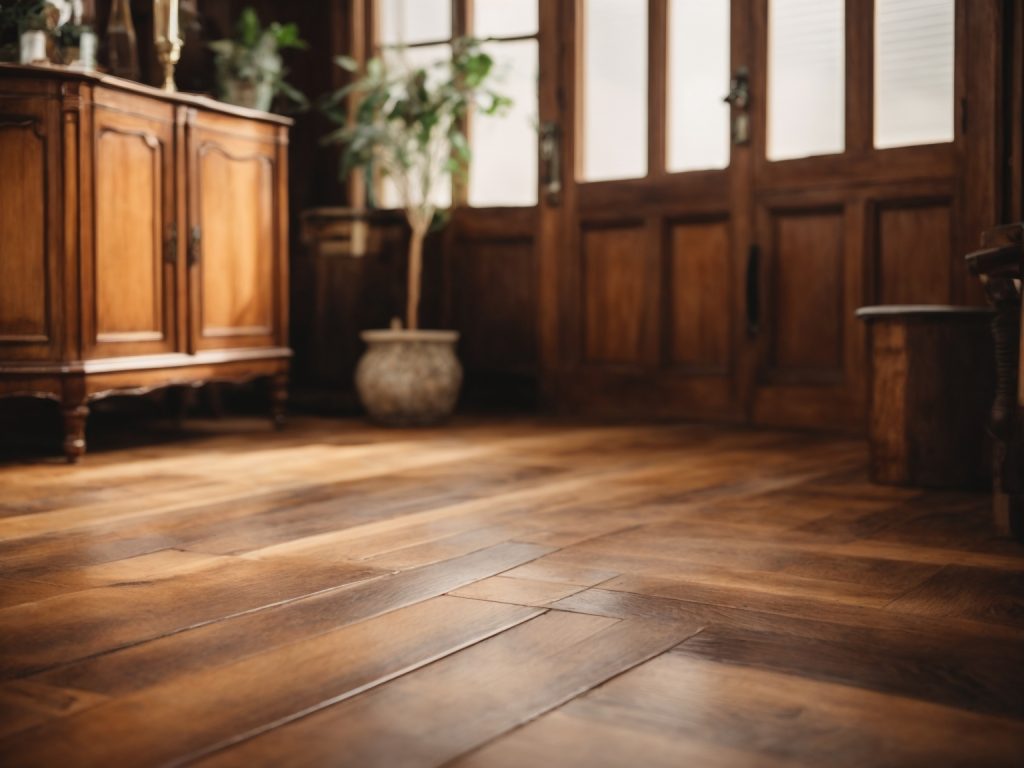
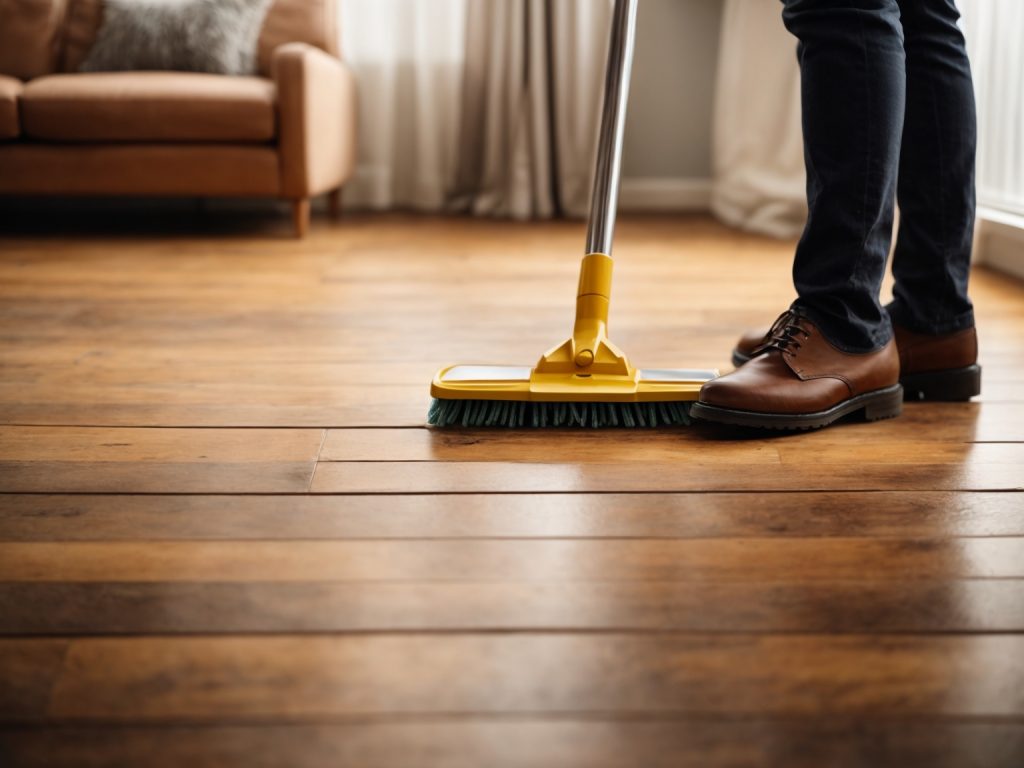
Cleaning wooden floors can be a daunting task, but it doesn’t have to be. With the right tools and techniques, you can keep your wooden floors looking shiny and new for years to come. Here are some tips on how to clean a wooden floor effectively.
First, it’s important to determine the type of finish on your wooden floor. This will help you choose the right cleaning solution and avoid damaging the wood. If you’re unsure, try a small test area with a mild cleaning solution to see how the wood reacts. Once you know the type of finish, you can choose a cleaning solution that is safe and effective for your wooden floor.
Wood floors add warmth and a unique look to your home decor. They are durable and can last for years if appropriately maintained. However, before you begin cleaning your wood floors, it’s essential to understand the type of wood and finish you have.
There are two types of wood floors: solid and engineered. Solid wood floors are made of one solid piece of wood and are available in various thicknesses. Engineered wood floors are made of several layers of wood and are more stable than solid wood floors.
There are three types of wood floor finishes: surface-sealed, penetrating-seal, and oil-treated. Surface-sealed finishes are the most common and have a protective layer on top of the wood. Penetrating-seal finishes soak into the wood and harden, providing a protective layer from the inside. Oil-treated finishes penetrate the wood and provide a natural look and feel.
Cleaning your wood floors is essential to maintain their shine and prevent damage. Here are some tips to clean your wood floors:
By understanding the type of wood and finish you have and following these cleaning tips, you can keep your wood floors looking beautiful for years to come.
Before you start cleaning your wooden floor, there are some preparatory steps you should take to ensure the best possible results. Here are some things you should do:
First, remove any furniture and rugs from the room. This will give you more space to work and prevent any damage to your belongings. If you can’t move some furniture, use furniture pads or sliders to protect the legs and prevent scratches.
Next, sweep or vacuum the floor to remove any loose dirt, dust, or debris. Use a soft-bristled broom or a vacuum cleaner with a hardwood floor attachment to avoid scratching the surface. If your vacuum has a beater bar, turn it off or adjust the height to the lowest setting.
Before you start cleaning, identify the type of wood and finish of your floor. This will help you choose the right cleaning method and products that won’t damage the surface. Solid hardwood, engineered hardwood, and laminate wood-look flooring require different care, so make sure you know what you have.
Before you apply any cleaning solution to the entire floor, test it on a small, inconspicuous area first. This will help you make sure the solution doesn’t discolor or damage the wood. If you notice any adverse effects, try a different cleaning solution or consult a professional.
By following these preparatory steps, you’ll be able to clean your wooden floor more effectively and safely.
Cleaning a wooden floor requires the right cleaning supplies to avoid damage to the wood. Here are some things to consider when choosing the right cleaning supplies for your wooden floor:
Different types of wood require different cleaning supplies. For example, hardwood floors need a cleaner that is gentle and pH-neutral, while laminate floors require a cleaner that is specifically designed for laminate. Be sure to check the manufacturer’s recommendations to ensure you’re using the right cleaner for your wooden floor.
When choosing a cleaning solution, avoid using harsh chemicals that can damage the wood. Instead, opt for a cleaner that is specifically formulated for wooden floors. You can also make your own cleaning solution by mixing water and vinegar or water and dish soap.
The right cleaning tools can make all the difference when it comes to cleaning your wooden floor. A microfiber mop or cloth is gentle on the wood and won’t scratch the surface. Avoid using abrasive scrub brushes or steel wool, which can damage the wood.
Here are a few other things to consider when choosing the right cleaning supplies for your wooden floor:
By choosing the right cleaning supplies, you can keep your wooden floor looking clean and beautiful for years to come.
Cleaning your wooden floors regularly is essential to maintain their shine and keep them looking new. Here are the steps you can follow to clean your wooden floors effectively:
By following these simple steps, you can keep your wooden floors looking clean and shiny for years to come.
Cleaning wooden floors is not rocket science, but there are some things you should and shouldn’t do to keep them looking their best. Here are some do’s and don’ts to keep in mind:
By following these do’s and don’ts, you can keep your wooden floors looking their best for years to come.
To keep your wooden floor looking great for years to come, it’s important to maintain it properly. Here are a few tips to help you maintain your wooden floor:
One of the most important things you can do to maintain your wooden floor is to sweep or vacuum it regularly. Dirt, dust, and debris can scratch the surface of your floor, so it’s important to keep them off as much as possible. Use a soft-bristled broom or a vacuum with a hardwood floor attachment to sweep your floor daily.
If you spill something on your wooden floor, be sure to clean it up immediately. Liquids can seep into the wood and cause damage if left to sit for too long. Use a soft cloth or paper towel to soak up the spill, then clean the area with a hardwood floor cleaner.
When it’s time to clean your wooden floor, use a hardwood floor cleaner that is specifically designed for your type of flooring. Avoid using harsh chemicals or abrasive cleaners that can damage the finish of your floor. Follow the manufacturer’s instructions for best results.
To help protect your wooden floor from scratches and wear, use mats and rugs in high-traffic areas, such as entryways and hallways. Be sure to use mats with a non-slip backing to prevent them from sliding around on your floor.
Excess moisture can cause your wooden floor to warp and buckle. Avoid using steam cleaners or wet mops on your floor, and be sure to clean up spills immediately. If you live in a humid environment, consider using a dehumidifier to help control moisture levels in your home.
By following these simple tips, you can help keep your wooden floor looking great for years to come.
Even with the best preventative measures, spills and stains are bound to happen on your wooden floors. Here are some tips on how to address them:
White water stains are the result of moisture penetrating the finish and reaching the wood. To remove them, try one of the following methods:
Dark stains are more difficult to remove and may require sanding and refinishing. However, before taking that drastic step, try the following:
Spills should be addressed immediately to prevent them from seeping into the wood. Here’s what to do:
By following these tips, you can keep your wooden floors looking their best, even when spills and stains occur.
While cleaning your hardwood floors at home can be a simple task, sometimes it may be necessary to seek professional help. Here are some situations where you may want to consider hiring a professional:
If your hardwood floors have deep stains that you cannot remove with regular cleaning methods, it may be time to call in a professional. They have access to specialized equipment and cleaning solutions that can effectively remove stubborn stains without damaging your floors.
If your hardwood floors have extensive damage such as deep scratches, gouges, or warping, it may be time to consider professional refinishing. Refinishing can restore your floors to their former glory and make them look brand new again.
If you lead a busy life and don’t have the time to devote to cleaning your hardwood floors, consider hiring a professional cleaning service. They can take care of your floors while you focus on other important tasks.
If you are unsure about how to properly clean and maintain your hardwood floors, it may be best to leave it to the professionals. They have the knowledge and experience to properly care for your floors and can provide you with tips and advice on how to keep them looking their best.
Overall, professional cleaning can be a great option for those who want to ensure their hardwood floors are properly cared for. Just be sure to do your research and choose a reputable and experienced professional to ensure the best results.

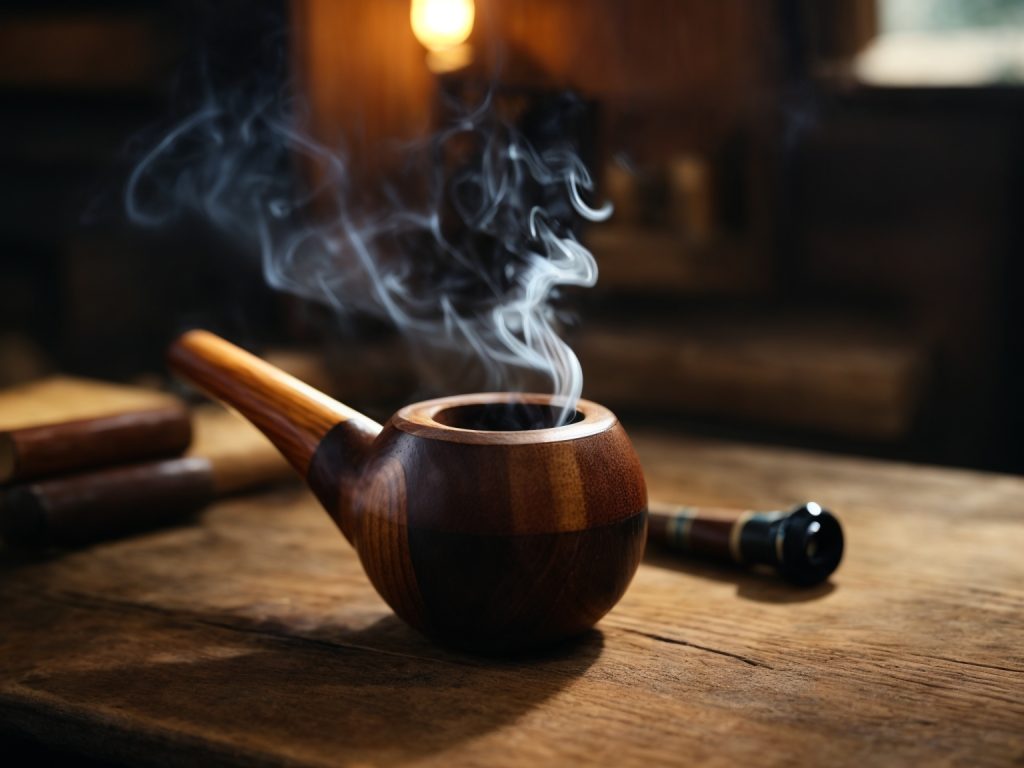
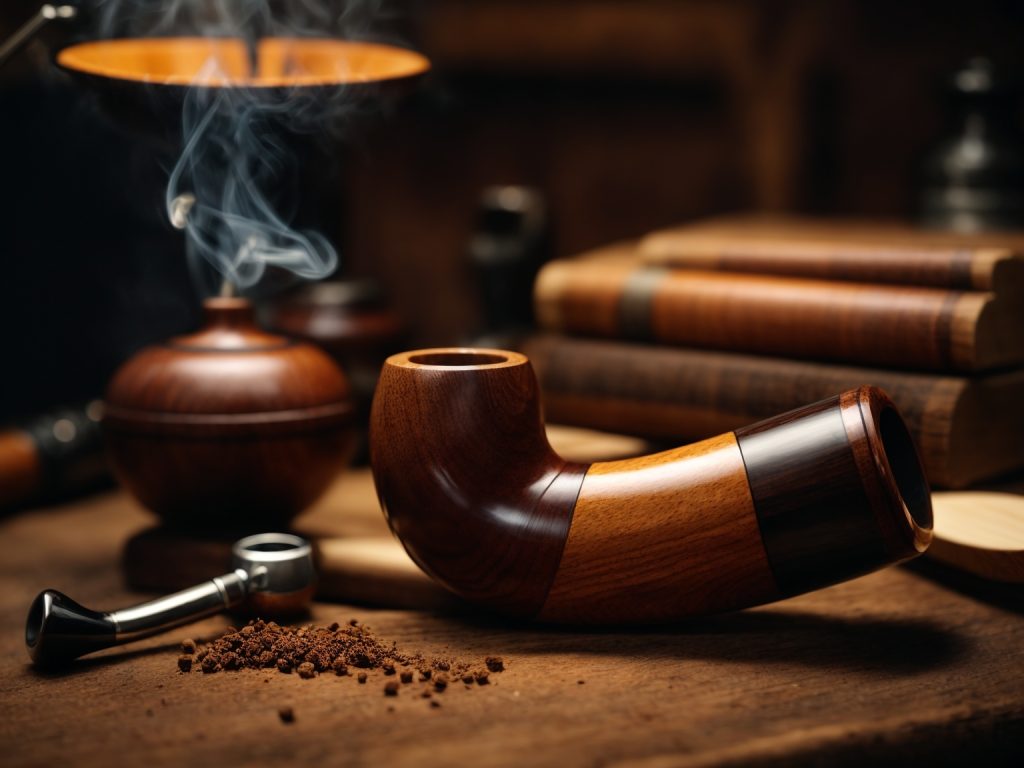
If you’re a fan of smoking and woodworking, then you might want to try your hand at making a wooden pipe. Not only is it a fun and creative project, but it also allows you to have a unique smoking experience. With a few basic tools and materials, you can create a beautiful and functional wooden pipe.
Before you start making your wooden pipe, it’s important to choose the right type of wood. Hardwoods like cherry, maple, and oak are great options because they are durable and have a nice grain pattern. Softwoods like pine and cedar are not recommended because they can be too porous and can affect the taste of the smoke. Once you have your wood, you can begin shaping it into the desired shape and size. There are many different styles of pipes, so choose one that suits your taste and skill level.
When it comes to smoking, wooden pipes are a classic choice. They are easy to make and provide a natural, earthy flavor to your smoking experience. In this section, we will cover the basics of a wooden pipe, including the types of wood used, pipe anatomy, and tools required.
The type of wood you choose for your pipe will affect the flavor of your smoking experience. Here are some common types of wood used for making pipes:
A wooden pipe consists of three main parts:
To make a wooden pipe, you will need the following tools:
Now that you understand the basics of a wooden pipe, you are ready to start making your own. Remember to choose the right type of wood for your smoking preferences and to use the proper tools for the job. Happy smoking!
When it comes to making a wooden pipe, choosing the right wood is crucial. The type of wood you select will affect the overall quality and durability of your pipe. Here are some things to consider when choosing the right wood for your pipe:
Hardwoods are generally the best choice for pipe making because they are denser and more durable than softwoods. Some popular hardwoods for pipe making include briar, cherry, maple, and oak. Softwoods like pine and cedar can also be used, but they are more prone to cracking and burning out over time.
The orientation of the wood grain is also important. You want to choose a piece of wood with a straight, uniform grain that runs parallel to the length of the pipe. This will help prevent the pipe from cracking or warping over time.
Some woods, like yew and ebony, can be toxic when burned or inhaled. It’s important to research the toxicity of any wood you plan to use before making your pipe.
The curing process is important for stabilizing the wood and preventing it from cracking or warping over time. Some woods, like briar, undergo a special curing process before they are used for pipe making. Other woods can be cured by air-drying or kiln-drying.
Finally, consider the availability and cost of the wood you plan to use. Some woods, like briar, can be expensive and difficult to find. Other woods, like cherry and maple, are more readily available and affordable.
By considering these factors, you can choose the right wood for your pipe and ensure that it will be durable, high-quality, and enjoyable to use.
When it comes to designing your wooden pipe, there are a few things to consider. First, think about the shape and style of the pipe. Pipes come in all shapes and sizes, from straight and simple to curved and intricate. The shape you choose will depend on your personal preference and the level of difficulty you are comfortable with.
Next, consider the type of wood you want to use. Different types of wood will give your pipe a unique look and flavor. Some popular options include cherry, briar, and rosewood. Make sure the wood you choose is dry and free of knots or imperfections.
Once you have chosen your shape and wood, it’s time to start designing the details. You can add decorative elements such as carvings, inlays, or stains to give your pipe a personalized touch. Keep in mind that some designs may be more difficult to execute than others, so choose a design that fits your skill level.
Finally, consider the size and weight of your pipe. A pipe that is too heavy or too large may be uncomfortable to use, so make sure to take these factors into account when designing your pipe.
Overall, designing your wooden pipe is a fun and creative process that allows you to express your personal style. With a little planning and attention to detail, you can create a beautiful and functional pipe that you will enjoy for years to come.
To start making your wooden pipe, you need to cut and shape the wood to the desired size and shape. Here are the steps to follow:
By following these steps, you can cut and shape your wooden pipe to the desired size and shape. Remember to take your time and be careful not to remove too much wood at once. With a little patience and practice, you can create a beautiful and functional wooden pipe that you can enjoy for years to come.
To create the bowl of your wooden pipe, you will need to follow a few simple steps. Here’s how to do it:
When it comes to choosing the wood for your pipe bowl, there are a few things to keep in mind. First, you’ll want to choose a hardwood that is suitable for smoking. Some popular choices include briar, cherry, and maple.
Second, you’ll want to make sure that the wood is dry and seasoned. This will help prevent cracks and warping as the wood dries further during the pipe-making process.
Once you’ve chosen your wood, it’s time to cut out the bowl shape. You can use a template or stencil to ensure that your bowl is the right size and shape.
Use a saw or other cutting tool to carefully cut out the bowl shape. Take your time and make sure that your cuts are clean and precise.
With the bowl shape cut out, it’s time to start carving the inside of the bowl. Use a carving knife or other tool to carefully hollow out the bowl. You’ll want to create a smooth, even surface that is deep enough to hold your tobacco.
Once you’ve carved the bowl, it’s time to sand and finish it. Use sandpaper to smooth out any rough edges or uneven surfaces. Then, apply a finishing oil or wax to protect the wood and give it a nice shine.
And that’s it! With these simple steps, you can create a beautiful wooden pipe bowl that is ready to be assembled into a fully-functional smoking pipe.
Now that you have the basic shape of your wooden pipe, it’s time to drill the stem. This will allow smoke to travel from the bowl to the mouthpiece.
Here are the steps to follow:
That’s it! With these simple steps, you can create a stem that’s perfectly sized for your wooden pipe.
Once you have completed the construction of your wooden pipe, it is time to give it a finishing touch to make it look polished and professional. In this section, we will discuss the three main steps involved in finishing your pipe: sanding, staining, and polishing.
Sanding is an important step in finishing your wooden pipe. It helps to smooth out any rough edges and give your pipe a sleek finish. To sand your pipe, you will need sandpaper of varying grits, ranging from coarse to fine. Start with a coarse grit sandpaper and work your way up to a finer grit. Make sure to sand in the direction of the wood grain to avoid any scratches or damage to the surface.
Staining your wooden pipe is an optional step, but it can add a touch of color and character to your pipe. Before staining, make sure to sand the surface of your pipe to remove any dirt or debris. Apply the stain evenly using a brush or cloth, and let it dry completely before applying a second coat. Choose a stain that is safe for smoking pipes and avoid using any toxic chemicals.
Polishing your wooden pipe is the final step in finishing your pipe. It helps to protect the surface and give it a shiny finish. To polish your pipe, you can use a wax or oil-based polish. Apply a small amount of polish to a clean cloth and rub it onto the surface of your pipe in a circular motion. Let it dry for a few minutes before buffing it with a clean cloth.
By following these simple steps, you can give your wooden pipe a professional and polished look. Remember to take your time and be patient during the finishing process to achieve the best results.
Congratulations on making your very own wooden pipe! Now that you have your new smoking accessory, it’s important to know how to properly maintain it to ensure its longevity. Here are a few tips to keep your wooden pipe in great condition:
It’s important to clean your wooden pipe regularly to prevent buildup and ensure a smooth smoking experience. Here’s how to do it:
To keep your wooden pipe looking like new, it’s important to oil it regularly. Here’s how to do it:
When you’re not using your wooden pipe, it’s important to store it properly to prevent damage. Here’s how to do it:
By following these simple tips, you can keep your wooden pipe in great condition and enjoy many smoking sessions to come.

If you’ve ever heard the phrase “don’t take any wooden nickels,” you might be wondering what exactly a wooden nickel is. A wooden nickel is a small, round token made of wood that was historically used as a substitute for currency. While they were once used as a form of currency during times of economic hardship, today they are more commonly used as promotional items or souvenirs.
Despite their name, wooden nickels were not actually worth anything. Instead, they were often used as a way to promote a business or event. For example, a merchant might give out wooden nickels that could be redeemed for a free drink or other small item. Wooden nickels were also used as souvenirs, often sold at fairs and other events as a way to commemorate the occasion.
Wooden nickels have been around for over a century, and their origin is shrouded in mystery. While some sources claim that they date back to the 1880s, others suggest that they were first produced in the 1930s. Regardless of when they were first created, wooden nickels have remained a popular collectible item and a unique form of currency.
One theory is that wooden nickels were created as a form of advertising. In the early 1900s, small businesses and banks would often produce wooden nickels with their name and logo on them as a way to promote their services. These wooden tokens were then handed out to customers and could be redeemed for discounts or other promotions.
Another theory is that wooden nickels were created as a way to combat counterfeiting. In the early 20th century, counterfeit coins were a common problem, and people were often cheated out of their money. Wooden nickels were created as a way to prevent this from happening. Since wooden nickels were obviously not real currency, people were less likely to be fooled by counterfeiters.
Regardless of their origin, wooden nickels have become a popular collectible item and are often used as souvenirs or promotional items. They are also used as tokens in games and events, and many people still collect them today. Whether you are a collector or just interested in the history of currency, wooden nickels are a fascinating piece of Americana that are sure to capture your imagination.
A wooden nickel is a type of token coin made of wood. It is usually circular in shape, with a diameter of around 1.5 inches. Wooden nickels are often used as promotional items or souvenirs by businesses, organizations, and events.
One of the most distinctive physical characteristics of a wooden nickel is its texture. Unlike metal coins, which are smooth and shiny, wooden nickels have a rough, matte finish. This is because they are made from a porous material that absorbs ink and other substances.
Another characteristic of wooden nickels is their weight. Because they are made of wood, they are much lighter than metal coins of the same size. This can make them easier to carry and transport, but also means that they may not feel as substantial or valuable as metal coins.
Despite their light weight, wooden nickels can be surprisingly durable. They are made from a variety of woods, including birch, maple, and oak, which are known for their strength and resilience. Additionally, many wooden nickels are coated with a protective finish that helps to prevent wear and tear.
Overall, the physical characteristics of a wooden nickel make it a unique and interesting alternative to traditional metal coins. Whether you are a collector, a business owner, or just someone who appreciates unusual and distinctive objects, a wooden nickel is a great choice.

Wooden nickels have a rich history and are more than just a novelty item. They hold symbolic meaning and have been used for various purposes throughout history. Here are some of the symbolic meanings of wooden nickels:
One of the most common uses of wooden nickels is for commemoration. They are often used to celebrate a special event or occasion, such as a grand opening, anniversary, or festival. Wooden nickels are a unique way to commemorate these events and can serve as a keepsake for those who attend.
Wooden nickels are also used as a promotional tool. Merchants and businesses often give them out as a way to promote their products or services. Wooden nickels can be redeemed for a specific item or discount, which encourages customers to visit the business again.
The phrase “Don’t take any wooden nickels” is a reminder to be cautious in one’s dealings and not to be cheated or duped. Wooden nickels serve as a reminder to be careful and to always consider the value of something before accepting it.
Wooden nickels are often collected by individuals who appreciate their historical and cultural significance. They are a unique and interesting part of pop culture and exonumia, which is the study of coin-like objects that are not legal tender.
In conclusion, wooden nickels have a rich history and hold symbolic meaning. They are used for commemoration, promotion, as a reminder, and as collectibles. Wooden nickels are more than just a novelty item and have played an important role in American culture.
Wooden nickels have been used for various purposes throughout history. They were initially used as a form of currency during the Great Depression when there was a shortage of coins. Today, they are often used as promotional items or souvenirs.
Wooden nickels are commonly used as promotional items by businesses and organizations. They can be handed out at events, given away with purchases, or used as a form of advertising. The wooden nickel may have the business’s name, logo, or contact information printed on it. This form of advertising is cost-effective and can be a fun way to engage with customers.
Wooden nickels are also popular as souvenirs. They can be customized with a design that represents a specific location or event. For example, a wooden nickel with a picture of a famous landmark or attraction can be sold as a souvenir to tourists. Wooden nickels can also be used as a collectible item, with different designs being released over time.
Wooden nickels can be used as a form of currency at charity events. Instead of using actual money, attendees can purchase wooden nickels that can be exchanged for goods or services. This is a fun way to raise money for a good cause while also providing attendees with a unique experience.
Wooden nickels are often used as tokens in games or events. For example, a wooden nickel can be used as a game token at a carnival or as a drink token at a festival. This allows organizers to control the number of drinks being served while also providing attendees with a fun souvenir.
Overall, wooden nickels have a wide variety of uses and are a fun and unique item to collect or use in different situations.
If you’re interested in collecting wooden nickels, you’re in for a challenge. These tokens are often quite scarce, and there are so many to choose from that you may not even know where to begin. Here are a few tips to help you get started:
Remember, collecting wooden nickels can be a fun and rewarding hobby, but it can also be expensive. Be sure to set a budget and stick to it, and don’t be afraid to pass on a wooden nickel if it’s not within your price range or doesn’t fit your collection’s theme.
Wooden nickels come in a variety of shapes, sizes, and designs, depending on the purpose for which they are made. Here are some of the most common variations of wooden nickels:
Souvenir wooden nickels are usually sold as a novelty or commemorative item. They often feature the name and logo of a particular business, event, or tourist attraction. They are not intended to be used as currency, but rather as a keepsake or memento of a particular place or occasion.
Promotional wooden nickels are typically used by businesses as a marketing tool. They are often given away for free and can be redeemed for a discount or special offer. They usually feature the name and logo of the business, along with a message or slogan.
Commemorative wooden nickels are similar to souvenir wooden nickels, but they are usually made to mark a specific event or occasion. They can be used as a way to raise funds or awareness for a particular cause, or simply as a way to celebrate a milestone or anniversary.
Historical wooden nickels are often made to commemorate a particular event or period in history. They may feature the image of a famous person or landmark, or they may be designed to look like an old-fashioned coin or currency.
Collectible wooden nickels are usually made in limited quantities and are highly sought after by collectors. They may be made to commemorate a particular event or occasion, or they may be designed to look like an old-fashioned coin or currency. Collectible wooden nickels can be quite valuable, depending on their rarity and condition.
Overall, wooden nickels are a unique and interesting form of currency that have been used for a variety of purposes throughout history. Whether you are a collector, a marketer, or simply someone who appreciates the novelty of wooden nickels, there is sure to be a design or style that appeals to you.

Wooden nickels have been around for over a century, and over time, they have become a popular collector’s item. Here are some famous wooden nickels that you might find interesting:
The phrase “Don’t Take Any Wooden Nickels” is a popular American saying that has been around for decades. It’s a lighthearted reminder to be cautious in one’s dealings and not allow oneself to be cheated or duped. The phrase has been used on many wooden nickels over the years, and it has become a popular collector’s item.
The Round Tuit wooden nickel is a popular collector’s item that has been around for decades. The wooden nickel features a picture of a circle with the words “Round Tuit” in the center. The phrase “Round Tuit” is a play on words that means “get around to it.” The wooden nickel is often given out at grand openings, fairs, and festivals, and it has become a popular collector’s item.
The Buffalo Nickel or Indian Head Nickel is a famous wooden nickel that was issued in the 1930s. The wooden nickel features a picture of a buffalo on one side and the words “Indian Head Nickel” on the other side. The wooden nickel was issued as a promotional item by the American Bison Society, and it has become a popular collector’s item over the years.
The Wooden Nickel Museum is a museum located in San Antonio, Texas, that features over 60,000 wooden nickels from around the world. The museum was founded in 1960 by Frank Shankwitz, who was a collector of wooden nickels. The museum is a popular tourist attraction and has become a must-see destination for wooden nickel collectors.
In conclusion, wooden nickels have been around for over a century, and they have become a popular collector’s item. From the “Don’t Take Any Wooden Nickels” wooden nickel to the Round Tuit wooden nickel, there are many famous wooden nickels that you might find interesting.
Wooden nickels have made their way into popular culture in a variety of ways. Here are a few examples:
Overall, wooden nickels have become a part of American culture, with their unique history and versatility making them a popular item for collectors, businesses, and artists alike.
If you’re new to collecting wooden nickels, it may be difficult to distinguish them from other similar items. Here are a few tips to help you identify a wooden nickel:
As the name suggests, wooden nickels are made of wood. They are usually round, flat, and about the same size as a regular nickel. Look for the wood grain on the surface of the token to confirm that it is made of wood.
Most wooden nickels have imprints on both sides. The imprints can be anything from a company logo to a commemorative design. Some wooden nickels may also have text on them, such as the name of the company or event.
Wooden nickels can be easily confused with other tokens, such as plastic or metal tokens. However, wooden nickels are usually thicker and heavier than plastic tokens, and they have a distinctive wood grain that sets them apart from metal tokens.
If you’re unsure whether a wooden nickel is authentic, there are a few things you can do to verify its authenticity. First, check the date on the token. Wooden nickels were first used in the 1930s, so any token dated before then is likely not authentic. Second, look for any signs of wear and tear on the token. Authentic wooden nickels are likely to have some signs of age, such as discoloration or scratches.
By following these tips, you can easily identify a wooden nickel and add it to your collection.
If you’re interested in starting a collection of wooden nickels, or you simply want to get your hands on a few for novelty or promotional purposes, there are several places where you can buy them. Here are a few options:
Online marketplaces like eBay and Etsy are great places to find wooden nickels. You can search for specific designs or themes, and you’ll often find sellers offering bulk quantities at discounted prices. Just be sure to read the seller’s reviews and check their return policy before making a purchase.
Many antique shops carry wooden nickels as part of their coin and currency collections. These shops are great places to find unique and rare wooden nickels, and you may even be able to negotiate a lower price with the seller.
If you’re looking for wooden nickels as souvenirs or promotional items, souvenir shops may be your best bet. Many tourist destinations and attractions sell wooden nickels with their logo or design, and you can often find them at gift shops and visitor centers.
There are several online retailers that specialize in selling wooden nickels and other collectible coins and currency. These retailers often have a wide selection of designs and themes to choose from, and you can usually filter your search by price, quantity, and other factors.
No matter where you choose to buy your wooden nickels, be sure to do your research and compare prices and quality before making a purchase. With a little bit of effort, you can build a unique and interesting collection of wooden nickels that will be the envy of your friends and family.

If you’ve ever attended a fair or special event, you may have received a wooden nickel as a token or souvenir. But what exactly are wooden nickels? Essentially, they are wooden tokens that resemble a five-cent coin and can be used as a form of currency for specific promotions or discounts.
Wooden nickels have a long history in the United States, dating back to the Great Depression when coin shortages led some towns to allow limited usage of wooden nickels for transactions. Today, they are often used as promotional items and handouts during grand openings and special events. Some merchants and banks even issue wooden nickels that can be redeemed for a specific item or discount.
While wooden nickels may seem like a novelty item, they hold a special place in American history and continue to be used today in various ways. Whether you collect them as souvenirs or use them to take advantage of special promotions, wooden nickels are a unique and interesting part of American culture.
Wooden nickels have a rich history that dates back to the late 19th century. In this section, we will explore the origin of wooden nickels and their popularity and decline over the years.
The origin of wooden nickels is not entirely clear, but it is believed that they were first used as a promotional item in the late 1800s. The wooden nickel was a way for businesses to promote their products or services and to encourage customers to visit their establishment.
During the Great Depression, wooden nickels gained popularity as a form of emergency currency. Banks in Tenino and Blaine, Washington issued wooden nickels printed on thin wood shingles due to coin shortages. These wooden nickels were accepted as currency by local merchants, and they helped to keep the local economy afloat during tough times.
Wooden nickels reached the peak of their popularity in the 1930s and 1940s. They were used as promotional items by businesses, given away as souvenirs at fairs and festivals, and even used as currency in some areas.
During the 1934 World’s Fair in Chicago, wooden nickels were made as souvenirs for people to take home. The wooden nickels varied in size and design, from the size of an actual nickel to 3 inches in diameter.
However, the popularity of wooden nickels declined in the 1950s and 1960s as plastic tokens became more common. Today, wooden nickels are considered a novelty item and are often used as collector’s items or as a way to commemorate a special event.
In conclusion, wooden nickels have a fascinating history that spans over a century. From their origins as a promotional item to their use as emergency currency during the Great Depression, wooden nickels have played an important role in American history. Although their popularity has declined over the years, wooden nickels remain a unique and interesting part of our cultural heritage.
Wooden nickels are a type of token coin that are made out of wood. They are typically issued by merchants or banks as a promotion, and can be redeemable for a specific item such as a drink. In this section, you will learn about the materials and crafting techniques used to create wooden nickels.
The most common type of wood used to create wooden nickels is birch. Birch is a hardwood that is easy to carve and has a smooth surface. Other types of wood that can be used include maple, cherry, and walnut. The wood is typically cut into round shapes using a saw or a lathe.
The crafting techniques used to create wooden nickels can vary depending on the manufacturer. However, there are some common techniques that are used by most manufacturers.
One of the most common techniques used to create wooden nickels is carving. Carving involves using a sharp tool to remove material from the wood to create a design or text. The design or text is typically carved into the surface of the wooden nickel.
Another technique used to create wooden nickels is printing. Printing involves applying a design or text onto the surface of the wooden nickel using a printing press or other printing method. The design or text is typically printed onto paper, which is then glued onto the surface of the wooden nickel.
Painting is another technique used to create wooden nickels. Painting involves applying paint onto the surface of the wooden nickel to create a design or text. The paint can be applied using a brush or other painting tool.
Overall, the manufacturing process for wooden nickels involves cutting the wood into round shapes, and then using carving, printing, or painting techniques to create a design or text on the surface of the wooden nickel.
Wooden nickels have been used for various purposes throughout history. Here are two common uses of wooden nickels:
During times of coin shortages, wooden nickels were sometimes used as a substitute for legal tender. For example, during the Great Depression, some towns allowed limited usage of wooden nickels for certain transactions due to coin shortages. Today, some businesses still use wooden nickels as trade tokens that customers can redeem for discounts or other perks.
Wooden nickels are often used as promotional items that businesses give away as a form of advertising. They can be customized with a business’s logo or message and handed out at events or as part of a marketing campaign. They can also be used as souvenirs for special events or as a way to commemorate an occasion.
Overall, wooden nickels have become a popular item for businesses and organizations to use for marketing and promotions. With their unique look and customizable design, they can be a fun and effective way to get people interested in a product or service.
If you’re interested in collecting wooden nickels, you’re in for a fun and challenging hobby. Here are some tips to help you get started:
Wooden nickels can range in value from a few cents to several hundred dollars, depending on their rarity and condition. Some collectors focus on collecting wooden nickels from a specific location or event, while others collect them based on a particular design or theme.
When evaluating the value of a wooden nickel, consider the following factors:
To keep your wooden nickel collection in good condition, consider the following preservation tips:
By following these tips, you can start building a valuable and interesting collection of wooden nickels. Happy collecting!
Wooden nickels have become a part of American culture and are often used idiomatically to warn someone not to be fooled or swindled. The phrase “Don’t take any wooden nickels” is a lighthearted reminder to be cautious in one’s dealings. It is considered a friendly piece of advice among acquaintances or loved ones.
Wooden nickels have also been used in popular media as a symbol of commemoration or remembrance. In the movie “It’s a Wonderful Life,” George Bailey is given a wooden nickel by his guardian angel Clarence as a reminder of the value of his life. In the TV show “The Simpsons,” wooden nickels are used as a currency in the fictional town of Springfield.
Wooden nickels have also been featured in various songs, such as “Wooden Nickel” by The Four Preps and “Don’t Take Any Wooden Nickels” by The Chordettes.
In addition, wooden nickels have been used as promotional items by businesses and organizations. They are often given out at events and grand openings as a way to commemorate the occasion.
Overall, wooden nickels have become a symbol of commemoration and caution in American culture. Their use in popular media and as promotional items has helped to keep their significance alive.


