Rahasia Sukses Poker Online: Cara Ampuh Membaca Lawan di Fase Post-Flop
Di antara seluruh platform penyedia poker online terbaik, fase taruhan post-flop (setelah tiga kartu pertama dibuka) senantiasa diakui sebagai salah

Di antara seluruh platform penyedia poker online terbaik, fase taruhan post-flop (setelah tiga kartu pertama dibuka) senantiasa diakui sebagai salah


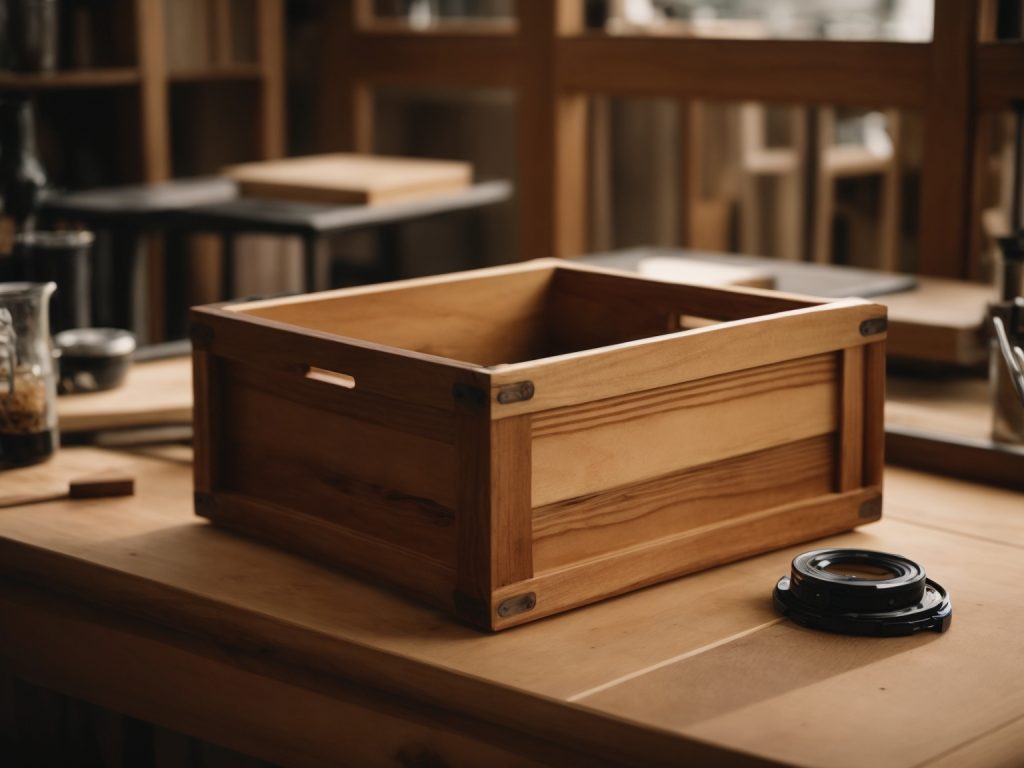
Are you looking for a simple and practical way to build a wooden box frame? Whether you need a storage solution or a decorative item, building a wooden box frame is a great DIY project that can be completed with basic tools and materials. In this article, we will provide you with step-by-step instructions on how to build a wooden box frame using lumber, screws, and nails.
First, you will need to gather the necessary tools and materials, such as a saw, a drill, screws, nails, and lumber. Then, you will need to measure and cut the lumber to the correct size and shape, and assemble the pieces using screws and nails. We will guide you through each step of the process, including how to create a sturdy frame and how to finish the box with paint or stain.
Whether you are a beginner or an experienced DIY enthusiast, building a wooden box frame can be a fun and rewarding project that allows you to create a custom piece that fits your needs and style. So, let’s get started and learn how to build a wooden box frame that will last for years to come.
If you’re looking for a simple and elegant way to showcase your artwork, photographs, or other prized possessions, a wooden box frame might be just what you need. These frames are easy to make, customizable, and can be built to fit any size or shape of item you want to display.
A wooden box frame is essentially a wooden frame with a box-like shape that can hold items inside it. The frame is made up of multiple layers of lumber glued together using special types of adhesive, making it sturdy and easy to assemble.
When building a wooden box frame, you’ll need to choose the right type of wood. Hardwoods like oak, maple, and cherry are popular choices because they’re strong and durable, but softwoods like pine and spruce can also be used if you’re on a budget.
One of the advantages of building a wooden box frame is that you can customize it to your specific needs. You can choose the dimensions of the frame, the thickness of the wood, and the finish you want to apply. You can also add decorative elements like moldings or carvings to give your frame a unique look.
Overall, building a wooden box frame is a fun and rewarding project that can be completed in just a few hours. With a little bit of patience and the right tools and materials, you can create a beautiful frame that will showcase your favorite items for years to come.
When it comes to building a wooden box frame, choosing the right materials is crucial. Here are some things to consider when selecting materials for your project.
Pine, oak, or cedar are all good choices for a box frame. Pine is a popular choice because it is affordable and easy to work with. Oak is a bit more expensive but is known for its durability and strength. Cedar is a great choice if you want a wood that is resistant to rot and insects.
When selecting your wood, make sure it is straight and free of knots. It should also be dry and have a moisture content of around 12%.
Make sure your nails and screws are large enough that they won’t pull out of the wood too easily. For a box frame, nails are usually the best choice. They are easy to use and provide a strong hold.
If you choose to use screws, make sure they are long enough to go through both pieces of wood and have a wide enough diameter to provide a secure hold.
A hammer and nails are the most basic tools you’ll need for building a box frame. Make sure you use a hammer with an anti-vibration handle to prevent fatigue while driving in the nails.
An electric saw is ideal for making precise cuts with minimal effort. If you don’t have an electric saw, a hand saw will work, but it will take more time and effort to make accurate cuts.
In addition to these tools, you may also need a drill, sandpaper, and wood glue depending on the design of your box frame.
Before you start building your wooden box frame, you need to design it. This will ensure that your box frame meets your requirements and looks the way you want it to. Here are two important steps to follow when designing your box frame:
The first step in designing your box frame is to determine its dimensions. You need to decide how big you want your box frame to be. Consider what you will be storing in it and how much space you have available.
To determine the dimensions of your box frame, measure the length, width, and height of the items you will be storing in it. Add a few inches to each measurement to ensure that your box frame will be big enough to hold everything.
Once you have determined the dimensions of your box frame, it’s time to sketch your design. This will help you visualize what your box frame will look like and make any necessary adjustments before you start building.
You don’t need to be an artist to sketch your design. Simply draw a rough outline of your box frame and label the dimensions. You can also add any additional features you want, such as handles or a lid.
Here are some things to keep in mind when sketching your design:
By following these steps, you can design a wooden box frame that meets your needs and looks great.
Before you can begin constructing your wooden box frame, you need to prepare the wood. This involves cutting the wood to the desired size and sanding it to create a smooth surface. Here are the steps you should follow:
The first step in preparing the wood is to cut it to the desired size. You can use a saw or a miter saw to cut the wood. Make sure to measure the wood carefully and mark the cut lines before you start cutting. Here are some tips to keep in mind:
Once you have cut the wood to the desired size, the next step is to sand it. Sanding the wood will help create a smooth surface and remove any rough edges. Here are some tips to keep in mind:
By following these steps, you can prepare the wood for your wooden box frame. With the wood cut to size and sanded, you are now ready to start constructing your box frame.
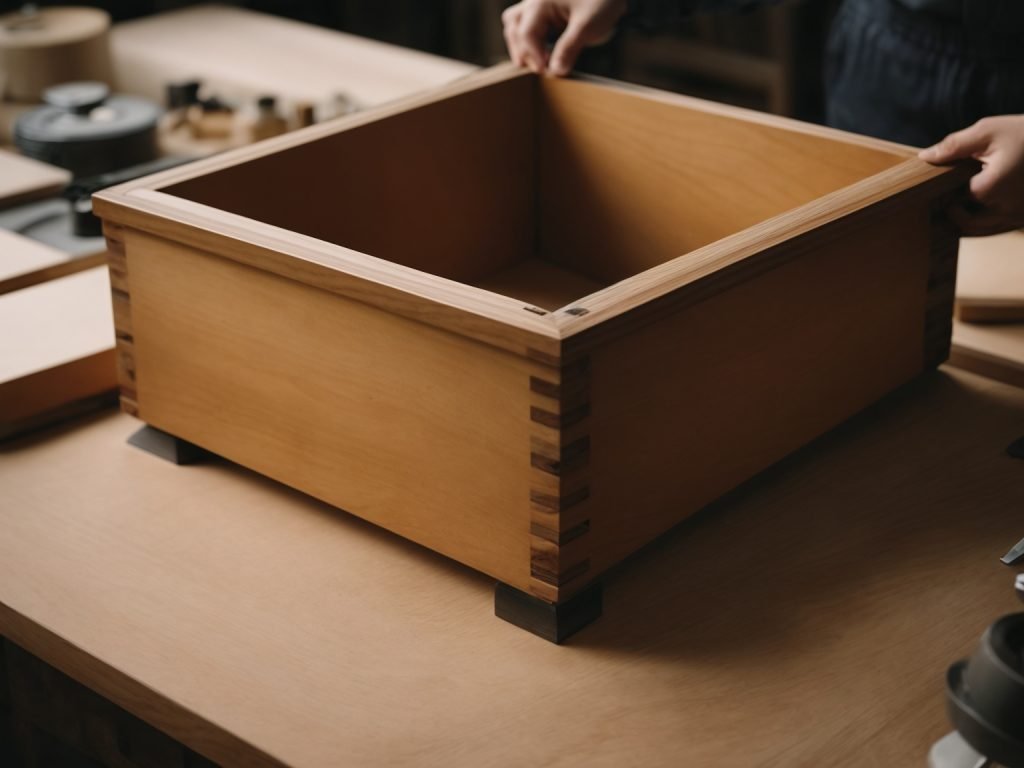
Once you have cut all the lumber pieces to the correct size and shape, it’s time to start assembling your wooden box frame. This section will guide you through the process of joining the pieces and securing the frame.
To join the pieces of lumber together, you can use screws, nails, or wood glue. However, using all three will provide the most secure and stable frame. Here are the steps to follow:
Once you have joined all the pieces together to form the frame, you need to secure it to ensure it remains stable. Here’s what you need to do:
Congratulations! You have successfully assembled your wooden box frame. The next step is to finish it by sanding, staining, or painting it to your desired finish.
Once you have constructed your wooden box frame, it is time to add the finishing touches to make it look polished and professional. Here are a few things you can do to give your box frame a final touch of elegance.
One of the easiest ways to give your wooden box frame a finished look is to apply paint or stain. You can choose a color that complements the decor of the room where the box frame will be displayed. Before applying paint or stain, make sure to sand the wood surface to ensure that it is smooth and free of any imperfections. Use a paintbrush or a cloth to apply the paint or stain evenly, and let it dry completely before handling the box frame.
If you want to protect your wooden box frame from scratches, dents, and other types of damage, you can add a protective coating. There are many types of protective coatings available, such as polyurethane, lacquer, and varnish. When applying a protective coating, make sure to read the instructions carefully to ensure that you are using it correctly. It is also important to apply the coating in a well-ventilated area and to wear protective gear, such as gloves and a mask.
By following these simple finishing touches, you can take your wooden box frame from a basic DIY project to a beautiful and functional piece of decor.

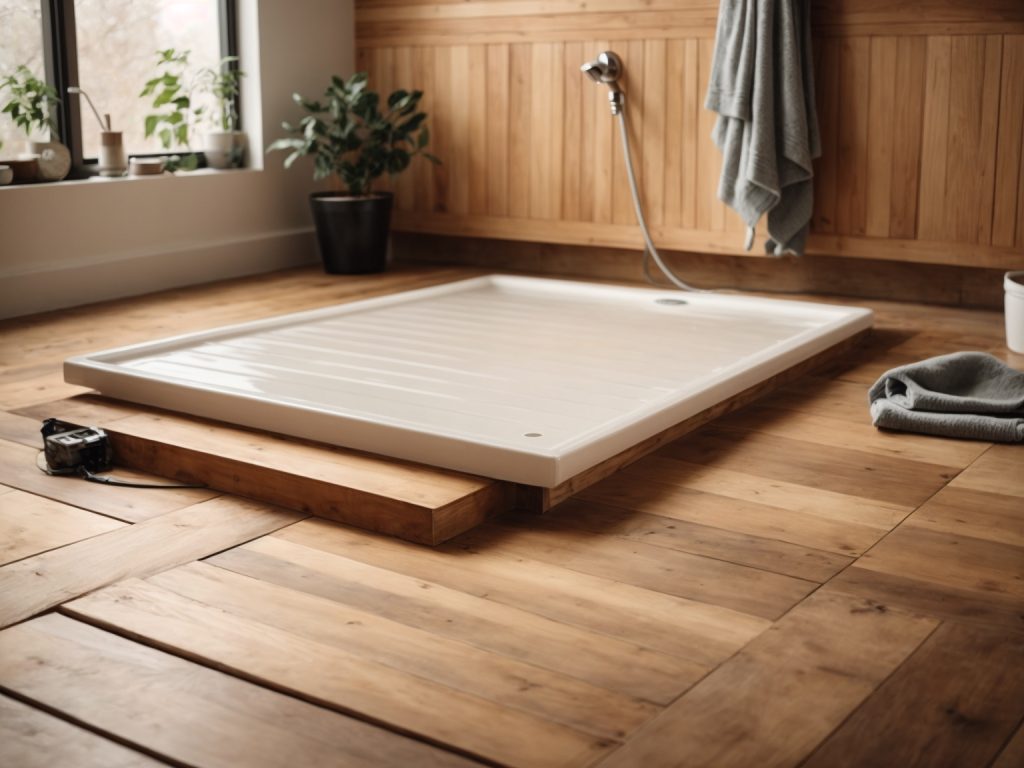
Installing a shower base on a wooden floor can be a challenging task, but with the right tools and guidance, it can be done with ease. The first step is to ensure that the wooden floor is strong enough to support the weight of the shower base and the person using it. If the floor is not strong enough, it may need to be reinforced before proceeding with the installation.
Once you have confirmed that the floor is sturdy enough, the next step is to prepare the floor for the shower base. This involves tracing and cutting the floorboards precisely where the shower base will be placed. It’s important to be careful not to cut into the floor joists below. After cutting the floorboards, you may need to make additional adjustments to ensure that the shower base fits snugly and securely on the floor.
Installing a shower base on a wooden floor can be a DIY project, but it’s important to follow the correct steps to ensure a safe and successful installation. In this article, we will provide a step-by-step guide on how to install a shower base on a wooden floor. We will cover everything from preparing the floor to installing the shower base and plumbing. With our guidance, you’ll be able to install a shower base on a wooden floor with confidence.
When it comes to installing a shower on a wooden floor, one of the most critical components is the shower base. A shower base is a waterproof barrier that sits on the floor and provides a solid foundation for the shower.
There are several types of shower bases available on the market, including fiberglass, acrylic, and cast iron. Each material has its own pros and cons, so it’s essential to choose the right one for your needs.
Here are some things to consider when selecting a shower base:
Once you have selected the right shower base, it’s time to prepare the wooden floor for installation. The next section will discuss the necessary steps to take to ensure a sturdy and waterproof foundation for your shower base.
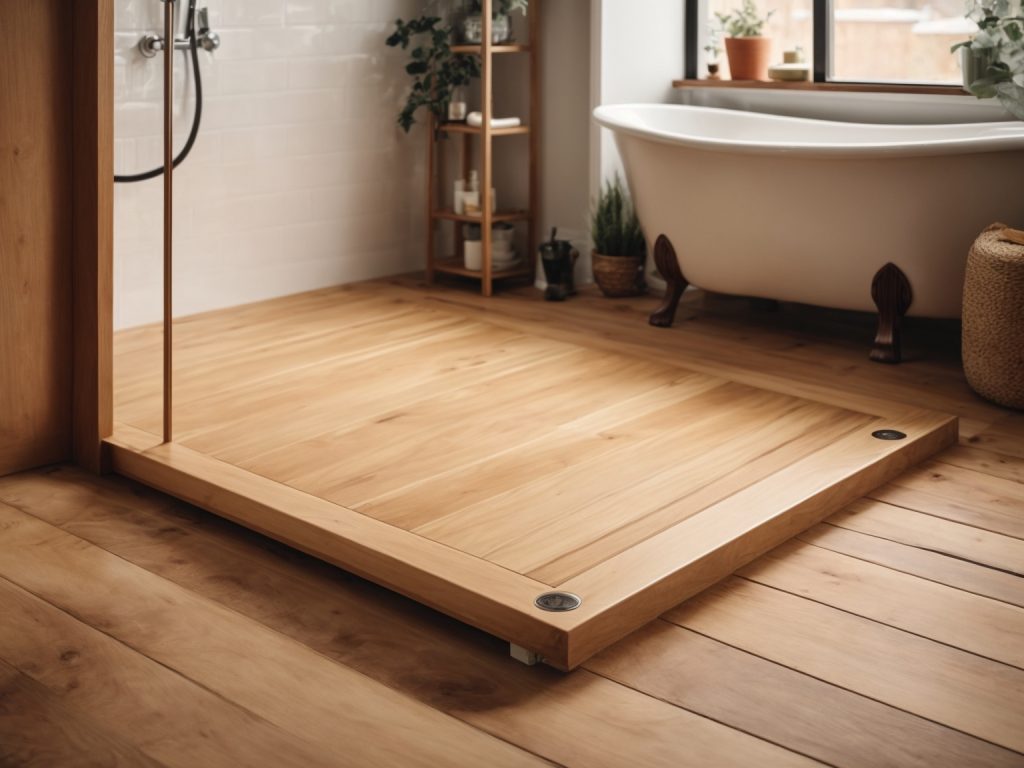
When it comes to installing a shower base on a wooden floor, it is important to choose the right type of shower base to ensure that it is compatible with the wooden floor. There are several types of shower bases available in the market, and each one has its own advantages and disadvantages. Here are some factors to consider when choosing the right shower base for a wooden floor:
The first factor to consider when choosing a shower base is the material it is made of. The most common materials used for shower bases are acrylic, fiberglass, and tile. Acrylic and fiberglass shower bases are lightweight and easy to install, making them a popular choice for wooden floors. Tile shower bases, on the other hand, are more durable and can be customized to match the bathroom decor.
The size of the shower base is another important factor to consider. The size of the shower base should be based on the size of the bathroom and the number of people who will be using it. A larger shower base may be necessary for a family bathroom, while a smaller base may be suitable for a guest bathroom.
The drain location is another important factor to consider when choosing a shower base. The drain should be located in a position that is easy to access and does not interfere with the wooden floor. It is important to choose a shower base that has a drain location that is compatible with the wooden floor.
The installation method is another important factor to consider when choosing a shower base. Some shower bases are designed to be installed directly onto the wooden floor, while others require a mortar base. It is important to choose a shower base that is compatible with the installation method that is being used.
In conclusion, choosing the right shower base for a wooden floor is important to ensure that it is compatible with the wooden floor and provides a comfortable and safe showering experience. Consider the material, size, drain location, and installation method when choosing a shower base for a wooden floor.
Before you start installing a shower base on a wooden floor, you need to make sure you have all the necessary tools and materials. Here is a list of the items you will need:
Make sure you have all the necessary tools and materials before starting the installation process. It is important to have the right tools to ensure a smooth and efficient installation process. A circular saw and corded drill will be needed to cut and drill holes in the wooden floor. A framing square will help ensure that the shower base is installed at the correct angle. A level will be used to ensure that the shower base is level and stable.
You will also need various other tools such as a hammer, hole saw kit, jigsaw, knee pads, miter saw, nut driver, pipe wrench, reciprocating saw, safety glasses, slip joint pliers, soldering torch, tape measure, trowel, tube cutter, utility knife, 4-in-1 screwdriver, and adjustable wrench.
In addition to the tools, you will need several materials such as a shower base, wooden floor, drainage pipes, screws, adhesive, glue or sealant, and silicone. The shower base is the foundation of the shower and should be chosen based on your specific needs and preferences. The wooden floor should be sturdy, level, and free from any damage. Drainage pipes are required to connect the shower base to the plumbing system. Screws, adhesive, glue or sealant, and silicone are used to secure the shower base to the wooden floor and prevent any leaks.
Before installing a shower base on a wooden floor, it is important to properly prepare the surface. This will ensure that the shower base is level and securely installed, preventing any potential leaks or damage to the floor.
Here are the steps to prepare the wooden floor for the shower base installation:
By properly preparing the wooden floor before installing the shower base, you can ensure a secure and leak-free installation. Taking the time to properly prepare the surface will save you time and money in the long run by preventing any potential damage or repairs.
Before you start installing the shower base, make sure that the wooden floor is level and sturdy. Here are the steps to follow when installing a shower base on a wooden floor:
By following these steps, you can install a shower base on a wooden floor with ease. Remember to always follow the manufacturer’s instructions and use the appropriate tools and materials for the job.
Before you start using your newly installed shower base, there are a few final checks that you should perform to ensure that everything is in good working order. Here are some things to keep in mind:
The first thing you should do is check for leaks. Turn on the water and let it run for a few minutes. Check around the base of the shower to see if there are any signs of water leaking out. If you do notice any leaks, you will need to take the necessary steps to fix them before you can start using your shower.
Next, you should check the drain to make sure it is working properly. Pour some water down the drain and watch to see how quickly it drains away. If the water is slow to drain, you may need to clear out any debris that is blocking the drain.
Finally, you should check to make sure that the shower base is level. Use a spirit level to check the base in both directions. If it is not level, you may need to adjust the base to ensure that it is properly aligned.
By performing these final checks, you can ensure that your shower base is installed correctly and is ready for use. If you do notice any issues, be sure to address them promptly to avoid any further problems down the line.
Congratulations! You have successfully installed a shower base on a wooden floor. Now, you need to take good care of it to ensure it lasts for a long time. Here are some maintenance tips to keep in mind:
By following these maintenance tips, you can keep your shower base in great condition for years to come.

If you’re looking for a fun and creative way to spend time with your kids, making wooden toys is a great option. Not only is it a great bonding activity, but it also allows you to create unique and personalized toys that your children will love. Plus, making wooden toys from scratch is a great way to teach your kids about the value of craftsmanship and the importance of using natural materials.
To get started, you’ll need some basic woodworking tools and materials. Some popular wooden toys you can make include balance boards, block stackers, dollhouses, and puzzles. You can find free project plans and tips online or create your own designs. Not only will making wooden toys provide hours of entertainment for your kids, but it’s also a great way to reduce screen time and encourage imaginative play. So why not give it a try and see what kind of unique and beautiful wooden toys you can create together?
When it comes to making wooden toys, understanding the different types of wood is essential. Each type of wood has its own unique characteristics that can affect the durability, safety, and appearance of the toy. In this section, we will discuss the three main types of wood used for toy-making: hardwood, softwood, and plywood.
Hardwood is a type of wood that comes from deciduous trees such as oak, maple, and cherry. Hardwood is known for its strength, durability, and resistance to wear and tear. It is also more expensive than softwood due to its slower growth rate and higher density.
Some common types of hardwood used in toy-making include:
Hardwood is an excellent choice for toys that will be subjected to heavy use, such as building blocks, puzzles, and vehicles.
Softwood comes from evergreen trees such as pine, spruce, and cedar. Softwood is less dense than hardwood, making it easier to work with and less expensive. However, it is also less durable and prone to dents and scratches.
Some common types of softwood used in toy-making include:
Softwood is a good choice for toys that will not be subjected to heavy use, such as dolls, figurines, and decorative items.
Plywood is a type of engineered wood made by gluing together thin layers of wood veneer. Plywood is strong, durable, and resistant to warping and cracking. It is also less expensive than solid wood and can be made from both hardwood and softwood.
Plywood is commonly used in toy-making for items such as:
When selecting plywood for toy-making, it is important to choose a high-quality product that is free of knots, cracks, and other defects.
In conclusion, understanding the different types of wood is crucial when making wooden toys. By selecting the right type of wood for your project, you can create toys that are safe, durable, and beautiful.

When making wooden toys, safety should always be a top priority. Here are some precautions to take to ensure that your finished product is safe for children to play with:
To prevent rough edges and splinters from forming, sand your wooden toys smoothly. Use fine-grit sandpaper and sand in the direction of the grain. Sanding also gives the toy a smooth texture, making it more pleasant for children to touch and play with.
If you choose to paint or stain your wooden toys, make sure to use non-toxic options. Children may put toys in their mouths, so it’s important to avoid any harmful chemicals that could be ingested. Look for paints and stains that are labeled as safe for use on children’s toys.
Toys should not have any small parts that could be choking hazards. Be sure to avoid using beads, pellets, eyes, noses, or any other small parts that are smaller than 3cm (about 1¼ inches) in diameter.
When selecting wood for your toys, choose hardwoods like maple, cherry, or oak. These woods are durable and non-toxic, making them safe for children to play with. Avoid using softwood or pressure-treated lumber as they could splinter easily or contain harmful chemicals.
In addition to these precautions, be sure to follow any safety guidelines provided by the Consumer Product Safety Commission (CPSC) or other relevant organizations. These guidelines may include testing requirements or other safety standards that must be met to ensure that your toys are safe for children to play with.
By taking these safety precautions when making wooden toys, you can ensure that your finished product is safe and enjoyable for children to play with.
When it comes to making wooden toys, having the right tools is essential. You’ll need a combination of hand tools and power tools to create your masterpieces. Here are the tools you’ll need to get started:
Hand tools are essential for any woodworking project. Here are some of the hand tools you’ll need to make wooden toys:
Power tools can make woodworking projects much easier and faster. Here are some of the power tools you’ll need to make wooden toys:
When it comes to power tools, it’s important to use them safely. Always wear eye and ear protection and follow the manufacturer’s instructions.
When it comes to making wooden toys, selecting the right design is crucial. You want to choose a design that is both fun to make and enjoyable for the child to play with. Here are some things to consider when selecting a toy design:
Consider the age range of the child you are making the toy for. You want to select a design that is appropriate for their age and skill level. For example, a simple block set may be better for a younger child, while a more complex puzzle may be better for an older child.
Think about the child’s interests when selecting a toy design. Do they love animals? Consider making a wooden animal puzzle or figurine. Are they fascinated by cars? A wooden car or train set may be perfect for them. By selecting a design that aligns with their interests, you can ensure that the child will love and cherish the toy for years to come.
Consider your own skill level and the amount of time you have to devote to the project. Some designs may be more complex and require more time and skill, while others may be simpler and more straightforward. Choose a design that you feel comfortable with and that fits within your timeline.
Consider the type of wood and other materials you will need for the design. Some designs may require specific types of wood or additional materials such as paint or glue. Make sure you have all the necessary materials before beginning the project.
By taking these factors into consideration, you can select the perfect wooden toy design for the child in your life.
When it comes to making wooden toys, cutting the wood is one of the most important steps. Here are some tips to help you cut your wood safely and accurately.
The type of saw you use will depend on the type of wood you are cutting and the shape you need to cut it into. Here are some common types of saws and when to use them:
Before you make any cuts, it’s important to measure your wood carefully. Use a ruler or tape measure to mark your wood where you need to cut it. Double-check your measurements to make sure they are accurate before you start cutting.
If you need to make a straight cut, it’s a good idea to use a cutting guide. You can make your own cutting guide by clamping a straight piece of wood to your board and using it as a guide for your saw.
Whenever you are cutting wood, it’s important to wear safety gear to protect yourself. Wear safety glasses to protect your eyes from sawdust and debris, and wear earplugs to protect your hearing from the noise of the saw.
Cutting wood can be dangerous if you rush or don’t pay attention. Take your time and make sure you are cutting your wood safely and accurately. If you are unsure about a cut, stop and double-check your measurements before you continue.
By following these tips, you can cut your wood safely and accurately, making it easier to create the wooden toys you want.
When it comes to making wooden toys, sanding and shaping are two essential steps that can make all the difference in the final product. Here are some tips and techniques to help you achieve a smooth and polished finish.
Sanding is an important step in creating wooden toys. It helps to smooth out rough edges, remove any splinters, and prepare the surface for finishing. Here are some sanding techniques to keep in mind:
Shaping is the process of carving and sculpting the wood to create the desired shape and form of the toy. Here are some shaping techniques to consider:
By following these sanding and shaping techniques, you can create wooden toys that are both beautiful and functional.

Now that you have all the wooden parts cut and sanded, it’s time to assemble them into a toy! Here are some tips to help you with the process:
Before you begin, make sure you have all the materials you need to assemble the toy. This may include wood glue, clamps, screws, nails, and any other hardware required for the specific toy you are making.
If you are using a toy plan or kit, be sure to follow the instructions carefully. Make sure you understand each step before you begin, and double-check your work as you go along.
Wood glue is the best way to attach wooden parts together. Apply a thin layer of glue to one surface, then press the two parts together firmly. Wipe away any excess glue with a damp cloth.
If the parts need to be held together while the glue dries, use clamps to hold them in place. Make sure the clamps are tight enough to hold the parts together, but not so tight that they squeeze out all the glue.
If the toy requires screws, nails, or other hardware, be sure to use the correct size and type. Pre-drill any holes to prevent the wood from splitting, and use a screwdriver or hammer to insert the hardware.
Once the parts are assembled, use sandpaper to smooth any rough edges or corners. This will make the toy safer for children to play with.
By following these tips, you can assemble your wooden toy with confidence and create a beautiful, durable toy that your child will love.
Once you have completed the construction of your wooden toy, it’s time to add the finishing touches to make it look its best. There are two main ways to finish a wooden toy: painting and polishing.
Painting a wooden toy can make it look more vibrant and colorful. Here are some tips to keep in mind when painting your wooden toy:
Polishing a wooden toy can give it a glossy, smooth finish. Here are some tips to keep in mind when polishing your wooden toy:
Remember, the finishing touches are what make a wooden toy stand out. Whether you choose to paint or polish your toy, take your time and do it right to ensure that your creation looks its best.
When making wooden toys, ensuring quality control is essential to produce safe and durable toys. Here are some tips to help you maintain quality control throughout the manufacturing process:
Before starting production, it is important to inspect the raw materials thoroughly. Check for any defects or damage that may affect the quality of the final product. Make sure the wood is of good quality and free from knots, cracks, or warping.
Before mass production, it is recommended to create a few prototypes to test the design and functionality of the toy. This will help identify any potential issues and allow you to make necessary adjustments before producing a large quantity of toys.
During production, it is important to monitor the process closely to ensure that each toy is made to the same high-quality standard. Regular checks should be conducted to ensure that the toys are being made to the correct specifications and that there are no defects or errors.
Once the toys are completed, it is crucial to perform safety tests to ensure that they meet all safety standards. This includes testing for sharp edges, small parts that could be a choking hazard, and any other potential safety risks.
By following these quality control tips, you can ensure that your wooden toys are safe, durable, and of the highest quality.
Once you’ve completed making your wooden toys, you’ll need to package and store them properly to keep them safe and in good condition. Here are some tips on how to do it:
When it comes to packaging your wooden toys, you want to make sure they are protected from damage during transport. Here are some ideas for packaging materials:
Once your wooden toys are packaged, you’ll need to store them properly to keep them in good condition. Here are some tips for storing your toys:
By following these tips, you can ensure that your wooden toys are packaged and stored properly, so they stay in great condition for years to come.

Cutting wooden dowels is a common task for those involved in woodworking. Dowels are used as a means of joining two pieces of wood together, or to reinforce a weak or damaged area. If you’re new to woodworking, the process of cutting dowels may seem daunting at first. However, with a few simple steps, you can easily cut wooden dowels to your desired length.
There are several tools and techniques you can use to cut wooden dowels. You can use a table saw, band saw, miter saw, or circular saw to make precise cuts. Alternatively, you can use a cutting jig, serrated knife, or garden shears if you don’t have access to power tools. In this article, we’ll explore the different methods you can use to cut wooden dowels and provide step-by-step instructions to help you get started.
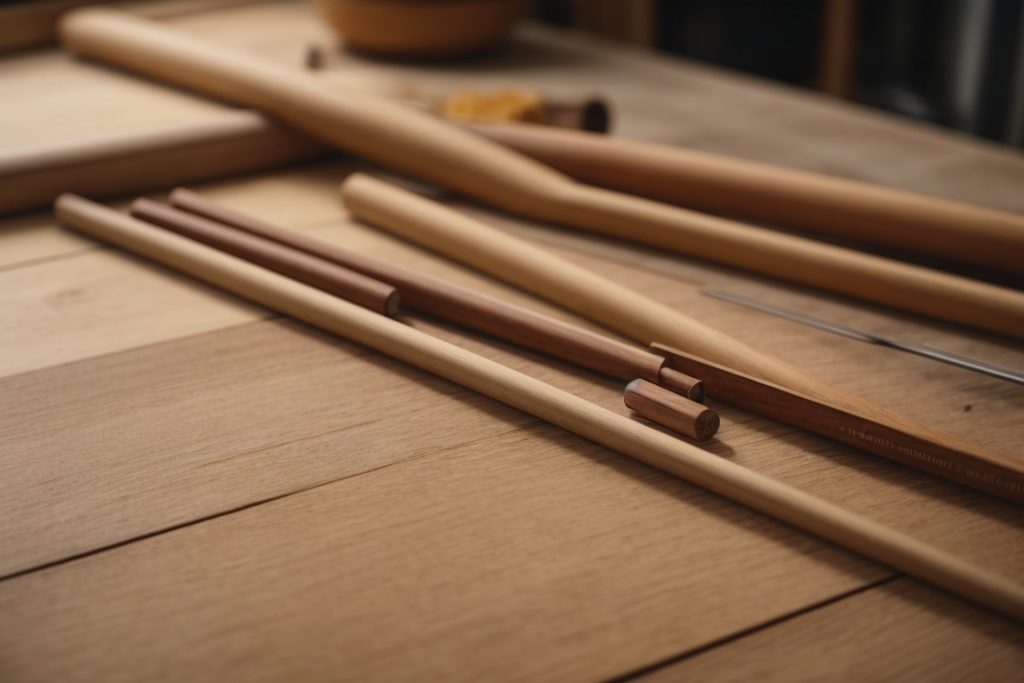
When it comes to woodworking, wooden dowels are a popular choice for joining two pieces of wood together. They are cylindrical rods made of wood that come in different sizes and lengths. Wooden dowels are versatile and can be used in various woodworking projects, such as furniture, cabinets, and shelves.
There are two main types of wooden dowels: hardwood and softwood. Hardwood dowels are made from deciduous trees, such as oak, maple, and walnut. They are denser and stronger than softwood dowels, making them ideal for heavy-duty projects. Softwood dowels, on the other hand, are made from coniferous trees, such as pine and cedar. They are lightweight and easy to work with, making them suitable for smaller projects.
Choosing the right size of wooden dowel is crucial for the success of your woodworking project. The size of the dowel you need depends on the thickness of the wood you are joining. A good rule of thumb is to choose a dowel that is one-third the thickness of the wood. For example, if you are joining two pieces of wood that are 1 inch thick, you should choose a dowel that is ⅜ inch in diameter.
Cutting wooden dowels is a simple process that can be done with a saw or a sharp knife. It is essential to make clean, straight cuts to ensure a tight fit. Before cutting the dowel, mark the length you need with a pencil or marker. Then, use a saw or knife to cut the dowel to size. It is important to be careful and avoid splintering or splitting the dowel when cutting it.
Understanding wooden dowels is essential for any woodworking project. Choosing the right size and type of dowel, as well as cutting it properly, will ensure that your project is successful. Wooden dowels are a versatile and reliable way to join two pieces of wood together, and with a little practice, you can use them to create beautiful and functional pieces of furniture and decor.
When it comes to cutting wooden dowels, having the right tools and materials is essential. Here are the things you will need to get started:
The type of saw you use to cut your wooden dowels will depend on the size and shape of the dowel, as well as the type of cut you want to make. Here are some common saws used for cutting dowels:
The type of dowel you choose will depend on the project you are working on. Here are some things to consider when selecting your dowel:
Whenever you are working with power tools, it is important to take safety precautions. Here are some safety equipment items you should have on hand:
By having the right tools and materials on hand, you can ensure that your wooden dowel cutting project goes smoothly and safely.
Before you start cutting your wooden dowels, it’s important to take some preparation steps to ensure that your cuts are accurate and clean. Here are some tips to help you get started:
The first step in cutting a wooden dowel is to measure it accurately. Use a ruler or tape measure to determine the length of the dowel you need. Make sure to measure from end to end, and take into account any extra length you may need for your project.
Once you have measured your dowel, it’s time to mark the cut. Use a pencil or marker to make a small mark on the dowel where you want to make the cut. Make sure to mark both sides of the dowel to ensure that your cut is straight and even.
If you are cutting multiple dowels to the same length, it can be helpful to use a stop block or jig to ensure that your cuts are consistent. You can also use a clamp or vise to hold the dowel in place while you make your cut.
Remember to take your time and be careful when making your cuts. A clean, accurate cut will ensure that your dowel fits properly in your project and looks professional.

Cutting wooden dowels can be done using various techniques, depending on the tools available and the desired level of precision. In this section, we will discuss three common cutting techniques: using a hand saw, using a miter box, and using a power saw.
Using a hand saw is a simple and inexpensive way to cut wooden dowels. Here are the steps to follow:
A miter box is a tool that helps you make precise cuts at specific angles. Here’s how to use a miter box to cut wooden dowels:
Power saws are efficient and accurate tools for cutting wooden dowels. Here are the steps to follow when using a power saw:
Remember to wear proper safety gear, such as goggles and gloves, when using power saws. Also, be sure to read and follow the manufacturer’s instructions for your specific power saw.
Once you have cut your wooden dowels to the desired size, it’s important to sand and finish them properly. This will not only improve their appearance but also protect them from damage and wear over time.
Before you start sanding, use a fine-toothed saw or sandpaper to smooth any rough edges left from cutting the dowels. This will prevent splintering and make the sanding process easier.
Start with a coarse-grit sandpaper, such as 80-grit, and work your way up to a finer grit, such as 220-grit. Sand in the direction of the grain, using a circular motion. Be careful not to sand too aggressively or you may create uneven surfaces or remove too much material.
Once you have sanded the dowels with the finer grit sandpaper, wipe them down with a tack cloth to remove any dust or debris.
Applying a finish to your wooden dowels will protect them from moisture, stains, and scratches. There are several types of finishes you can use, including varnish, lacquer, shellac, and oil-based finishes.
Before applying any finish, make sure the dowels are clean and free of dust. Apply the finish in thin, even coats, using a brush or cloth. Be sure to follow the manufacturer’s instructions for drying time and number of coats.
After the final coat has dried, use a fine-grit sandpaper, such as 320-grit, to lightly sand the surface of the dowels. This will remove any bumps or imperfections and create a smooth, even finish.
In conclusion, sanding and finishing your wooden dowels is an important step in ensuring their longevity and appearance. By following these simple steps, you can achieve a professional-looking finish that will protect your dowels for years to come.
When cutting wooden dowels, splintering can be a common issue. To avoid this, it is important to use the right cutting tool and technique. A handsaw or a sharp knife is recommended for cutting dowels. Make sure to mark the dowel’s length on one end and score the dowel at the mark with a sharp knife. Turn the dowel so the scored end is facing the saw blade and make 1-3 cuts straight down the dowel. Repeat on the other side. This will help prevent splintering.
Another way to avoid splintering is to use a cutting jig. A cutting jig is a tool that helps guide the saw blade and keeps the dowel in place while cutting. This will help prevent the dowel from moving around and causing splintering.
If you accidentally make an uneven cut while cutting a wooden dowel, don’t worry. There are ways to correct it. One way is to use sandpaper to smooth out the uneven edges. Start with a coarse grit sandpaper and gradually work your way up to a finer grit until the edges are smooth and even.
Another way to correct uneven cuts is to use a dowel plate. A dowel plate is a tool that helps shape and smooth out wooden dowels. Simply insert the dowel into the appropriate size hole and tap it with a hammer until the dowel is shaped and smoothed out.
In conclusion, avoiding splintering and correcting uneven cuts are important steps when cutting wooden dowels. By using the right cutting tool and technique, and utilizing tools like a cutting jig or dowel plate, you can achieve clean and precise cuts without any issues.

Making your own wooden candle wicks is a fun and easy way to add a unique touch to your homemade candles. Not only do wooden wicks provide a cozy crackling sound when burned, but they also have a longer burn time than traditional cotton wicks. In this article, we will guide you through the steps of making your own wooden candle wicks.
To start, you will need to gather your materials. You will need wooden dowels, scissors, a saw, sandpaper, and wick clips. You can purchase these materials at your local craft store or online. Once you have your materials, you can begin the process of making your wooden wicks.
The first step is to cut your wooden dowels to the desired length of your candle. Then, sand down the ends of the dowels to create a smooth surface. Next, attach the wick clip to the center of the wooden dowel. Finally, trim the wooden wick to the appropriate length for your candle. With these simple steps, you can create your own wooden candle wicks and elevate your candle-making game.

If you’re looking for a unique and natural alternative to cotton wicks, wooden wicks are a great option to consider. They are becoming increasingly popular among candle makers and enthusiasts alike. In this section, we will explore what wooden wicks are, their benefits, and how to use them in your candle making.
Wooden wicks are made from natural wood, typically sourced from sustainable forests. They come in various shapes and sizes, including straight, curved, and spiral designs. Unlike traditional cotton wicks, wooden wicks are wider and flat, providing a larger surface area for the flame to burn. This produces a brighter and more vibrant flame, which can enhance the ambiance of your candle.
There are several benefits to using wooden wicks in your candle making. Here are a few:
When using wooden wicks, it’s important to choose the right size and type for your candle. The size of the wick will depend on the diameter of your candle and the type of wax you’re using. You can refer to a wick size chart or consult with a supplier to determine the appropriate size.
It’s also recommended to pre-wick your wooden wicks before using them in your candle. This involves dipping the wick in melted wax to create a protective coating that will help it burn evenly and prevent it from curling or mushrooming.
In conclusion, wooden wicks are a unique and natural option for candle makers looking to enhance the aesthetics and sensory experience of their candles. By understanding the benefits and proper usage of wooden wicks, you can create beautiful and long-lasting candles that stand out from the rest.
Making a wooden candle wick requires some specific materials. Here are the essential supplies you will need to make your own wooden wick candles.
The first step in making a wooden candle wick is choosing the right wood. You want to choose a hardwood that will burn slowly and evenly. Some popular choices include cherry, maple, and birch. Avoid softwoods like pine or cedar, as they tend to burn too quickly and unevenly.
You will also need to choose the thickness of your wooden wick. Thicker wicks will burn longer and produce a larger flame, but they may also produce more smoke. Thinner wicks will burn more quickly and produce a smaller flame, but they may also be more prone to extinguishing.
In addition to the wood, you will need a few other supplies to make your wooden wick candles. Here is a list of the essential supplies:
With these materials, you can make your own wooden wick candles at home.
Before you can start making wooden candle wicks, you need to prepare the wood. Here are the steps to follow:
By following these steps, you can prepare your wooden candle wick and ensure that it burns evenly and lasts a long time.
To create a wooden candle wick, you will need to gather a few materials. You will need wooden wicks, scissors, a double boiler, a wooden spoon, and a container to pour the wax into.
Creating a wooden candle wick is a simple process that can add a unique touch to your homemade candles. With a little practice, you can create beautiful candles with crackling wooden wicks that will delight your senses.

When making wooden candle wicks, there are some safety precautions that you should follow to ensure that you are not putting yourself or others in danger. Here are some tips to keep in mind:
Using proper equipment is essential when making wooden candle wicks. You should use a double boiler to melt the wax, as this will prevent the wax from getting too hot. Additionally, use a thermometer to monitor the temperature of the wax to prevent it from overheating.
When pouring the wax into the glass jars, make sure to handle them with care. Clean the glass jars with warm water before pouring the wax to prevent any residue from contaminating the wax. Preheat the glass jars in the oven to slow the cooling of the wax and prevent any cracks from forming.
Before lighting the candle, trim the wick to about 1/4 inch in length. This will prevent the wick from smoking and ensure that the candle burns evenly.
It is important to never leave a burning candle unattended. Keep the candle away from any flammable materials and make sure that it is placed on a stable surface.
If the glass jar is broken, chipped, or cracked, discontinue use immediately. Burning a candle in a damaged jar can be dangerous and increase the risk of a fire.
By following these safety precautions, you can enjoy making wooden candle wicks without putting yourself or others in danger.
Making wooden candle wicks can be a fun and rewarding experience, but it’s not without its challenges. Here are some common issues you might encounter when making wooden wicks and how to troubleshoot them:
If your wooden wick is burning too fast, it’s likely because the wick is too thin for the size of the candle. To fix this, try using a thicker wick. You can also try using a different type of wood that burns slower, such as cherry or maple.
If your wooden wick is burning too slow, it’s likely because the wick is too thick for the size of the candle. To fix this, try using a thinner wick. You can also try using a different type of wood that burns faster, such as cedar or pine.
If your wooden wick is not burning at all, it’s likely because the wick is not properly primed. To prime your wick, dip it in melted wax and let it dry completely before using it in your candle. You can also try trimming the wick to a shorter length.
If your wooden wick is smoking, it’s likely because the wick is too long. To fix this, trim the wick to a shorter length. You can also try using a different type of wood that burns cleaner, such as birch or beech.
If your wooden wick is mushrooming, it’s likely because the wick is too thick. To fix this, try using a thinner wick. You can also try trimming the wick to a shorter length. Additionally, make sure to keep the candle away from drafts, as this can cause the wick to mushroom.
By troubleshooting these common issues, you can ensure that your wooden candle wicks burn smoothly and evenly, creating a beautiful and relaxing ambiance in your home.
After making your own wooden wick candle, you’ll want to ensure that the wick is properly maintained to ensure a consistent burn. Here are some tips for maintaining your wooden wick:
To maintain your wooden wick, you should trim it before each use. The ideal length for your wooden wick is 1/8 to 1/4 inch. If the wick is too long, it may create a large flame and burn too hot. If the wick is too short, it may not create a large enough flame to melt the wax.
To trim your wooden wick, you can use a wick trimmer or scissors. Make sure to trim the wick when the wax is solid, and remove any debris or ash that may have accumulated on the wick.
Another important aspect of maintaining your wooden wick is keeping it centered in the candle. If the wick is off-center, it may create an uneven burn and cause the candle to tunnel.
To keep the wick centered, you can use a wick centering tool or a pencil. Simply place the tool or pencil across the top of the container and adjust the wick until it is centered.
When storing your wooden wick candle, it’s important to keep it in a cool, dry place away from direct sunlight. Heat and moisture can affect the quality of the wax and the wooden wick.
Additionally, make sure to store your candle upright to prevent any wax from spilling or the wick from becoming misaligned.
By following these tips, you can maintain your wooden wick candle and enjoy a consistent burn every time you light it.

Learning how to play a wooden flute can be a rewarding experience for anyone interested in music. Wooden flutes are popular among musicians because of their unique sound and versatility. Whether you are a beginner or an experienced musician, playing the wooden flute can be a great way to express your creativity and connect with others through music.
To begin playing the wooden flute, you will first need to learn how to hold the instrument properly. The left hand should be closest to the mouth hole, whether you are right-handed or left-handed. The flute should point to your right with open finger holes. Position the mouth hole edge against the lower lip’s center. Once you have the proper grip, you can start practicing the basic techniques of playing the wooden flute, such as producing sound and changing notes.
In this article, we will provide you with a comprehensive guide on how to play the wooden flute. We will cover the basics of holding the instrument, producing sound, and changing notes. Additionally, we will provide you with some tips and tricks to help you improve your playing skills. Whether you are a beginner or an experienced musician, this guide will help you take your wooden flute playing to the next level.
If you’re interested in playing the wooden flute, it’s important to understand the history and different types of wooden flutes available. Here are some key things to keep in mind:
The wooden flute has been around for centuries and has been used in various cultures around the world. In Europe, wooden flutes were commonly used during the Baroque and Classical periods. The flute was also popular in traditional Irish and Scottish music.
The wooden flute is made of wood, which gives it a unique sound. Different types of wood can be used to create different sounds and tones. Some of the most popular woods used for wooden flutes include African Blackwood, Boxwood, and Rosewood.
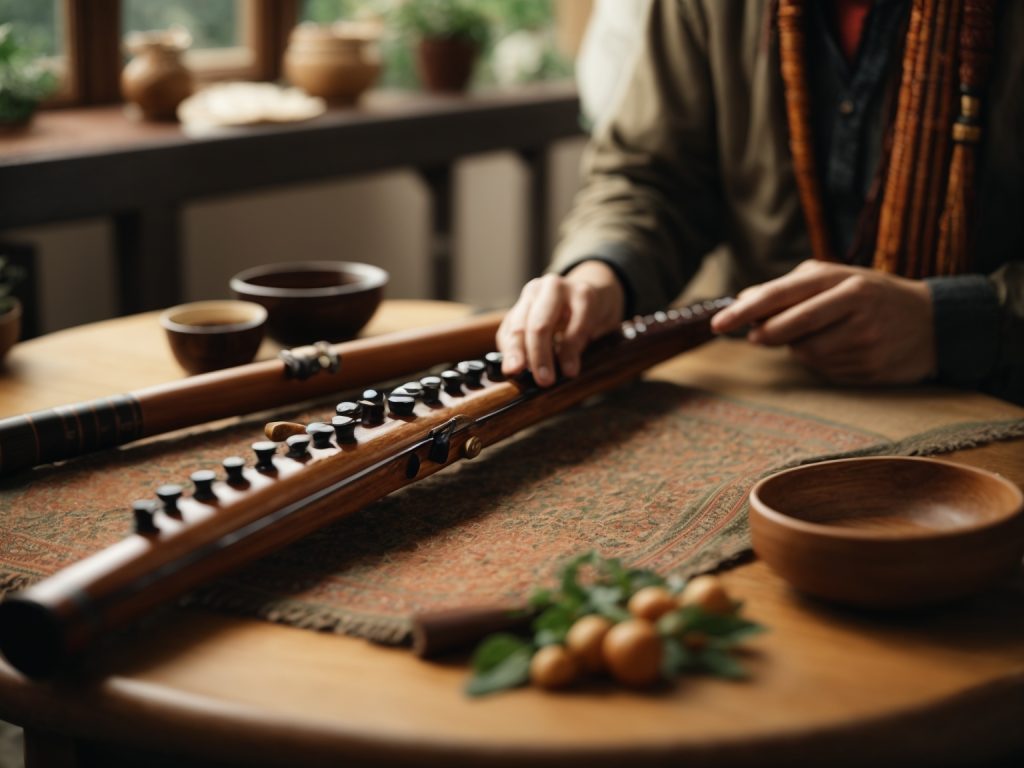
There are two main types of wooden flutes: end-blown and side-blown. End-blown flutes are played by blowing into the end of the flute, while side-blown flutes are played by blowing into a hole on the side of the flute.
One popular type of end-blown wooden flute is the Native American flute. This type of flute has a long history and is commonly used in Native American music and culture.
Side-blown wooden flutes come in a variety of shapes and sizes. One popular type is the Irish flute, which is commonly used in traditional Irish music. The Irish flute is typically made of wood and has six finger holes and a blow hole.
No matter what type of wooden flute you choose, it’s important to practice regularly and learn proper techniques to produce the best sound possible.
Learning to play the wooden flute requires some basic techniques that you need to master. These techniques include holding the flute, blowing techniques, and finger placement. Here’s what you need to know:
The first thing you need to learn is how to hold the flute properly. Hold the flute with your left hand closest to the mouth hole, whether you are right-handed or left-handed. The flute should point to your right with open finger holes. Position the mouth hole edge against the lower lip’s center. Use your right hand to hold the end of the flute. Keep your elbows relaxed and close to your sides.
To make a sound on the wooden flute, you need to blow air across the mouth hole. Start by placing your lips over the hole and blowing a steady stream of air. Adjust the angle of your lips until you hear a clear tone. You can also experiment with different amounts of air pressure to produce different sounds. Practice blowing until you can produce a clear, sustained tone.
Once you can produce a clear tone, the next step is to start learning some basic finger techniques for playing notes. The fingers of your left hand are positioned on top of the holes, while the right hand holds the end of the flute. Each finger represents a different note, and by covering or uncovering the holes with your fingers, you can produce different pitches. Use a fingering chart to help you learn the different finger positions for each note.
In summary, mastering the basic techniques of holding the flute, blowing techniques, and finger placement is essential for learning to play the wooden flute. Practice these techniques regularly to improve your skills and become a proficient player.
Learning to read flute sheet music is an essential skill for any flutist. It allows you to play a wide range of music and communicate with other musicians. In this section, we will cover the basics of reading flute sheet music.
Musical notation is a system of symbols and markings that represent musical sounds and rhythms. The most basic element of musical notation is the staff. The staff is made up of five horizontal lines and four spaces between them. Each line and space represents a different pitch.
Flute sheet music is written on the treble clef staff, which is the top staff on a piece of sheet music. The notes on the staff indicate which pitch to play on the flute. The higher the note on the staff, the higher the pitch.
In addition to the notes on the staff, flute sheet music also includes symbols that indicate how to play the notes. Here are some common symbols you will see in flute sheet music:
By understanding these symbols and markings, you will be able to read and interpret flute sheet music with ease. Practice reading sheet music regularly to improve your skills and become a better flutist.

To become proficient at playing the wooden flute, you need to practice your scales and notes regularly. This will help you to develop your finger placement, breath control, and tone quality. Here are some tips to help you practice your scales and notes effectively:
By practicing your scales and notes regularly, you will develop the muscle memory and technique necessary to become a skilled wooden flute player. Remember to take your time and focus on accuracy and tone quality rather than speed. With practice and dedication, you will be able to play beautiful music on your wooden flute.
Playing simple tunes on a wooden flute can be a great way to start your musical journey. With a little bit of practice, you can quickly learn to play some popular melodies and impress your friends and family. Here are some tips to help you get started:
When you’re just starting out, it’s best to stick with simple tunes that you already know. This will help you get a feel for the instrument and build your confidence. Some popular songs to start with include “Twinkle, Twinkle, Little Star,” “Mary Had a Little Lamb,” and “Row, Row, Row Your Boat.”
Before you can start playing songs, you need to master the basics of playing the wooden flute. This includes learning proper finger placement, breath control, and posture. Make sure you practice these techniques regularly to build your skills.
Sheet music can be a great resource when you’re learning to play the wooden flute. Look for simple sheet music for the songs you want to play, and practice playing along with the notes. This will help you learn the melody and timing of the song.
Another great way to learn how to play simple tunes on the wooden flute is to play along with recordings of the songs. This will help you get a feel for the rhythm and tempo of the music. You can find recordings of popular songs on YouTube or in music stores.
Like any skill, playing the wooden flute takes practice. Make sure you set aside time each day to practice playing simple tunes. This will help you build your skills and improve your technique over time.
By following these tips, you can quickly learn to play simple tunes on the wooden flute. Remember to be patient and practice regularly, and you’ll be playing your favorite songs in no time!
Once you’ve mastered the basics of playing the wooden flute, it’s time to move on to more advanced techniques. In this section, we’ll cover some of the most common advanced techniques, including vibrato, staccato and legato, and trills and slurs.
Vibrato is a technique that involves creating a vibrating sound by rapidly altering the pitch of the note being played. To produce vibrato on the wooden flute, you’ll need to use your diaphragm and throat muscles to control the airflow and pitch of the note.
To practice vibrato, start by playing a sustained note and then gradually increase and decrease the pitch of the note by moving your diaphragm and throat muscles. As you get more comfortable with the technique, try experimenting with different speeds and intensities to create different effects.
Staccato and legato are two techniques used to create different articulations and phrasing in your playing. Staccato involves playing short, detached notes, while legato involves playing long, connected notes.
To play staccato on the wooden flute, you’ll need to use a sharp, quick tonguing technique to create a crisp, clean sound. To play legato, you’ll need to focus on creating a smooth, connected sound by using a gentle, flowing tonguing technique.
Trills and slurs are two techniques used to create ornamentation and embellishments in your playing. A trill involves rapidly alternating between two adjacent notes, while a slur involves smoothly transitioning between two or more notes without tonguing.
To practice trills, start by playing two adjacent notes and then rapidly alternate between them, gradually increasing the speed and intensity as you get more comfortable with the technique. To practice slurs, start by playing two or more notes in a smooth, connected manner, focusing on creating a seamless transition between each note.
Remember, mastering advanced techniques on the wooden flute takes time and practice. Take your time, be patient, and don’t be afraid to experiment and try new things to find your own unique style and sound.
If you want to keep your wooden flute in good condition, it’s important to take proper care of it. Here are some tips to help you maintain your wooden flute.
Cleaning your wooden flute is an important part of maintenance. Here are some steps to follow when cleaning your flute:
Proper storage is also important for maintaining your wooden flute. Here are some tips for storing your flute:
By following these tips, you can help ensure that your wooden flute stays in good condition for years to come.
Learning to play the wooden flute can be a challenging but rewarding experience. Finding a good flute teacher or class can make all the difference in your progress and enjoyment. Here are some tips to help you find the right flute teacher or class for you:
When choosing a flute teacher or class, it’s important to consider your goals, learning style, and budget. Be sure to ask about the teacher’s qualifications, experience, and teaching style before committing to lessons. With the right teacher or class, you can develop your skills and achieve your musical goals.

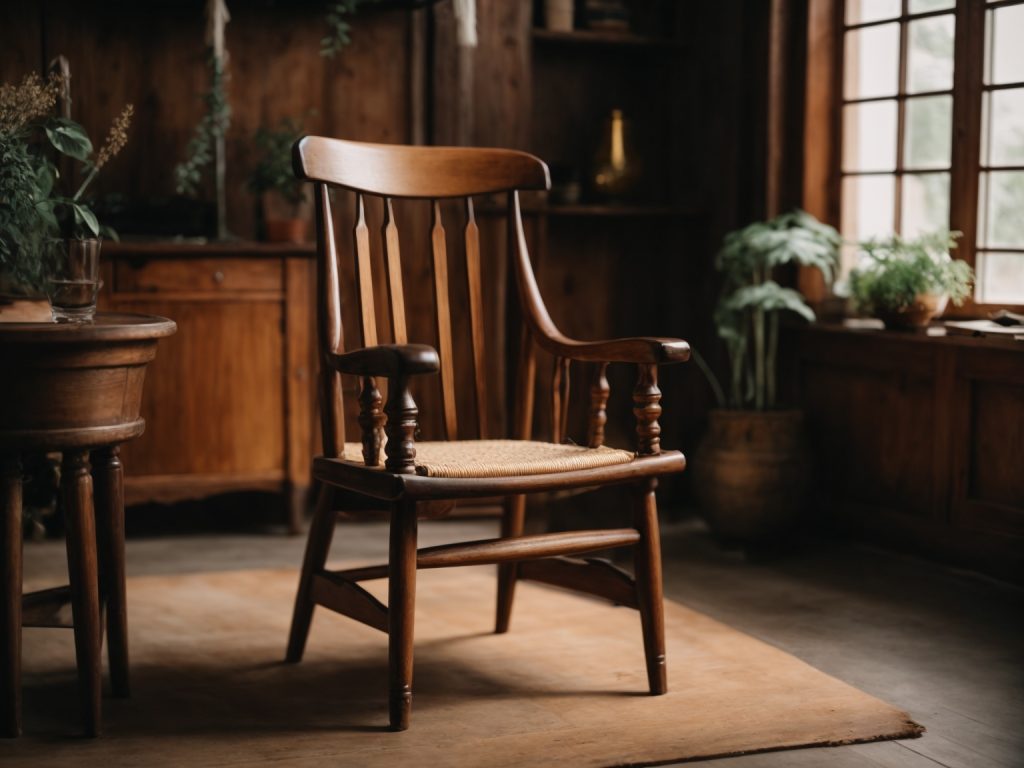
Making a wooden chair can be a fun and rewarding experience. Not only will you have a functional piece of furniture, but you will also have the satisfaction of knowing that you made it yourself. Whether you are an experienced woodworker or a beginner, building a wooden chair is a great project to take on.
Before you start building your chair, it’s important to have a plan. You can find plans online or in woodworking books and magazines. Make sure to choose a plan that matches your skill level and the tools you have available. Once you have your plan, gather all the necessary materials and tools. You will need wood, screws, glue, clamps, a saw, a drill, and sandpaper, among other things.
Building a wooden chair can be a time-consuming process, but it’s important to take your time and work carefully. Make sure to measure twice and cut once, and always follow the instructions in your plan. With a little patience and effort, you can create a beautiful and functional piece of furniture that you will be proud to use and display in your home.
Woodworking is a rewarding hobby that allows you to create beautiful and functional pieces of furniture. If you’re interested in making a wooden chair, it’s important to understand the basics of woodworking before you get started.
The first step in making a wooden chair is to choose the right wood. Hardwoods like maple, oak, and cherry are ideal for furniture-making because they are durable and can be finished to a high shine. Softwoods like pine and cedar can also be used, but they are more prone to dents and scratches.
When selecting wood, look for boards that are straight and free of knots or other defects. You should also consider the grain pattern and color of the wood, as these can affect the appearance of your finished chair.
To make a wooden chair, you will need a variety of tools. Some of the essential tools include:
You will also need sandpaper, wood glue, and finishing materials like stain or varnish.
Before you start using any of these tools, it’s important to read the manufacturer’s instructions and take appropriate safety measures.
Working with woodworking tools can be dangerous if you’re not careful. To protect yourself, you should wear safety glasses, ear protection, and a dust mask. You should also avoid wearing loose clothing or jewelry that could get caught in the machinery.
When using power tools like saws and routers, make sure the blades are sharp and properly adjusted. Always keep your hands away from the blades and use push sticks or other tools to guide the wood through the machine.
By understanding the basics of woodworking and taking appropriate safety measures, you can create a beautiful and functional wooden chair that will last for years to come.
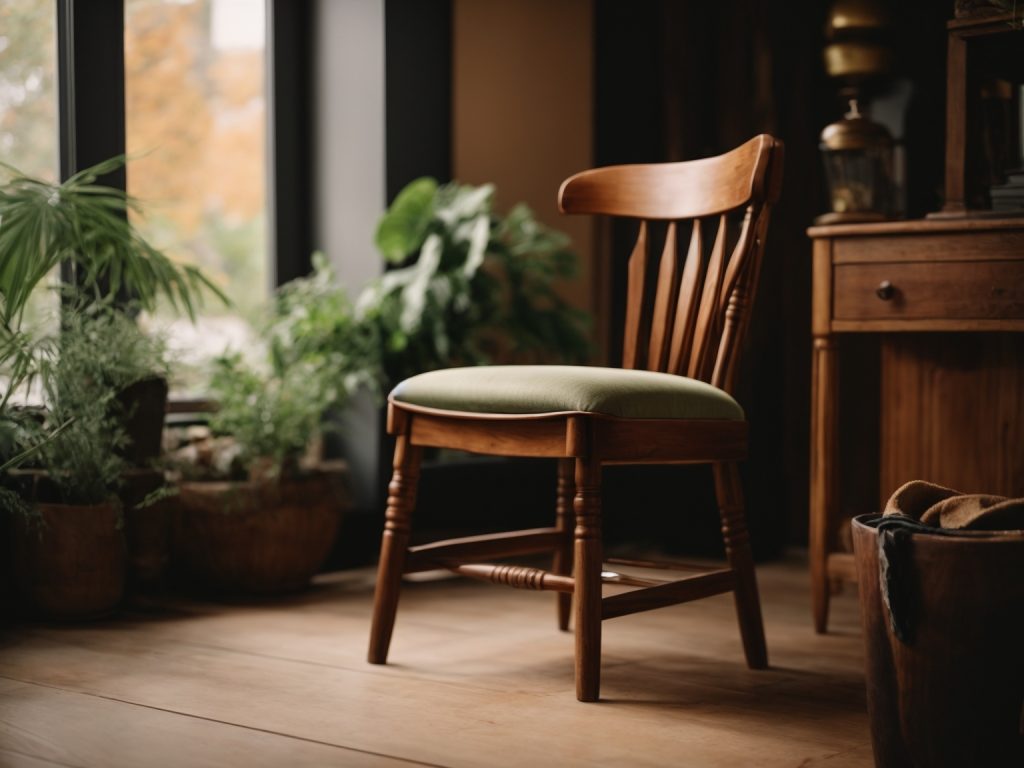
When it comes to designing your wooden chair, there are a few things to consider to ensure that your final product is both functional and visually appealing. Here are two sub-sections to help you get started:
Before you start building your wooden chair, it’s important to sketch out a blueprint of your design. This will help you visualize your final product and make any necessary adjustments before you start cutting your wood.
When sketching your blueprint, consider the overall style of your chair. Do you want a modern or traditional design? Will your chair have a backrest or armrests? These are all important factors to consider when designing your chair.
Once you have a rough sketch of your design, you’ll need to decide on the dimensions of your chair. This includes the height, width, and depth of your seat, as well as the height and angle of your backrest.
When deciding on your dimensions, consider the average size of the person who will be using the chair. You’ll want to make sure that your chair is comfortable and supportive for the user.
It’s also important to consider the type of wood you’ll be using when deciding on your dimensions. Different types of wood have different strengths and weaknesses, so you’ll need to choose a wood that can support the weight and size of your chair.
By sketching a blueprint and deciding on your dimensions, you’ll be well on your way to designing a wooden chair that is both functional and visually appealing.
Before you start making a wooden chair, it is important to properly prepare the wood. This will ensure that your chair is strong, durable, and looks great. In this section, we will cover the two main steps for preparing the wood: cutting and sanding.
The first step in preparing the wood is to cut it to the correct size and shape. You will need to use a saw to cut the wood into the appropriate pieces for your chair. Make sure to measure and mark the wood carefully before cutting it to avoid mistakes.
When cutting the wood, it is important to use the correct type of saw for the job. A hand saw or a circular saw can be used for most cuts, but a jigsaw may be necessary for more intricate cuts or curves.
Once the wood is cut to the correct size and shape, the next step is to sand it. Sanding the wood will smooth out any rough edges and prepare it for finishing. Start with a coarse grit sandpaper and work your way up to a finer grit for a smooth finish.
When sanding the wood, it is important to sand with the grain of the wood. Sanding against the grain can cause scratches and damage to the wood. Use a sanding block or a power sander for larger pieces of wood to make the job easier.
In conclusion, preparing the wood is an important step in making a wooden chair. By cutting the wood to the correct size and shape and sanding it properly, you will ensure that your chair is strong, durable, and looks great.
Now that you have all the pieces cut and sanded, it’s time to start assembling the chair. Begin by laying out all the pieces and checking that you have everything you need. You will need wood glue, clamps, and screws.
Start by gluing the joints together. Apply a generous amount of wood glue to the joints and use clamps to hold them in place. Make sure to wipe off any excess glue with a damp cloth. Let the glue dry completely, which usually takes about 24 hours.
Once the glue has dried, you can start screwing the pieces together. Use a drill with a screwdriver bit to attach the pieces together. Make sure to pre-drill the holes to prevent the wood from splitting.
After you have screwed all the pieces together, it’s time to secure the structure. You want to make sure that the chair is sturdy and will not wobble.
To do this, you can add corner braces to the chair. These are small metal brackets that you can attach to the corners of the chair. They will help to reinforce the structure and prevent it from wobbling.
Another option is to add dowels to the joints. These are small wooden pegs that you can insert into the joints to add extra strength. To do this, you will need to drill holes into the joints and then insert the dowels.
Once you have secured the structure, you can sand the chair to remove any rough edges and apply a finish. You can use a stain or paint to give the chair the look you want.
Congratulations! You have successfully assembled your wooden chair.
Now that you have completed building your wooden chair, it’s time to give it a beautiful finish. Applying a wood finish will not only enhance the look of your chair but also protect it from moisture and wear. There are various types of wood finishes available, such as oil-based, water-based, and wax-based finishes. Choose the one that suits your chair and your preferences.
Before applying the finish, make sure the chair is clean and free of dust. Sand the chair lightly with fine-grit sandpaper to smooth out any rough spots. Apply the finish with a brush or a cloth, following the manufacturer’s instructions. Let the finish dry completely before applying a second coat. Repeat the process until you achieve the desired finish.
Once the finish has dried, you can polish your chair to give it a shiny and smooth appearance. Polishing also helps to protect the finish and make it more durable. There are various polishing products available, such as paste wax, liquid wax, and oil-based polishes.
To polish your chair, apply a small amount of polish to a soft cloth and rub it onto the surface of the chair in a circular motion. Make sure to cover the entire surface evenly. Let the polish dry for a few minutes, then buff the chair with a clean cloth to remove any excess polish.
Remember to polish your chair regularly to maintain its shine and protect the finish. Avoid using abrasive cleaners or harsh chemicals that can damage the finish. With proper care and maintenance, your wooden chair will last for many years to come.

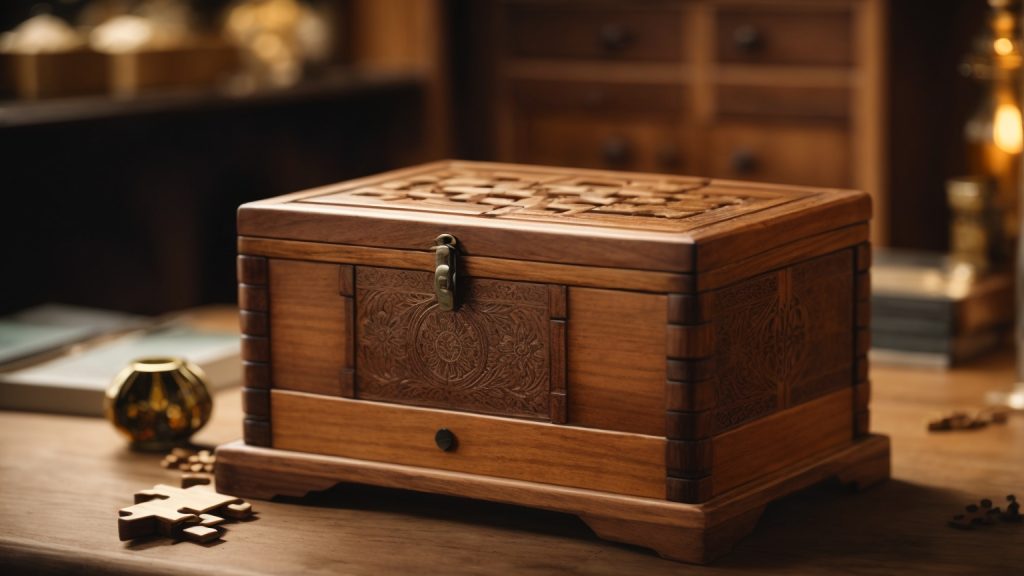
Opening a wooden puzzle box can be a challenging yet rewarding experience. These intricate boxes are designed to keep their contents hidden and require a series of steps to unlock them. If you’re new to puzzle boxes, it can be intimidating to know where to start. In this article, we’ll provide you with some tips and tricks to help you open your wooden puzzle box.
The first step in opening a wooden puzzle box is to examine the box carefully. Look for any visible clues or markings that may indicate how to open it. Some boxes may have small notches or protruding pieces of wood that can be used to unlock them. Others may require a specific sequence of movements or actions to unlock them. By examining the box, you can get a better idea of how to proceed.
Once you have examined the box, it’s time to start trying different techniques to open it. There are several methods you can use, such as pressing, sliding, and jiggling. Each box is unique, so it’s important to be patient and try different approaches until you find the right one. Don’t be discouraged if it takes some time to open the box – the satisfaction of finally unlocking it will be worth it in the end.

Wooden puzzle boxes are a type of mechanical puzzle that requires a series of moves to open. They come in different shapes, sizes, and designs, but they all have one thing in common: they are meant to be challenging and fun to solve. If you’re new to wooden puzzle boxes, here’s what you need to know to get started.
There are many types of wooden puzzle boxes, but they can be broadly categorized into two groups: traditional and modern. Traditional puzzle boxes are usually made in Japan and have a long history of craftsmanship and design. They often feature intricate patterns and hidden compartments that require a series of moves to unlock. Modern puzzle boxes, on the other hand, are made all over the world and come in a variety of designs and difficulty levels. They may have hidden panels, sliding mechanisms, or other types of locks that require a combination of moves to open.
To solve a wooden puzzle box, it’s helpful to understand its anatomy. Most puzzle boxes have a lid, a base, and one or more walls that surround the inner compartment. The walls may have different shapes and sizes, and they may be fixed or moveable. Some puzzle boxes also have knobs, keys, or other types of locks that need to be manipulated to unlock the box. Understanding how the different parts of the puzzle box work together is key to solving it.
Here are a few tips to keep in mind when solving a wooden puzzle box:
With these tips and a little bit of practice, you’ll be able to solve wooden puzzle boxes like a pro.
Before attempting to open a wooden puzzle box, it is important to gather the necessary tools and examine the box thoroughly.
To successfully open a wooden puzzle box, you will need the following tools:
While some puzzle boxes may require additional tools, these basic items should be sufficient for most wooden puzzle boxes.
Before attempting to open the puzzle box, take a few moments to examine it closely. Look for any markings or clues that may indicate how to open it. Pay attention to the number of wooden beams circling the outside of the box, as this can provide important information about the opening process.
If the box has any visible seams or gaps, try gently pressing or sliding the pieces to see if they move. If the box has any visible buttons or knobs, try pressing or twisting them to see if they trigger any movements.
Remember to approach the puzzle box with a clear mind and a gentle touch. Rushing or using excessive force can damage the box and make it even more difficult to open.
When you first get your wooden puzzle box, it might seem like an impossible task to open it. However, with a little bit of patience and some careful observation, you can figure out how to unlock the secrets within. Here are some steps to follow:
The first step to opening a wooden puzzle box is to identify any marks or symbols that might be on the box. These could be anything from small notches or grooves to intricate designs or patterns. Take a close look at the box from all angles, and try to identify any markings that might be important.
Once you have identified any marks or symbols, the next step is to apply gentle force to the box. This could involve pushing, pulling, twisting, or sliding different parts of the box. Be careful not to use too much force, as this could damage the box or break any delicate mechanisms inside.
If you are having trouble opening the box with your hands alone, you may need to use some tools to help you. Some common tools that can be useful for opening wooden puzzle boxes include:
Remember to use these tools carefully and gently, and only use them if you are confident that you know what you are doing.
With these steps in mind, you should be well on your way to unlocking the secrets of your wooden puzzle box. Remember to be patient, take your time, and enjoy the process of discovering what lies inside!
When it comes to opening a wooden puzzle box, there can be a few common challenges that you might face. In this section, we’ll go over some of these challenges and how you can overcome them.
One of the most common challenges that people face when trying to open a wooden puzzle box is that some of the pieces might get stuck. This can happen if the box has been sitting for a long time or if it hasn’t been properly maintained.
To overcome this challenge, you can try using a small amount of lubricant on the pieces. You can also try gently tapping the box on a flat surface to loosen any stuck pieces. If these methods don’t work, you might need to disassemble the box and reassemble it, making sure that all the pieces are properly aligned.
Another challenge that you might face when trying to open a wooden puzzle box is that there could be hidden compartments that you’re not aware of. These compartments can be tricky to find, and if you don’t know where they are, you might not be able to fully open the box.
To overcome this challenge, you can try examining the box closely and looking for any seams or gaps that might indicate the presence of a hidden compartment. You can also try gently pressing and sliding different parts of the box to see if anything moves or shifts. If all else fails, you can try searching online for information about the specific type of puzzle box you have, as there might be clues or hints available that can help you find any hidden compartments.
When attempting to open a wooden puzzle box, it is important to take certain safety measures to avoid any potential injuries. This section will outline a few safety precautions to keep in mind while working on your puzzle box.
One of the most important safety measures to keep in mind is to avoid using forceful actions while attempting to open the puzzle box. If you try to force the box open, you risk damaging the box or injuring yourself. Instead, take a step back and analyze the box and its components before attempting to open it.
Some puzzle boxes may require the use of sharp tools, such as knives or screwdrivers, to open them. It is important to handle these tools with care and to use them only as instructed. Always keep your fingers and other body parts away from the sharp edges of the tools to avoid any potential injuries.
If you are not comfortable using sharp tools, it is recommended that you seek the help of a professional or someone with experience in opening puzzle boxes.
By following these simple safety measures, you can ensure that your experience with opening a wooden puzzle box is both fun and safe.
Opening a wooden puzzle box can be a frustrating experience, especially if you are new to it. However, it is important to remember that patience is key. Rushing through the process or forcing the box open can damage it and make it even harder to solve. Take your time and approach the puzzle methodically. Try different techniques and motions until you find the right combination that unlocks the box. With patience, you will eventually solve the puzzle and feel a sense of satisfaction.
Like any skill, opening wooden puzzle boxes requires practice. The more puzzles you solve, the better you will become at recognizing patterns and identifying key motions. Start with simpler puzzles and work your way up to more complex ones. Take notes on the techniques you used to solve each puzzle and refer back to them when you encounter a similar puzzle in the future. With practice, you will become a puzzle box master.
Here are some additional tips to keep in mind:

Are you tired of spending a lot of money on a bed frame that doesn’t fit your style or budget? Building your own wooden bed frame can be a fun and rewarding DIY project that will save you money and allow you to customize it to your liking. In this article, we’ll show you how to build a wooden bed frame that fits your mattress size and style.
Before you start building your wooden bed frame, it’s important to decide on the size and style you want. You can build a DIY wooden bed frame of any size by scaling the measurements to suit your mattress. You’ll also want to consider the style of your bed frame, whether you want a rustic, modern, or traditional look. Once you have your design in mind, you can start gathering the materials and tools you’ll need to get started.
Building a wooden bed frame may seem intimidating, but with the right tools and materials, it can be a fun and easy project. In the following sections, we’ll provide step-by-step instructions on how to build a wooden bed frame that fits your mattress size and style. So, grab your tools and let’s get started!
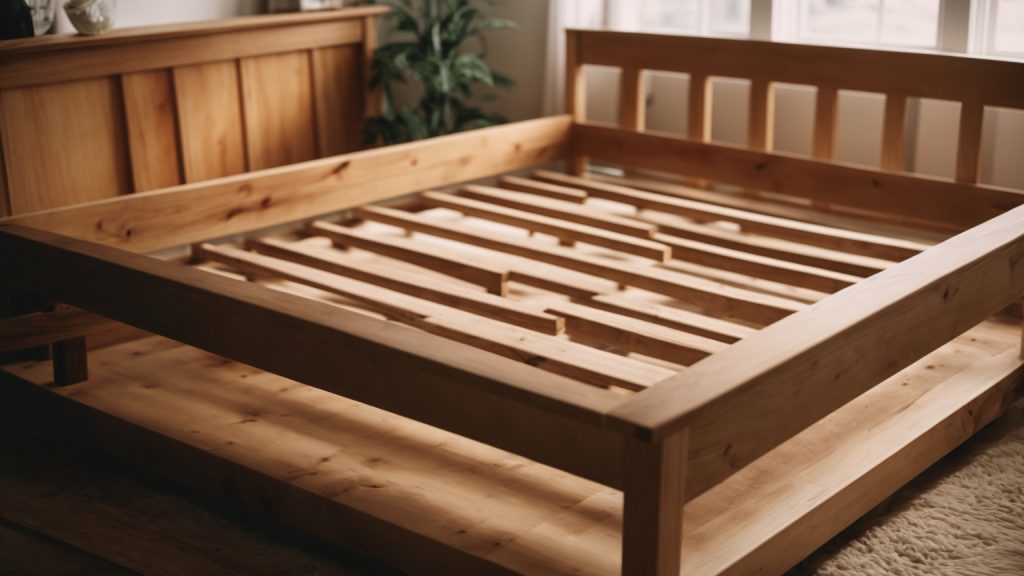
When it comes to building a wooden bed frame, there are a few basics you should understand before getting started. In this section, we’ll cover the types of wood you can use and the different bed frame sizes available.
The type of wood you choose for your bed frame will affect both its appearance and durability. Here are some common types of wood used for bed frames:
Before you start building your bed frame, you’ll need to know what size mattress it will be supporting. Here are the standard bed frame sizes:
Keep in mind that these are just the standard sizes – you can also build a custom bed frame to fit a non-standard mattress size.
Now that you understand the basics of wood types and bed frame sizes, you’re ready to start building your own DIY wooden bed frame.
When it comes to building a wooden bed frame, you need to have the right tools and materials to ensure a sturdy and durable finished product. Below, we’ll go over the key items you’ll need to get started.
Before you start building, it’s important to have the right tools on hand. Here are some of the essential tools you’ll need for this project:
Having these tools will make the process much easier and ensure that your bed frame is built to last.
The quality of the wood you choose will have a big impact on the strength and durability of your bed frame. Here are some tips for selecting the right wood:
In addition to the tools and wood, there are a few other materials you’ll need to complete the project:
Having these materials on hand will ensure that you can complete the project without any delays or hiccups.
When it comes to building a wooden bed frame, the design is an important aspect to consider. A well-designed bed frame can not only add a personal touch to your bedroom but also ensure that it is functional and comfortable to sleep on. In this section, we will discuss how to sketch the design and determine the dimensions of your bed frame.
Before you start building your bed frame, it’s important to sketch out the design to get an idea of what you want it to look like. You can use a pen and paper or a digital tool to create a rough sketch. Here are some things to consider when sketching your bed frame design:
Once you have a rough sketch, you can start making adjustments until you are satisfied with the design.
After you have sketched out the design of your bed frame, the next step is to determine the dimensions. The dimensions will depend on the size of your mattress and the style of your bed frame. Here are some standard mattress sizes to consider:
You will need to add a few inches to the dimensions of your mattress to ensure that it fits comfortably on the bed frame. For example, if you have a queen-size mattress that is 60″ x 80″, you may want to add a few inches to the length and width to make it 63″ x 83″.
When determining the dimensions of your bed frame, you should also consider the height of the bed. A standard bed height is around 25 inches from the floor to the top of the mattress. However, you can adjust the height to fit your needs and preferences.
By sketching the design and determining the dimensions of your bed frame, you can ensure that it is both functional and aesthetically pleasing.
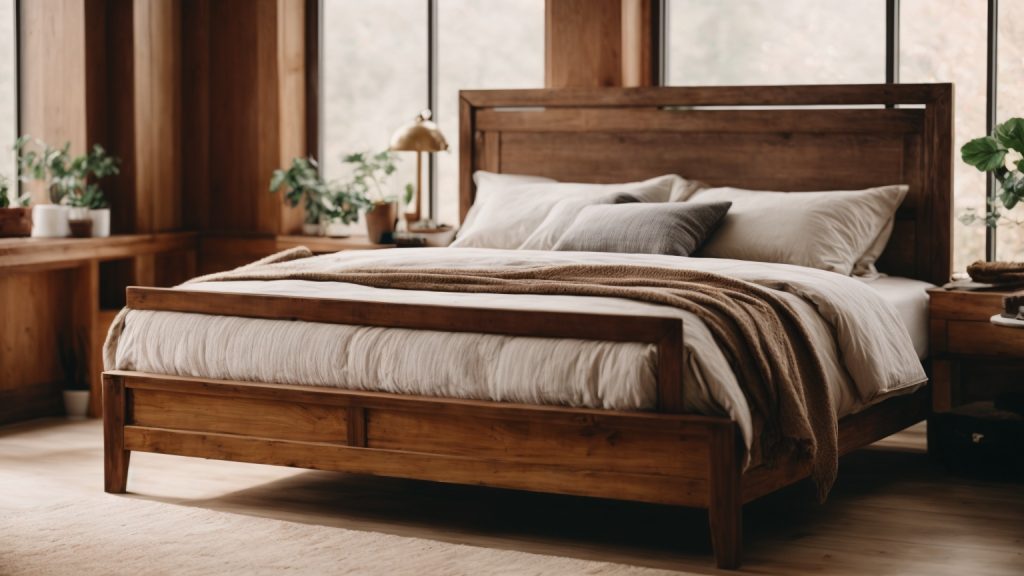
Building a wooden bed frame can be a fun and rewarding DIY project. With the right tools and materials, you can create a sturdy and stylish bed frame that will last for years to come. In this section, we’ll walk you through the process of building a basic wooden bed frame, from preparing the wood to adding the slats.
Before you can start building your bed frame, you’ll need to prepare your wood. You can use either hardwood or softwood, depending on your preference and budget. Hardwood is more durable but also more expensive, while softwood is more affordable but less durable.
To prepare your wood, you’ll need to cut it to the appropriate lengths and widths. The dimensions will depend on the size of your bed frame. For a queen-sized bed frame, you’ll need two long pieces of wood (80 inches) and two shorter pieces (60 inches).
Once you’ve cut your wood to the right size, you’ll need to sand it down to remove any rough edges or splinters. Sanding will also help the wood absorb stain or paint more evenly.
To assemble the frame, you’ll need to use bed rail hangers and wood screws. First, attach the bed rail hangers to the headboard and footboard using wood screws. Then, attach the side rails to the bed rail hangers using more wood screws.
Make sure to measure and mark where the bed rail hangers should be placed before attaching them. This will ensure that your bed frame is the right size for your mattress.
Finally, you’ll need to add slats to the bed frame to support your mattress. You can use either solid wood slats or plywood slats, depending on your preference and budget.
To add the slats, simply lay them across the bed frame and attach them using wood screws. Make sure to space the slats evenly to provide even support for your mattress.
And that’s it! With these simple steps, you can build a sturdy and stylish wooden bed frame that will provide a comfortable and supportive base for your mattress.
Once you have completed building your wooden bed frame, it’s time to give it a finishing touch. This will not only enhance the appearance of your bed frame but also protect it from wear and tear. In this section, we will discuss the two main steps for finishing your wooden bed frame: sanding the wood and applying a finish.
Before applying any finish, it’s essential to sand the wood to create a smooth surface. This will ensure that the finish adheres well to the wood and gives it a polished look. Here are the steps to follow when sanding your wooden bed frame:
Once you have sanded the wood, it’s time to apply a finish. There are several options to choose from, including paint, stain, and varnish. Here are some tips for applying a finish to your wooden bed frame:
By following these simple steps, you can give your wooden bed frame a beautiful and long-lasting finish.
When building a wooden bed frame, it is important to prioritize safety. Here are some safety precautions you should take to ensure a safe and successful project.
Before using any tools, make sure you read the manufacturer’s instructions and safety guidelines. Always wear appropriate safety gear, such as goggles and a dust mask, when working with power tools. Keep your work area clean and organized to avoid tripping hazards.
When using a saw, make sure the blade is sharp and properly installed. Use a push stick to guide the wood through the saw and keep your fingers away from the blade. When using a drill, make sure the bit is securely fastened and the drill is set to the correct speed for the material you are drilling.
When building a bed frame, stability is key. Here are some tips to ensure your bed frame is stable and secure:
By following these safety precautions and ensuring bed frame stability, you can build a beautiful and safe wooden bed frame that will last for years to come.

If you’re looking to spruce up your entryway, building outdoor wooden steps is a great way to do it. Not only do they add visual appeal, but they also provide a safe and sturdy way to access your home. However, building outdoor wooden steps can seem like a daunting task, especially if you’re not a seasoned DIYer. But fear not, with the right tools and a little know-how, you can build beautiful and functional outdoor wooden steps in no time.
Before you get started, it’s important to prepare the area where the steps will be located. This involves removing any shrubs or plants from the spot and leveling the ground. You’ll also need to build up low spots with fill dirt so that the area slopes away from the house. Once the area is prepped, it’s time to start building the steps. There are a few different methods you can use, depending on your skill level and the design you’re going for. In this article, we’ll cover the basics of building outdoor wooden steps, so you can tackle this project with confidence.

If you’re looking to add some charm to your outdoor space, building wooden steps is a great way to do so. Not only do they provide functionality, but they can also enhance the look of your home. In this section, we’ll cover the basics of building outdoor wooden steps.
Before you start building, make sure you have all the necessary materials. Here’s a list of what you’ll need:
| Materials |
|---|
| Pressure-treated lumber |
| Gravel |
| Concrete |
| Wood screws |
| Wood glue |
| Stain or paint |
Pressure-treated lumber is the best type of wood to use for outdoor steps because it’s resistant to rot and decay. Gravel and concrete will be used to create a stable foundation for the steps. Wood screws and glue will be used to secure the steps together. Finally, you’ll need stain or paint to protect the wood from the elements.
In addition to the materials, you’ll need a few tools to complete the project. Here’s a list of what you’ll need:
The circular saw and jigsaw will be used to cut the lumber to the appropriate size and shape. The hammer and drill will be used to attach the steps together. The level, tape measure, and square will be used to ensure the steps are level and square. The shovel and wheelbarrow will be used to move the gravel and concrete. Finally, safety glasses and work gloves are essential for protecting your eyes and hands during the construction process.
Now that you have an idea of what materials and tools you’ll need, let’s move on to the next section to learn how to prepare the area for building the steps.
Before starting to build outdoor wooden steps, you need to prepare the site properly. Here are the steps you should follow:
The first thing you need to do is choose the location where you want to build your outdoor wooden steps. It could be alongside the house, a porch, or a deck. Make sure to choose a location that is safe and easy to access.
Once you have chosen the location, you need to clear the area of any shrubs, plants, or debris. This will ensure that you have a clear and level area to work with. Use a shovel or a rake to remove any debris and level the ground.
If the area where you want to build your outdoor wooden steps is not level, you need to build up the low spots with fill dirt. This will ensure that the area slopes away from the house and prevent water from accumulating around the steps.
Use a measuring tape and stakes to mark the location where you want to build your outdoor wooden steps. This will help you to ensure that the steps are level and evenly spaced.
Before you start digging, make sure to check for any utility lines such as gas, water, or electricity. You can call your local utility company to request a free utility locate service.
By following these steps, you can prepare the site properly for building your outdoor wooden steps.
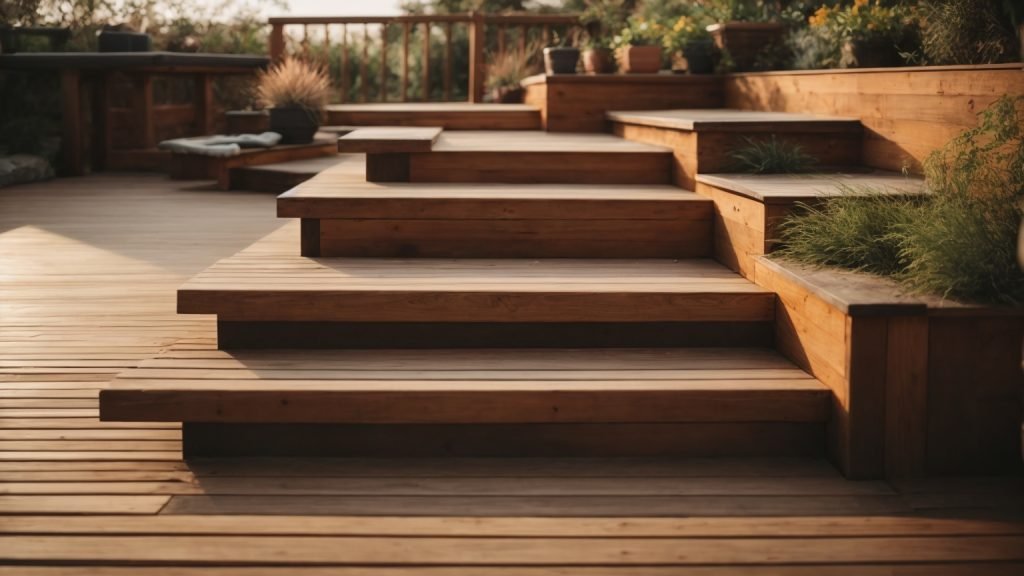
Before you start building your outdoor wooden steps, it’s important to consider the design of your steps. Here are a few things to keep in mind when designing your steps:
The size and height of your steps are essential for both safety and comfort. The general rule of thumb is that each step should be no higher than 7.5 inches and no deeper than 11 inches. If your steps are too steep or too shallow, it can make it difficult to climb up or down the stairs.
The number of steps you need will depend on the height of your deck or porch. To determine the number of steps you need, divide the height of your deck or porch by the height of each step. For example, if your deck is 30 inches high and each step is 7.5 inches high, you will need four steps.
When it comes to building your outdoor wooden steps, you have several options for materials. Pressure-treated lumber is a popular choice because it is durable and weather-resistant. Cedar and redwood are also good choices because they are naturally resistant to decay and insects. If you want a more modern look, you can use metal or concrete for your steps.
The style of your outdoor wooden steps should match the style of your home and landscape. You can choose from a variety of styles, including straight, curved, or spiral. You can also add decorative elements, such as railings, to enhance the look of your steps.
By considering these factors, you can design outdoor wooden steps that are safe, comfortable, and aesthetically pleasing.
Once you have measured and marked the wooden pieces for your outdoor steps, it’s time to cut them. Here are some tips to make the cutting process easier and more efficient:
To cut wooden pieces for your steps, you will need a circular saw, a handsaw, or a jigsaw. A circular saw is the most efficient tool for cutting long pieces of wood, while a handsaw or a jigsaw is better for cutting shorter pieces or making angled cuts.
Make sure the saw blade is sharp and in good condition before you start cutting. A dull blade can cause the wood to splinter or burn, which will ruin the cut and may damage the saw.
Before you start cutting, double-check your measurements to make sure they are accurate. Measure twice, cut once is a good rule of thumb to follow to avoid wasting wood and time.
To make straight cuts, use a straightedge or a guide to keep the saw blade on track. You can use a piece of scrap wood as a guide or purchase a commercial saw guide.
If your steps require angled cuts, use a protractor or a bevel gauge to measure the angle accurately. Set the saw blade to the correct angle and make a test cut on a scrap piece of wood before cutting the actual piece.
After you have cut the wooden pieces, sand the cut edges to remove any rough spots or splinters. This will make the steps safer to use and give them a more finished look.
By following these tips, you can cut the wooden pieces for your outdoor steps accurately and efficiently.
Once you have completed the previous steps of preparing the area and cutting the stringers and treads, it’s time to assemble the steps. This is where you will put all the pieces together to create a sturdy and safe set of outdoor wooden steps. Here’s how to do it:
The first step in assembling your wooden steps is to join the stringers. Stringers are the diagonal pieces that support the treads and risers. To join the stringers, you will need to use a metal angle bracket. Here’s how to do it:
Once the stringers are joined, it’s time to attach the treads. Treads are the horizontal pieces that you step on when walking up or down the stairs. Here’s how to attach them:
It’s important to note that you should leave a gap of about 1/4 inch between each tread to allow for water drainage. You can use a piece of scrap wood as a spacer to ensure that the gap is consistent.
Once you have attached all of the treads, your outdoor wooden steps are complete! You can add a coat of sealant or paint to protect the wood and enhance its appearance. With proper maintenance, your wooden steps will provide safe and reliable access to your home for years to come.
Now that you have built your outdoor wooden steps, it is time to install them. Here are the steps to follow:
Congratulations! You have successfully built and installed your outdoor wooden steps. Enjoy your new entryway and the added curb appeal it brings to your home.
When building outdoor wooden steps, it’s important to prioritize safety to avoid accidents and injuries. Here are some safety measures you should keep in mind:
Before you start building, it’s important to wear the right protective gear. This includes safety glasses, gloves, and a dust mask. Safety glasses will protect your eyes from flying debris, while gloves will protect your hands from splinters and cuts. A dust mask will prevent you from inhaling sawdust and other particles that can cause respiratory problems.
Make sure to check the weather forecast before you start building. Avoid working on rainy or windy days, as this can make it difficult to handle tools and materials. Wet surfaces can also be slippery and hazardous, so make sure the ground is dry and stable before you start building.
Using the right tools is essential for safety and efficiency. Make sure to use sharp blades and bits, and keep your tools in good condition. Dull or damaged tools can cause accidents and injuries. Also, make sure to use the right tool for the job. Using the wrong tool can cause damage to your materials and increase the risk of accidents.
Make sure to follow building codes and regulations in your area. This will ensure that your steps are safe and up to code. Building codes may vary depending on your location, so make sure to check with your local authorities before you start building.
Building outdoor wooden steps can be a physically demanding task. Make sure to take breaks and stay hydrated to avoid exhaustion and fatigue. Stretching before and after working can also help prevent muscle strains and injuries.
By following these safety measures, you can ensure that your outdoor wooden steps are built safely and efficiently.
Once you’ve built your outdoor wooden steps, it’s important to maintain them to ensure they last as long as possible. Here are some tips for maintaining your wooden steps:
Regular cleaning is essential to keep your wooden steps looking good and to prevent the buildup of dirt and debris. You can use a broom to sweep away loose dirt and debris, and a stiff-bristled brush to scrub away any stubborn dirt or stains. You can also use a pressure washer on a low setting to clean your steps, but be careful not to use too much pressure as this can damage the wood.
Staining and sealing your wooden steps can help to protect them from the elements and prevent them from rotting. You should stain and seal your steps every 2-3 years, or as needed. Before applying stain or sealer, make sure your steps are clean and dry. You can use a brush or sprayer to apply the stain or sealer, and make sure to follow the manufacturer’s instructions.
If your wooden steps become damaged, it’s important to repair them as soon as possible. Small cracks or splits can be filled with wood filler, while larger damage may require replacing the affected boards. You should also check your steps regularly for signs of rot, and replace any rotting boards as needed.
There are also some preventative measures you can take to help maintain your wooden steps. For example, you can place mats or rugs on your steps to prevent dirt and debris from accumulating. You can also install a roof or awning over your steps to protect them from the elements.
By following these tips, you can help to ensure that your outdoor wooden steps remain safe, sturdy, and attractive for years to come.


