Rahasia Sukses Poker Online: Cara Ampuh Membaca Lawan di Fase Post-Flop
Di antara seluruh platform penyedia poker online terbaik, fase taruhan post-flop (setelah tiga kartu pertama dibuka) senantiasa diakui sebagai salah

Di antara seluruh platform penyedia poker online terbaik, fase taruhan post-flop (setelah tiga kartu pertama dibuka) senantiasa diakui sebagai salah


Refinishing a hardwood floor can give your home a fresh new look and increase its value. However, one of the biggest concerns homeowners have when considering this type of renovation is the cost. If you’re wondering how much it will cost to refinish a 2,000 square foot hardwood floor, you’ve come to the right place.
According to industry experts, the cost to refinish a 2,000 square foot hardwood floor can range from $3,000 to $7,000. The final cost will depend on a variety of factors, such as the condition of the floor, the type of wood, the extent of the damage, and the type of finish you choose. It’s important to note that these prices are just estimates, and the actual cost may be higher or lower depending on your specific situation.
Factors that can affect the cost of refinishing a hardwood floor include the level of sanding required, the type of finish you choose, and the amount of prep work needed. Some homeowners opt for a DIY approach to save money, but it’s important to note that refinishing a hardwood floor can be a time-consuming and labor-intensive process. Hiring a professional can ensure that the job is done properly and efficiently, but it will also add to the overall cost.

Hardwood floor refinishing is the process of sanding, staining, and sealing a hardwood floor to restore its original beauty. Over time, hardwood floors can become dull, scratched, and worn out due to foot traffic, pets, and furniture. Refinishing your hardwood floor can bring it back to life and make it look brand new again.
The process of hardwood floor refinishing involves several steps. First, the floor is sanded down to remove the old finish and any scratches or imperfections on the surface. Then, the floor is stained to achieve the desired color and tone. Finally, a protective sealant is applied to protect the floor from future damage.
Refinishing your hardwood floor has several benefits. First and foremost, it can improve the appearance of your home. A freshly refinished hardwood floor can make a room look brighter, cleaner, and more inviting. It can also increase the value of your home if you plan to sell it in the future.
In addition to aesthetic benefits, refinishing your hardwood floor can also help prolong its lifespan. The protective sealant applied during the refinishing process can help prevent scratches, dents, and other damage from occurring. This can save you money in the long run by reducing the need for costly repairs or replacements.
Overall, hardwood floor refinishing is a great investment for any homeowner looking to improve the appearance and durability of their hardwood floors. With the right tools and techniques, it is possible to refinish a 2,000 square foot hardwood floor at a reasonable cost.
When it comes to refinishing a hardwood floor, several factors can influence the overall cost of the project. Here are some essential cost factors you should consider before starting the refinishing process.
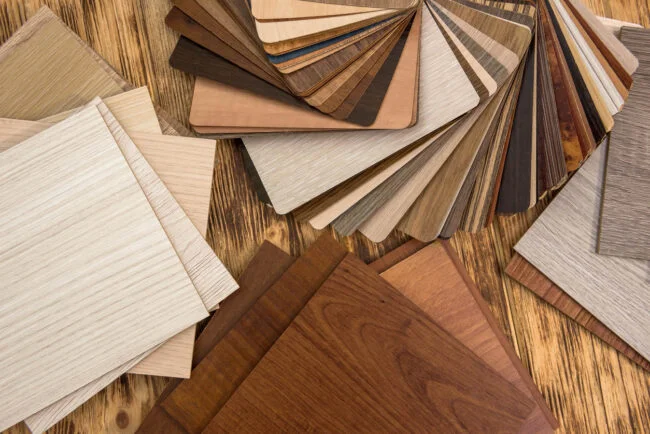
The type of hardwood you have can significantly affect the cost of refinishing. Some hardwoods are more difficult to work with than others, and therefore, require more time and effort to refinish. For instance, exotic hardwoods like Brazilian Cherry or Teak can be more challenging to sand and finish, which can increase the cost of refinishing.
The condition of your hardwood flooring is another significant cost factor. If the flooring has deep scratches, dents, or stains, it may require more extensive sanding and repair work, which can increase the overall cost of refinishing. On the other hand, if the flooring is in good condition, it may only require light sanding and a new coat of finish, which can be less expensive.
Geographical location can also affect the cost of refinishing a hardwood floor. In some areas, the cost of living is higher, which can increase the labor costs associated with the refinishing process. Additionally, some regions have more experienced and skilled hardwood flooring professionals, which can also impact the overall cost.
The level of finishing required is another critical cost factor. If you want a high-gloss finish, it may require more coats of finish and additional buffing, which can increase the cost. However, if you prefer a more natural look, it may only require a single coat of finish, which can be less expensive.
In summary, the cost of refinishing a 2,000 square foot hardwood floor can vary depending on several factors. By considering the type of hardwood, the condition of the flooring, your geographical location, and the level of finishing required, you can get a better idea of the overall cost of the project.

When it comes to refinishing a 2,000 square foot hardwood floor, the cost can vary depending on several factors. In this section, we’ll break down the average cost of refinishing a 2,000 square foot hardwood floor, including labor costs, material costs, and additional costs.
The cost of labor is typically the most significant expense when it comes to refinishing a hardwood floor. The labor cost for refinishing a 2,000 square foot hardwood floor can range from $2,500 to $5,000. The cost of labor will vary depending on the experience and expertise of the contractor, the location of the project, and the complexity of the job.
The material cost for refinishing a 2,000 square foot hardwood floor can range from $1,500 to $3,000. The cost of materials will depend on the type of finish you choose, the quality of the materials, and the size of the project. The most common materials used for refinishing hardwood floors include sandpaper, stain, polyurethane, and paint brushes.
In addition to labor and material costs, there may be additional costs associated with refinishing a 2,000 square foot hardwood floor. These costs may include:
It’s important to keep in mind that the cost of refinishing a 2,000 square foot hardwood floor can vary depending on your location, the contractor you hire, and the materials you choose. Be sure to get multiple quotes from different contractors and compare them to find the best deal for your project.
When it comes to refinishing a 2,000 square foot hardwood floor, there are a few cost comparison factors to consider. In this section, we’ll compare the cost of DIY vs professional refinishing and new installation vs refinishing.
One way to save money on refinishing a hardwood floor is to do it yourself. DIY refinishing costs around $600 to $1,100, according to HomeGuide. However, this option is only recommended for those with experience in woodworking and refinishing.
Professional refinishing, on the other hand, costs between $2 and $8 per square foot, depending on the location, type of finish, and condition of the floor. According to This Old House, a 2,000 square foot floor could cost between $4,800 and $16,000 for professional refinishing.
While DIY refinishing may seem like a cost-effective option, it’s important to consider the time and effort required to complete the project. Professional refinishing may be more expensive, but it ensures a high-quality finish and saves you the hassle of doing the work yourself.
Another cost comparison to consider is new installation vs refinishing. Installing a new hardwood floor can cost between $8 and $14 per square foot, according to HomeAdvisor. This means that a 2,000 square foot floor could cost between $16,000 and $28,000 to install.
Refinishing, on the other hand, costs between $2 and $8 per square foot, as mentioned earlier. Refinishing a 2,000 square foot floor could cost between $4,000 and $16,000.
While new installation may seem like a better option, refinishing can save you money and preserve the character and history of your existing hardwood floor. Refinishing also has a shorter timeline than new installation, as it can be completed in a few days compared to the weeks required for new installation.
In conclusion, both DIY and professional refinishing and new installation and refinishing have their pros and cons. It’s important to consider your budget, timeline, and desired outcome before making a decision.

Refinishing a 2,000 square foot hardwood floor can be a significant investment. However, there are ways to save on refinishing costs without compromising the quality of the work. Here are some tips to help you save money on your hardwood floor refinishing project.
The first step in saving on refinishing costs is to choose the right contractor. Look for a contractor who has experience in hardwood floor refinishing and has good reviews from previous customers. Ask for references and check them to ensure that the contractor is reliable and provides quality work.
Get multiple quotes from different contractors and compare their prices and services. Don’t simply choose the lowest bidder, as the quality of their work may not be up to par. Instead, choose a contractor who offers a fair price and provides a detailed breakdown of the costs involved in the project.
Hardwood floor finishes come in a variety of options, ranging from simple to complex. While complex finishes may look more attractive, they can also be more expensive. Opting for a simpler finish can save you money without compromising the quality of the work.
Consider using a water-based finish instead of an oil-based finish. Water-based finishes are cheaper and dry faster, which means that the project can be completed more quickly. They are also more environmentally friendly and have fewer fumes than oil-based finishes.
One of the best ways to save on refinishing costs is to maintain your floors properly. Regular cleaning and maintenance can extend the life of your hardwood floors and reduce the need for refinishing.
Sweep or vacuum your floors regularly to remove dirt and debris. Use a damp mop to clean spills and stains immediately. Avoid using harsh chemicals or abrasive cleaners, as they can damage the finish of your floors.
Place rugs or mats in high-traffic areas to protect your floors from wear and tear. Trim your pet’s nails regularly to prevent scratches on the floor. By maintaining your floors properly, you can save money on refinishing costs and keep your floors looking beautiful for years to come.
In conclusion, refinishing a 2,000 square foot hardwood floor can be expensive, but there are ways to save on costs without compromising the quality of the work. Choose the right contractor, opt for simpler finishes, and maintain your floors properly to save money on your hardwood floor refinishing project.
The cost of refinishing hardwood floors depends on several factors, including the size of the area to be refinished, the condition of the floors, the type of finish you want, and the cost of labor in your area. If your floors require extensive repairs, such as replacing damaged boards or fixing squeaks, this will also add to the cost.
While it is possible to refinish hardwood floors yourself, it can be a time-consuming and challenging process. Hiring a professional can ensure that the job is done correctly and efficiently. Additionally, professionals have access to specialized equipment and materials that can produce better results than DIY methods.
The cost to rent a hardwood floor sander varies depending on your location and the type of sander you need. On average, you can expect to pay between $50 and $100 per day to rent a sander. Keep in mind that you will also need to purchase sandpaper and other supplies, which can add to the overall cost.
Yes, it is possible to refinish hardwood floors yourself. However, there are several risks involved. If you are not experienced with sanding and finishing floors, you may damage the wood or produce uneven results. Additionally, refinishing floors can produce a significant amount of dust, which can be hazardous to your health if you do not take proper precautions.
The cost to refinish 2,000 square feet of hardwood floors can vary widely depending on several factors. On average, you can expect to pay between $3,000 and $6,000 for professional refinishing services. However, this cost can be higher or lower depending on the condition of your floors, the type of finish you choose, and the cost of labor in your area.
In general, it is cheaper to refinish hardwood floors than to replace them. Refinishing can cost between $3 and $8 per square foot, while replacing can cost between $8 and $15 per square foot. However, if your floors are severely damaged or you want to change the layout of your space, replacement may be a better option.
If you’re someone who regularly uses wood as a source of heat during the colder months, then you’ve probably heard of the term “cord of wood.” But what exactly is a cord of wood and how much does it weigh? A cord of wood is a unit of measurement used to indicate the amount of firewood in a stack. It’s defined as a stack of wood that measures 4 feet high, 4 feet wide, and 8 feet long, with the logs being arranged in a neat and orderly manner.
Now, you may be wondering how much a cord of wood actually weighs. The weight of a cord of wood can vary depending on a few factors, such as the type of wood and whether it’s fresh or seasoned. Generally, a cord of seasoned firewood can weigh anywhere from 2,500 to 5,000 pounds, while a cord of green or freshly cut wood can weigh twice as much. It’s important to know the weight of a cord of wood, as it can affect the cost, transportation, and storage of your firewood.

If you’re planning to buy firewood for your home, you’ll likely come across the term “cord of wood.” But what exactly does it mean? In this section, we’ll define a cord of wood and discuss its standard measurements.
A cord of wood is a unit of measurement used to describe a stack of firewood. Specifically, a cord of wood is a stack that measures 4 feet high, 4 feet wide, and 8 feet long, resulting in a total volume of 128 cubic feet. This is equivalent to a stack of wood that measures approximately 4 feet by 4 feet by 8 feet.
It’s important to note that a cord of wood is a standard unit of measurement used in the United States and Canada. Other countries may use different measurements to describe a stack of firewood.
As we mentioned above, a cord of wood is a stack that measures 4 feet high, 4 feet wide, and 8 feet long. However, it’s important to note that not all firewood is created equal. The weight of a cord of wood can vary depending on a few factors, such as the species of wood and its moisture content.
On average, a cord of wood can weigh anywhere from 2,500 to 6,000 pounds. The weight of a cord of wood will depend on the species of wood involved, as some types of wood are heavier than others. For example, oak is generally heavier than pine.
To ensure that you’re getting a fair price for your firewood, it’s important to know how much a cord of wood weighs. You can use a cord of wood calculator to determine the weight of your firewood based on its dimensions.
In summary, a cord of wood is a standard unit of measurement used to describe a stack of firewood. It measures 4 feet high, 4 feet wide, and 8 feet long, resulting in a total volume of 128 cubic feet. The weight of a cord of wood can vary based on the species of wood and its moisture content.

When it comes to the weight of a cord of wood, there are a few factors that can affect it. In this section, we will discuss two of the most important factors that can impact the weight of a cord of wood: the wood species and the moisture content.
The species of wood used to make a cord of wood can have a significant impact on its weight. Different species of wood have different densities, which means that some types of wood are heavier than others. For example, oak is a dense hardwood that is heavier than softer woods like pine.
Here is a table that shows the average weight of a cord of wood for some common wood species:
| Wood Species | Average Weight of a Cord of Wood |
|---|---|
| Oak | 4,000 pounds |
| Maple | 3,700 pounds |
| Hickory | 4,200 pounds |
| Pine | 2,500 pounds |
The moisture content of the wood used to make a cord of wood can also have a significant impact on its weight. Wood that is freshly cut and has a high moisture content will be heavier than wood that has been seasoned and has a lower moisture content.
Here is a table that shows the average weight of a cord of wood based on its moisture content:
| Moisture Content | Average Weight of a Cord of Wood |
|---|---|
| Freshly Cut | 5,000 pounds |
| Seasoned | 4,000 pounds |
| Kiln-Dried | 3,000 pounds |
It is important to note that the weight of a cord of wood can vary depending on how it is stacked. A tightly packed cord of wood will weigh more than a loosely stacked cord of wood. Additionally, the dimensions of the cord of wood can also impact its weight. A cord of wood that is cut into smaller pieces will weigh more than a cord of wood that is cut into larger pieces.
When it comes to buying firewood, knowing the average weight of different wood types can help you plan for transportation and storage. Here are the average weights of common hardwood and softwood types:
Hardwood is denser and heavier than softwood, making it a popular choice for long-burning fires. Here are the average weights of some common hardwood types:
| Wood Type | Green Weight (lbs/cord) | Dry Weight (lbs/cord) |
|---|---|---|
| Oak | 4,000 – 5,000 | 2,200 – 3,000 |
| Maple | 3,000 – 4,000 | 1,800 – 2,500 |
| Hickory | 4,000 – 5,000 | 2,500 – 3,500 |
| Cherry | 2,500 – 3,500 | 1,800 – 2,500 |
| Ash | 3,000 – 4,000 | 2,000 – 2,800 |
Softwood is lighter and less dense than hardwood, making it easier to handle and transport. Here are the average weights of some common softwood types:
| Wood Type | Green Weight (lbs/cord) | Dry Weight (lbs/cord) |
|---|---|---|
| Pine | 2,500 – 3,000 | 1,500 – 2,000 |
| Fir | 2,500 – 3,000 | 1,500 – 2,000 |
| Spruce | 2,500 – 3,000 | 1,500 – 2,000 |
| Cedar | 2,000 – 2,500 | 1,200 – 1,800 |
Keep in mind that the weight of a cord of wood can vary depending on factors such as moisture content, how the wood is stacked, and the size of the logs. Also, remember that transporting overweight loads can be dangerous and illegal, so always check your vehicle’s weight capacity and local regulations before loading up on firewood.

When it comes to buying firewood, it is important to consider the weight of the wood. The weight will determine how much wood you can transport at once, as well as how much storage space you will need. Here are some practical implications of wood weight that you should keep in mind.
Transporting firewood can be a challenge, especially if you have a small vehicle. The weight of the wood will determine how much you can transport at once. For example, if you have a half-ton pickup truck, you can typically transport a cord of seasoned firewood, which weighs between 2,000 to 3,000 pounds. However, if you have a smaller vehicle, you may need to make multiple trips or purchase smaller amounts of wood.
Here is a table that shows the weight of different amounts of firewood:
| Amount of Firewood | Weight |
|---|---|
| 1/8 cord | 250 – 375 pounds |
| 1/4 cord | 500 – 750 pounds |
| 1/2 cord | 1,000 – 1,500 pounds |
| 1 cord | 2,000 – 3,000 pounds |
Storing firewood is another important consideration. The weight of the wood will determine how much storage space you will need. It is important to stack the wood properly to ensure that it stays dry and does not become a fire hazard.
Here are some tips for stacking firewood:
It is also important to note that the weight of the wood will increase if it is not properly seasoned. Green, fresh-cut wood can weigh twice as much as dry wood. Make sure to purchase seasoned firewood to ensure that you are getting the most for your money.
Overall, the weight of firewood is an important consideration when buying and transporting wood. Keep these practical implications in mind to ensure that you have enough wood to keep your home warm all winter long.
A cord of wood is a unit of measurement used to quantify the amount of firewood or timber that has been cut and stacked for use as fuel. The weight of a cord of wood depends on the type of wood, as some species are heavier than others. However, an average cord of wood can weigh about 5,000 pounds on the higher side based on the volume of 128 cubic feet.
A cord of wood can weigh about 5,000 pounds on the higher side based on the volume of 128 cubic feet. However, the weight of a cord of wood can vary depending on the species of wood involved.
A half cord of wood is half the size of a full cord, measuring 4 feet high, 4 feet wide, and 4 feet long. Therefore, a half cord of wood will weigh approximately half of a full cord, or around 2,500 pounds on the higher side based on the volume of 64 cubic feet.
Oak wood is a dense hardwood that is commonly used for firewood. The weight of a cord of oak wood can vary depending on the moisture content, but on average, a cord of oak wood can weigh around 5,500 pounds.
No, a cord of wood is not necessarily a truckload. The amount of firewood that can fit in a truck depends on the size of the truck and the size of the firewood pieces. However, a standard pickup truck can typically hold around 1/2 to 1 cord of wood.
A cord of wood is traditionally measured as a stack that is 4 feet high, 4 feet wide, and 8 feet long. When the firewood is stacked, it should be tightly packed with minimal gaps between the pieces to ensure an accurate measurement.

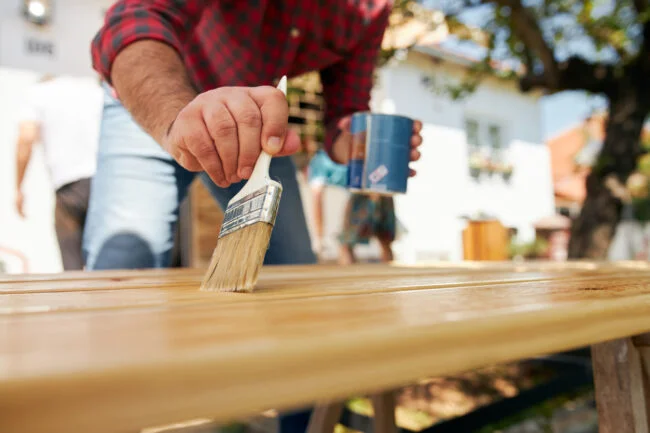
Are you wondering how long you should wait between wood stain coats? Applying wood stain is an excellent way to enhance the natural beauty of wood and protect it from the elements. However, it can be tricky to know exactly when to apply the next coat. The length of time you should wait between coats depends on several factors, including the type of stain you’re using, the humidity and temperature of the environment, and the absorbency of the wood.
While some wood stain products only require a few hours between coats, most manufacturers recommend waiting at least 24 hours before applying the next coat. Waiting a full day between coats is a safe bet to ensure that the first coat has fully dried and cured, allowing the second coat to adhere properly. Keep in mind that if you apply the second coat too soon, it can cause the first coat to become tacky or peel, which can ruin the finish of your project.

When it comes to staining wood, applying multiple coats is often necessary to achieve the desired color and finish. However, it’s important to understand how long to wait between each coat to ensure the best results.
As a general rule, most manufacturers recommend waiting at least 24 hours between coats of wood stain. This allows the first coat to fully dry and cure, creating a strong base for subsequent coats. However, the exact wait time can vary depending on the type of stain, the wood being stained, and environmental factors such as temperature and humidity.
It’s also important to note that applying too many coats of stain can actually have a negative effect on the final result. Too much stain can lead to a buildup of pigment, which can obscure the natural beauty of the wood and create a muddy, unattractive finish. As a general guideline, most experts recommend applying no more than two or three coats of stain.
To ensure the best results when staining wood, it’s important to follow the manufacturer’s instructions carefully and to take your time between coats. Rushing the process can lead to uneven coloring, streaks, and other imperfections. By taking the time to properly apply and dry each coat of stain, you can create a beautiful, durable finish that will last for years to come.
When it comes to applying wood stain, waiting time between coats is crucial to achieve the desired finish. Several factors can affect how long you need to wait between coats. In this section, we will discuss the most important factors that can influence the waiting time.
The type of wood you are staining can significantly affect how long you need to wait between coats. Softwoods such as pine, spruce, and fir tend to absorb the stain more quickly and may require less time between coats. On the other hand, hardwoods such as oak, maple, and cherry may require more time between coats to allow the stain to fully penetrate the wood.
The type of stain you are using can also impact the waiting time between coats. Oil-based stains tend to dry more slowly and may require more time between coats. Water-based stains, on the other hand, dry more quickly and may require less time between coats. Gel stains typically take the longest to dry, and you may need to wait longer between coats.
The weather conditions in your area can also affect how long you need to wait between coats. High humidity and low temperatures can slow down the drying process, while hot and dry weather can speed it up. It’s best to check the manufacturer’s instructions for specific recommendations on waiting time based on weather conditions.
In conclusion, several factors can affect how long you need to wait between wood stain coats. By considering the type of wood, type of stain, and weather conditions, you can determine the optimal waiting time between coats to achieve the desired finish.

When staining wood, it is important to know how long to wait between coats to achieve the best results. The waiting time can vary depending on the type of stain you are using, the temperature, and the humidity of the room. In general, it is best to wait at least 24 hours before applying a second coat of stain.
Waiting for a full day allows the first coat of stain to fully dry and cure, ensuring that the second coat will be applied to a stable and consistent base. If the first coat is not completely dry, the second coat may not adhere properly and can result in an uneven finish.
It is important to note that some stain products may require a shorter or longer waiting time between coats. Always refer to the manufacturer’s instructions for specific recommendations on waiting times.
When staining wood, it’s essential to know when it’s ready for another coat. Applying the second coat too soon can result in a blotchy finish, while waiting too long can cause the first coat to dry out completely, making it difficult for the second coat to adhere properly. Here are some signs to look out for to know when your wood is ready for another coat:
In conclusion, knowing when your wood is ready for another coat is crucial for achieving a beautiful and even finish. By using the touch test, color change, absorption test, and following the recommended drying time, you can ensure that your wood is ready for another coat and achieve the desired results.

When it comes to staining wood, applying multiple coats can enhance the color and depth of the finish. However, it’s important to know the proper techniques for applying multiple coats of stain to ensure the best results. Here are some tips to keep in mind:
Before you begin staining, make sure the wood is clean and free of any dust or debris. Sand the wood with a fine-grit sandpaper to smooth out any rough spots and ensure even absorption of the stain. It’s also important to choose the right type of stain for your project, whether it’s oil-based, water-based, or gel-based.
When applying multiple coats of stain, it’s important to wait for each coat to dry completely before applying the next. The drying time will vary depending on the type of stain you’re using, so be sure to check the manufacturer’s instructions. Generally, oil-based stains take longer to dry than water-based stains, and gel stains take the longest.
When applying the stain, use a clean brush or rag and work in the direction of the grain. Apply a thin, even coat and wipe away any excess with a clean cloth. If you’re applying more than one coat, lightly sand the surface between coats to smooth out any rough spots.
Staining wood can be messy and potentially hazardous if proper safety measures aren’t taken. Always wear gloves and protective eyewear when handling stain and make sure the area is well-ventilated. Avoid smoking or using open flames in the area, as some stains are flammable.
In conclusion, applying multiple coats of stain can enhance the beauty of your wood project, but it’s important to take the proper precautions and follow the right techniques for the best results. With these tips in mind, you’ll be able to achieve a beautiful, long-lasting finish on your woodwork.
The drying time for oil-based stain can vary depending on the humidity and temperature of the environment. Generally, it is recommended to wait at least 8 hours before applying a second coat of oil-based stain. However, it is best to follow the manufacturer’s instructions on the label to ensure the best results.
For a deck, it is recommended to wait at least 24 hours before applying a second coat of stain. This allows the first coat to fully dry and cure, ensuring that the second coat will adhere properly. However, it is important to check the manufacturer’s instructions on the label for specific recommendations.
Stain can take longer to dry in cooler temperatures, such as 50 degrees Fahrenheit. In general, it is best to wait at least 24 hours before applying a second coat of stain in cooler temperatures. However, it is important to check the manufacturer’s instructions on the label for specific recommendations.
Minwax stain typically requires a wait time of at least 4-6 hours before applying a second coat. However, it is important to follow the manufacturer’s instructions on the label for specific recommendations.
Yes, you can apply 2 coats of stain on wood. However, it is important to wait for the first coat to dry and cure before applying the second coat. This ensures that the second coat will adhere properly and provide the desired color and finish.
Yes, a second coat of stain can make the wood darker. However, it is important to note that the color and darkness of the stain can vary depending on the type of wood and the amount of time the stain is left on. It is recommended to test the stain on a small area before applying it to the entire surface.
Have you ever wondered what type of wand wood you would have if you were a witch or wizard in the Harry Potter universe? Thanks to Pottermore, you can discover your own personal wand and learn about the unique characteristics of the wood it is made from. With a variety of woods to choose from, each with their own strengths and weaknesses, your wand wood can reveal a lot about your personality and magical abilities.
One of the rarest wand woods is elder, which is said to be deeply unlucky and tricky to master. It contains powerful magic but scorns to remain with any owner who is not the superior of their peers. Another unusual wand wood is acacia, which creates tricky wands that often refuse to produce magic for anyone but their owner. These are just a few examples of the many wand woods available on Pottermore, each with their own unique properties and characteristics.
If you’re curious about what type of wand wood you would have in the Harry Potter universe, take the Pottermore quiz and discover your own personal wand. With the right wand wood, you may be able to unlock your full magical potential and achieve greatness in the wizarding world.
Pottermore is an online platform that allows Harry Potter fans to explore the wizarding world in a more interactive way. It was created by J.K. Rowling in collaboration with Sony, and it offers a variety of features such as quizzes, articles, and games. One of the most popular features of Pottermore is the wand quiz, which allows you to discover what type of wand you would have if you were a wizard.
To take the wand quiz, you need to create an account on Pottermore and answer a series of questions about your personality, preferences, and values. The quiz is designed to be fun and engaging, and it takes into account various factors such as your favorite color, your favorite animal, and your preferred mode of transportation.
Once you have completed the wand quiz, you will receive a detailed description of your wand, including its wood, core, and length. You can also explore the properties and meanings of different wand woods and cores on Pottermore, which can help you understand the significance of your wand.
It is important to note that the wand quiz on Pottermore is not an exact science, and the results should be taken with a grain of salt. While the quiz is based on J.K. Rowling’s descriptions of wand woods and cores in the Harry Potter books, it is ultimately a fun and fictional experience. Nonetheless, taking the wand quiz can be a great way to connect with the Harry Potter universe and explore your own personality and values in a magical context.

When it comes to wand selection, the type of wood used is just as important as the core. Each wood has its own unique properties and characteristics that can greatly affect the wand’s performance and the wizard or witch’s abilities. Here are some of the most popular wand woods and their significance:
Ash wood is known for its durability and resilience, making it a popular choice for defensive spells. It is also said to be a good wood for healing magic and divination.
Cherry wood is associated with strong, commanding personalities and is often used by those who are natural leaders. It is also said to be a good wood for wandmakers who are skilled in Legilimency.
Elder wood is rare and highly sought after, as it is said to have powerful magical properties. It is associated with protection and is often used for defensive spells. However, it is also said to be a difficult wood to master and can be dangerous in the wrong hands.
Maple wood is known for its versatility and adaptability, making it a good choice for a wide range of spells. It is also associated with travelers and is said to be a good wood for wandmakers who specialize in Apparition.
Oak wood is one of the most popular wand woods and is associated with strength and endurance. It is often used for defensive spells and is said to be a good wood for wandmakers who are skilled in Occlumency.
Walnut wood is associated with intuition and is often used by those who are skilled in Divination. It is also said to be a good wood for wandmakers who specialize in wandlore.
Keep in mind that these are just general associations and the true significance of a wand wood can vary depending on the individual wand and its owner. When selecting a wand, it is important to consider not only the wood and core, but also how the wand feels in your hand and how it responds to your magic.

When you received your wand on Pottermore, you were assigned a specific type of wand wood. Each type of wood has its own unique characteristics and can affect the spells you cast. Here are some of the most common types of wand wood and their properties:
Oak is a strong and sturdy wood that produces a wand with great power. Oak wands are often used by witches and wizards who are bold and courageous.
Willow wands are known for their flexibility and adaptability. They are often used by witches and wizards who are creative and imaginative.
Holly wands are said to be the most powerful of all wand woods. They are often used by witches and wizards who are destined for greatness.
Vine wands are known for their versatility and adaptability. They are often used by witches and wizards who are quick-witted and resourceful.
Hazel wands are known for their sensitivity and intuition. They are often used by witches and wizards who are empathetic and perceptive.
Cedar wands are known for their strength and durability. They are often used by witches and wizards who are reliable and steadfast.
Blackthorn wands are known for their power and precision. They are often used by witches and wizards who are determined and focused.
Aspen wands are known for their charm and elegance. They are often used by witches and wizards who are graceful and refined.
Elder wands are said to be the rarest and most powerful of all wand woods. They are often used by witches and wizards who are wise and experienced.
Cherry wands are known for their beauty and grace. They are often used by witches and wizards who are charming and charismatic.
Ivy wands are known for their adaptability and versatility. They are often used by witches and wizards who are resourceful and quick-witted.
Yew wands are known for their power and strength. They are often used by witches and wizards who are skilled in the dark arts.
Cypress wands are known for their durability and strength. They are often used by witches and wizards who are reliable and steadfast.
Birch wands are known for their flexibility and adaptability. They are often used by witches and wizards who are creative and imaginative.
Hawthorn wands are known for their power and precision. They are often used by witches and wizards who are determined and focused.
Ash wands are known for their sensitivity and intuition. They are often used by witches and wizards who are empathetic and perceptive.
Walnut wands are known for their strength and durability. They are often used by witches and wizards who are reliable and steadfast.
Redwood wands are known for their power and precision. They are often used by witches and wizards who are determined and focused.
Rowan wands are known for their sensitivity and intuition. They are often used by witches and wizards who are empathetic and perceptive.
Poplar wands are known for their versatility and adaptability. They are often used by witches and wizards who are quick-witted and resourceful.
Spruce wands are known for their strength and durability. They are often used by witches and wizards who are reliable and steadfast.

When you first sign up for Pottermore, one of the most exciting parts is receiving your wand. The wand wood you receive is determined by a series of questions that you answer during the sorting process. Here’s a breakdown of the wand wood selection process:
During the wand quiz, you will be asked a series of questions that will determine your wand wood, core, and length. The questions are designed to assess your personality traits and preferences. For example, you might be asked whether you prefer the moon or the stars, or whether you would rather be liked or feared.
Once you have completed the wand quiz, you will be presented with your wand. The wand wood is determined by your personality traits and preferences. For example, if you are loyal and dependable, you might receive a wand made of oak. If you are adventurous and creative, you might receive a wand made of willow.
In addition to the wand wood, your wand will also have a core. The core is determined by your personality traits and preferences. For example, if you are intelligent and curious, you might receive a wand with a core made of dragon heartstring. If you are compassionate and kind, you might receive a wand with a core made of unicorn hair.
Finally, your wand will have a length. The length is determined by your height and arm span. The wand should feel comfortable in your hand and be easy to use.
Overall, the wand wood selection process is a fun and exciting part of the Pottermore experience. Your wand is a reflection of your personality and preferences, and it will be your loyal companion throughout your journey at Hogwarts.

Every witch and wizard has a unique wand that reflects their personality and magical abilities. Here are some personal wand stories from Pottermore users:
No matter what type of wand you receive on Pottermore, remember that it is a reflection of your unique personality and magical abilities. Use it wisely and with care, and it will serve you well on all of your magical adventures.
In the Harry Potter universe, wand woods are significant because they determine the characteristics and abilities of the wand. Each wood has its own unique properties that can influence the wand’s power, flexibility, and durability. The wand wood also plays a role in the relationship between the wand and its owner, as different woods may be more compatible with certain personalities.
Some of the rarest wand woods in the Wizarding World include elder, snakewood, and blackthorn. These woods are difficult to come by and are often associated with powerful and mysterious wizards.
No, you cannot get an Elder wood wand on Pottermore. Elder wood is extremely rare and is reserved only for the most powerful wizards. It is said that the Elder wand, one of the Deathly Hallows, was made from Elder wood.
Some common wand cores include unicorn hair, phoenix feather, and dragon heartstring. Unicorn hair is known for producing consistent magic, phoenix feather for producing powerful magic, and dragon heartstring for producing magic that is both powerful and temperamental.
According to Pottermore, the most popular wand wood is cedar. Cedar wands are known for their strength and versatility, making them a popular choice among witches and wizards.
The best wand wood for a powerful and versatile wand is said to be holly. Holly wands are known for their ability to perform a wide range of magic and are often associated with powerful and courageous wizards.

Are you tired of seeing unsightly scratches on your wooden doors caused by your furry friend’s claws? Don’t worry, you’re not alone. Many pet owners face this issue and wonder how they can fix dog scratches on their wood doors. Fortunately, there are several DIY methods that you can try to restore your door’s appearance.
One option is to use a wood filler crayon to fill in the scratches. Another method is to lightly sand the scratches and the surrounding area, then apply a coat of paint or varnish to cover up the damage. If the scratches are more extensive, you may need to use wood filler to repair the holes and cracks before sanding and painting. With a little patience and elbow grease, you can make your wood door look brand new again.

If you have a furry friend at home, you might have noticed that your wooden doors have started to show signs of wear and tear. Dog scratches on wood doors can be frustrating to deal with, but with a little effort, you can restore your doors to their former glory. Before you start repairing the damage, it’s important to understand the extent of the damage and the type of scratches you’re dealing with.
Not all scratches are the same, and understanding the type of scratches you’re dealing with can help you choose the right method to fix them. Here are some common types of scratches:
Once you’ve identified the type of scratches, it’s time to assess the extent of the damage. Here are some things to consider:
By assessing the extent of the damage, you’ll be able to determine the best course of action to fix it. For minor scratches, a simple touch-up might be enough. For more extensive damage, you might need to use a wood filler or sand down the entire door.
Remember, repairing dog scratches on a wood door can be a time-consuming process, but with the right tools and techniques, you can restore your door to its former glory.
If your furry friend has left some unsightly scratches on your wooden door, don’t worry, you can fix it yourself with some simple tools and materials. Here are the things you’ll need:
Before you start, make sure you have all of the materials and tools needed for the job. You can find these items at your local hardware store or online. When choosing a wood filler, be sure to select one that matches the color of your door. You may also need to choose a paint or stain that matches the existing finish of your door.
Sandpaper is used to smooth out the scratches and prepare the surface for the wood filler. You’ll need different grits of sandpaper to get the best results. The 100-grit paper is used for rough sanding, while the 120-grit and 150-grit papers are used for finer sanding. The 220-grit paper is used for smoothing out the surface after the wood filler has been applied.
A putty knife is used to apply the wood filler to the scratches. You’ll also need a vacuum cleaner to clean up the dust and debris from sanding. Finally, a soft cloth is used to wipe away any excess wood filler or dust. With all of these materials and tools at your disposal, you’ll be able to fix those dog scratches on your wooden door in no time!

Before you start fixing dog scratches on your wood door, it’s essential to prepare the door for repair. This step will help you to see the extent of the damage better and make it easier to apply any repair materials or stains. Here are the two sub-sections that will help you prepare your door for repair.
The first step is to clean the scratched area before you start the fix. Use a soft cloth and a mild cleaner to remove any dirt or debris from the scratched area. This will help you see the extent of the damage better and ensure that the repair materials adhere properly to the surface.
After cleaning the area, use medium-fine to fine-grained sandpaper (100 to 150 grit) to gently buff away scuffs and marks. The deeper the groove, the coarser the sandpaper required to repair the door. Once the scratches are buffed away, sand very lightly in the adjacent undamaged area to blend.
It’s important to note that sanding too much can damage the wood, so be careful not to overdo it. Once you have finished sanding, wipe away the sawdust with a clean cloth.
In summary, preparing your wood door for repair involves cleaning the area and sanding the scratched area. By doing this, you will ensure that the repair materials adhere properly to the surface and that the scratches are buffed away.
If your dog has left minor scratches on your wood door, you can easily repair them yourself. Here are two methods you can use:
Both of these methods are effective for repairing minor scratches on your wood door. Choose the one that works best for you and your door.

If your dog has left deep scratches on your wood door, don’t worry! You can fix them easily with a few simple steps. Here are two methods you can use to repair deep scratches on your wood door:
Epoxy putty is a versatile material that can be used to fill in deep scratches on wood doors. Here’s how you can use it to repair your door:
Another option for repairing deep scratches on wood doors is to use hard wax. Here’s how you can do it:
By following these simple steps, you can repair deep scratches on your wood door and make it look as good as new!
Once you have repaired the dog scratches on your wood door, you will want to apply a finish to protect the wood and make it look new again. Here are some tips for applying a wood stain and sealing the door.
If you want to match the existing finish on your wood door, you can apply a wood stain. Here’s how:
To protect the wood and make it look shiny and new, you can apply a sealer. Here’s how:
By following these tips, you can make your wood door look like new again, even after your dog has scratched it up.

If you’ve repaired the scratches on your wood door, you’ll want to take steps to prevent future damage. Here are a few ways to do just that:
One of the most effective ways to prevent future scratches on your wood door is to train your dog not to scratch it in the first place. Here are a few tips to get you started:
Another way to prevent scratches on your wood door is to use scratch protectors. These are products designed to protect your door from scratches and other damage. Here are a few options to consider:
By training your dog and using scratch protectors, you can help prevent future scratches on your wood door.
When it comes to repairing dog scratches on a wooden door, you want to choose a wood filler that matches the color of your door as closely as possible. Some popular options include Elmer’s Carpenter’s Color Change Wood Filler and Minwax High Performance Wood Filler. Be sure to follow the manufacturer’s instructions for application and drying times.
For deeper gouges in your wooden door, you may need to use a wood filler or putty to fill in the damaged area. Sand the area smooth after the filler has dried, and then stain or paint to match the rest of the door. If the gouges are too deep to repair with filler, you may need to replace the damaged section of the door.
For minor scratches, you can try using a wax filler crayon or a wood touch-up marker to fill in the scratch. For deeper scratches, sand the area smooth and then apply a wood filler or putty. Once the filler has dried, sand the area again and then stain or paint to match the rest of the door.
If your wooden door is painted, you can use a spackle or wood filler to fill in the scratches. Once the filler has dried, sand the area smooth and then repaint the door. Be sure to use a paint that matches the color and finish of the rest of the door.
For interior wooden doors, you can try using a wax filler crayon or a wood touch-up marker to fill in the scratch. If the scratch is deeper, use a wood filler or putty to fill in the damaged area. Sand the area smooth and then stain or paint to match the rest of the door.
To repair scratches on a front wooden door, start by cleaning the area with a mild soap and water. For minor scratches, use a wax filler crayon or wood touch-up marker to fill in the scratch. For deeper scratches, use a wood filler or putty to fill in the damaged area. Sand the area smooth and then stain or paint to match the rest of the door. To prevent future scratches, consider adding a protective cover or mat to the area where your dog likes to scratch.
If you’re a DIY enthusiast, you probably know how frustrating it can be to have a hole in your wooden furniture or wall. It can ruin the entire look of your project, and you might think that you’ll have to start all over again. But don’t worry, filling holes in wood and redrilling is a simple process that can save you both time and money. In this article, we’ll explore the different methods you can use to fill holes in wood and redrill, so you can get back to your project in no time.
One of the most common methods to fill holes in wood and redrill is by using wood filler. Wood filler is a putty-like substance that you can use to fill in any gaps or holes in your woodwork. It’s easy to apply and can be sanded down once it dries to create a smooth surface for redrilling. However, not all wood fillers are created equal, and some might not be suitable for your specific project. We’ll cover the different types of wood fillers and how to choose the right one for your needs.
Another method for filling holes in wood and redrilling is by using wood plugs. Wood plugs are small wooden pieces that you can insert into a hole to cover it up. They can be sanded down and painted to match the surrounding wood, creating a seamless look. However, using wood plugs requires a bit more precision and skill than using wood filler. We’ll go over the steps you need to take to use wood plugs effectively and get the best results.
If you’re a DIY enthusiast or a woodworker, you’ve probably encountered the need to fill holes in wood. Holes in wood can result from various reasons, including drilling, screwing, or nailing. Depending on the size of the hole and the type of wood, filling the hole may be necessary to restore the wood’s integrity.
Before you start filling holes in wood, it’s essential to understand the type of hole you’re dealing with. The nature of the hole will determine the type of filler you’ll use and the method you’ll employ to fill it. Here are some common types of holes in wood:
Screw holes are the most common type of holes in wood. They occur when screws are driven into the wood. Over time, the wood around the screw hole may become weak, causing the screw to loosen or fall out. To prevent this, you’ll need to fill the hole with a suitable filler.
Nail holes are similar to screw holes, but they’re smaller and have a different shape. They’re usually round or oval and occur when nails are driven into the wood. Like screw holes, nail holes can weaken the wood around them, making it necessary to fill them.
Knot holes are voids in the wood caused by the removal of a knot. They’re usually irregular in shape and can be quite large. Knot holes can be filled with a suitable filler to restore the wood’s structural integrity.
Gouges and scratches are not technically holes, but they can still weaken the wood and affect its appearance. They’re usually caused by accidental impacts or improper use of tools. Gouges and scratches can be filled with a suitable filler to restore the wood’s appearance and integrity.
In summary, filling holes in wood is an essential skill for any DIY enthusiast or woodworker. Understanding the type of hole you’re dealing with is the first step in selecting the right filler and method for filling it. With the right tools and techniques, you can restore the wood’s structural integrity and appearance.

When it comes to filling holes in wood and redrilling, having the right tools is essential. Here are some tools you may need:
A scraper is a simple tool that can be used to remove chips, splinters, or paint residue around the hole. This will make it easier to fill the hole and ensure that the filler adheres properly.
If the hole is not clean or wide enough, you can use a drill bit to make it cleaner and wider. This will make it easier to fill the hole and ensure that the filler adheres properly.
After filling the hole, you will need to smooth the edges using sandpaper. This will make the surface even and ensure that the filler blends in with the surrounding wood.
Wood filler is a popular choice for filling holes in wood. It is easy to use and can be found at most hardware stores. There are many different types of wood filler, so be sure to choose one that is appropriate for your project.
If the hole is small, you can use wood glue to fill it. Simply apply the glue to the hole and let it dry. Once it is dry, you can redrill the hole.
If the hole is too large for wood filler or glue, you can use wooden dowels or plugs. Simply cut the dowel or plug to the appropriate size, apply some glue, and insert it into the hole. Once it is dry, you can redrill the hole.
By choosing the right tools, you can ensure that your project is a success. Remember to always follow the manufacturer’s instructions and take your time to ensure that the filler is applied properly.
Before you fill a hole in wood and redrill, you need to prepare the wood surface. This section will cover the two sub-sections: Cleaning the Area and Marking the Spot.
The first step in preparing the wood surface is to clean the area around the hole. You want to remove any debris, sawdust, or paint residue from the area. This will ensure that the wood filler adheres properly to the wood.
To clean the area, you can use a scraper to remove any chips or splinters around the hole. You can also use sandpaper to smooth the edges of the hole. If the hole is too small to use a scraper, you can use a toothbrush or a soft-bristled brush to remove any debris.
Once you have cleaned the area, you need to mark the spot where you want to redrill. This is important because you don’t want to redrill in the same spot where you filled the hole. Redrilling in the same spot can cause the wood to split or weaken.
To mark the spot, you can use a pencil or a marker to make a small dot on the wood surface. Make sure the dot is visible and easy to see. You can also use a piece of masking tape to mark the spot.
In conclusion, preparing the wood surface is an important step in filling a hole in wood and redrilling. Cleaning the area and marking the spot will ensure that the wood filler adheres properly to the wood and that you redrill in the right spot.

When it comes to filling holes in wood, there are a few different methods to choose from. One of the most common methods is to use wood filler, which is a putty-like substance that can be used to fill in holes and gaps in wood surfaces. Here are the steps to follow when filling holes with wood filler:
The first step is to select the right type of wood filler for your project. There are many different types of wood filler available, including water-based, solvent-based, and epoxy-based fillers. Each type has its own advantages and disadvantages, so it’s important to choose the right one for your specific needs. Some factors to consider when selecting wood filler include the size and depth of the hole, the type of wood you are working with, and the final finish you are hoping to achieve.
Once you have selected the right wood filler, it’s time to apply it to the hole. Start by cleaning the area around the hole with a scraper or sandpaper to remove any debris or loose wood fibers. Then, using a putty knife or spatula, apply the wood filler to the hole in thin layers, making sure to press it firmly into the hole and smooth it out as you go. Be sure to fill the hole completely, but avoid overfilling it, as this can make it difficult to sand down later.
After the wood filler has dried completely, it’s time to sand the surface smooth. Use sandpaper or a sanding block to sand the surface of the wood filler until it is flush with the surrounding wood. Start with a coarse grit sandpaper and gradually work your way up to finer grits until the surface is smooth and even. Be sure to sand the surface lightly to avoid damaging the surrounding wood or creating any new scratches or marks.
By following these steps, you can easily fill holes in wood surfaces and prepare them for redrilling. Whether you are working on a small DIY project or a larger renovation, using wood filler is a simple and effective way to achieve a professional-looking finish.
After filling the hole in wood, you need to redrill the hole to make it ready for screwing. Here are the steps to follow when redrilling:
Before redrilling, you need to mark the new spot where you want the screw to go. You can use a pencil or a marker to make a small dot on the wood where you want the screw to be. Make sure to measure the distance between the old hole and the new spot to ensure that the screw will be in the right place.
To ensure that the new hole is straight and in the right place, you can use a drill guide. A drill guide is a tool that attaches to the drill and helps guide the drill bit to the right spot. You can purchase a drill guide at any hardware store or online.
After marking the new spot and attaching the drill guide, it’s time to drill the new hole. Make sure to use the right size drill bit for the screw you will be using. Start drilling slowly and gradually increase the speed until the bit goes through the wood. Be careful not to drill too deep or too far to the side. Once the hole is drilled, remove the drill guide and clean up any wood shavings or debris.
That’s it! You have successfully filled the hole in wood and redrilled it. Now you can screw in your hardware with confidence, knowing that it will be secure and stable.

Once you have filled the hole in your wood and redrilled it, you will want to make sure the surface looks as good as new. Here are some tips for finishing touches that will help your wood look polished and professional.
After filling the hole, you may notice that the surface is not completely smooth. To fix this, use sandpaper to smooth out the surface until it is flush with the surrounding wood. Start with a coarse grit sandpaper and work your way up to a finer grit until the surface is completely smooth. Be sure to sand in the direction of the wood grain to avoid damaging the surface.
To make the filled hole blend in with the surrounding wood, you can apply a wood finish. There are many different types of wood finishes available, including stains, varnishes, and oils. Choose a finish that matches the color and sheen of the surrounding wood.
Before applying the finish, make sure the surface is clean and free of dust. Apply the finish using a brush or cloth, following the manufacturer’s instructions. Allow the finish to dry completely before sanding lightly with a fine grit sandpaper and applying a second coat, if necessary.
Remember, the key to a professional-looking finish is patience and attention to detail. Take your time and follow the instructions carefully to achieve the best results.
There are several techniques for filling holes in wood and redrilling. Two-part epoxy products, wooden dowels and plugs, sawdust and glue, and wood fillers are some of the most commonly used techniques. You can also use vinegar and baking soda or a wax candle to fill the holes. Once you have filled the hole, you can redrill it using a drill bit of the appropriate size.
There are many good wood fillers available in the market, but it is important to choose one that is strong and durable enough to hold screws and nails. Some of the best wood fillers for redrilling are Elmer’s Carpenter’s Wood Filler, Minwax High-Performance Wood Filler, and Abatron WoodEpox.
To fill in drill holes in wood, you can use wood fillers, wooden dowels or plugs, or sawdust and glue. First, clean out the hole and make sure it is dry. Then, apply the filler or glue and let it dry completely. Once it is dry, sand the surface smooth and redrill the hole if necessary.
The best way to fill large holes in a wood deck is to use a two-part epoxy product. First, clean out the hole and make sure it is dry. Then, mix the two parts of the epoxy together and apply it to the hole. Smooth it out and let it dry completely. Once it is dry, sand the surface smooth and apply a coat of paint or stain if necessary.
To fix a hole in a wooden wall, you can use wood filler or a wooden dowel. First, clean out the hole and make sure it is dry. Then, apply the filler or glue and let it dry completely. Once it is dry, sand the surface smooth and paint or stain the area to match the surrounding wood.
When filling knot holes in wood, it is important to use a filler that matches the color and grain of the surrounding wood. You can use wood filler or sawdust and glue to fill the hole. Apply the filler or glue, let it dry, and then sand the surface smooth. If necessary, apply a coat of paint or stain to match the surrounding wood.

Are you wondering whether red cedar is a hard or soft wood? The answer is not as straightforward as you might think. Cedar is a type of softwood, but it is known for its durability and strength. In fact, some species of cedar are even harder than certain types of hardwoods.
When it comes to determining the hardness of wood, the Janka scale is often used. This scale measures the force required to embed a steel ball into the wood, and the higher the rating, the harder the wood. While Western red cedar has a Janka rating of only 320, it is still a strong and durable wood. Other species of cedar, such as Alaskan yellow cedar and Eastern red cedar, have higher Janka ratings and are even stronger.
So, while cedar is technically a softwood, it should not be underestimated in terms of its strength and durability. In this article, we will explore the properties of cedar and the factors that determine its hardness. Whether you are a woodworker or simply curious about the different types of wood, this article will provide you with valuable information about red cedar and its characteristics.

When it comes to woodworking, understanding the characteristics of different types of wood is essential. One of the most fundamental distinctions is between hardwood and softwood.
Hardwood comes from deciduous trees, which are trees that lose their leaves in the fall. These trees tend to be slower-growing and have a more complex structure than softwoods. As a result, hardwoods are generally denser and stronger than softwoods. They also tend to have a more attractive grain pattern, making them popular for use in furniture and decorative woodworking.
Some common examples of hardwoods include oak, maple, cherry, and walnut. These woods are prized for their durability, strength, and beauty. However, they can also be more difficult to work with than softwoods, as they are denser and may require more effort to cut and shape.
Softwood comes from evergreen trees, which are trees that keep their leaves year-round. These trees tend to be faster-growing and have a simpler structure than hardwoods. As a result, softwoods are generally less dense and less strong than hardwoods. However, they are also more lightweight and easier to work with.
Some common examples of softwoods include pine, cedar, and spruce. These woods are often used in construction and outdoor woodworking because of their affordability and ease of use. However, they may not be as durable or attractive as hardwoods.
It’s important to note that the terms “hardwood” and “softwood” can be somewhat misleading. For example, some softwoods like yew and Douglas fir are actually harder than some hardwoods like American cherry. Additionally, some woods like cedar can be both soft and hard depending on the species.
In conclusion, understanding the differences between hardwood and softwood is crucial for any woodworker. By choosing the right type of wood for your project, you can ensure that your finished product is both beautiful and functional.

Red Cedar is a softwood that is obtained from gymnosperm trees which are conifers. The common term for gymnosperms is softwoods. Other popular softwoods are pine and fir trees. Below are some of the properties of Red Cedar:
Red Cedar has excellent resistance to decay and insect attacks, making it a popular choice for outdoor applications like fence posts. It is also rated as durable to very durable in regard to decay resistance, though it has a mixed resistance to insect attack.
Red Cedar is easy to work with, and it is a popular choice among woodworkers. It has a straight grain and a uniform texture, which makes it easy to carve and turn. However, it can have knots and irregularities that can make it difficult to work with.
Red Cedar has a reddish-brown color that can vary from light to dark. It has a distinct and pleasant aroma that is often used in closet linings and furniture. The wood has a straight grain and a uniform texture, which gives it a smooth and consistent finish.
Red Cedar is a strong wood, but it is not as strong as hardwoods like oak or maple. It has a bending strength of 8,800 lbf per square inch (60.7 MPa), which is lower than some other softwoods like Alaskan yellow cedar. However, it is still strong enough for most applications.
Red Cedar is a versatile wood that is used in a variety of applications. It is commonly used for outdoor applications like fence posts, decking, and siding. It is also used for indoor applications like closet linings, furniture, and carvings. Red Cedar is a popular choice among woodworkers because of its easy workability and pleasant aroma.

If you are wondering whether red cedar is a hardwood or a softwood, the answer is simple: red cedar is a softwood. While hardwoods come from trees that produce seeds encased in a fruit or nut, softwoods come from trees that produce seeds in cones. Cedar trees belong to the latter category, which means that red cedar is a softwood.
However, just because red cedar is a softwood does not mean that it is not strong. In fact, red cedar is known for its strength and durability, which makes it a popular choice for outdoor furniture, decks, and siding. Red cedar is also resistant to rot and decay, making it an excellent choice for outdoor applications.
When it comes to compressive strength, red cedar is not as strong as some other woods, but it is still quite strong for a softwood. According to the North American Wood Products Association, the average compressive strength of red cedar is around 6,020 lbf per square inch (41.5 MPa).
In addition to its strength and durability, red cedar is also known for its pleasant aroma and beautiful color. The wood has a reddish-brown hue that can vary in intensity depending on the age and location of the tree. The wood also has a straight grain and a fine texture, which makes it easy to work with using both hand and power tools.
Overall, while red cedar may be a softwood, it is still a strong and durable choice for a variety of outdoor applications. Its natural resistance to rot and decay, pleasant aroma, and beautiful color make it a popular choice among homeowners and builders alike.
Red cedar is a versatile wood that can be used for various applications. Its unique properties make it an excellent choice for both indoor and outdoor use. Here are some common applications of red cedar:
Red cedar is a popular choice for outdoor applications due to its natural resistance to decay and insects. It is commonly used for:
Red cedar is also a popular choice for indoor applications. Its unique properties make it an excellent choice for:
Red cedar can also be used for a variety of other applications, such as:
Overall, red cedar is a versatile wood that can be used for a variety of applications. Its unique properties make it an excellent choice for both indoor and outdoor use.

When it comes to determining whether red cedar is a hardwood or a softwood, the answer is clear – it is a softwood. But how does it compare to other woods in terms of hardness and durability? Let’s take a look.
First, it’s important to understand the difference between hardwood and softwood. Hardwood comes from deciduous trees, which are trees that lose their leaves annually, while softwood comes from coniferous trees, which are evergreen trees that typically have needles or scale-like leaves. Hardwood tends to be denser and harder than softwood, but this isn’t always the case.
Douglas fir is a softwood that is often used in construction for its strength and durability. However, when it comes to hardness, red cedar is actually slightly harder than Douglas fir. Red cedar has a Janka hardness rating of 900 lbf (pounds-force) while Douglas fir has a rating of 660 lbf. This means that red cedar is slightly more resistant to wear and tear than Douglas fir.
Redwood is another softwood that is often used in construction for its durability and resistance to decay. When it comes to hardness, redwood is actually harder than red cedar. Redwood has a Janka hardness rating of 450 lbf, making it about half as hard as red cedar. This means that red cedar is more resistant to wear and tear than redwood.
Cherry wood is a hardwood that is often used in furniture making for its beauty and durability. In terms of hardness, cherry wood is slightly harder than red cedar. Cherry wood has a Janka hardness rating of 950 lbf, making it about 50% harder than red cedar. However, cherry wood is still not as resistant to wear and tear as red cedar.
While red cedar is technically a softwood, it is still relatively hard compared to other softwoods like Douglas fir and redwood. When compared to hardwoods like cherry wood, red cedar is not as hard, but it still offers a good balance of durability and workability. If you’re looking for a wood that is resistant to wear and tear and easy to work with, red cedar is a great choice.
Red cedar wood is known for its distinctive aroma and beautiful reddish-brown color. It has a straight grain and a fine, even texture. Red cedar is also lightweight and has natural resistance to decay, rot, and insect damage.
Red cedar wood is a popular choice for outdoor furniture, decking, siding, and fencing. It is also commonly used for indoor furniture, closets, and chests due to its natural resistance to moths and other insects.
Red cedar is a softwood, not a hardwood. Softwoods come from conifer trees, while hardwoods come from deciduous trees.
Red cedar is generally considered to be harder than pine, but not as hard as some other hardwoods. The Janka hardness scale rates red cedar at around 900, while pine is rated at around 690.
One potential disadvantage of using red cedar wood is that it can be relatively expensive compared to other softwoods. Additionally, while it is naturally resistant to decay and insect damage, it is not completely immune and may still require regular maintenance to maintain its appearance and structural integrity.
Red cedar is relatively strong and durable for a softwood, but it is not as strong as many hardwoods. It has a moderate bending strength and stiffness, but may be prone to splitting or cracking if not properly cared for.

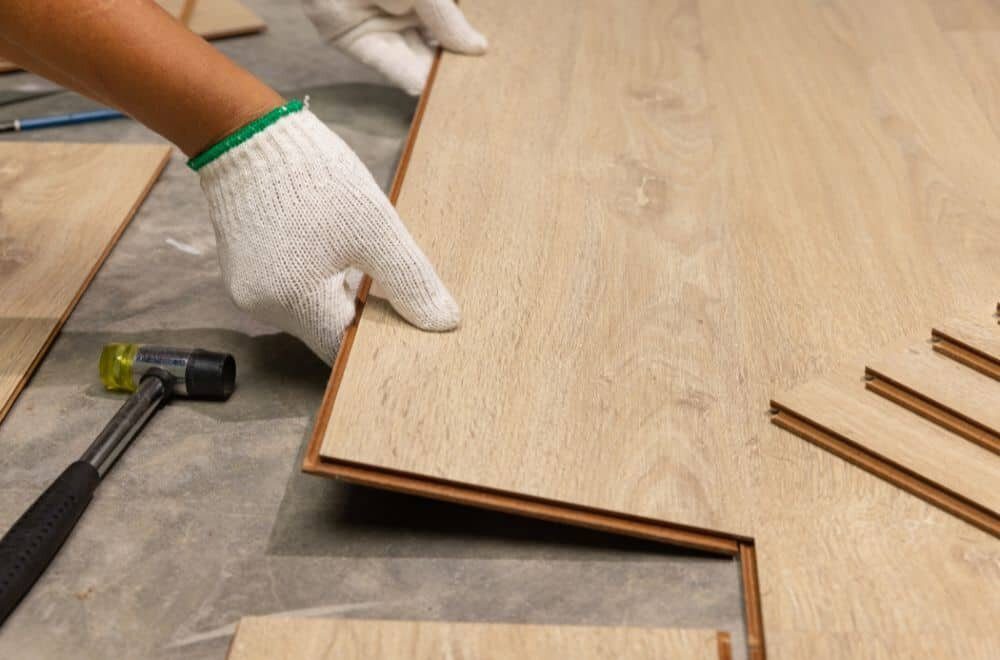
Are you planning to renovate your home and have different types of wood floors in different rooms? If so, you may be wondering how to transition between two different wood floors. Transitioning between two different floors can be challenging, but it can be done in various ways. In this article, we will discuss some of the most popular ways to transition between two different wood floors.
One of the most commonly used methods to transition between two different wood floors is using T-molding. T-molding fits well if the two floors are the same height. It is a wooden or vinyl trim with a rounded top and a stem piece that fits between the gaps in your floor. Another way to transition is by using transition molding, which comes in various colors and finishes. It can be cut to size and attached using screws and pre-drilled holes or a construction adhesive.

When it comes to wood floor transitions, it’s important to ensure that they are not only aesthetically pleasing, but also functional. A smooth transition between two different wood floors can prevent accidents and make your home look more cohesive. In this section, we will explore the different types of wood floors and the importance of smooth transitions.
Before we dive into the types of wood floor transitions, it’s important to understand the different types of wood floors. There are two main types of wood floors: solid wood and engineered wood.
Solid wood floors are made of a single piece of wood and are typically thicker than engineered wood floors. They are more expensive but can be sanded and refinished multiple times.
Engineered wood floors, on the other hand, are made of layers of wood that are glued together. They are more affordable and can be more stable in areas with high humidity or moisture.
A smooth transition between two different wood floors is important for several reasons. First, it can prevent accidents. Uneven transitions can create tripping hazards, especially for young children and elderly people.
Second, smooth transitions can make your home look more cohesive. A seamless transition between two different wood floors can create a more polished look and feel.
To achieve a smooth transition, there are several transition options available, including T-molding, reducer strips, and threshold strips. It’s important to choose the right transition option based on the height difference between the two floors and the overall design of your home.
In summary, understanding the types of wood floors and the importance of smooth transitions is crucial when it comes to creating a cohesive and safe home. By choosing the right transition option, you can ensure that your home not only looks great but also functions well.
Before you start transitioning between two different wood floors, there are a few preparation steps that you need to take. These steps will help you ensure that the transition is smooth and seamless.
The first step in preparing for a transition between two different wood floors is to evaluate the existing floors. You need to determine the type of wood, the condition of the floors, and the level of the floors. Make sure that the floors are level and free from any damage or defects before you start the transition.
Once you have evaluated the existing floors, the next step is to choose the transition materials. There are several transition materials that you can use, including seam binders, T-molding, and transition strips. Choose a material that matches the color and style of your existing floors.
Here are some tips to help you choose the right transition material:
By following these preparation steps, you can ensure that your transition between two different wood floors is seamless and visually appealing.

When it comes to transitioning between two different wood floors, there are several installation techniques you can use to achieve a seamless and visually appealing transition. Here are three popular techniques to consider:
T-molding is a great option if the two different floors are the same height. This type of molding is typically made of wood or vinyl and has a rounded top with a stem piece that fits between the gaps in your floor. To use T-molding, leave about 1 3⁄4 inches (4.4 cm) of space between the two floors so some of the subfloor is exposed. Then, simply snap the T-molding into place.
A saddle transition is a type of molding that is used when the two different floors are at different heights. This technique involves creating a gradual slope between the two floors using a piece of wood or other material. To create a saddle transition, you’ll need to measure the height difference between the two floors and cut a piece of wood to fit. Then, attach the wood to the lower floor using construction adhesive and screws. Finally, sand and finish the saddle transition to match the surrounding floors.
A flush transition is a type of molding that is used when the two different floors are at the same height. This technique involves installing a piece of molding that sits flush with the surrounding floors. To install a flush transition, you’ll need to measure the width of the gap between the two floors and cut a piece of molding to fit. Then, use construction adhesive to attach the molding to the floor. Finally, sand and finish the molding to match the surrounding floors.
No matter which installation technique you choose, it’s important to take your time and ensure that the transition is level and secure. With a little patience and attention to detail, you can create a seamless and beautiful transition between two different wood floors.

When it comes to maintaining and caring for your transition between two different wood floors, there are a few things to keep in mind. By following these tips, you can ensure that your floors remain in good condition for years to come.
Regular cleaning is essential to keep your transition looking its best. Here are some tips to keep in mind:
If your transition becomes damaged or worn over time, it may need to be repaired or replaced. Here are some things to keep in mind:
By following these tips, you can ensure that your transition between two different wood floors remains in good condition and looks great for years to come.
When transitioning between two different types of wood flooring, there are several options available. One option is to use a transition strip, such as a T-molding, to create a smooth transition between the two floors. Another option is to use a contrasting wood or stain to create a deliberate design choice. You can also use a patterned or textured rug to help blend the two floors together.
Blending new hardwood floors with old hardwood floors can be tricky, but there are a few things you can do to help make the transition smoother. One option is to use a transition strip, such as a T-molding, to create a seamless transition between the two floors. Another option is to use a contrasting wood or stain to create a deliberate design choice. You can also use a patterned or textured rug to help blend the two floors together.
When transitioning between different colored wood floors, there are several ideas you can use to create a cohesive design. One option is to use a transition strip, such as a T-molding, to create a seamless transition between the two floors. Another option is to use a contrasting wood or stain to create a deliberate design choice. You can also use a patterned or textured rug to help blend the two floors together.
A T-molding transition is a type of transition strip that is used to create a smooth transition between two different types of flooring. The T-molding is installed by placing the stem piece between the two floors and attaching the rounded top to the stem piece. This creates a clean and seamless transition between the two floors. T-molding transitions can be used for wood floors, as well as other types of hard flooring.
Transitioning between two different types of hard flooring can be done using a variety of transition strips. One option is to use a T-molding transition, which is a type of transition strip that is used to create a smooth transition between two different types of flooring. Another option is to use a reducer strip, which is used to transition between two different types of flooring that are at different heights.
When transitioning between two different types of flooring that are at different heights, there are several options available. One option is to use a reducer strip, which is used to transition between two different types of flooring that are at different heights. Another option is to use a stair nose transition, which is used to transition between a stairway and a different type of flooring. A T-molding transition can also be used for different floor heights, as long as there is enough space between the two floors to accommodate the transition strip.

Are you considering building a new house but unsure whether to use wood or cinder blocks as the primary construction material? This is a common dilemma faced by many homeowners and builders. Both materials have their own set of pros and cons, including cost, durability, and environmental impact. Ultimately, the decision comes down to your personal preferences and priorities.
When it comes to cost, wood is generally considered to be the more affordable option. However, the price of wood can fluctuate depending on a variety of factors, such as the type of wood, location, and availability. On the other hand, cinder blocks are more expensive upfront, but they tend to be more durable and require less maintenance over time. Additionally, cinder block houses may have lower insurance costs due to their resistance to fire and other natural disasters. It is important to weigh the initial cost against the long-term benefits when deciding which material to use.

When it comes to building a house, there are many different materials to choose from. Two popular options are wood and cinder blocks. Each material has its own characteristics and advantages, so it’s important to understand them before making a decision.
Wood is a traditional building material that has been used for centuries. It is a renewable resource and is readily available in many parts of the world. Here are some of the characteristics of wood:
Cinder blocks, also known as concrete blocks, are a popular building material for foundations and walls. They are made from cement, water, and aggregates such as sand, gravel, or crushed stone. Here are some of the characteristics of cinder blocks:
In conclusion, when deciding between wood and cinder blocks for your home, it’s important to consider your budget, the climate in your area, and your personal preferences. Both materials have their own advantages and disadvantages, so it’s up to you to decide which one is the best fit for your needs.
When deciding between building a house with wood or cinder blocks, cost is a major factor to consider. In this section, we will analyze the cost of building with wood and cinder blocks to help you make an informed decision.
Building a house with wood is generally less expensive than building with cinder blocks. The cost of lumber varies depending on the type of wood, location, and availability, but it is generally cheaper than cinder blocks. The cost of labor for wood construction is also generally cheaper than for cinder block construction because it requires less specialized skills.
However, it is important to keep in mind that wood construction may have higher maintenance costs in the long run. Wood is susceptible to rot, pests, and fire, which can lead to costly repairs and replacements.
Building a house with cinder blocks is generally more expensive than building with wood. The cost of cinder blocks, mortar, and other materials is generally higher than the cost of lumber and other materials for wood construction. Additionally, cinder block construction requires more specialized skills and labor, which can drive up the cost.
However, cinder block construction is generally more durable and requires less maintenance than wood construction. Cinder blocks are resistant to pests, rot, and fire, which can save you money in the long run.
In summary, building a house with wood is generally cheaper than building with cinder blocks, but it may have higher maintenance costs in the long run. Cinder block construction is generally more expensive, but it is more durable and requires less maintenance. Ultimately, the decision between building with wood or cinder blocks will depend on your budget, location, and personal preferences.

When it comes to building a house, wood is a popular choice due to its availability and ease of use. However, there are both pros and cons to using wood as a building material.
Cinder blocks, also known as concrete blocks, are another popular choice for building a house. Like wood, there are both pros and cons to using cinder blocks as a building material.
Overall, both wood and cinder blocks have their pros and cons when it comes to building a house. It’s important to consider your budget, design preferences, and maintenance needs when deciding which material to use.
When choosing between wood and cinder blocks for your home, it’s important to consider the environmental impact of each material. Here, we’ll take a look at the environmental impact of both wood and cinder blocks.
Wood is a renewable resource, but it’s important to consider where the wood comes from. If the wood is harvested from old-growth forests, it can have a negative impact on the environment. However, if the wood is harvested from sustainably managed forests or from reclaimed sources, it can be a more environmentally friendly option.
Another consideration is the use of chemicals in the treatment of the wood. Pressure-treated wood contains chemicals that can be harmful to the environment and human health. If you choose to use wood in your home, look for sustainably sourced, untreated wood.
Cinder blocks are made from cement, which is a non-renewable resource. Cement production is a major contributor to greenhouse gas emissions, so using cinder blocks can have a significant impact on the environment.
In addition, the production of cinder blocks requires a lot of energy, which contributes to air pollution. The use of cinder blocks can also contribute to urban heat islands, which can have negative impacts on the environment and human health.
Overall, both wood and cinder blocks have environmental impacts that should be considered when choosing materials for your home. If you choose to use wood, look for sustainably sourced, untreated wood. If you choose to use cinder blocks, consider using alternative building materials that are more environmentally friendly.

Wood houses require regular maintenance to ensure their longevity. The following table shows some common maintenance tasks for wood houses:
| Maintenance Task | Frequency |
|---|---|
| Painting/Staining | Every 3-5 years |
| Cleaning Gutters | Twice a year |
| Inspecting Roof | Every year |
| Checking for Termites | Every year |
It is important to note that wood houses are susceptible to termite damage, which can lead to costly repairs if not detected early. Regular inspections can help prevent termite damage.
Cinder block houses require less maintenance compared to wood houses. The following table shows some common maintenance tasks for cinder block houses:
| Maintenance Task | Frequency |
|---|---|
| Cleaning Exterior | Every year |
| Checking for Cracks | Every year |
| Inspecting Roof | Every year |
Cinder block houses are more durable and resistant to pests, such as termites, compared to wood houses. However, they may be more prone to cracking due to settling or shifting of the foundation.
Overall, both wood and cinder block houses require regular maintenance to ensure their longevity. The type and frequency of maintenance tasks may vary depending on the specific materials and construction methods used.
Cinder block homes can be cheaper to build than wood frame homes in some cases. The cost of building a cinder block home will depend on several factors, such as the size of the home, the location, and the materials used. Cinder block homes are generally more durable and require less maintenance than wood frame homes, which can save money in the long run.
The cost of building a cinder block house can vary depending on several factors. Generally speaking, cinder block homes can be more expensive to build than wood frame homes. However, cinder block homes are more durable and require less maintenance, which can save money in the long run.
Building a wood frame house in Florida can have its advantages and disadvantages. Some of the pros of building a wood frame house in Florida include faster construction times, lower upfront costs, and more design flexibility. However, wood frame homes are more susceptible to damage from hurricanes and other natural disasters, which can be a concern in Florida.
The cost difference between concrete and wood frame construction can vary depending on several factors. Generally speaking, building with concrete can be more expensive upfront than building with wood. However, concrete homes are more durable and require less maintenance, which can save money in the long run.
Whether it is better to build a house with concrete or wood depends on several factors. Concrete homes are generally more durable and require less maintenance than wood frame homes. However, building with concrete can be more expensive upfront than building with wood. It is important to consider your budget, location, and personal preferences when deciding which material to use.
A cinder block foundation can last for many years if it is properly constructed and maintained. The lifespan of a cinder block foundation will depend on several factors, such as the quality of the materials used, the climate, and the level of maintenance it receives. With proper care, a cinder block foundation can last for several decades.

Are you wondering if you need to put polyurethane on wood that was stained? The answer is yes, you should use a protective finish, such as polyurethane, to safeguard the wood’s beauty and integrity. Applying polyurethane over stain is essential to achieve a smooth, even finish, but it is important to ensure that the stain is completely dry before applying the polyurethane.
Polyurethane is a clear, durable finish that protects wood from scratches, stains, and water damage. It also enhances the natural beauty of the wood and adds a glossy or matte finish, depending on your preference. While you do not have to put polyurethane over the wood stain, it is highly recommended, especially if the wood will be exposed to wear and tear or moisture.
Choosing the right type of polyurethane based on the type of wood and the intended use of the project is important. There are two basic types of polyurethane: oil-based and water-based. Both have different pros and cons, such as drying time, odor, and exposure to heat or the elements. By understanding the benefits and drawbacks of each type, you can make an informed decision on which type of polyurethane to use on your stained wood project.
Polyurethane is a popular finish used on wood surfaces to protect them from scratches, water damage, and other types of wear and tear. It is a synthetic polymer that is available in both oil-based and water-based forms.
Here are a few things you should know about polyurethane:
Overall, polyurethane is an excellent choice for protecting and enhancing the beauty of wood surfaces. Understanding the different types of polyurethane and how to properly apply them can help you achieve a beautiful, long-lasting finish on your wood projects.
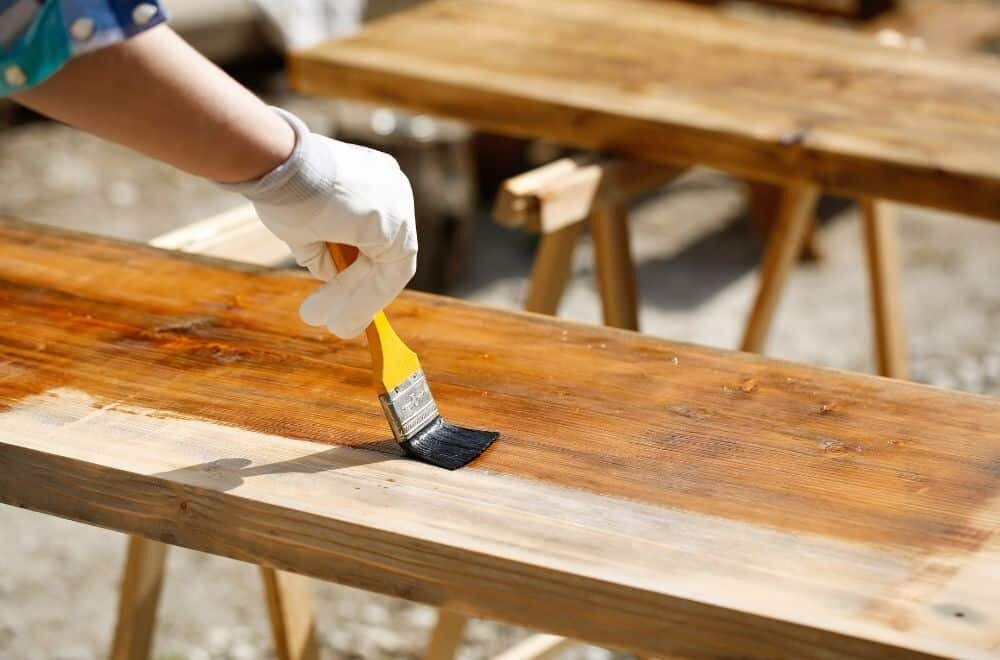
Staining wood is a popular way to enhance its natural beauty and add color to it. It is a process of applying a pigmented liquid to the surface of the wood to change its color. The purpose of staining wood is to:
It’s important to note that staining wood alone does not provide protection against moisture, heat, or checking. For this reason, it’s essential to use a protective finish, such as polyurethane, after staining to safeguard the wood’s beauty and integrity.
If you have stained your wood, it is recommended to apply polyurethane to protect the wood and give it a polished look. Polyurethane is a clear, protective coating that can be applied on top of the stained wood to provide a durable finish. In this section, we will discuss the steps to apply polyurethane on stained wood.
There are two types of polyurethane – oil-based and water-based. Oil-based polyurethane takes longer to dry, has a strong odor, and can yellow over time. On the other hand, water-based polyurethane dries quickly, has a low odor, and does not yellow over time. If you have a light-colored stain or want to maintain the natural color of the wood, water-based polyurethane is the best choice.
Before applying polyurethane, ensure that the surface is clean and free of dust and debris. Sand the surface with fine-grit sandpaper and wipe it down with a tack cloth to remove any remaining dust. If the surface has any imperfections, fill them with wood filler and sand them down until smooth.
Using a natural bristle brush, apply a thin layer of polyurethane to the surface. Apply the polyurethane in long strokes in direct horizontal motions with the grain of the wood. Ensure that the brush strokes are even and smooth. Let the first coat dry completely before applying the second coat.
Apply the second coat of polyurethane in the same manner as the first coat. The second coat will provide additional protection and give the wood a polished look. Let the second coat dry completely before using the surface.
In conclusion, applying polyurethane on stained wood is an important step to protect the wood and give it a polished look. By following these simple steps, you can apply polyurethane on stained wood and achieve a professional-looking finish.
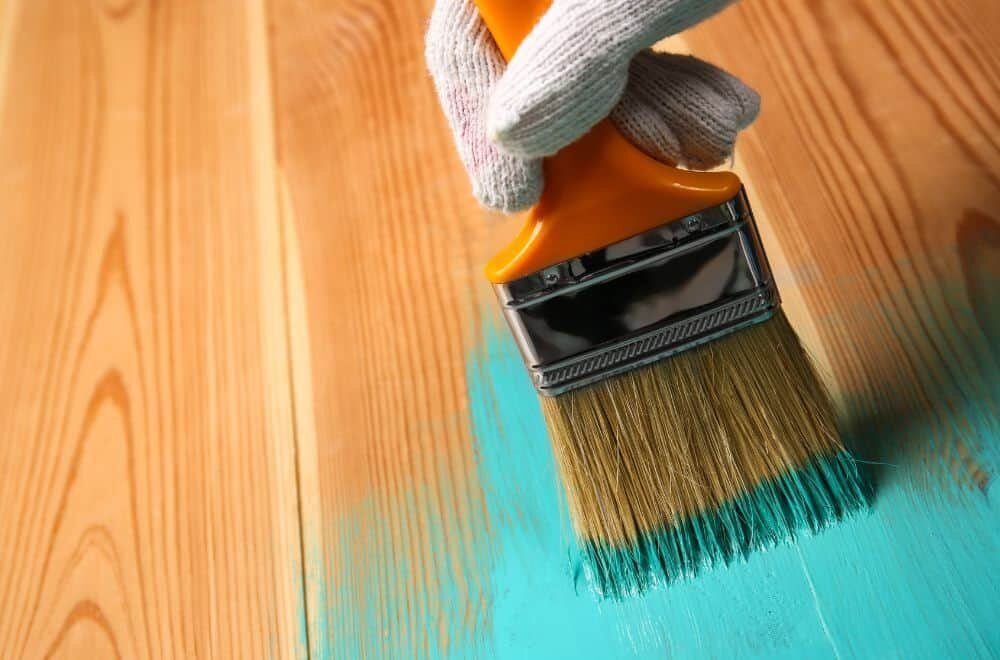
When it comes to preserving the look and feel of your wooden furniture, applying polyurethane on stained wood can be a game-changer. Here are some benefits of applying polyurethane on stained wood:
Polyurethane is a durable and scratch-resistant coating that can help protect your wooden furniture from scratches and stains. By applying polyurethane on stained wood, you can ensure that your furniture stays looking new for longer.
Polyurethane gives a smooth and shiny finish to the stained wood. It enhances the natural beauty of the wood and gives it a glossy look that can make it stand out in any room.
Polyurethane can help extend the life of your wooden furniture. By providing a protective layer over the stained wood, polyurethane can help prevent damage caused by exposure to sunlight, moisture, and other environmental factors.
Polyurethane makes maintenance of the stained wood easy. It prevents dust from settling on the surface of the wood and makes it easier to clean. You can simply wipe the surface of the wood with a damp cloth to keep it looking clean and shiny.
Polyurethane can be used on a variety of wooden surfaces, from floors to furniture. It can be applied over different types of stains and finishes, making it a versatile coating for any wooden surface.
Overall, applying polyurethane on stained wood can be a great way to protect and enhance the natural beauty of your wooden furniture.
If you are planning to apply polyurethane on stained wood, there are a few potential drawbacks that you should consider:
Polyurethane can have a slight yellowing effect on the wood, which can alter the color of the stain. This is especially true for oil-based polyurethane. If you want to maintain the color of the stain, it’s important to choose a water-based polyurethane that won’t yellow over time.
Polyurethane can create a plastic-like appearance on the wood, which can detract from the natural beauty of the grain. This is especially true for high-gloss polyurethane. If you want to maintain a natural look, it’s important to choose a satin or matte finish.
Polyurethane can be difficult to apply, especially if you are not experienced with the process. It can be prone to drips, bubbles, and uneven coverage. It’s important to follow the manufacturer’s instructions carefully and to apply the polyurethane in thin, even coats.
Polyurethane can be difficult to remove once it has been applied. If you make a mistake during the application process, it can be challenging to fix without sanding down the entire surface and starting over. It’s important to take your time and work carefully to avoid any mistakes.
Overall, there are some potential drawbacks to applying polyurethane on stained wood. However, if you choose the right type of polyurethane and apply it carefully, you can achieve a beautiful, durable finish that will protect your wood for years to come.
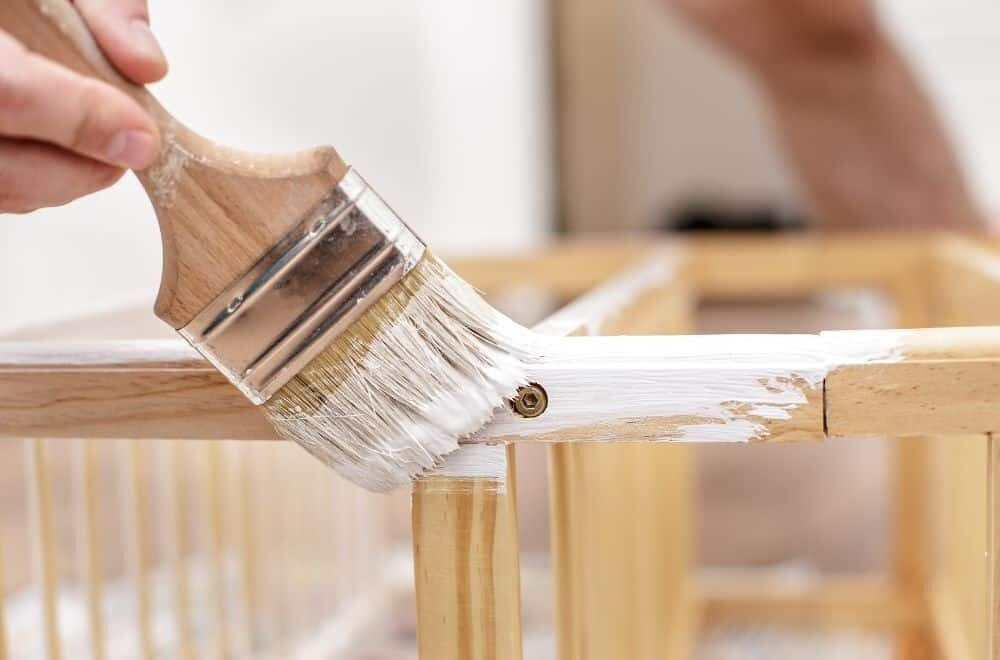
If you have recently stained your wood and are wondering whether to apply polyurethane on top of it or not, the answer is yes. Polyurethane is a protective coating that helps to prevent scratches and water damage while also enhancing the wood’s natural beauty. Here are the steps to follow when applying polyurethane on stained wood.
Before you start applying polyurethane, make sure your wood is clean and free of any dust or debris. You can use a tack cloth or a vacuum cleaner to remove any dirt or sawdust. If you notice any imperfections on the wood surface, sand it down gently with a fine-grit sandpaper.
Next, choose the type of polyurethane you want to use. There are two types of polyurethane: water-based and oil-based. Water-based polyurethane is easy to clean up and dries faster, while oil-based polyurethane is more durable and gives a richer finish. Make sure to read the label carefully and follow the manufacturer’s instructions.
When applying polyurethane, use a high-quality brush or a foam applicator. Start by applying a thin coat of polyurethane in the direction of the wood grain. Make sure to spread the polyurethane evenly and avoid leaving any brush marks or bubbles. If you notice any bubbles, gently brush them out with a dry brush.
Wait for the first coat to dry completely before applying the second coat. Depending on the type of polyurethane you are using, this may take anywhere from 2 to 24 hours. Once the first coat is dry, lightly sand the surface with a fine-grit sandpaper to remove any imperfections. Then, apply a second coat of polyurethane in the same manner as the first coat.
After applying the final coat of polyurethane, wait for it to dry completely before using the wood surface. This can take anywhere from 24 to 72 hours, depending on the type of polyurethane and the humidity level in your area.
Once the polyurethane is dry, it will still need to cure for several days before it reaches its maximum hardness and durability. Avoid placing any objects on the wood surface or exposing it to water or heat until the polyurethane has fully cured.
In summary, applying polyurethane on stained wood is a simple process that requires a bit of patience and attention to detail. With the right tools and techniques, you can protect and enhance the natural beauty of your wood for years to come.
Once you have applied polyurethane to your stained wood, it is important to properly maintain it to ensure its longevity and beauty. Here are some tips to help you maintain your polyurethane-coated wood:
Regular cleaning is essential to maintain the appearance and durability of your polyurethane-coated wood. You can use a soft cloth or a damp mop to clean the surface. Avoid using harsh chemicals or abrasive cleaners, as they can damage the polyurethane coating. Instead, use mild soap and water to clean the surface.
Polyurethane-coated wood is durable, but it is not indestructible. Avoid dragging heavy objects across the surface, as this can cause scratches and dents. Use furniture pads or coasters to protect the surface from scratches and dents.
Polyurethane-coated wood can withstand moderate temperatures, but it is not designed to withstand extreme temperatures. Avoid placing hot objects directly on the surface, as this can cause the polyurethane coating to melt or warp. Similarly, avoid exposing the surface to extreme cold, as this can cause the polyurethane coating to crack.
Over time, the polyurethane coating may start to wear away. When this happens, you can recoat the surface to restore its appearance and durability. Before recoating, clean the surface thoroughly and sand it lightly to remove any rough spots. Apply a thin coat of polyurethane and allow it to dry completely before applying a second coat.
By following these tips, you can maintain the beauty and durability of your polyurethane-coated wood for years to come.
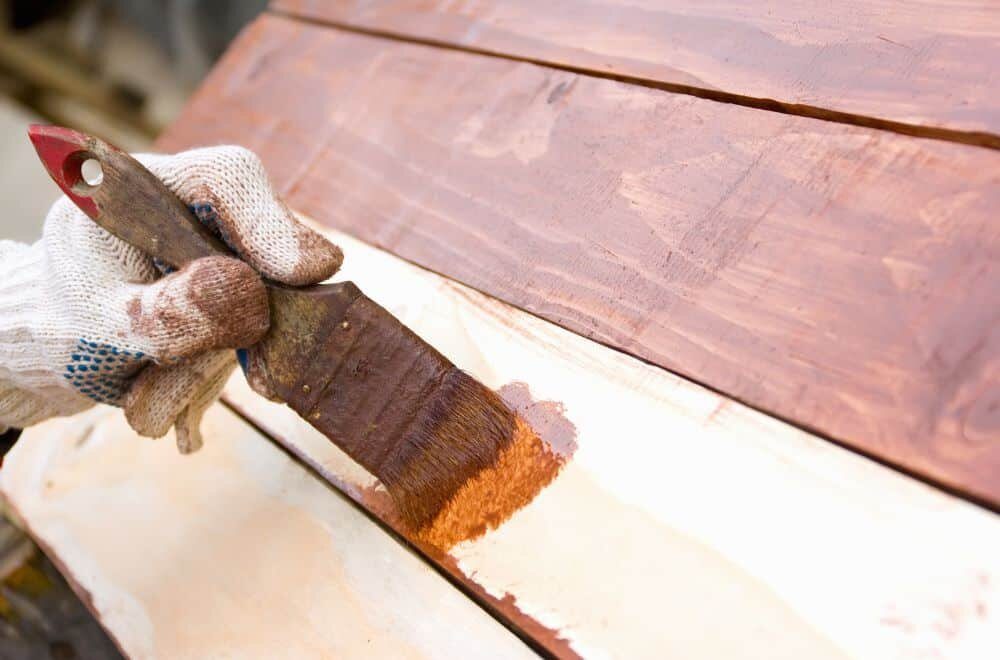
If you’re looking for alternatives to polyurethane for stained wood, you’re in luck! There are several options available that can provide a protective finish for your stained wood without using polyurethane.
Tung oil is a natural oil that is derived from the seeds of the tung tree. It is a popular alternative to polyurethane because it is easy to apply and provides a durable finish that enhances the natural beauty of the wood. Tung oil is also resistant to water and stains, making it a great choice for high-traffic areas.
Shellac is a natural resin that is derived from the secretions of the lac bug. It has been used for centuries as a wood finish and is still a popular choice today. Shellac is easy to apply and dries quickly, providing a hard, protective finish that resists water, alcohol, and heat.
Lacquer is a synthetic finish that is made from nitrocellulose and other chemicals. It is a popular alternative to polyurethane because it dries quickly and provides a hard, durable finish. Lacquer is also resistant to water and stains, making it a great choice for high-traffic areas.
Wax is a traditional finish that has been used for centuries to protect and enhance the natural beauty of wood. There are several types of wax available, including beeswax, carnauba wax, and candelilla wax. Wax is easy to apply and provides a low-luster finish that enhances the natural grain of the wood. However, wax is not as durable as other finishes and may require more frequent reapplication.
In conclusion, there are several alternatives to polyurethane for stained wood, each with its own unique benefits and drawbacks. Consider your specific needs and preferences when choosing a finish for your stained wood project.
When applying polyurethane to stained wood, it is important to ensure that the surface is clean and free of dust. You can use a clean cloth or brush to apply the polyurethane in thin, even coats. Be sure to follow the manufacturer’s instructions for drying times and the number of coats recommended.
While it is not absolutely necessary to apply polyurethane after staining wood, it is highly recommended. Polyurethane provides a protective layer that helps to prevent scratches and other damage to the stained surface. It also helps to enhance the color and grain of the wood.
Yes, it is recommended to sand between staining and applying polyurethane. This helps to ensure a smooth and even surface for the polyurethane to adhere to. Use a fine-grit sandpaper and be sure to remove all dust before applying the polyurethane.
The recommended wait time before applying polyurethane after staining wood varies depending on the type of stain used. It is best to follow the manufacturer’s instructions for the specific stain you are using. In general, it is recommended to wait at least 24 hours before applying polyurethane.
Yes, you can use water-based polyurethane on stained wood. However, it is important to ensure that the stain is completely dry before applying the water-based polyurethane. Water-based polyurethane dries faster than oil-based polyurethane, so be sure to work quickly and apply thin, even coats.
It is not necessary to seal wood after staining before applying polyurethane. However, if you are using a stain that is not compatible with polyurethane, you may need to apply a sealer before applying the polyurethane. Be sure to check the manufacturer’s instructions for compatibility and application guidelines.


