Rahasia Sukses Poker Online: Cara Ampuh Membaca Lawan di Fase Post-Flop
Di antara seluruh platform penyedia poker online terbaik, fase taruhan post-flop (setelah tiga kartu pertama dibuka) senantiasa diakui sebagai salah

Di antara seluruh platform penyedia poker online terbaik, fase taruhan post-flop (setelah tiga kartu pertama dibuka) senantiasa diakui sebagai salah


Are you having trouble drilling through wood studs? Does your drill bit stop before it reaches the end of the wood, no matter how hard you push? This can be a frustrating problem, but fortunately, there are several reasons why this might be happening and several solutions to try.
One common reason why your drill bit may not be going all the way through the wood is that it is worn. Over time, drill bits can become dull and less effective, making it difficult to penetrate hard materials like wood. Another reason could be that the wood is too dry, making it harder for the drill bit to cut through. Additionally, if you are not applying enough pressure or using the right lubrication, your drill may not be able to complete the job.
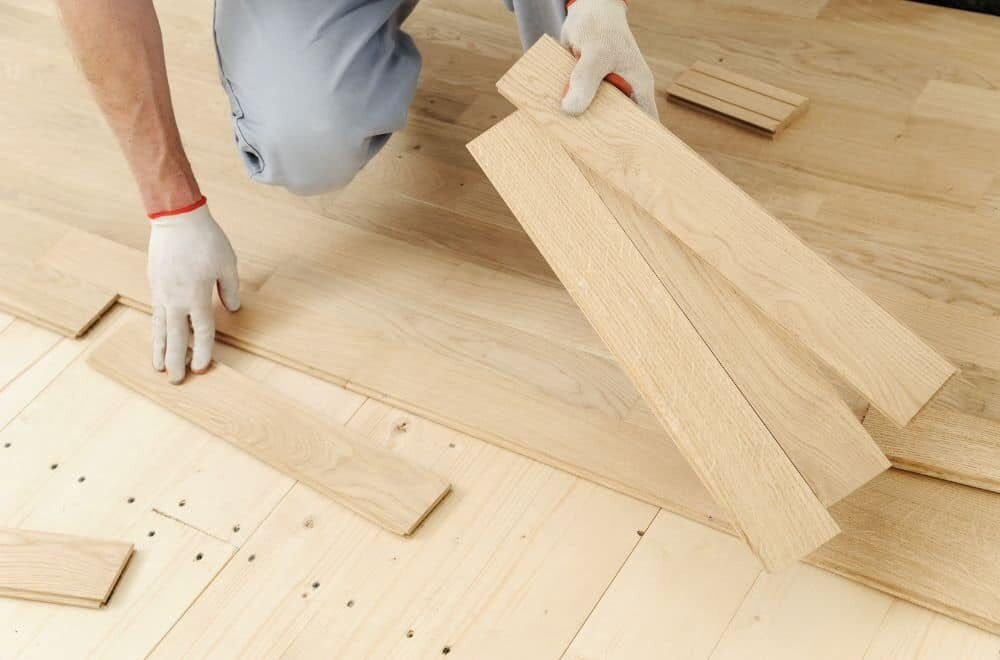
When it comes to drilling into wood studs, it’s important to understand what you’re working with. Wood studs are vertical framing members that make up the structural framework of a building. They are typically made from softwood lumber, such as pine or fir.
Studs are usually spaced 16 or 24 inches apart, center to center, and are typically 1.5 inches thick and 3.5 inches wide. However, the actual dimensions can vary slightly depending on the type of lumber used and the building code requirements in your area.
When drilling into wood studs, it’s important to keep in mind that they can be prone to splitting. This is especially true if you’re using a drill bit that’s too large for the screw you’re using. To avoid splitting, it’s a good idea to use a pilot hole that’s slightly smaller than the screw you’re using.
Another thing to keep in mind is that wood studs can be prone to knots, which can make them harder to drill into. If you encounter a knot while drilling, you may need to use a bit designed for drilling through knots, or you may need to move your hole slightly to avoid the knot.
Overall, understanding the characteristics of wood studs can help you drill into them more effectively and avoid common issues like splitting and knotting. By taking the time to prepare properly and use the right tools and techniques, you can ensure that your drilling projects are successful and long-lasting.

If you’re having trouble drilling through a wood stud, there could be a few reasons why. Here are some common issues to consider:
One reason your drill may not be going all the way through the stud is that the bit you’re using isn’t long enough. Make sure you’re using a bit that is long enough to reach all the way through the stud. If the bit is too short, it won’t be able to penetrate the entire length of the stud.
Another reason your drill may not be able to drill all the way through the stud is that the drill isn’t powerful enough. If you’re using a low-powered drill, it may not have the torque necessary to drill through the wood. Consider using a more powerful drill to get the job done.
The density of the wood you’re drilling through can also be a factor. If the wood is particularly dense, it may be more difficult to drill through. In this case, you may need to use a more powerful drill or a different type of bit that is better suited for drilling through dense wood.
Overall, there are a few different factors that can cause your drill to have trouble drilling through a wood stud. By considering the length of your bit, the power of your drill, and the density of the wood, you can identify the problem and find a solution that works for you.
Pre-drilling is an essential technique that you need to master if you want to avoid ruining your wood project. Here are some pre-drilling techniques that you can follow to ensure that your drill bit goes all the way to the end of the bit:
A dull drill bit can cause your drill to stop before it reaches the end of the bit. Make sure that you use a sharp drill bit to avoid this problem. You can sharpen your drill bit using a bench grinder or a sharpening stone.
Proper lubrication is crucial to ensure that your drill bit goes all the way to the end of the bit. Lubrication reduces friction and heat, which can cause your drill bit to stop before it reaches the end of the bit. You can use a lubricant such as WD-40 to lubricate your drill bit.
Applying enough pressure is another important technique that you need to follow to ensure that your drill bit goes all the way to the end of the bit. You need to apply enough pressure to push the drill bit through the wood. However, be careful not to apply too much pressure, as it can cause your drill bit to break.
Using the right drill bit size is also important to ensure that your drill bit goes all the way to the end of the bit. If you use a drill bit that is too small, it can cause your drill to stop before it reaches the end of the bit. On the other hand, if you use a drill bit that is too big, it can cause your screw to become loose.
By following these pre-drilling techniques, you can ensure that your drill bit goes all the way to the end of the bit. Remember to use a sharp drill bit, proper lubrication, apply enough pressure, and use the right drill bit size.

When it comes to drilling wood studs, choosing the right drill and bit can make all the difference in ensuring a successful outcome. Here are some things to consider when selecting your tools.
The material of the bit can impact its durability and effectiveness. Here are some common bit materials and their benefits:
The type of drill you use can also impact your drilling success. Here are some common types of drills and their benefits:
When selecting your drill and bit, consider the size and hardness of the wood stud you will be drilling into, as well as the volume of work you will be doing. By choosing the right tools for the job, you can ensure a successful outcome every time.
When drilling wood studs, it is important to take safety measures to avoid accidents and injuries. Here are some safety tips to keep in mind:
Before using your drill, inspect it for any damage or defects. Make sure the drill bit is sharp and not worn out. Check the power cord for any cuts or frays, and ensure that the plug is not damaged. If you are using a battery-powered drill, make sure the battery is fully charged.
When drilling, wear protective gear to prevent injuries. This includes safety glasses to protect your eyes from flying debris and gloves to protect your hands from sharp edges. If you are drilling in a noisy environment, wear earplugs to protect your hearing.
Make sure your workpiece is securely clamped or held in place before drilling. This will prevent it from moving or spinning while you drill, reducing the risk of accidents.
Using the right drill bit for the job is crucial for safety and efficiency. Make sure the drill bit is appropriate for the material you are drilling, and that it is the correct size and shape for the hole you need to make.
After each use, clean your drill to remove any sawdust or debris that may have accumulated. This will help keep your drill in good working condition and prevent accidents.
By following these safety measures, you can ensure that your drilling experience is safe and efficient. Remember to always prioritize safety when using power tools.

Drilling into wood studs can be a frustrating experience, especially when the drill bit won’t go all the way to the end. Here are some common drilling issues and how to troubleshoot them:
Using the wrong drill bit size is a common issue that can prevent the drill bit from going all the way through the wood stud. Make sure to use the correct size drill bit for the screw or anchor you are using. The drill bit should be slightly smaller than the screw or anchor to allow for a snug fit.
A dull drill bit can cause the drill to stop before it reaches the end of the wood stud. If your drill bit is dull, it may be time to replace it. You can also sharpen your drill bit using a drill bit sharpener or a sharpening stone.
If your drill speed is too low, the drill bit may not be able to penetrate the wood stud. Make sure to set your drill to the appropriate speed for the size of the drill bit and the material you are drilling into. You can refer to the manufacturer’s instructions for recommended drill speeds.
A clogged drill bit can also prevent the drill from going all the way through the wood stud. Make sure to clear any debris from the drill bit before drilling. You can use a brush or compressed air to clear the debris.
If the drill bit is binding, it may be because the angle of the bit is incorrect. Make sure to hold the drill steady and apply even pressure as you drill. You can also try lubricating the drill bit with a bit of oil to reduce friction.
By troubleshooting these common drilling issues, you can ensure that your drill bit goes all the way through the wood stud. Remember to always follow safety precautions when using power tools and to refer to the manufacturer’s instructions for proper use and maintenance.
If your drill bit won’t go through wood, it could be due to a few reasons. One reason could be that the bit is dull or damaged. Another reason could be that you are not applying enough pressure while drilling. Ensure that you are using the correct type of bit for the type of wood you are drilling into.
To get your drill bit to go all the way through wood, ensure that you are using a sharp bit and applying enough pressure while drilling. You can also try drilling a pilot hole first to make it easier for the drill bit to go through the wood.
If your drill bit is not drilling through wood, it could be due to a few reasons. One reason could be that the bit is dull or damaged. Another reason could be that you are not applying enough pressure while drilling. Ensure that you are using the correct type of bit for the type of wood you are drilling into.
To make your drill bit grip better, ensure that it is properly secured in the chuck. You can also try using a bit with a threaded shank, which will help it stay in place better.
If your screw won’t go all the way into a wood stud, it could be due to a few reasons. One reason could be that the screw is too long for the thickness of the wood. Another reason could be that the screw is not properly aligned with the pilot hole. Ensure that you are using the correct size and type of screw for the job.
If your wood screw won’t go all the way in, it could be due to a few reasons. One reason could be that the screw is too long for the thickness of the wood. Another reason could be that the screw is not properly aligned with the pilot hole. Ensure that you are using the correct size and type of screw for the job.

Are you looking to glue glass to wood, but not sure which glue to use? It can be a tricky process, as glass and wood have very different properties and require a strong adhesive to create a lasting bond. In this article, we will explore the different types of glue that work best for gluing glass to wood and provide you with some tips to ensure a successful bond.
One of the best types of glue to use when attaching glass to wood is epoxy adhesive. Epoxy is known for its strong and durable bonding qualities and can be used on a wide range of surfaces. It dries clear and forms a seriously strong bond. Other popular options include superglue, silicone glue, or even hot glue from a glue gun. Each of these glues has its own unique properties and can work well depending on the specific needs of your project.

When it comes to gluing glass to wood, it’s important to understand the characteristics of both materials. Glass is a hard, brittle, and transparent material that is commonly used for windows, mirrors, and decorative items. It is made by heating sand, soda ash, and limestone to a high temperature until it melts and then cooling it rapidly to create a solid material.
Glass has a few important properties to consider when gluing it to wood. First, it is non-porous, which means that it doesn’t absorb liquids or gases. This can make it difficult for some adhesives to bond with glass. Second, glass is smooth and slippery, which can make it challenging for some adhesives to grip onto it. Finally, glass is fragile and can crack or shatter easily if it is not handled carefully.
Wood is a natural material that is commonly used for furniture, flooring, and building structures. It is made up of fibers that are held together by a natural adhesive called lignin. Wood can be soft or hard, depending on the species and how it is treated. It can also be porous or non-porous, depending on the type of wood and how it is finished.
When gluing glass to wood, it’s important to consider the characteristics of the wood as well. First, wood is porous, which means that it can absorb liquids and gases. This can make it easier for some adhesives to bond with wood. Second, wood can be rough or smooth, depending on how it is finished. A rough surface can provide more grip for an adhesive, while a smooth surface can make it more challenging for an adhesive to hold onto the wood. Finally, wood can be flexible or rigid, depending on the thickness and type of wood. It’s important to choose an adhesive that can accommodate the flexibility of the wood to prevent cracking or splitting.
Overall, understanding the characteristics of both glass and wood is important when choosing an adhesive for gluing them together. By considering the porosity, smoothness, and flexibility of each material, you can choose an adhesive that will provide a strong and durable bond.
When it comes to gluing glass to wood, there are several types of glue that you can use. Each type of glue has its own unique properties that make it suitable for different applications. In this section, we will discuss the most common types of glue used for gluing glass to wood.
Epoxy resin is a popular type of glue for bonding glass to wood. It is a two-part adhesive that consists of a resin and a hardener. When these two components are mixed together, they create a strong and durable bond. Epoxy resin is known for its excellent adhesion to a wide range of surfaces, including glass and wood. It also dries clear, which makes it ideal for applications where appearance is important.
One of the advantages of using epoxy resin is that it can be used on both porous and non-porous surfaces. It is also resistant to water, heat, and chemicals, which makes it suitable for outdoor applications. However, it can take several hours to cure, so you will need to be patient when using this type of glue.
Polyurethane adhesive is another type of glue that can be used for bonding glass to wood. It is a one-part adhesive that cures by reacting with moisture in the air. Polyurethane adhesive is known for its excellent bonding strength and flexibility. It can also be used on a wide range of surfaces, including glass and wood.
One of the advantages of using polyurethane adhesive is that it cures quickly, usually within 24 hours. It is also resistant to water, heat, and chemicals, which makes it suitable for outdoor applications. However, it can be difficult to remove once it has cured, so you will need to be careful when using this type of glue.
Silicone adhesive is a type of glue that is often used for bonding glass to wood. It is a one-part adhesive that cures by reacting with moisture in the air. Silicone adhesive is known for its excellent flexibility and durability. It can also be used on a wide range of surfaces, including glass and wood.
One of the advantages of using silicone adhesive is that it is easy to apply and can be used on both porous and non-porous surfaces. It is also resistant to water, heat, and chemicals, which makes it suitable for outdoor applications. However, it can take several hours to cure, so you will need to be patient when using this type of glue.

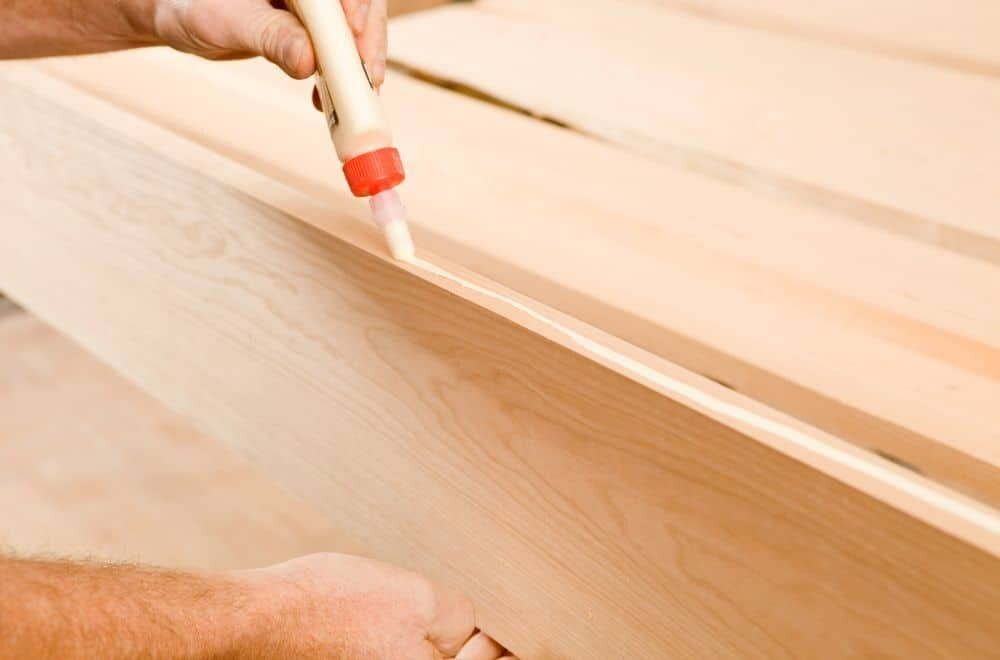
Before you begin gluing glass to wood, there are a few important steps you should take to ensure a successful bond. In this section, we’ll cover the two main steps you should take before applying any glue: cleaning the surfaces and applying the glue.
The first step in preparing to glue glass to wood is to clean the surfaces that will be bonded. Any dirt, dust, or debris on the surfaces can prevent the glue from adhering properly, so it’s important to clean them thoroughly.
To clean the glass surface, use a glass cleaner and a lint-free cloth. Make sure to remove any fingerprints or smudges, as these can also interfere with the bonding process. If the glass surface is particularly dirty, you may need to use a degreaser or rubbing alcohol to remove any stubborn grime.
For the wood surface, use a damp cloth to remove any dust or debris. If the wood is particularly dirty, you can use a mild soap and water to clean it. Be sure to let the wood dry completely before proceeding to the next step.
Once the surfaces are clean and dry, it’s time to apply the glue. As we mentioned earlier, epoxy adhesive is the best glue to use for bonding glass to wood. Here’s how to apply it:
By following these preparation steps, you’ll be well on your way to successfully bonding glass to wood with epoxy adhesive.
After applying the glue to your glass and wood surfaces, it’s important to allow sufficient time for the glue to cure. The curing time can vary depending on the type of glue used. For example, epoxy glue can take up to 24 hours to cure completely. During this time, it’s important to keep the glass and wood surfaces stationary and avoid any movement or jostling that could disrupt the curing process.
To ensure a strong bond, it’s also important to apply pressure to the glued surfaces during the curing process. This can be done by using clamps or weights to hold the surfaces together while the glue cures. Check the manufacturer’s instructions for specific pressure recommendations.
Once the glue has fully cured, you can remove any clamps or weights and inspect the bond between the glass and wood surfaces. If necessary, you can use sandpaper to smooth out any rough edges or excess glue that may have seeped out during the gluing process.
To give your project a professional finish, you can also consider painting or staining the wood surface. Be sure to use a paint or stain that is safe for use on glass surfaces if you plan to apply it to the glass as well.
Overall, taking the time to properly cure and finish your glass to wood project will ensure a strong and long-lasting bond that will stand up to everyday use.
When working with glue, it’s important to take proper safety precautions to avoid any accidents or injuries. Here are a few safety tips to keep in mind when gluing glass to wood:
Before you start gluing, make sure you’re wearing protective gear such as gloves, goggles, and a mask. This will help protect your skin, eyes, and lungs from any harmful chemicals in the glue.
When using glue, it’s important to work in a well-ventilated area to avoid inhaling any fumes. Open windows and doors, or use a fan to circulate the air in the room.
Using too much glue can cause it to seep out and make a mess, while using too little can result in a weak bond. Follow the instructions on the glue packaging to ensure you’re using the right amount.
Glue can be toxic if ingested, so it’s important to keep it out of reach of children and pets. Store your glue in a safe place where it can’t be accidentally accessed.
If you accidentally spill glue, clean it up immediately with a damp cloth. Avoid using hot water, as this can cause the glue to set and become even harder to remove.
By following these safety precautions, you can ensure that your gluing project goes smoothly and safely.
Epoxy adhesive is one of the most effective adhesives for attaching glass to a wooden frame. It is strong, durable, and can be applied to a wide range of surfaces. Superglue, silicone glue, and hot glue from a glue gun are also popular options.
For attaching wood to a glass mirror, silicone adhesive or clear epoxy is the best option. These adhesives provide a strong and durable bond that can withstand the weight of the mirror.
Gorilla Glue can be used to attach glass to wood, but it may not be the best option. Gorilla Glue expands as it dries, which can cause the glass to crack or break. It is best to use a clear epoxy or silicone adhesive for attaching glass to wood.
The best way to secure glass to a wooden table top is to use clear silicone adhesive or clear epoxy. Apply the adhesive to the edges of the glass and press it firmly onto the wooden table top. Allow the adhesive to dry completely before using the table.
Liquid Nails is not recommended for attaching glass to wood. It is designed for use with porous materials and may not provide a strong enough bond for glass.
E6000 is a suitable adhesive for attaching glass to wood. It is a strong and durable adhesive that can be used on a wide range of surfaces. However, it is important to follow the manufacturer’s instructions carefully and allow the adhesive to dry completely before using the glass.

Cutting a circle in wood with hand tools can seem like a daunting task, but it’s actually quite simple once you know the right techniques. Whether you’re a beginner or an experienced woodworker, cutting circles by hand is a useful skill to have in your arsenal. With the right tools and a little bit of practice, you can create perfect circles every time.
One of the most common hand tools used for cutting circles in wood is a coping saw. This saw has a thin, flexible blade that allows you to make intricate cuts with ease. To use a coping saw, you’ll need to start by drilling a small hole in the center of your circle. Then, insert the blade of the saw into the hole and begin cutting along the line you’ve drawn. As you cut, be sure to keep the saw blade perpendicular to the wood to ensure a clean cut.
Another tool that can be used for cutting circles in wood is a hand-held jigsaw. This saw has a reciprocating blade that moves up and down, allowing you to make curved cuts with ease. To use a jigsaw, you’ll need to start by drilling a small hole in the center of your circle. Then, insert the blade of the saw into the hole and begin cutting along the line you’ve drawn. As you cut, be sure to keep the saw blade perpendicular to the wood to ensure a clean cut.

Woodworking is a craft that involves creating objects from wood. It requires skill, patience, and the right tools. In this section, we will cover the basics of woodworking, including the types of wood and hand tools used in the craft.
There are many types of wood used in woodworking, each with its own properties and characteristics. Some of the most common types of wood used in woodworking include:
When choosing wood for your woodworking project, consider the intended use of the object, as well as your budget and personal preferences.
In woodworking, hand tools are used to shape and manipulate wood. Some of the most common hand tools used in woodworking include:
When choosing hand tools for your woodworking project, consider the type of wood you will be working with, as well as the intended use of the object. Invest in high-quality tools that will last for years to come.
Cutting wood requires proper safety measures to prevent accidents and injuries. Here are some safety tips to keep in mind when cutting circles in wood with hand tools:
Before you start cutting wood, make sure you wear the appropriate protective gear. This includes safety glasses or goggles to protect your eyes from sawdust and wood chips, gloves to protect your hands from splinters, and a dust mask to prevent you from inhaling sawdust.
Make sure you use the appropriate tool for the job. Using the wrong tool can be dangerous and can damage the wood. When cutting circles in wood, use a compass or a circle-cutting jig to ensure accurate cuts.
Secure the wood to a workbench or a sawhorse before you start cutting. This will prevent the wood from moving around while you cut and will ensure that your cuts are straight and accurate.
Make sure you keep your hands away from the blade when cutting wood. Use a push stick or a push block to guide the wood through the blade. This will prevent your hands from getting too close to the blade and will ensure that your cuts are straight and accurate.
Always cut away from your body when cutting wood. This will prevent accidents and injuries in case the blade slips or the wood moves unexpectedly.
Take frequent breaks when cutting wood to prevent fatigue and to ensure that you are always alert and focused. Cutting wood requires concentration and focus, and taking breaks can help you maintain your focus and prevent accidents and injuries.
By following these safety measures, you can ensure that you cut circles in wood safely and accurately.

Before you begin cutting a circle in wood with hand tools, you need to prepare the wood properly. Here are a few steps to follow:
The type of wood you use will affect the ease of cutting and the finished product. Choose a wood that is easy to work with and has a smooth surface. Some popular choices include pine, poplar, and birch.
Use a compass or a circle template to measure and mark the circle on the wood. Make sure the circle is centered and the size is correct.
Secure the wood to a workbench or a clamp to prevent it from moving while you cut. This will ensure a straight and even cut.
Choose the right tool for the job. For cutting circles in wood, you can use a coping saw, a jigsaw, or a hand-held rotary tool. Each tool has its advantages and disadvantages, so choose the one that you are most comfortable with.
Choose the right blade for the tool you are using. A fine-toothed blade will give you a smoother cut, while a coarse-toothed blade will cut faster but leave a rougher edge.
By following these steps, you can prepare the wood properly for cutting a circle with hand tools.
To cut a circle in wood with hand tools, you’ll need to start by drawing the circle onto the wood. Here are a few methods you can use to do this:
A compass is a tool used for drawing circles. To use a compass, follow these steps:
If you don’t have a compass, you can use a string and pencil to draw a circle. Here’s how:
If you need to draw the same circle multiple times, you can create a template out of cardboard or another material. Here’s how:
Once you’ve drawn the circle onto the wood, you can move on to cutting it out using hand tools.

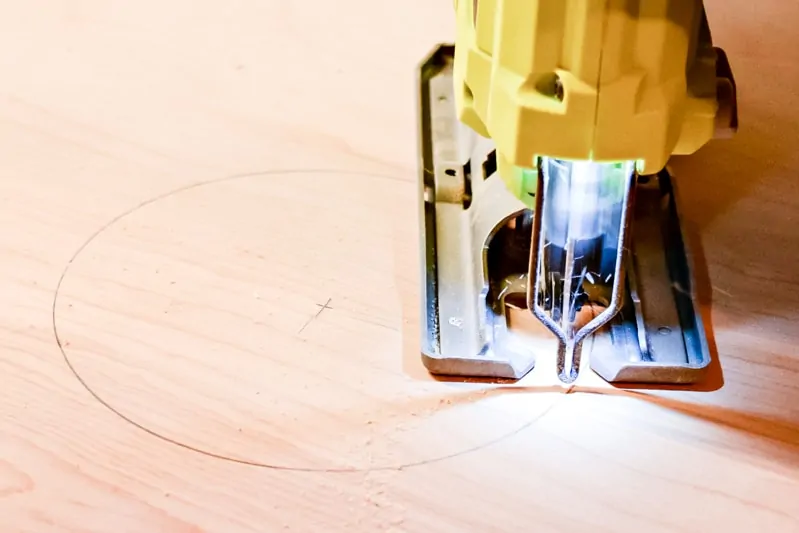
Cutting a circle in wood can be done with a variety of hand tools. In this section, we will discuss two common methods: using a coping saw and using a jigsaw.
A coping saw is a small, handheld saw with a narrow blade that is used to make intricate cuts in wood. It is an excellent tool for cutting circles in wood, especially if you need to make small or irregular shapes.
To cut a circle with a coping saw, follow these steps:
A jigsaw is a handheld power tool that uses a reciprocating blade to cut through wood. It is a versatile tool that can be used to make a variety of cuts, including circles.
To cut a circle with a jigsaw, follow these steps:
Both of these methods are effective for cutting circles in wood. The choice of which method to use will depend on the size and shape of the circle you need to cut, as well as your personal preference and the tools you have available.
Once you have cut the circle in wood with hand tools, it’s time to refine it. This involves sanding the edges and polishing the circle to give it a smooth and finished look.
To sand the edges of the circle, you will need sandpaper. Start with a coarse grit sandpaper and gradually work your way up to a finer grit. This will help smooth out any rough edges and make the circle more even.
To make the sandpaper easier to use, you can wrap it around a piece of dowel or a pencil. This will give you a firm grip and make it easier to sand the edges evenly.
When sanding, be sure to keep the sandpaper flat against the wood and move it in a circular motion. This will help prevent any flat spots or bumps from forming.
Once you have sanded the edges, you can polish the circle to give it a smooth and shiny finish. To do this, you will need a polishing compound and a soft cloth.
Apply a small amount of the polishing compound to the cloth and rub it onto the surface of the circle in a circular motion. Be sure to cover the entire surface evenly.
After applying the polishing compound, use a clean part of the cloth to buff the surface of the circle. This will remove any excess compound and give the wood a smooth and shiny finish.
With these simple steps, you can refine the circle you cut with hand tools and give it a professional-looking finish.

To ensure that your hand tools are in good condition and perform well, you need to take proper care of them. Here are some tips to help you maintain your tools:
By following these tips, you can ensure that your hand tools are in good condition and perform well. Proper maintenance of your tools can also help to extend their lifespan, saving you money in the long run.
The best hand tool to cut circles in wood is a compass saw. It is a small, lightweight saw with a narrow blade that is perfect for cutting curves and circles. It has a pointed tip that allows you to start the cut in the center of the circle, and the narrow blade makes it easy to follow the curve of the circle.
If you don’t have a jigsaw, you can still cut a circle in wood using a compass saw or a coping saw. First, mark the center of the circle and draw the circle on the wood. Then, drill a hole in the center of the circle and insert the blade of the saw. Start cutting along the line of the circle, following the curve of the blade.
A circle cutting jig is a tool that attaches to a jigsaw or a router and allows you to cut perfect circles in wood. It works by holding the wood in place and guiding the blade of the tool along the circumference of the circle. The jig can be adjusted to cut circles of different sizes.
To make a wooden circle frame using hand tools, you will need a compass saw, a chisel, and a mallet. First, cut the circle out of the wood using the compass saw. Then, use the chisel and mallet to create a rabbet on the back of the circle. The rabbet should be the same depth as the thickness of the frame. Finally, cut the frame pieces to size and glue them to the circle.
The recommended drill bit for cutting circles in wood is a hole saw. A hole saw is a circular saw blade with teeth that is used to cut holes in wood. It attaches to a drill and is available in different sizes. It is important to choose a hole saw that is the same size as the circle you want to cut.
To cut large circles in plywood with hand tools, you will need a compass saw and a jigsaw. First, use the compass saw to cut a rough circle in the plywood. Then, use the jigsaw to cut along the line of the circle, following the curve of the blade. It is important to use a sharp blade and to take your time to ensure a clean cut.

Are you wondering why sanding is necessary after staining wood? If you’re a DIY enthusiast or a professional woodworker, you might have asked yourself this question at some point. Sanding is an essential step in the wood finishing process, and it can significantly affect the final outcome of your project. In this article, we’ll explore the reasons why sanding after staining is crucial and how it can improve the appearance and durability of your woodwork.
When you apply a wood stain, it can raise the grain of the wood, causing it to feel rough and uneven. Sanding after staining helps to smooth out the surface, removing any roughness or bumps caused by the raised grain. This step also helps to even out the color of the stain and enhance the natural beauty of the wood. Additionally, sanding after staining can help the subsequent coats of finish adhere better to the wood, improving the durability and longevity of your project.
Staining wood is a popular way of enhancing its natural beauty. It involves applying a colored liquid to the wood surface to change its color or highlight its natural grain. Wood stains come in various colors, shades, and types, including oil-based, water-based, and gel stains.
Before staining wood, it’s essential to prepare the surface by sanding it to remove any dirt, debris, or old finishes. Sanding also opens up the wood pores, allowing the stain to penetrate deeper and adhere better.
When you apply the stain, it seeps into the wood fibers, coloring them and changing their appearance. The stain can also highlight the natural grain of the wood, making it look more attractive.
However, staining wood can also have some downsides. For instance, some types of wood, such as pine and birch, have a blotchy appearance and can absorb the stain unevenly. In such cases, you may need to use a pre-stain conditioner to help the wood absorb the stain more evenly.
Additionally, some types of wood stains, such as water-based stains, can cause the wood grain to rise. This can lead to the lifting of individual fibers, making the wood surface rough and uneven. To remedy this, you may need to sand the wood surface after staining to smooth it out and remove any raised fibers.
Overall, staining wood can be a great way of enhancing its natural beauty and character. By understanding the basics of wood staining and proper preparation techniques, you can achieve a beautiful and long-lasting finish on your woodworking projects.

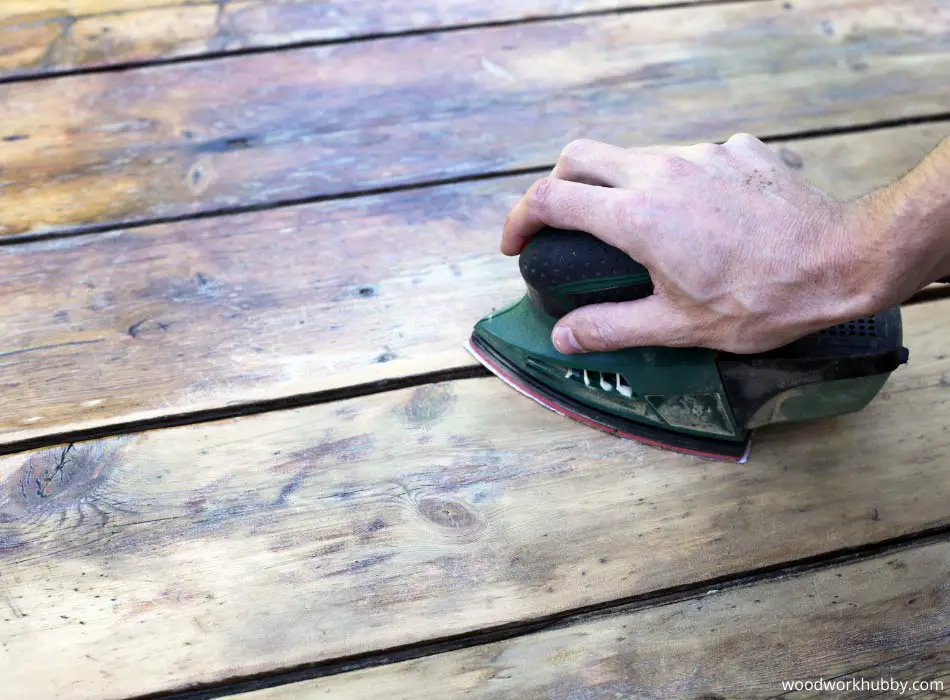
Sanding after staining is an essential step in achieving a smooth, professional-looking finish. The purpose of sanding is to prepare the surface of the wood for the next layer of finish, whether it be another coat of stain, a sealer, or a topcoat. Sanding also helps to promote adhesion between the layers of finish, ensuring that they bond properly and create a durable, long-lasting finish.
One of the main reasons for sanding after staining is to prepare the surface of the wood for the next layer of finish. Sanding helps to remove any rough spots or raised grain that may have resulted from the staining process. It also helps to smooth out any brush or roller marks that may have been left behind. Sanding creates a uniformly smooth surface that is ready for the next layer of finish.
Another important reason for sanding after staining is to promote adhesion between the layers of finish. Sanding creates a slightly rough surface that allows the next layer of finish to bond more effectively. This helps to ensure that the finish is durable and long-lasting. Without proper adhesion, the finish may peel or flake off over time, leaving the wood unprotected and vulnerable to damage.
In summary, sanding after staining is an important step in achieving a smooth, professional-looking finish. Sanding helps to prepare the surface of the wood for the next layer of finish and promotes adhesion between the layers of finish. By taking the time to sand properly, you can ensure that your finished product looks great and lasts for years to come.
Before you start sanding, you need to have the right tools. Here are the tools you will need:
| Tools | Description |
|---|---|
| Sandpaper | Choose a grit that is appropriate for your project. |
| Sanding Block | This will help you keep the sandpaper flat and even. |
| Vacuum | You will need to clean up the dust and debris created by sanding. |
| Tack Cloth | Use this to wipe off any remaining dust or debris. |
Now that you have the tools, you can start sanding. Here is a step-by-step guide:
By following these steps, you can achieve a smooth and even finish on your stained wood project.

When it comes to staining wood, sanding is an important step that should not be overlooked. Sanding after staining offers several benefits that can help enhance the overall look and longevity of your project. In this section, we will discuss two major benefits of sanding after staining: enhanced wood grain and longevity of the stain.
Sanding after staining can help enhance the natural beauty of the wood grain. Staining can sometimes raise the wood grain, which can make the surface feel rough to the touch. Sanding can help smooth out the surface and bring out the natural patterns and colors of the wood. It can also help remove any excess stain that may have been applied, which can result in a more even and consistent color.
Sanding after staining can also help improve the longevity of the stain. When wood is stained, the stain penetrates the surface and can sometimes leave behind excess pigment on the surface. This excess pigment can cause the stain to wear off more quickly over time. By sanding after staining, you can remove any excess pigment and create a smoother surface that is less likely to wear off.
In addition, sanding after staining can also help prepare the surface for a topcoat. A topcoat can help protect the stain from wear and tear, but it needs a smooth surface to adhere to. Sanding after staining can help create this smooth surface and ensure that the topcoat adheres properly.
Overall, sanding after staining is an important step that should not be skipped. It can help enhance the natural beauty of the wood grain and improve the longevity of the stain. So, if you want your project to look its best and last for years to come, be sure to take the time to sand after staining.
When it comes to sanding after staining wood, there are a few common mistakes that you should avoid to ensure a smooth and even finish. Here are two common mistakes to keep in mind:
One of the most common mistakes people make when sanding after staining wood is over sanding. Over sanding can cause the stain to be removed in some areas, leaving you with an uneven finish. This can be especially problematic if you are using a dark stain, as the lighter areas will be more noticeable.
To avoid over sanding, start with a fine grit sandpaper and work your way up to a coarser grit if necessary. Be sure to sand lightly and evenly, and avoid applying too much pressure. If you’re not sure if you’re over sanding, stop and take a look at the wood. If the stain is starting to come off, you’re sanding too much.
Another common mistake is using the wrong sandpaper grit. If you use a sandpaper that is too coarse, you can end up with scratches in the wood that will be visible after staining. On the other hand, if you use a sandpaper that is too fine, it may not be effective at removing the top layer of the wood, which can prevent the stain from penetrating evenly.
To avoid this mistake, start with a medium grit sandpaper and work your way up or down depending on the condition of the wood. For example, if the wood is rough or has a lot of scratches, you may need to start with a coarser grit. If the wood is already smooth, you can start with a finer grit.
By avoiding these common mistakes, you can ensure that your stained wood has a smooth and even finish that looks great.

Sanding stained wood can be a tricky task, but with the right tools and techniques, you can do it safely and effectively. Here are some safety tips to keep in mind when sanding stained wood:
Before you start sanding, make sure you have the right protective gear. This includes a dust mask or respirator, safety glasses, and gloves. Sanding can create a lot of dust, which can be harmful if inhaled or ingested. Protect your eyes and skin from dust and debris by wearing the appropriate gear.
Choosing the right sandpaper is crucial when sanding stained wood. Use a fine-grit sandpaper, such as 220-grit, to avoid damaging the stain or the wood. Coarse-grit sandpaper can scratch the surface of the wood and remove too much of the stain, while too fine-grit sandpaper may not be effective in removing rough spots or fibers.
When sanding stained wood, always sand with the grain of the wood. Sanding against the grain can cause scratches and damage the surface of the wood. Sanding with the grain will help you achieve a smooth, even finish.
Be careful not to over-sand the wood. Sanding too much can remove too much of the stain, leaving the wood looking uneven or patchy. Sand just enough to remove any rough spots or fibers and achieve a smooth finish.
After sanding, make sure to clean up thoroughly. Use a vacuum or dustpan to remove any dust or debris left behind. Wipe down the surface of the wood with a clean cloth to remove any remaining dust or debris.
By following these safety tips, you can sand stained wood safely and achieve a beautiful, smooth finish.
Sanding after staining helps to smooth out any rough spots or unevenness on the surface of the wood. This creates a smooth and uniform surface, which enhances the overall appearance of the wood. Sanding also helps to remove any excess stain that has not been absorbed into the wood, which can cause blotches and uneven coloring.
If you want to restain wood, it is generally recommended that you sand it first. This helps to remove any existing stain or finish, which can prevent the new stain from penetrating the wood properly. However, if the existing stain is in good condition and you are using a similar color or a darker color, you may be able to skip sanding and simply apply the new stain over the old one.
If you do not sand before applying polyurethane, the finish may not adhere properly to the wood. This can result in a rough or uneven finish, or the finish may peel or flake off over time. Sanding also helps to smooth out any imperfections on the surface of the wood, which can enhance the overall appearance of the finished product.
Yes, it is generally recommended that you sand between coats of stain and polyurethane. This helps to create a smooth and uniform surface, and it also helps to remove any dust or debris that may have settled on the surface during the drying process. Sanding between coats also helps to ensure that the subsequent coats adhere properly to the previous ones.
When sanding stained wood, it is important to use a fine-grit sandpaper (220 grit or higher) and to sand lightly. Avoid using too much pressure, as this can remove too much color and damage the wood. Sand in the direction of the grain, and use a tack cloth or vacuum to remove any dust or debris before applying a new coat of stain or finish.
Sanding does not typically affect the color of the stain. However, if you sand too aggressively or use a coarse-grit sandpaper, you may remove too much of the stain and lighten the color. It is important to sand lightly and use a fine-grit sandpaper to avoid removing too much color.

If you’re a DIY enthusiast or a professional woodworker, you know that having your wood cut precisely can make a big difference in the outcome of your project. Whether you need a few cuts or a lot, finding a reliable place to get your wood cut can be a challenge. Fortunately, there are several options available to you, both free and fee-based.
One of the most popular places to go for wood cutting services is Home Depot. They have a designated wood-cutting area where they can cut any wood you purchase in-store to the size you need. However, they have a policy that only the first few cuts are free, and there may be a charge for additional cuts. Other big-box stores like Lowe’s, Ace Hardware, Menards, and True Value also offer wood cutting services, but their policies may vary.
If you prefer to go to a local workshop or lumber yard, you may be able to find a skilled craftsman who can cut your wood to your exact specifications. Many local makerspaces and trade schools also offer wood cutting services, as do local tradespeople like handymen and carpenters. While these options may come with a cost, they can provide you with the precision and expertise you need to get the job done right.
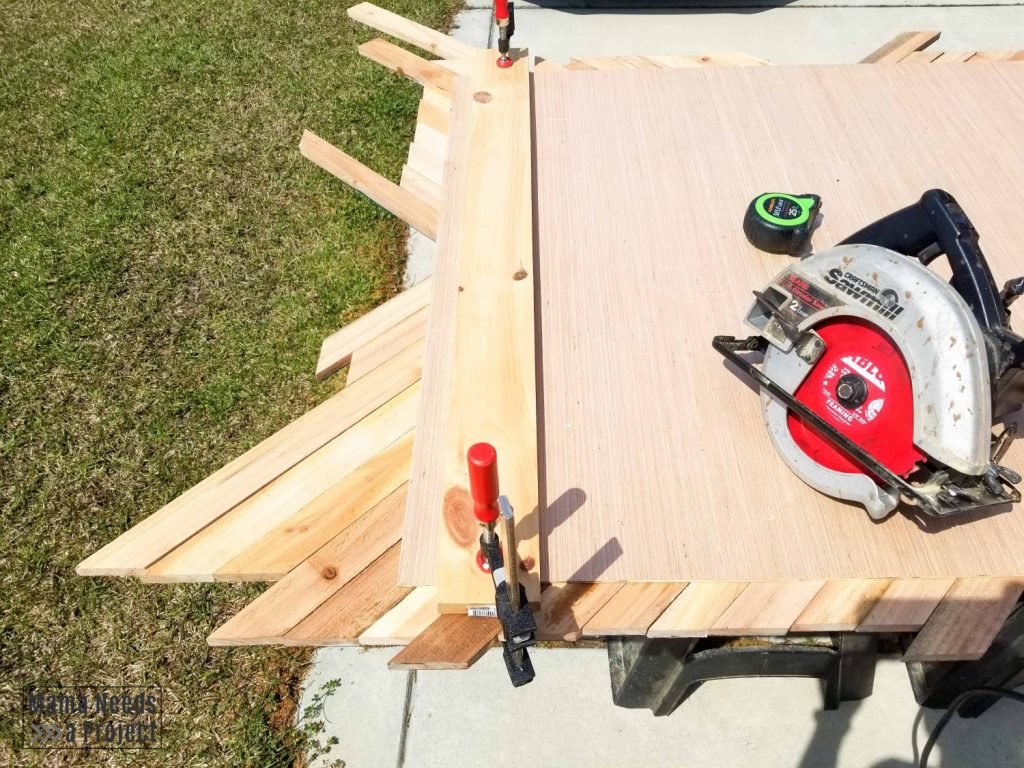
When it comes to precision wood cutting, it’s all about accuracy. Every cut you make needs to be precise, or else you risk ruining your project. Here are a few things to keep in mind when you’re cutting wood:
This old adage is especially true when it comes to precision wood cutting. You need to measure your wood carefully before you make any cuts. Make sure you’re measuring the right part of the wood, and double-check your measurements to ensure accuracy.
Precision wood cutting requires the right tools. You need a saw that’s sharp and in good condition, and you need to use the right type of saw for the job. A circular saw is great for straight cuts, while a jigsaw is better for curves and intricate designs.
Before you start cutting, mark your wood where you want to make the cut. Use a pencil to draw a straight line or a curve, depending on what you’re cutting. Make sure your line is clear and easy to see.
When you’re cutting, go slow and be careful. Keep your saw blade aligned with your cut line, and make sure you’re cutting straight. Don’t force the saw through the wood; let it do the work for you.
After you’ve made your cut, sand the edges of your wood to smooth them out. This will help your project look more professional, and it will also remove any splinters or rough spots.
Remember, precision wood cutting takes practice. Don’t be discouraged if your first few cuts aren’t perfect. Keep practicing, and you’ll get better over time.

If you’re looking to get wood cut precisely, one of the first places you should consider is your local hardware store. Here are some options to keep in mind:
Big box retailers like Home Depot, Lowe’s, and Menards are great options for getting wood cut. They typically have a dedicated cutting area with saws and other equipment to make precise cuts. You can bring in your own wood or purchase it at the store and have it cut to your specifications. Some stores may even offer free cutting services for certain types of wood or cuts.
In addition to big box retailers, you may also have local specialty stores in your area that offer wood cutting services. These stores may have a more limited selection of wood, but they may also have more specialized equipment and expertise. Some examples of local specialty stores that may offer wood cutting services include woodworking supply stores and lumber yards.
When visiting a local hardware store, be sure to bring your measurements and specifications with you. This will help ensure that you get the precise cuts you need. Additionally, it’s always a good idea to call ahead to confirm that the store offers wood cutting services and to ask about any fees or restrictions.
If you’re looking for precise wood cutting, professional woodworking shops are a great option. These shops are equipped with high-quality tools and experienced staff who can ensure that your wood is cut to your exact specifications. Here are some sub-sections to consider:
Custom furniture makers are a great option if you need wood cut for a specific piece of furniture. These professionals can help you design and build custom furniture pieces that meet your exact specifications. They have the expertise and equipment to cut wood to precise measurements, ensuring that your furniture fits perfectly in your space.
When working with custom furniture makers, be sure to provide them with detailed plans and measurements for your project. This will help them understand your vision and create a piece of furniture that meets your needs.
Carpentry contractors are another option for precise wood cutting. These professionals specialize in building and installing structures made of wood, such as cabinets, doors, and trim. They have the tools and expertise to cut wood to precise measurements, ensuring that your project is completed to your exact specifications.
When working with carpentry contractors, be sure to provide them with detailed plans and measurements for your project. This will help them understand your vision and create a finished product that meets your needs. Additionally, be sure to ask for references and check their credentials to ensure that you are working with a reputable professional.
Overall, professional woodworking shops are a great option for precise wood cutting. Whether you’re working with custom furniture makers or carpentry contractors, these professionals can help you create a finished product that meets your exact specifications.

If you don’t have access to a physical store or workshop, you can also get wood cut online. Here are some options to consider:
There are several e-commerce platforms that offer wood cutting services. These platforms allow you to order wood online and have it cut to your specifications before it’s shipped to you. Some popular options include:
There are also several specialized woodworking sites that offer wood cutting services. These sites are typically run by professionals who have experience working with wood and can provide high-quality cuts. Some popular options include:
When using online services, it’s important to communicate your specific needs and requirements clearly to ensure that you get the cuts you need. Additionally, be sure to read reviews and check the credentials of any professionals you’re considering hiring to ensure that they are qualified and trustworthy.
If you are looking to cut wood yourself, there are a few DIY options you can consider. These include home woodworking and community workshops.
If you have the tools and skills, you can cut wood at home. Here are a few tips to help you get started:
If you don’t have the tools or space to cut wood at home, you can consider community workshops. These spaces provide access to tools and equipment, as well as expert guidance. Here are a few options to consider:
Remember, cutting wood can be dangerous, so always prioritize safety. If you are unsure about your skills or don’t feel comfortable cutting wood yourself, it’s best to seek professional help.

When it comes to woodworking, safety should always be a top priority. Here are some safety considerations to keep in mind when getting wood cut:
Make sure to wear personal protective equipment (PPE) when using power tools. This includes safety glasses, ear protection, and a dust mask. Gloves can also be useful, but make sure they fit well and don’t get caught in any moving parts.
Always follow the manufacturer’s instructions for using power tools and make sure they are in good working condition before use. Keep your fingers and other body parts away from the blade and always use a push stick when necessary.
The wood shop can be a dangerous place if not properly maintained. Keep the area clean and free of clutter to prevent tripping hazards. Make sure all tools are properly stored when not in use and that cords are not tangled or frayed.
Getting wood cut precisely is important, but not at the cost of safety. Always follow the guidelines provided by the cutting service and make sure the wood is properly secured before cutting. If you are cutting the wood yourself, take the time to measure and mark the wood accurately to prevent mistakes.
By following these safety considerations, you can ensure that your woodworking projects are both safe and successful.
There are several places where you can get wood cut to size. Big box stores like Home Depot and Lowe’s offer wood cutting services, as do local lumber yards, workshops, and trade schools. Some high school shop classes, maker spaces, and tradespeople may also offer wood cutting services.
If you’re looking for a laser wood cutting service, you may be able to find one in your area by doing a quick online search. Some makerspaces and local workshops may offer laser cutting services, as well as specialized laser cutting businesses.
Home Depot offers wood cutting services, but their policy may vary from store to store. Generally, they will cut your wood so that it fits in your car and may offer a set number of cuts if they have the time to do so. However, some stores are switching to a fee-based model for wood cutting services.
Yes, Lowe’s also offers wood cutting services. Similar to Home Depot, their policy may vary from store to store, but they will generally cut your wood to fit in your car and may offer a set number of cuts if they have the time to do so.
Yes, there are several online retailers that offer custom cut wood. Some popular options include Home Depot, Lowe’s, and Woodworkers Source. Be sure to check the specifications and measurements carefully before placing your order.
Yes, Ace Hardware stores may also offer wood cutting services. However, their policy may vary from store to store, so it’s best to check with your local Ace Hardware for more information.

Are you looking for affordable wood options for your next DIY project? You’re not alone. Many people want to create beautiful pieces without breaking the bank. Fortunately, there are several types of wood that are both cheap and versatile. In this article, we’ll explore some examples of cheap types of wood and what they are commonly used for.
Dari sekian banyak jenis taruhan judi online, memilih idn slot sebagai fokus permainan taruhan Anda adalah hal paling cerdik di tahun 2024 ini. Bukan karena berdasarkan kepada hiburannya saja, melainkan juga keuntungan yang bisa didapatkan. IDN Slot 88 adalah salah satu permainan judi yang menjanjikan keuntungan besar, karena ada jackpot progresif dan RTP tinggi yang menjadi ciri khasnya.
One of the most popular types of cheap wood is pine. Pine wood is sourced from various pine species that grow natively around the world. It is one of the best wood options when high strength and low cost are needed. Pine wood is easy to work with and can be used for a variety of projects, including furniture, flooring, and construction.
Another option is American white oak or maple. These homegrown species perform well for many projects, including DIY furniture. For general projects, 3 Common is a good choice because it’s strong and affordable. If you’re looking for something a little bit nicer, 2 Common can be substituted for 1 without too much sacrifice in terms of strength. Stay tuned to learn more about other examples of cheap types of wood and their uses.
Secara keseluruhan, situs toto togel online membuka pintu bagi para pecinta taruhan untuk menikmati pengalaman taruhan yang menyenangkan, seru, dan terpercaya. Dengan berbagai pasaran, informasi terpercaya, fitur menarik, dan keamanan yang dijamin, situs-situs ini menjelma menjadi destinasi utama bagi mereka yang ingin menjelajahi dunia taruhan toto togel secara online.
 When it comes to woodworking, choosing the right type of wood is essential. There are many different types of wood available, each with its own unique properties and characteristics. Some woods are more expensive than others, while some are more durable or easier to work with.
Here are a few things to keep in mind when selecting a type of wood for your project:
One of the first things to consider is whether you need hardwood or softwood. Hardwood comes from deciduous trees, while softwood comes from evergreen trees. Hardwood is generally denser and stronger than softwood, but it is also more expensive. Softwood is usually less expensive and easier to work with, but it may not be as durable.
Another important consideration when choosing wood is the grain pattern. The grain pattern refers to the way the wood fibers are oriented. Some woods have a straight grain pattern, while others have a more complex pattern. The grain pattern can affect the strength and appearance of the wood.
The color and texture of the wood can also be important factors to consider. Some woods are naturally light in color, while others are darker. Some woods have a smooth, even texture, while others have a more rustic, rough texture. The color and texture of the wood can affect the overall look and feel of your project.
Lastly, cost is always a consideration when choosing wood. Some types of wood are more expensive than others, so it’s important to consider your budget when selecting a type of wood for your project. Keep in mind that the cost of the wood may also be affected by its availability and how difficult it is to work with.
By considering these factors, you can choose the right type of wood for your project and ensure that it will be both beautiful and functional.
If you’re looking for cheap wood options, softwood is a great choice. Softwoods come from coniferous trees and are generally less expensive than hardwoods. Here are a few examples of softwoods that won’t break the bank:
Pine is a popular choice for furniture, flooring, and construction. It’s easy to work with and relatively inexpensive. Pine is also lightweight, making it a good option for projects that require a lighter touch. Keep in mind that pine can be prone to dents and scratches, so it may not be the best choice for high-traffic areas.
Cedar is another softwood that’s often used for outdoor projects like decks and fences. It’s naturally resistant to rot and insects, making it a good choice for outdoor applications. Cedar also has a pleasant scent, which can help repel insects. Keep in mind that cedar can be more expensive than other softwoods, so it may not be the best choice if you’re on a tight budget.
Fir is a versatile softwood that’s often used for framing and construction. It’s relatively inexpensive and easy to work with, making it a good choice for DIY projects. Fir is also strong and durable, making it a good option for structural applications. Keep in mind that fir can be prone to warping and splitting, so it may not be the best choice for projects that require a lot of precision.
Overall, softwoods are a great choice if you’re looking for inexpensive wood options. Pine, cedar, and fir are just a few examples of softwoods that can be used for a variety of projects. When choosing a softwood, consider the project you’re working on and the specific qualities you need in your wood.
When it comes to cheap hardwood, there are a few options that you can consider. In this section, we will discuss two of them: Poplar and Beech.
Poplar is a hardwood that is often overlooked because it is not as hard as some of the other hardwoods. However, it is a great option if you are looking for a cheap wood that is easy to work with. Poplar has a straight grain and a uniform texture, which makes it easy to cut and sand. It is also lightweight, which makes it a good option for projects that require a lighter wood.
One of the downsides of poplar is that it is not as strong as some of the other hardwoods. This means that it may not be the best option for projects that require a lot of weight-bearing. However, if you are looking for a cheap wood that is easy to work with and is suitable for lighter projects, poplar is a great option.
Beech is another hardwood that is often overlooked because it is not as hard as some of the other hardwoods. However, it is a great option if you are looking for a cheap wood that is easy to work with. Beech has a straight grain and a fine, even texture, which makes it easy to cut and sand. It is also a very stable wood, which means that it is less likely to warp or twist.
One of the downsides of beech is that it can be difficult to stain. If you are planning on staining your project, you may want to consider a different wood. However, if you are looking for a cheap wood that is easy to work with and is suitable for projects that do not require staining, beech is a great option.
In conclusion, if you are looking for a cheap hardwood, poplar and beech are two great options to consider. They are both easy to work with and are suitable for a variety of projects. However, it is important to keep in mind that they may not be the best option for projects that require a lot of weight-bearing or staining.
If you’re looking for a cheap type of wood, you might want to consider manufactured wood. Manufactured wood is made by combining wood fibers and resins, which are then pressed into boards. This process creates a strong and durable material that can be used for a variety of projects.
Plywood is a type of manufactured wood that is made by gluing together several layers of thin wood veneers. This creates a strong and stable material that is perfect for a variety of projects. Plywood is often used for furniture, cabinets, and flooring.
One of the great things about plywood is that it comes in a variety of grades and thicknesses. This means that you can choose the perfect type of plywood for your project, depending on your needs and budget.
MDF, or medium-density fiberboard, is another type of manufactured wood that is made by combining wood fibers and resins. MDF is a great option if you’re looking for a cheap and versatile material that can be used for a variety of projects.
MDF is often used for furniture, cabinets, and shelving. It’s also a popular choice for molding and trim work. One of the great things about MDF is that it’s easy to work with and can be cut, drilled, and shaped just like solid wood.
When choosing MDF, it’s important to consider the thickness and density of the material. Thicker and denser MDF will be stronger and more durable, but it will also be more expensive. Thinner and less dense MDF will be cheaper, but it may not be as strong or durable.
If you are looking for a cheap and eco-friendly option for your woodworking projects, reclaimed wood may be the way to go. Reclaimed wood is wood that has been salvaged from old buildings, barns, or other structures that are no longer in use. Instead of being discarded, this wood is repurposed and given a new life.
One of the benefits of using reclaimed wood is that it is often available in larger sizes than new lumber. This is because the old-growth trees that were used in construction projects in the past were much larger than the trees that are harvested today. Reclaimed wood can also have unique character and a weathered look that is difficult to replicate with new wood.
When it comes to the types of wood that can be reclaimed, the possibilities are endless. Some of the most common species of reclaimed wood include Douglas fir, redwood, pine, and oak. However, any wood species can be reclaimed and repurposed for use in building structures, floors, paneling, siding, and even furniture.
The cost of reclaimed wood can vary depending on the type of wood and its intended use. In most cases, reclaimed wood can range from $10 to $40 per square foot. While this may be more expensive than new lumber, the environmental benefits and unique character of reclaimed wood make it a worthwhile investment for many woodworkers.
Overall, reclaimed wood is a great option for those looking for a cheap and eco-friendly alternative to new lumber. With its unique character and larger sizes, it can add a touch of history and charm to any woodworking project.
When it comes to buying wood, the price is one of the most important factors to consider. The cost of wood can vary significantly depending on a number of factors. Here are some of the most important factors that can affect wood prices:
The type of wood you choose can have a significant impact on the cost. Some types of hardwoods like mahogany and teak tend to be more expensive than other softwoods like pine or spruce. Factors affecting the price include how rare they are, where they were sourced from (e.g., imported), and their quality.
The grade of wood you choose can also affect the price. Wood is graded based on its appearance, strength, and other factors. Higher grade wood is generally more expensive than lower grade wood. If you’re using the wood for a project where appearance is important, you may want to consider spending more for a higher grade.
Season and availability can also affect wood prices. For example, in the winter, when construction slows down, the demand for wood may decrease, which can lead to lower prices. On the other hand, during the summer, when construction is in full swing, prices may be higher due to increased demand.
The location of the wood can also affect the price. If you’re buying wood from a local supplier, you may be able to save money on shipping costs. However, if you’re buying wood from a supplier that’s located far away, you may have to pay more for shipping, which can increase the overall cost.
Finally, market conditions can also affect wood prices. For example, if there’s a shortage of wood due to a natural disaster or other event, prices may increase. On the other hand, if there’s an oversupply of wood, prices may decrease. It’s important to keep an eye on market conditions if you want to get the best price for your wood.
If you’re looking to save money on your woodworking projects, buying cheap wood is a great way to do it. Here are some places where you can find affordable lumber:
Home improvement stores like Home Depot and Lowe’s are great places to find cheap wood. They often have a wide selection of lumber, including pine, poplar, and other inexpensive woods. You can also find sales and discounts on wood at these stores, so be sure to check regularly.
Lumberyards are another great place to find affordable wood. They often have a wider selection than home improvement stores and may have better prices, especially if you’re buying in bulk. You can also ask the salespeople at the lumberyard for advice on the best types of wood for your project.
Online retailers like Amazon and Etsy can be great places to find cheap wood, especially if you’re looking for specialty woods that may be harder to find locally. Be sure to read reviews and check the seller’s ratings before making a purchase, and factor in shipping costs when comparing prices.
If you’re willing to do a little digging, salvage yards can be a great source of cheap wood. Look for old barns, fences, and other structures that are being torn down, and ask the owner if you can salvage any usable wood. You may need to do some cleaning and sanding, but the savings can be worth it.
If you live in a rural area, local sawmills can be a great source of cheap wood. They may have a limited selection, but the prices are often lower than what you’ll find at a home improvement store or lumberyard. You can also ask the sawmill owner for advice on the best types of wood for your project.
Remember, when buying cheap wood, it’s important to check for quality. Look for wood that is straight, free of knots and cracks, and has a consistent color and texture. With a little research and some smart shopping, you can find affordable wood that will work great for your woodworking projects.
You can find affordable wood boards at your local lumberyard or home improvement store. You can also check online retailers for competitive prices.
Plywood and particle board are two inexpensive options for wood sheets. They are both made from wood particles and fibers, making them strong and affordable.
Pine is a popular option for affordable wood. Some types of pine wood that are affordable include Eastern White Pine, Southern Yellow Pine, and Ponderosa Pine.
American White Oak and Maple are both strong and affordable options for wood. 3 Common is also a good choice for general projects because it is both strong and affordable.
Pine is the most affordable natural wood to buy. It is widely available and comes in many different grades, making it a versatile and cost-effective option.
If you’re looking for a cheaper alternative to oak for furniture, consider using Birch or Poplar. Both woods have a similar look and feel to oak but are more affordable.

Burning wood is a common occurrence that happens when you light a match or turn on a stove. But have you ever wondered what happens to the wood when it burns? The answer lies in the chemical reaction that occurs between the wood and oxygen.
When wood burns, it undergoes a process called pyrolysis, which is the decomposition of organic matter by heat. During this process, the heat causes the wood to release volatile gases, such as methane and carbon monoxide. These gases ignite and produce a flame, which is what we see when wood burns.
Ragam Permainan yang Luas menjadi daya tarik utama IDN Poker terbaru. Dari Texas Hold’em hingga Omaha, pemain dapat menjelajahi berbagai variasi poker sesuai dengan tingkat keahlian dan preferensi mereka. Turnamen seru dan tantangan berhadiah besar juga menjadi bagian integral dari pengalaman bermain, menambah tingkat kompetitivitas dan keseruan di meja poker virtual. Bonus dan Promosi Menarik melengkapi pengalaman bermain di IDN Poker terbaru. Pemain dapat menikmati berbagai jenis bonus, termasuk bonus selamat datang, cashback, dan turnamen eksklusif dengan hadiah menggiurkan. Ini tidak hanya meningkatkan nilai hiburan, tetapi juga memberikan kesempatan tambahan untuk meraih kemenangan besar.
The chemical reaction of burning wood involves the combustion of the wood’s cellulose, hemicellulose, and lignin components. The cellulose and hemicellulose break down into simple sugars, which then undergo oxidation to produce carbon dioxide and water vapor. The lignin component of wood is more complex and produces a variety of compounds when burned, including carbon dioxide, carbon monoxide, and various organic compounds.
When wood burns, it undergoes a chemical reaction known as combustion. This reaction involves the release of energy in the form of heat and light. Understanding the process of combustion is essential to understanding the chemical reaction of burning wood.
One of the key components of combustion is oxygen. When wood burns, it reacts with oxygen in the air to produce carbon dioxide, water vapor, and other gases. This reaction is exothermic, which means it releases heat. The heat produced by the reaction is what causes the wood to continue burning.
The heat produced by combustion can be used for a variety of purposes. For example, it can be used to generate steam to power turbines in power plants. It can also be used to heat homes and buildings. The amount of heat produced by combustion depends on several factors, including the type of fuel being burned and the amount of oxygen present.
Overall, combustion is a complex chemical process that plays an important role in our daily lives. By understanding the role of oxygen and the heat production involved, you can gain a better understanding of the chemical reaction of burning wood.

When wood burns, it undergoes a chemical reaction that releases energy in the form of heat and light. The chemical composition of wood is primarily made up of cellulose and lignin, which are two of the main components that determine how wood reacts when it is burned.
Cellulose is a carbohydrate that makes up the majority of the wood’s composition, accounting for 40-50% of its total weight. It is a polymer made up of repeating units of glucose, which are linked together by beta-1,4-glycosidic bonds. Lignin, on the other hand, is a complex polymer that is responsible for giving wood its rigidity and strength. It makes up 18-35% of the wood’s composition and is composed of three main types of monomers: coniferyl, sinapyl, and p-coumaryl alcohols.
Salah satu daya tarik utama dari situs Slot88 adalah ragam permainan slot yang ditawarkan. Dengan ribuan judul slot dari berbagai penyedia perangkat lunak terkemuka, pemain dapat memilih dari berbagai tema dan fitur yang menarik. Dari slot klasik yang nostalgis hingga slot progresif dengan jackpot besar, Slot88 menyajikan pilihan yang memenuhi selera setiap pemain. Keberagaman bonus dan promosi juga menjadi keunggulan situs Slot88. Mulai dari bonus selamat datang, putaran gratis, hingga program loyalitas, pemain memiliki banyak kesempatan untuk meningkatkan kemenangan mereka dan memperpanjang waktu bermain. Bonus-bonus ini tidak hanya menambah nilai hiburan, tetapi juga memberikan insentif tambahan bagi para pemain yang setia.
When wood is burned, cellulose and lignin undergo a process called pyrolysis, which is the thermal decomposition of organic materials in the absence of oxygen. During this process, the high temperatures break down the complex molecules of cellulose and lignin into simpler molecules such as carbon dioxide, water vapor, and various organic compounds.
The moisture content of wood also plays a critical role in how it burns. When wood is exposed to high temperatures, the water inside the wood evaporates, which requires a significant amount of energy. As a result, burning wet or green wood can be less efficient because a significant amount of energy is used to evaporate the water instead of producing heat.
In general, dry wood with a moisture content of less than 20% is ideal for burning because it produces more heat and burns more efficiently. In contrast, wood with a moisture content of more than 20% can be difficult to ignite and can produce more smoke and creosote, which can be hazardous to your health and can also increase the risk of chimney fires.
In conclusion, understanding the chemical composition of wood and its moisture content can help you to burn wood more efficiently and safely. By using dry wood with a low moisture content, you can maximize the heat output of your fire while minimizing the amount of smoke and pollutants that are released into the environment.
When you burn wood, it goes through three distinct stages: Drying Stage, Gasification Stage, and Charcoal Burning Stage.
During the Drying Stage, the moisture in the wood evaporates as it heats up. This stage is important because wet wood doesn’t burn efficiently. The Drying Stage is complete when the wood has lost all of its moisture and the temperature of the wood has risen to around 212°F (100°C).
During the Gasification Stage, the wood begins to break down into its component parts, releasing volatile gases like hydrogen, carbon monoxide, and methane. These gases mix with oxygen in the air and ignite, producing a flame. This is the stage where the majority of the heat is produced. The Gasification Stage is complete when all of the volatile gases have been released and burned.
During the Charcoal Burning Stage, the remaining charcoal burns slowly and steadily, producing a low, steady heat. This stage is important because it produces a long-lasting heat source that can be used for cooking or heating. The Charcoal Burning Stage is complete when all of the charcoal has been burned.
Overall, the burning of wood is a complex chemical process that involves multiple stages. By understanding these stages, you can better control the fire and produce a more efficient burn.

When wood is burned, it undergoes various chemical reactions that release energy in the form of heat and light. The main components of wood are cellulose, hemicellulose, and lignin. Each of these components has a different chemical structure and undergoes a different reaction when burned.
Cellulose is the most abundant component of wood, making up about 40-50% of its dry weight. It is a polymer of glucose molecules and has a complex structure that is difficult to break down. When cellulose is heated, it undergoes a process called pyrolysis, which breaks down the long chains of glucose into smaller molecules. The pyrolysis of cellulose can be represented by the following equation:
C6H10O5 (cellulose) + heat → 6C + 5H2O
As you can see, the pyrolysis of cellulose produces carbon (C) and water (H2O) as the main products. The carbon is left behind as a black residue, which is commonly known as charcoal.
Lignin is another important component of wood, making up about 20-30% of its dry weight. It is a complex polymer of phenylpropane units and has a highly cross-linked structure. When lignin is heated, it undergoes a process called depolymerization, which breaks down the complex structure into simpler molecules. The depolymerization of lignin can be represented by the following equation:
C9H10O3 (lignin) + heat → 3C + 3H2O + CO
As you can see, the depolymerization of lignin produces carbon (C), water (H2O), and carbon monoxide (CO) as the main products. The carbon is left behind as a black residue, similar to the residue produced by the pyrolysis of cellulose.
In summary, the burning of wood involves the decomposition of cellulose and lignin, which produces carbon, water, and carbon monoxide as the main products. The exact amounts of these products depend on various factors, such as the temperature and oxygen supply during the combustion process.
When you burn wood, it undergoes a chemical reaction called combustion. This process releases various byproducts such as smoke and ash. In this section, we will explore these byproducts in detail.
Smoke is the visible gas that is released when wood is burned. It is a complex mixture of gases and particles, some of which can be harmful to human health. The composition of smoke can vary depending on the type of wood being burned, the temperature of the fire, and the amount of oxygen available.
Some of the common components of wood smoke include carbon monoxide, nitrogen oxides, sulfur dioxide, and particulate matter. In addition, wood smoke contains a variety of volatile organic compounds (VOCs) such as benzene, toluene, and formaldehyde.
Exposure to wood smoke can cause a range of health problems, including respiratory irritation, headaches, and nausea. Long-term exposure to wood smoke can also increase the risk of developing lung cancer and other respiratory diseases.
Ash is the residue that remains after wood has been burned. It is composed of the non-combustible minerals and other inorganic compounds that were present in the wood. The composition of ash can vary depending on the type of wood being burned.
Ash can be used as a source of nutrients for plants and can also be used as a soil amendment. However, it is important to note that ash can also contain harmful substances such as heavy metals and other pollutants. As a result, it is important to use caution when handling and disposing of ash.
In conclusion, burning wood can release various byproducts such as smoke and ash. These byproducts can have both positive and negative effects on the environment and human health. It is important to use caution when burning wood and to properly handle and dispose of the resulting byproducts.

Burning wood can have a significant impact on the environment. Here are some of the ways it can affect the air, water, and soil:
When wood is burned, it releases a variety of pollutants into the air, including carbon monoxide, nitrogen oxides, and particulate matter. These pollutants can have a negative impact on human health, particularly for people with respiratory conditions like asthma.
Wood smoke can also contribute to the formation of smog, which can make it difficult to breathe and can cause eye and throat irritation.
Burning wood releases carbon dioxide into the atmosphere, which contributes to climate change. While it is true that trees absorb carbon dioxide as they grow, burning wood releases that carbon back into the atmosphere, making it a net contributor to greenhouse gas emissions.
Additionally, the production and transportation of wood can also contribute to greenhouse gas emissions, particularly if the wood is harvested from forests that are not sustainably managed.
Wood ash can be a source of nutrients for plants, but it can also be a source of pollution. If wood is burned with treated or painted wood, the ash can contain harmful chemicals like lead and arsenic.
Additionally, if wood ash is not disposed of properly, it can leach into the soil and water, potentially contaminating them.
Overall, while burning wood can be a renewable source of energy, it is important to consider the environmental impact before doing so. Properly managing forests and using sustainably harvested wood can help mitigate some of the negative effects, but it is important to be aware of the potential consequences.
When wood burns, it produces carbon dioxide, water vapor, and a variety of other compounds, depending on the type of wood and the conditions under which it is burned.
The chemical reaction that occurs when wood burns is called combustion. During combustion, the oxygen in the air combines with the carbon, hydrogen, and other elements in the wood to form new compounds, such as carbon dioxide and water vapor. This reaction releases energy in the form of heat and light.
Oxygen is a key component in the combustion of wood. Without oxygen, the wood cannot burn. During combustion, the oxygen in the air combines with the carbon, hydrogen, and other elements in the wood to form new compounds.
The balanced chemical equation for the combustion of wood is:
C6H12O6 + 6O2 → 6CO2 + 6H2O + energy
This equation shows that when wood burns, it reacts with oxygen to produce carbon dioxide, water vapor, and energy.
The burning of wood is a chemical change, not a physical change. During combustion, the chemical composition of the wood changes, and new compounds are formed.
The reactants involved in the burning of wood are oxygen and the organic compounds that make up the wood, such as cellulose, hemicellulose, and lignin. When these compounds react with oxygen, they undergo combustion and produce carbon dioxide, water vapor, and energy.

Are you wondering if white vinegar diluted in water can be used to clean your hardwood floors? The answer is yes, but with some important considerations. While vinegar is a natural and inexpensive cleaning solution, it can damage your hardwood floors if used improperly. In this article, we will explore the do’s and don’ts of cleaning hardwood floors with vinegar to help you keep your floors looking their best.
Before you start cleaning your hardwood floors with vinegar, it’s important to understand the potential risks. Vinegar is acidic and can strip the finish off your floors if used in high concentrations or too frequently. However, when diluted properly, vinegar can be an effective and safe cleaning solution. We will discuss the right ratio of vinegar to water, as well as other tips to help you avoid damaging your hardwood floors. By following our guidelines, you can use vinegar to clean your floors without worrying about causing harm.
If you’re looking for a natural and affordable cleaning solution, white vinegar is a popular option. But what exactly is white vinegar, and how can it be used to clean hardwood floors?
White vinegar is a clear, acidic liquid made from fermented grain alcohol. It typically has a pH of around 2.5 – 3.5, which makes it effective at breaking down dirt, grime, and mineral deposits. When diluted with water, white vinegar can be used to clean a variety of surfaces, including hardwood floors.
It’s important to note that not all types of vinegar are created equal. While white vinegar is a great all-purpose cleaner, other types of vinegar, such as apple cider vinegar or balsamic vinegar, may contain sugars or other additives that can leave behind a sticky residue. Stick with white vinegar for cleaning purposes.
When using white vinegar to clean hardwood floors, it’s important to dilute it properly. A solution of 1/4 cup of white vinegar to 1 gallon of warm water is a good starting point. Avoid using undiluted vinegar, as it can be too acidic and may damage your floors.
In addition to its cleaning properties, white vinegar also has some other benefits. It’s non-toxic, biodegradable, and safe to use around children and pets. Plus, it’s much cheaper than many commercial cleaning products.
Overall, white vinegar is a versatile and effective cleaning solution for hardwood floors and many other surfaces in your home. Just be sure to dilute it properly and avoid using it on surfaces that may be sensitive to acidity.

Vinegar is a natural cleaning agent that is commonly used in households. It is a diluted solution of acetic acid, which makes it acidic. The acidity of vinegar can range from 2.4 to 3.4 pH, depending on the type of vinegar.
When vinegar is mixed with water, it becomes less acidic. A solution of 50% water and 50% vinegar has a pH of around 2.5 to 3.0. This level of acidity is safe for most hardwood floors.
However, it is important to note that vinegar should not be used on floors that have been treated with wax or oil-based finishes. The acidity of the vinegar can break down the wax or oil, causing damage to the floor.
When used in moderation, vinegar can be an effective cleaner for hardwood floors. It can help remove dirt, grime, and stains without leaving behind a residue. Additionally, vinegar is a natural disinfectant, which makes it a great choice for households with pets or young children.
However, it is important to use vinegar in moderation. Overuse of vinegar can damage hardwood floors, especially those with a polyurethane finish. The acidity of the vinegar can strip away the protective coating, leaving the wood vulnerable to damage.
To avoid damage, it is recommended to dilute vinegar with water and use it sparingly. A good ratio to follow is 1/4 cup of vinegar to 1 gallon of water. Additionally, it is important to avoid using abrasive materials, such as steel wool, when cleaning hardwood floors with vinegar.
In summary, vinegar can be an effective cleaner for hardwood floors when used in moderation. The acidity of the vinegar can help remove dirt and grime without leaving behind a residue. However, it is important to dilute vinegar with water and avoid using it on floors with wax or oil-based finishes.
Cleaning hardwood floors with vinegar and water is a great way to remove dirt and grime without using harsh chemicals. However, it’s important to dilute the vinegar properly to avoid damaging your floors. In this section, we’ll walk you through the ideal vinegar to water ratio and the preparation steps for cleaning your hardwood floors with vinegar.
The ideal vinegar to water ratio for cleaning hardwood floors is 1 cup of vinegar to 1 gallon of warm water. This ratio is safe for most hardwood floors, but if you’re unsure, it’s always a good idea to test the solution on a small, inconspicuous area first.
If you have particularly dirty floors, you can increase the vinegar concentration slightly, but be careful not to use too much vinegar as it can damage the finish on your floors. A good rule of thumb is to never use more than 1 cup of vinegar per 1 gallon of water.
Now that you know the ideal vinegar to water ratio, let’s go over the preparation steps for cleaning your hardwood floors with vinegar.
That’s it! Cleaning your hardwood floors with vinegar and water is a simple and effective way to keep them looking their best. Just be sure to follow the ideal vinegar to water ratio and preparation steps to avoid damaging your floors.

The frequency of cleaning your hardwood floors depends on the amount of foot traffic and the level of dirt and debris. Generally, it is recommended to clean your hardwood floors once a week. However, if you have pets or children, or if your living area is prone to dust and dirt, you may need to clean your floors more frequently.
Cleaning your hardwood floors with white vinegar diluted in water is a safe and effective way to keep them clean and shiny. Here is a step-by-step guide to help you get started:
It’s important to note that you should never use a steam mop or wet mop on hardwood floors, as it can cause damage to the wood. Additionally, you should avoid using abrasive cleaners or tools that can scratch the surface of the wood. By following these simple steps, you can keep your hardwood floors clean and looking their best.
When it comes to cleaning hardwood floors, using a vinegar solution has several benefits. Here are a few reasons why you should consider using vinegar solution for your hardwood floors:
Vinegar is a natural and non-toxic cleaning agent that is safe to use on hardwood floors. Unlike harsh chemicals, vinegar solution won’t damage the finish of your hardwood floors or leave behind any harmful residue.
Vinegar solution is an effective cleaner that can remove dirt, grime, and stains from your hardwood floors. It can also help to eliminate odors and leave your floors looking clean and shiny.
Using vinegar solution to clean your hardwood floors is a cost-effective option. Vinegar is a common household item that is readily available and affordable. You can save money on expensive cleaning products by using vinegar solution instead.
Making vinegar solution is easy and requires only a few ingredients. All you need is white vinegar, water, and a spray bottle. Simply mix the vinegar and water in the spray bottle, and you’re ready to clean your hardwood floors.
Using vinegar solution to clean your hardwood floors is an environmentally friendly option. Vinegar is a natural and biodegradable substance that won’t harm the environment. By using vinegar solution, you can reduce your impact on the environment and help to keep your home clean and healthy.

While white vinegar diluted in water can be an effective cleaning solution for hardwood floors, there are potential risks to keep in mind. Using undiluted vinegar or vinegar with a higher acidity level can damage the finish of the hardwood and cause discoloration. Additionally, using too much vinegar or leaving it on the floor for too long can cause the wood to swell or warp.
Another potential risk is using vinegar on floors that have already been waxed or polished. The acidic properties of vinegar can strip away the wax or polish, leaving the floor dull and unprotected.
To prevent any potential damages, it is important to dilute the vinegar properly. A good ratio to follow is one part vinegar to four parts water. This will ensure that the acidity level is not too high and will not damage the finish of the hardwood.
It is also important to avoid leaving the vinegar solution on the floor for too long. After applying the solution, be sure to wipe it up with a clean, damp cloth. This will prevent any excess vinegar from soaking into the wood and causing damage.
If your hardwood floors have already been waxed or polished, it is best to avoid using vinegar altogether. Instead, use a cleaning solution that is specifically designed for waxed or polished floors.
By following these preventive measures, you can safely use white vinegar diluted in water to clean your hardwood floors without causing any damage.
Yes, you can use diluted white vinegar to clean your hardwood floors. However, it is important to note that vinegar is acidic and can damage the finish of your hardwood floors over time. It is recommended to only use vinegar as a cleaning solution occasionally and to follow proper dilution ratios.
Yes, vinegar and water can be safe to use on hardwood floors as long as it is properly diluted and used sparingly. However, it is important to note that excessive use of vinegar can damage the finish of your hardwood floors.
The recommended ratio of vinegar to water for cleaning hardwood floors is 1/2 cup of white vinegar to one gallon of warm water. This ratio is safe for most hardwood floors and will effectively clean and remove dirt and grime.
Some alternatives to using vinegar to clean hardwood floors include using a pH-neutral cleaner specifically designed for hardwood floors, using a microfiber mop with warm water, or using a hardwood floor cleaner recommended by the manufacturer.
Avoid using abrasive cleaners, wax-based cleaners, oil-based cleaners, or steam cleaners when cleaning your hardwood floors. These cleaners can damage the finish of your hardwood floors and cause long-term damage.
To prevent streaks when cleaning your hardwood floors, use a microfiber mop and make sure to wring out excess water before cleaning. Additionally, make sure to follow the recommended dilution ratios for cleaning solutions and avoid using too much cleaning solution on your floors.

If you’re planning to build a house or renovate an existing one, you might be wondering what size of wood is typically used as a main support beam. The answer to this question is not straightforward as it depends on several factors such as the size of the house, the type of construction, and the load-bearing requirements. However, there are some general guidelines that can help you determine the appropriate size of support beam for your project.
Traditionally, main support beams were made of solid wood such as Douglas fir, spruce, or pine. These beams were typically 4×6, 4×8, 6×6, or 6×8 in size. However, with advancements in building technology, engineered wood products such as laminated veneer lumber (LVL), glued-laminated timber (glulam), and parallel strand lumber (PSL) have become popular alternatives to solid wood beams. These products offer several advantages over traditional wood beams, including increased strength, stability, and durability.
When determining the size of support beam for your project, it’s important to consult with a structural engineer or an experienced builder. They can help you calculate the load-bearing requirements and recommend the appropriate size and type of support beam for your specific project. By following the guidelines and recommendations of professionals, you can ensure that your house is structurally sound and safe for you and your family.
When it comes to building a house, support beams are one of the most important components. They provide the necessary structural support to keep the house standing, and without them, the house would be at risk of collapsing. In this section, you’ll learn about the typical size of the main support beam used in house construction.
The main support beam, also known as the load-bearing beam, is responsible for supporting the weight of the house’s structure. It’s typically made of wood, steel, or concrete. In most cases, wood is the preferred material for the main support beam because it’s cost-effective, readily available, and easy to work with.
The size of the main support beam depends on several factors, including the size of the house, the weight of the structure, and the span of the beam. In general, the larger the house and the longer the span of the beam, the larger the beam needs to be.
Here’s a table that shows the typical sizes of wood beams used as main support beams in house construction:
| Span (in feet) | Beam Size (in inches) |
|---|---|
| 8 | 4×8 or 4×10 |
| 10 | 4×10 or 4×12 |
| 12 | 6×10 or 6×12 |
| 14 | 6×12 or 8×10 |
| 16 | 8×10 or 8×12 |
| 18 | 8×12 or 10×10 |
| 20 | 10×10 or 10×12 |
It’s important to note that these sizes are just a general guideline and may vary depending on the specific requirements of the house. It’s always best to consult with a structural engineer or a building inspector to determine the appropriate size of the main support beam for your house.
In conclusion, the main support beam is a crucial component of house construction, and its size depends on several factors, including the size of the house, the weight of the structure, and the span of the beam. By understanding the typical sizes of wood beams used as main support beams, you can ensure that your house is built with the necessary structural support to keep it standing for years to come.
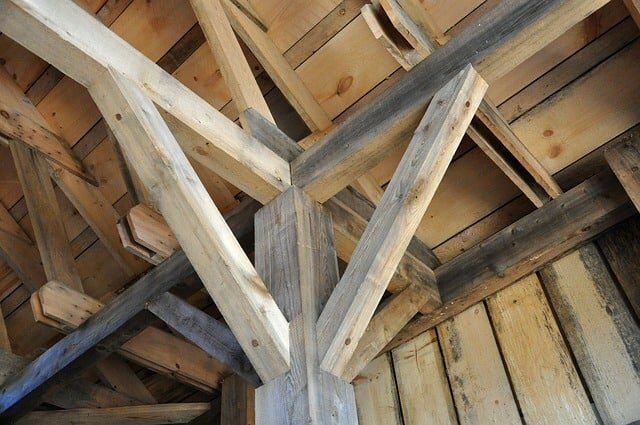
When it comes to building a house, one of the most important components is the main support beam. This beam is responsible for carrying the weight of the structure and ensuring the stability of the building. Therefore, it is essential to choose the right size and type of wood for the job. Here are some typical wood sizes for main support beams that you can consider for your project:
Solid sawn lumber is a popular choice for main support beams due to its strength and durability. The most common sizes used for residential construction include:
The size you choose will depend on the span of the beam and the load it needs to carry. For example, a 4×6 beam can support a span of up to 6 feet, while a 4×12 beam can support a span of up to 18 feet.
Laminated veneer lumber (LVL) is another popular option for main support beams. It is made by gluing together thin layers of wood veneers with adhesives, creating a strong and stable product. Some common sizes used for residential construction include:
LVL beams are known for their uniformity and consistency, making them a reliable choice for main support beams.
Glued laminated timber (glulam) beams are another option for main support beams. They are made by gluing together multiple layers of lumber with adhesives, creating a strong and stable product. Some common sizes used for residential construction include:
Glulam beams offer a unique aesthetic appeal due to their exposed wood grain, making them a popular choice for modern and contemporary designs.
In conclusion, choosing the right size and type of wood for your main support beam is crucial for the safety and stability of your building. By considering the span of the beam and the load it needs to carry, you can select the appropriate wood size from the options listed above.
When building a house, one of the most crucial components is the support beams. The size of the support beams is vital for ensuring the structural integrity of the building. Several factors influence the size of support beams, including load-bearing capacity, span length, and wood type.
The load-bearing capacity of a support beam is the amount of weight that a beam can support without collapsing. The load-bearing capacity of a support beam is influenced by several factors, including the type of wood, the size of the beam, and the spacing of the beams.
A beam’s load-bearing capacity can be calculated using a wood beam span calculator, which considers the beam’s dimensions and the load it will carry. It is important to ensure that the load-bearing capacity of a support beam is sufficient for the weight it will carry.
The span length is the distance between two support points of a beam. The longer the span length, the larger the support beam needs to be. The span length is influenced by the design of the building and the layout of the rooms.
The American Wood Council provides span tables that can be used to determine the maximum allowable span length for a given beam size and wood type. The span tables consider the load the beam will carry and the beam’s dimensions.
The type of wood used for support beams influences the size of the beams. Different types of wood have different load-bearing capacities and strengths. Some common types of wood used for support beams include Douglas Fir, Western Larch, Red Maple, Black Oak, Eastern White Pine, Redwood, and Laminated Veneer Lumber (LVL).
The choice of wood type for support beams depends on several factors, including cost, availability, and the load the beam will carry. It is important to choose a wood type that has sufficient load-bearing capacity for the specific application.
In summary, the size of support beams is influenced by several factors, including load-bearing capacity, span length, and wood type. It is crucial to ensure that the size of the support beams is sufficient for the load they will carry and the span length they will cover.

Choosing the right size of support beam for your house is crucial for several reasons. Here are some of the benefits of properly sized support beams:
A properly sized support beam ensures the safety of your house. It can withstand the weight of the structure and the load it carries, preventing accidents such as the collapse of walls, ceilings, or floors.
Using the right size of support beams increases the durability of your house. It reduces the risk of structural damage caused by overloading, sagging, or warping.
Properly sized support beams can save you money in the long run. They prevent the need for costly repairs or replacements due to structural damage caused by using undersized beams.
Using the right size of support beam can also improve your home’s energy efficiency. It reduces air leaks and drafts, which can lead to higher energy bills.
Properly sized support beams can also enhance the aesthetic appeal of your house. They provide a clean and uniform look to the structure, making it look more attractive and appealing.
In summary, choosing the right size of support beam is crucial for the safety, durability, cost-effectiveness, energy efficiency, and aesthetic appeal of your house.
Choosing the correct size of wood beam for your house is crucial to ensure the structural integrity of your home. However, there are common mistakes that people make when selecting the size of support beams. Here are some common mistakes that you should avoid:
One of the most common mistakes is underestimating the load that the support beam will carry. It is important to consider the weight of the structure that the beam will support, as well as any additional weight that may be added in the future. Failure to account for the load can lead to structural failure and potential safety hazards.
Another common mistake is ignoring the span of the beam. The span is the distance between the supports that the beam will rest on. The longer the span, the larger the beam needs to be to support the weight. Ignoring the span can lead to sagging or even collapse of the beam.
Choosing the right type of wood for your support beam is important. Different types of wood have different strengths and properties, and some are better suited for supporting heavy loads than others. Using the wrong type of wood can lead to failure of the beam and potential safety hazards.
Wood is a natural material that can expand and contract with changes in moisture content. It is important to consider the moisture content of the wood when selecting the size of the support beam. Failure to do so can lead to warping, cracking, and even failure of the beam.
Finally, one of the biggest mistakes is not consulting a professional. A structural engineer or contractor can help you select the right size of support beam for your home based on the specific requirements of your project. Failure to consult a professional can lead to costly mistakes and potential safety hazards.
In conclusion, choosing the right size of support beam for your home is crucial to ensure the structural integrity of your house. Avoiding these common mistakes can help you make an informed decision and avoid potential safety hazards.
When it comes to choosing the right support beam size for your house, there are a few things to consider. The size of the beam will depend on the span of the beam, the load it will carry, and the type of wood you will be using. Here are some tips to help you choose the right size support beam for your house:
The first thing you need to do is determine the load that the beam will carry. This will depend on the size of the house and the number of floors it has. You can use a load calculator to determine the load, or you can consult with a structural engineer.
Once you have determined the load, you need to calculate the span of the beam. The span is the distance between the two points where the beam will be supported. You can use a beam span calculator to determine the span, or you can consult with a structural engineer.
The type of wood you choose will also affect the size of the beam. Softwoods like pine and fir are less dense than hardwoods like oak and maple, so they will require a larger beam to support the same load. You can use a wood beam span calculator to determine the size of the beam based on the type of wood you will be using.
It is important to check building codes in your area to ensure that you are using the correct size beam. Building codes will specify the minimum size of the beam based on the load it will carry and the span of the beam. If you are unsure about the building codes in your area, consult with a structural engineer.
Finally, you should consider the aesthetics of the beam. While the size of the beam is important for structural reasons, it is also important to choose a beam that looks good in your house. A common beam is composed of the same size and type of lumber used for the joists by nailing 2 or 3 together side by side. Even if you are allowed to use a smaller beam, you should maintain the same depth of material as the joists to present a uniform appearance.
By following these tips, you can choose the right size support beam for your house that will provide the necessary structural support while also looking great.
The maximum length of a load-bearing beam depends on several factors, including the type of wood used, the size of the beam, and the amount of weight it needs to support. In general, the longer the beam, the larger it needs to be to support the weight. A structural engineer can help determine the maximum length of a load-bearing beam for your specific project.
Laminated Veneer Lumber (LVL) is considered to be the strongest engineered wood beam. It is made by gluing together multiple layers of thin wood veneers with the grain running in the same direction. LVL beams are strong, lightweight, and resist warping, splitting, and shrinking.
To size LVL beams, you need to consider the load it will be carrying and the span it needs to cover. You can use online calculators or consult with a structural engineer to determine the appropriate size of LVL beam for your project.
There are several types of load-bearing beams, including solid wood beams, engineered wood beams (such as LVL and glulam), steel beams, and concrete beams. The type of beam you choose will depend on the specific needs of your project.
The size of structural wood beams used in a project depends on the load they need to carry. In residential construction, 2×8 and 2×10 beams are commonly used for spans up to 12 feet, while 4×8 and 4×10 beams are used for spans up to 20 feet.
Spruce, Pine, and Fir (SPF) lumber is commonly used for support beams in houses. These woods have small tight knots and are readily available in standard sizes. Western SPF lumber is typically available in larger sizes than their eastern counterparts.

Are you curious about whether wood conducts electricity or not? The short answer is that dry wood is generally considered a non-conducting substance. This is because it is made of organic compounds that do not contain free electrons. However, under certain conditions, wood can also conduct electricity. For example, some composite wood might contain substances that can conduct electricity.
Moist or damp wood can also transmit electricity to varying degrees. This is because the water in the wood can act as a conductor, allowing the flow of electric current. Additionally, wood that is moist and contains impurities such as salts can conduct electricity as well. The conductivity of wood can also depend on the wood species and the voltage applied.
Understanding whether wood conducts electricity or not can be important in certain situations, such as when working with electrical equipment or building structures. Knowing the conductivity of wood can help prevent accidents and ensure safety. In this article, we will explore the topic of whether wood conducts electricity, providing you with accurate and relevant information.
Electricity is a fundamental part of modern life, powering everything from our homes to our workplaces. It is a form of energy that is generated by the movement of charged particles, such as electrons.
To understand how electricity works, it is helpful to think of it as a flow of water through a pipe. Just as water flows from a high pressure area to a low pressure area, electricity flows from a high voltage area to a low voltage area.
The amount of electricity that flows through a material is determined by its conductivity. Conductivity is a measure of how easily electricity can flow through a material. Materials that have high conductivity, such as metals, are good conductors of electricity, while materials that have low conductivity, such as wood, are insulators.
When it comes to electricity, safety is paramount. It is important to ensure that all electrical equipment is properly installed and maintained, and that all wiring is up to code. Failure to do so can result in serious injury or even death.
In the next section, we will explore whether wood is a conductor or insulator of electricity.
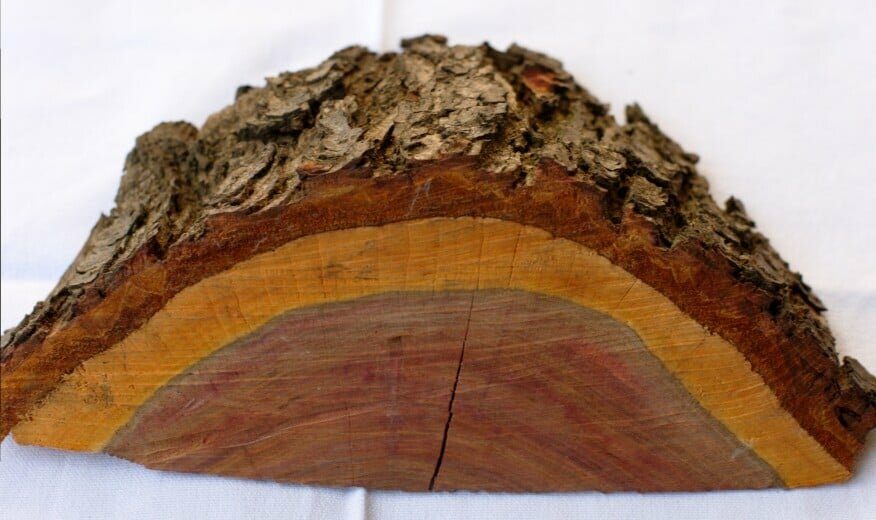
Wood is a natural and renewable resource that has been used for thousands of years by humans. It is a versatile material that can be used for various purposes, including furniture, construction, and fuel. In this section, we will discuss the basic properties of wood and how they relate to its ability to conduct electricity.
Wood is primarily composed of cellulose, hemicellulose, and lignin. These three components make up the majority of the wood’s cell walls. Cellulose is a polymer of glucose and is the primary component of the cell wall, while hemicellulose is a mixture of several different polysaccharides. Lignin is a complex polymer that helps to provide structural support to the wood.
The structure of wood is complex, with several different layers and components. The outer layer of the wood is called the bark, which serves to protect the tree from external damage. Beneath the bark is the cambium layer, which is responsible for the growth of new cells. The innermost layer of the wood is called the heartwood, which is the oldest and densest part of the tree.
Wood has several properties that make it a unique material. It is a good insulator of heat and electricity, which means it does not conduct electricity very well. However, damp or wet wood can conduct electricity to some extent, depending on the wood species and the voltage applied. Wood is also strong in relation to its weight, making it a popular choice for construction and furniture. Additionally, wood has desirable acoustic properties, making it an excellent material for musical instruments.
In conclusion, wood is a versatile material that has been used for thousands of years. Its unique properties make it an excellent choice for various purposes, including furniture, construction, and fuel. While wood is not a good conductor of electricity, damp or wet wood can conduct electricity to some extent.
When it comes to electrical conductivity, wood is generally considered a non-conducting substance. This is because wood is made up of organic compounds that do not contain free electrons, which are necessary for the flow of electricity. However, there are certain conditions under which wood can conduct electricity to varying degrees.
One of these conditions is when the wood is moist or damp. Under these circumstances, the wood can transmit electricity to some extent, depending on the species of the wood and the voltage applied. In fact, damp or wet wood can conduct electricity up to a certain level.
Another factor that can affect the electrical conductivity of wood is the presence of certain substances in composite wood. Some composite wood may contain materials that can conduct electricity, which can make it more conductive than solid wood.
It’s important to note that while wood may not be a good conductor of electricity, it can still be a potential source of electrical hazards. For example, if electrical wiring is run through wood, it can create a fire hazard if the wiring is not properly insulated.
Overall, while wood is not typically considered a conductor of electricity, it’s important to be aware of its potential to conduct electricity under certain conditions. By understanding the properties of wood and its relationship to electrical conductivity, you can take steps to ensure that you are using wood safely and effectively in your projects.
Wood is generally considered an insulator, meaning it does not conduct electricity. However, the electrical conductivity of wood can vary depending on a number of factors. In this section, we will explore some of the key factors that influence wood’s electrical conductivity.
One of the most important factors affecting wood’s electrical conductivity is its moisture content. Dry wood is a poor conductor of electricity, while wet or damp wood can conduct electricity to some extent. This is because water is a good conductor of electricity, and when wood absorbs water, it can create a path for electrical current to flow through.
Temperature can also have an impact on the electrical conductivity of wood. Generally speaking, the higher the temperature, the more conductive wood becomes. This is because heat causes the molecules in wood to vibrate more rapidly, which can help to free up electrons and allow them to flow more easily.
The type of wood can also play a role in its electrical conductivity. Some species of wood are naturally more conductive than others. For example, woods with high resin content, such as pine, tend to be better conductors than woods with low resin content, such as maple.
It’s worth noting that while wood can conduct electricity to some extent, it is still generally considered an insulator. This means that it should not be relied upon as a safe conductor of electricity, and appropriate precautions should always be taken when working with electrical equipment around wood.
When it comes to conducting electricity, wood is not the best material out there. In fact, it is considered an insulator, which means it resists the flow of electricity. Let’s compare wood with some other materials to better understand its electrical conductivity properties.
Metal is a great conductor of electricity, which is why it is used in electrical wiring and circuits. Unlike wood, metal has free electrons that can move easily, allowing electricity to flow through it. This is why metal is used in electrical applications where conductivity is crucial.
Plastic is another insulator, much like wood. However, some types of plastic are better insulators than others. For example, PVC (polyvinyl chloride) is a common plastic used in electrical applications because of its high insulating properties. Wood, on the other hand, is not commonly used in electrical applications because of its poor conductivity.
Water is a unique substance when it comes to electrical conductivity. It is a good conductor of electricity, which is why electrical appliances should never be used near water. In fact, if wood is wet enough, it can conduct electricity to some extent. However, dry wood is still considered an insulator.
Glass is another insulator, much like wood and plastic. However, it is also a good conductor of heat. This is why glass is used in double-paned windows to help insulate homes and buildings. Wood, on the other hand, is not a good conductor of either electricity or heat.
Overall, while wood may not be the best material for conducting electricity, it still has many unique properties and uses in various applications.
When working with wood and electricity, it is important to take certain safety precautions to avoid accidents and injuries. Here are some tips to keep in mind:
By following these safety precautions, you can reduce the risk of accidents and injuries when working with wood and electricity. Always prioritize your safety and take the necessary steps to protect yourself and those around you.
Wood has been used for centuries in various fields, including construction, furniture, and art. However, it is also a useful material in electrical fields due to its unique properties. Here are some applications of wood in electrical fields:
Wood is an excellent insulator due to its low electrical conductivity. It is often used in electrical equipment and devices to prevent electrical current from flowing through unwanted paths. For example, wooden poles are used to support electrical wires and prevent them from touching the ground or other conductive materials.
Wood is also a popular material for speakers due to its acoustic properties. It can absorb and reflect sound waves in a way that creates a warm and natural sound. Many high-end speakers are made entirely of wood, including the cabinets and cones.
While wood is generally considered an insulator, it can conduct electricity to some extent when it is moist or wet. This property has led to the development of new technologies, such as “electrifying wood,” which involves impregnating wood with conductive materials to create new electrical devices.
Wood is also used in electrical safety equipment, such as electrical gloves and mats. These products are made of special types of wood that have been treated to increase their electrical resistance and prevent electrical shock.
In summary, wood is a versatile material that has many applications in electrical fields. Its unique properties make it an excellent choice for insulators, speakers, and electrical safety equipment. As technology advances, we can expect to see even more innovative uses of wood in electrical applications.
No, dry wood is not a conductor of electricity. Wood is made up of organic compounds that do not contain free electrons, which are necessary for electricity to pass through it. However, moist or damp wood can conduct electricity to varying degrees.
Wood is not a conductor of electricity because it lacks free electrons. Free electrons are necessary for electricity to pass through a material. Wood is made up of organic compounds such as lignin, hemicellulose, cellulose, and extractives, which do not contain free electrons.
Wood is generally considered a non-conducting substance. However, damp or wet wood can transmit electricity to varying degrees. Thus, in this case, it is not the wood that makes the electrical connection, but rather the moisture in the wood.
No, wood is not a conductor of lightning. Lightning seeks the path of least resistance to the ground, and materials that are good conductors of electricity, such as metal, are more likely to be struck by lightning than wood.
A material that does not conduct electricity is called an insulator. Examples of insulators include rubber, plastic, and glass.
No, paper does not conduct electricity. Like wood, paper is made up of organic compounds that do not contain free electrons, which are necessary for electricity to pass through a material.


