Rahasia Sukses Poker Online: Cara Ampuh Membaca Lawan di Fase Post-Flop
Di antara seluruh platform penyedia poker online terbaik, fase taruhan post-flop (setelah tiga kartu pertama dibuka) senantiasa diakui sebagai salah

Di antara seluruh platform penyedia poker online terbaik, fase taruhan post-flop (setelah tiga kartu pertama dibuka) senantiasa diakui sebagai salah


Are you tired of seeing your wooden furniture looking dull and faded? Restofinisher claims to be the solution to this problem, restoring your wooden surfaces to their former glory. But does it really work? What are your reviews of the Restofinisher wood finish restorer?
According to some online reviews, Restofinisher can mask minor issues like abrasions, blemishes, and scratches on most wooden surfaces. It comes in a sprayer bottle, making it easy for anyone to work with. Some users claim that it has restored their cabinets, wooden floors, tables, and other wooden surfaces within a few minutes.
However, not all reviews are positive. Some users have reported inconsistencies and a lack of transparency from the company. The Federal Trade Commission has also warned about online shopping fraud and negative reviews being one of the most reported fraud categories. So, before you make a purchase, it’s important to do your research and read reviews from multiple sources.

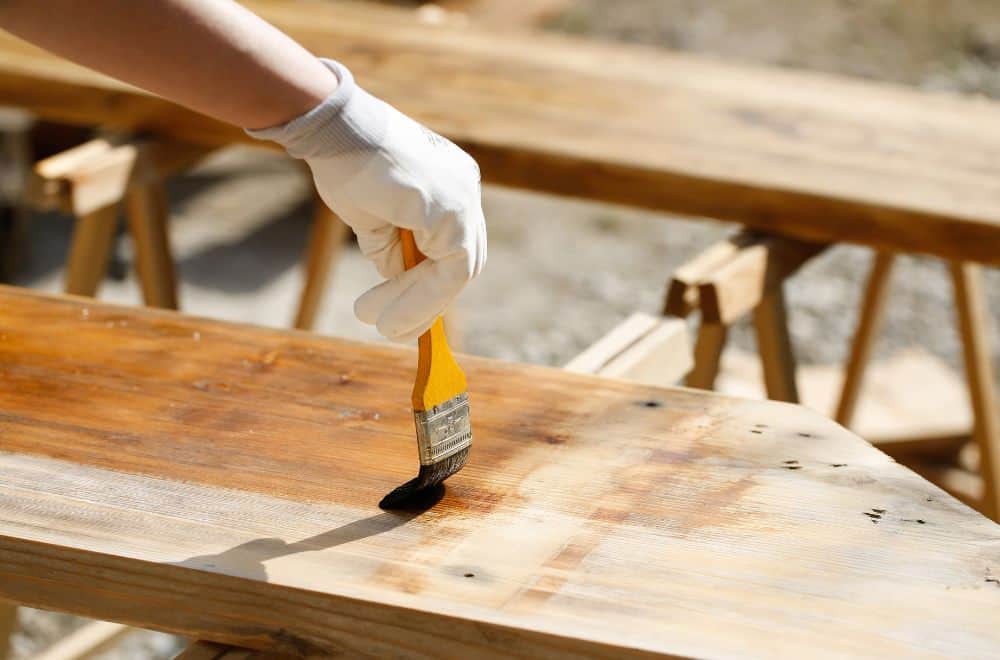
If you are looking to restore the original color of your wooden furniture, cabinets, flooring, and other surfaces, Restofinisher Wood Finish Restorer may be a product you want to consider. This product claims to be an ideal solution for bringing back the luster and color of your faded wooden surfaces. Here is what you need to know about Restofinisher Wood Finish Restorer.
Restofinisher is a wood finisher that penetrates wooden surfaces and works on three different finishes: old and faded lacquer, shellac, and varnish. According to the product’s claims, it can restore your wooden surfaces’ original color and luster. The product is also said to be easy to use, requiring only a few minutes of application and wiping off.
However, it is important to note that there are inconsistencies in the product’s claims. Some customers have testified that the product has nothing to do with restoring furniture. It is always advisable to read reviews and gather more information before making a purchase.
Restofinisher Wood Finish Restorer may be a great budget-friendly and time-saving choice if you are looking to restore your wooden surfaces. However, it is always important to do your research and make an informed decision before making a purchase.
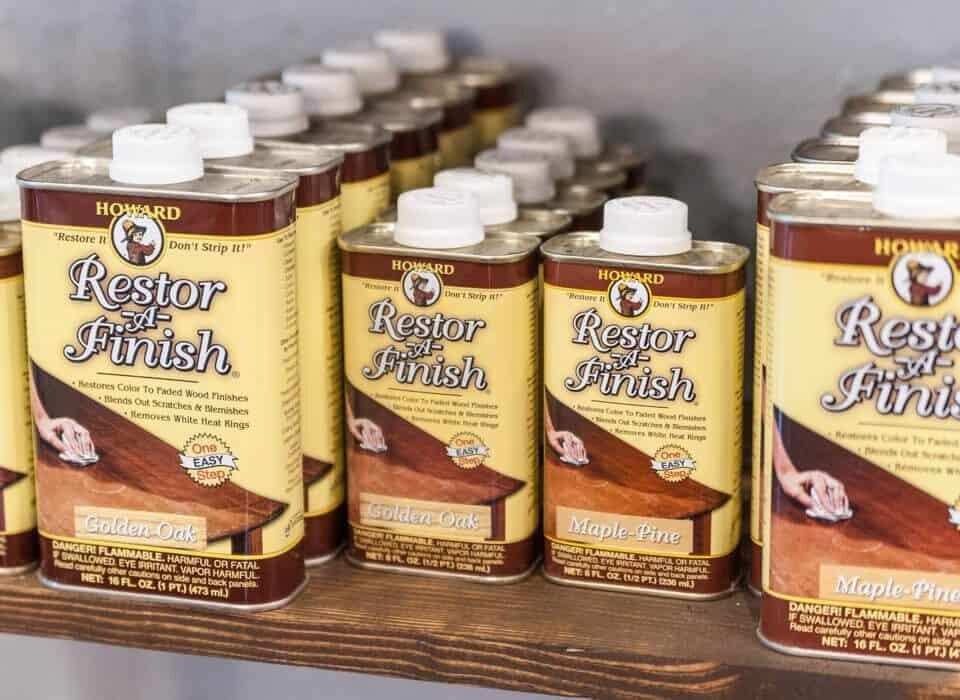 Image Credit: xivents
Restofinisher is a wood finish restorer that claims to work on lacquer, shellac, and most other finishes. According to the manufacturer, it is formulated with a blend of natural oils and other ingredients that penetrate deep into the wood, replenishing its moisture and restoring its natural beauty.
However, it is important to note that Restofinisher does not provide an ingredient list on the bottle. This lack of transparency has raised some concerns among consumers about the safety and effectiveness of the product.
Some users have reported experiencing eye irritation and feeling sick after using Restofinisher. Additionally, the product is inflammable, which means that it should be handled with care.
It is also worth mentioning that Restofinisher has been accused of copying the name of a similar product called “Restor-A-Finish,” which has been on the market for some time. This raises questions about the credibility of the brand and the legitimacy of its claims.
In summary, while Restofinisher claims to be a reliable wood finish restorer, the lack of transparency regarding its ingredients and the safety concerns raised by some users should be taken into consideration before using this product.

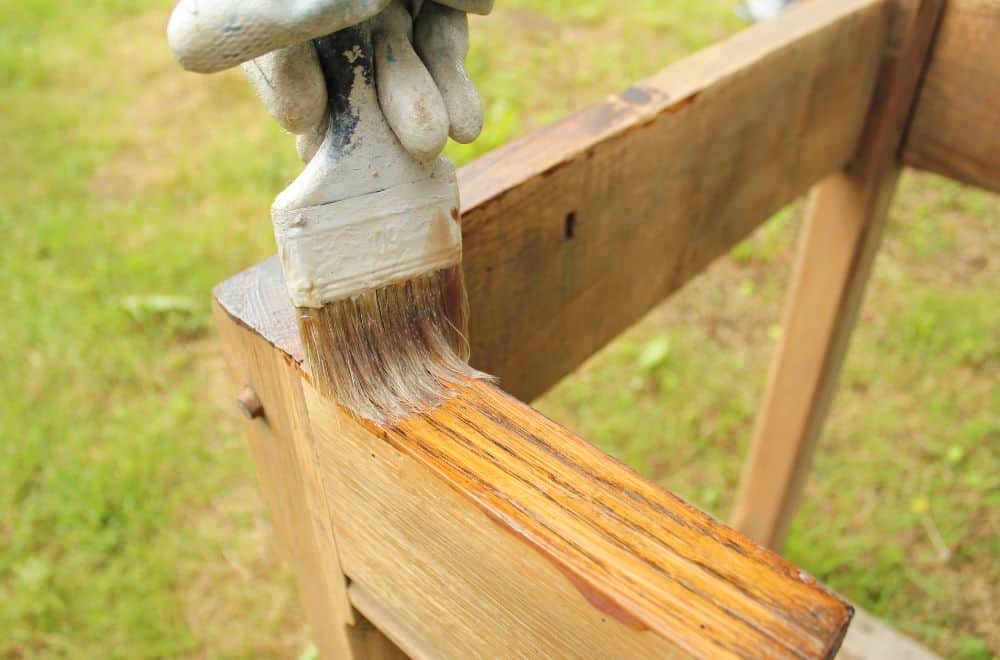
Using Restofinisher to restore your wood furniture is a straightforward process that you can easily do at home. Here is a step-by-step guide to applying Restofinisher effectively:
Note: Restofinisher may not work on all types of wood finishes. Test the product on a small, inconspicuous area before applying it to the entire surface.
Restofinisher is a safe and effective way to restore the original color and luster of your wood furniture. Follow the application process carefully, and you will be amazed at the results.
When it comes to restoring wooden furniture and surfaces, Restofinisher is a product that claims to do wonders. But does it actually work? Based on our experience, we can say that the performance and results of Restofinisher are mixed.
On the one hand, Restofinisher can indeed restore the color and luster of faded lacquer, shellac, and varnish finishes. It can also penetrate the surface of the wood to repair minor scratches and blemishes. In some cases, the results are impressive, especially if you follow the instructions carefully and apply the product evenly.
However, on the other hand, Restofinisher is not a miracle worker. It cannot fix deep cracks, gouges, or other major damage to the wood. It also cannot change the color of the wood itself, so if you don’t like the original color, Restofinisher won’t help you. Moreover, some customers have reported that Restofinisher did not work at all for them, or even made the problem worse.
In summary, Restofinisher can be a useful tool for restoring the appearance of wooden furniture and fixtures, but it is not a magic potion. You should use it with realistic expectations and test it on a small, inconspicuous area before applying it to the whole piece. If you have major damage or a different color in mind, you may need to consider other options, such as refinishing or painting.
When it comes to restoring wooden surfaces, there are several products available in the market. Restofinisher is one such product that claims to restore your faded wooden furniture and surfaces. Here is a comparison of Restofinisher with similar products:
Restor-A-Finish is another popular product that claims to restore the original finish of wooden surfaces. Unlike Restofinisher, it comes in a liquid form and requires a cloth for application. Restor-A-Finish is available in several colors, making it easier to match the color of your furniture. However, Restofinisher comes in a sprayer bottle, making it more convenient to use.
Howard Restor-A-Shine is a product that is used to restore the shine of wooden surfaces. It is not as effective in masking scratches and blemishes as Restofinisher. However, it does an excellent job of bringing back the shine of dull wooden surfaces. Howard Restor-A-Shine comes in a liquid form and requires a cloth for application.
Minwax Wood Finish Stain Marker is a product that is used to touch up scratches and blemishes on wooden surfaces. Unlike Restofinisher, it is not suitable for restoring the entire surface. Minwax Wood Finish Stain Marker comes in several colors, making it easier to match the color of your furniture. However, it requires more effort to use than Restofinisher.
In conclusion, Restofinisher is a unique product that can mask minor issues like abrasions, blemishes, and scratches. It is more convenient to use than other similar products like Restor-A-Finish and Howard Restor-A-Shine. However, if you need to touch up scratches and blemishes on wooden surfaces, Minwax Wood Finish Stain Marker might be a better option.
When using Restofinisher, it is important to take proper safety measures to avoid any accidents or harm. Here are a few safety tips to keep in mind:
It is important to note that Restofinisher is not non-toxic and may cause eye irritation or sickness. Therefore, it is crucial to handle the product with care and follow the instructions carefully.
In case of any accidents or mishaps, seek medical attention right away. It is always better to be safe than sorry when it comes to handling any chemical products.
By taking these safety measures, you can ensure a safe and successful experience with Restofinisher.

When it comes to the environmental impact of Restofinisher, there are a few things to consider. First of all, the product is not advertised as being eco-friendly or sustainable. While it does not contain any VOCs (volatile organic compounds), it does contain some ingredients that can be harmful to the environment.
According to the Restofinisher website, the product is not non-toxic and can cause eye irritation and sickness. It is also flammable, which means it should be used with caution and kept away from heat sources.
While the environmental impact of using Restofinisher may not be ideal, it is worth noting that the product is designed to restore old furniture and surfaces, which can help reduce waste. By breathing new life into old pieces, you can avoid the need to purchase new furniture, which can have a much larger environmental impact.
If you are concerned about the environmental impact of using Restofinisher, there are a few things you can do to minimize your impact. First, make sure to follow the instructions carefully and use the product in a well-ventilated area. It is also important to dispose of any leftover product properly, according to local regulations.
Overall, while Restofinisher may not be the most eco-friendly product on the market, it can still be a useful tool for restoring old furniture and surfaces. By using it responsibly and taking steps to minimize your impact, you can help ensure that your furniture restoration projects are as sustainable as possible.
When it comes to buying a product, customer feedback is an essential aspect to consider. Restofinisher claims to restore the color and luster of wooden furniture and surfaces, but what do customers have to say about it?
After researching various sources, it appears that the customer feedback for Restofinisher is mixed. Some customers have reported positive experiences with the product, while others have had negative experiences.
Positive feedback includes customers who have used Restofinisher to restore the look of their wooden furniture and surfaces successfully. They have reported that the product is easy to use and has restored the color and shine of their furniture, making it look new again.
On the other hand, negative feedback includes customers who have reported that Restofinisher did not work as advertised. Some customers have reported that the product did not restore the color and luster of their furniture, and in some cases, it even made the furniture look worse.
Overall, it appears that the effectiveness of Restofinisher may vary depending on the type of furniture or surface being restored. While some customers have reported positive experiences, others have had negative experiences. If you decide to try Restofinisher, it may be a good idea to test it on a small, inconspicuous area first to see how it works on your particular furniture or surface.
If you’re looking for an affordable and effective wood finish restorer, Restofinisher might be the perfect solution for you. Restofinisher is available for purchase online and in some physical stores. The price of Restofinisher varies depending on the size of the bottle and the seller. On average, a 16 oz. bottle of Restofinisher costs around $20 to $30.
Restofinisher is a great investment for those who want to restore the original beauty of their wooden furniture without spending a lot of money on professional services. It’s a cost-effective solution that can save you a lot of money in the long run. You can use Restofinisher to restore the finish of your wooden furniture, floors, and fixtures without having to replace them.
Restofinisher is a popular product, and you can find it on many online stores, such as Amazon, Home Depot, and Walmart. You can also find it in some physical stores, such as Lowe’s and Home Depot. If you’re not sure where to buy Restofinisher, you can check the official website for a list of authorized sellers.
In summary, Restofinisher is an affordable and effective wood finish restorer that can save you a lot of money in the long run. It’s widely available online and in some physical stores, and you can purchase it for around $20 to $30. If you’re looking for a cost-effective solution to restore the original beauty of your wooden furniture, Restofinisher might be the perfect product for you.
Restofinisher is a wood finish restorer that has been proven effective in restoring the original color and luster of wooden surfaces. It can repair old and faded lacquer, shellac, and varnish finishes. Many users have reported positive results after using Restofinisher on their wooden furniture and fixtures.
Restofinisher is available for purchase on various online platforms, including Amazon and the official Restofinisher website. You can also find it in some hardware stores and home improvement centers.
Restofinisher is a premium wood polish and restorer that offers several benefits. It can restore the original color and luster of wooden surfaces, repair scratches, and remove watermarks. It can also protect against heat and water damage, and it is safe to use on all types of wood.
Many people have tried the Restofinisher wood finish restorer, including those who have seen it advertised on TV. The product has received positive reviews from many users who have reported significant improvements in the appearance of their wooden furniture and fixtures.
To use Restofinisher, first, clean the wooden surface with a damp cloth and let it dry completely. Apply Restofinisher to a clean cloth and rub it onto the wooden surface, following the grain. Allow it to penetrate for a few minutes, then wipe off any excess with a clean cloth. For best results, repeat the process as needed.
The price of Restofinisher may vary depending on where you purchase it. On average, it costs around $20 to $30 for a 16-ounce bottle. However, it is important to note that the price may be higher or lower depending on the retailer and any promotions or discounts that may be available.

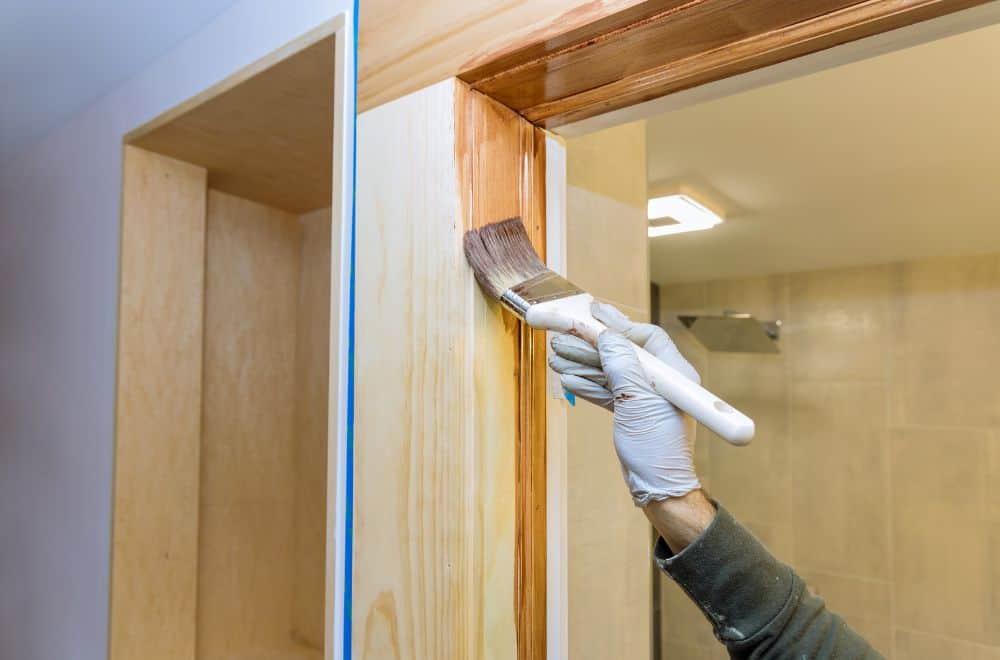
Are you wondering if Rustoleum can be used on wood? The short answer is yes, Rustoleum can be used on wood. However, there are some things you should consider before using Rustoleum on wood.
Firstly, Rust-Oleum recommends using a primer on high-tannin woods like cedar and redwood, as well as woods with lots of knots to prevent tannin from bleeding through. It’s also generally recommended to use a primer on all woods. This will ensure that the Rustoleum adheres properly and provides a smooth, even finish.
Additionally, it’s important to choose the right Rustoleum product for your project. Rustoleum offers a variety of products that are specifically designed for use on wood, such as Rustoleum 2X Ultra Cover Spray Primer. Using the right product for your project will help ensure that the Rustoleum provides the desired finish and protection for your wood surface.
If you’re wondering whether you can use Rustoleum on wood, it’s important to understand what Rustoleum is and how it works. Rustoleum is a brand of spray paint that was originally designed for metal surfaces. It is known for its ability to prevent rust from forming on metal surfaces, as well as its durability and long-lasting finish.
Rustoleum is an oil-based spray paint, which means that it is made up of tiny particles of paint suspended in an oil-based solvent. When you spray Rustoleum onto a surface, the solvent evaporates, leaving behind a layer of paint that adheres to the surface. The paint then dries to form a hard, durable finish.
While Rustoleum was originally designed for metal surfaces, it can also be used on wood. However, there are a few things you need to keep in mind when using Rustoleum on wood. First, you should always use a primer before applying Rustoleum to wood. This will help the paint adhere to the wood surface and prevent it from peeling or chipping over time.
Second, you should be aware that Rustoleum can be a bit tricky to work with on wood. Because it is an oil-based paint, it can take longer to dry than other types of paint. This means that you may need to wait longer between coats or before handling the painted surface.
Finally, you should be aware that Rustoleum may not be the best choice for all types of wood projects. If you’re looking for a more natural, rustic finish, you may want to consider using a different type of paint or stain. However, if you’re looking for a durable, long-lasting finish for your wood project, Rustoleum can be a great choice.
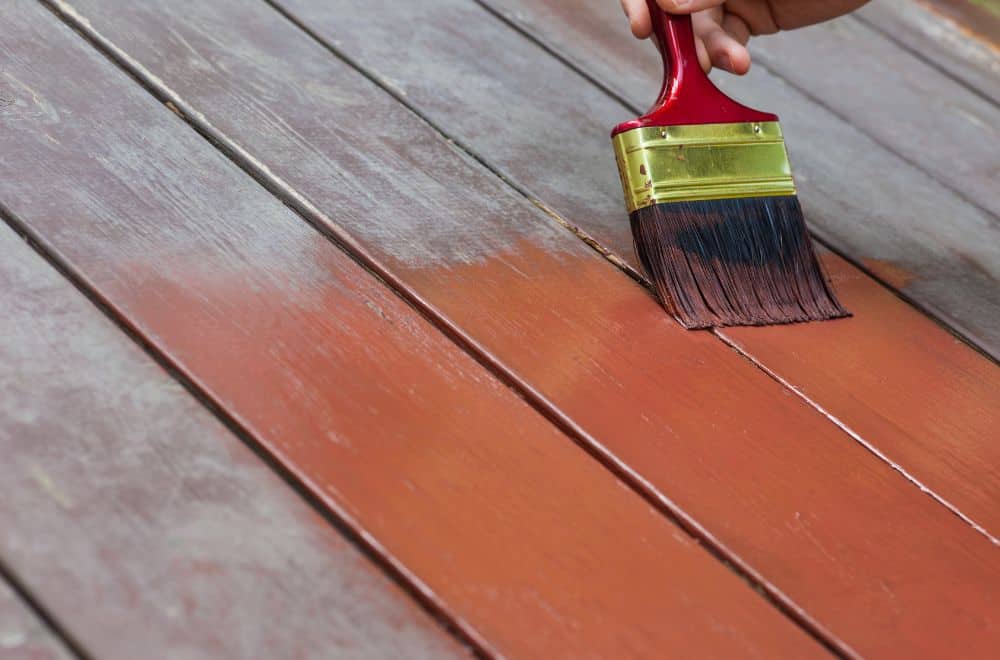
If you’re wondering whether Rustoleum can be used on wood, the answer is yes! Rustoleum enamel paint is an excellent choice for painting wood surfaces. Here’s how to apply Rustoleum on wood:
Before you start painting, you need to prepare the wood surface. This process involves cleaning and sanding the wood to remove any dirt, dust, or debris. Once the surface is clean and dry, apply a coat of oil-based primer to ensure that the Rustoleum adheres properly. If you’re painting high-tannin woods like cedar and redwood or woods with lots of knots, Rustoleum recommends using a primer to prevent tannin from bleeding through.
Once the primer has dried, it’s time to apply the Rustoleum. Shake the can well before use and test the spray on a small, inconspicuous area to ensure that the color and finish are what you want. Hold the can about 8-10 inches away from the surface and spray in a sweeping motion. Apply multiple thin coats, waiting a few minutes between each coat, until you achieve the desired coverage. Be sure to follow the manufacturer’s instructions for best results.
After you’ve finished painting, allow the Rustoleum to dry completely before using or handling the wood. The drying time can vary depending on the temperature and humidity, but it usually takes about 24 hours to dry to the touch and 7 days to fully cure. Avoid exposing the painted wood to moisture or extreme temperatures during the drying process.
In summary, Rustoleum can be used on wood surfaces with proper preparation and application. Follow the steps outlined above for best results and enjoy your newly painted wood surfaces!
If you are wondering whether Rustoleum can be used on wood, the answer is yes. In fact, there are several benefits to using Rustoleum on wood. Here are a few of them:
One of the primary benefits of using Rustoleum on wood is that it provides excellent protection. Rustoleum enamel paint is expertly formulated to protect various surfaces from the harsh weather elements that typically characterize the outdoor environment. This protective coat can help prevent your wood from rotting or warping, which can extend its lifespan.
Another benefit of using Rustoleum on wood is that it is incredibly durable. Rustoleum enamel paint dries to form a hard, often glossy finish that is resistant to chipping, fading, and peeling. This means that your wood will look great for years to come, even with regular use.
Rustoleum can be used on a variety of surfaces, including wood, metal, concrete, ceramic, vinyl, porcelain tiles, and laminate. This versatility makes it an excellent choice for DIY painters and those who are involved in home improvement projects.
Finally, Rustoleum is incredibly easy to use. It comes in a spray can, which makes it easy to apply evenly to your wood surface. Just remember to prepare the wood surface well by cleaning, sanding, and then applying a coat of oil-based primer first.
Overall, using Rustoleum on wood is an excellent choice if you want to protect and enhance the look of your wood surface. With its excellent protection, durability, versatility, and ease of use, Rustoleum is a top choice for DIY painters and home improvement enthusiasts alike.
While Rustoleum can be a great choice for painting wood, there are some potential drawbacks you should be aware of before using it on your project.
One of the biggest drawbacks of Rustoleum is its longer drying time compared to other wood paints. It can take up to 24 hours for the paint to fully dry, which can be frustrating if you need to use the painted surface soon after painting it. However, this longer drying time can also be an advantage since it allows the paint to fully adhere to the wood, resulting in a more durable finish.
Rustoleum is an oil-based paint, which means it has a strong odor. If you are sensitive to strong smells, you may want to avoid using Rustoleum or make sure you use it in a well-ventilated area. It’s also important to note that the fumes from Rustoleum can be flammable, so make sure to keep it away from any open flames or heat sources.
To get the best results with Rustoleum on wood, you need to properly prepare the surface before painting. This includes cleaning the wood, sanding it to create a smooth surface, and applying a primer. If you skip any of these steps, the paint may not adhere properly to the wood, resulting in a less durable finish.
While Rustoleum offers a wide range of colors for their spray paint, their selection of colors for their wood paint is more limited. If you are looking for a specific color, you may need to look for another brand of paint or consider mixing colors to achieve the shade you want.
While Rustoleum is a durable paint, it may not be the best choice for high-traffic areas like floors or stairs. The paint can chip or scratch under heavy use, which can be unsightly and require touch-ups. If you need to paint a high-traffic area, consider using a more specialized paint designed for that purpose.
When using Rustoleum on wood, it is important to take safety measures to ensure that you are not exposing yourself to any harmful chemicals or causing any damage to yourself or your surroundings. Here are some safety measures that you should take when using Rustoleum on wood:
When using Rustoleum, make sure that you wear protective gear such as gloves, goggles, and a mask. This will help to protect your skin, eyes, and lungs from any harmful chemicals that may be present in the Rustoleum.
It is important to work in a well-ventilated area when using Rustoleum. This will help to ensure that any fumes that are released during the application process are properly ventilated and do not accumulate in the air.
When using Rustoleum, it is important to follow the instructions carefully. This will help to ensure that you are using the product correctly and that you are not causing any damage to yourself or your surroundings.
When you are not using Rustoleum, make sure that you store it properly. This will help to ensure that the product remains in good condition and that it does not become a hazard to you or your surroundings.
When you are finished using Rustoleum, make sure that you dispose of it properly. This will help to ensure that the product does not become a hazard to the environment or to other people.
While Rustoleum can be used on wood, there are other products available that may better suit your needs. Here are a few alternatives to consider:
If you want to enhance the natural beauty of the wood, wood stain is a great option. It penetrates the wood fibers to provide long-lasting color and protection. Wood stain is available in a variety of colors and finishes, so you can find the perfect match for your project.
If you want to protect the wood from moisture and UV rays, wood sealer is a good choice. It forms a protective barrier on the surface of the wood, preventing water and other liquids from penetrating. Wood sealer is available in clear and tinted finishes.
Polyurethane is a clear, protective finish that can be used on wood floors, furniture, and other surfaces. It provides a durable, long-lasting finish that resists scratches and stains. Polyurethane is available in gloss, semi-gloss, and satin finishes.
Lacquer is a fast-drying, durable finish that can be used on wood furniture, cabinets, and other surfaces. It provides a high-gloss finish that is resistant to scratches and stains. Lacquer is available in clear and tinted finishes.
When choosing a product for your wood project, consider the level of protection you need, the desired finish, and the application method. Each product has its own unique properties and benefits, so be sure to choose the one that best meets your needs.
Rustoleum is a versatile spray paint that can be used on a variety of surfaces, including metal, plastic, and ceramic. It is also suitable for use on concrete, masonry, and brick.
Yes, Rustoleum enamel can be used on previously painted wood surfaces. However, it is important to ensure that the existing paint is in good condition and free from any cracks or peeling. If the old paint is in poor condition, it should be removed before applying Rustoleum enamel.
Yes, Rustoleum primer can be used on wood surfaces. It is recommended to apply a coat of primer before painting with Rustoleum to ensure better adhesion and longer-lasting results.
Rust-Oleum offers a wide range of wood paint colors, including classic wood tones like oak, mahogany, and walnut, as well as bold and modern colors like navy blue, emerald green, and bright red.
Yes, Rustoleum clear enamel can be used on wood surfaces to provide a protective and glossy finish. It is recommended to apply a coat of primer before using clear enamel for better adhesion.
Yes, Rustoleum protective enamel can be used on wood surfaces to provide a durable and protective finish. It is recommended to apply a coat of primer before using protective enamel for better adhesion.

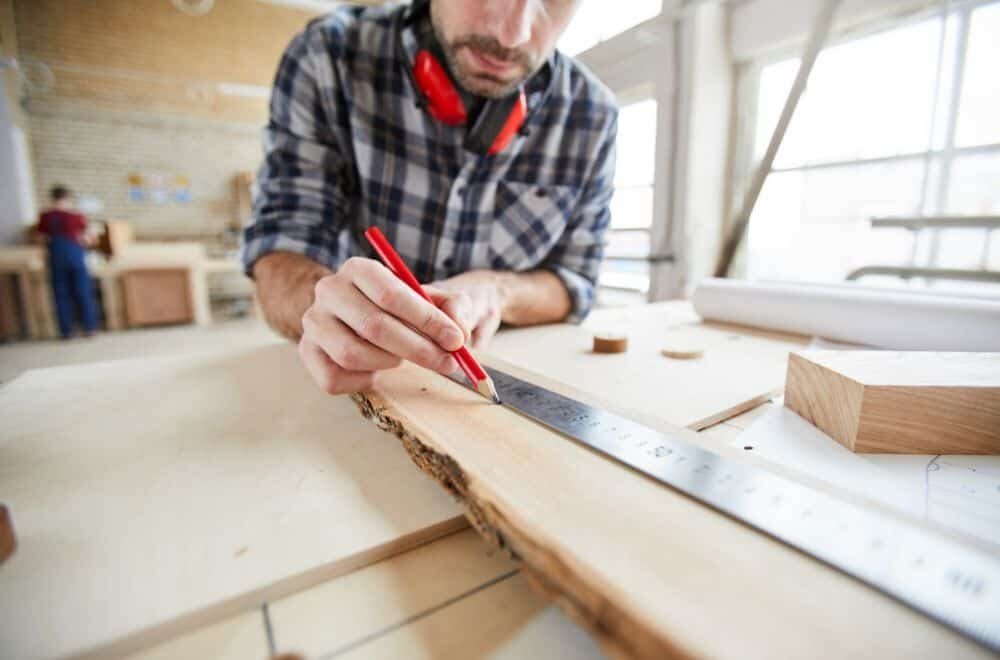
If you’re new to woodworking, measuring and cutting wood at precise angles can be a daunting task. A 45-degree angle cut is a common cut used in many woodworking projects, such as creating frames or molding. But how do you measure and cut a 45-degree angle cut in wood?
First, you’ll need the right tools. A miter saw is the most common tool used for cutting 45-degree angles in wood. It’s a power tool that allows you to make precise cuts at various angles. You’ll also need a measuring tape, a pencil, and safety gear such as safety glasses and ear protection.
Once you have your tools, it’s time to measure and mark your wood. Measure the length of the wood you want to cut and mark it with a pencil. Then, use your measuring tape to find the halfway point of the wood and mark it with another pencil line. This will be the point at which you’ll make your 45-degree angle cut. The next step is to adjust your miter saw to a 45-degree angle and carefully cut along the marked line. With practice, you’ll be able to make precise 45-degree angle cuts in no time.
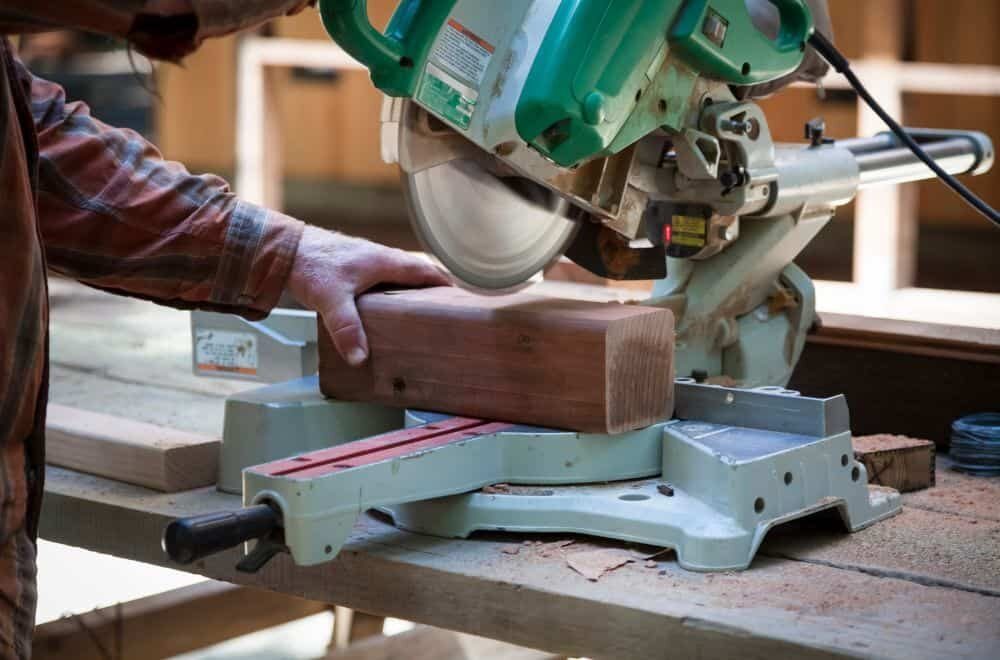
If you’re new to woodworking, you may be wondering what a 45-degree angle cut is and why it’s important. Simply put, a 45-degree angle cut is a diagonal cut made on a piece of wood at a 45-degree angle. This type of cut is commonly used in woodworking to create beveled edges, miter joints, and other angled cuts.
To make a 45-degree angle cut, you will need a combination square, a pencil, and a saw. The easiest way to make this cut is by using an electric miter saw, as it allows you to adjust the angle of the blade to precisely 45 degrees. However, if you don’t have a miter saw, you can still make a 45-degree angle cut using a handsaw or circular saw.
When measuring for a 45-degree angle cut, it’s important to measure to the long end of the miter. This means that if you need a 10-inch piece of wood with a 45-degree angle cut, you should measure 10 inches from the long end of the miter and mark the cut line with your pencil.
It’s also important to remember that a 45-degree angle cut is an opposite cut, which means that the angle of the cut will be in the opposite direction of the angle of the saw blade. To ensure that you make a clean and accurate cut, use a saddle square or combination square to guide your saw along the cut line.
In summary, understanding how to measure and cut a 45-degree angle cut in wood is an essential skill for any woodworker. With the right tools and techniques, you can create beveled edges, miter joints, and other angled cuts with precision and ease.

If you’re planning to make a 45-degree angle cut in wood, you’ll need to have the right tools for the job. Here are the tools you’ll need:
To make a precise 45-degree angle cut, you’ll need to measure and mark the wood accurately. Here are the measuring tools you’ll need:
Once you’ve measured and marked the wood, you’ll need to cut it at a 45-degree angle. Here are the cutting tools you’ll need:
With these tools, you’ll be able to make a precise 45-degree angle cut in wood. Make sure you take the time to measure and mark the wood accurately, and use the right cutting tool for the job.

Measuring a 45-degree angle is essential if you want to make precise cuts in wood. There are different tools and methods you can use to measure a 45-degree angle, and we will discuss some of them below.
A combination square is a versatile tool that can help you measure angles, distances, and depths. To measure a 45-degree angle with a combination square, follow these steps:
A protractor is a tool that measures angles. To measure a 45-degree angle with a protractor, follow these steps:
A bevel gauge is a tool that measures and transfers angles. To measure a 45-degree angle with a bevel gauge, follow these steps:
A speed square is a tool that helps you make square cuts and angles. To measure a 45-degree angle with a speed square, follow these steps:
In conclusion, measuring a 45-degree angle is not difficult if you have the right tools and know-how. You can use a combination square, protractor, bevel gauge, or speed square to measure a 45-degree angle. Choose the tool that works best for you and your project, and always double-check your measurements before making any cuts.
When it comes to measuring and cutting a 45-degree angle cut in wood, marking the wood properly is crucial to ensuring a precise and accurate cut. Here are a few steps to follow when marking the wood for a 45-degree cut:
By following these steps, you can accurately mark the wood for a 45-degree cut and ensure that your cut is precise and accurate. Remember to always measure twice and cut once to avoid any mistakes.
Now that you have your wood marked at a 45-degree angle, it’s time to cut it. The easiest way to do this is by using an electric miter saw. Here’s how you can do it:
Make sure to take your time and be careful while cutting the wood. If you rush the process, you may end up with a crooked cut or even injure yourself.
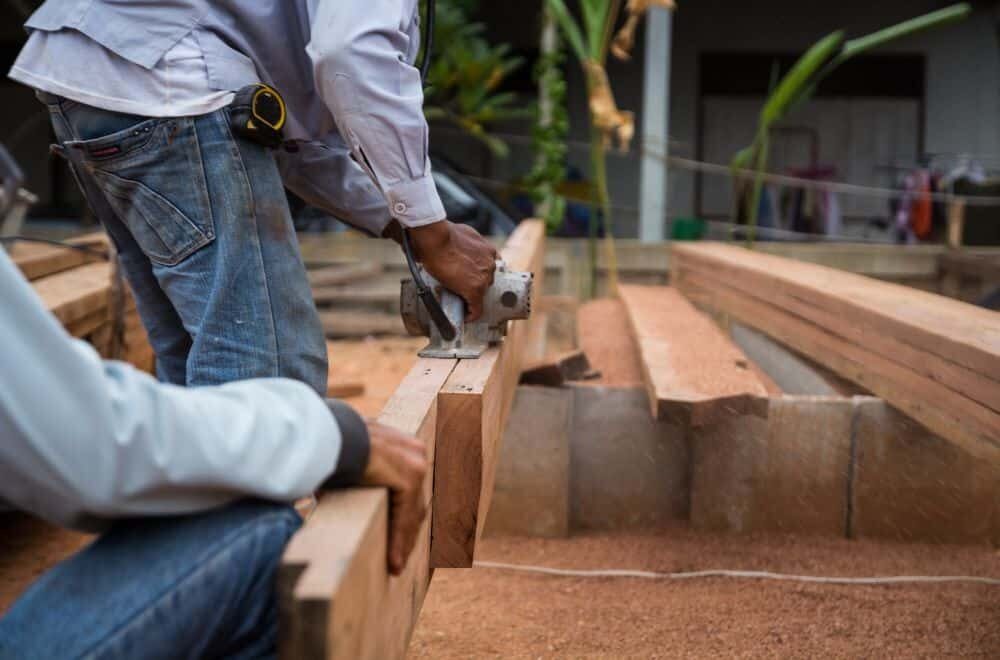
If you don’t have a miter saw, you can use a circular saw or a handsaw to make the cut. However, these methods may not be as accurate as using a miter saw.
Another thing to keep in mind is that the thickness of the wood can affect how the cut turns out. Thicker wood may require multiple passes with the saw to get a clean cut.
Remember to always wear appropriate safety gear, such as safety glasses and ear protection, when using power tools.
When working with power tools, it is important to prioritize safety. Here are a few precautions you should take when cutting a 45-degree angle in wood:
Before you begin cutting, make sure you are wearing the appropriate protective gear. This includes safety glasses or goggles to protect your eyes from flying debris, earplugs to protect your hearing from loud noises, and a dust mask to prevent inhalation of sawdust.
Make sure the wood you are cutting is securely clamped or held in place to prevent it from moving or slipping during the cut. This will help you maintain control over the saw and prevent accidents.
Make sure you are using the appropriate blade for the type of cut you are making. For a 45-degree angle cut, a crosscut blade or a combination blade with a high tooth count is recommended.
Always make sure the blade guard is in place and functioning properly before you begin cutting. The blade guard helps protect your fingers from the blade and also helps prevent debris from flying out of the saw.
When making the cut, keep your hands well clear of the blade and the path of the saw. Use a push stick or other tool to guide the wood through the saw, if necessary.
By following these safety precautions, you can help ensure a safe and successful 45-degree angle cut in wood.
Cutting a 45-degree angle in wood may seem simple, but it can be frustrating when things don’t go as planned. Here are some common issues you may encounter and how to troubleshoot them:
If your 45-degree angle cut is uneven, it could be due to a few reasons. First, make sure your saw blade is sharp and in good condition. Dull blades can cause jagged cuts. Next, check that your wood is clamped securely in place and not moving during the cut. Finally, ensure that your saw is properly aligned and calibrated for a 45-degree cut.
If your 45-degree angle is not accurate, it may be due to incorrect measurements or saw adjustments. Double-check your measurements and use a combination square to ensure accuracy. If your saw is not calibrated correctly, adjust it accordingly and recheck your cut.
Tear-out occurs when the wood fibers splinter or tear during the cut, leaving an unsightly finish. To prevent this, use a sharp saw blade with a high tooth count. You can also use masking tape on the wood surface to prevent splintering. Another option is to make a scoring cut before the 45-degree cut to weaken the wood fibers and reduce tear-out.
Always prioritize safety when using power tools. Wear safety glasses and ear protection, and keep your hands and fingers away from the blade at all times. Use a push stick to guide the wood through the saw and never force the cut. If you are unsure or uncomfortable with the process, seek guidance from a professional or experienced woodworker.
Cutting a 45-degree angle in wood can be a challenging task, but with the right tools and techniques, you can achieve a perfect cut every time. Here are some tips that will help you get the job done:
A combination square is an essential tool for measuring and marking angles. To cut a 45-degree angle, set your combination square on the 45-degree mark and draw the cut line on the wood. This will ensure that your cut is accurate and straight.
An electric miter saw is the best tool for cutting a 45-degree angle in wood. Adjust the miter saw to 45 degrees, align it to the cut line, and gently guide the saw into and through the wood. Make sure to wear safety goggles and gloves while using the saw.
Before making the cut, double-check your measurements to ensure that they are accurate. Use a tape measure or ruler to measure the length of the wood and mark the 45-degree angle with a pencil. This will help you avoid mistakes and ensure that your cut is precise.
If you are new to woodworking, it is a good idea to practice cutting 45-degree angles on scrap wood before working on your project. This will help you get a feel for the saw and ensure that you are comfortable with the process before making the cut on your final piece.
Cutting a 45-degree angle in wood requires patience and precision. Take your time and make sure that you are comfortable with each step of the process before moving on to the next. Rushing can lead to mistakes and a less-than-perfect cut.
By following these tips, you can achieve a perfect 45-degree angle cut in wood every time. Remember to always prioritize safety and take your time to ensure a quality result.
When using a circular saw to cut a 45-degree angle, it’s important to make sure that the saw blade is set to the correct angle. You can use a protractor or angle finder to measure the angle of the blade. It’s also important to use a guide to ensure that your cut is straight and accurate. You can use a straight edge or a piece of scrap wood as a guide.
To measure and cut a 45-degree angle with a tape measure, you can use the Pythagorean theorem. Measure the length of the side you want to cut, then divide it by the square root of 2. This will give you the length of the other side of the triangle. Use this measurement to mark your cut line, then use a saw to make the cut.
Yes, there are several angle cut calculators available online that can help you calculate the correct angle for your cut. Simply enter the length of the side you want to cut, and the calculator will give you the correct angle to use.
The easiest way to measure a 45-degree angle on wood is to use a combination square. Set the square to 45 degrees, then use it to mark your cut line. You can also use a protractor or angle finder to measure the angle.
To cut trim at a 45-degree angle, you can use a miter saw or a coping saw. If using a miter saw, set the saw to a 45-degree angle and make your cut. If using a coping saw, cut along the profile of the trim at a 45-degree angle.
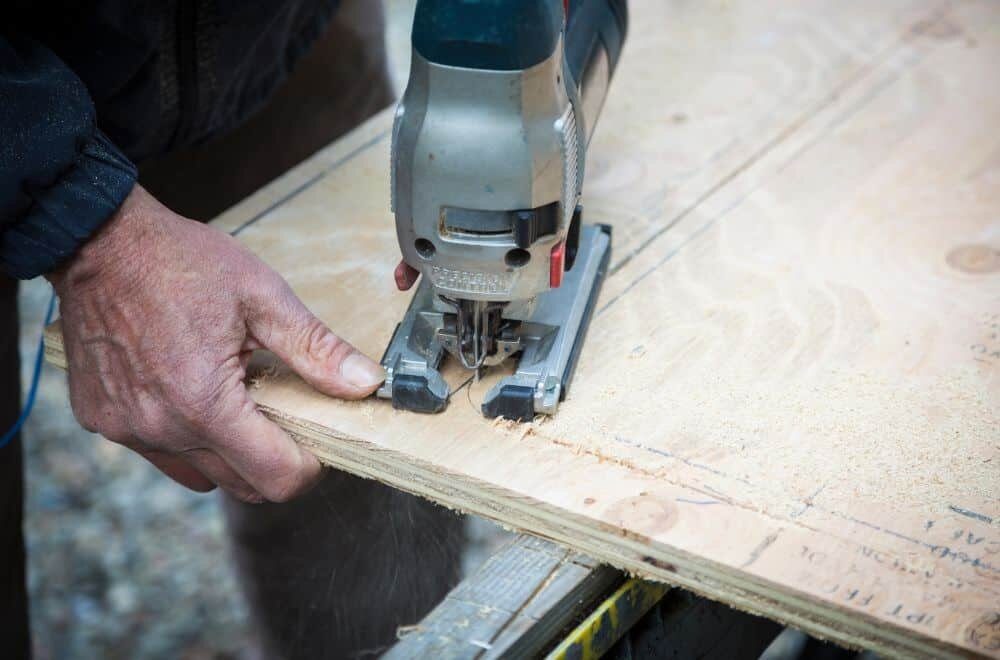
Yes, there are several techniques for cutting a 45-degree angle without a miter saw. You can use a circular saw with a guide, a handsaw with a miter box, or a jigsaw with a bevel cut. It’s important to take your time and make sure that your cut is accurate.

Australia is renowned for its strict biosecurity regulations aimed at keeping pests and diseases from entering the country and harming its precious natural environments and agricultural sector. For tourists and travelers, these important quarantine laws can pose challenges when trying to bring beloved wooden items along on trips – whether antique walking sticks, handmade musical instruments, or simple utensils.
This comprehensive guide covers all aspects of importing wood products into Australia. We’ll examine prohibited items, preparation steps for permitted goods, what to expect during inspection, options for storing non-approved items for pickup later, biosecurity obligations for exporting wood from Australia, and even cultural considerations around wood handicrafts. By understanding quarantine guidelines, you can navigate your travels with any necessary wood belongings while also helping preserve the country’s ecosystems.

Australia’s timber quarantine regulations establish clear categories of high-risk wood materials prohibited from entering the country except in rare circumstances with extensive processing. Before packing any wood products in your luggage, review the following banned items:
This encompasses raw wood materials like lumber, logs, planks, bark, mulch, shavings, and industrial wood shavings. Raw wood poses a major contamination risk.
Including wood crating, pallets, boxes, reels, dunnage, packing blocks, skids, and other wood packing supports. Some exemptions exist for treated ISPM-certified packing from approved locations.
Specific products banned include painted masks, spears, arrows, walking sticks, straw goods, rattan and bamboo articles. Exceptions can apply if thoroughly treated and declared.
Furniture, kitchenware, utensils, etc. made partially or wholly of wood materials often prohibited. Requires extensive cleaning and official certification.
Transporting firewood, kindling, or similar wood materials, whether as goods themselves or packaging/dunnage, is completely banned.
Any wood showing signs of live/dead pests, insects, fungi, eggs, soil, bird droppings or organisms. Also bans decorative finishes using animal or insect parts.
Review Australia’s Timber Import Regulations thoroughly before packing wood products. When in doubt, declare items for inspection rather than risk automatic seizure. Fines and penalties apply to non-declared prohibited goods.
Certain wood items are approved for importation, provided they undergo treatment and declaration procedures demonstrating minimal biosecurity risk. You can bring:
Carved figural statues, masks, painted wood artwork, and decorative boxes/objects are permitted if made from properly dried, treated timber and free of pests. An invoice showing clean treatment may be required.
Guitars, violins, clarinets and other instruments can enter if all wood components are thoroughly cleaned and certified pest-free. Avoid instruments incorporating animal materials like ivory.
Tables, chairs, kitchen utensils, bowls, and other decorative housewares require documented fumigation, cleaning, and restricted timber use. Must meet lowest biosecurity risk standards.
Clean lumber, pallets and dunnage materials certified with ISPM markings prove they’ve undergone required heat or fumigation treatments. Lower risk than uncertified woods.
Can be imported after inspection to confirm either a total absence of pests or successful treatment if any infestation detected. Bamboo and rattan often problematic.
The key for these items is meticulous preparation ensuring wood is sterile, dried, and certified free of organisms. Never attempt to sneak untreated or contaminated wood past quarantine.
To maximize chances permitted wood products pass inspection, implement the following treatments and preparations:
Closely examine all wood surfaces and crevices for any sign of living/dead insects, larvae, fungi, rot, soil, eggs, tunnels or bird droppings. Also check for hidden hollow spaces.
Wash and scrub all wood surfaces with soapy water and dry completely. Repeat as needed to remove any traces of debris, pests or organisms. Bleaching can also sanitize.
Coat or spray approved insecticides containing bifenthrin, permethrin or other registered agents. Ensure full coverage and let dry completely. Include treatment certificates.
Seal porous woods with varnishes, polyurethane or oils that contain fungicides or pest resistance and make woods unsuitable environments.
Fixed compliance labels and stamps prove timber has undergone proper commercial drying and treatment processes to standards.
Provide invoices listing contents, treatment info, pest-free certificates, compliance declarations, and ISPM certifications to customs and quarantine officers.
Following all these preparation best practices demonstrates attention to biosecurity, lowering your risk of wood seizure or delays.
All wood products and organics undergo stringent inspection upon arrival at Australian international airports and seaports. Here’s what to expect:
Submit completed BICON declaration forms to quarantine officers providing descriptions, values and treatment details for every wood item in your luggage. Omitting materials leads to problems.
Luggage will undergo x-ray or dense wavelength scanning looking for undeclared or unauthorized wood materials. Anomalies require search.
Dogs trained to sniff out food, wood, and organic matter patrol the baggage areas. A dog showing interest in your luggage flags it for inspection.
Quarantine officers closely examine wood products by sight, tapping for hollow spots, using magnifying glasses, and extracting samples. Unpacking of items may be required.
Swab tests and on-site labs analyze drill samples for presence of foreign pests, fungi or disease organisms. Suspicious areas warrant further scrutiny.
Wood found contaminated may be fumigated, cleaned, or surrendered. Heavily invested materials get immediately seized and destroyed to control spread.
Cooperate fully with all inspection processes. Delays are common but this protects Australia’s ecosystems. Report anything missed on your declaration forms.
If certain wood belongings in your luggage don’t clear quarantine standards, they may be confiscated and destroyed on the spot. However, you can request prohibited items be held in secure storage near the airport for retrieval when departing Australia later. Here’s how:
If you have prohibited woods like untreated lumber, uncertified pallets or risky carvings, admit this immediately rather than risk undeclared seizure at the airport.
Fill out Australian Border Force forms to identify stored items, pay required storage fees, provide local contact details and outline the seizure terms.
Notify quarantine authorities several days in advance that you’ll be collecting stored materials so transportation to the airport can be arranged in time for your departure.
Carefully inspect any wood products returned after storage for damage, tampering or signs of further pest contamination before packing them to exit Australia.
Leave ample time when picking up stored wood belongings before flights to account for transportation delays. Missing luggage could get stuck in quarantine indefinitely.
Properly coordinating temporary seizure storage and item pickup helps ensure prohibited belongings can be kept intact for the trip home. But work within the system.
Wooden items legally imported into Australia that clear quarantine may also undergo monitored export in passenger baggage to other international destinations. Here’s how to do so properly:
Research if your next destination restricts or bans import of wood handicrafts, instruments, packing materials or furniture. Bring supporting export documents.
Fill out required forms declaring all wood items leaving Australia, providing descriptions, values and references to entry inspection certificates. Keep copies.
Australia can endorse exit of already approved wood through added inspection and cleanliness certification to facilitate entry elsewhere. Fees may apply.
If transporting large wood objects like instruments in their own cases, follow airline size and weight limits. Extra luggage fees may be imposed.
Answer exit border agent questions honestly, present any requested documents related to the wood, and fully comply with scanning or examinations of items.
Satisfying Australian export processes demonstrates your commitment to global biosecurity. This speeds the process when entering your next destination country.
If you’ll be acquiring traditional wood handicrafts or instruments while visiting Australia, be sensitive that customs issues can hamper the economic livelihood of Aboriginal and Islander artisans who rely on export income. Some tips:
Culturally-significant wood items deserve special care and consideration around complex quarantine laws. Keep artisans’ best interests in mind.
With proper preparation and understanding of quarantine policies, you can successfully visit Australia with needed wood belongings without accidental infractions or sacrificing treasured items. Follow protocols to protect Australia’s environmental treasures.
No, all wood items must undergo x-ray screening and quarantine inspection so must be checked in as luggage. Do not attempt bypassing security with hand-carried items or they will be seized.
You can file damage claims and potentially seek compensation if poor handling during cleaning, fumigation or other required treatments damages wood belongings. Save photographs documenting the original condition of items.
Decorative elements made from animal materials introduce additional biosecurity risks and restrictions. Simple, unfinished wooden canes have the highest chance of easy entry. Avoid composites.
No, even tiny traces of prohibited raw wood materials could present a biohazard. Carefully inspect and clean all luggage, bags, shoes, etc to ensure you do not accidentally transport illegal wood bits or fibers.
Antique wood furniture can indeed be shipped to Australia through special catchment importers familiar with entry procedures for rare collectibles. This requires extensive documentation and inspections.
ISPM regulations require pine lumber fumigation and debarking before pallet construction. Then pallets undergo heat treatment during manufacturing as well to sterilize. Multiple safeguards.
Sticks tend to have bark intact making detection of organisms harder. Cane materials like bamboo easily harbor insects internally. They may require drilling, swabbing, and treatment to gain Australia entry approval.
Small decorative wood boxes are permitted if made from compliant timber and containing no pests. However, avoid boxes incorporating seeds, straw, shellac or animal materials which face greater scrutiny.
Authentic didgeridoos crafted by Aboriginal artisans make excellent keepsakes. Ensure yours is made from termite-resistant hardwoods like eucalyptus and has received internal cleaning and pest treatments before traveling with it.
Bringing in banned wood without declaring it risks on-the-spot destruction of items plus civil penalties up to $420,000 AUD depending on the severity, quantity, and type of concealment. Declare or discard prohibitives.

Wooden clogs are iconic traditional shoes with a unique charm. But can these hard, heavy-looking wooden soles actually be comfortable for walking around all day? At first glance, they seem like they would cause painful feet and blisters!
In this extensive article, we’ll explore whether wooden clogs live up to their appearance. We’ll dive deep into the many factors that determine the cushiness of these shoes. Read on for the ultimate guide to understanding wooden clog comfort!

To appreciate the comfort aspects of clogs, it helps to understand where they originated and developed over time. Here is a brief overview of the history of wooden clogs.
The earliest precursors to wooden clogs emerged in East Asia. Rice farmers in ancient China wore wooden sandals called kikuu for muddy fields. In Japan, geta sandals with elevated wooden soles appeared in the 8th century for both field work and city street wear.
Some historians believe even the Ancient Greeks and Romans used primitive wooden soled shoes to tread uneven roads and protect feet outdoors. The influence of Asian styles may have spread the concept West early on.
However, wooden clogs as we now know them took strongest root in Europe during the Middle Ages. Wooden shoes emerged as practical footwear for peasant farmers and manual laborers in areas like France, the Netherlands, and Spain starting in the 14th century.
Unlike costly leather, wood was an inexpensive, accessible material for poor, rural populations. The sturdy shoes protected feet from cold, damp fields and precarious dirt roads. Their water resistance also made them ideal for marshy terrains in places like Holland.
By the 1500s and 1600s, distinctive regional clog styles evolved across Europe. The shoes became ingrained into local traditions and folk costumes. An arched, high clog design became quintessentially Dutch.
In the 19th and early 20th centuries, wooden clogs experienced a dichotomy. As Europe industrialized, factory and city life drove most people to abandon clogs for more “modern” footwear. Only poorest sharecroppers and farmers retained heavy clog use out of necessity.
Yet clogs also became symbols of pride for rural citizens who moved into cities like Amsterdam and Brussels. Urban factory workers wore them to express regional identity and solidarity with their home villages.
By the late 1900s, wooden clogs transcended their humble past. As retro fashion soared, clogs became trendy “ vintage” urban footwear in Europe and North America. Contemporary clog designs also emerged, melding traditional motifs with comfort and style.
Today, wooden clogs are coming full circle to appreciate their heritage while pioneering new territory. Custom designers handcraft contemporary clogs using time-tested techniques yet modern materials. The shoes represent both durable, elemental designs and new innovations for comfort.
Now that we’ve covered the history, let’s look closely at what makes traditional clogs actually comfortable or not on your feet all day.
Many elements work together to produce comfortable wooden clogs – or uncomfortable ones! Understanding these key factors helps ensure you select shoes supporting all day wear:
Identifying whether your potential clogs account for all these considerations will determine if they provide a comfortable walking experience. Next we’ll look at how these factors impact break-in and all day wear.
Unlike soft leather shoes that mold instantly to feet, wooden clogs traditionally involve a multi-week physical break-in period before reaching peak coziness. Here’s what to expect.
Give yourself 2-4 weeks of incremental wear before new clogs feel like custom slippers. The wood needs time to gently compress and respond to the contours of your feet.
During this transitional phase, limit wear to a few hours at a time around the house and on short errands. Listen to any sore spots signaling needed adjustments.
Resist the temptation to speed break-in by wearing clogs all day from the get-go. This often backfires by causing painful blisters before the wood adapts.
As you walk during the break-in period, the wood interior will slowly start to flex where your foot bends most yet remain sturdy around the arches.
The ideal clog wood will retain enough rigidity for support while softening selectively under pressure areas. With use, the inner surface also polishes to an ultra smooth finish.
This carefully developed flexion results in clogs that are perfectly contoured to hold each forward step securely, then release easily for the next. It’s a sublime feeling when the wood adapts just right.
If clogs remain obstinately rigid and pinch feet after several weeks of dedicated wear, they may simply be a poor footwear choice for your individual foot shape.
This doesn’t mean you did the break-in wrong. Rather than continuing to “tough it out” through pain, try a different clog brand or increase your size. Well-fitted clogs should ease to comfort quickly without a grueling struggle.
While proper wooden clogs always require some break-in, it’s more of a mutual adaptation than one-way battle with stubborn shoes. Don’t settle for persistent pain.
Once past the initial transition period, high quality wooden clogs often feel heavenly to wear for extended periods of time. However, getting the right design for your needs and feet is key.
For all-day wear, prioritize clogs promoting healthy biomechanics: anatomically contoured soles, spacious toe boxes, arch support, heel stabilization and shock absorbing padding.
Cheaper mass manufactured clogs lack these details and cause discomfort quickly. However, well-crafted anatomical clogs promote proper gait and weight distribution so you can genuinely forget you’re wearing them.
Clogs made for standing all day on hard surfaces, like a chef’s clogs, incorporate thicker, plusher padding. Their structure actively resists fatigue versus casual designs.
Conversely, sleeker wooden sandals work well for beach lounging but won’t satisfy sidewalk pounding. Make sure to match clog function with your activity levels and surfaces.
It’s still wise to alternate clogs with other comfortable shoes those first few weeks even after the break-in period. This allows your feet final time to adjust before relying on clogs for full days of wear at a time.
Slowly increase hours in the clogs as they start to feel like an extension of your feet versus an imposition. The goal is working up to that “forget you’re wearing them” feeling.
If specific spots like the heel or toes ache before full day comfort develops, utilize temporary cushioning strategies just on those areas until the wood conforms.
Targeted gel pads and moleskin patches ease friction that dissipates over time. This helps you power through minimal discomfort during the final shaping without excess pain.
You’ve just purchased a pair of traditional wooden clogs. The shoes look great but feel hard and stiff. How can you soften them up and mold the shape faster to your feet with less pain? Follow these top tips:
Wood can’t stretch much width-wise to accommodate feet. If clogs remain painfully tight after a few weeks, don’t keep suffering. Try sizing up a half or full size to allow foot freedom as they adjust.
With smart strategies like these, you can shorten the usual wooden clog break-in period and make it much less torturous. Be patient, let your feet guide the pace, and you’ll achieve blissful clog comfort quickly.
Interested in traditionally crafted wooden clogs but not sure if they will be comfortable for your needs? Below are answers to the most common questions about clog cushioning and fit.
This depends on the clog’s structure. Well-made Danish style clogs with thick, built-in cushioning and high sidewalls provide exceptional all-day standing comfort. The design minimizes strain on feet, knees and backs even on hard surfaces. Lighter flip-flop styles, however, lack the requisite support for prolonged standing comfort. Assess the intended use and robustness of padding materials.
Absolutely! Rigid wooden clog soles provide an ideal stable base for orthotics. Look for styles with removable footbeds so you can insert your customized orthotics directly against the wood. Make sure to accommodate the extra volume of the insert in your sizing. A half size up or wide width prevents a too-tight fit.
Regularly apply clog oil to the inside surfaces. The oils moisturize wood fibers to flex faster. Gently sand excessively rigid spots, but don’t overdo it. Try wearing clogs with damp socks or use a shoe stretcher to accelerate the break-in process. Rotate them with other shoes at first to avoid blisters. Allow weeks not days for full custom molding.
The stiff toe box shape may not suit your foot. Try a wider toe box design or size up a half-size in your current pair. The extra space prevents friction while the wood still molds snugly over time. Bandage blisters immediately to prevent re-injury. Wear toe socks temporarily until the wood smooths from abrasions.
Yes, beeswax or oil-based sealers maintain water resistance and durability of leather clogs over time. This prevents moisture damage that can shrink and distort the leather against your feet. A few light applications per year replenishes protection. Test products first on inconspicuous spots to confirm colorfastness before fully applying.
We hope these answers help you decide if traditionally handcrafted wooden clogs can deliver the comfort experience you seek. With realistic expectations about break-in time, customized fit, and foot-friendly designs, wooden clogs reward wearers with their distinctive look and feel. The extra effort is well worth it for many loyal clog aficionados. Give them a try to experience timeless wood comfort on your own feet.
 $12.89
 $16.99
 $8.99
$8.99 $11.99
 $13.99
 $16.99
 $13.99
 $29.75
 $14.89
 $13.89
 $18.88
 $18.88
 $15.99
Dapatkan penawaran terbaik di slot88 resmi hari ini, jangan lewatkan promo 2024!
")
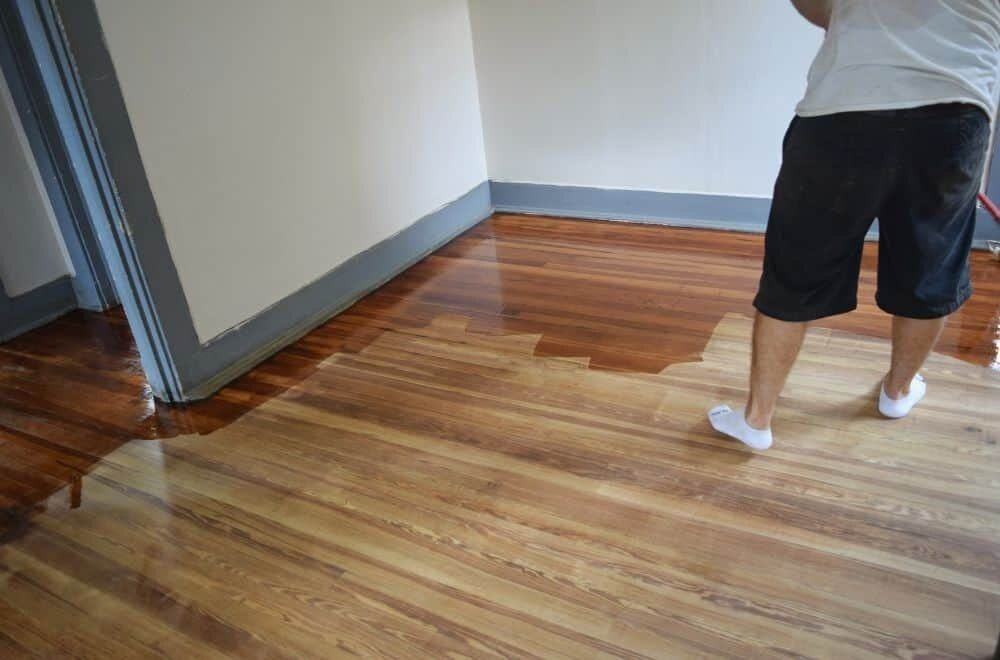
If you’re coming to the end of a woodworking project, you may be thinking about adding an attractive lacquer coat to the finished item to improve the way it looks and to protect it – but you may also be considering adding polyurethane for an extra layer of protection.
But is this a smart idea? Can it help protect the lacquer beneath? And does it even work? To give you all the info you need, in this post, we answer the question, can you put polyurethane over lacquer?
Before we talk about whether you can use polyurethane over lacquer, let’s take a step back and think about what they both are to help us understand how they’re usually used and if they can be used together.
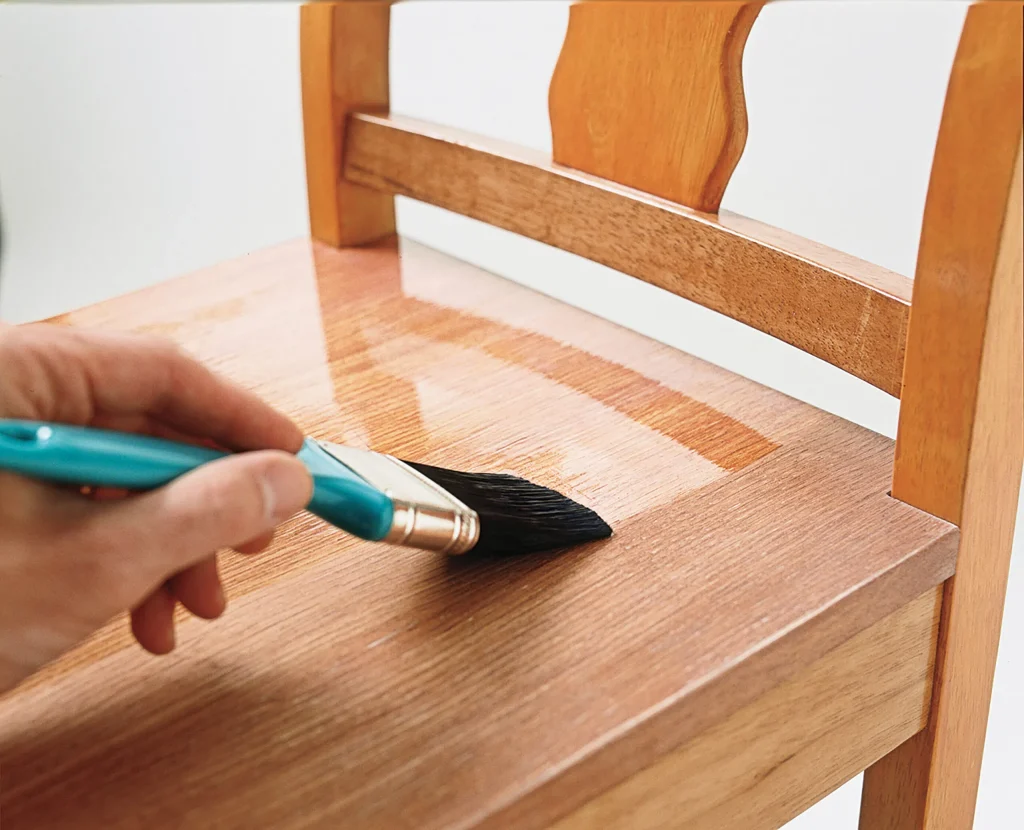
Image Credit: thisoldhouse
Polyurethane is a versatile plastic polymer that has a wide range of applications. It is used to make synthetic kitchen sponges, and it is also found in shoes, upholstery and plastic straps. And of course, it’s commonly used as a varnish to finish wooden furniture and floors.
Polyurethane comes in two main types – oil-based and water-based. When it is applied to a surface, it then dries as the water or oil content evaporates off.
Following this, it then cures – this means the surface hardens as the polyurethane reacts with the oxygen in the air.
Once dried and cured, it provides a tough and durable protective surface to the wood it covers.
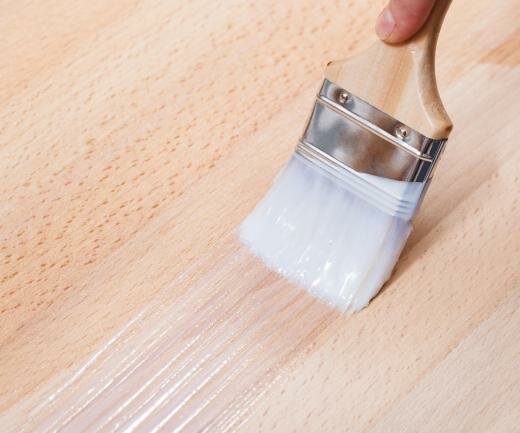 Image Credit: homequestionsanswered
Lacquer is also a popular finish that is applied to wood surfaces to provide an aesthetically pleasing finish while also protecting the wood.
Lacquer techniques have been in use for millennia, with the first known example dating back to Neolithic China from around 5000–4500 BCE.
Traditionally, lacquers have been made from tree sap or the resin secreted by certain beetles, but nowadays, synthetic lacquers are far more common.
Like polyurethane, lacquer also exists as both oil-based and water-based versions.
Lacquer is known to produce particularly attractive finishes and can also help protect the wood surface it covers. However, it can be brittle compared to polyurethane and may also chip or peel off if not applied correctly.

Polyurethane and lacquer are both considered “varnishes” or “finishes”, which means they are intended to be the top coat that’s applied to wood to protect it from water, mold, wood-eating insects and other general wear and tear.
This means that using them together is usually unnecessary – since lacquer is used to protect the wood, it would seem a strange idea to then add another layer of polyurethane over the top.
This is because it would essentially mean you are adding a second protective layer to protect the first protective layer.
Furthermore, by adding polyurethane over the top of lacquer, you would diminish the aesthetic appeal of the lacquer, which is known to be particularly beautiful when used well.
What all this means is that in normal circumstances, although you can use polyurethane over lacquer, it doesn’t necessarily mean you should.
Most of the time, adding two protective layers is just overkill, and it would also make the finished piece less attractive.
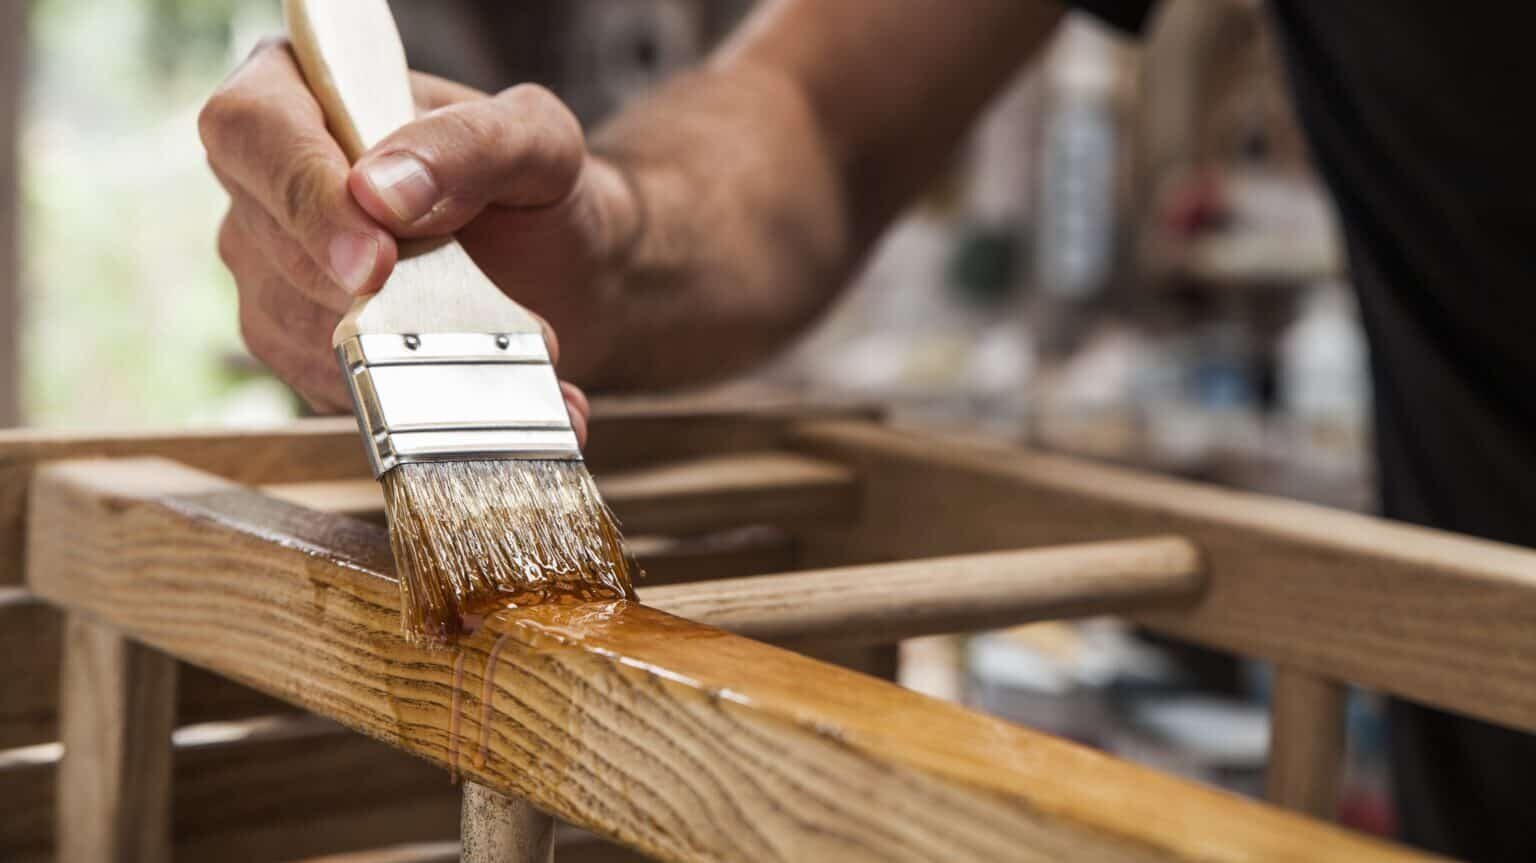 Image Credit: woodfinishingadvice
Having said all this about why it’s normally not necessary or advisable to use polyurethane over lacquer, there are still some situations where you might consider this option, and here are some examples:
Lacquer is a great option for items that are destined for indoor use, but if you are giving a finish to something that will spend most of its life outdoors, lacquer might not stand up to the kind of wear and tear the item is likely to see.
However, you might still prefer the lacquer-style finish, and in this case, you can achieve something similar by first giving the item a lacquer finish and then protecting it with a few coats of polyurethane.
Similarly, if you want to give an object a lacquer finish but know the object is going to see a lot of use, a good compromise might be to give it a lacquer finish first and then protect this with an outer layer of polyurethane.
Polyurethane is more resistant than lacquer to acids and oils – especially if you choose an oil-based version. For this reason, if you want a lacquer finish but want to protect it against acids and oils, a polyurethane outer layer might be worth trying.
Finally, if you want a lacquer finish with less luster, covering it with a layer or two of polyurethane might help you achieve this effect.
However, there are other ways to achieve something similar, so using polyurethane over lacquer might not be the most efficient way to create this look.

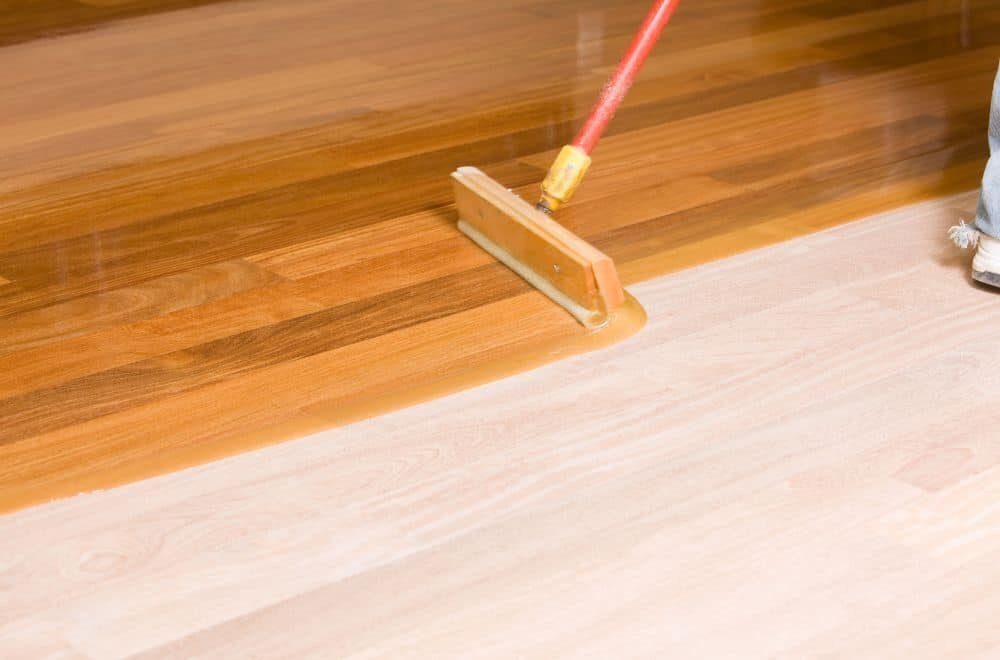
For anyone who’s decided that polyurethane over lacquer is something worth trying, now let’s look at how to go about doing it.
The secret to success when applying lacquer or polyurethane is to always sand the previous layer before applying the next, and the same applies to the bare wood when you start.
However, you don’t want to scratch the surface – you just want to slightly roughen it to give the first lacquer coat something to bind to.
This means you only need to use fine grit sandpaper – something like 220-grit or 320-grit would be ideal.
Next, apply the first lacquer coat and leave it to dry. Once it’s dry, you can consider adding extra coats.
If you want to add more coats of lacquer, you can, and at least a few coats are recommended – you just need to remember to sand each layer lightly as explained above before applying each new coat to give the new coat something to adhere to.
Next, add as many coats of polyurethane as you think you need, remembering to sand each layer lightly before adding the next.
Polyurethane takes longer to dry than lacquer, so make sure you give it enough time. Generally speaking, water-based polyurethane will be ready after about six hours, but oil-based polyurethane needs at least 24 hours before it will be ready for the next coat.
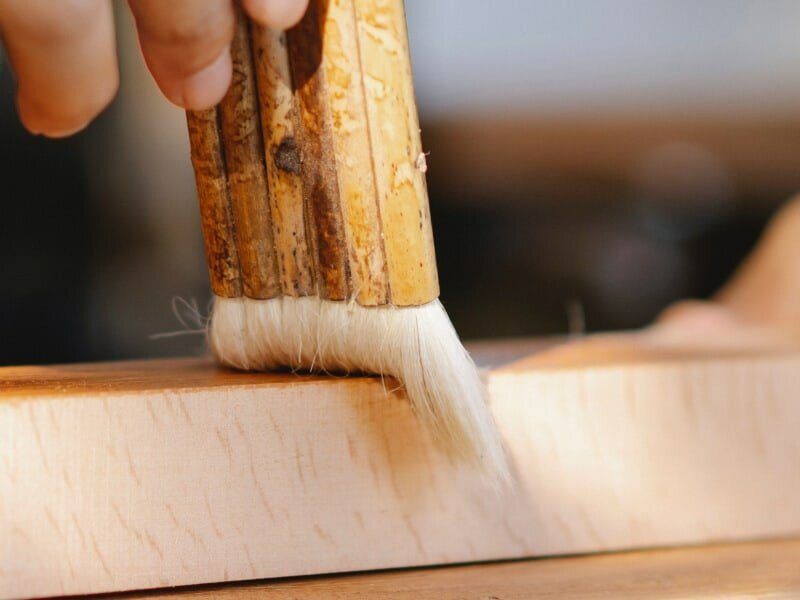 Image Credit: garagesee
To finish, here are a few tips that will help you make a success of your project.
Before opting for a polyurethane covering over lacquer, think about whether this is really something you want to do.
Modern lacquers are very hard and durable, and usually, they won’t need additional protection provided by an outer layer of polyurethane.
In addition, when lacquer is scratched or damaged, it can only be repaired by adding another layer of lacquer – but if you have covered it in a layer of polyurethane, you won’t be able to do this.
Remember, lacquer is designed to be a protective outer layer in itself, and most people would advise against using polyurethane over lacquer for the reasons we outlined above.
More than this, it requires a lot of extra time and effort for something that won’t necessarily produce great results.
When applying either lacquer or polyurethane, you always need to give each layer a light sanding before applying the next coat – and the same is true when you are applying these two finishes one over the other.
One important thing to remember if you’re going to make your lacquer and polyurethane work is that you must use the same type of polyurethane as you do lacquer.
This means if you use a water-based lacquer, you need to use a water-based polyurethane, and if you use an oil-based lacquer, you need to use an oil-based polyurethane – you can’t use one of one and one of the other because they won’t bind together correctly.
When applying lacquer and polyurethane, you also need to think about how many coats of each you need to apply.
When it comes to lacquer, you’ll usually need to apply at least three coats – although, for something that will see more use, you’ll need to use more.
As far as the polyurethane is concerned, at least two coats are required – but it can’t hurt to add one more if you want some extra protection.
As we’ve seen, the technique of adding polyurethane over lacquer is not necessarily a great idea since lacquer looks great and does a good job of protecting wood on its own without any help.
However, if you decide to go ahead and try using polyurethane over lacquer, it can be made to work, and in theory, it should provide an extra level of protection to the lacquer layer beneath it.

If you’re a keen DIY woodworker – or maybe even a pro – you might be wondering about which type of plywood would be the best option for building cabinets since different thicknesses of plywood have their associated advantages and disadvantages.
So to help you understand the difference between using a thicker or thinner type of plywood, in this post, we look at the question of ½” vs ¾” plywood for cabinets along with some of the other considerations to bear in mind while planning your build.

Before we talk about which thickness of plywood to use for making cabinets, let’s take a step back and remind ourselves what plywood is to give ourselves a better understanding of the material we’re dealing with.
Plywood is a composite material that’s made by taking thin sheets of wood and gluing them together. Each layer is referred to as a “ply”, hence the name, and with each layer, the grain of the wood is rotated to increase the overall strength.
Using plywood for things like cabinets is much cheaper than using natural wood, and it’s also more environmentally friendly since it’s more sustainable. It’s usually made from a variety of softwoods, but hardwood versions also exist for certain applications.
In the hardware store, you’ll find plywood being sold by thickness. Most people use either ¾” plywood or ½” plywood, but other thickness also exists, such as ¼” plywood – which can be used for certain parts of cabinet builds too, as we will see later in this post.
But why is the thickness of the plywood you choose to build your cabinet important? Let’s look at this now.

When building a cabinet, there are several factors that need to be considered – like what the cabinet is for, how big it is and how much weight it needs to be able to carry.
This means the choice of material for one cabinet might not be the right choice for another – and the thickness of the plywood you use is a key variable for several reasons. Here are some of the things you need to think about when choosing.
One of the most important advantages ¾” plywood has over ½” plywood is that is stronger and more durable. The extra quarter of an inch means a cabinet made of ¾” plywood is likely to last longer, and this would be the best option for a cabinet that is likely to see a lot of use.
If the weight-bearing sections of a cabinet are constructed using ¾” plywood, this will give the cabinet more weight-bearing capacity.
When considering this aspect, it’s also important to consider whether a particular cabinet is going to be vertical (that is, narrower and taller) or horizontal (meaning a wider and shorter cabinet).
This is because the shape of the cabinet will affect its weight-bearing capacity, which may also determine which type of plywood is best suited for making it.
A cabinet constructed of ¾” plywood will weigh more than a cabinet that’s made of ½” plywood, so if you need a lighter cabinet, ½” plywood gives you an advantage.
¾” plywood costs more than ½” plywood per sheet, so if you need to save money, choosing ½” plywood may allow you to save a few dollars – or depending on the size of your project, maybe even more.
If you want to use European-style hinges, ¾” plywood is better suited since there is more wood to attach them to.
At the same time, ¾” plywood is more forgiving for less experienced woodworkers since if you slightly misplace a screw or a nail, the extra thickness of the wood means the screw or nail is less likely to stick out from the side of the wood.

So having looked at how the thickness of the plywood can affect the design and performance of a cabinet, now let’s look at which the best option is.
Generally speaking, most woodworkers would choose ¾” plywood over ½” plywood for many of the reasons mentioned above.
Choosing ¾” plywood will give you a sturdier, more robust cabinet that is likely to last longer, and it will also be able to carry more weight.
Of course, if you need your cabinet to be light, using ½” plywood to make it could be an option, but in most cases, the weight carrying capacity of a cabinet is usually more important than how much it weighs.
There is an argument that you can save money by using ½” plywood, at least for some parts of the cabinet, but for small-scale projects, the difference would be negligible.
For example, if the cabinet you were making only needed the amount of wood that could be taken from one 4’x8’ sheet of plywood, you would save very little money by choosing ½” over ¾” plywood, so you might as well opt for the thicker stronger version.
However, if you were working on a larger project – either making a bigger cabinet or working on multiple cabinets – you could consider buying some ½” plywood and some ¾” plywood and combining them to save money.
So for these reasons, if you prefer to follow the crowd, most people would suggest that ¾” plywood is usually the better choice.

Having said all this, there are still those who would suggest that using ½” plywood to build cabinets is a good idea.
If you don’t need a particularly robust cabinet, using ½” plywood can work well. This is especially true of vertical cabinets as opposed to more horizontal ones since it is easier for vertical cabinets to hold more weight.
It’s true that you can save a few dollars by building a cabinet entirely from ½” plywood, and if you need to make it stronger, you can do things like adding braces.
As a result, you shouldn’t dismiss using ½” plywood out of hand but rather should consider your project carefully and think about whether ½” plywood might be sufficient.
Plywood is sold in sheets measuring 4’x8’, but it is also sold in various grades according to the quality of the two faces.
The front is graded from A to D, with A being the highest quality, and the back is graded from 1 to 4, with 1 representing the highest quality.
This means that when choosing your plywood, as well as thinking about the thickness, you should also think about which part of the cabinet you are going to use it for.
Usually, the doors of cabinets are made of natural wood rather than plywood, but for the sides, you will want a high-grade plywood surface because it will be visible once the cabinet is complete.
Similarly, for the inside, you might also want a high-grade surface – although maybe not top grade – while for the section that will be placed against the wall, the lowest grade of plywood would be suitable.
As we’ve seen, the consensus is that ¾” is best but that ½” can work well too.
Perhaps the best option of all is to mix and match according to your needs.
This means for the parts of the cabinet that need to be sturdiest, you should opt for ¾” plywood. This would include things like the base and the shelves.
However, for other parts, such as the sides as well as the sides and backs of drawers, ½” plywood could be just as good.
For some parts, such as the bottoms of drawers or the back of the cabinet, you could even use ¼” plywood since very thin wood is all you would need for those parts.
At the same time, you also need to think about which parts will be visible and which parts won’t and then choose the grade accordingly.
However, being able to work like this would depend largely on the volumes of plywood you buy and use and what you use it for.
If you are only building one small cabinet, the most sensible thing would be to build the whole thing from ¾” plywood since the amount you would save by buying one sheet of ½” plywood instead would be very small.
However, if you buy lots of plywood for lots of different projects, it might be a more feasible solution to mix and match as we suggest.
As we’ve seen, although many people would suggest that simply opting for ¾” plywood is the best option for building cabinets due to the extra durability and other advantages it gives you, the answer is not quite as simple as just that.
It can be possible to construct cabinets from ½” plywood, and they can be perfectly strong and durable too, depending on their shape, size and intended use.
However, probably the best option is to use a mix of different thicknesses and grades depending on which part of the cabinet the plywood is being used for.
")
Polyurethane is a popular finish for wood furniture and wood floors, and it can help protect the surface of the wood while also giving it an attractive sheen – but it takes some time to apply properly, so this is something you’ll need to consider before using it.
To help you understand the process and the kinds of timescales that are involved – and to give you some advice about which type to choose and how to use it – in this post, we answer the question, how long does it take for polyurethane to dry?
Before we talk about how long polyurethane takes to dry, let’s take a step back and think about what polyurethane is to help us understand what we’re talking about.
Polyurethane is a type of polymer that was first invented in the 1930s and has since been used for a wide range of applications.
For example, many synthetic kitchen sponges are made of polyurethane. It is also found in upholstery and shoes, and it can be used to make plastic straps or bands.
And as mentioned in the introduction, it is commonly used as a protective varnish for wood, both in floors and in furniture.
When used as a finish, it comes in two main forms, oil-based and water-based.
This means that the polyurethane is mixed with either water or oil for application, and after it is applied, the oil or water evaporates, leaving a protective layer of polyurethane on the surface.
Now that we understand what polyurethane is, we also need to say a few words about the difference between drying and curing – because they are both vital steps in the application of polyurethane.
After a layer of polyurethane is applied, it will dry relatively quickly. Exactly how long it takes can depend on many factors, something we’ll come to just a moment, but once it is dry, it will no longer feel sticky and will be dry to the touch.
At this point, you can apply another coat of polyurethane if you are working with a piece of furniture, and if you are using it for a floor, it should be safe to walk on it in socks.
However, just because it is dry, it doesn’t mean it’s cured – because to fully cure, it takes a whole lot longer.
The curing process involves the molecules of the polyurethane binding with oxygen from the air. Once this is complete, the layer becomes much harder and more resistant than polyurethane that is just “dry”.
What this all means is that as well as knowing how long it takes for polyurethane to dry, it’s also just as important to know how long it takes to cure – because when curing is complete, it means the whole process of application is finished.
Although many factors affect how long it takes for polyurethane to dry, one of the most important is whether the polyurethane you’re using is oil-based or water-based – so let’s say a few words about this now.

Since polyurethane dries through the oil or water evaporating off once it’s been applied, water-based polyurethane dries more quickly since the water evaporates off faster and more easily than oil.
It is also practically odorless when compared with oil-based polyurethane, so you won’t need to worry so much about ventilation while you’re applying it.
Once it’s dried and cured, it’s easy to wash with water, and unlike oil-based polyurethane, it doesn’t change color or turn yellow with age.
However, on the downside, it tends to be less durable, so it isn’t a great choice for areas that see lots of foot traffic.
Pros
Cons

Oil-based polyurethane, on the other hand, takes longer to dry after application, so you’ll need to wait longer before you can apply more coats or walk on it. It also has a strong odor, so you’ll have to ensure the area is well-ventilated while you’re applying it.
However, once dry, it is more resistant to everything from heat to water and solvents, and it will also stand up better to heavy foot traffic, so it’s a good choice for wood floors in rooms that see a lot of use.
Unfortunately, another negative to mention is that oil-based polyurethane tends to turn yellow as it ages, so you may need to replace it if you want your floor to remain in perfect condition.
Pros
Cons
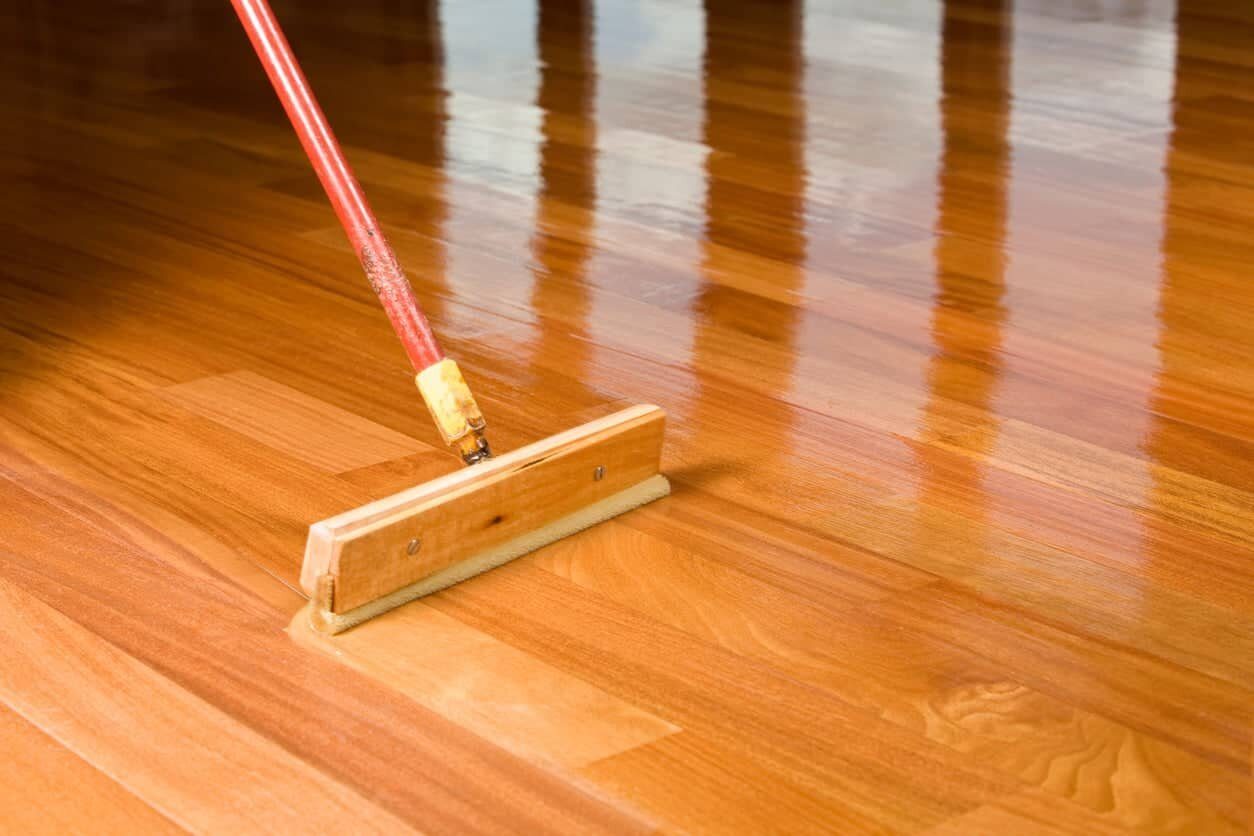 Image Credit: bobvila
So having talked about what polyurethane is and the different types that exist, now we can say a few words about the other factors that can affect how long it takes for it to dry.
Other than whether polyurethane is oil-based or water-based, here are some of the most important.
Certain types of wood cause polyurethane to dry more slowly than others. For example, polyurethane on woods like cedar takes longer to dry because the oils in the wood don’t absorb the polyurethane as well.
The surface of the wood can also affect how long polyurethane takes to dry. If you apply polyurethane to a live edge or to raw or sanded wood, it will dry more quickly since the wood absorbs some of the polyurethane.
Polyurethane dries more quickly in warmer temperatures than in cold temperatures because the oil or water content evaporates faster. Generally speaking, temperatures above 70°F will cause the polyurethane to dry more quickly.
On the other hand, higher humidity causes polyurethane to dry more slowly for the opposite reason – in more humid conditions, the oil or water in the polyurethane will evaporate more slowly due to the water content in the air.
If the humidity is significantly above 50%, the polyurethane will dry more slowly – but if humidity is significantly below this level, it will dry more quickly.
If the area is well-ventilated with a gentle breeze blowing through, this will cause the polyurethane to dry more quickly since it helps encourage evaporation.
If the surface of the wood is not clean, it will increase the drying time – and will also produce imperfections in the varnish once it’s dry.
So now we’ve talked about all the various factors that can affect drying and curing times, we can get to the main point of this post and think about how long it takes for polyurethane to dry – as well as how long it takes to cure.
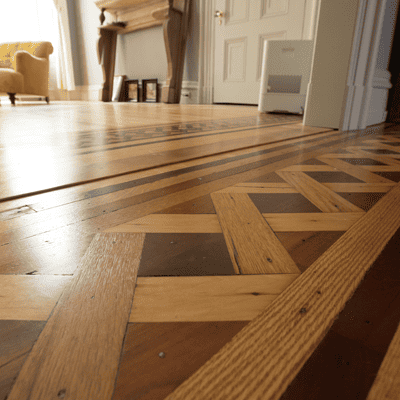 Image Credit: artisanwoodfloorsllc
As a rule, water-based polyurethane will be dry after about six hours. This means you can walk on it in socks or apply the next coat.
However, you’re better off waiting a further 24 hours before you walk on it wearing shoes.
After another day – 48 hours after applying the last coat – you can move furniture back onto it, but you shouldn’t place rugs or anything similar on it for at least the first two weeks because this will interfere with the curing process.
Finally, the surface will be fully cured after 30 days.

If you’re using oil-based polyurethane, you’ll need to wait at least 24 hours before you can walk on it in socks – and you can walk on it in shoes 48 hours after applying the last coat.
Following this, you can move furniture onto it after four days – and rugs can be placed on it after two weeks.
The surface will then be fully cured after 30 days, just like with water-based polyurethane.
To finish, here are a couple of tips for speeding the process up if you’re short on time.
If you’re in a hurry, you can choose a fast-drying formula. These are types of polyurethane that are designed to dry faster than regular formulas. Ask in your local hardware or DIY store when buying it and check the packaging for drying times.
Since lower humidity can help with drying times, using an A/C unit or a dehumidifier can also help by reducing the humidity in the air. However, make sure you don’t set the A/C too high – or the lower temperatures will make the polyurethane dry more slowly.
As we’ve seen, although water-based polyurethane can be considered dry enough to walk on after just a few hours and oil-based polyurethane takes about a day, the process of fully drying and curing can take quite a bit longer.
This means you need to choose the polyurethane you use for the job carefully – and then you need to plan ahead to make sure you’ll be able to leave the polyurethane to dry and cure correctly to achieve the most perfect results.

The most common house building material in America is wood. Over 90% of American homes are constructed primarily using wooden frames and other wood products for the floors, walls, roofs and interior elements. This differs greatly from many other parts of the world that more commonly utilize brick, concrete, stone and steel for home construction.
There are several major historical, economic, practical and cultural reasons why wood became the predominant building material for houses across the United States:
The early United States was blessed with vast, dense forests that provided an abundant, high quality source of lumber for the first American settlers. It has been estimated that over 50% of the land area that would become the United States was covered in forests when Europeans first arrived.
Unlike Europe and large parts of Asia that had largely depleted their native forests by the 18th and 19th centuries after centuries of logging, charcoal production and shipbuilding, America still had huge woodland areas that remained heavily wooded.
The heavily forested Northeast and Midwest were especially rich in tall, straight, high quality trees like pine, fir, spruce and oak that were ideal for milling into lumber for construction. This gave American builders easy access to a local, renewable building material. Constructing with plentiful wood was faster, easier and most importantly cheaper than having to quarry, transport and shape heavy masonry materials like stone or brick.
The early United States did not have the same tradition of quarrying and shaping stone for building found in Europe. There were far fewer granite, limestone, marble and quality sandstone deposits that produced the building stones commonly used in Britain, France, Germany and elsewhere in Europe.
American also historically lacked significant high quality clay deposits needed for firing structural brick in quantity. Some exceptions like Baltimore had access to good brick clay. But many areas had no local brick production. Even basic cement for concrete was not manufactured in the States until the 1820s.
This lack of abundant, quality alternative building materials forced most American builders to rely almost exclusively on what was available in copious amounts all around them – trees for wood. Even as brick kilns and masonry production centers developed later on, wood construction techniques had already become standardized across the country.

The relative lightness yet high strength of wood compared to masonry gave wood-frame building methods several advantages that led to its adaptation as the dominant construction system. The ability to pre-cut and assemble major structural elements like wall panels and trusses using nails rather than heavy mortared joints allowed for greater standardization and much faster building.
The balloon framing technique developed in Chicago in the 1830s revolutionalized building with wood. It used efficient modular construction with pre-cut wooden wall studs, joists, rafters and sheathing that could be quickly nailed together on site row by row to erect whole houses. This along with platform framing became prevalent ways of constructing multi-story wood-frame houses and commercial buildings across America’s growing cities and towns.
Wood’s relative ease of working on site allowed builders great flexibility to experiment and innovate with different architectural styles and floor plans more difficult to achieve with masonry or concrete construction. Wood framing’s simplicity and speed allowed it to fully capitalize on the economies of scale possible with standardized dimensional lumber mass production that developed over the 19th century.
As the American population steadily expanded westward over the 19th century, having housing construction methods that were portable, flexible and quick became a necessity to keep pace with growth. The relative ease of using local wood that was available in abundance nearly everywhere to build houses made perfect sense for what was often still a frequently moving populace pushing the frontier further westward.
More permanent masonry house construction methods common in older settled areas of Europe and colonial America did not align well with the needs of more temporary shelter and rapid development required in the new settlements springing up on the western frontier. Even as populations settled more permanently in frontier regions like the Midwest and Pacific Coast, wood stick construction remained the dominant status quo method. Sawmills were erected near growing settlements to provide steady local supplies of dimensional lumber.
The wide climatic variations found across the many regions of the United States posed additional problems for more traditional masonry construction methods. In northern cold weather regions, wood withstood freeze-thaw cycles and wide temperature swings far better than masonry. The flexibility of wood construction did not result in the same cracked, crumbling walls seen more with brick and stone.
Wood-framed buildings can also flex and breathe with the seasons, which is a major advantage in extreme cold. In southern hot and humid regions, massive masonry walls tend to retain heat and moisture more than lighter wood-framed wall systems that allowed for better airflow and ventilation through spaces like attics. Overall, wood construction proved more adaptable across America’s diverse and often extreme climates compared to masonry.
The continual development and refinement of advanced wood framing techniques such as balloon framing in the mid 19th century made wood-based building even faster, easier and cheaper. The milling of standardized dimensional lumber and factory production of wire nails enabled framers to quickly erect buildings using modular pre-cut 2x4s and 2x6s for wall studs, floor joists, rafters and sheathing.
These framing advances eliminated the need for intensive labor cutting joints and fitting structural timbers on site. The resultant skeleton framing also reduced material use compared with traditional timber framing methods. The lightness and spaced studding possible with balloon framing allowed the creation of much larger and open floor plans than possible with dense, heavy masonry load-bearing wall systems.
Overall, wood framing became an increasingly industrialized, optimized construction system based on interchangeable parts. This sped the construction of everything from houses to commercial buildings to factories.
Even as alternative building materials like steel, superior manufactured brick and concrete block became more available and cost-effective by the early 20th century, wood-frame building remained by far the dominant construction method. The techniques, tools, trade skills and best practices using dimensional lumber and plywood were deeply ingrained in several generations of American builders by this point.
Home buyers were also most familiar and comfortable with the wood-frame houses which had a proven track record. Light wood framing allowed for flexibility in home plan designs and sizes. Wood lightness and resilience was also thought to provide better resistance to earthquakes and high winds compared to more brittle masonry construction. So tradition and familiarity helped wood maintain market dominance.
The established wood product supply chains, construction techniques, trade skills and overall industry maturity gave wood stick-framed houses a consistent cost advantage in most American housing markets, which still holds true today. The distributed nature and competition within the wood products industry helped keep material costs relatively affordable and stable. Wood’s lightness also made it cheaper to transport lumber than heavier masonry.
In addition, the speed of framing assembly along with wood’s lower labor requirements reduced overall construction schedules by weeks or months compared to other methods, lowering costs. Builders naturally gravitated toward the building materials and methods that provided the most cost-efficient path to completion. For most residential and small commercial buildings, wood stick framing provided that lowest cost option.
In summary, abundant local wood supplies, lack of abundant quality local alternatives, wood’s construction adaptability, an expanding and frequently mobile population, the diversity of American climates, refinements like balloon framing, tradition and familiarity, along with consistent cost savings for builders and buyers all contributed heavily to wood becoming the dominant building material for American houses as well as most low-rise structures.
Wood framing developed very early in American building history, primarily because there were abundant local forests that supplied quality lumber across the country. But masonry materials like high grade bricks were in short supply. Wood was also quicker and easier to work for builders, especially as balloon framing improved the process. This allowed fast, affordable construction.
Wood is a renewable and workable material that’s available locally in most areas. Wood framing allows for more open floorplans, lower construction costs, and design flexibility compared to masonry. It also handles extreme weather conditions well. Homeowners appreciate wood’s familiarity, aesthetics and resilience.
Properly engineered, constructed and maintained wood homes are normally quite safe and meet building code standards. Wood can perform very well in seismic zones when proper structural bracing is used. Fire risks are minimized through design elements like fire-rated wall assemblies, automatic sprinklers and fire-resistant exterior finishes.
Places like Europe and Asia historically lacked the same abundant native forests available in North America. Masonry construction has much older regional traditions there. Population densities in urban areas also favored sturdier masonry building methods. America’s sprawling suburban development patterns make wood’s structural lightness more practical and affordable.
Wood is flammable so fire is always a concern if building codes and best practices aren’t followed. Rot, insects and moisture can damage wood if not properly maintained. Logging for lumber can deplete forests when not sustainably managed. But responsibly managed forests, fire-retardant treatments and improved water-resistance are helping address these issues.


