Rahasia Sukses Poker Online: Cara Ampuh Membaca Lawan di Fase Post-Flop
Di antara seluruh platform penyedia poker online terbaik, fase taruhan post-flop (setelah tiga kartu pertama dibuka) senantiasa diakui sebagai salah

Di antara seluruh platform penyedia poker online terbaik, fase taruhan post-flop (setelah tiga kartu pertama dibuka) senantiasa diakui sebagai salah


Are you new to Minecraft and wondering how to craft a wooden pickaxe? Look no further, as we have got you covered! A wooden pickaxe is a basic tool that is essential for mining stone and other materials. In this article, we will guide you through the simple steps to craft a wooden pickaxe in Minecraft.
To craft a wooden pickaxe, you will need two sticks and three wooden planks of any type. You can use oak, spruce, birch, jungle, acacia, dark oak, mangrove, bamboo, crimson, warped, or cherry planks. Once you have gathered these materials, open your crafting table and place the three wooden planks horizontally on the top row, and the two sticks in the middle row. This will create a crafting pattern for the wooden pickaxe.
Crafting a wooden pickaxe is a crucial step in Minecraft, as it allows you to mine basic stone blocks and collect resources. It is also a great way to get started with crafting tools and exploring the game. So, grab your materials and get ready to craft your very own wooden pickaxe in Minecraft!
Crafting is an essential aspect of Minecraft that allows you to create various tools, weapons, and items that will help you survive and thrive in the game world. In this section, we will cover the basics of crafting, including the materials needed and the essentials of using a crafting table.
Before you can start crafting, you need to gather the necessary materials. The materials you need will depend on what you want to craft. For example, to craft a wooden pickaxe, you will need three wooden planks, two sticks, and one piece of string. To craft a stone pickaxe, you will need three cobblestones and two sticks.
Here is a table that shows the materials needed to craft some of the basic tools in Minecraft:
| Tool | Materials Needed |
|---|---|
| Wooden Pickaxe | 3 Wooden Planks, 2 Sticks, 1 String |
| Stone Pickaxe | 3 Cobblestones, 2 Sticks |
| Iron Pickaxe | 3 Iron Ingots, 2 Sticks |
| Diamond Pickaxe | 3 Diamonds, 2 Sticks |
To craft items in Minecraft, you need to use a crafting table. A crafting table is a block that allows you to access a 3×3 crafting grid, which is where you will place the materials needed to craft an item.
To use a crafting table, you need to right-click on it to open the crafting interface. Once the interface is open, you can place the materials in the correct pattern to craft the item you want. For example, to craft a wooden pickaxe, you would place two sticks in the middle column and one wooden plank in each of the top and bottom rows.
It’s important to note that the crafting table is an essential tool in Minecraft, and you will need to use it frequently to craft items that will help you survive and progress in the game. So, make sure you always have access to a crafting table when you need it.
In summary, crafting is a vital aspect of Minecraft, and understanding the basics of crafting is crucial to your success in the game. By gathering the necessary materials and using a crafting table, you can create a variety of tools, weapons, and items that will help you survive and thrive in the game world.
Crafting a wooden pickaxe is one of the first things you should do when starting a new game in Minecraft. This tool is essential for mining blocks and collecting resources. Here is a step-by-step guide to crafting a wooden pickaxe.
The first step in crafting a wooden pickaxe is to arrange the sticks in the crafting table. Follow these steps:
Once you have arranged the sticks in the crafting table, it’s time to place the wooden planks. Follow these steps:
After you have arranged the sticks and placed the wooden planks, the wooden pickaxe will appear in the result box of the crafting table. Simply click on the pickaxe to add it to your inventory.
Crafting a wooden pickaxe is an easy process that only requires a few basic materials. With this tool in hand, you’ll be able to mine blocks and collect resources to help you progress through the game.
Crafting a wooden pickaxe in Minecraft is a fun and exciting process, but it’s important to take some safety precautions to ensure that you don’t accidentally hurt yourself or damage your surroundings. Here are some tips to keep in mind while crafting:
By following these safety precautions, you can ensure that your crafting experience is safe and enjoyable. So, put on your safety gear, choose a safe location, and start crafting your wooden pickaxe!
After crafting your wooden pickaxe, it’s important to maintain it to ensure that it lasts as long as possible. Here are some tips on how to maintain your wooden pickaxe:
Wooden pickaxes are susceptible to water damage, so it’s important to keep them away from water. If your pickaxe gets wet, it will become damaged and may break more easily.
If your wooden pickaxe becomes damaged, you can repair it by using wooden planks. Simply place the damaged pickaxe and a wooden plank in a crafting table to repair it. This will restore its durability and make it last longer.
Using your wooden pickaxe on inappropriate blocks, such as stone or ores, will cause it to lose durability more quickly. To make your wooden pickaxe last longer, use it only on appropriate blocks, such as dirt, sand, and gravel.
When you’re not using your wooden pickaxe, it’s important to store it properly. Keep it in a chest or on a tool rack to prevent it from getting damaged or lost.
By following these tips, you can keep your wooden pickaxe in good condition and make it last as long as possible.
Now that you know how to craft a wooden pickaxe, let’s take a look at some advanced crafting tips to help you improve your skills and make the most out of your resources.
Crafting tables are essential for crafting various items in Minecraft. However, did you know that you can use them more efficiently? Here are some tips:
Tools in Minecraft have a durability rating that decreases as you use them. When the durability reaches zero, the tool will break and you will need to craft a new one. Here are some tips to help you maximize the durability of your tools:
Gathering resources is a key part of Minecraft. Here are some tips to help you gather resources more efficiently:
By following these advanced crafting tips, you will be able to craft more efficiently, maximize the durability of your tools, and gather resources more efficiently.

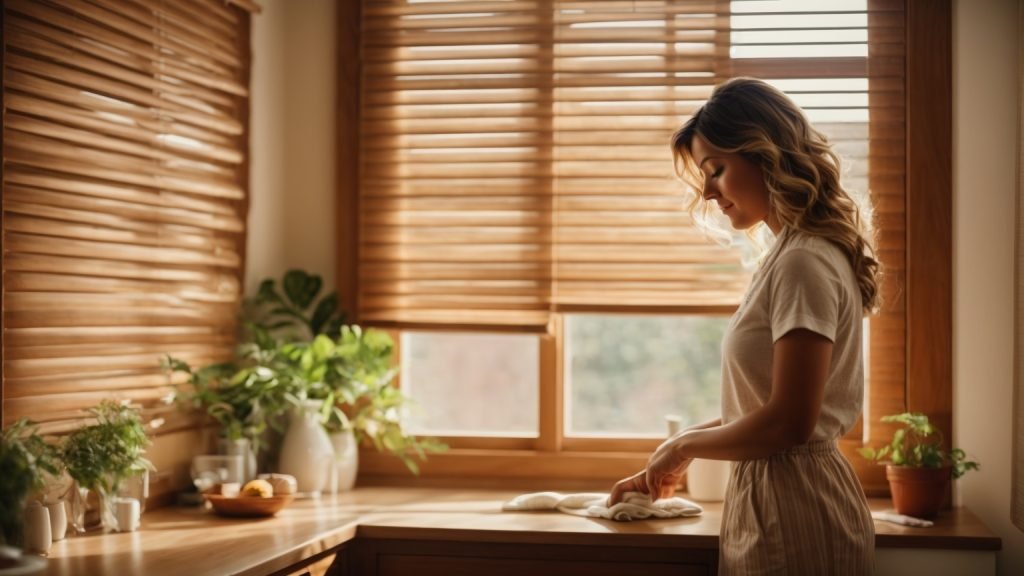
Cleaning wooden blinds can be a daunting task, but it doesn’t have to be. With the right tools and techniques, you can have your blinds looking like new in no time. Whether you’re dealing with dust, grime, or stubborn stains, there are a variety of methods you can use to get your wooden blinds clean and looking great.
One of the most important things to keep in mind when cleaning wooden blinds is to avoid using harsh chemicals or abrasive materials that can damage the wood. Instead, opt for gentle cleaners and soft cloths or brushes that won’t scratch or scrape the surface of the blinds. Additionally, it’s important to take your time and be gentle when cleaning your blinds to avoid accidentally bending or breaking any of the slats.
There are a variety of methods you can use to clean wooden blinds, from dusting and vacuuming to more intensive deep cleaning techniques. Depending on the level of dirt and grime on your blinds, you may need to use a combination of methods to get them looking their best. So, let’s dive into some of the best ways to clean wooden blinds and get your windows looking sparkling clean.
When it comes to cleaning wooden blinds, it’s important to understand the type of wood they’re made of. Different types of wood require different cleaning methods to avoid damaging the material.
Wooden blinds are typically made from either hardwood or softwood. Hardwood blinds are made from dense wood such as oak, cherry, or maple, while softwood blinds are made from lighter woods such as pine or cedar.
Another factor to consider is whether your wooden blinds are stained or painted. Stained blinds have a natural wood finish that allows the grain to show through, while painted blinds have a solid color finish.
Here are some general tips for cleaning wooden blinds:
By understanding the type of wood your blinds are made of and using the proper cleaning methods, you can keep them looking great for years to come.
Cleaning your wooden blinds can be a daunting task, but with the right cleaning supplies, it can be a breeze. Here are some tips to help you choose the right cleaning supplies for your wooden blinds.
A microfiber cloth is an excellent tool for cleaning wooden blinds. It is gentle on the wood and won’t scratch or damage the surface. Plus, it is reusable and can be washed and used again and again. When cleaning your wooden blinds, be sure to use a clean microfiber cloth to avoid spreading dust and dirt around.
When it comes to choosing a cleaning solution, it’s essential to select one that is safe for your wooden blinds. Avoid using harsh chemicals or abrasive cleaners that can damage the wood. Instead, opt for a mild, non-acidic dish soap mixed with warm water. You can also use a specialized wood cleaner designed specifically for wooden blinds.
A vacuum cleaner with an upholstery brush attachment can be a handy tool for cleaning wooden blinds. It can quickly remove dust and dirt from the surface of the blinds, making it easier to clean with a microfiber cloth or cleaning solution. Be sure to use the lowest setting on your vacuum cleaner to avoid damaging the wood.
A sturdy stepladder is necessary when cleaning wooden blinds that are out of reach. It’s essential to have a stable and secure platform to stand on to avoid accidents and injuries. When using a stepladder, be sure to follow safety guidelines and never stand on the top rung.
By choosing the right cleaning supplies, you can keep your wooden blinds looking clean and beautiful for years to come.

Before you start cleaning your wooden blinds, it’s important to take some pre-cleaning steps to ensure that the cleaning process goes smoothly and effectively. Here are some steps you should take:
The first step in cleaning your wooden blinds is to dust them thoroughly. Use a soft-bristled brush or a microfiber cloth to gently sweep the dust off each slat. Make sure to dust both sides of the blinds, as well as the cords and the headrail.
If your blinds are particularly dusty, you can use a vacuum cleaner with a soft brush attachment to remove the dust. Simply run the brush attachment over each slat, making sure to get into all the crevices and corners.
If your wooden blinds have stains or spots on them, you’ll need to remove them before you can start cleaning the blinds. Here are some tips for removing common stains:
By taking these pre-cleaning steps, you’ll be able to ensure that your wooden blinds are clean and looking their best.
Cleaning your wooden blinds is an essential task to keep them looking new and to prevent dust and dirt from building up. There are two primary methods for cleaning wooden blinds: wet cleaning and dry cleaning.
To wet clean your wooden blinds, you will need a soft cloth, mild detergent or vinegar, and warm water. Follow these steps:
To dry clean your wooden blinds, you can use a microfiber cloth or a feather duster. Follow these steps:
Remember to clean your wooden blinds regularly to keep them looking their best. Wet cleaning is recommended once or twice a year, while dry cleaning can be done as often as needed.
After cleaning your wooden blinds, it is essential to take proper care of them to ensure their longevity. Here are some post-cleaning care tips that you can follow to keep your wooden blinds looking great for years to come.
Once you have finished cleaning your wooden blinds, it is crucial to dry them thoroughly to prevent any water damage. Use a clean, dry cloth to wipe the blinds down, removing any excess water. Then, leave them open to air dry completely before closing them again.
To keep your wooden blinds looking their best, it is essential to perform regular maintenance. Here are some tips to help you maintain your wooden blinds:
By following these post-cleaning care tips and regular maintenance tips, you can keep your wooden blinds looking beautiful and extend their lifespan.

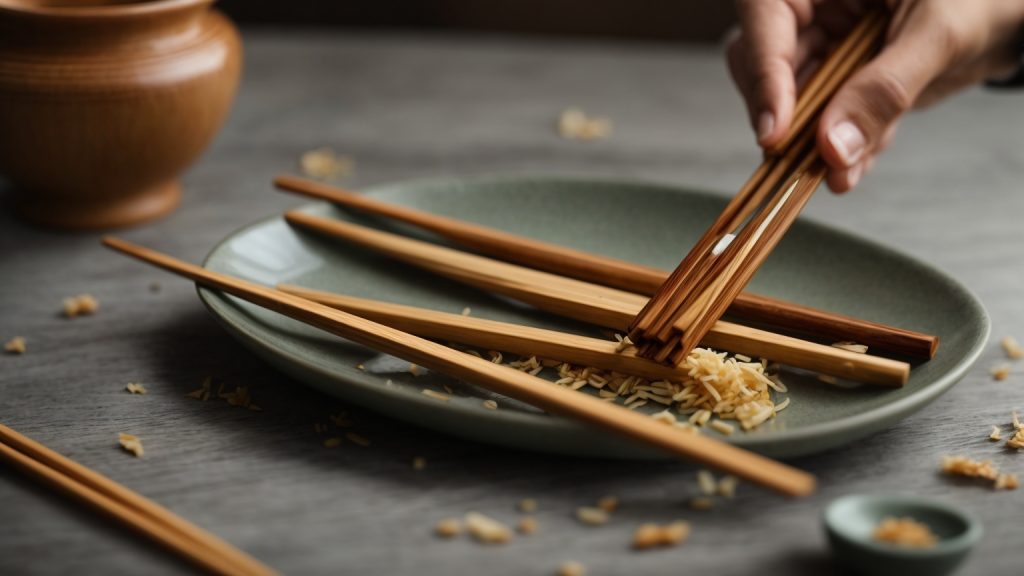
Are you tired of using disposable chopsticks every time you order takeout? Wooden chopsticks are a great alternative, but they require proper cleaning to ensure they are safe to use. In this article, we will guide you through the steps of cleaning wooden chopsticks effectively.
Cleaning wooden chopsticks might seem like a daunting task, but it’s actually quite simple. With just a few basic tools and some easy-to-follow steps, you can keep your chopsticks in top condition for longer. In the following paragraphs, we will provide you with some tips and tricks to make the process as quick and painless as possible. So, if you want to learn how to clean wooden chopsticks like a pro, keep reading!
If you’re a fan of Asian cuisine, you’re likely familiar with the use of chopsticks. Wooden chopsticks are a popular choice, but it’s essential to keep them clean. Here’s why:
When you use chopsticks, they come into contact with your mouth and the food you’re eating. This means that bacteria can build up on the surface of the chopsticks. If you don’t clean them properly, you could be spreading germs and bacteria every time you use them. Cleaning your chopsticks after each use helps prevent the spread of germs and keeps them hygienic for future use.
Wooden chopsticks are a sustainable alternative to disposable chopsticks, but they do require proper care to ensure longevity. Regular cleaning helps prevent damage to the wood and ensures that they last longer. If you neglect to clean your chopsticks, they may become stained, warped, or even moldy.
Dirty chopsticks can affect the taste of your food. Leftover food particles on the chopsticks can mix with your next meal, altering the flavor. Keeping your chopsticks clean ensures that you can enjoy the full flavor of your food without any unwanted additions.
In summary, cleaning your wooden chopsticks is essential for maintaining hygiene, ensuring longevity, and preserving the flavor of your food.
Cleaning wooden chopsticks is an easy process that requires a few basic materials. These materials are gentle and will not cause any damage to the chopsticks, helping to keep them in top condition for longer. Here are the materials you will need:
A soft cloth is essential for cleaning wooden chopsticks. It is gentle and will not scratch or damage the wood. You can use a microfiber cloth or any other soft cloth that you have at home.
Warm water is necessary for cleaning wooden chopsticks. It helps to loosen any food particles or dirt that may be stuck on the chopsticks. You can use tap water or boiled water that has been cooled down.
Mild dish soap is useful for cleaning wooden chopsticks. It helps to remove any grease or oil that may be on the chopsticks. You can use any mild dish soap that you have at home.
A soft-bristled brush is optional but can be helpful for cleaning wooden chopsticks. It can help to remove any stubborn food particles or dirt that may be stuck on the chopsticks. You can use a toothbrush or any other soft-bristled brush that you have at home.
Using these materials, you can effectively clean your wooden chopsticks and keep them in top condition for longer.
Cleaning wooden chopsticks can be a bit tricky, but with the right tools and techniques, you can keep them clean and hygienic. Here is a step-by-step guide on how to clean wooden chopsticks:
Before cleaning your wooden chopsticks, it is important to prepare them properly. Here are the steps to follow:
Once you have prepared the chopsticks, it is time to clean them. Here are the steps to follow:
After cleaning your wooden chopsticks, it is important to rinse and dry them properly. Here are the steps to follow:
By following these simple steps, you can keep your wooden chopsticks clean and hygienic, ensuring that they last for years to come.

If you want to keep your wooden chopsticks in top condition, there are a few things you can do to maintain them properly. Here are some tips to help you take care of your wooden chopsticks and extend their lifespan.
Storing your wooden chopsticks properly is essential to maintain their quality. Here are some tips to keep in mind:
Cleaning your wooden chopsticks regularly is important to prevent bacteria growth and maintain their quality. Here are some tips to clean your chopsticks properly:
Wooden chopsticks should never be washed in a dishwasher. The high temperature and strong detergents can damage the wood and cause them to warp or crack. Instead, follow the steps above to clean your chopsticks by hand.
By following these tips, you can maintain the quality of your wooden chopsticks and enjoy using them for years to come.
Cleaning wooden chopsticks may seem like a simple task, but there are a few common mistakes that people make that can damage the chopsticks or make them unsafe to use. Here are some mistakes to avoid when cleaning your wooden chopsticks:
Soaking wooden chopsticks in water for an extended period can cause them to warp or crack. It is recommended to only soak them for a few minutes before cleaning them with a soft-bristled brush.
Using harsh detergents or abrasive materials such as steel wool or scouring pads can scratch or damage the surface of the chopsticks. It is best to use a mild dish soap and a soft-bristled brush to clean them.
Leaving your wooden chopsticks wet can cause them to develop mold or bacteria, making them unsafe to use. After cleaning them, be sure to pat them dry with a soft cloth and allow them to air dry completely before storing them.
Storing your wooden chopsticks in a damp or humid environment can cause them to absorb moisture and warp. It is best to store them in a dry, cool place, such as a utensil holder or a drawer.
By avoiding these common mistakes, you can ensure that your wooden chopsticks remain clean, safe, and in good condition for many uses to come.
Using and cleaning wooden chopsticks can offer several benefits that you may not have considered before. Here are some of the benefits of using and cleaning wooden chopsticks:
One of the most significant benefits of using wooden chopsticks is that they are eco-friendly. Unlike disposable chopsticks, wooden chopsticks are reusable and can last for years with proper care. By using wooden chopsticks, you can reduce the amount of waste generated by disposable chopsticks, which can be harmful to the environment.
Wooden chopsticks are easy to clean and sanitize, which makes them more hygienic compared to other materials. Proper cleaning and maintenance can help remove any bacteria or dirt that may be present on the surface of the chopsticks, ensuring that they are safe to use for your next meal.
Wooden chopsticks are versatile and can be used for a variety of dishes, including noodles, sushi, and stir-fry. They are also suitable for use with different types of cuisines, such as Japanese, Chinese, and Korean.
Wooden chopsticks are lightweight and comfortable to hold, making them an excellent choice for people of all ages. Unlike metal chopsticks, wooden chopsticks do not conduct heat, which means that you can use them to eat hot dishes without burning your fingers.
Wooden chopsticks are affordable and widely available, making them an excellent choice for people on a budget. They are also easy to find at most grocery stores or online retailers, which means that you can easily replace them if needed.
By using and cleaning wooden chopsticks, you can enjoy these benefits and more. With proper care and maintenance, your wooden chopsticks can last for years, making them a sustainable and cost-effective choice for your dining needs.

Are you looking for a unique and creative way to add some color to your home decor or special event? Look no further than wooden flowers! Not only are they eco-friendly and long-lasting, but they also offer endless possibilities for customization. One of the easiest ways to add color to wooden flowers is by dyeing them. In this article, we will guide you through the process of dyeing wooden flowers, including the supplies you’ll need and step-by-step instructions.
To get started, you’ll need some wooden flowers and dye. There are a variety of dyes available, including wood flower dye, acrylic paint, and even natural dyes like tea or coffee. Depending on the type of dye you choose, you may also need some additional supplies like water, gloves, and a bowl. Once you have your supplies ready, you can begin the fun and creative process of dyeing your wooden flowers.
Whether you’re looking to add a pop of color to your home decor or create a unique bouquet for your wedding, dyeing wooden flowers is a simple and affordable way to achieve the look you want. So, grab your supplies and let’s get started on this fun and creative project!

Wooden flowers, also known as sola wood flowers, are a popular choice for crafting and wedding projects due to their versatility and durability. These flowers are made from the tapioca plant root, making them eco-friendly and sustainable. They are also lightweight and easy to work with, making them a great option for DIY projects.
When it comes to dyeing wooden flowers, it is important to understand their nature. Unlike real flowers, wooden flowers do not absorb dye in the same way. Instead, they require a special type of dye that is specifically designed for use on wood.
One popular method for dyeing wooden flowers is the dip-dye method. This involves dipping the flowers into a mixture of dye and water, allowing them to soak up the color. However, it is important to note that the amount of dye and water used can affect the final color of the flowers.
Another important factor to consider when dyeing wooden flowers is the type of paint or dye used. Acrylic paint is a popular choice for dyeing wooden flowers, as it is easy to work with and comes in a wide range of colors. However, other types of paint and dye can also be used, such as alcohol ink and fabric dye.
Overall, understanding the nature of wooden flowers is key to successfully dyeing them. With the right tools and techniques, you can create beautiful, customized flowers that are perfect for any occasion.
When it comes to dyeing wooden flowers, choosing the right dye is crucial to achieving the desired result. Not all dyes are created equal, and each type of dye has its own unique properties that can affect the final outcome of your project.
One of the most important factors to consider when choosing a dye is the colorfastness. This refers to the ability of the dye to resist fading or bleeding over time. If you want your wooden flowers to maintain their vibrant colors for a long time, it’s important to choose a dye that is colorfast.
Another factor to consider is the type of wood that your flowers are made from. Some dyes may work better on certain types of wood than others. For example, water-based dyes may work well on softer woods like balsa or basswood, while oil-based dyes may be better suited for harder woods like oak or maple.
It’s also important to consider the application method when choosing a dye. Some dyes are designed to be applied with a brush, while others are meant to be sprayed on. Make sure to choose a dye that is compatible with the application method you plan to use.
In addition to these factors, it’s important to choose a dye that is safe for both you and the environment. Some dyes may contain harmful chemicals or require special disposal methods. Make sure to read the label carefully and choose a dye that is safe and eco-friendly.
Overall, taking the time to choose the right dye can make a big difference in the final outcome of your wooden flower project. By considering factors like colorfastness, wood type, application method, and safety, you can ensure that your flowers turn out beautifully and stand the test of time.
Dyeing wooden flowers can be a fun and creative way to add a personal touch to your home decor or special events like weddings. However, before you dive into the dyeing process, it’s important to gather the right materials. Here are some essential materials you’ll need to dye wooden flowers:
Choosing the right type of dye is crucial to achieving the desired color and texture for your wooden flowers. Here are some common types of dyes you can use:
In addition to the dye, there are a few other materials you’ll need to dye wooden flowers:
By gathering these essential materials, you’ll be well on your way to creating beautiful and unique wooden flowers that can add a personalized touch to any space or event.
Before you start dyeing your wooden flowers, it’s important to prepare both the flowers and your workspace. This will ensure that you have everything you need and that the process goes smoothly.
The first step in preparing your wooden flowers is to make sure they are clean and dry. If they are not, the dye may not adhere properly. You can use a soft-bristled brush to remove any dust or debris from the flowers.
Next, you may want to consider softening your wooden flowers. This can help the dye penetrate the wood more easily, resulting in a more even color. You can use a sola softener, which is specifically designed for wooden flowers, or you can soak them in warm water for a few minutes.
It’s important to have a clean and organized workspace before you start dyeing your wooden flowers. Here are a few things to keep in mind:
By taking the time to prepare both your wooden flowers and your workspace, you can ensure that your dyeing process goes smoothly and that you achieve the desired results.

Dyeing wooden flowers is a fun and easy way to add a pop of color to your home decor or special event. Here’s a step-by-step guide to dye wooden flowers:
Dyeing wooden flowers is an easy and affordable way to add a personal touch to your decor or event. With this step-by-step guide, you can create beautiful and colorful wooden flowers in no time.
Dyeing wooden flowers can be a fun and rewarding experience, but it can also be frustrating if you don’t get the results you want. Here are some tips and tricks to help you achieve better results:
When choosing a dye, it’s important to consider the type of wood your flowers are made of. Some dyes work better on certain types of wood than others. For example, water-based dyes work well on porous woods like birch and pine, while alcohol-based dyes work better on hardwoods like oak and maple.
Before dyeing your wooden flowers, make sure they are clean and free of any dirt or debris. You can use a soft-bristled brush or a damp cloth to clean them. It’s also a good idea to sand the flowers lightly to create a smooth surface for the dye to adhere to.
Before dyeing all of your wooden flowers, it’s a good idea to test the dye on a small, inconspicuous area first. This will help you determine if the color is what you want and if the dye is compatible with your flowers.
Dyeing can be messy, so it’s a good idea to wear gloves to protect your hands. You can use disposable gloves or reusable ones, depending on your preference.
There are many different techniques you can use to dye wooden flowers, including dip-dyeing, hand-painting, and spray-painting. Experiment with different techniques to see which one gives you the best results.
Dyeing wooden flowers can be a time-consuming process, especially if you want to achieve a deep, rich color. Be patient and allow enough time for the dye to fully penetrate the wood.
By following these tips and tricks, you can achieve beautiful, vibrant colors on your wooden flowers.
Dyeing wooden flowers is a fun and creative activity that can produce beautiful results. However, it is important to take certain safety measures to ensure that the process is safe and enjoyable. Here are some tips to keep in mind when dyeing wooden flowers:
It is important to wear protective gear, such as gloves and a mask, when dyeing wooden flowers. This will protect your skin and lungs from the chemicals in the dye. Make sure to choose gloves that are made of a material that will not be damaged by the dye. A mask will prevent you from inhaling any fumes that may be released during the dyeing process.
When dyeing wooden flowers, it is important to work in a well-ventilated area. This will help to prevent the buildup of fumes that may be released during the dyeing process. If you are dyeing wooden flowers indoors, make sure to open windows and doors to allow fresh air to circulate. If you are dyeing wooden flowers outdoors, make sure to choose a location that is not too windy.
When dyeing wooden flowers, it is important to use the right type of dye. Make sure to choose a dye that is safe for use on wooden flowers. Some dyes may contain chemicals that can damage the flowers or cause them to become brittle. Make sure to read the label carefully before purchasing a dye.
When dyeing wooden flowers, it is important to follow the instructions carefully. Make sure to mix the dye according to the instructions on the label. Use the right amount of dye and water to achieve the desired color. Do not leave the flowers in the dye for too long, as this can cause them to become damaged.
After dyeing wooden flowers, it is important to clean up properly. Make sure to dispose of any leftover dye in a safe and responsible manner. Rinse any containers or utensils used in the dyeing process thoroughly with water. Store any leftover dye in a cool, dry place away from children and pets.
By following these safety measures, you can ensure that your experience with dyeing wooden flowers is safe and enjoyable.

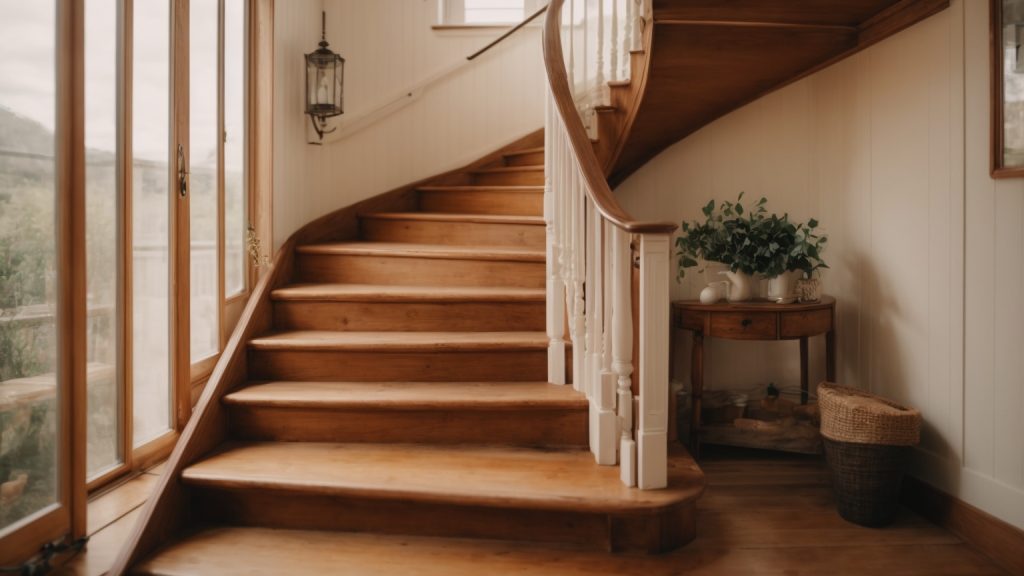
If you’re looking to give your wooden stairs a fresh new look, painting them is a great option. Not only is it an affordable way to spruce up your home, but it’s also a relatively easy DIY project that can be completed in a weekend. Whether you’re looking to add a pop of color or simply refresh the existing finish, painting your stairs can make a big impact.
Before you get started, it’s important to properly prepare your stairs. This includes thoroughly cleaning and sanding the surface to ensure the paint adheres properly. You’ll also want to choose the right kind of paint for the job. Look for a high-quality floor paint that will withstand heavy foot traffic and provide a durable finish.
Once you’ve prepped your stairs and gathered your supplies, it’s time to start painting. Take your time and work in small sections, using a brush or roller to apply the paint evenly. Depending on the size of your staircase, you may need to apply multiple coats to achieve the desired finish. With a little patience and attention to detail, you can transform your wooden stairs into a beautiful focal point of your home.
When it comes to painting wooden stairs, selecting the right materials is key to achieving a professional-looking finish that will last. In this section, we’ll cover the basics of choosing the right paint, brushes, and rollers for your project.
Choosing the right paint for your wooden stairs is crucial to ensure a durable and long-lasting finish. You’ll want to look for a paint that is specifically designed for use on floors and stairs, as these paints are formulated to withstand heavy foot traffic and wear and tear.
When selecting a paint, you’ll also want to consider the finish. High-gloss finishes are durable and easy to clean, but can be slippery underfoot. Satin or semi-gloss finishes offer a good balance of durability and slip resistance, while matte finishes are less durable but provide better traction.
Some recommended paints for wooden stairs include:
Selecting the right brushes and rollers is just as important as choosing the right paint. For painting stairs, you’ll want to use a combination of brushes and rollers to ensure even coverage and a smooth finish.
For the flat surfaces of the stairs, use a high-quality roller with a short nap. This will help you apply the paint evenly and quickly. For the edges and corners of the stairs, use a small, angled brush to ensure precise application.
When selecting brushes and rollers, look for ones that are specifically designed for use with floor and stair paints. These brushes and rollers will have the right stiffness and thickness to apply the paint evenly and smoothly.
Some recommended brushes and rollers for painting wooden stairs include:
By selecting the right paint, brushes, and rollers, you can ensure a professional-looking finish that will last for years to come.
Before you start painting your wooden stairs, it’s important to prepare the surface properly. This will ensure that the paint adheres well and that the finish is smooth and even.
The first step in preparing your wooden stairs is to clean them thoroughly. This will remove any dirt, dust, or grime that may have accumulated on the surface. You can use a vacuum cleaner to remove loose dirt and debris, and then wipe down the stairs with a damp cloth and warm soapy water. Make sure to clean all the nooks and crannies, including the handrails and spindles. Once you have cleaned the stairs, allow them to dry completely before moving on to the next step.
Once the stairs are clean and dry, it’s time to sand the surface. Sanding will help to smooth out any rough patches and create a surface that the paint will adhere to more easily. You can use a sanding block or an orbital sander to sand the stairs. Start with a coarse grit sandpaper and work your way up to a finer grit. Make sure to sand the entire surface of the stairs, including the edges and corners. Once you have finished sanding, wipe down the stairs with a clean, dry cloth to remove any dust or debris.
By properly cleaning and sanding your wooden stairs, you will create a smooth and even surface that is ready for painting. This will ensure that your paint job looks great and lasts for a long time.
Painting your wooden stairs can be a fun and rewarding project, but it’s important to take safety measures to prevent accidents. Here are some things to keep in mind before you start:
1. Wear Protective Gear:
Before you start painting, make sure you have the right protective gear. Wear a dust mask to avoid inhaling dust particles, safety goggles to protect your eyes from paint splatters, and gloves to protect your hands from chemicals.
2. Prepare the Work Area:
Prepare the work area by removing any obstacles that could cause you to trip or fall. Cover the floor with a drop cloth to protect it from paint drips and spills. Make sure the area is well-ventilated by opening windows or using a fan.
3. Use the Right Tools:
Using the right tools is crucial to ensure your safety while painting stairs. Use a sturdy ladder that can support your weight and reach all areas of the stairs. Use a paintbrush with a comfortable grip to prevent hand fatigue.
4. Follow Proper Painting Techniques:
When painting stairs, it’s important to follow proper painting techniques to prevent accidents. Start at the top of the stairs and work your way down, painting one step at a time. Allow each step to dry completely before moving on to the next one.
5. Clean Up Properly:
After you finish painting, clean up properly to prevent accidents. Dispose of any paint cans, brushes, or rollers in a safe manner. Clean up any spills or drips immediately to prevent slipping.
By following these safety measures, you can ensure a safe and successful painting project.
Before you start painting your wooden stairs, it’s important to apply a primer. A primer is essential because it helps the paint adhere better to the surface, and it also helps to seal the wood, preventing any stains or tannins from bleeding through the paint. Here’s how to apply primer to your wooden stairs:
Before you apply primer, make sure your stairs are clean and free of any dust, dirt, or debris. Use a vacuum cleaner or a soft-bristled brush to remove any loose dirt or debris. Then, wipe the stairs down with a damp cloth to remove any remaining dirt or dust.
Next, you’ll need to sand the stairs to create a smooth surface for the primer to adhere to. Use a fine-grit sandpaper (220-grit) and sanding sponge to sand the spindles, handrails, and any other wood surfaces to smooth them before painting. Vacuum up any sanding dust and wipe down your sanded surfaces with a damp cloth.
Apply the primer using a medium-sized paintbrush or a roller. Make sure to apply the primer evenly and cover all areas of the stairs. If you’re using a sprayer, make sure to cover any nearby surfaces to prevent overspray. Let the primer dry completely before painting.
Once the primer is dry, use a fine-grit sandpaper (220-grit) to lightly sand the surface. This will help to create a smooth surface for the paint to adhere to.
If necessary, apply a second coat of primer. This will help to ensure that the surface is fully covered and that the paint will adhere properly.
By following these steps, you’ll be able to apply primer to your wooden stairs and prepare them for painting.

When painting wooden stairs, it’s important to use the right techniques to ensure a smooth and long-lasting finish. Here are some tips to help you get the best results:
Before applying the first coat of paint, make sure the stairs are clean and dry. Sand the surface lightly to remove any rough spots or imperfections. Then, apply a coat of primer to help the paint adhere better and provide a more even finish.
When applying the first coat of paint, use a brush or roller to apply the paint in long, even strokes. Start at the top of the stairs and work your way down, making sure to cover all areas evenly. Avoid applying too much paint at once, as this can cause drips and uneven coverage.
Once the first coat is dry, you can apply additional coats of paint as needed. Depending on the type of paint you’re using, you may need to apply two or more coats to achieve the desired finish.
Before applying each additional coat, lightly sand the surface to remove any bumps or imperfections. Then, apply the paint in the same manner as the first coat, using long, even strokes and avoiding applying too much paint at once.
If you notice any drips or uneven areas, use a brush or roller to smooth them out before the paint dries. Allow each coat to dry completely before applying the next coat.
By following these painting techniques, you can achieve a smooth and durable finish on your wooden stairs.
Once you have finished painting your wooden stairs, you will need to allow them to dry and cure properly. This process is essential to ensure that your stairs look their best and that the paint job lasts for a long time.
The drying time for your stairs will depend on a few factors, including the type of paint you used, the temperature and humidity in the room, and the airflow. In general, you should allow the stairs to dry for at least 24 hours before walking on them or putting any furniture back in place.
Curing, on the other hand, takes longer and involves the hardening and strengthening of the paint. This process can take up to a week or more, depending on the type of paint and the conditions in the room. During this time, it is important to avoid heavy traffic on the stairs, and to be careful when moving furniture or other objects.
To ensure that your stairs dry and cure properly, follow these tips:
Properly drying and curing your painted wooden stairs is a crucial step in achieving a professional-looking finish that will last for years to come. So be patient, follow these tips, and enjoy your newly painted stairs!
Once you’ve painted your wooden stairs, it’s important to maintain them properly to ensure they look great for years to come. Here are some maintenance tips to keep in mind:
By following these maintenance tips, you can keep your painted wooden stairs looking great for years to come.

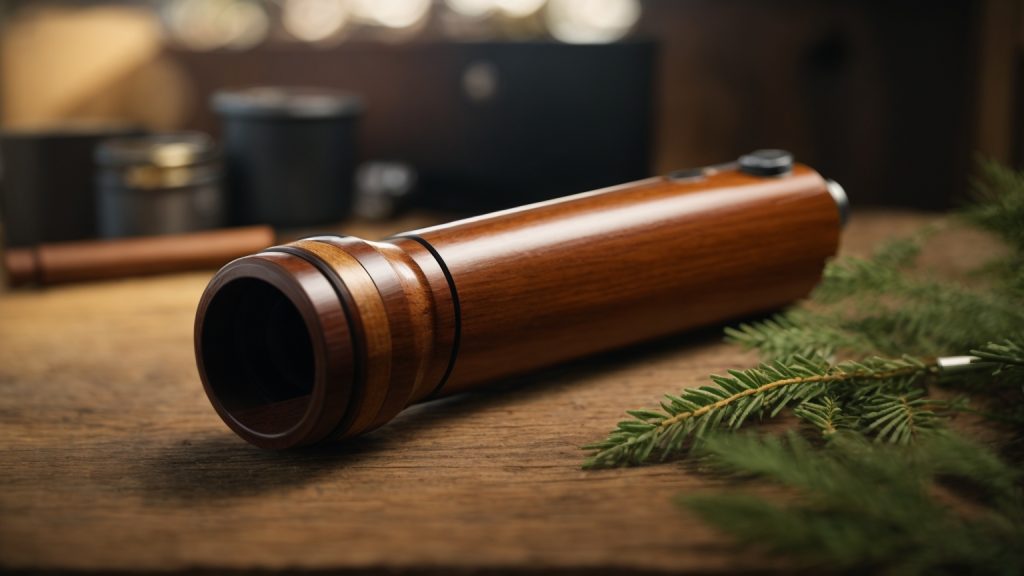
Are you interested in making your own wooden whistle? It’s a fun and simple woodworking project that can be completed in just a few minutes. With the right tools and materials, you can create a unique and functional whistle that you can use or gift to others.
There are many different ways to make a wooden whistle, and the process can vary depending on the design you choose. Some people prefer to use hand tools, while others may opt for power tools to speed up the process. Regardless of your approach, the basic steps for making a wooden whistle include selecting the right wood, drilling a hole through the center, and shaping the whistle to produce sound.
Whether you are a seasoned woodworker or a beginner looking for a new project, making a wooden whistle is a great way to hone your skills and create something useful and beautiful. So, grab your tools and let’s get started!
When it comes to making a wooden whistle, understanding the types of wood available is important. Different woods have different properties, and choosing the right one can make all the difference in the sound quality and durability of your whistle.
Hardwood is a dense and durable type of wood that is often used in woodworking projects. It is a popular choice for making wooden whistles because it produces a clear and distinct sound. Some common types of hardwood include:
Each of these woods has its own unique properties. Oak, for example, is a strong and sturdy wood that is often used for furniture. Maple is a hard and dense wood that is ideal for making musical instruments. Cherry has a warm and rich tone, while walnut is known for its deep and rich color.
Softwood, as the name suggests, is a softer and less dense type of wood. It is often used in construction and woodworking projects because it is easy to work with and readily available. However, it is not always the best choice for making wooden whistles because it can produce a muffled or unclear sound. Some common types of softwood include:
If you do choose to use softwood for your whistle, it is important to choose a high-quality piece of wood that is free of knots and other imperfections. This will help to ensure that your whistle produces a clear and distinct sound.
In general, it is best to choose a hardwood for making a wooden whistle. However, if you do decide to use softwood, be sure to choose a high-quality piece of wood and take extra care when carving and shaping it to ensure that it produces a clear and distinct sound.
When it comes to making a wooden whistle, having the right tools is essential. In this section, we’ll go over the tools you’ll need to create your own beautiful and functional wooden whistle.
To create the shape of your whistle, you’ll need some carving tools. Here are some of the essential carving tools you’ll need:
Once you’ve carved the shape of your whistle, you’ll need to sand it down to create a smooth finish. Here are some sanding tools you’ll need:
To protect and enhance the beauty of your wooden whistle, you’ll need to apply a finish. Here are some of the finishing tools you’ll need:
In conclusion, having the right tools is crucial to making a wooden whistle that looks and sounds great. By investing in the right carving, sanding, and finishing tools, you’ll be able to create a beautiful and functional whistle that you can be proud of.
When it comes to making a wooden whistle, choosing the right type of wood is essential. Not all woods are created equal, and some will produce better results than others. Here are some things to consider when selecting the wood for your whistle:
The hardness of the wood will affect the sound quality of your whistle. Softer woods, such as pine or cedar, will produce a softer, more mellow sound. Harder woods, such as oak or maple, will produce a louder, more piercing sound. Consider the sound you want your whistle to produce when choosing the wood.
The direction of the wood grain can also affect the sound quality of your whistle. For the best results, choose a piece of wood with straight, even grain running parallel to the length of the whistle. This will allow the air to flow smoothly through the whistle, producing a clear, consistent sound.
The density of the wood will also affect the sound quality of your whistle. A denser wood will produce a louder, clearer sound than a less dense wood. However, denser woods can be more difficult to work with, so consider your skill level and the tools you have available before choosing a dense wood.
Here are some common woods used for making whistles, along with their characteristics:
| Wood Type | Characteristics |
|---|---|
| Cherry | Medium hardness, good tone |
| Maple | Hard, bright tone |
| Oak | Hard, loud tone |
| Walnut | Medium hardness, warm tone |
| Cedar | Soft, mellow tone |
| Pine | Soft, mellow tone |
In general, hardwoods will produce a better sound than softwoods. However, softer woods can be easier to work with, especially for beginners. Ultimately, the best wood for your whistle will depend on your personal preferences and skill level.
When it comes to designing your wooden whistle, there are a few things to keep in mind. First, you’ll want to consider the size and shape of your whistle. The size will determine the pitch of the sound, while the shape will affect the quality and volume of the sound.
Next, you’ll want to think about the placement of the finger holes. These holes will determine the notes that can be played on the whistle. You may want to experiment with different hole sizes and placements to achieve the desired sound.
Another factor to consider is the type of wood you’ll be using. Different types of wood can produce different sounds, so it’s important to choose a wood that will complement the sound you’re looking to achieve. Hardwoods like maple, oak, and cherry are good options for wooden whistles.
You may also want to add decorative elements to your whistle, such as carving or wood burning. These can add a personal touch and make your whistle unique.
Overall, designing your wooden whistle can be a fun and creative process. By considering the size, shape, finger hole placement, wood type, and decorative elements, you can create a whistle that produces the sound and look you desire.
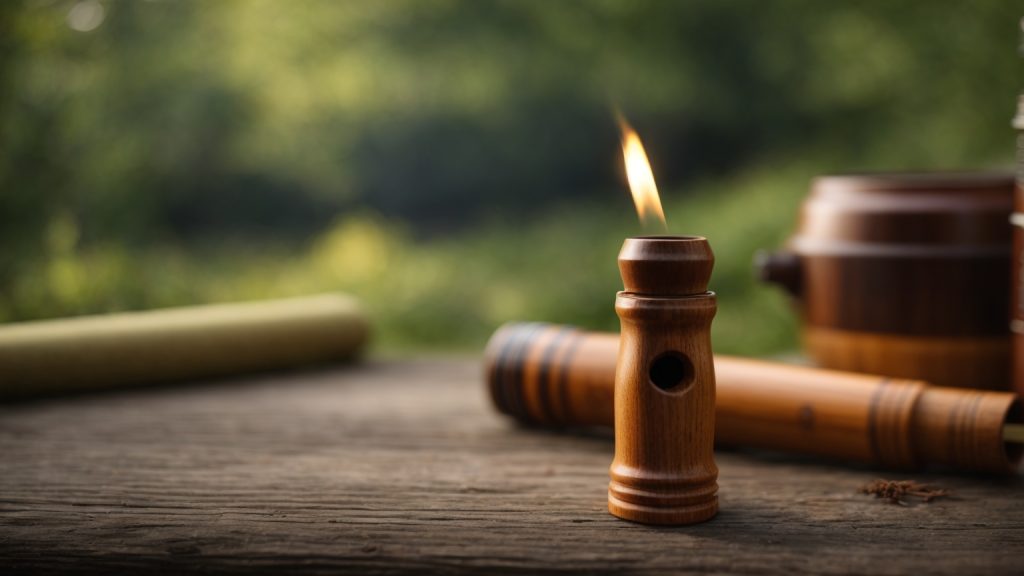
Carving the whistle is the most important part of the process. This is where you will shape and create the sound of the whistle. In this section, we will discuss how to shape the body and create the mouthpiece.
To shape the body of the whistle, you will need a woodblock that is soft enough for carving, a knife or ax (or both), and a carving and finishing tool (sander or sandpaper) to smooth edges and round the whistle once finished.
The mouthpiece is the most important part of the whistle, as it is where the sound is created. To create the mouthpiece, you will need a vice to help hold the wood in place, but it can be omitted if you’re careful.
Remember, the key to creating a good whistle is to take your time and be patient. Don’t rush the process, and make sure to test the whistle frequently as you carve it. With a little practice, you’ll be able to create a beautiful and functional whistle that you can be proud of.
The sound hole is a crucial part of your wooden whistle, as it is what produces the sound when you blow into the whistle. Here’s how you can create the sound hole:
Remember to be patient and take your time when creating the sound hole, as it is a crucial part of your wooden whistle. With a little practice and experimentation, you’ll be able to create a beautiful and unique sound that is all your own.
Now that you have created your wooden whistle, it’s time to sand it down to give it a smooth and polished finish. Sanding the whistle will also help to remove any rough edges or splinters that may have been left behind during the carving process.
To begin sanding, you will need a few supplies, including sandpaper, a sanding block, and a soft cloth. Start by wrapping a piece of sandpaper around the sanding block and gently rubbing it over the surface of the whistle. Be sure to sand evenly and in the direction of the grain of the wood.
As you sand, you may notice that the surface of the whistle becomes smoother and more polished. If you find that there are still rough spots or areas that need further sanding, switch to a finer grit sandpaper and continue sanding until the surface is smooth and even.
Once you have finished sanding, use a soft cloth to wipe away any dust or debris that has accumulated on the surface of the whistle. You may also want to apply a coat of wood polish or wax to help protect the surface of the wood and give it a shiny finish.
Overall, sanding your wooden whistle is an important step in the process of creating a beautiful and functional instrument. With a little bit of time and effort, you can create a whistle that looks and sounds great.
Once your wooden whistle is complete, it’s time to apply the finish. This step is important as it helps to protect the wood and gives it a polished look. Here’s how to apply the finish:
Remember, applying the finish is an important step in making a wooden whistle. It not only protects the wood but also gives it a polished look. Follow these steps, and you’ll have a beautiful and functional wooden whistle that you can be proud of.
Once you have finished making your wooden whistle, it’s time to test it out and see how it sounds. Here are some tips to help you test your whistle:
When testing your whistle, it’s important to blow gently at first. This will help you get a feel for the whistle and how it sounds. You can gradually increase the force of your breath to see how the sound changes.
The sound of your whistle can be affected by the amount of airflow that passes through it. You can adjust the airflow by moving your tongue and lips around the whistle’s mouthpiece. Experiment with different positions to see how it affects the sound.
Before testing your whistle, make sure to inspect it for any cracks or leaks. If there are any, the sound may be affected. You can use a small amount of wood glue or wax to seal any cracks or leaks.
To get a better sense of how your whistle sounds, you can compare it with other whistles. Try testing it alongside a store-bought whistle or another handmade whistle. This can help you identify any areas where your whistle may need improvement.
Remember, making a wooden whistle takes practice. Don’t be discouraged if your first attempt doesn’t sound perfect. Keep practicing and experimenting with different techniques until you find the sound you’re looking for.
By following these tips, you’ll be able to test your wooden whistle and make any necessary adjustments to get the perfect sound. Enjoy the process and have fun making music with your handmade whistle!

Are you a baseball fan wondering why MLB players use wooden bats? You’re not alone. It’s a question that has intrigued fans for years. While metal bats may seem like a better option, the MLB mandates the use of wooden bats for specific reasons. In this article, we’ll dive into the reasons why wooden bats are used in the MLB and why they’re preferred over metal bats.
One of the main reasons why MLB players use wooden bats is safety. Wooden bats are less likely to shatter on impact, reducing the risk of injury to both players and spectators. Additionally, the ball has less velocity off the bat when compared to metal bats, making it easier for players to react and protect themselves. But safety isn’t the only reason why wooden bats are preferred in the MLB. They also provide the benefits of being cost-effective, reducing bat modifications, and sticking to the tradition of using wooden bats in the league.

If you have ever watched a game of baseball, you would have noticed that the players use wooden bats instead of aluminum or composite ones. But have you ever wondered why? In this section, we will explore the historical context of wooden bats in MLB.
The first baseball bats used in the early 1800s were made of wood, usually ash. These bats were heavier and thicker than the ones used today. Over time, the design of the bat changed, and it became thinner and lighter.
In the 1970s, aluminum bats were introduced to the game. These bats were lighter and had a larger sweet spot, which made it easier to hit the ball. However, they were also more dangerous as they could hit the ball at a faster speed, which increased the risk of injury for the players.
In 1859, the first set of baseball rules was created, and it stated that the bat could be made of any material as long as it was round and not more than 2.5 inches in diameter. However, in 1884, the rules were changed, and the bat had to be made of wood.
In the early 1900s, players started to modify their wooden bats by shaving off the handle or adding cork to the barrel to increase the speed and power of their swing. To prevent this, the MLB introduced regulations on the size and weight of the bat.
Today, the MLB has strict regulations on the type of wood that can be used to make a bat. The bat must be made of a single piece of wood, and the wood must be hard enough to prevent it from breaking easily. The diameter of the bat cannot be more than 2.61 inches, and the length cannot be more than 42 inches.
In conclusion, the use of wooden bats in MLB has a long history and is deeply rooted in the game’s tradition. While other materials have been introduced over time, wooden bats remain the standard in the game today.
When it comes to baseball, the type of bat used can make a big difference in the game. MLB players use wooden bats for a variety of reasons, including the physics behind them.
One of the main reasons that MLB players use wooden bats is due to the swing speed and bat weight. Wooden bats are heavier than metal ones, which means that they require more force to swing. This increased force can help players hit the ball farther, as the ball will travel further when hit with more force.
However, this also means that wooden bats require more skill to use effectively. Players must be able to swing the bat with enough force to hit the ball while also maintaining control over the bat.
Another reason that MLB players use wooden bats is due to the vibration and feel. Wooden bats tend to have less vibration than metal ones, which can be beneficial for players. This is because the vibrations can be distracting and make it harder for players to maintain control over the bat.
In addition, wooden bats also have a unique feel that many players prefer. This can be due to the natural wood grain or the way that the bat handles during a swing.
Overall, the physics behind wooden bats make them a popular choice for MLB players. While they may require more skill to use effectively, they offer a unique feel and the ability to hit the ball with more force.
Wooden bats have a significant impact on game strategy in Major League Baseball. In this section, we will explore the different strategies that players and coaches use to take advantage of the unique characteristics of wooden bats.
Hitting a baseball with a wooden bat requires a different technique than hitting with a metal bat. Wooden bats are heavier and have a smaller sweet spot, making it more difficult to make solid contact with the ball. As a result, players need to be more selective with their swings and focus on hitting the ball with the sweet spot of the bat.
Coaches also need to adjust their hitting strategies when using wooden bats. For example, they may emphasize hitting the ball to the opposite field or using a more contact-oriented approach to get on base. Additionally, players may need to adjust their swing mechanics to generate more power and speed when using wooden bats.
Pitchers also need to adjust their strategies when facing batters using wooden bats. Since wooden bats are heavier and have a smaller sweet spot, pitchers can use a wider variety of pitches to keep batters off balance. Breaking balls, changeups, and other off-speed pitches can be more effective against wooden bats than metal bats.
Pitchers may also need to adjust their location and velocity to compensate for the differences in bat performance. For example, they may need to pitch inside more often to prevent batters from getting the barrel of the bat on the ball. Additionally, they may need to throw harder to generate more swing-and-miss strikeouts.
In conclusion, the use of wooden bats in Major League Baseball has a significant impact on game strategy. Hitters need to adjust their swing mechanics and approach, while pitchers need to use a wider variety of pitches and adjust their location and velocity. By understanding these unique characteristics of wooden bats, players and coaches can develop effective strategies to succeed on the field.

One of the main reasons why Major League Baseball players use wooden bats is due to its sustainability. While metal and composite bats can be designed to match the “pop” of wooden bats, they are not as environmentally friendly as wooden bats. Wooden bats are biodegradable and renewable, making them a more sustainable option.
However, the sustainability of wooden bats is threatened by climate change. The white ash tree, which is the primary source of wood for baseball bats, is being threatened by a beetle that thrives in warmer winters. This could lead to a shortage of white ash wood and potentially impact the production of wooden bats in the future.
Another factor to consider is the cost of using wooden bats versus metal or composite bats. Wooden bats are generally more expensive than metal or composite bats, which can be a significant cost for players and teams. However, wooden bats are also more durable and can last longer than metal or composite bats, which can save money in the long run.
In addition, wooden bats are required in professional baseball, which means that players must purchase them regardless of the cost. This can be a disadvantage for players who cannot afford the high cost of wooden bats, but it also ensures a level playing field for all players.
Overall, the sustainability and cost of wooden bats are important factors to consider when discussing why Major League Baseball players use wooden bats. While there may be advantages and disadvantages to using wooden bats, it is clear that they are a traditional and environmentally friendly option for the sport.
One of the main reasons why MLB players use wooden bats is to prevent injuries. Wooden bats are less likely to shatter or break compared to metal or composite bats. When a metal bat breaks, it can send sharp pieces of metal flying in different directions, posing a risk to both players and spectators. On the other hand, when a wooden bat breaks, it usually splits in half, reducing the risk of injury.
Furthermore, wooden bats are heavier than metal or composite bats, which can help prevent injuries caused by bat speed. When a player swings a wooden bat, they have to use more force and control, which can help prevent injuries caused by overexertion.
While wooden bats may not provide the same level of performance enhancement as metal or composite bats, they do offer some advantages. For example, wooden bats have a smaller sweet spot than metal or composite bats, which means that players have to be more precise with their swings. This can help improve a player’s hand-eye coordination and overall hitting skills.
In addition, wooden bats have a different weight distribution compared to metal or composite bats, which can affect a player’s swing and overall performance. Some players prefer the feel of a wooden bat and believe that it helps them hit the ball more accurately.
Overall, while wooden bats may not provide the same level of performance enhancement as metal or composite bats, they do offer some advantages in terms of injury prevention and skill development. This is why MLB players continue to use wooden bats, despite the availability of other materials.

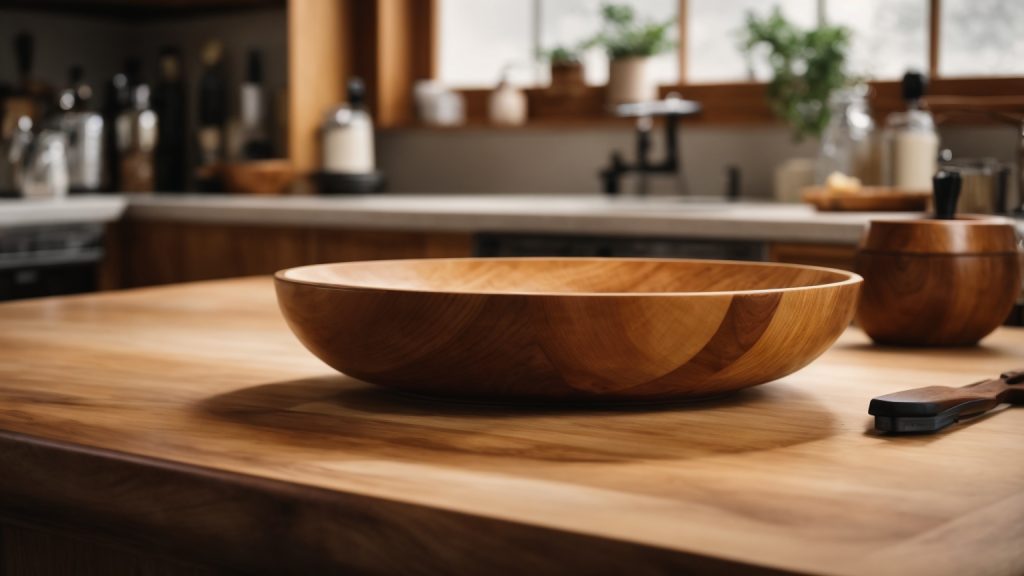
If you’re looking to add some warmth and character to your kitchen, a wooden countertop can be a great choice. However, to keep it looking beautiful and functional, you need to properly finish it. In this article, we’ll guide you through the steps to finish a wooden countertop, so you can enjoy it for years to come.
First, it’s important to gather the necessary materials. You’ll need fine-grit sandpaper, staining pads or rags, wood stain, protective gloves, safety glasses, a paintbrush or foam brush, polyurethane, clean, lint-free cloths, and a tack cloth. Once you have all of your materials, you can begin the process of finishing your wooden countertop.
The first step is to sand the countertop with the fine-grit sandpaper until it’s smooth to the touch. Then, use the tack cloth to remove any dust or debris. Next, apply the wood stain with the staining pads or rags, following the manufacturer’s instructions. Once the stain has dried, apply a coat of polyurethane with the paintbrush or foam brush, and let it dry completely. Repeat this process until you’ve achieved the desired level of protection and sheen. With these steps, you can finish your wooden countertop and enjoy its natural beauty.

When it comes to choosing the right wood for your countertop, it’s important to consider both aesthetics and functionality. Different types of wood have varying levels of hardness, durability, and resistance to moisture and stains. Here are some common wood types used for countertops:
Maple is a popular choice for countertops due to its durability and resistance to wear and tear. It has a light, uniform color and a fine, even grain pattern. Maple is also relatively affordable compared to other hardwoods.
Cherry is a beautiful, warm-toned wood with a rich, reddish-brown color that darkens over time. It has a fine, straight grain pattern and is known for its durability and resistance to moisture. Cherry is a more expensive option than maple, but it adds a luxurious feel to any kitchen.
Walnut is a darker wood with a rich, chocolate brown color and a swirling grain pattern. It is a softer wood than maple or cherry, but it is still durable and resistant to moisture. Walnut is a more expensive option, but it adds a unique and sophisticated look to any kitchen.
Oak is a classic choice for countertops with its distinctive grain pattern and warm, golden color. It is a hard, durable wood that is resistant to moisture and stains. Oak is a more affordable option than some other hardwoods, but it still adds a timeless look to any kitchen.
Teak is a tropical hardwood with a warm, golden color and a distinctive grain pattern. It is extremely durable and resistant to moisture, making it a popular choice for outdoor kitchens. Teak is one of the most expensive wood options, but it adds a luxurious feel to any kitchen.
When choosing a wood for your countertop, consider the level of maintenance required to keep it in good condition. Some woods may require more frequent oiling or sealing to prevent damage from moisture and stains. Ultimately, the right wood for your countertop will depend on your personal preferences and the specific needs of your kitchen.
When it comes to choosing the right wood for your countertop, there are several factors to consider. Here are some things to keep in mind:
First and foremost, you want a wood that is durable enough to withstand daily use. Hardwoods like oak, maple, and cherry are popular choices for this reason. They are strong and can handle the wear and tear of a busy kitchen.
Of course, you also want your countertop to look good. Different woods have different colors, grains, and textures, so choose one that complements your kitchen’s style. For example, if you have a modern kitchen with stainless steel appliances, you might opt for a sleek, pale wood like birch or ash.
Wood countertops can be expensive, so you’ll want to consider the cost of the wood you choose. Some woods, like teak or mahogany, can be quite pricey, while others, like pine or poplar, are more affordable.
Finally, it’s important to consider the environmental impact of the wood you choose. Look for woods that are sustainably sourced and certified by organizations like the Forest Stewardship Council (FSC). These woods are harvested in a way that protects the environment and ensures that forests will be around for future generations.
By considering these factors, you can choose a wood that not only looks great but also meets your practical needs and values.
Before you start finishing your wooden countertop, it is essential to prepare the wood surface properly. Proper preparation will ensure that the finish adheres well to the wood surface and gives you a smooth, even finish. Here are some steps to follow:
The first step in preparing the wood surface is sanding. Sanding the wood surface will remove any roughness, scratches, or stains and create a smooth surface for the finish. Here are some tips for sanding your wooden countertop:
After sanding, use a tack cloth to remove any dust or debris from the surface.
If you want to stain your wooden countertop, you should do it after sanding and before applying the finish. Here are some tips for applying wood stain:
Allow the stain to dry completely before applying the finish.
The final step in preparing the wood surface is applying the finish. Here are some tips for applying the finish:
By properly preparing the wood surface, you will ensure that your wooden countertop looks beautiful and lasts for years to come.
Before you start finishing your wooden countertop, you need to cut and shape it according to your desired size and design. Here are some tips to help you with this process:
First, measure the area where you want to install the countertop. Use a measuring tape to get accurate measurements. Then, mark the measurements on the wooden board where you want to cut. Use a straight edge to ensure that your marks are straight and even.
Next, use a circular saw or a jigsaw to cut the countertop along the marked lines. Make sure to wear safety goggles and gloves to protect yourself from flying debris. If you are using a jigsaw, start by drilling a hole in the wood along the cut line. Then, insert the jigsaw blade into the hole and start cutting.
After cutting the countertop, use a belt sander or an orbital sander to smooth out the edges. Start with a coarse grit sandpaper and gradually move to a finer grit. Sand in the direction of the wood grain to avoid damaging the wood.
If you want to shape the countertop, use a router to create the desired edges and curves. You can also use a chisel to create decorative details. Make sure to sand the shaped areas to smooth out any rough edges.
Finally, clean the countertop with a tack cloth to remove any sawdust or debris. This will ensure that the wood is clean and ready for the finishing process.
By following these steps, you can cut and shape your wooden countertop to your desired size and design.
When it comes to finishing a wooden countertop, sanding is a crucial step that can make or break the final result. Here are some tips to help you sand your wooden countertop like a pro:
Remember, sanding is a crucial step in finishing a wooden countertop, but it can also be time-consuming and messy. Take your time, use the right sandpaper, and follow these tips to achieve a smooth and beautiful finish that will last for years to come.
When it comes to finishing a wooden countertop, applying a wood conditioner is an important step to ensure a smooth and even stain application. A wood conditioner is a type of pre-stain treatment that helps to prepare the wood surface for staining. It helps to prevent blotchiness and uneven absorption of the stain.
To apply a wood conditioner, you will need to follow these simple steps:
By applying a wood conditioner before staining your wooden countertop, you can ensure that the stain will be absorbed evenly and prevent blotchiness. It’s an easy step that can make a big difference in the final appearance of your countertop.
Staining the wood is a crucial step in finishing a wooden countertop. It adds color and depth to the wood, enhancing its natural beauty. Here are some tips on how to stain a wooden countertop:
Before you start staining, make sure the wood is sanded properly. Sanding removes any rough patches or imperfections, allowing the stain to penetrate the wood evenly. Start with a coarse-grit sandpaper and gradually work your way up to a finer grit. Once you’ve sanded the wood, wipe it down with a tack cloth to remove any dust or debris.
Choosing the right stain is important to achieve the desired color and finish. There are two types of stain: oil-based and water-based. Oil-based stains penetrate deeper into the wood, resulting in a richer color. Water-based stains dry faster and are easier to clean up. Consider the type of wood you’re working with and the look you’re trying to achieve when choosing a stain.
Apply the stain using a staining pad or rag, working with the grain of the wood. Start with a small section and work your way across the entire countertop. Make sure to apply the stain evenly and wipe off any excess with a clean cloth. Allow the stain to dry completely before moving on to the next step.
Once the stain has dried, it’s time to seal the wood. This protects the wood from moisture and wear and tear. There are several types of sealers to choose from, including polyurethane, varnish, and shellac. Apply the sealer using a brush or roller, working with the grain of the wood. Allow the sealer to dry completely before using the countertop.
Staining a wooden countertop is a great way to add character and warmth to your kitchen. With the right tools and techniques, you can achieve a beautiful finish that will last for years to come.
After sanding and staining your wooden countertop, the next step is to seal it. Sealing the countertop will protect it from moisture, stains, and scratches, and it will also enhance the natural beauty of the wood. In this section, we will discuss how to choose the right sealer and how to apply it.
When it comes to choosing a sealer for your wooden countertop, there are several options available. Here are some of the most popular ones:
When choosing a sealer for your wooden countertop, consider the level of durability you need, the desired appearance, and the ease of application.
Before applying the sealer, make sure the countertop is clean and free of dust. You can use a tack cloth or a vacuum to remove any dust or debris.
To apply the sealer, follow these steps:
By following these steps, you can seal your wooden countertop and protect it for years to come.
Wooden countertops are a beautiful addition to any kitchen, but they require a bit of maintenance to keep them looking their best. Here are some tips to help you maintain your wooden countertop:
The most important thing you can do to maintain your wooden countertop is to clean it regularly. You should wipe down the surface with a damp cloth after each use, and then dry it with a clean towel. Avoid using harsh chemicals or abrasive sponges, as these can damage the wood.
To keep your wooden countertop looking its best, you should re-seal it periodically. This will help to protect the wood from moisture and stains. The frequency with which you need to re-seal your countertop will depend on the type of wood and the amount of use it gets. As a general rule, you should re-seal your countertop every six months to a year.
To re-seal your countertop, follow these steps:
Wooden countertops are susceptible to damage from heat, moisture, and sharp objects. To avoid damage, follow these tips:
By following these tips, you can keep your wooden countertop looking beautiful for years to come.

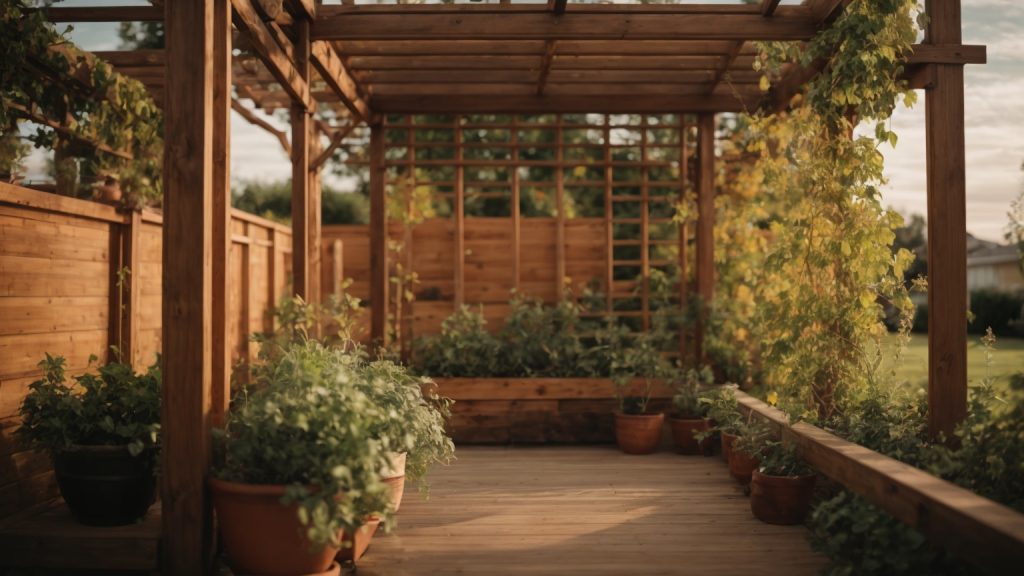
Looking to add some height and interest to your garden? A wooden trellis is a great way to support climbing plants and create a beautiful focal point in your outdoor space. With a few basic tools and materials, building a wooden trellis can be a fun and rewarding DIY project.
When it comes to building a wooden trellis, there are a variety of designs and styles to choose from. Some trellises are designed to stand alone, while others can be attached to a wall or fence. You can also choose from a range of materials, including cedar, pine, and redwood, depending on your budget and desired aesthetic. Whether you’re a seasoned woodworker or a beginner, building a wooden trellis is a project that can be customized to fit your skill level and design preferences.
In this article, we’ll walk you through the steps to build a basic wooden trellis, as well as provide some inspiration for more advanced designs. From choosing the right materials to adding decorative touches, we’ll cover everything you need to know to create a beautiful and functional trellis for your garden. So grab your tools and let’s get started!
If you’re looking to add a touch of elegance to your garden or outdoor space, a wooden trellis is a perfect addition. Not only do they provide a beautiful aesthetic, but they also serve a functional purpose as support for climbing plants. In this section, we’ll go over the basic design of a wooden trellis, including the types of wooden trellis and key components.
There are several types of wooden trellises that you can choose from depending on your preference and the plants you are looking to support. Here are a few common types:
Regardless of the type of wooden trellis you choose, there are some key components that all trellises should have. Here are the basic components of a wooden trellis:
By understanding the basic design of a wooden trellis, you can create a beautiful and functional addition to your outdoor space. Whether you choose a lattice, fan, or obelisk trellis, make sure to include all of the key components for a sturdy and reliable structure.
When building a wooden trellis, choosing the right materials is crucial to ensure the longevity of your structure. In this section, we’ll discuss the types of wood you can use and the essential tools and equipment you’ll need.
When selecting wood for your trellis, it’s important to choose a type of wood that is resistant to rot and decay. Cedar and redwood are excellent options due to their natural resistance to water and insects. Pine and spruce are also good choices, but they will need to be treated with a wood preservative to prevent rotting.
Here’s a breakdown of the different types of wood you can use for your trellis:
| Wood Type | Pros | Cons |
|---|---|---|
| Cedar | Naturally resistant to water and insects, lightweight, easy to work with | Expensive |
| Redwood | Naturally resistant to water and insects, durable, attractive | Expensive |
| Pine | Affordable, widely available, easy to work with | Prone to rotting and decay |
| Spruce | Affordable, widely available, easy to work with | Prone to rotting and decay |
To build a wooden trellis, you’ll need a few essential tools and equipment. Here’s a list of what you’ll need:
It’s important to wear safety goggles and work gloves when working with wood to protect your eyes and hands. Clamps are also helpful to hold pieces of wood in place while you drill and screw them together.
In summary, when building a wooden trellis, it’s important to choose a type of wood that is resistant to rot and decay, such as cedar or redwood. You’ll also need essential tools and equipment, including a circular saw or handsaw, drill, screwdriver, wood screws, wood glue, clamps, tape measure, pencil, safety goggles, and work gloves.

Before you start building your wooden trellis, it’s important to plan out the size and shape of the trellis. By doing so, you’ll be able to determine the amount of materials you’ll need and ensure that the finished product will fit your specific needs.
The first step in planning your wooden trellis is to decide the size and shape of the trellis. Consider the following factors:
Once you have these factors in mind, you can begin to sketch out a rough design of the trellis. You can use graph paper or a computer program to create a blueprint of the trellis.
Creating a blueprint of your wooden trellis will help you visualize the finished product and ensure that you have all the materials you need before you start building. Here are some tips for creating a blueprint:
Once you have a blueprint of your wooden trellis, you’re ready to start building. By taking the time to plan out your trellis, you’ll be able to create a beautiful and functional addition to your garden.
If you want to build a wooden trellis, you’ll need to prepare the wood, assemble the structure, and secure it in place. Here’s how to do it:
Before you start building your trellis, you’ll need to prepare the wood. You can use any type of wood, but cedar and redwood are popular choices because they’re naturally resistant to rot and insects. Here’s what you’ll need to do:
Once your wood is prepared, you can start assembling your trellis. Here’s how to do it:
Now that your trellis is assembled, you’ll need to secure it in place. Here’s how to do it:
And that’s it! Your wooden trellis is now ready to support your climbing plants and add a beautiful touch to your garden.
To ensure that your wooden trellis lasts for years to come, it’s important to perform regular maintenance. This includes inspecting your trellis for damage and cleaning it as needed. Here are some tips for maintaining your wooden trellis:
It’s important to inspect your wooden trellis regularly to catch any damage early on. This will help prevent further damage and prolong the life of your trellis. Here’s what to look for during your inspection:
If you notice any damage during your inspection, it’s important to address it as soon as possible to prevent further damage.
Cleaning your wooden trellis will help remove dirt, grime, and other debris that can accumulate over time. Here’s how to clean your trellis:
If you notice any damage during your inspection, such as rot or cracks, it’s important to make repairs as soon as possible. Here’s how to make repairs to your wooden trellis:
By performing regular maintenance on your wooden trellis, you can help ensure that it lasts for years to come.
Once you’ve built your wooden trellis, you can customize it to fit your personal style and garden needs. Here are some ideas to get you started:
One way to customize your trellis is by painting or staining it. This not only adds color and personality to your garden, but also helps protect the wood from weather and insects. Here are some tips for painting and finishing your trellis:
Another way to customize your trellis is by adding decorative elements. This can be as simple as hanging a potted plant or as elaborate as attaching metal sculptures. Here are some ideas for adding decorative elements to your trellis:
Remember, the possibilities are endless when it comes to customizing your wooden trellis. Get creative and have fun!

Are you wondering what the size of a wooden pallet is? If you’re in the shipping or warehousing industry, you know how important it is to have standardized pallet sizes to ensure smooth operations. Wooden pallets are one of the most common types of pallets used in the industry, and their size can vary depending on the region and intended use.
In the United States, the most common size for wooden pallets is 48 inches by 40 inches. This size is known as the GMA standard pallet size and is widely used in general warehousing and storage. However, there are other sizes available as well, such as 42 inches by 42 inches and 48 inches by 48 inches. The size of a wooden pallet can also vary depending on the materials used, such as the thickness and width of the deck boards.

If you are in the business of shipping or transporting goods, you are likely familiar with the importance of pallets. Pallets are used to stack and move goods, making them an essential part of the logistics industry. One of the most common questions asked about pallets is, “What is the standard size of a wooden pallet?”
The answer to this question is not as straightforward as you might expect. There are several standard sizes of wooden pallets, each with its own unique dimensions. However, there are a few sizes that are more commonly used than others. The following are the most common standard dimensions of a wooden pallet:
| Pallet Size | Length (inches) | Width (inches) | Height (inches) |
|---|---|---|---|
| 48″ x 40″ | 48 | 40 | 6 |
| 42″ x 42″ | 42 | 42 | 5.5 |
| 48″ x 48″ | 48 | 48 | 6 |
The 48″ x 40″ pallet is the most commonly used size in the United States. It is often referred to as the “GMA pallet” and is used by many industries, including grocery stores and retail outlets. The 42″ x 42″ and 48″ x 48″ pallets are also commonly used, but they are not as widely used as the 48″ x 40″ pallet.
It is important to note that there are other standard sizes of wooden pallets used in different parts of the world. For example, in Europe, the most common size is the 1200mm x 800mm pallet, while in Asia, the most common size is the 1100mm x 1100mm pallet. If you are shipping goods internationally, it is important to know the standard pallet sizes in the destination country.
In addition to the standard sizes, there are also custom pallet sizes available. These pallets are made to order and can be designed to meet specific requirements. Custom pallets are often used for specialized industries, such as the automotive or aerospace industries.
In conclusion, the standard size of a wooden pallet varies depending on the region and industry. However, the 48″ x 40″ pallet is the most commonly used size in the United States. If you are shipping goods internationally, it is important to know the standard pallet sizes in the destination country.
When it comes to wooden pallets, there are several variations in size that you should be aware of. While there are standard sizes that are commonly used, there are also custom sizes that are used for specific applications.
The most common standard size for wooden pallets in the United States is the 48×40 inch pallet, also known as the GMA pallet. This pallet is used in a variety of industries, including retail and grocery. Other common standard sizes include the 42×42 inch pallet and the 48×48 inch pallet.
In Europe, the most common standard size is the EUR pallet, which measures 800x1200mm. Other standard sizes in Europe include the 1000x1200mm pallet and the 1200x1200mm pallet.
Custom sizes are often used for specific applications. For example, the CP pallet series is a set of custom sizes that are used for transporting chemicals and other hazardous materials. These pallets range in size from the CP1, which measures 1200x1000mm, to the CP9, which measures 1140x1140mm.
Other custom sizes may be used for specific industries or applications. For example, the automotive industry often uses custom-sized pallets to transport car parts.
In addition to variations in overall pallet size, there are also variations in deck board and stringer sizes. Deck boards are the boards that make up the top and bottom of the pallet, while stringers are the boards that run between the top and bottom deck boards.
Common deck board sizes include 1×4 inch and 2×4 inch boards, while common stringer sizes include 2×3 inch and 3×4 inch boards. The size of the deck boards and stringers can impact the weight capacity of the pallet, as well as its overall durability.
Overall, it is important to consider the specific application when selecting a wooden pallet size. Whether you need a standard size or a custom size, choosing the right pallet can help ensure the safe and efficient transport of your goods.

When it comes to wooden pallets, there are several factors that can influence their size. Here are a few of the most common factors:
The type of wood used to make a pallet can have a significant impact on its size. Hardwoods like oak and maple are more durable and can support heavier loads, but they are also more expensive. Softwoods like pine and spruce are less expensive but may not be as strong. The thickness of the wood used can also affect the size of the pallet.
The intended use of the pallet is another factor that can influence its size. For example, pallets used in the retail and grocery industries are often designed to maximize load capacity in vehicles and may be larger than those used in other industries. Pallets used for storage may be smaller and designed to fit specific storage spaces.
Pallet sizes can also vary depending on the country of origin. In the United States, the standard pallet size is 40″ x 48″, while in Europe, the standard size is 1200mm x 800mm. In other parts of the world, different sizes may be used based on regional preferences and regulations.
Overall, the size of a wooden pallet can be influenced by a variety of factors, including the material used, intended use, and country of origin. By understanding these factors, you can choose the right size pallet for your specific needs.
When it comes to choosing the right wooden pallet for your business needs, size matters. The size of a pallet can have a significant impact on your business operations, including shipping costs, storage space, and the overall efficiency of your supply chain. In this section, we will discuss the importance of pallet size and how it affects your business.
One of the most significant factors to consider when choosing the size of your wooden pallet is shipping costs. Shipping companies charge based on the weight and size of your shipment, so choosing a pallet that is too large or too small can result in higher shipping costs. It’s essential to choose a pallet that is the right size for your shipment to avoid paying more than necessary.
Another factor to consider when choosing the size of your wooden pallet is storage space. If you have limited storage space, you may want to choose a smaller pallet size to maximize your storage capacity. However, if you have ample storage space, you may want to choose a larger pallet size to accommodate larger shipments.
The size of your wooden pallet can also impact the efficiency of your supply chain. Choosing the right size pallet can make it easier to move and transport your goods, reducing the risk of damage during transit. Additionally, using a standard pallet size can make it easier to stack and store your shipments, reducing the time and labor required to move your products.
In conclusion, choosing the right size wooden pallet is essential for your business operations. It can impact your shipping costs, storage space, and supply chain efficiency. By considering these factors and choosing the right size pallet for your business needs, you can optimize your operations and improve your bottom line.
When it comes to choosing the right pallet size, there are several factors to consider. The size of the pallet can affect the weight it can carry, the space it takes up in storage and transportation, and the compatibility with your equipment. Here are some things to keep in mind:
The most common pallet size in the United States is the 48×40-inch pallet, also known as the GMA pallet. However, there are other standard sizes to choose from, such as the 42×42-inch and 48×48-inch pallets. It’s essential to know which size is most commonly used in your industry and region to ensure compatibility with your suppliers and customers.
The load capacity of a pallet depends on its size and construction. The stringers, which run lengthwise on two sides of the pallet and in the middle, can be made of 3×4 or 2×4 wood. The thicker the stringers, the more weight the pallet can carry. Additionally, the spacing between the deck boards can affect the load capacity. A closer spacing provides more support and stability for heavy loads.
The size of the pallet can also affect the amount of space it takes up in storage and transportation. A larger pallet may be more efficient for carrying larger loads, but it may not fit in your warehouse or be compatible with your equipment. It’s crucial to consider the dimensions of your storage and transportation equipment when choosing the right pallet size.
If the standard pallet sizes don’t meet your specific needs, you can also opt for custom pallets. Custom pallets can be made to any size or shape, but they may be more expensive and require longer lead times. It’s essential to weigh the cost and benefits of custom pallets before making a decision.
Choosing the right pallet size can have a significant impact on your supply chain efficiency and cost-effectiveness. Consider the load capacity, storage and transportation, and standard sizes to make an informed decision.


