
Can You Use Drywall Anchors in Wood? Explained
Are you wondering whether you can use drywall anchors in wood? The short answer is yes, but it’s important to choose login nirwanapoker the right type of anchor for the job. Not all drywall anchors are compatible with wood, as they are designed for use in drywall that lacks wooden studs. Using the wrong type of anchor can result in damage to your wood surface or a failed installation.
When it comes to using drywall anchors in wood, toggle bolts and expanding plugs are two types of anchors that can be used. However, it’s important to choose the right one for your specific application. Additionally, plastic anchors should be avoided as they are likely to break during installation. Keep in mind that the weight of the item you are hanging will also play a role in determining which type of anchor to use.
Understanding Drywall Anchors
When it comes to hanging items on walls, drywall anchors are a popular slot online idn choice. But can you use drywall anchors in wood? The answer is yes, but not all types of drywall anchors are compatible with wood. Here’s what you need to know about drywall anchors.
What are drywall anchors?
Drywall anchors are devices used to secure objects to walls that are made of drywall. They are designed to distribute weight across a larger surface area than a simple screw or nail, which can cause damage to the drywall and fail to hold heavier items.
Types of drywall anchors
There are several types of drywall anchors, including:
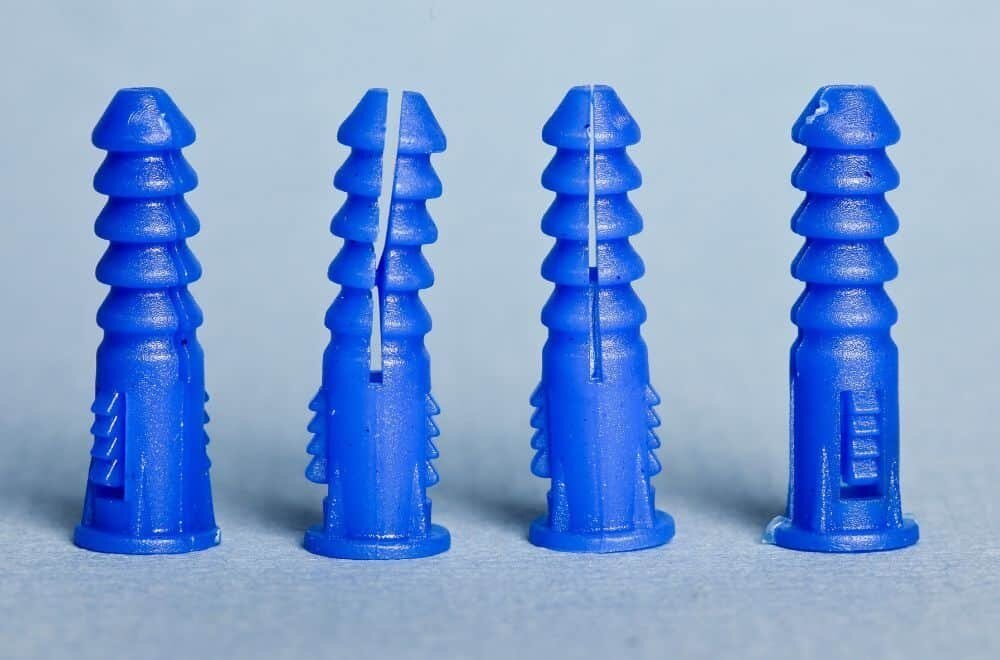
- Plastic expansion anchors
- Threaded anchors
- Toggle bolts
- Winged plastic anchors
- Self-drilling anchors
Each type of anchor has its own strengths and weaknesses, and some are better suited to wood than others.
Bermain poker online dengan keberuntungan besar! Rasakan suasana seru bermain dengan lawan sesungguhnya, dan raih kemenangan yang menguntungkan. Situs kami menjamin keselamatan dan keamanan bermain, serta pengalaman yang nyaman dan adil melalui akses idn poker apk, dimana pemain dapat dengan mudah menikmati game poker melalui mobile phone. Sera dapatkan juga bonus dan promosi harian yang menarik dan bikin kantongmu makin tebal. Daftar sekarang dan jadilah juara poker terbaik!
Can you use drywall anchors in wood?
Not all drywall anchors are compatible with wood since they’re designed for drywall that lacks wooden studs. However, some types of drywall anchors can be used in wood, including:
- Threaded anchors
- Toggle bolts
- Self-drilling anchors
It’s important to avoid plastic anchors because they’ll likely break when you install them. You also generally shouldn’t use anchors that expand on the other side since wood is solid.
How to use drywall anchors in wood
To use drywall anchors in wood, you’ll need to follow these steps:
- Choose the right type of anchor for your project.
- Drill a hole in the wood where you want to place the anchor.
- Insert the anchor into the hole.
- Tighten the screw into the anchor until it’s secure.
Remember to check the weight capacity of the anchor and choose one that’s appropriate for the weight of the item you’re hanging.
By understanding the different types of drywall anchors and their compatibility with wood, you can choose link situs vio88 the right anchor for your project and ensure that your items are securely hung on the wall.
Can You Use Drywall Anchors in Wood?
Drywall anchors are typically used to hang heavy objects on drywall, but they can also be used in wood. However, not all drywall anchors are compatible with wood. Some anchors are designed specifically for drywall that lacks wooden studs, so they may not work well in wood.
If you plan to use drywall anchors in wood, it’s important to choose the right type of anchor. Toggle bolts and expanding plugs are two types of drywall anchors that can be used in wood. Toggle bolts are a good choice for heavier objects, while expanding plugs are better for lighter objects.
When installing drywall anchors in wood, it’s important to avoid using plastic anchors because they’re more likely to break during installation. You should also avoid using anchors that expand on the other side, as wood is a solid material and won’t compress like drywall.
Before installing drywall anchors in wood, make sure to drill a pilot hole that’s slightly smaller than the diameter of the anchor. This will help the anchor grip the wood more securely and prevent it from slipping or pulling out.
Overall, drywall anchors can be used in wood, but it’s important to choose the right type of anchor and follow proper installation techniques to ensure a secure hold.
Types of Drywall Anchors Suitable for Wood
When it comes to hanging things on wood surfaces, you may wonder if drywall anchors can be used. The answer is yes, but not all types of drywall anchors are suitable for wood. In this section, we will discuss the three types of drywall anchors that are compatible with wood.
Plastic Expansion Anchors
Plastic expansion anchors are not recommended for wood surfaces. They are designed for hollow walls and may not provide adequate support for heavier objects on wood surfaces. Additionally, they may break or crack when installed in wood.
Threaded Anchors
Threaded anchors are suitable for wood surfaces. They are designed to grip the wood and provide a secure hold. These anchors are available in different sizes and can support various weights. It is important to select the appropriate size and weight capacity for your project.
Molly Bolts
Molly bolts are another type of drywall anchor that can be used on wood surfaces. They are designed to expand behind the surface to provide a secure hold. These anchors are available in different sizes and can support various weights. It is important to select the appropriate size and weight capacity for your project.
Overall, when using drywall anchors on wood surfaces, it is important to select the appropriate type of anchor for your project. Threaded anchors and molly bolts are suitable for wood surfaces, while plastic expansion anchors are not recommended. Always follow the manufacturer’s instructions when installing drywall anchors on wood surfaces to ensure a secure hold.
Pros and Cons of Using Drywall Anchors in Wood

When it comes to hanging items on walls made of wood, using drywall anchors can be a convenient solution. However, there are both advantages and disadvantages to using them. In this section, we will discuss the pros and cons of using drywall anchors in wood.
Advantages
- Ease of installation: Drywall anchors are easy to install and do not require you to locate studs in the wall, which can be time-consuming. This makes them a convenient option for hanging lightweight items on wood walls.
- Versatility: Drywall anchors come in various sizes and types, making them versatile and suitable for a wide range of applications. You can choose from plastic sleeve anchors, self-drilling threaded anchors, molly bolts, and toggle bolt anchors, depending on your needs.
- Affordability: Drywall anchors are relatively inexpensive and widely available at hardware stores, making them a cost-effective option for hanging items on wood walls.
Disadvantages
- Limited weight capacity: Drywall anchors are designed to hold lightweight items, and their weight capacity is limited. If you need to hang heavy items on a wood wall, drywall anchors may not be suitable, and you may need to locate and use studs instead.
- Risk of damage: Drywall anchors can damage the wood wall if they are not installed correctly or if they are overloaded. They can also loosen over time, causing the item to fall and potentially causing damage.
- Compatibility issues: Not all drywall anchors are compatible with wood walls. Plastic anchors, for example, may break when you install them, and anchors that expand on the other side may not be suitable for solid wood walls.
In conclusion, using drywall anchors in wood walls can be a convenient solution for hanging lightweight items. However, it is essential to consider the weight capacity of the anchors, the risk of damage, and compatibility issues before using them.
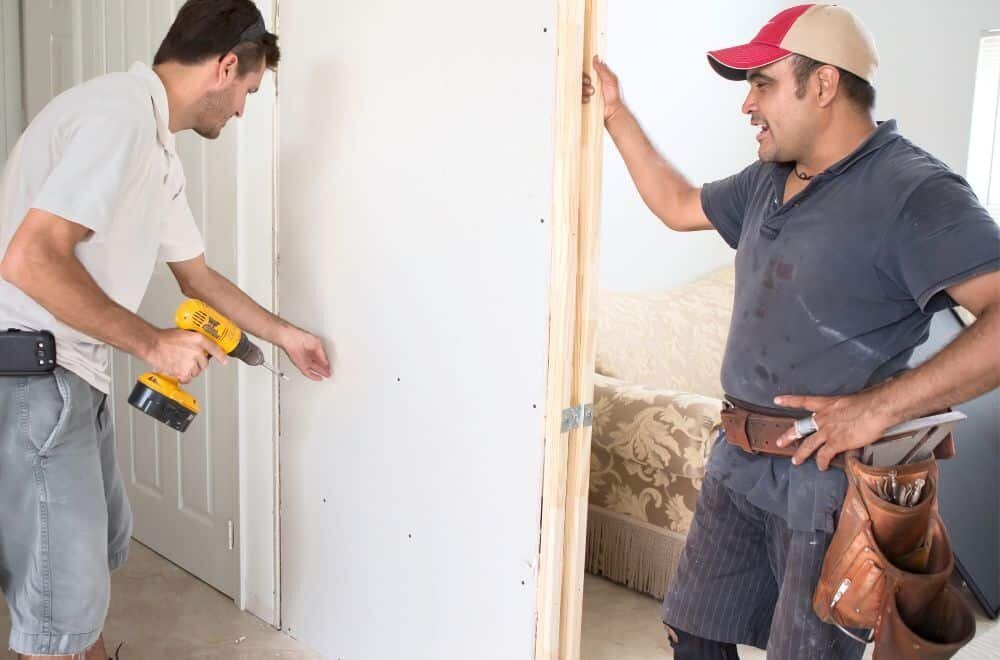
How to Install Drywall Anchors in Wood
If you need to hang something on a wooden wall, you may wonder if you can use drywall anchors. The answer is yes, but not all drywall anchors are suitable for wood. Here’s how to install drywall anchors in wood properly.
Choosing the Right Anchor
When choosing a drywall anchor for wood, you need to consider the weight of the object you want to hang. Different types of anchors have different weight capacities. Here are some common types of drywall anchors and their weight limits:
- Plastic expansion anchors: up to 30 pounds
- Toggle bolts: up to 100 pounds
- Winged plastic anchors: up to 75 pounds
- Threaded anchors: up to 75 pounds
Choose an anchor that can support the weight of your object. If you’re not sure, choose an anchor with a higher weight capacity to be safe.
Drilling the Hole
Once you’ve chosen the right anchor, you need to drill a hole in the wood to insert it. Use a drill bit that is slightly smaller than the anchor’s diameter. For example, if your anchor is 1/4 inch in diameter, use a 3/16 inch drill bit.
Mark the spot where you want to insert the anchor with a pencil. Then, drill the hole straight into the wood. Don’t drill too deep or too shallow. The hole should be just deep enough to fit the anchor.
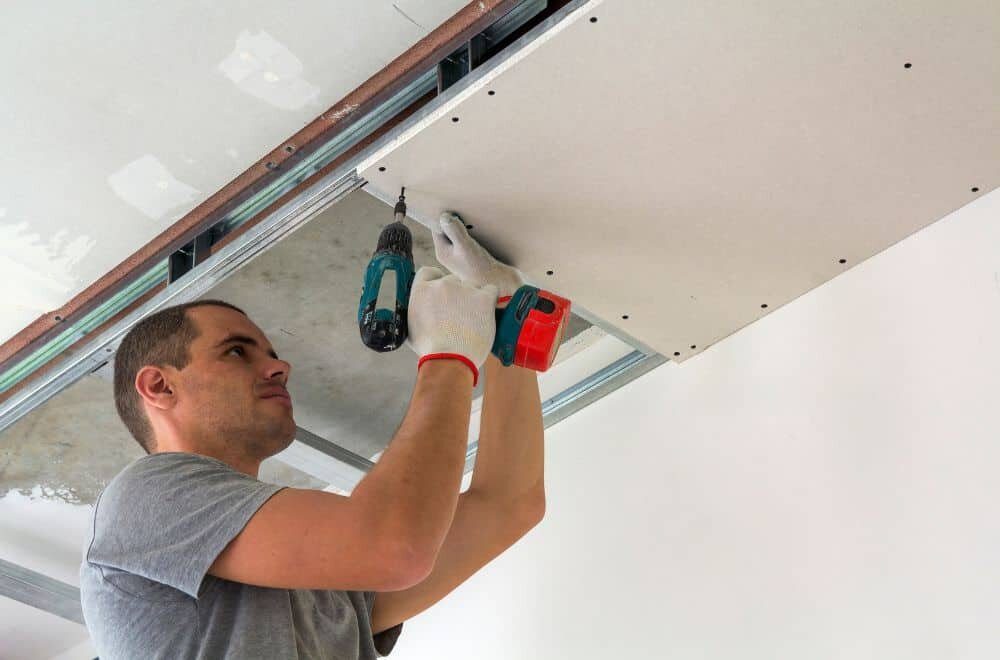
Inserting the Anchor
After drilling the hole, insert the anchor into the wood. Tap it gently with a hammer to make sure it’s flush with the surface. Then, insert the screw into the anchor and tighten it until it’s snug.
If you’re using a toggle bolt or a threaded anchor, you’ll need to follow the manufacturer’s instructions to install it properly. Some anchors require you to insert a bolt or a hook into the anchor before attaching the object.
In conclusion, you can use drywall anchors in wood, but you need to choose the right type of anchor and install it properly. By following these simple steps, you can hang objects securely on your wooden walls without damaging them.
Safety Precautions When Using Drywall Anchors in Wood
When using drywall anchors in wood, it is important to take certain safety precautions to ensure that your installation is secure and safe. Here are some tips to keep in mind:
1. Choose the Right Type of Anchor
When using drywall anchors in wood, it’s important to choose the right type of anchor for the job. There are many different types of anchors available, each designed for a specific weight and application. Make sure you choose an anchor that is rated for the weight of the item you will be hanging.
2. Check the Load Capacity of the Wood
Before installing a drywall anchor in wood, it is important to check the load capacity of the wood. Different types of wood have different load capacities, and exceeding the load capacity can result in damage to the wood, the anchor, and the item you are hanging.
3. Use the Right Tools
When installing drywall anchors in wood, it is important to use the right tools for the job. This includes a drill, drill bit, and screwdriver. Using the wrong tools can result in damage to the anchor, the wood, and the item you are hanging.
4. Use Proper Installation Techniques
When installing drywall anchors in wood, it is important to use proper installation techniques. This includes drilling a pilot hole, inserting the anchor, and tightening the screw. Failure to follow proper installation techniques can result in the anchor pulling out of the wood, causing damage to the wood and the item you are hanging.
5. Avoid Overloading the Anchor
When using drywall anchors in wood, it is important to avoid overloading the anchor. This can cause the anchor to pull out of the wood, resulting in damage to the wood and the item you are hanging. Always follow the weight capacity guidelines for the anchor and the wood.
By following these safety precautions, you can ensure that your drywall anchor installation in wood is secure and safe.
Frequently Asked Questions
What types of anchors are suitable for wood?
Not all types of anchors are suitable for wood. It is recommended to use anchors that are specifically designed for wood, such as threaded anchors, toggle bolts, or expansion anchors. Avoid using plastic anchors, as they may break or fail to hold properly in wood.
Do I need wall anchors for wood?
If you are mounting something heavy or if the wood is thin, it is recommended to use wall anchors to ensure that the item stays securely in place. However, if the wood is thick and sturdy, you may not need to use wall anchors.
What are the best wall anchors for plywood?
Toggle bolts are a great choice for mounting items on plywood. They are easy to install and provide a strong hold. Another option is to use threaded anchors, which can be screwed directly into the plywood.
What types of screw anchors can be used in wood?
Threaded anchors, toggle bolts, and expansion anchors are all suitable for use in wood. It is important to choose the right size and type of anchor based on the weight and size of the item you are mounting.
Can anchor bolts be used in wood?
Anchor bolts are typically used in concrete or masonry, and are not recommended for use in wood. Instead, use threaded anchors, toggle bolts, or expansion anchors designed specifically for wood.
How do I properly install anchors in wood?
To properly install anchors in wood, start by drilling a pilot hole slightly smaller than the anchor. Then, insert the anchor into the hole and tap it in with a hammer. Finally, screw the anchor into the wood until it is flush with the surface. Make sure to choose the right size and type of anchor for the weight and size of the item you are mounting.


 Image Credit: en.wikipedia
 Image Credit: offgrid48
 Image Credit: motherearthnews


